
This is the third game in our five scenario Sharp Practice campaign set around New York in 1776. The first encounter 'The British are Coming' saw the rebels inflict a surprising defeat on the British. Perhaps buoyed with over-confidence from that victory the next battle at 'Miller's Crossing' saw the Continentals, the cream of the rebel force, broken and driven back by a well timed charge from the British light dragoons. Major Morris the American commander was lucky to salvage the remnants of his command from the disaster.

That leaves honours fairly even, however when it comes to casualties it's a different matter. The Americans suffered many more losses than the British which leaves them in a precarious position for this third game.
Major Morris, the rebel commander, started the campaign with a core force of three groups of Continentals and two groups of militia skirmishers. That force must last the campaign without receiving replacements. Each game an unknown number of local militias or state line units will join them, but they will vary in quantity and quality and so it's important he tries to keep his command intact. That hasn't proven easy and he is down to two groups of Continentals and a single group of militia skirmishers. He must now make do with that small force and whatever additional units come to join him.

On the other hand the British have all their units available, with only a few casualties spread across them. They can field four groups of regulars; two of light infantry; a group of light dragoons, and last but not least, a captured 4 pounder artillery piece - the spoils of victory from the previous game. That is a formidable force for the rebels to try to deal with.
As the Americans I have much to consider, not least of which is how best to use my small force to counter the redcoats. I made the mistake of relying on the Continentals to stand up to the British regulars at Miller's Crossing and that proved a costly error. The rebels must find a way to play to their strengths and limit the ability of the British to play to theirs.

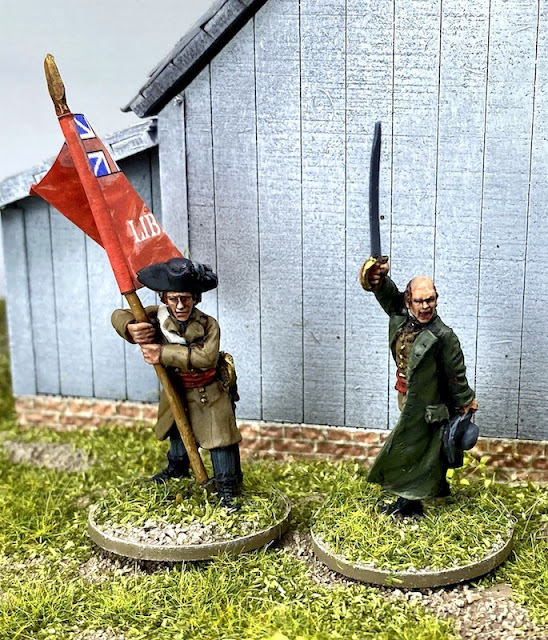
For this game Major Morris has been joined by a group of frontiersmen skirmishers and two groups of militia under the command of Lieutenant Jeremiah Bradbury, a fiery leader who inspires as much fear as affection.
However I intend to put most of my hopes with the newly arrived frontiersmen and the remaining militia skirmishers. Morris will leave his horse behind and temporarily pass command of the Continentals to Sergeant Burns. He intends to lead from the front, on foot, taking charge of the two groups of skirmishers.
The close terrain may work in their favour and I'll try to use the skirmishers to break up the British formations before they can get to grips with the militia and Continentals. If things go badly I'll withdraw, but as long as I can keep American force morale intact I may just be able to inflict further casualties on the British without suffering too many myself. No honour lost in preserving my force to fight another day.

In this scenario the Americans are not able to deploy from the start. Each time Major Morris would be activated they need to roll 2D6 and can only deploy once they reach a cumulative total of 14. This gives the British an opportunity to make unimpeded progress as it will take an absolute minimum of two activations to reach that total. So, they will have a freehand for at least two turns, although that's quite likely to be more, with much depending on the frequency of Morris's activation and the outcome of the dice roll. If fortune favours the British and they act fast it could make life very difficult for the rebels.
The primary deployment points for each side are at their respective ends of the table, however the frontiersmen skirmishers have a movable deployment point available and I place that as far forward as possible in the orchard. This does put it at risk of capture if American arrival is slow, but if it can be used to deploy skirmishers into the orchard to harass the British then it could serve its purpose well.


They are soon joined by the British commander Major Petrie and his regulars.

And by Captain Winston-Smythe and his regulars.

Before long the British are pushing ahead up the road into the centre of the village.


Both Major Petrie and Captain Winston-Smythe are prepared to break up their columns in order to have the men move faster.


With the British moving quickly and continued uncertainty regarding the arrival of the Americans I did begin to wonder if I might live to regret placing that movable deployment point so far forward.

Fortunately we reach Turn 6 and the Americans are able to begin their deployment. However it has required the activation of Major Morris, so that means he won't be able to deploy with his skirmishers in this turn. The first rebels that do make an appearance are Sergeant Burns with two groups of Continentals.


They have been used aggressively in the campaign so far and suffered a couple of casualties, so each group is down to five men.

Tiffin Card drawn (British:0 American:0)

From there he can try to rally them, safe from harassment by the rebel skirmishers.


The frontiersmen are saved by their ability to make the most of cover and escape with only two points of shock. That could have been much worse.


This could be the start of a major threat. Once the British can bring their full fire to bear it will be very difficult for the rebels to hold their ground against them.


Their musketry inflicts a single point of shock and they reload.


Major Morris rallies off the remaining shock.


With the British light infantry moving swiftly towards the orchard it may not be long before the Continentals are needed. At the very least they can form a second line of defence along the fence should the skirmishers be forced back.


Once again the lights don't bother to reload and continue advancing once they have fired. Given their ability to move rapidly I can expect them to be at the skirmishers at their next opportunity. It's probably time to consider falling back deeper into the orchard before it's too late.


The other is used to advance the militia.


Lieutenant Parker-Edwards' men don't move as rapidly as the other group and only reach the edge of the orchard.

Nonetheless the light infantry are a menace that cannot be taken lightly and the orchard may not be tenable for too much longer.


That now presents a wall of muskets to any advancing British and may give Lieutenant Parker-Edwards second thoughts about moving any further into the orchard.


That puts them in a position to threaten the rebel skirmishers who will want to waste no time pulling back into the protection of the orchard.


He can watch from a safe distance until he senses the moment has arrived to strike.


This time the musketry proves deadly and the light infantry suffer two casualties and two points of shock. That's enough to force an involuntary withdrawal and British morale drops a further point to five.

The frontiersmen then fall back deeper into the orchard and reload.


The British four pounder is still covering the road, so there won't be any easy shots for the Continentals who will need to work their way forward carefully.


With no shock to impede their movement I'm hoping they can move along the fence and target the light infantry before they move out of range.


Major Morris orders the militia skirmishers to move to the corner of the ploughed field and fire at the light infantry.

This time they make a quick move that gives them all a line of sight to the British, who are still in range.


The lights suffer another point of shock which takes them to six, double the number of men in the group.


With two American command cards available I decide to use them to maximise the volume of fire the frontiersmen can generate.


I was fearful of the threat posed by the gun and the dragoons and so I'm pleased to see both withdraw having done little damage to my force today.


The other group with Captain Winston-Smythe fall back alongside the road.

Unfortunately I sense the British will be able to get away before I can do much more harm. I've managed to drive them off without losing a single casualty and I don't want to do anything reckless. At best I will be content with taking pot shots from the cover of the rail fence and the orchard.


They may get to the rail fence in time to fire at the retreating British but I suspect that by the time they do they may find the British have gone or are out of range.


The game starts with American and British force morale both on nine. I won't do a blow by blow account of the turns before the Americans begin to deploy, instead I will summarise how things unfold in those early turns.
The first British to appear are the light dragoons under Captain Carr-Clarke. Those dragoons made short work of the Continentals in the previous encounter with a timely charge that broke the rebel defence. I have much to fear from them and so they are a most unwelcome sight so early on.
As if the dragoons were not enough for the rebels to contend with, the British now have a captured four pounder gun which they discovered in a hidden arms cache following their previous victory.
By Turn 4 the cumulative American total for deployment has reached 11, meaning there's a high chance the rebels would be making their appearance in the near future. With all units except the light infantry deployed the British begin to speed up their advance by sending groups of regulars running ahead.
They are joined by Lieutenant Bradbury and his militia who arrive in column on the road alongside the Continentals.
At that moment the Tiffin card is drawn. The British have yet to draw any command cards and the two available American cards are of no use, so Turn 6 draws to a close. From the rebel's perspective that's good timing as it means the cards will reset for a new turn increasing the possibility of Major Morris deploying with the skirmishers. Now that the game has started in earnest we'll begin to follow the action in more detail.
Turn 7
Captain Winston-Smythe orders the group behind him to run and catch up with his forward group. They run up smartly and Winston-Smythe has them form up into column.
American Command Card drawn (British:0 American:1)
American Command Card drawn (British:0 American:2)
The four pounder moves up behind Captain Winston-Smythe's column. There is a bit of congestion on the road but once the British are clear of the buildings they can fan out to make a considerable show of force.
Captain Carr-Clarke moves his dragoons towards the large barn. No doubt intending to search there for the hidden loyalist spy.
British Command Card drawn (British:1 American:2)
American Command Card drawn (British:1 American:3)
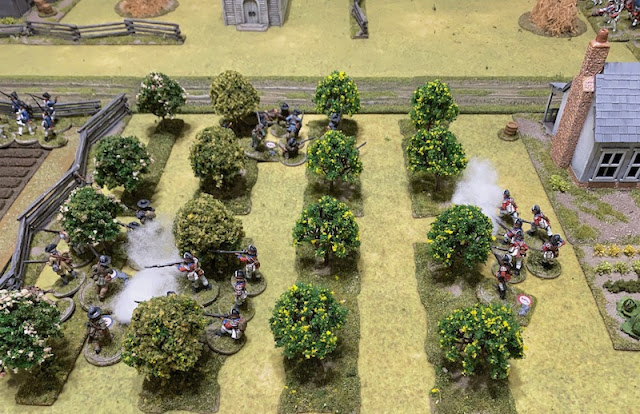
The British are closing fast but they are not yet formed up to be at their most effective, so I think this is the optimum time to use the three American command cards to have Major Morris make an appearance with both groups of skirmishers.
They deploy into the orchard and pour fire into the leading British column.
Every shot is a hit and although there are no casualties the British suffer eleven points of shock.
The rear group has excess shock which forces them to recoil and withdraw involuntarily.
The withdrawal also breaks the formation. Those two events combined make a big dent in British morale, dropping it three points to six. As the regulars fall back they stumble into the four pounder passing on a point of shock to the crew. The skirmishers may not have inflicted any casualties but they have stopped the British in their tracks. They reload, ready for whatever comes next.
British Command Card drawn (British:2 American:0)
Sergeant Burns has a single command initiative and decides to waste no time and bring one of the groups of Continentals forward over the fence. I'm not looking at fighting the British in formation, especially when I cannot hope to match them, instead I plan to work forward with individual groups and take whatever opportunities I can find to strike at the redcoats.
British Command Card drawn (British:3 American:0)
The British light infantry have yet to make an appearance and now they are sorely needed to deal with the rebel skirmishers. Dave uses the three command cards to activate Lieutenant Parker-Edwards and have him deploy his two groups of light infantry opposite the orchard.
Turn 8
With so much shock on his command Captain Winston-Smythe wisely withdraws his men behind the house.
Major Petrie now takes the opportunity to order the crew of the four pounder to give the skirmishers a round of canister. There's a good chance this could sweep Morris and his frontiersmen away.
Petrie then orders both groups of regulars under his direct command to fan out to the right of the road.
Lieutenant Carroll orders his skirmishers to fire at Major Petrie's regulars by the barn.
Lieutenant Parker-Edwards' and his light bobs move forward rapidly, keen to get to grips with the skirmishers.
American Command Card drawn (British:0 American:1)
Captain Carr-Clarke's men call into the barn in search of the loyalist spy but he is nowhere to be found. He must be elsewhere.
British Command Card drawn (British:1 American:1)
British Command Card drawn (British:2 American:1)
American Command Card drawn (British:2 American:2)
The three cards initiate a random event but it has no effect on any of the units.
Sergeant Cooper with the frontiersman rallies a point of shock off his men.
He then orders the frontiersmen to fire at Major Petrie's regulars by the barn.
One of the redcoats is hit and taken casualty.
Meanwhile Sergeant Burns continues to lead his Continentals across the ploughed field and up to the rail fence.
British Command Card drawn (British:4 American:2)
The British make immediate use of the four command cards to once again activate Lieutenant Parker-Edwards and his light infantry. This could put the rebel skirmishers in peril. They have been pursued successfully by the light infantry before and it has never ended well.
Parker-Edwards sends one group forward and they fire at the skirmishers.
The flurry of musket balls inflicts two points of shock but no casualties, and rather than reload, the lights move forward again. It looks like they intend to settle this matter at the point of their bayonets.
Parker-Edwards orders the second group to move with him and open fire at the same target.
The skirmishers suffer another point of shock.
Tiffin Card drawn (British:0 American:2)
The rebels use one of the two remaining American command cards to move up the second group of Continentals.
Turn 9
Ominously for the skirmishers it's Lieutenant Parker-Edwards and his light infantry who are the quickest to react. He sends one group charging towards the orchard.
The skirmishers don't intend hanging around to meet the light infantry and immediately try to evade. They move back quickly to the rear of the orchard, but will it be far enough?
The light infantry move quickly and they are hot on the heels of the skirmishers but not quite close enough to catch them. For now the rebels have made a lucky escape.
Lieutenant Parker-Edwards moves his group toward Major Morris and the frontiersmen. I doubt they will be able to reach them and so decide to hold my ground for now. Unlike the militia skirmishers the frontiersmen are aggressive and more willing to engage in a hand to hand fight. They'll take their chances.
Fortunately Lieutenant Carroll is then able to take his militia skirmishers even further away from harm by falling back over the rail fence. This puts them in a much better position should the light infantry choose to continue pursuing them.
The four pounder crew spend their activation reloading the gun.
British Command Card drawn (British:1 American:0)
American Command Card drawn (British:1 American:1)
With the militia skirmishers behind the fence the situation in the orchard now presents the rebels with a fleeting opportunity. The frontiersmen have a few good traits for fisticuffs, including tomahawks and aggression, and, if they attack now, the British light infantry will receive them unloaded. I decide it's worth taking a risk.
Major Morris has chosen to lead from the front and that's exactly what he does. The frontiersman follow him in a charge through the orchard. The five light infantry weigh up the impending odds and decide it might be wise to evade. The frontiersmen come bursting out from the other side of the orchard to see the light infantry moving off hastily in the other direction.
Sergeant Burns then leads his Continentals up to the fence line to join the skirmishers.
Lieutenant Campbell, Petrie's second in command, has the two groups of regulars form up into line.
American Command Card drawn (British:1 American:2)
The rebels may need more support up on the fence line and so I use the two command cards to activate the second group of Continentals and bring them across the ploughed field.
The militia's Lieutenant Bradbury has noticed the four pounder crew busy reloading and senses the road is no longer a safe place for his men. He orders them to split up and move to the right and left.
British Command Card drawn (British:2 American:0)
Lieutenant Smith takes the opportunity to get his men in better order and rallies off a point of their shock. They've had a lucky escape but are likely to be facing the light infantry again in the near future.
Captain Carr-Clarke turns his dragoons from the barn and walks them briskly across the road. It looks like the British are shifting the weight of their attack to the other flank and the dragoons will come to the support of the light infantry.
American Command Card drawn (British:2 American:1)
Major Petrie rallies shock from his regulars and then moves towards the road.
British Command Card drawn (British:3 American:1)
British Command Card drawn (British:4 American:1)
The British have been fortunate with their command cards and this is the second time in the game they have four available. Major Petrie activates once again and crosses the road to join Captain Winston-Smythe's regulars.
He rallies off some of their shock and then orders the light dragoons to continue making their way around to the left flank.
Tiffin Card drawn (British:0 American:2) All American units have activated and so the remaining cards cannot be used.
Turn 10
Major Petrie is full of energy today and sets to work rallying Captain Winston-Smythe’s regulars, removing three points of shock.
While Petrie is busy trying to restore his command to order, Major Morris is eager to drive off the light infantry while they are caught in the open. He has the frontiersmen fire on them.
There are no casualties but the lights suffer three points of shock. Without a leader in command range they may find themselves pinned in the open.
Morris has the frontiersmen pull back into the cover of the orchard and reload.
Lieutenant Campbell rallies the last point of shock from the regulars by the barn. The skirmishers may not have inflicted many casualties but the large amount of shock they inflicted has completely hampered British progress. It's a pity I cannot capitalise more on this but at least it allows the Americans to focus their attention on the light infantry.
Tiffin Card drawn (British:0 American:0)
Turn 11
Captain Carr-Clarke is wary of the skirmishers in the orchard and decides it might be wise to keep his dragoons out of musket range.
American Command Card drawn (British:0 American:1)
Major Petrie rallies more shock. He then has the regulars across the road form up into column.
Lieutenant Parker-Edwards needs to rescue his isolated group of light bobs and he brings the group with him around to the left hand side of the orchard and they reload.
Once in command range he orders the isolated group to reload and fire.
The frontiersmen with Major Morris suffer a point of shock and then the lights move back, but they do so very slowly.
Major Morris is keen to see those light infantry finished off and he orders the militia skirmishers behind the orchard to move across to the corner of the field and fire.
The skirmishers are carrying two points of shock and they barely move. Disappointed Morris turns his attention back to the frontiersmen. He rallies off their shock and activates them to fire once again on the light infantry, making use of the one American command card to make that fire as effective as possible.
With their force morale down to five and likely to drop further the first signs that the British are considering withdrawal come when Lieutenant Campbell turns his column about-face and they move toward the back of the table.
American Command Card drawn (British:0 American:2 )
If the British are trying to withdraw then I want to inflict as many more casualties as I possibly can. It's time to push forward to try to catch the British before they disappear.
Lieutenant Bradbury orders his militia to follow him over the rail fence.
Lieutenant Smith rallies shock from the militia skirmishers in the ploughed field. If they could only move faster they should be able to engage the British light infantry before they too withdraw.
American Command Card drawn (British:0 American:2)
Tiffin Card drawn (British: American:2)
The two American command cards are used to move the group of militia and Continentals forward in the ploughed field.
Turn 12
American Command Card drawn (British:0 American:1)
American Command Card drawn (British:0 American:2)
Sergeant Burns advances his men over the fence and into the orchard.
British Command Card drawn (British:1 American:2)
Lieutenant Smith rallies more shock off the militia skirmishers.
Lieutenant Parker-Edwards senses the danger and orders both groups of light infantry to fall back. The lights are unusually slow and only move 6" and 7" respectively.
That's enough to see them break and they fall back hastily towards the rear.
That's yet another blow to British morale which drops to four.
With the British falling back Morris orders the frontiersmen back to the edge of the orchard and has them target the group of light infantry with Lieutenant Parker-Edwards.
The lights lose another man and suffer a point of shock.
Morris then orders the Continentals to continue making their way through the orchard. I'm not looking to mount a full blown counterattack here. The rebels have too much to lose if they are not careful, it's more a matter of trying to pick off stragglers as the British withdraw.
Lieutenant Campbell continues to lead two of the groups of regular back down the road and it's clear that the British have decided to withdraw before they take any more casualties or their force morale collapses completely.
American Command Card drawn (British:1 American:1)
The four pounder crew turn their gun and follow Lieutenant Campbell.
Captain Carr-Clarke turns his dragoons and they walk back.
British Command Card drawn (British:2 American:1)
British Command Card drawn (British:3 American:1)
Major Petrie rallies more shock from the regulars and orders one group to move with him to cover the retreat of the light infantry and the dragoons.
Lieutenant Bradbury runs with his group of militia toward the church.
British Command Card drawn (British:4 American:1)
For the third time this game the British have four command cards available in play and once again the energetic Major Petrie is activated. He orders both groups of lights to continue withdrawing and brings the regulars with him back towards the hill.
Tiffin Card drawn (British:0 American:1)
At this point it's clear the British will withdraw before the rebels can inflict any more casualties and so the Americans settle for another scenario victory.
This was certainly not the outcome I was expecting. The plan to rely on the rebel skirmishers worked far better than expected. Their initial round of fire inflicted so much shock on the column of British regulars that those two groups were effectively taken out of the game. That disrupted British plans and prevented a coordinated assault by the full force of regulars. The initiative could have been restored by the light infantry, but they were hampered by their own late arrival and their inability to catch the skirmishers and drive them off with the bayonet. That resulted in one group of lights isolated in the orchard and having to make their own escape from the aggressive frontiersmen, which put paid to the attempt to clear the orchard of rebel skirmishers.
It turns out the loyalist spy was hiding in the house across the road from the barn, but the British were too busy trying to rally the regulars and avoid the fire of the skirmishers that they had no time to search it.
In the end the British suffered only four casualties - three from the light infantry and one regular. The main damage came to their force morale and once it was down to four it became increasingly unlikely they could turn the tables without it dropping further. The regular succumbs to his wound before the next game, but the three light infantry were only lightly wounded and they will return to the unit in time for the next game.
Surprisingly the rebels came away without losing a single man, a significant outcome given how weak their force has become as the campaign has progressed. However several of their wounded from the previous games have succumbed to their injuries. One of the militia skirmishers dies while the other remains wounded. Four of the Continentals were wounded during the charge of the dragoons in the previous game and two of those die, one still remains wounded and one makes enough of a recovery to return to the unit.
While the American victory was welcome they still face a strong British force and they might not be so fortunate in the future. So we now move to Engagement 4 and you can find out what happens next in this post.
Interesting game, the colonial side was just aggressive enough, the British wisely called it off when the morale suffered. They can try again tomorrow.
ReplyDeleteThanks, that was the outcome I was hoping for, but didn’t really expect, things went surprisingly well for the Americans.
DeleteInteresting AAR and lovely looking table and toys.
ReplyDeleteThanks Peter, glad you like it.
DeleteAnother great AAR. That was a shocking 'ambush' by those rebel skirmishers!
ReplyDeleteOnly having read, not played, the rules; the thing that seems odd to me is the lack of a morale test for charging or being charged. I would like to hear your views on how this plays out as in some cases the I would expect simply being charged to be enough to rout a small group.
Finally, as one doesn't have to win to advance to the next scenario in the sequence is it just VPs that determine the win? If so, what is the current score?
Thanks Rob, that ‘ambush’ almost decided the outcome of the game all by itself. There is no morale tests for charging/being charged as such, however morale does play a part. Units with shock are penalised when moving towards the enemy, but not when retiring from them. In other words a unit with shock will struggle to have the movement to close with the enemy, or risk getting only close enough to receive a volley before contact. A threatened unit can retire the full movement distance regardless of shock and given how detrimental shock is to the outcome of hand to hand both players should take this into consideration (if they want their unit to survive). Troop quality also determines the outcome, so militia will be worse off facing regulars for example. In the end I’m not sure there would be a big difference in game outcome if a unit broke and fled before contact or as a consequence of contact, in both cases the inferior troops are most likely out of the game regardless. Casualties could be an issue for a campaign but I think I could abstract this easily enough to represent routed men that never return to the unit. Nothing to stop a player trying something crazy though, which might be your issue, but anyone who uses militia without bayonets to charge regulars who receive them with muskets loaded should not be at all surprised at the result. It’s almost self regulating in that sense. The subsequent losses and other impacts on force morale would also have their impact.
ReplyDeleteAs for VPs we’re not really counting at the moment, in some ways this is a glorified play test of Dave’s ideas, so we’re feeling our way as we go. After the American losses in the last game we gave some thought to whether they needed reinforcement but decided to play it as written for now. The rebels are probably slightly ahead although at this stage we’re not certain how balanced the campaign is and so don’t want to read too much into that just yet.
Thanks - I guess I need to try it out for myself and see how it feels.
DeleteI was of course rooting for you the whole time. But from the get out I thought the British would have a hard time of it just bc the scenario kinda calls for them to spread out and have to concentrate at the point of contact. But it looks like both sides played very cagey and well. I’m REALLY enjoying these SP2 reports. 😀
ReplyDeleteInteresting game May nuoc nong nang luong mat troi ong dau
ReplyDeleteReally enjoying this campaign! All good inspirational stuff
ReplyDeleteCheers
Matt
Another excellent AAR. I'm really enjoying this series of games. Looking forward to reading the next one.
ReplyDeleteTerrific report as always. It would be great to see some SP Campaigns in the same vein as the Chain of Command PSC. One off games are brilliant, but a campaign really tests the players judgement in an operational and tactical context.
ReplyDelete