This is the fourth scenario in our Ruckzug campaign for Chain of Command. So far the Germans have had some success in stalling the British pursuit and conducted a reasonably orderly retreat (you can follow the campaign progress starting with
this post).
Now, at another small village, the German kampfgruppe will turn once more to face their pursuers. Can they gain more time and prevent the retreat descending into a rout?
Having made a voluntary withdrawal in the
previous game the Germans suffered a few losses in men and equipment. That hasty retreat has also made their defensive position less than ideal. In this game they face a flank attack.
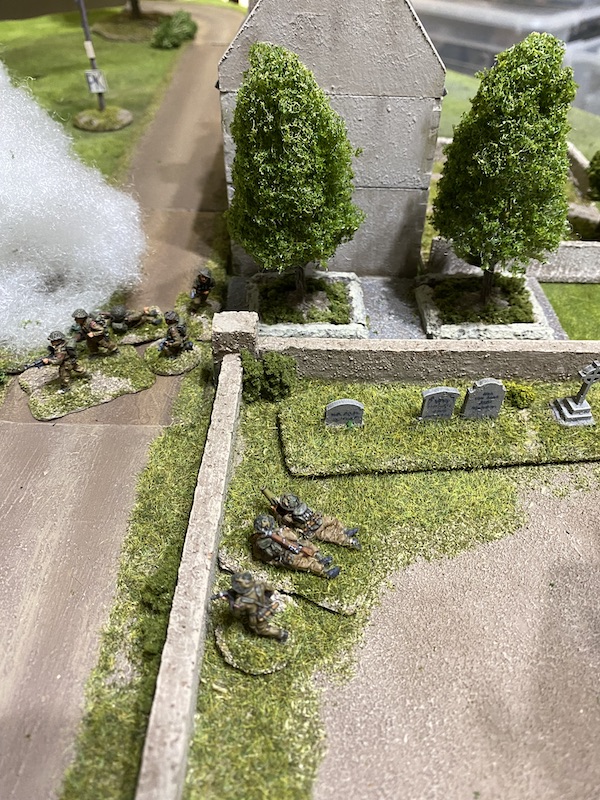
German patrol markers will start in the area marked by the blue box. The British will come from the table edges marked in red, which gives them a good chance of gaining a toehold in the village. They start the patrol phase with four moves and push quickly toward the church. I decide to bring the phase to a conclusion by locking down all my patrol markers as hastily as possible. Nonetheless the British are able to place two jump-off-points on one side of the village as shown below.
This puts them in a good position to launch their assault.
The current British motor platoon has suffered many casualties and is short of ten men. While they have the option to replace this platoon with a fresh one the delay created by the changeover comes at the cost of two victory points. With the British already trailing the Germans by five victory points it's a price they cannot afford to pay if they are to retain any hope of winning the campaign.
As a result the platoon is reduced to two sections, one of which is formed by merging two Bren teams.
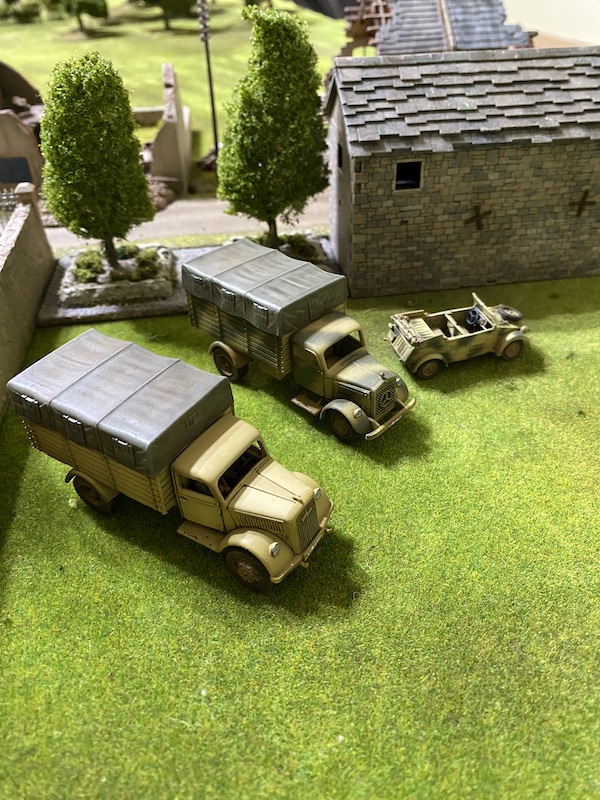
The core platoon of the German kampfgruppe is in reasonable shape but the same cannot be said for the other adhoc units that have joined them since the campaign began. These are now much reduced squads, composed in two cases of only small LMG teams with their junior leader. While they have no armour they do have a Pak40 75mm anti-tank gun and a panzerschreck team, which I hope will be enough to hold off any British tanks. As always transport is critical for an orderly German withdrawal, but they find themselves relying on two trucks and a car.
Any new German support for this game will be decided on the roll of a single D10 (see
this post for an overview on how this is allocated). What they discover is that no more units have turned up but they have unearthed a supply of fuel with enough petrol to keep all the transport vehicles on the road.
The British enjoy considerably more support with sixteen points available. That should help them cover some of the shortfall caused by their casualties. As usual the Germans are unaware of the support choices that are made.
We begin the game with German force morale at nine and the British at eight. With that we are ready to start and Dave announces that a pregame barrage is in effect.
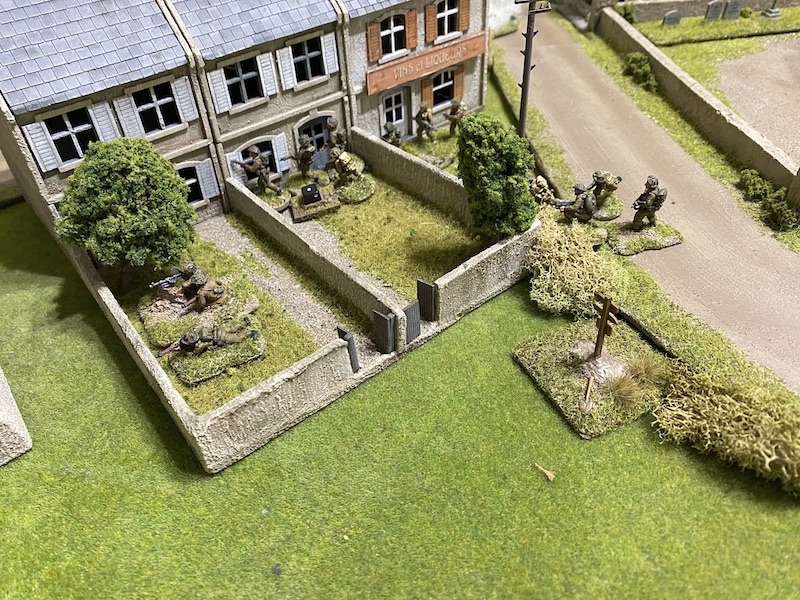
The British have the first phase and the platoon sergeant deploys into the church yard. He's accompanied by the section with two Bren teams and he puts both on overwatch.
The platoon's 2” mortar team takes up position behind the house next to the church.
While the mortar crew don't have a direct line of sight into the village other British units will be able to spot for them.
The pregame barrage makes German deployment unreliable and that situation is made all the worse by the close proximity of the British. That gives the Germans little choice but to try to commit units earlier than I might prefer.
In the German phase a junior leader and MG42 LMG team manage to deploy through the barrage into a rubbled building. These are all that remain of a squad of hardened veterans that joined the kampfgruppe earlier in the campaign.
They take up overwatch positions covering the road through the village.
In the British phase the sergeant spots for the 2” mortar team.
He has them fire a round of smoke into the road junction near the church.
The platoon's second section deploys into the house next to the church.
With the British infantry infiltrating into the village the Germans then face an ominous threat from another direction. A Churchill Crocodile rumbles up the road.
With the British approaching from two directions, this is already starting to look like a difficult position to hold.
The platoon's lieutenant joins the section in the house by the church and he puts both teams on overwatch.
In the German phase a two man MG42 LMG team and a junior leader make their way through the barrage to the jump-off-point near the rear of the village. They are all that remains of a green infantry squad and with a short deployment distance of 4" they are unable to deploy directly into the nearest house.
In the British phase the Churchill Crocodile moves slowly and cautiously up the road.
The next German command roll is 55442 and while it provides two useful CoC points it offers little else and so I let the phase pass back to the British.
They continue to build up their force. A flamethrower engineer team deploys into the churchyard to join the section and the platoon sergeant. It looks like Dave has come to the conclusion that the quickest way to evict the Germans is to burn them out. It doesn't bode well.
Lastly a medic arrives at the rear of the house near the 2” mortar team. A medical orderly is a support we rarely use and Dave confesses the main reason he selected this was because he had a spare support point for which he didn't have a specific use. Despite that and especially in the context of a campaign a medic could prove useful in recovering wounded leaders.
In the German phase the recently arrived junior leader and LMG team make their way into the house.
The Churchill Crocodile is a potent threat that cannot be ignored and its flamethrower will soon be able to target the village. I expect Dave to use it cautiously and take advantage of its range to remain beyond the reach of panzerfausts. That means the best hope the Germans have of disabling it lay with the Pak40 or the panzerschreck team.
That said, it won't be easy. The tank has heavy armour and so waiting for a chance to ambush it with a side shot offers little advantage. All of which says there is a good case to try and take it out as early as possible. With that in mind I try to deploy the Pak40. Unfortunately they fail to make it through the barrage.
The British command roll is 65543 and that provides enough points for their first full CoC die. I have a feeling using CoC die for interrupts could be very important in the cat and mouse game my anti-tank teams will play with British armour and so that's not a welcome sight.
As if to press the point home, the Churchill Crocodile continues moving forward relentlessly bringing it into range of the first row of houses.
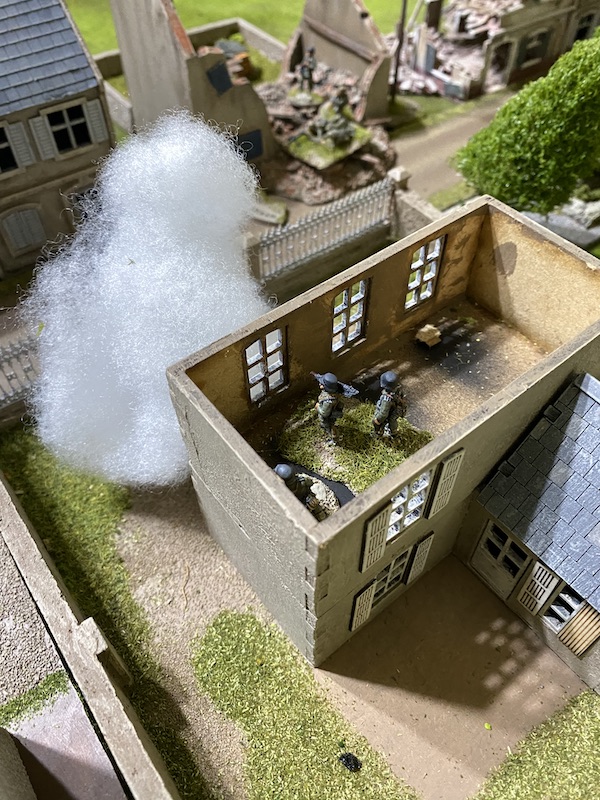
Back at the village the platoon lieutenant orders the rifle team out into the street and behind the cover of the mortar smoke.
He then orders the 2” mortar team to send another smoke round into the village.
They don't have direct line of sight and so the round misses its intended target. Despite that it falls directly in front of the house just occupied by the green LMG team and its obergefreiter.
In the German phase the green LMG team follow the obergefreiter upstairs. For now their line of sight is blocked by the smoke, but I'm working on the assumption a turn end is probably not far away. If that eventuates then it puts them in a good position to cover the street and houses opposite. Call it wishful thinking.
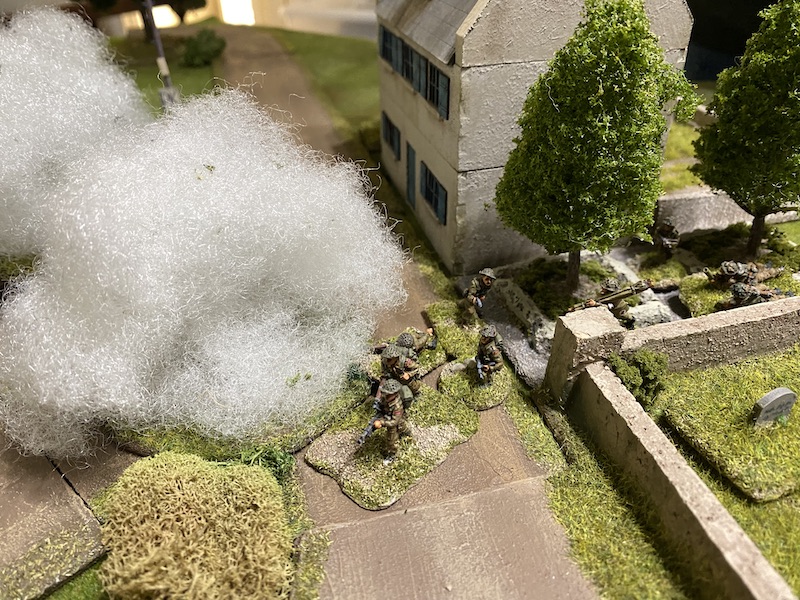
To my relief a second attempt to deploy the Pak40 through the barrage is successful. The crew is short of one man who was killed in an earlier game and the commander and surviving crew members take up position at the edge of the village ready for a duel with the Crocodile.
The gun commander uses a command initiative to help aim the weapon before giving the order to fire.
It's a fairly clear shot and the Churchill is hit. Unfortunately the round manages only three AP strikes and the tank's thick armour generates two saves, resulting in one net hit. That's not the result I was hoping for. It leaves the crew suffering a point of shock and the sight for the 75mm gun damaged.
The British command roll is 44431 and that's enough to spur the commander of the Crocodile into action. He orders the driver to slowly adjust the angle of the vehicle's hull before telling the gunner to unleash a jet of burning fuel towards the Pak40.
The gun crew suffer terribly. Four of them are killed including the gun commander and that brings German force morale down to seven.
Surprisingly there is no shock and so against the odds the sole surviving member of the crew remains steadfastly at his post. For how long though is another matter.
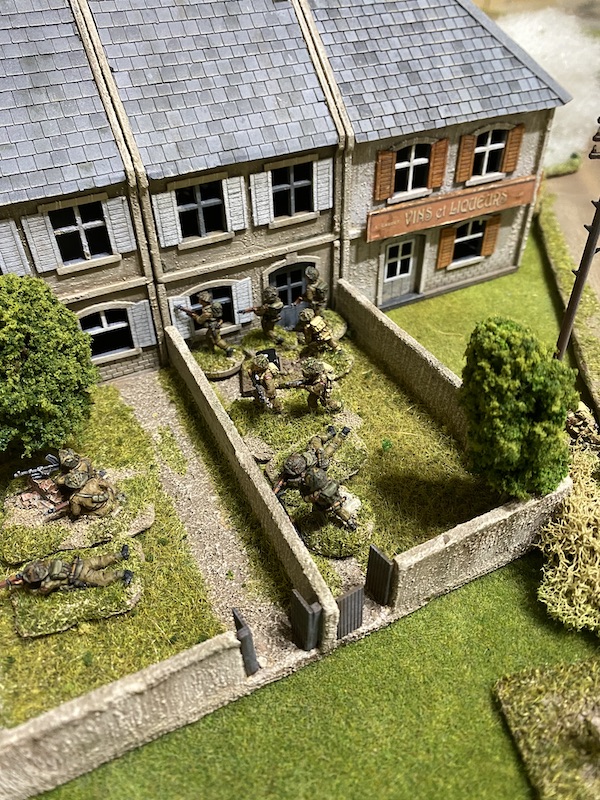
The British infantry begin to press on into the village. The rifle team moves at the double from behind the mortar smoke.
That brings them close enough to shut down one of the German jump-off-points.
The sergeant then sends one of the bren teams over the churchyard wall to join the rifle team.
He tells the other bren team to follow, but they don't advance quite as briskly.
The flamethrower team and the sergeant then move along the churchyard wall.
With the Churchill Crocodile providing such effective support it's hard to see how the Germans can stop the British from working their way around this side of the village.
The platoon lieutenant orders the 2” mortar team to continue firing smoke.
Once again the round falls short of the target but still provides an effective screen for British movement.
When it comes to the German phase I'm hoping I can activate the surviving member of the Pak40 crew to heroically continue at his post and engage the Churchill. Unfortunately a roll of 64433 doesn't provide the 1 that I need.
This leaves me with a difficult decision. I could try and deploy the platoon's feldwebel, but he is the German's only senior leader. Having him present on the table would mean any future deployment by the remaining units would be through a pregame barrage and without a senior leader off the table to direct them. I weigh up whether it's worth the risk. Of course, if the Pak40 succeeds in taking out the Crocodile it would appear a stroke of genius. On the other hand failure would cast things in a different light and leave the Germans in a very precarious position. It's a tough call, but I'm sorely tempted.
If I'm going to deploy the senior leader then I decide I should first attempt to bring on another squad. That fails and they don't make it through the barrage. Regardless, I decide to throw caution to the wind and deploy the feldwebel in the hope of squeezing one more shot out of the Pak40. For all the agonising it comes to nought, he too fails to make it through the barrage.
Lastly, the green LMG in the upper level of the house is placed on overwatch.
The way the command dice do such a good job of removing the element of predictability from a game is highlighted when the British command roll is 54441. For all my agonising over what to do it turns out I may have more time than I thought and the Crocodile won't be returning fire just yet.
That doesn't prevent the British infantry from pressing forward across the village backyards. The rifle team climb over one of the walls and into the next yard.
The sergeant then begins barking orders from the churchyard.
He directs one of the bren teams to follow the rifle team into the backyard.
He then orders the second bren team to move up behind them.
With such a weak platoon Dave is playing this carefully as he has limited resources for the task at hand and cannot afford needless casualties.
Lastly the sergeant leads the flamethrower team over the churchyard wall.
The lone Pak40 gunner looks unlikely to survive at his post if he remains there much longer.

The platoon lieutenant leads the section's bren team out of house and into the street.
He then orders the 2” mortar team and the medic to come forward.
The next German command roll is 65432 and it brings up one full CoC dice. That presents an interesting dilemma. I'm eager to bring the turn to an end - it would see the end of the pregame barrage and removal of the British smoke. Then again I'm certain it might find better use for an interrupt.
As it stands I'm unable to activate the Pak40 this phase unless I deploy the senior leader. If I do that I'm certain Dave will use his CoC die to interrupt and the lone German gunner is unlikely to survive another burst from the flamethrower. On the other hand, if I wait until the Churchill moves or fires and use the German CoC die to interrupt then the Pak40 could fire without the need for a senior leader or an activation dice. That seems the better option and so I decide to hold on to the CoC die for now and wait to see what unfolds.
While the Pak40 won't activate this phase the Germans do manage successfully to deploy a squad and their obergefreiter.
They cover the flank and rear of the village but can also pose a threat to the British flank.
In the British phase the sergeant orders one of the Bren teams to move to the backyard nearest the Pak40. They clear one wall and advance across the backyard to the other wall, bringing them within line of sight of the anti-tank gun.
The sergeant orders them to throw a grenade. It hits the gun and inflicts a point of shock on the solitary gunner.
The sergeant orders them to throw a second grenade which also hits. It inflicts another two points of shock which is enough to break the lone crew member and he falls back across the village.
The dispiriting sight of the abandoned gun is enough to bring German force morale down to six. So much for my plan to use the CoC die to interrupt the Crocodile.
The section corporal brings the other bren team over the wall and into one of the backyards.
The rifle team then move into the house....
and capture the the jump-off-point.
More British units press forward and the lieutenant leads the bren team around the mortar smoke.
The medic joins them.
And the 2” mortar team climb over the wall into the churchyard.
I feel things are not going well for the Germans and the loss of the crew for the Pak40 has been quite a blow, so a command roll of 66441 is very welcome. Can the panzerschreck team do what the Pak40 failed to do and disable the Crocodile?
To my relief the team deploy successfully through the barrage and alongside the abandoned anti-tank gun.
Due to the range this is not the easiest of shots but the panzerschreck rocket is on target and strikes the Churchill. We play the advanced rules for armour penetration and so the panzerschreck will roll thirteen dice hitting on a 4,5 or 6. Average dice should give six or seven AP strikes but unfortunately I only manage three strikes. The Churchill has armour of ten and rolls only two saves - the result is a disappointing one net hit. The crew suffer a further point of shock and the driver is out of action for the next British phase.
The Germans have the next phase and a command roll of 65541 means the panzerschreck can activate again. As expected Dave uses his CoC die to interrupt and the Crocodile lets loose a jet of flame before the panzerschreck team can fire their second round.
I expect the team to be wiped out but miraculously they both survive. However the experience is enough to leave them suffering eight points of shock which breaks them.
They fall back to the rear and German morale drops to five.
In the British phase the lieutenant and bren team move at the double around the building to the backyards.
Once there the lieutenant orders the bren team in the backyard to move forward over the wall and join the other team.
Last, he sends the flamethrower team with the sergeant around the outside of the backyard walls.
The British platoon may be depleted but that puts three bren teams and a rifle team in and around those houses. They are supported by the flamethrower team and benefit from the close proximity of the sergeant and lieutenant.
The Crocodile is not far away, but with the driver out of action for this phase the tank commander spends the phase rallying the shock from the crew.
I decide the best thing may be to make a stand in the other side of the village. There seems little point exposing my units to two flamethrowers, I think it's easy to see how that might end.
The recently deployed squad moves into the house and faces across the street.
The LMG team and junior leader from the elite squad moves out of the rubble and across the street.
In the British phase the Crocodile moves off the road towards village.
The sergeant sends the section with two bren teams over the wall and out of the backyard.
The sergeant then moves with the flamethrower team. They have no walls to climb and move quickly to close down the German jump-off-point near the anti-tank gun.
Not far behind, the lieutenant rallies shock and crosses into the backyards with the bren team. Once there he rallies a point of shock from the rifle team in the house.
The British continue to fire smoke and the 2” mortar team fires another round into the village.
It lands on target and blocks line of sight across the street.
At this point I'm beginning to wonder how I can possibly influence the outcome of the game. With my two most effective anti-tank weapons out of action any chance of attaining a scenario victory seem remote. If British morale can be driven down to four or less then there is the option for a voluntary withdrawal. Yet that too looks unlikely, currently their force morale sits at eight - where it started.
If the only outcome is to be an involuntary withdrawal do I withdraw now before I take further losses? Or am I better fighting until my force morale reaches zero? The benefit of doing the latter would be to inflict enough casualties on the British that they are forced to replace the platoon and lose two campaign victory points in the process. All things considered I think this might be the better option.
So, if I'm going down fighting now is as good a time as any to start. In the German phase the MG42 MMG team deploy through the barrage into the upper level of a barn.
From there they open fire on the sergeant and flamethrower team.
Two men are hit, but no shock is inflicted. The flamethrower team lose one man and the platoon sergeant suffers a light wound. That sudden wounding of a senior leader hits British morale hard and it drops two points to six. That was unexpected and offers a glimmer of hope. Perhaps there is a realistic chance of driving their morale down to four or less?
Despite all the smoke I see no reason not to have my men prepared. The squad in the house across the street is placed on overwatch.
The obergefreiter of the elite squad puts the LMG team on overwatch.
I then decide to risk an aggressive move to see if I can finish off the flamethrower team. It will mean exposing a squad to return fire, possibly from both flamethrowers but it's a gamble I'm prepared to take.
The squad deploys successfully through the barrage across the street from the German jump-off-point in the barn. They are in close enough range to the British that the obergefreiter's SMG can fire at full effect.
The Germans open fire and the flamethrower team lose another man and suffer a point of shock.
I was hoping for more than that but the squad is not finished yet. With his second command initiative the obergefreiter has one of the men throw a grenade.
It hits but only manages to inflict another point of shock. It's agonisingly close but it's still not quite enough.
Dave can see the danger of losing the flamethrower team. If he can move them out of harm's way that will also free up the line of sight for the Crocodile to target the recently deployed German squad. In the British phase the team start to move away but I choose this as the moment to use that CoC die to interrupt. The squad in the rubble opens fire once again.
That's enough to kill the last engineer in the flamethrower team and wipe it out. That brings British force morale down to four.
The sergeant survives and he makes a move away to safety, but it means the Germans have reached a critical moment in the game. With British morale at four, 50% of where it started, suddenly the Germans are in a position to make a voluntary withdrawal.
The game's not quite over yet and there may still be an opportunity to interfere with German plans. The Crocodile's flamethrower is very capable of inflicting considerable casualties and with German force morale at five it could come crashing down just as quickly as the British.
With the engineer flamethrower team no longer in the line of fire the Crocodile seeks revenge.
The German squad is lucky. They lose only one man from the rifle team, but the burning jet of fuel has rattled the men and with ten points of shock that's enough for them to break.
They fall back and join the other broken units and that is enough to bring German morale down to three.
The British continue to press forward into the village and the lieutenant leads the bren team into one of the houses.
With force morale dangerously low the German phase can't come soon enough and it's clear what I'm going to do - the Germans announce they will make a voluntary withdrawal. The collapse in British morale was as welcome as it was unexpected and it's enabled the Germans to get themselves out of a very tight spot. They may not have achieved a scenario victory but it certainly feels like one under the circumstances.
Overall casualties were light, in most cases the British succeeded in driving the Germans off by breaking them rather than inflicting casualties. The only exception was the crew of the Pak40, most of whom met a grizzly end. The Germans earn one more campaign victory point for this voluntary withdrawal which brings their total to 4, while the British are at -2. That differential of six points may prove difficult for the British to close in the remaining games.
At this point in the campaign we roll at the end of every scenario to see if the next game will be the last and this roll could have big implications for the campaign. On a six the next game will be the last and I roll a six. That gives the British no hope of overtaking the German victory point total as the maximum they could achieve from a scenario victory in the last remaining game would be three points. With the outcome a foregone conclusion Dave decides to concede and admit defeat and so the campaign comes to a close.
It's been a very interesting campaign with a very different feel from many others. Both Dave and I agree it is certainly balanced, in the sense both sides have an equal chance of winning it, but having said that it can be described equally as 'volatile'. In other words events and game results can have considerable implications for the following games and the campaign as a whole. Certainly the early German successes in this campaign swung it in their favour making it difficult for the British to overcome their early setbacks.
If you've enjoyed following along and would like to
Buy Me a Coffee to help cover some of the costs of running the blog you can click through at the link or on the tab in the right hand column of this page.