On the other hand the British will have the advantage of arriving on the table earlier than the Americans. The timing of the rebels' deployment will be uncertain. Each time the force commander's card is drawn the Americans will roll two D6. Once the accumulated total of these rolls reaches sixteen they may then start to deploy. Given the British have cavalry and light infantry a delayed American deployment could prove disastrous and so they find themselves hostages to fortune.
We start with Force Morale for both sides at nine.
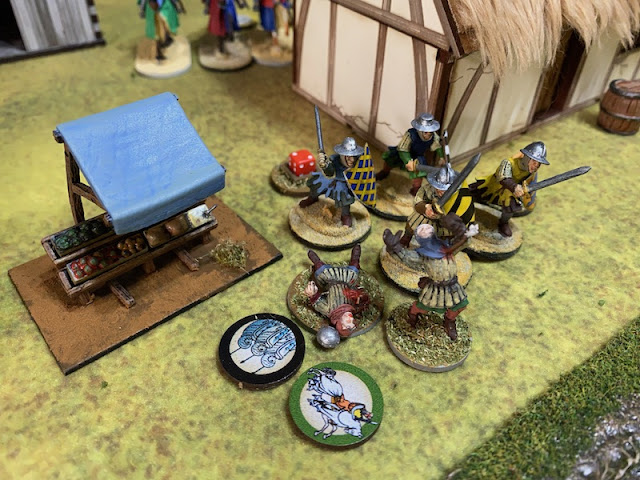
The first redcoats to arrive are under the command of Captain Winston-Smythe. He has two groups of regulars who have lost two men killed over the course of the campaign.
The card for Major Morris, the rebel commander is drawn, giving a timely start to the dice rolls that will determine American deployment. A roll of seven takes them nearly halfway toward the total of sixteen that they need.
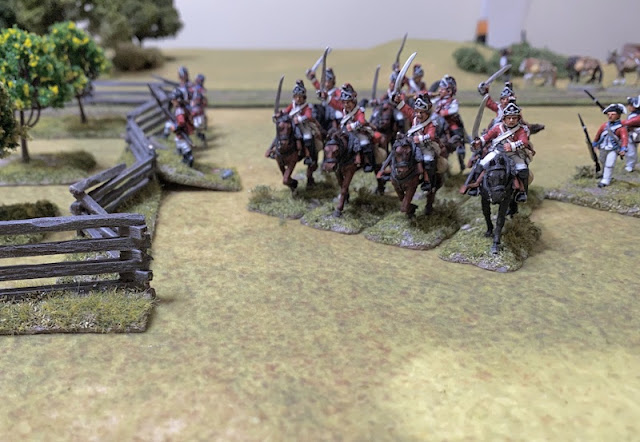
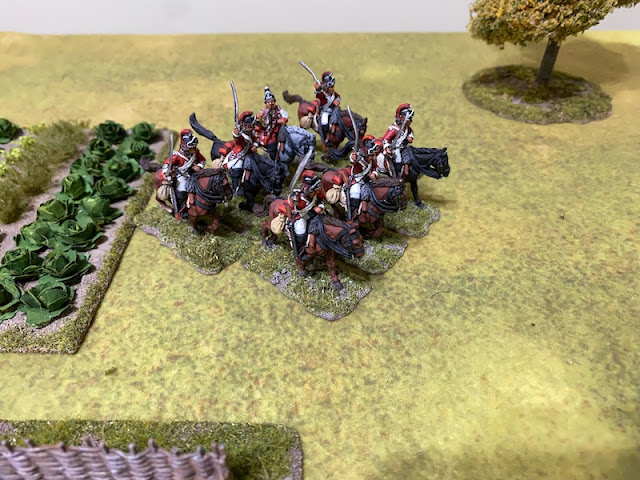
The arrival of Captain Carr-Clarke and his dragoons gives the British an advantage in speed that the Americans are unable to match.
The British light infantry under Lieutenant Parker-Edwards are next to arrive and they are soon joined by the four pounder gun that the British captured in Engagement 2.
He activates the dragoons and has them canter toward the hill on the British right.
British Command Card drawn (British:1 American:0)
American Command Card drawn (British:1 American:1)
Tiffin Card drawn (British:1 American:1)
Turn 3
American Command Card drawn (British:0 American:1)
American Command Card drawn (British:0 American:2)
British Command Card drawn (British:1 American:2)
Captain Carr-Clarke's dragoons canter forward working their way around toward the rear of the barn.
Meanwhile Captain Winston-Smythe has both of his groups of regulars continue making their way toward the fence.
The first group move rapidly and almost reach it.
The second group are much slower and remain some distance behind.
British Command Card drawn (British:2 American:2)
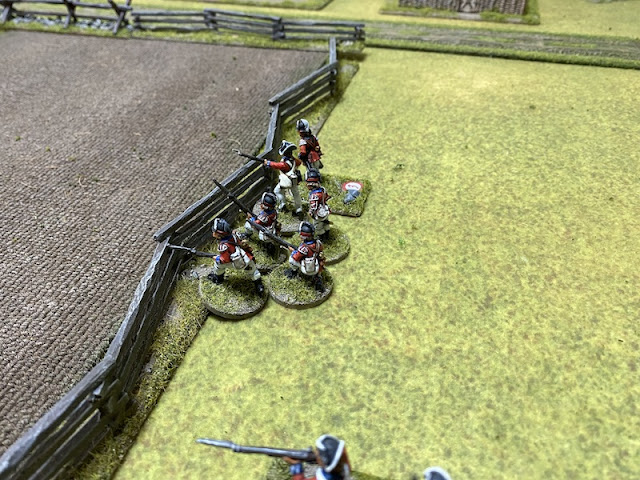
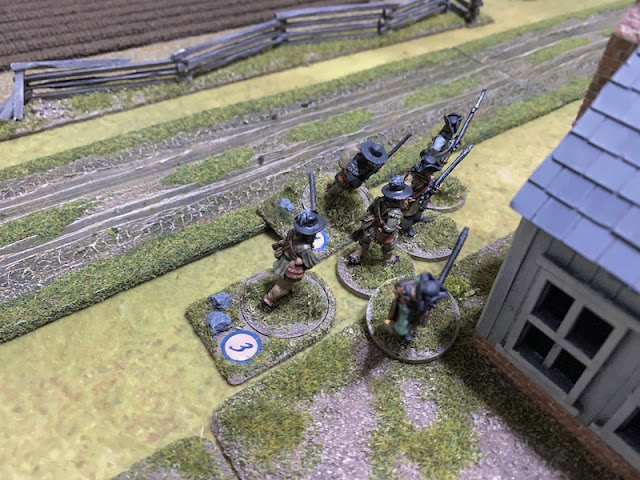
With the dragoons making their way around the barn the frontiersmen skirmishers make a timely arrival. Taking full advantage of their movable deployment point they take up positions in the field on the American left.
They find good cover at the rail fence and looking between the barn and the farmhouse they can spot the dragoons.
Their opening salvo strikes true, hitting one of the dragoons and inflicting two points of shock. First blood to the rebels.
The four pounder advances into a position that dominates the road.
British Command Card drawn (British:3 American:2)
With the frontiersmen covering the left flank Lieutenant Carroll moves his militia skirmishers to the rail fence on the American right. His small group are not likely to do much damage to the British but hopefully they can slow them down until more rebel support can arrive.
On the opposite flank the loyalists follow the dragoons towards the barn.
Tiffin Card drawn (British:3 American:2)
The group of light infantry with Lieutenant Parker-Edwards move with their customary speed and soon reach the fence.
They are soon joined by the second group.
That puts Lieutenant Carroll and his militia skirmishers under pressure, they will need support soon if they are not to be overwhelmed.
With the light infantry at the fence Major Petrie has his regulars make their way forward behind them.
Turn 4
Major Morris and his Continentals finally appear and deploy on the American right. Have they arrived in the nick of time? I'm not certain. They need to get to the rail fence quickly and before the British can be ready to receive them. The race is on.
British Command Card drawn (British:1 American:0)
British Command Card drawn (British:2 American:0)
The British make use of the two command cards to activate the four pounder, which fires round shot at the militia skirmishers.
Fortunately the skirmishers are able to make the most of the available cover and suffer only two points of shock.
American Command Card drawn (British:0 American:1)
The three consecutive command cards initiate a random event and this sees the four pounder crew push their gun forward even closer to the skirmishers.
Major Petrie is eager to bring his command to the fence and he leads his column of regulars towards it.
The light infantry are already there and Captain Winston-Smythe's regulars are fast approaching.
One group are already lining the edge of the field.
Once Petrie approaches within command range he orders the group with Winston-Smythe to join the light infantry at the fence.
Having been slow to move earlier they now pick up the pace and are soon behind the light infantry. It looks like the British will win the race and Morris's Continentals may find themselves facing an overwhelming line of redcoats by the time they join the militia skirmishers on the opposite side of the field.
Meanwhile the loyalists move in the direction of the farms, no doubt intending to search both properties.
British Command Card drawn (British:1 American:1)
The British continue to push forward aggressively and Lieutenant Parker-Edwards has his lights climb the fence. Something they do with ease (helped by a movement roll of 6,6!).
That puts them in close range and they fire at the militia skirmishers.
That inflicts a further two points of shock. The militia are yet to fire a shot and are already on the receiving end of cannon fire and musket balls.
The second group of light infantry don't prove quite as nimble but they too push forward and climb the fence.
Once in the field they also target the rebel skirmishers.
Their fire is more deadly, hitting one of the rebels and inflicting further shock. It's hard to imagine the skirmishers will be able to stand much more of this.
American Command Card drawn (British:1 American:2)
Captain Winston-Smythe rallies shock from one of his groups and has the two of them form up into line.
The skirmishers have done little to stall the British advance. Lieutenant Carroll rallies a point of shock and decides his men are not leaving before they give the light infantry a taste of their musketry.
They open fire at the nearest group.
This is their first fire and it's at close range. The skirmishers make their shots count and the light infantry lose one man and suffer two points of shock.
The light infantry may be displaying their customary aggression, but it's not going all their way.
Lieutenant Smith is able to rally more shock from the skirmishers. He may have lost his command but he's able to provide Lieutenant Carroll with useful assistance encouraging the men.
American Command Card drawn (British: 1 American: 3)
Tiffin Card drawn (British:1 American:3)
Perhaps I should have used those three American command cards to deploy the State Line? Too late now, but at least I can activate the frontiersmen to continue firing on the dragoons.
There are no casualties but the dragoons suffer a further two points of shock.
They in turn are activated and canter towards the barn.
For now that takes them out of sight of the skirmishers.
Turn 5
Lieutenant Parker-Edwards orders one group of light bobs to reload and move towards road.
Dave then gives some thought to what to do with the other group. He's tempted to have them charge the skirmishers but the rail fence brings the odds much more in favour of the skirmishers and he decides the risk is too great (if nothing else it confirms my assessment that the Americans best hope is a strong line at the fence). Instead Dave has the group of light infantry reload.
Once again they fire at the militia skirmishers.
And inflict a further point of shock.
The light infantry then move off in the direction of the other group but with the shock they only manage a move of 1”. I've no doubt they plan to exit the field to allow the regulars to unleash a devastating volley once they are all gathered at the fence line.
British Command Card drawn (British:1 American:0)
At long last the State Line arrive.
The rebel force is now on the table but poorly positioned to deal with the British who have made a rapid advance and will soon be able to give the State Line or the Continentals a hot reception.
As if on cue, Major Petrie sends his column up to the fence
He then has them form up into line.
With that the British have won the race to the ploughed field giving the Continentals a difficult task to try and hold the fence line opposite.
Petrie then orders the loyalists to move to the first farmhouse.
The frontier skirmishers want to maintain their fire on the dragoons and so move along the fence to the corner of the field.
Once there they open fire.
Another of the dragoons is hit and the group's shock climbs to five. The steady fire of the skirmishers is slowly taking its toll and may even drive them off.
It's probably time for the militia skirmishers to pull back. Lieutenant Carroll rallies shock before having the skirmishers return fire on the light infantry and then withdraw.
They manage to inflict another point of shock, but only manage to fall back a short distance.
British Command Card drawn (British:2 American:0)
American Command Card drawn (British:2 American:1)
British Command Card drawn (British:3 American:1)
Tiffin Card drawn (British:3 American:1)
Captain Carr-Clarke decides there is nothing to be gained in drawing the fire of the frontiersmen and decides to pull his men back and out of musket range. He slows the horses to a walk and they turn about.
The Continentals need to prevent the British regulars crossing the fence and desperately need to form their own firing line to do that. Both groups run ahead, breaking the formation as they do.
The crew of the four pounder then reload and turn the gun back to face down the road.
From there it can give the State Line something to consider if they want to cross to the other field.
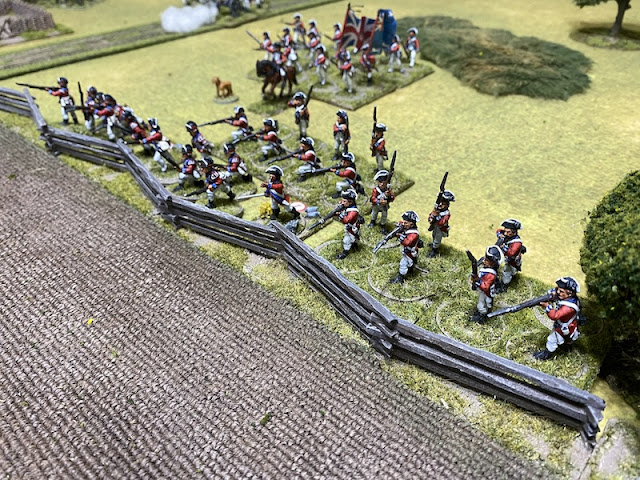
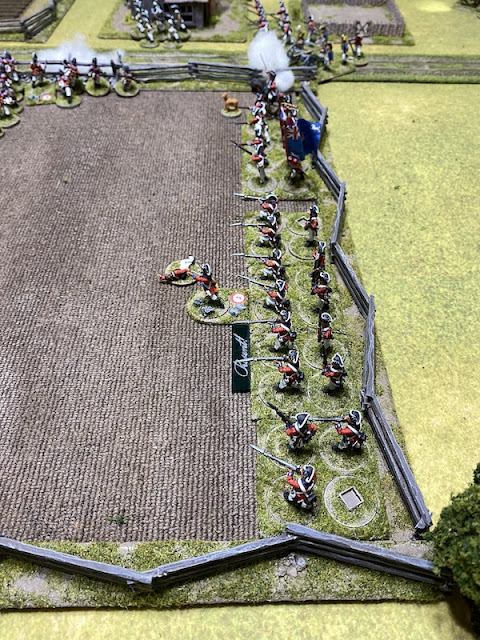
The British are not content to maintain a firing line at the fence, they clearly want to take the fight to the enemy. Captain Winston-Smythe leads his regulars over the fence and into the field. This is exactly what I feared. If the Americans were to have any hope of stopping the British it was to have the Continentals in a good defensive position from where they could pour fire on any British move forward. Alas that now looks less and less likely to happen.
Turn 6
The loyalists make their way to the door of the first farmhouse where, unbeknownst to Dave, the arms cache is concealed.
British Command Card drawn (British:1 American:0)
The four pounder moves further along the road and presents.
American Command Card drawn (British:1 American:1)
American Command Card drawn (British:1 American:2)
Lieutenant Carroll rallies another point of shock from his skirmishers and continues to pull them further back.
Lieutenant Parker-Edwards is in the ploughed field with the light infantry and Dave decides to use one of the British command cards to increase his command initiatives to three.
He takes a point of shock off the group he's attached to.
He then sends the other group to the corner of the field.
From there they fire at the frontiersmen in the field opposite.
Despite the frontiersmen enjoying hard cover they lose one man and suffer two points of shock.
Lieutenant Parker-Edwards then takes his group to join the the first group of light infantry.
That puts his men in a position to target the frontiersmen, but perhaps more importantly it clears the field of fire across the ploughed field for the regulars.
The State Line decide to take a gamble and try running across road in the hope that a rapid move will avoid attracting the attention of the four pounder crew.
Alas they fail to sense the danger they might be in and only cover a short distance.
British Command Card drawn (British:1 American:2)
Captain Carr-Clarke continues to lead his dragoons from danger and rallies off a point of their shock as he does so.
The dragoons may have been driven back from the right flank but Major Petrie seizes the moment to move things forward and maintain the tempo of the British advance.
Firstly he sends Lieutenant Campbell with a group of regulars across the road.
Next he crosses the fence with his second group of regulars.
This now puts him with a formidable array of regulars in the ploughed field.
While the British are making an orderly and organised advance the Continentals are still struggling to reach the fence line and when they do, they will need a bit of time to get themselves in order. It doesn't bode well, but if the Continentals cannot stop the redcoats from the fence line, where can they?
British Command Card drawn (British:2 American:2)
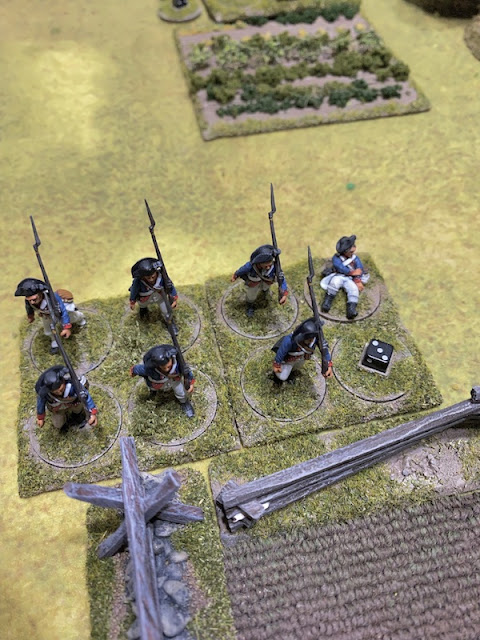
Sergeant Burns follows Major Morris and brings the third group of Continentals forward.
This puts the three groups of Continentals closer together, however forming up into line will not be straightforward. At this early stage of the war their training is rudimentary - they are rated as
Conscripts and Volunteers and are unable to form up into a formation if they carry any shock. It will need Morris and Burns to rally the men before they can do that. I just don't sense they have the time!
The frontier skirmishers' leader rallies shock and has the men return fire at the light infantry across the road.
That fire has no effect.
American Command Card drawn (British:2 American:3)
Major Morris begins trying to get his command into order. The British have set the tempo and the rebels need to make a speedy response.
Firstly, he rallies shock from the group he is with.
He then orders both groups to the fence, but with one still carrying a point of shock they cannot form up into line just yet.
British Command Card drawn (British:3 American:3)
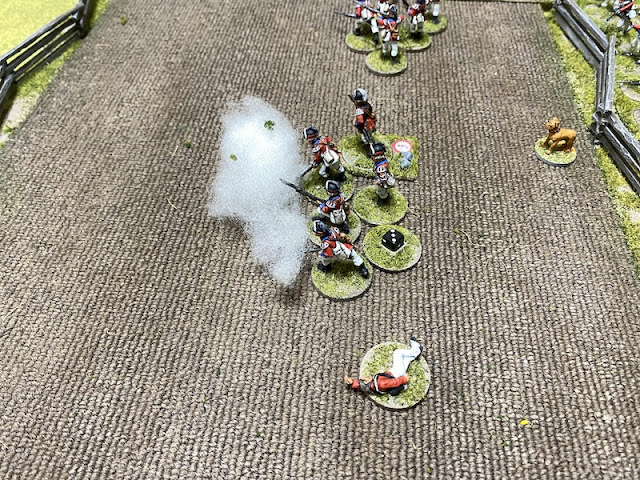
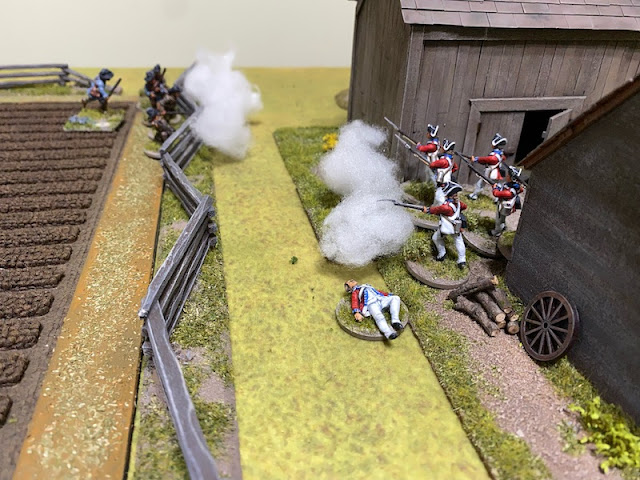
Dave takes the opportunity to use the three British command cards now in play to activate Captain Winston-Smythe and the two groups of regulars. They are formed up in line and he orders a controlled volley. They present and fire.
This was the moment I feared - to reach the fence the Continentals have had to move to within close range of the line of regulars. The redcoats will first fire a controlled volley at close range. The chance of inflicting damage on the Continentals is high.
So it transpires. Despite the cover of the rail fence the Continentals lose three men and suffer four points of shock.
The chance of Morris forming the Continentals into line and making the most effective use of their fire is now looking very unlikely.
Tiffin Card drawn (British:0 American:3)
Turn 7
Lieutenant Carroll moves his skirmishers around to the rear of the farmhouse.
Sergeant Burns senses the crisis of the moment and has his men run to join Major Morris at the fence.
While they may be unable to form into line Morris needs all the firepower he can get and Burns group will be most welcome.
Lieutenant Smith rallies more shock from the militia skirmishers and hopefully they can return to the fray to add more weight to the rebel defence.
British Command Card drawn (British:1 American:0)
American Command Card drawn (British:1 American:1)
With the State Line crossing the road slowly and in plain sight the four pounder crew cannot resist such a tempting target. They send a round of ball careening down the road towards them.
It strikes the State Line, killing one man and they suffer two points of shock. They are lucky it was not worse.
The crew then move the gun forward to the fence and turn it in the direction of the Continentals.
Major Petrie is in the centre of the action and Dave makes the most of the opportunity by using one of the British command cards to increase his command initiative to four.
His first order is to the group of light infantry in the corner of the field. They reload and fire at the frontiersmen.
This time the frontiersman benefit from the hard cover and the fire has no effect.
The light infantry then move to face the farmhouse.
Petrie activates the second group of lights. They reload and fire at the frontiersmen, but once again that has no effect.
They then move towards the corner of the field.
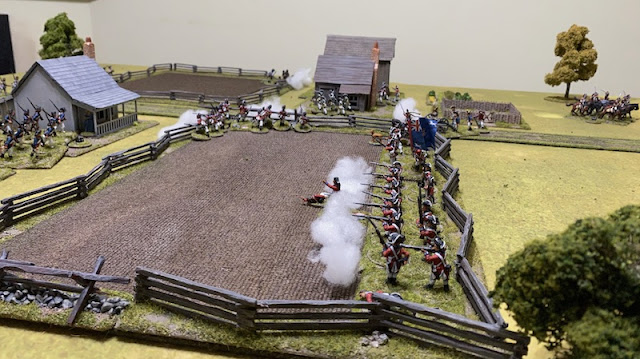
Next the Major has the group of regulars he is attached to fire at the Continentals.


The rebels don't like this at all and suffer six points of shock.
That's enough shock to force an involuntary withdrawal. American force morale doesn't suffer but that group of Continentals are moving in the wrong direction. The British have won the race to the ploughed field in no uncertain terms.
To put the Americans in no doubt that a stand at the fence might be unwise Petrie uses his final command initiative to have Winston-Smythe's line of regulars reload and present.
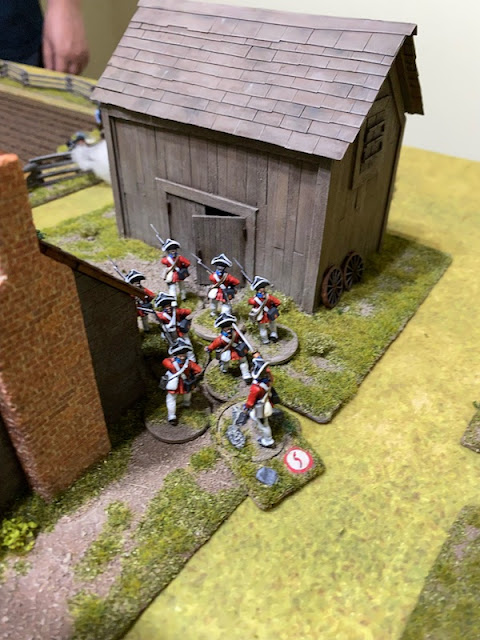
Lieutenant Campbell continues to move his regulars towards the barn.
British Command Card drawn (British:1 American:2)
The situation for the Americans is getting desperate and so I use the two command cards to increase Major Morris's command initiatives to five. The first thing he does is rally three points of shock from his group.
He then orders the two other groups of Continentals to fire at the regulars in the field. The British lose two men and suffer a point of shock. It's a start, but it's not nearly enough
British Command Card drawn (British:2 American:0)
Dave makes use of the two command cards to have Captain Winston-Smythe's line of regulars use Sharp Practice. They are loaded and presented and so will continue firing controlled volleys. The Americans are suffering a sustained battering by British musketry.
Major Morris's group see another man fall and suffer a point of shock. If it wasn't for the presence of Morris they would have been forced to withdraw yet again.
Tiffin Card drawn (British:0 American:0)
Turn 8
Captain Carr-Clarke rallies more shock off the dragoons. If there's been any highpoint for the Americans it has been the ability of the frontiersmen to drive off the British cavalry. It's a small ray of sunshine in an otherwise bleak picture.
British Command Card drawn (British:1 American:0)
Lieutenant Smith rallies the final point of shock from the militia skirmishers. I'm hoping I can bring them forward to rejoin the fight.
Sergeant Burns orders his group of Continentals to fire at the light infantry in the field.
They have a man killed and suffer a point of shock.
The light infantry are exactly where the Americans would like to be - taking full advantage of the good cover of the rail fences. I had hoped the situation would be the reverse.
British Command Card drawn (British:2 American:0)
Dave uses the two command cards for Sharp Practice and has Winston-Smythe's regulars reload. This is impressive musketry drill from the British, it's just a shame I'm on the receiving end!
Over on the other flank Lieutenant Campbell moves his men between the barn and the farmhouse.
From there they fire at the frontiersmen.
Despite the close range the fire has no effect.
The State Line commander rallies shock and leads one of the groups across the road to relative safety.
American Command Card drawn (British:0 American:1)
The leader of the frontiersmen rallies off their shock. They then load and return fire at the regulars by the barn.
Lieutenant Campbell's men lose one man and suffer two points of shock. These particular rebel skirmishers have proven to be the most effective unit for the Americans, but they can only do what skirmishers do best - harass and inflict the odd casualty. I fear that won't be enough to turn the tide today.
Captain Winston-Smythe's men are loaded and presented and he has them maintain their impressive rate of fire, unleashing yet another controlled volley at the Continentals.
There's something very satisfying when events unfold in a historical wargame that feel just right for the period you are trying to recreate. I think this is one of those moments. My Americans are on the receiving end of a truly galling fire from well drilled British regulars hammering out rapid volleys. From my perspective it certainly doesn't feel good, but it does feel right!
Another two men are lost from the group of Continentals with Major Morris and suffering more shock they are forced into another involuntary withdrawal, this time it's 6". While American force morale remains unchanged their prospects for the outcome of this fight have clearly taken a turn for the worst.
The British volley also killed one of the group of Continentals at the fence.
American Command Card drawn (British:0 American:2)
In a vain attempt to match the volume of British fire I use the two command cards for Sharp Practice with the group under the command of Sergeant Burns. They fire at the light infantry once again but this time they benefit from the cover and it has no effect.
The loyalists enter the first farmhouse ready to begin a thorough search. I doubt I'm going to be able to prevent them finding the arms cache.
Lieutenant Carroll's skirmishers are finally ready to return to the fight.
They make their way around to the other side of the farmhouse.
From there they open fire at the light infantry in the field.
The light bobs lose another man, reducing one of the groups to three men.
The Americans are picking off the redcoats here and there but Major Morris needs to try to gets his Continentals in a position where they can put up a more determined stand. He leaves the battered group he was with and moves up to the fence where he rallies shock.
He then orders the men to fire at the regulars in the field.
The prospect of holding off the British is looking remote but it's not quite over yet.
The fire has little effect other that to inflict a point of shock.
British Command Card drawn (British:1 American:0)
American Command Card drawn (British:1 American:1)
Lieutenant Parker-Edwards has both his groups of light infantry around him and he orders the group reduced to three men to fire at Burns and his Continentals.
They suffer two points of shock.
The second group then target the frontiersmen in the field opposite.
Their fire inflicts a point of shock.
British Command Card drawn (British:2 American:1)
American Command Card drawn (British:2 American:2)
The two command cards are an opportunity for the Continentals with Morris to use Sharp Practice. They fire on the regulars in the field.
Despite the fact the British are at close range and in open ground the fire only manages to inflict a point of shock on the group with Winston-Smythe.
Tiffin Card drawn (British:2 American:0)
The first British command card is used to move the regulars with Major Petrie.
They then fire at the Continentals with Sergeant Burns, but it has no effect.
With the other command card the four pounder turns to face back along the road.
So the turn ends with the British pressing on all fronts and the Americans in some disarray. If holding the ploughed field was critical to any chance of American success the prospect of them doing that successfully is looking more and more remote.

Turn 9
American Command Card drawn (British:0 American:1)
American Command Card drawn (British:0 American:2)
Lieutenant Campbell's men have had enough of the frontiersmen and decide to go at them with the bayonet.
The frontiersmen would receive them unloaded but they do have the protection of the fence, nonetheless I decide skirmishers are not there to stand toe-to-toe in fisticuffs with regulars. Best to evade, which they do with remarkable speed.
British Command Card drawn (British:1 American:3)
The loyalists discipline holds good and they resist the urge to loot the farmhouse and instead they set about conducting a thorough search for weapons.
When Sergeant Burns activates I decide to use all three command cards to boost his command initiative. He rallies all the shock on his group and moves them up to the fence alongside Major Morris.
It's a last and slightly desperate attempt to form a firing line at the fence.
The State Line have been completely ineffective, but they have had few options other than to move directly down the road in the face of the four pounder (and perhaps suffer the attentions of the dragoons in the process). They move across the road to join the other group. They may be able to form a good firing line at the rail fence with the frontiersmen, unfortunately it's not on the flank where the battle will be decided.
I fear that by the time they are ready to come into action all may be lost, but they will do what they can to shore up the left flank.
Major Morris rallies the shock from his group and has them fire at the regulars.
The group with Captain Winston-Smythe suffer a further two points of shock. It appears the American fire is doing too little, too late.
Lieutenant Carroll's militia skirmishers continue firing at the light infantry.
There are no casualties but the lights suffer two points of shock.
The State Line may have crossed the road and found the protection of the fence but they have not escaped the attention of the four pounder. The crew present and fire ball in their direction.
The rail fence may offer some protection from musket balls, but it offers none from the cannon ball which rips through the wooden fence killing two of the State Line and inflicting more shock.