Despite a -2 to the force morale roll due to the very low opinion of the men the Russian force morale starts at nine and the Germans at eight. Every little will help in this desperate battle.
Support will be crucial, but of course what helps me will also help my opponent. A roll of nine is a good result for the Germans and with +2 due to the COs opinion they will have a total of eleven support points. The Russians will make do with five.
With that we start playing and the Germans open with a major surprise as the first unit to appear is a Tiger I. Now that really does present me with quite a problem. I have brought along one panzerfaust as my sole anti-tank weapon and, assuming I can even get it in range, I will have a single chance to take out the Tiger. Gulp.
As my plan is to stay hidden until the Germans are within close enough range a large part of this game involved the Germans slowly closing in on the objective. There is really no benefit in a phase by phase account so I will try to convey the general direction of the German advance.
Dave, quite rightly, decides to be cautious. He's had bitter experience of sudden surprise ambushes from SMG squads (see
Gardening in Metgethen); hidden Russian Maxim MMGs (see
Probe at Moditten), and, entrenched DSHK HMGs (see
Signal box at Seerappen), so this time he plans on taking his time. All under the watchful eye of the commander of the Tiger.
The armoured beast slowly makes its way forward to take up a position where it can sit on overwatch observing the Russian occupied houses and barns.
Once in a commanding position it is joined by German squads who take up positions from which they can alternate between moving tactically or covering each other on overwatch.
The Russians meanwhile observe this careful advance and wait, slowly accumulating CoC points but doing little else.
The Germans concentrate on taking advantage of the cover offered by the hedgerows that line the road on their right flank.
While the Germans are beyond SMG range there is no advantage to the Russians revealing themselves and certainly not while the Tiger's 88mm gunner is on overwatch. A situation made all the more threatening when a German FO deploys in the upper level of the farmhouse.
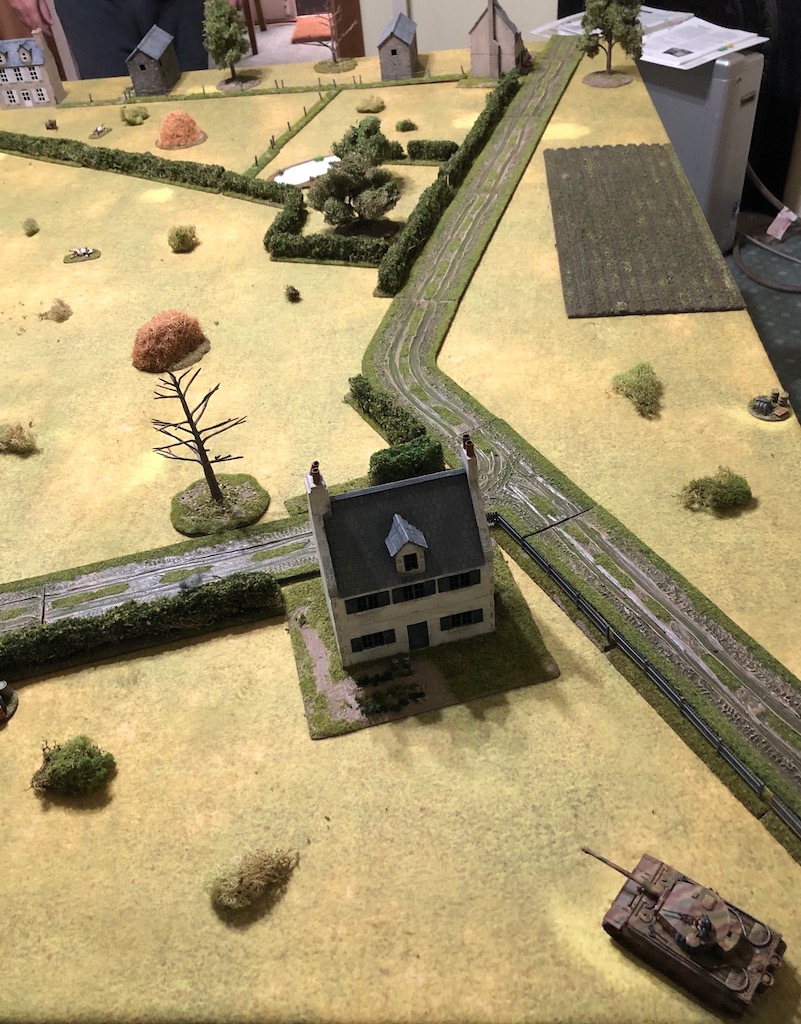
Dave has chosen to support his attack with some considerable firepower - the Tiger and a mortar barrage. I think I might be in real trouble here. With all the German units deployed the Unterfeldwebel (SL) arrives and takes up a position behind the farmhouse from where he can command a number of units.
The Russians have accumulated two full CoC dice, but otherwise continue to observe rather than act. A wise decision when the FO calls down a ranging shot close to the objective building.
The Germans continue to move forward down their right flank making best use of the cover provided by the small wooded area and the hedgerow.
Now that they are getting closer to the Russian jump-off points the most forward German Obergefrieter (JL) sends a lone rifleman forward on a scouting mission while the other squads follow behind.
The Russians have three full CoC dice but no obvious use for any of them just yet. As the lone German scout moves forward the other squads move up in support and the commander of the Tiger orders the driver to move forward slowly to ensure a better line of sight.


With the German scout close to the damaged house on my left and before all the other squads are in position to give the most effective fire, I flirt with the idea of finding a way to kill the scout and so wipe out a team.
A Russian double phase is food for thought. I could deploy a two man scout team of my own and either engage the lone German with SMG fire or be really aggressive and engage in close combat. While both options give great odds for killing the scout the problem then becomes getting my Russians back into some cover. In the subsequent phase they would need to get back over the wire fence and into one of the buildings, which is not possible in a single phase. It would also require a 1 in the command roll. So, tempting as the moment is, I let it pass which is just as well as the next command roll didn't include a 1. Best to bide my time.
With that the German advance continues in a careful and methodical fashion, pressing ever closer to the objective.
The scout finally makes contact with the damaged house and is concealed behind the safety of its remaining walls.
As he moves into the building the other squads wait on overwatch to see what reaction the Russians will make. However any attempt to deploy will only be met with a lot of firepower to very little advantage.
A German double phase sees a burst of action as they take advantage of this fleeting opportunity. With the Tiger creeping closer to the hedgerow I have been contemplating using one of the many CoC dice for an ambush from my most forward jump-off point. Once again it would be by another scout team, but this one armed with a panzerfaust. However that may come to nothing as the Germans sense the chance to close down that jump-off point and a squad moves out of the small woods in its direction.
A further double phase allows the squad to make its way along the hedgerow and close down the JoP. Meanwhile the other squads continue to move down the road following the footsteps of the scout.
The German command dice continue to be kind and a roll of 666 means another phase and a turn end, a perfect gift and the chance to capture the jump-off-point.
The scout makes a nuisance of himself by doing something similar by advancing out of the damaged house to close down the jump-off-point in the left flank barn.
With several CoC dice available I decide to use one to negate a roll on the morale table for the captured jump-off-point at the turn end, but this is not looking encouraging. In the following phase the German squads begin to move around the damaged house.
Sensing the squad that captured the jump-off-point might be a little exposed Dave brings them back over the hedge and covers them with the Tiger, putting both the main gun and bow MG on overwatch.
Meanwhile the other squads work their way around the flank and as they do the scout rejoins his squad.
To be honest at this point I am at a complete loss for what to do. If I expose any of my units I can expect to be targeted by the Tiger and hit with the mortar barrage, however I can't simply allow the Germans to envelop my position like this. Yet I think I'm just going to have to rely on some vicious fighting around the objective as the Germans are forced to come and dig me out.
And so slowly the German build up continues with the squads working their way around the flank and closing in on the objective.
The squad behind the hedgerow opposite the objective joins the Tiger taking up overwatch positions while the FO peers through his binoculars searching for a target for the mortars.
With Russians still concealed the Tiger starts to make its way forward and the FO adjusts the ranging shot. I'm anticipating the mortars plastering the objective to allow the German squads to approach even closer, ready for the final assault.
The Tiger continues rumbling forward and breaks through the hedgerow.
It is now in range of the barn and I decide to try to knock it out with the panzerfaust. I use a CoC die to announce an ambush and a two man scout team with a panzerfaust suddenly appear in the barn. It may be a shot on the Tiger's frontal armour but given it has heavy armour and so its sides are just as well protected this is as good a chance as any to damage it.
At that range it needs a 6 or more to hit but I only manage to roll 5 and so the shaped charge thuds harmlessly into the ground. Well, there goes my only anti-tank weapon. Things do look bleak!
The Tiger is on overwatch and the 88mm gun sends an HE round crashing back into the barn. That's enough to kill one of the scout team and, to make matters worse, with three 6s in the to hit roll it's enough to make the building unstable and on the point of collapse (sort of sums up my defence really).
The squad at the hedgerow are on overwatch and they also open fire.
That's enough to kill the remaining man and see the scout team wiped out. Russian force morale holds up but I'm not sure how we cope with all that the Germans can now throw at us.
In preparation for their assault the FO calls down the barrage.
With that the Germans start to make a move forward on my left flank but the Tiger decides it might be best to reverse and withdraw from panzerfaust range (little does he know that I only had one to use).
I need to be ready for the final battle and I can't afford for the barn to collapse around my few men and so I use a CoC die to end the turn. At which point the barn collapses into a pile of rubble.
The Germans use one of their CoC die to keep the barrage in action but they also capture the jump-off-point that was in the other barn and so I use another one of my CoC die to avoid the morale roll. While my force morale remains in good shape I'm still at a loss to work out how to stop these Germans who now move with determination towards the barrage and the collapsed barn.
Simultaneously the Tiger and the other squad move to their left to approach the objective from a different direction.
At this point the Russians roll a double phase and so I decide to try to grab the initiative and try to make the most of a desperate situation. It seems rash but I deploy the support squad out of the barrage and straight into close combat with the nearest German squad. I'm hoping my SMGs will give me an edge and who knows with two phases I might just roll up this flank?

I haven't really worked this close combat out very well. For one thing I've forgotten that since capturing Metgethen the Germans are now aggressive, so while the SMGs help, the odds end up favouring the Germans. The Russians kill two of the Germans and wound their Obergerfreiter (JL), however in return the Russians lose five men, which sees their Serzhant (JL) killed and the squad wiped out. I use a CoC die to avoid a morale roll but things are now looking very grim indeed, I'm not sure it really matters now, I have one squad left. So, what the hell, in my next phase they also make a charge out of the barrage.
This time the Russians wipe out the German rifle team and kill their Obergefreiter but in the process they lose three men and see their Serzhant wounded. The close combat was a draw and so we follow with another round immediately. This time the Russians wipe out the remaining Germans in the LMG team and their morale drops to seven.
While we've dealt with one German squad, we've failed to deal with the other and they now wait, poised to unleash their fire in the coming German phase.


It's a devastating round of fire that wipes out the squad and sees the entire Russian force eliminated with the exception of the Leytenant (who didn't deploy for lack of a 4 in the command roll). It's irrelevant but Russian force morale is actually in reasonable shape, which is a lot more than can be said for the men themselves!
This last scenario was always going to be desperate for the Russians, but for as long as there was a chance of hanging on I was prepared to fight it out. However in the face of a reasonably strong German platoon supported by a Tiger and a mortar barrage it was always going to take something close to a miracle (or a good panzerfaust shot) to squeeze out a Russian victory. Dave played that extremely well with excellent support choices that provided exactly what was required to get the job done. I can't fault him there, as he never once allowed me to play to my strengths.
So, a campaign victory for the Germans with a game to spare. That was an enjoyable and very challenging campaign, although it did confirm my suspicions that a SMG platoon probably wasn't up to handling this job, at least not without their accompanying armour support.
That brings our fifth campaign to a close and a further demonstration that Chain of Command really shines in these settings. For our next campaign we are planning on returning to the early war and France 1940, with a chance for us to use Dave's early war German and French forces.
If you've enjoyed following along and would like to
Buy Me a Coffee to help cover some of the costs of running the blog you can click through at the link or on the tab in the right hand column of this page.
The Westwind Königsberg Campaign appears in the Too Fat Lardies Summer Special 2014. You can purchase this as a downloadable pdf from TFL Summer Special 2014.
You can find all of the AAR game reports for our Chain of Command campaigns on the
Chain of Command AARs page.