
Despite this the Dutch have several incentives to fight here. Most importantly, they will delay the Germans for another campaign turn. Secondly, a scenario victory will boost both the CO and Men's opinions while a German loss would negatively impact theirs, an outcome which could reap benefits later in the campaign. Finally, if nothing else, it's an opportunity to inflict further casualties on the enemy.
They have good reason to think this table is worth fighting over. Any attacker must approach across very open terrain and the Dutch can construct a tough defensive line anchored in hard cover.

The German task was made all the more difficult in the last game by their lack of armour or heavy weapons, so they have regrouped and this has allowed for the arrival of a few heavier support weapons. No vehicles are available yet, but other support weapons have begun crossing the river which means infantry and AT guns can be called upon for the first time in the campaign. Given all the open ground that has to be crossed they need all the firepower they can get.


That's a lot further than I was expecting to advance this early in the game and it's put that squad in a very threatening position that will force a Dutch response.


That provides supporting fire for the advance should the Dutch emerge near the farmhouse or the Kazemat.

Lastly, the MMG team fire up the road, putting covering fire on the hedge near the Dutch jump-off-point.

I fully anticipate seeing an enemy unit deploy from there. They can't ignore the threat presented by the schützen squad and so I hope the covering fire will limit the harm they can do.


The German squad on overwatch could return fire but only one of the teams has a clear line of sight, the other is hindered by the friendly squad in front of them. I decide to hold fire for now and see what other response the Dutch make.


They have a line of sight between the farm buildings to the leading German squad and they open fire immediately.


The Leutnant then orders the nearby squad to engage the same target.


It too targets the Dutch at the hedge.


It has some way to go but given the paucity of German anti-tank weapons it could play a key role in shoring up that flank.


The machine gun team are the first to fire.

They inflict a further two points of shock on the Dutch.

Next the Leutnant has the leIG18 send a round of high explosive their way.

That inflicts another casualty.
Lastly, the Leutnant has the schützen squad fire.

The hail of bullets from the two MG34s is deadly and the Dutch lose two more men and suffer a further four points of shock, which is enough to see them pinned down.


Ideally the Obergefreiter would issue the Handranaten! command, but I don't have the necessary command dice, nonetheless the Dutch are looking vulnerable and my last remaining command dice is enough to activate the squad.

While the Dutch are pinned and suffering a lot of shock they are defending light cover and have a Lewis gun, so the odds do not greatly favour the attacker. In the end the Germans will roll ten dice to the Dutch six. It's a finer margin than I imagined.


All that remains of the mitrailleursgroepen is four men suffering fourteen points of shock.


Having driven the Dutch off the schützen squad can secure the ground and capture the jump-off-point.

While their spirits are lifted at the sight of the broken mitrailleursgroepen fleeing across the field, they are met with the disconcerting image of a Carden Loyd carrier advancing rapidly in their direction.


German force morale holds steady but without the Obergefreiter in command the schützen may have trouble pulling back.


With that the charge is set and ready to detonate.


I sense Dave sees his main task now as defending the engineer demolition team and seeing that both culverts are demolished.


That sees the advance on this flank stalled until I can bring more units forward. It also buys the Dutch more precious time to set about destroying the culverts.


From there it will be able to cover any German activity in that field.


With the small culvert destroyed, do they have time to act quickly and demolish the larger one? The charges will take longer to lay, requiring a task roll of twelve, but at this stage it looks like they might have enough time to do it.


It's clear Dave is focussed on setting up a defensive screen whose sole aim is to protect the engineer demolition team while they complete their task. I sense time may be slipping away for the Germans. They have a lot to do to reach the culvert and prevent the engineers completing their task.


The Luitenant rallies the shock from the engineer demolition team.


It's a gamble because it leaves them very exposed to return fire from the Kazemat where I'm sure a mitrailleursgroepen is lurking just waiting for an opportunity to catch any Germans in the open. The chance of preventing the engineers completing their task is slim and in return I might find I suffer more casualties than I would like.

That said it seems the Dutch are moments away from scenario victory and I can't see what other actions I can take to prevent that happening in the next few phases. If the squad can inflict a casualty and shock it's possible the engineers become pinned or even break. With that the schützen squad opens fire.

It's long range but they manage five hits. I jokingly say to Dave, 'you wouldn't want to roll three sixes right now' and unbelievably, that's exactly what he does.


With the platoon Leutnant wounded the newly promoted Feldwebel deploys to help maintain the momentum of the attack.


The Germans will continue to assign the No.2 platoon with the capture of this table. Their Feldwebel was killed in an earlier game and his replacement is one of the platoon's Obergefreiters. He in turn will be replaced by a man promoted from the ranks to lead his former squad. As a result two of the NCOs are new to their role, which limits their effectiveness. Three men are missing from the other ranks - one has been killed and two are still suffering from wounds. That leaves the platoon short of three men and so I will disband the 50mm mortar team and reassign them as riflemen to bring the squads closer to full strength.
The Dutch will use their 1st platoon which has also suffered losses and is short of eleven men. With only two platoons for the entire campaign Dave needs to keep on eye on his casualties if his force is to last the distance.
We start with Force Morale at nine for the Germans and eight for the Dutch. The patrol phase follows a similar pattern to the previous game except this time the Dutch opt for a jump-off-point close to the culverts instead of in the farmhouse.


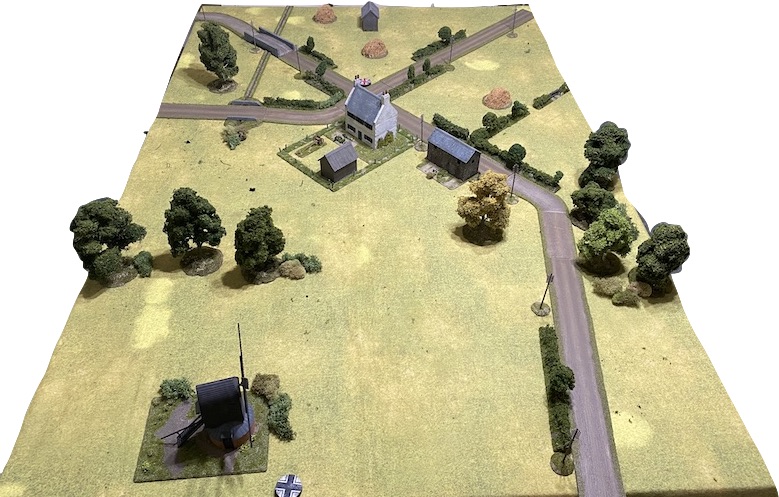
That creates a very solid looking defence line with the Dutch well positioned to channel the German attack into a killing field in the left and centre of the table.


It has a way to travel, so there's no reason for it not to deploy early.

We make the support rolls secretly. The Germans will have 2D6+7 and a roll of four restricts them to only eleven support points. I will call on a leIG18 75mm infantry gun to provide extra punch and back that up with a tripod mounted MG34 team. A pioneer squad will add more firepower plus the benefits of an engineer team (I'll most likely select a demolition team to deal with any barbed wire, but I will wait to see what fortifications are revealed before I decide).
The Dutch support is 1D6+4 and Dave also rolls a four. With the additional seven points for the difference in force ratings that gives him a total of 15 points. We decided that the minefields from the previous game remain in place but will come from the total support points available and so Dave uses the remaining thirteen points for more fortifications in the form of three sections of barbed wire; one entrenchment and one Kazemat. He will have an Adjutant to help the platoon's single senior leader plus a support Mitrailleursgroepen and a Carden Loyd carrier.
Before the game begins the fortifications are placed on the table. A Kazemat appears on the German left, an unwelcome surprise and obviously something that they failed to identify in the previous encounter.

That creates a very solid looking defence line with the Dutch well positioned to channel the German attack into a killing field in the left and centre of the table.

Given all the barbed wire I decide to select an engineer demolition team for the pioneers. Although exactly how I tackle this position is not at all clear. Approaching from the German left looks like it could be the most difficult and costly in casualties - it would be a frontal attack on an entrenched position behind barded wire, it's hard to see that ending well. Unfortunately it's also the fastest and most direct route to the culverts.

As I've mentioned, preventing the Dutch destroying those two culverts is not essential, however I would welcome another scenario victory to keep the CO's opinion high so ideally I prevent their destruction. At the same time anything I can do to continue inflicting casualties on the Dutch will make the German task easier as the campaign progresses. With all that in mind I will aim to attack up my right flank where the Dutch field of fire will be less intense. It means taking the long route to the culverts but I think it's the most viable if I want to avoid heavy losses.
Should the Dutch decide to make a stand in the barn or the farmhouse I now have the leIG18 infantry gun to make that a less attractive option for them. If I can't prevent the demolition of the culverts then at the very least I can focus on writing down enemy units.

The Germans open with a double phase but unfortunately the command dice don't leave many options. I want to be careful I don't deploy an unsupported unit and have it chewed up by a violent Dutch response, particularly if they are also fortunate enough to benefit from a double phase. It can be a cheap way for a defender to whittle down an attacker's force morale (there's a very good example of just that in this game from our Gembloux Gap campaign). So I decide to wait.
The only activity from the Dutch in their phase is the arrival of a Carden Loyd carrier.


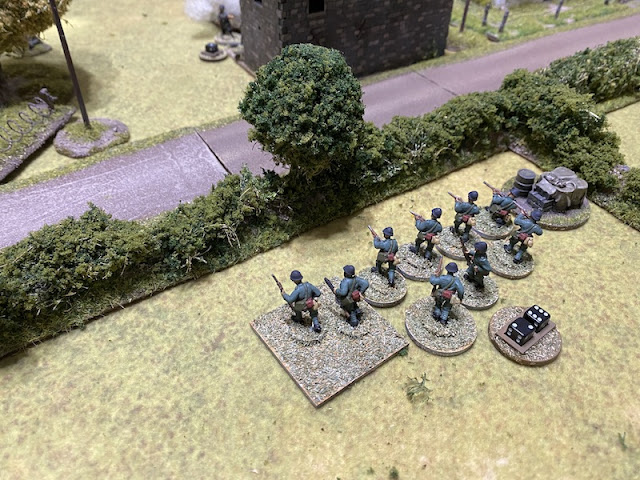
The next German command roll is 66431 and this does give me the activations I need to begin deploying. The platoon Leutnant arrives with a schützen squad and an MG34 MG team and all are placed on overwatch.

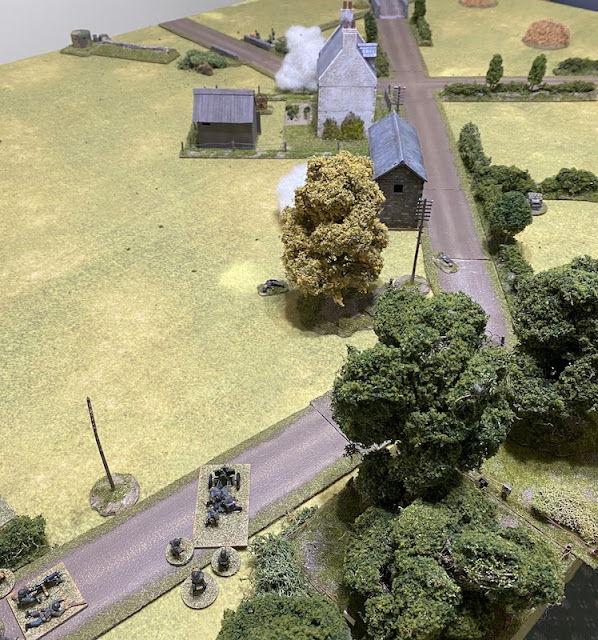
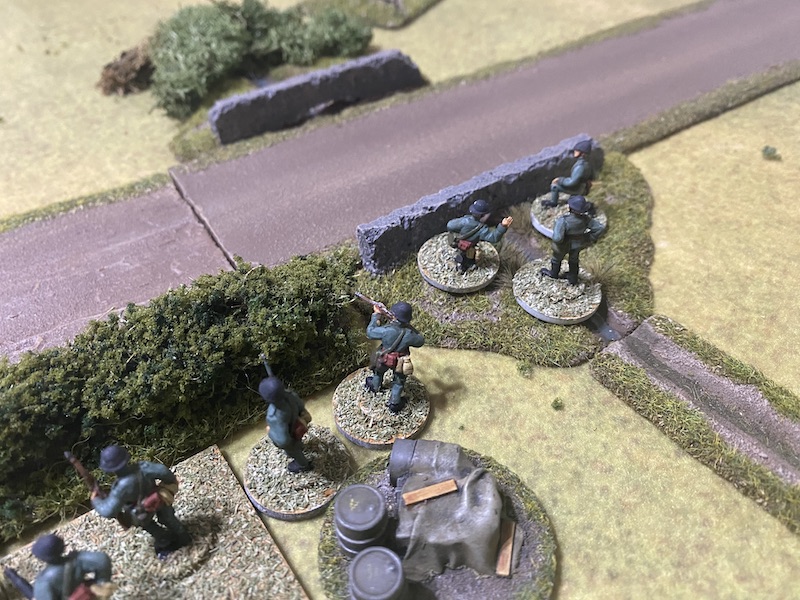
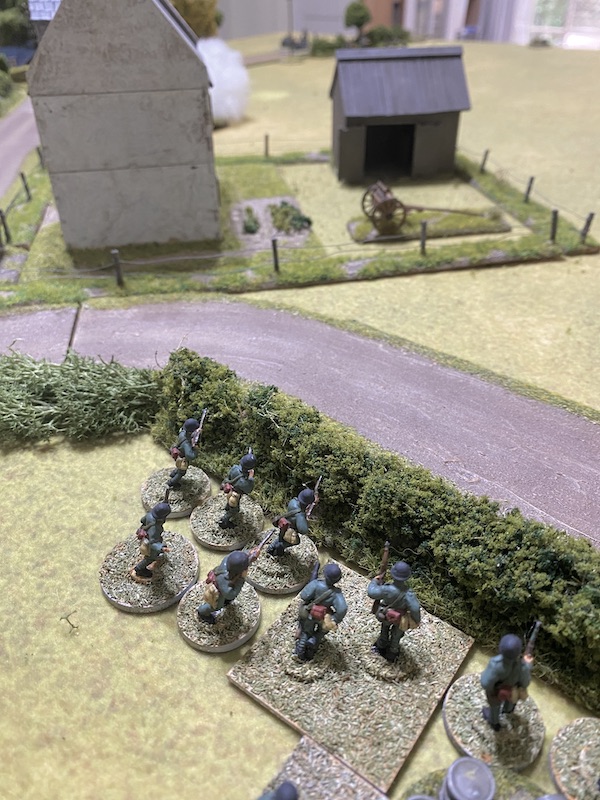
The subsequent command roll is 64331 which will allow the Germans to press forward. The recently arrived schützen squad jumps to its feet and moves at the double. The going is good and the squad move very fast indeed, covering 17" in a single bound.


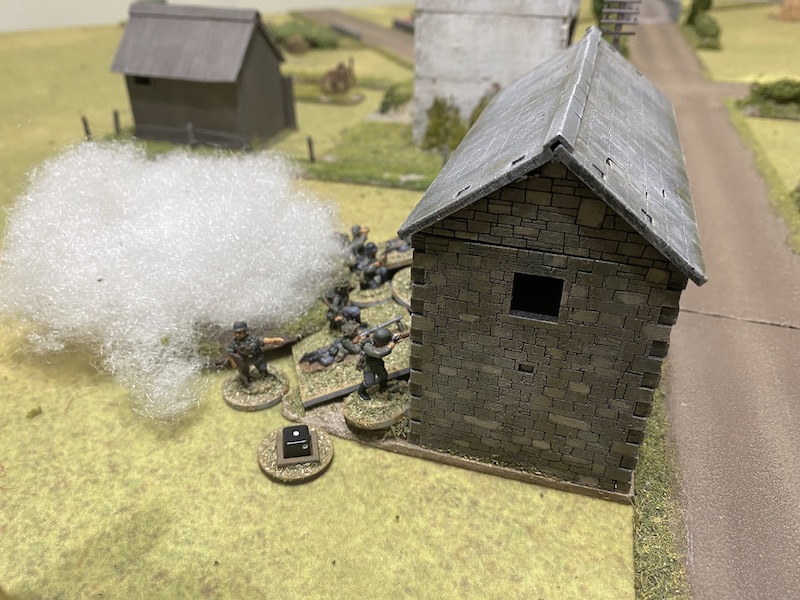
They have a jump-off-point in the field behind the barn and it's close enough that the Dutch could deploy into the barn itself. Just in case they are in there, the Obergefreiter has one of the men hurl a smoke grenade to provide a bit of cover.

A second schützen squad deploys on overwatch, taking the place of the one that just moved forward.


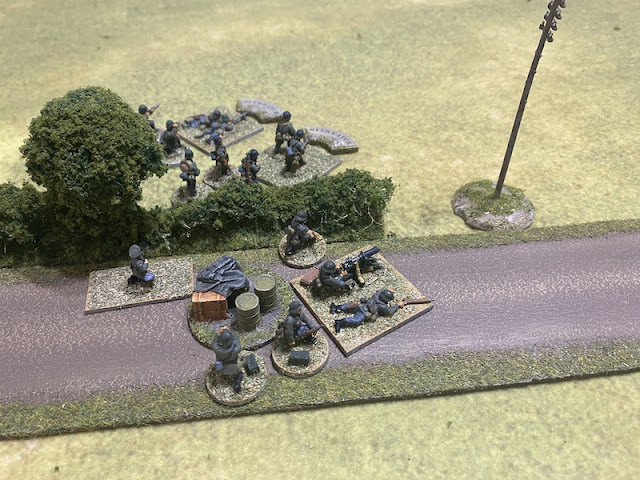
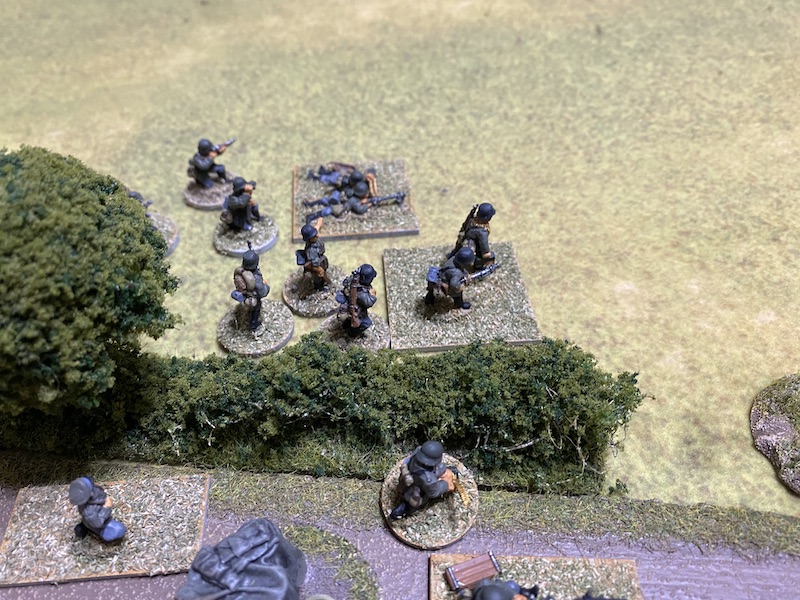
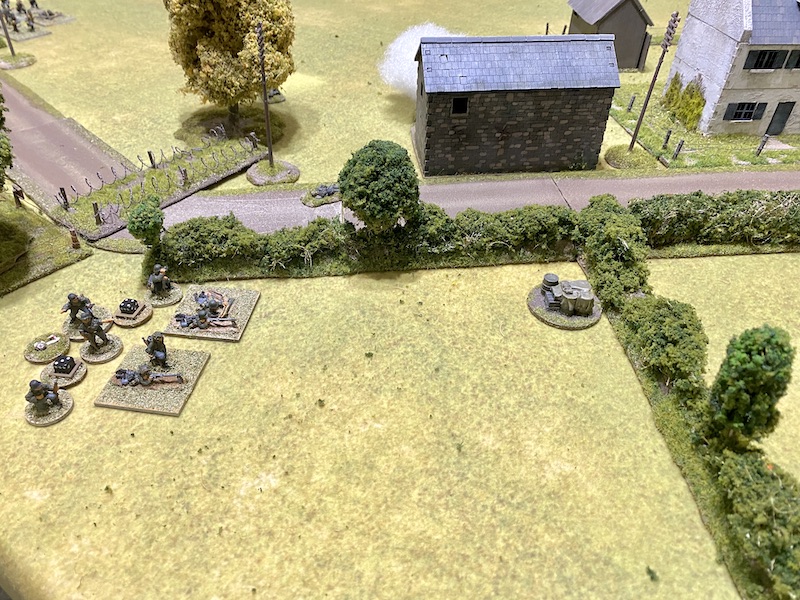
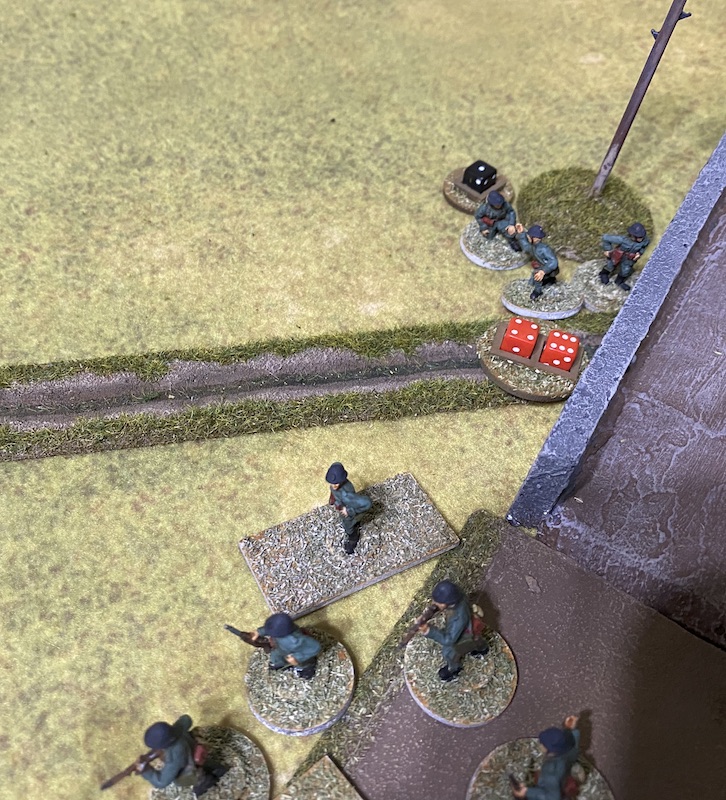
When the Dutch phase arrives I'm not at all surprised to see an immediate response. The support mitrailleursgroepen deploys behind the hedge and they open fire on the schützen.

The machine gun's covering fire does its work. The Dutch fire is reduced to two hits and the schützen are unscathed.


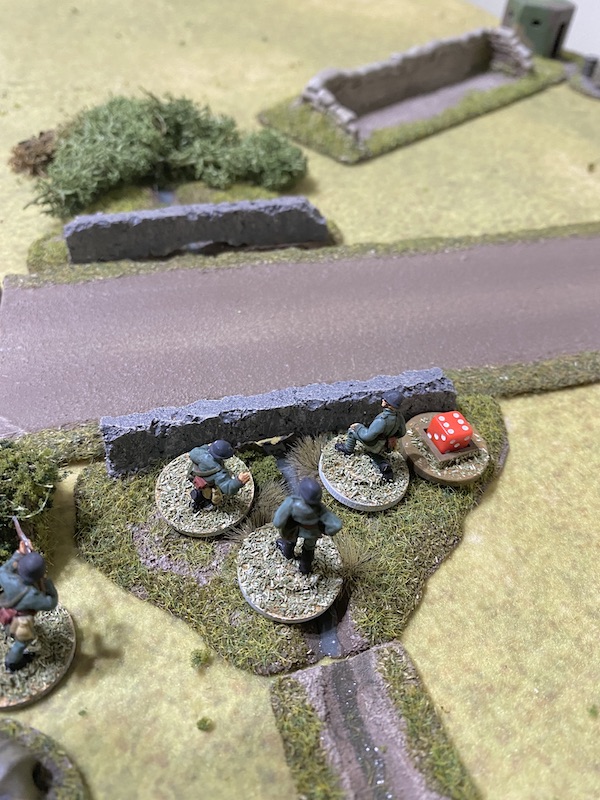
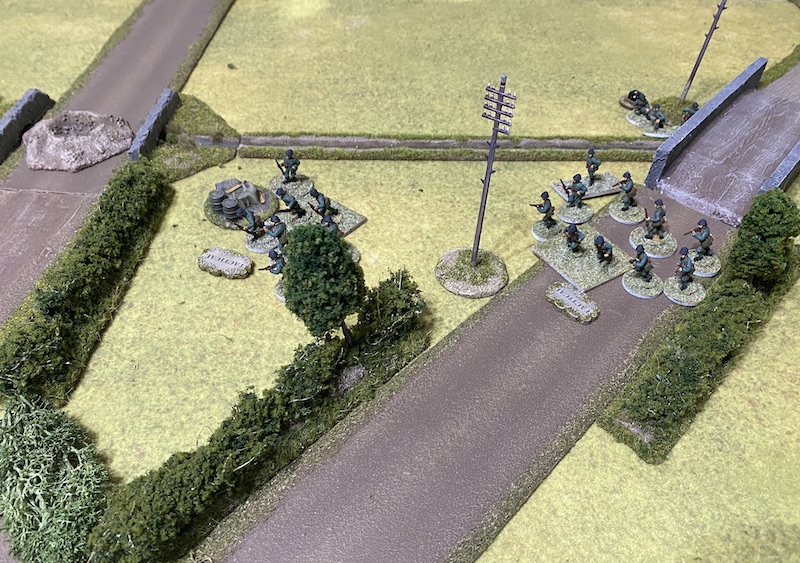
A second mitrailleursgroepen, this time from the core platoon, deploys near the small culvert.


This time the Dutch fire is more accurate and the Germans lose a man from one of the LMG teams and suffer a point of shock.

An engineer demolition team arrive at the small culvert and I've no doubt they will waste little time trying to destroy it.
In the German phase the squad Obergefreiter rallies a point of shock and has the men move into the smoke at the back of the barn. For now that puts them out of the line of sight of either of the mitrailleursgroepen.

The platoon Leutnant orders the MMG team to open fire at the Dutch behind the hedge.


It's not particularly effective and they suffer only a single point of shock.


Now they have a clear line of sight and they open fire with both LMGs.

The fire proves more effective than the MMG and the Dutch suffer a further three points of shock.

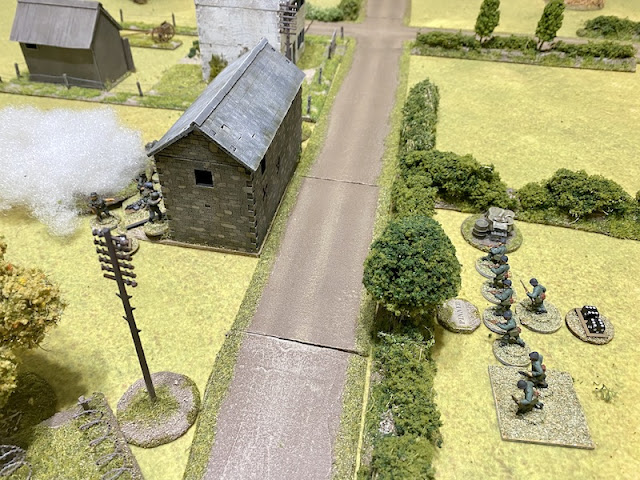
I sense an opportunity to neutralise that mitrailleursgroepen and the leIG18 infantry gun deploys on the right flank.


This time they lose one man and suffer a further point of shock.

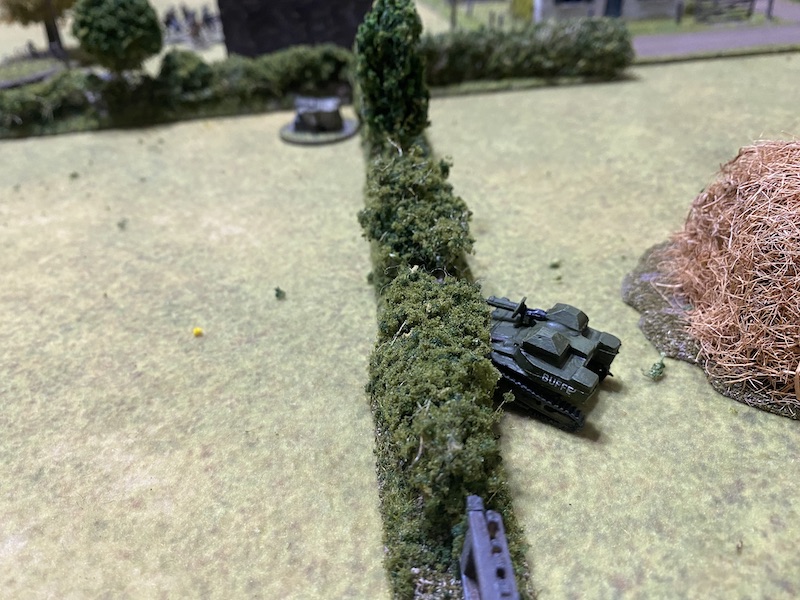
In the Dutch phase the Carden Loyd carrier drives flat out.


The Dutch at the hedge are unlikely to withstand the weight of German fire for much longer and so the sergeant orders the men to fall back at the double. Unfortunately the combination of shock and poor movement sees them withdraw only 1" which means they will remain in sight of the Germans. To add insult to injury the movement has added to their shock.

Meanwhile Dutch fortune doesn't fare much better at the culvert where the engineer demolition team are slow to begin setting their charges (rolling a 1 towards the total of 6 that they need to finish the task).

The arrival of the engineers has increased the sense of urgency for the Germans. They need to clear the flank and move forward before the demolition charges can be set. The Leutnant sets about issuing orders to the units around him.


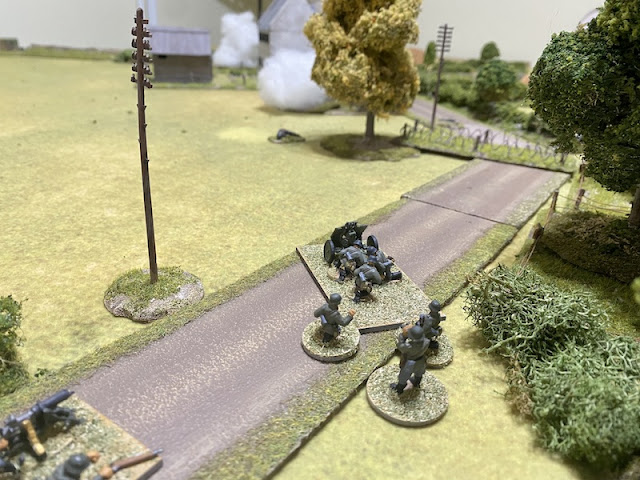
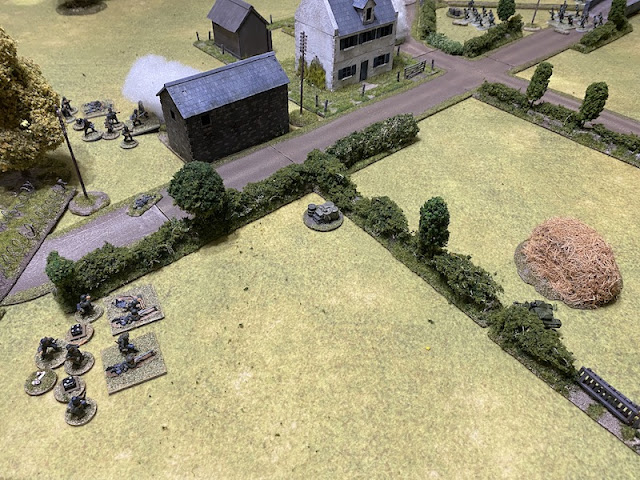
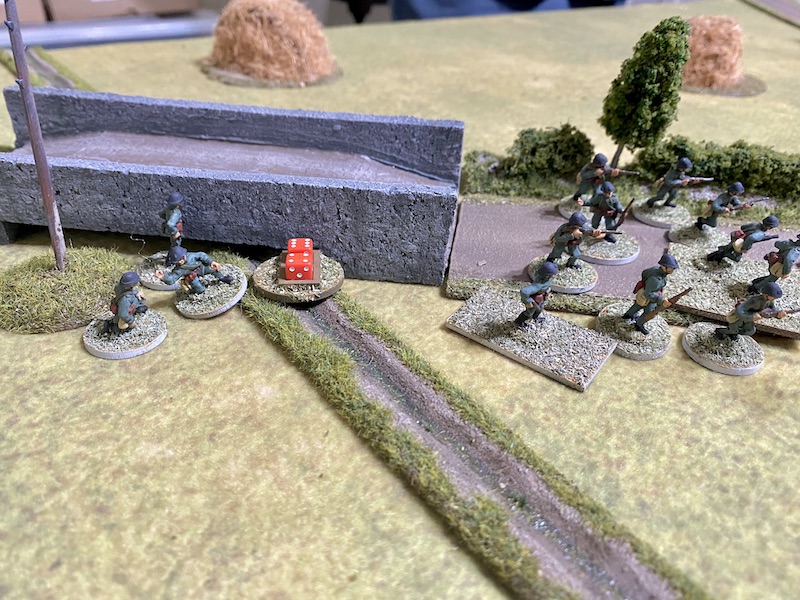
With that the Germans behind the barn will seize the opportunity to launch an attack across the road.

The Germans are carrying a point of shock on each team and I decide not to gamble with a normal move and so have them charge at the double to ensure they can cover the distance. The squad moves 11”, more than enough to bring them into close combat range.


Close combat can be a lottery so there is always an element of risk, but in the end the Germans prevail. The Dutch lose three men and suffer a further point of shock, while the Germans lose a single man and also suffer a point of shock. The junior leaders on both sides survive unharmed.


Having lost the close combat they fall back 9”.

However the excess shock means that they also break and retreat back a further 11”. The sight of the support squad breaking is enough to bring Dutch force morale down two points to six.


The following Dutch command roll is 66211 and the carrier has an opportunity to exact a little revenge. It comes to a halt and opens fire.

The bullets rip through the hedges and strike the Obergefreiter who suffers a light wound that will put him out of action for the rest of the turn.


The Dutch engineers make further progress laying their charges. A task they are likely to complete the next time they are activated.

In the following phase the Carden Loyd carrier moves slowly towards the hedge, firing as it does and inflicting a further two points of shock on the squad.

The Dutch platoon Luitenant joins the men at the culvert. This is the critical point at the moment and he wants to make sure the engineers are working as fast as they possibly can.

His presence is enough to ensure they reach the target they need.

The Luitenant then turns his attention to the nearby mitrailleursgroepen and has them fire at the German MMG team.

The crew suffer a point of shock but the attached platoon Leutnant is hit by the fire. He is wounded and that puts him out of action for the rest of the turn. That's a blow to German morale which drops to eight.

Lastly, the Dutch Luitenant has a smoke grenade thrown into the road to hinder the line of sight.


In the German phase the squad pulls back from the hedge and away from the attentions of the Carden Loyd carrier.

In the meantime the leIG18's crew manhandle the gun forward onto the road. From there they can see through the smoke and target the mitrailleursgroepen that fired on the MMG team.


The second schützen squad tries to emulate the first squad and move rapidly towards the barn. They make decent progress but lack the same speed.

In the Dutch phase the Carden Loyd carrier moves towards the gate in the hedgerow, clearly determined to make a very aggressive move to threaten the Germans.


The Luitenant orders the mitrailleursgroepen back from hedge towards the road and the large culvert.


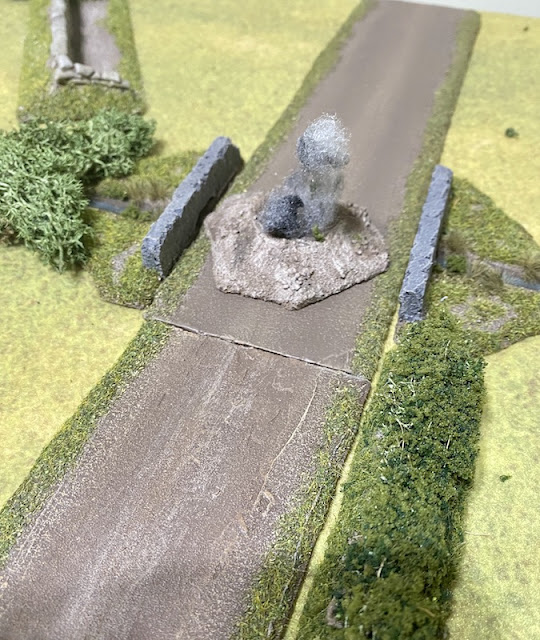
He then orders the engineers to detonate their explosives. The charges were well placed and when the smoke clears there is a gaping hole in the road. One culvert down, one to go.

With that job complete the Luitenant moves back to join the mitrailleursgroepen.

While I'm determined to prevent the destruction of the second culvert I'm not at all sure how I can go about moving fast enough to prevent that happening. The Carden Loyd carrier is proving a real nuisance, as is the lack of German light anti-tank weapons, but the key is to just push forward with whatever I can. With that the squad runs towards the barn, covering a bit more ground this time.

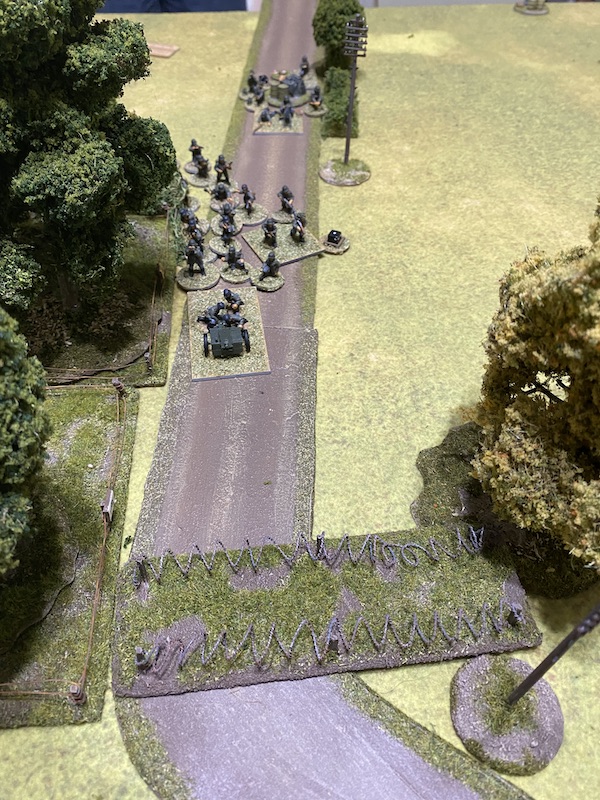
The leIG18 continues moving up the road. It should be able to target the second culvert from behind the wire (and hopefully the pioneers can blow a hole in the wire that will give them passage through it). It may also be able to target the Carden Loyd carrier and while the gun might not possess the most potent AP rounds the carrier is hardly well protected.

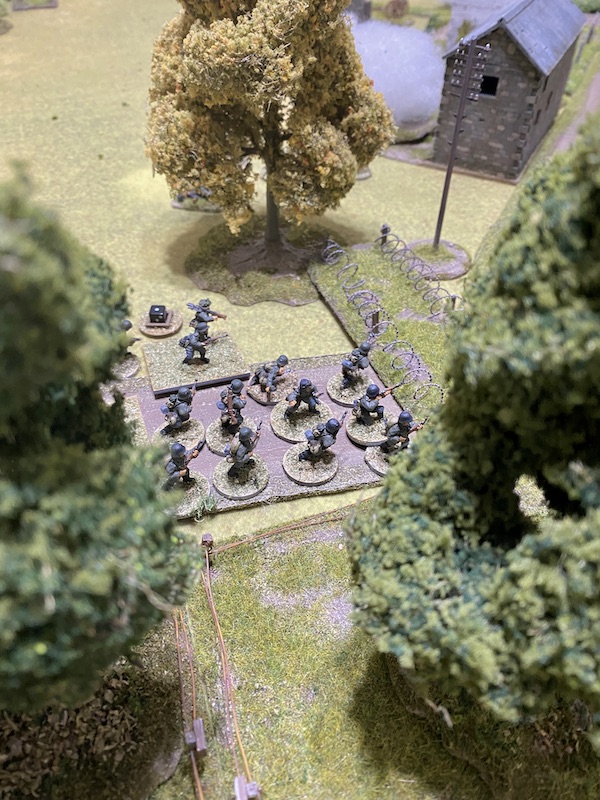
With the aim of clearing a way through the wire the pioneer squad deploys by the road.


The arrival of more Germans doesn't deter the Carden Loyd carrier which changes direction and moves directly up to the hedge. The diminutive carrier may not be high enough to see over it from a distance but will have no problem firing right through now that it is up against it.


The Luitenant orders the engineer demolition team to move at the double toward the second culvert. They obviously sense the urgency of the mission and cover the 11” in a single bound.


The Luitenant orders the mitrailleursgroepen to move back tactically to the culvert.

A second mitrailleursgroepen from the platoon deploys in between the two culverts and takes up tactical positions.

There is nothing else to do in the German phase but continue pushing forward. The schützen squad moves up to the barn.

While the pioneers move at the double towards the wire.

The best the squad facing the Carden Loyd carrier can do is fire one of their LMGs in an attempt to drive the vehicle away, but the carrier manages one armour save and so the fire has no effect on the crew.


The next Dutch command roll is 66554 and it gives me a horrible feeling the engineer demolition team will get the time they need to reach their task roll target of twelve and set their charges. The Luitenant urges them to get moving and they waste no time at all, rolling six which gets them started at a terrific pace.


The nearby mitrailleursgroepen throw smoke into the road. The Dutch are doing all they can to screen the engineers while they work.


In the following Dutch phase the Luitenant once again spurs the engineers into action and this time they roll four, taking their total to ten. It's almost certain they will reach the twelve they need in their next activation meaning it's quite possible the Dutch are only two phases away from achieving victory.

The Carden Loyd carrier continues hounding the German squad with machine gun fire.

The schützen are caught in the open. They suffer a further two points of shock and lose a man from one of the LMG teams. That's enough to see them pinned. I don't think they will be playing much more of role in this game.

Come the German phase I consider my options and decide to commit a schützen squad to the left flank to target the engineers.


There's a possible reprieve that might just save the engineers - the platoon Luitenant is attached and so he may take one of those hits. It's not very often you wish your platoon leader becomes a casualty but this is probably one of those moments, however it's not to be and all three engineers are lost. That's a support team wiped out and Dutch force morale falls to five. I suspect Dave's personal morale has dropped even further. As for me, I can't believe my good fortune.

While that makes it impossible for the Dutch to win by destroying both culverts they still have the opportunity to drive down German morale or simply inflict further casualties, so the game may not be over just yet.
The pioneer squad make their way forward to the wire with the demolition team leading the way.


When the Dutch phase arrives Dave considers his options. He could deploy his third mitrailleursgroepen to the Kazemat and call down the Kazemat fire plan, potentially inflicting a number of casualties on the Germans. However we've often found things invariably don't happen so neatly in these situations. We've both experienced moments where we've decided to fight on for "one last phase" with the intention of then withdrawing in our next phase to only find the enemy responds with a lucky run of phases that ends up inflicting far more casualties in return (I can vouch first hand for this, it happened to me in this game in our Westwind Konigsberg campaign and very unpleasant it was too). Both the Dutch platoons are fairly brittle at the moment and in the end Dave decides that as he can no longer destroy the culverts any additional gains in German losses has to be balanced against the potential longer term detrimental effects for the campaign should the Dutch take more losses. So he makes the decision to withdraw.
Well, well, what can I say? Talk about snatching victory from the jaws of defeat. That was both a sudden and completely unexpected turn of events, helped by a perfectly timed moment of good fortune at just the right moment (although I'm sure Dave takes a completely different view of it!).
That sees the game end with German force morale at eight and the Dutch at five. As a result the three German casualties from the core platoon can be patched up and returned to duty. If there's a consolation for the Dutch it's that all today's losses came from their support units and none from the core platoon which leaves it in the same shape it was in at the start of the game.
With that we now move on to Map 5 and Campaign Turn 4. The Germans will still have to wait one more campaign turn before their armour arrives, but at least they have a few more support options to help with the task ahead. You can follow what happens next in this report.
If you've enjoyed following along and would like to Buy Me a Coffee to help cover some of the costs of running the blog you can click through at the link or on the tab in the right hand column of this page.
You can find links to all the games in this campaign and several others on the Chain of Command Campaign AAR Page (link from here or at the top of this page).