
This is the second game in our Chain of Command campaign Many Rivers To Cross set in the Netherlands in 1940.
Having forced the Dutch to withdraw from the village in the previous scenario the Germans continue their push forward toward the next river line.

Barring the way is a defensive position sited around a stout Dutch farm. The platoon holding it were not expecting to see the Germans so soon and they have been told that although support is on the way it's unclear when it will arrive.

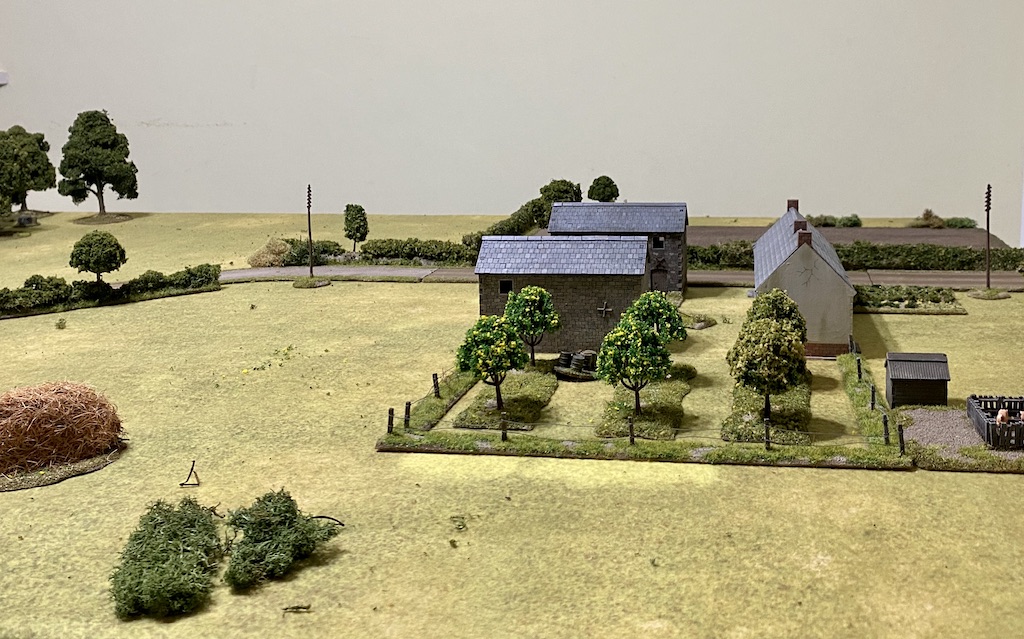

The German patrol phase will start from one of the two areas marked in blue. The Dutch may place their patrol markers anywhere behind the red line. It looks unlikely that the Germans can grab an advanced position for a jump-off-point and I think the best they can hope for is to limit the options for the Dutch.


We make our support rolls secretly. The Dutch receive D6+3 for this scenario and I later discover Dave has the good fortune to roll a six. That gives him nine support points plus another seven for the difference in force ratings, for a very useful total of sixteen. Although I don't know it at the time he's decided to avoid the potential pitfall of waiting for Turn 2 to deploy and opts to rely on a substantial number of fortifications - a Kazemat, four sections of barbed wire and four entrenchments. He will aid his deployment with an Adjutant and have the added support of a forward observer directing a mortar barrage.
As the Germans I receive 2D6+6 support and I am equally fortunate, rolling eleven, for a total of seventeen. I'm expecting to come up against fortifications, the scenario calls for it and Dave made use of both barbed wire and a Kazemat in the last scenario and so I think the support of pioneers will prove useful here. Having used a Stuka Bombardment in Campaign Turn 1 I'm unable to call on one in this campaign turn, so I decided to go with weight of numbers - calling on a Pioneer squad, an extra schutzen squad, a pioneer demolition team and a tripod mounted MG34 team. This could prove a handful to command and so I will call on an Adjutant so that I can deploy both senior leaders early if necessary. To further delay any Dutch deployment the Germans will have a pre-game barrage and a Shabby Nazi Trick in the form of a 5th columnist has the potential to play further havoc with Dutch command and control.
Both sides are able to call on fresh platoons for this game and that's what we both do. The Germans have a full strength Schützen platoon and the Dutch have a full strength, first line Infantry platoon.
Before play begins Dave places the four sections of barbed wire. They block off access to the wooded area on the German right flank and deny them the cover of one of the hedgerows in the centre.


While the defence looks impressive I think I spot a weakness on my right flank where there could be an opportunity to breach the wire where it cannot be covered by Dutch fire and get into the woods.
The first German command roll is 66541 and I decide to take full advantage of a double phase to get the assault moving. I plan to use the engineer demolition team to clear a gap in that wire on my right flank and they are the first to deploy.

I want this team to move quickly and clear the wire before the Dutch can react. This is a job to be supervised by a good NCO and so the Feldwebel will accompany them.

Fortune can be a mixed blessing. The following German command roll is 66654 and while another phase is welcome, the end of the turn is not. It will mean the loss of the German pre-game barrage and free up the Dutch to deploy their support units. I was hoping both of those things would inhibit a coordinated defence but as that's not to be it adds a real sense of urgency to the attack.
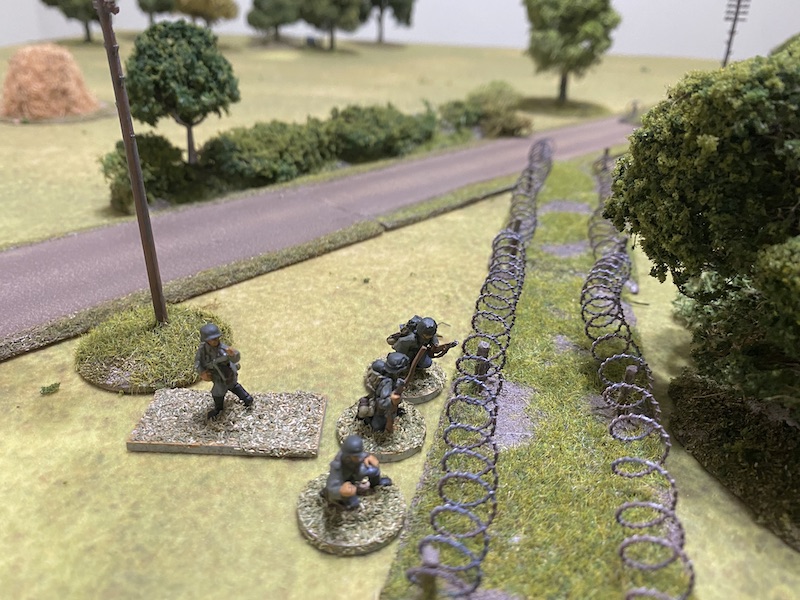
The Feldwebel is the right man in the right place and, wasting no time, he orders the demolition team to follow him and move forward at the double. His leadership is inspiring and they do this at a cracking pace, covering 15” and making it to the wire in a single bound.

With the phase completed the turn comes to an end and the German pre-game barrage is lost before it has even had a chance to make an impact. The Dutch are now free to deploy their support units.
However the run of German phases is not yet over - the following command roll is 66441. As is often the case with double phases the command dice are not the most useful, nonetheless the tripod mounted MG34 team deploys in the woods on the left.


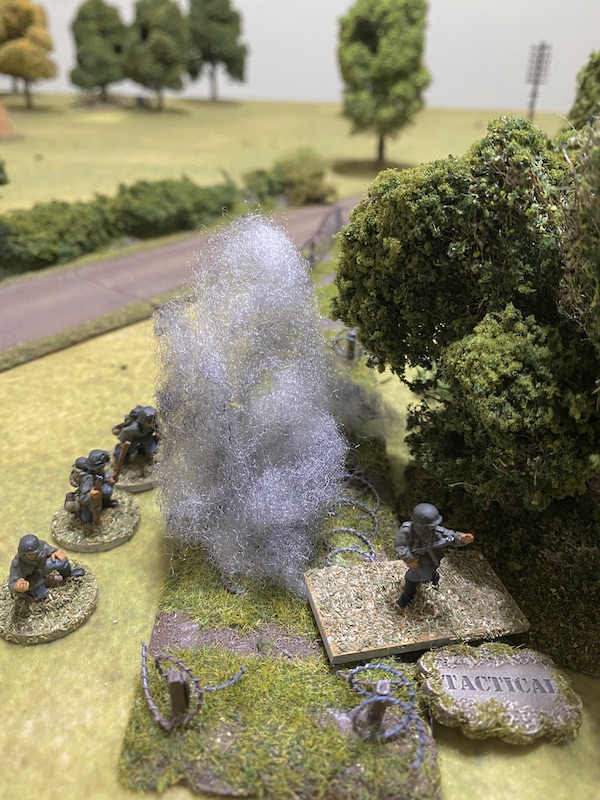
The Feldwebel has the engineer demolition team place their charge and set it off.

It detonates successfully and blows a gap in the wire. The demolition team have done their job and opened up a route into the woods.

While the engineers will play no further part in the assault the Feldwebel looks for cover and moves tactically through the gap in the wire. He's certainly leading from the front, but for now he needs to take cover while he awaits the arrival of the others.
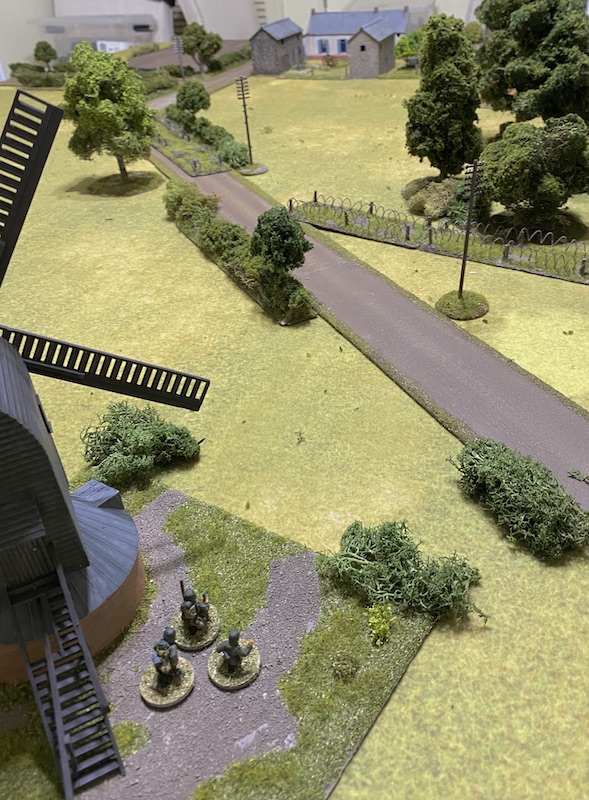
The next command roll of 66432 means the run of German phases continues - the Dutch must be asleep or otherwise distracted! The pioneer squad deploys by the windmill.

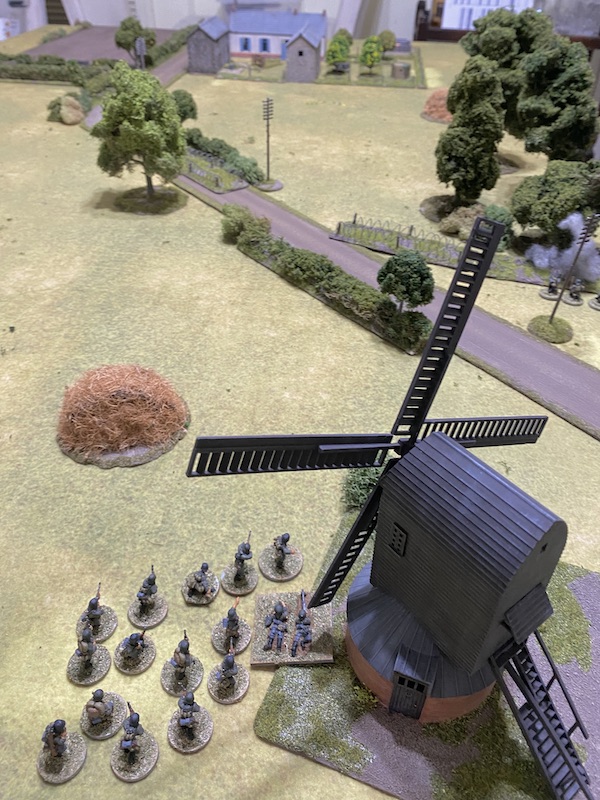
The schützen squad that was brought in as a support deploys on the other side.

I'm tempted to consider moving the lone Feldwebel to close down the Dutch jump-off-point in the woods, however it is fraught with risk. He needs to get within 4" to close it down which would put him in line of sight of the farm and the Kazemat. He would make a very inviting target and so I decide he is better off waiting.
The run of phases ends with a command roll of 55521, much to Dave's relief. The pioneer squad's Obergefreiter leads his command in a dash to the hedgerow. Much like the engineer demolition team they cover the distance rapidly. When they arrive the Obergefreiter rallies the shock from the LMG team.


Well, that was an astounding opening to the game with five consecutive German phases. While it seems to be a considerable disadvantage to the Dutch there was always a good chance that they may not have deployed anything this early in the scenario until they could assess the main direction of the German attack. That said, that direction must now be fairly obvious and I expect to see a Dutch reaction.
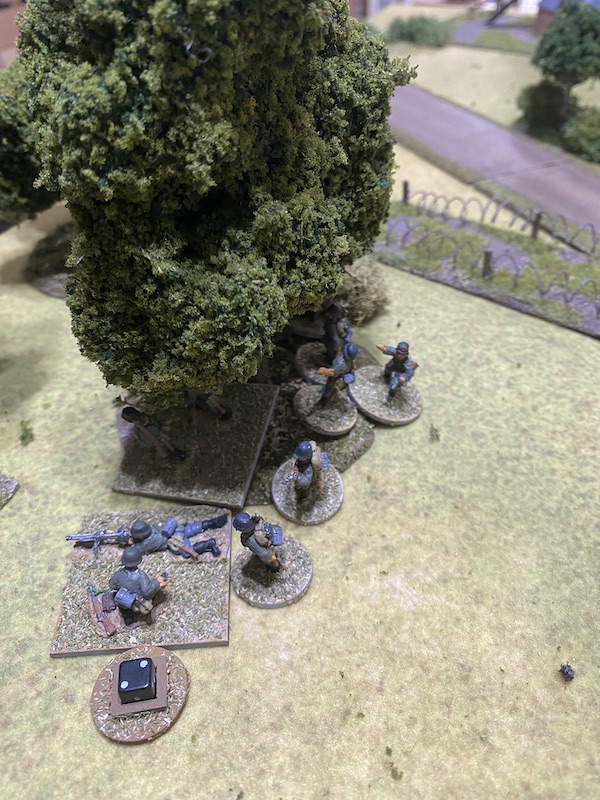
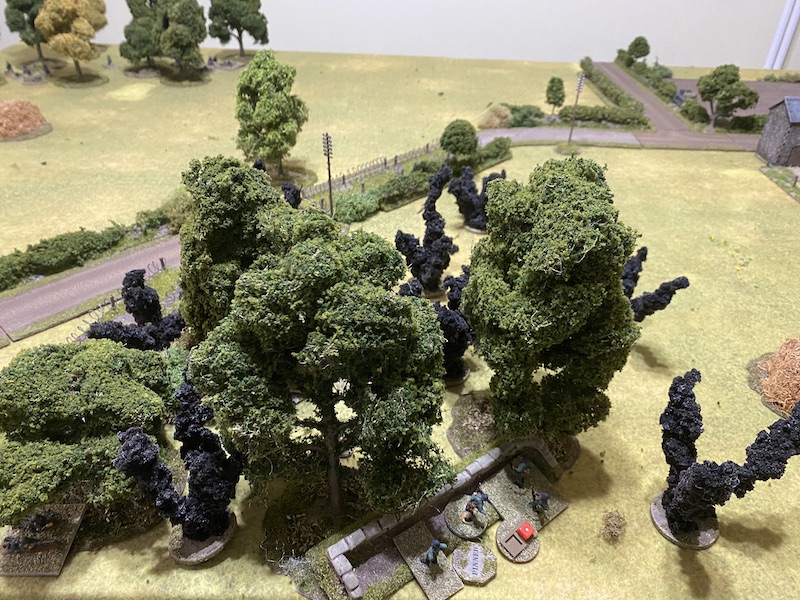
Dave decides to make a stand in the woods, he's not prepared to cede that ground to the advancing Germans just yet. A mitrailleurgroep deploys dug-in near the Dutch jump-off-point at the rear of the woods. They have a line of sight within the trees but cannot be seen from outside. It looks like the only way I'm going to drive them out is to go in there and fight them.

I sense it's important to maintain the momentum of the attack and to push forward quickly with both the pioneers and the schützen squad, but the command roll of 64443 is limiting. It will need the Feldwebel to leave the safety of the woods to keep things moving along. Firstly, he orders the engineer demolition team to depart, no point losing a team needlessly to Dutch fire.

He then makes a tactical move back across the gap in the wire.

That brings him into command range of the pioneer squad and he orders them to move at the double around the hedge and join him.


The schützen squad's Obergefreiter also has his men move at the double but they are not quite as fast as the pioneers.

The Obergefreiter rallies off a point of shock from the move.

The Dutch command roll is 64322 but Dave decides to wait and see how things develop before deploying any more units.
Fortune smiles on the Germans once again with a command roll of 66542. With such little Dutch opposition at the moment I intend to make the most of the double phase to push forward as quickly as possible. The schützen squad move up to the hedge.

The Feldwebel rallies two points of shock from the pioneers.

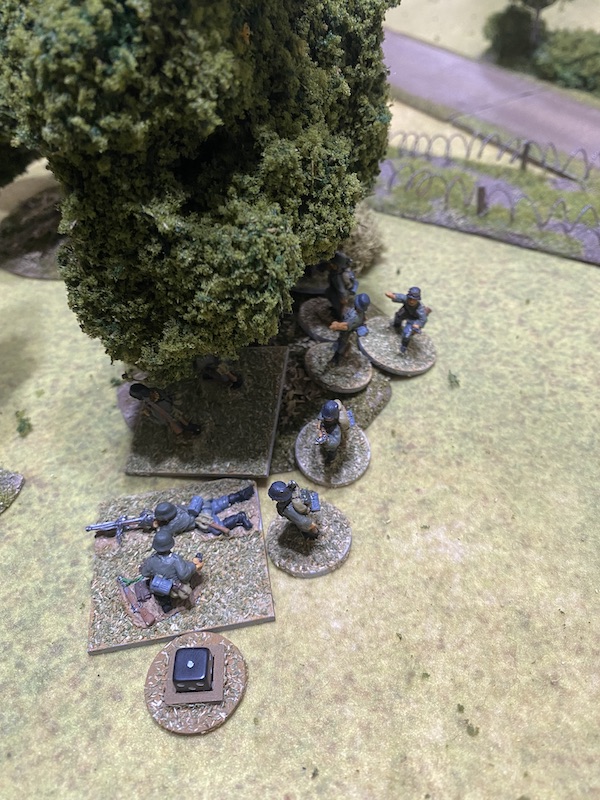
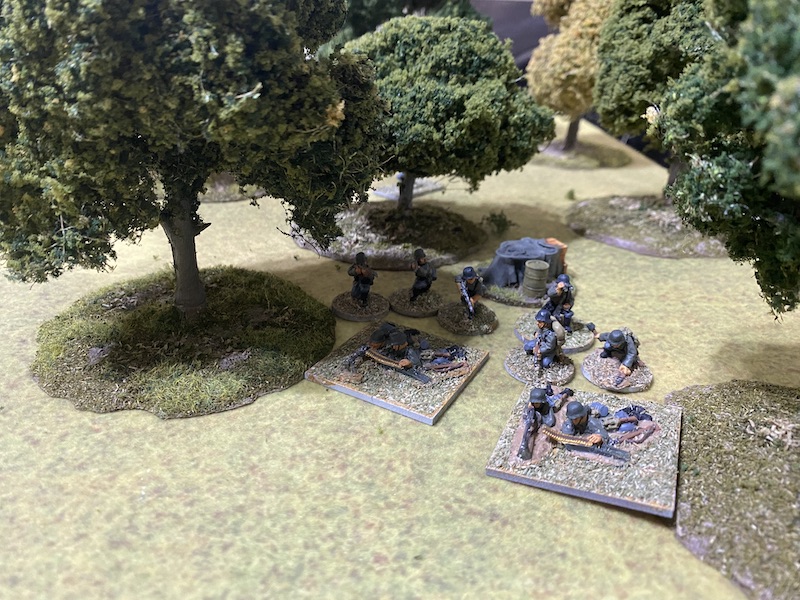
He then directs them to move tactically into the woods.


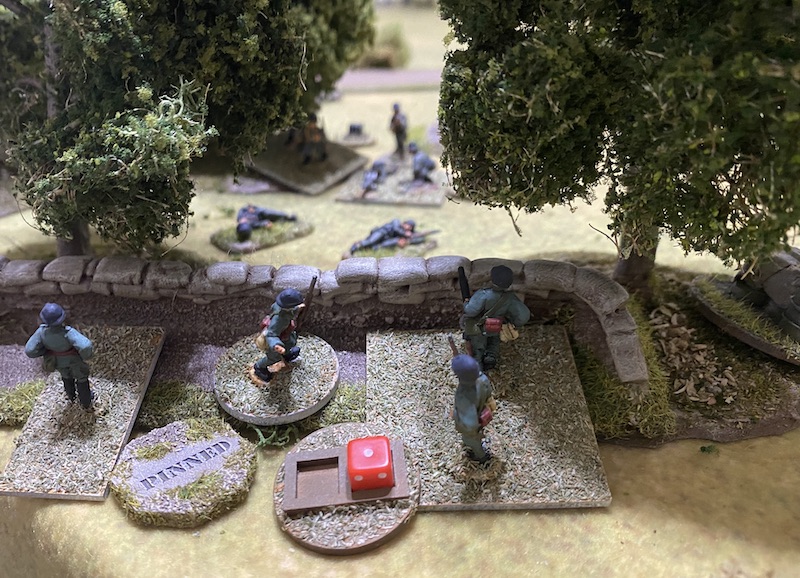
No surprise the mitrailleurgroep open fire the moment the pioneers appear.

Despite moving tactically and in light cover the pioneers suffer two casualties and two points of shock.

The next German command roll is 63211, so the run of phases will end and I decide to be very aggressive in an attempt to dislodge the Dutch this phase. The Feldwebel rallies off all three points of shock and at that point the pioneer's Obergefreiter gives the order Handgranaten!
The pioneers jump to their feet hurling their grenades and charge into the woods.

Only a single grenade hits the Dutch and inflicts two points of shock.

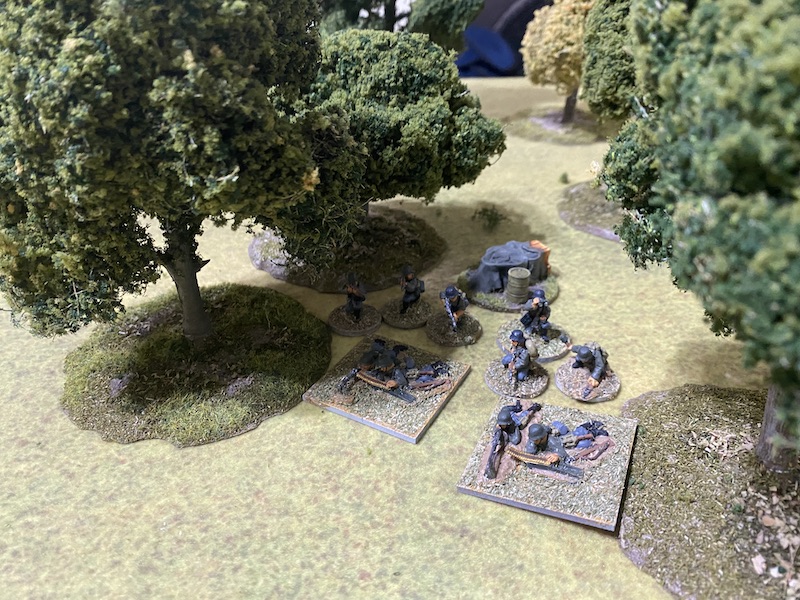
With that the pioneers and the Feldwebel charge through the trees and into the Dutch position.


The pioneers outnumber the mitrailleurgroep but it's not enough to swing the odds their way. The Germans will roll twenty two dice to the Dutch twenty seven. This could be a bloodbath.
The Dutch lose five men, almost half of the squad, and suffer a further two points of shock.

However they inflict more losses on the pioneers who lose six men and the Feldwebel pays the price of leading from the front - he is killed. That's a real blow and I use a CoC die to avoid the roll for the loss of the senior leader. For now at least the Dutch are victorious and they have seen off the more numerous pioneers who fall back 9" with seven points of shock.

The mitrailleurgroep may have lost half of their number but for now they hold the woods. This might prove a tough nut to crack and the decision to defend so far forward may just pay off for the Dutch.

With play now in Turn 2 the Dutch are free to deploy their support units and in an ominous development their forward observer makes an appearance in one of the barns.


A mortar barrage could catch the two German squads in the open and put an immediate halt to their advance. The FO puts the aiming point on the schützen squad behind the hedge.

The spotting round fails to fall on target and lands in the road between the schützen and the pioneers.

A command roll of 66433 sees the incredible good fortune of the Germans continue. The Obergefreiter rallies two points of shock from the pioneers, who must pause any advance to lick their wounds and recover from the close combat.

With the mortar barrage likely to hit soon the schützen squad wastes no time moving from the hedge.


In the following phase the squad continues with their move.


I want to bring even more firepower to bear on that squad and so the pioneer's LMG team moves tactically through the gap in the wire towards the edge of woods.


The following German command roll is 66632 - awful timing for the Dutch, not only a German double phase but the end of the turn and the lifting of the barrage. This is good luck for the Germans but only if I can make the most of it.
The Obergefreiter rallies a further two points of shock from the pioneer squad's rifle team.

Another schützen squad deploys, this time on the German left near the machine gun team.


With that the phase ends and so does the Turn. The Dutch mortar barrage lifts and the wounded Obergefreiter on the edge of the woods is back up on his feet.
The run of double phases continues with a command roll of 66544. However with the loss of the Feldwebel there is little the Germans can do right now with those command dice and so the phase passes. At this point the final smoke from the mortar barrage is removed.
The subsequent German command roll is 52221 which enable the squads to get back into action. The Obergefreiter at the edge of the woods rallies a point of shock and orders the two MG34 teams to fire at the entrenched Dutch.
The Germans can really maximise their firepower at this range and despite occupying hard cover the Dutch lose two men and suffer a further two points of shock, which is enough to see them pinned.

I'm hoping the Germans can close in for the kill and the pioneer squad edges forward tactically.

However only the LMG team go far enough to enter the woods and gain a light of sight to the Dutch.

A third schützen squad deploys at the windmill. While the pioneers and the forward schützen squad may succeed in eliminating the Dutch in the woods I doubt they will be in much shape to continue leading the assault and so I need to feed more men forward to reinforce any success.


They don't generate a lot of firepower given they are pinned but still it's enough to cause one casualty.

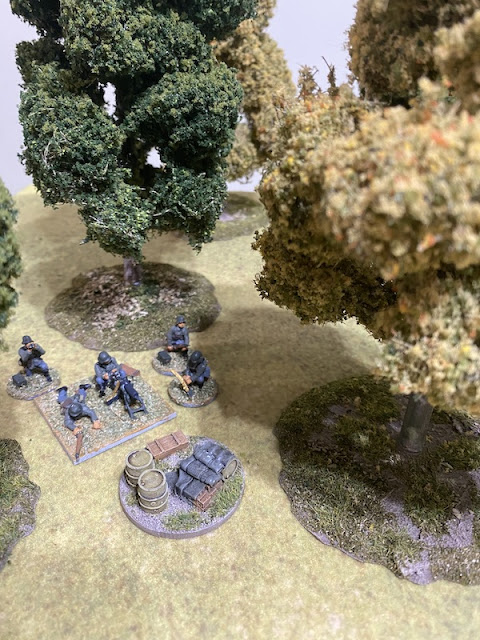
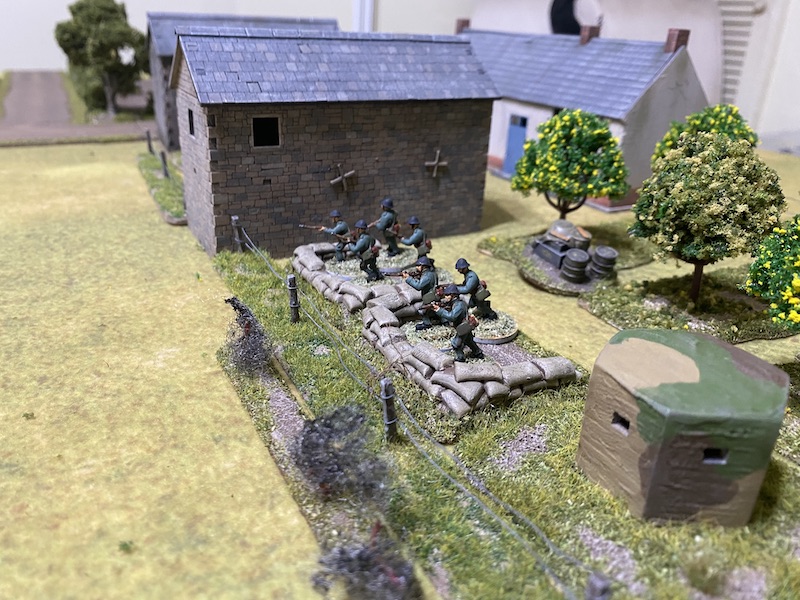
In the orchard by the farm another mitrailleurgroep deploys, with the Lewis team in the Kazemat and the remainder of the squad entrenched outside.


In the German phase the pioneer squad's Obergefreiter rallies a point of shock from the rifle team. He then orders the LMG team to fire in the woods but it has no effect on the Dutch.

The schützen squad open fire at the same target and with two MG34s they generate more firepower.

That's enough for the Dutch to lose another man and take a further point of shock. That position is looking extremely brittle now and the Luitenant might find himself in real trouble. If he's not reinforced soon he will need to pull back before it's too late.

The Germans continue to push men forward and the recently arrived schützen squad move at the double towards the hedgerow.

The platoon's Leutnant deploys in the woods on the left from where he can control the fire of the machine gun and the squad.

He orders the MMG and...

the squad...

to put covering fire on the Kazemat and the entrenchment (I realise later this is a bit of overkill - the schützen squad can do this on its own).

In the Dutch phase the Luitenant rallies off two points of shock and has what remains of the mitrailleurgroep fire at the schützen squad.

Pinned down and with so few men they are able to inflict only a point of shock on the Germans.

The mitrailleurgroep occupying the Kazemat position fire on the schützen squad at the woods but the effect of the covering fire limits how effective that can be.

Despite that, the Germans lose another man, this time from one of the LMG teams.

The Dutch forward observer frantically calls the battery hoping to reconnect and access more fire, but today is just not their day - the FO is told that the battery will no longer be available. Not the news the Dutch commander needed to hear.
In the German phase the schützen squad fires once more into the entrenched position in the woods, but this time the Dutch survive unscathed. They are not so lucky when they are fired upon by the pioneer's LMG team.

They lose the assistant gunner for the Lewis and suffer three points of shock. That leaves the Luitenant, the mitrailleurgroep sergeant and the lone Lewis gunner as the only survivors in the entrenchment.

The pioneer squad Obergefreiter leads the remaining men of the rifle team into the woods to join the LMG team.

In the meantime the platoon Leutnant orders the machine gun team and the schützen squad in the woods to maintain their covering fire on the Kazemat position in the orchard.


In the Dutch phase the Luitenant rallies all three points of shock from the lone survivor of the mitrailleursgroep.

The Sergeant then has the Lewis gun target the schützen, but the paltry amount of fire has no effect.

The mitrailleurgroep at the Kazemat open fire.

The Germans lose another man. That schützen squad is starting to look a little brittle and things are about to get worse for them.

The Kazemat calls down its pre-prepared mortar fire plan. It won't be a sustained barrage but could be enough to cause the Germans some problems.

The barrage comes down directly on target.

However it will encompass the entire wooded area and that will include the entrenched Dutch.
The brief barrage crashes down through the trees. The pioneer squad Obergefreiter receives a light wound, but German morale remains steady. The rifle team lose a man and suffer a point of shock.


The Dutch benefit from their entrenchment and are unharmed but the schützen squad at the edge of the woods lose another man, reducing them to five men and their Obergefreiter.

In the German phase the schützen squad in the rear makes its way slowly toward the hedge row.

It's only at this point in the game I realise I've used a bit of overkill with the covering fire. The schutzen squad generate enough fire to do that on their own, which means the tripod mounted MG is free to fire normally. The Leutnant orders the MMG team to fire on the Dutch at the Kazemat.


Despite the long range and the protection of their entrenchment the Dutch lose one man.

At this point I think it's clear the Dutch forward defensive position is in a lot of trouble. Down to three men it includes the platoon's Luitenant, the sergeant and the man with the Lewis gun. They have nowhere safe to withdraw to and Dave faces the potential loss of a senior leader, a junior leader, a squad wiped out and a captured jump-off-point. All combined their loss could lead to a drastic drop in force morale, not to mention the longer term consequences those casualties would have for the campaign.
Without the help of the mortar barrage and with the Kazemat fire plan expended all that remains to hold the position is the unit at the Kazemat and deployment of the platoon's final mitrailleurgroep.
On the other hand the Germans are still in good shape. Despite the loss of the Feldwebel and a significant number of casualties from the pioneer squad and the support schutzen squad, the core platoon is still at full strength and supported by an MMG. The prospects for the Dutch are not looking good and so Dave decides the best decision is to withdraw to fight another day.
That was an interesting scenario with an unusually large number of consecutive phases for the Germans. That said, it was by no means an easy position to crack. The Dutch decision to make a stand in the woods was risky but it looked like it might pay dividends when the pioneer squad was repulsed. However, they also suffered significant loss and required further reinforcement to avoid being wiped out. That made the decision to deploy the Luitenant fraught with risk and yet it may have paid off had the mortar barrage proved more effective, but fortune was definitely running against the Dutch today.
The Germans suffered twelve casualties and the loss of the Feldwebel, however other than the senior NCO all losses were from the support squads. On the other hand the Dutch lost nine men, all from one of the core platoons. That gives the Germans a second victory in the campaign and the option to push on immediately using only the survivors from this scenario for a blitzkrieg move to the next map. The thought is tempting given time is not on the German's side, but the loss of the Feldwebel could make it very difficult for the lone Leutnant to command five squads and a machine gun team. Nonetheless I've decided it's worth a shot and so the survivors from this attack will move on immediately to attack Map 4: Farm & Road. You can find out what happens next in this report.
If you've enjoyed following along and would like to Buy Me a Coffee to help cover some of the costs of running the blog you can click through at the link or on the tab in the right hand column of this page.
You can find links to all the games in this campaign and several others on the Chain of Command Campaign AAR Page (link from here or at the top of this page).