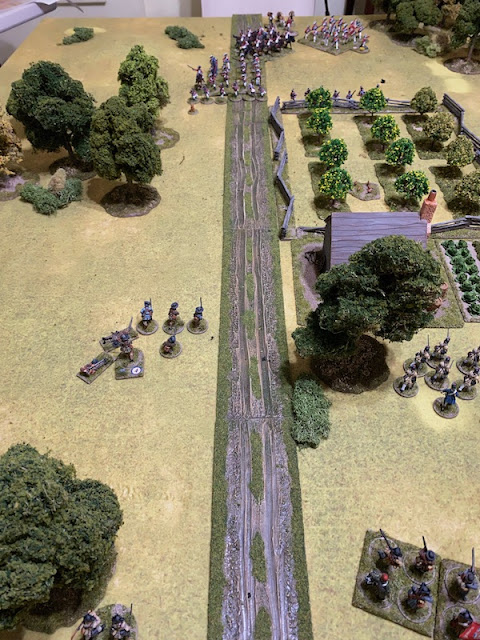
Meanwhile the British commander Major Petrie continues to lead his column along the road.
The British are well provisioned for this advance and a laden mule train follows slowly behind.
Turn 3
British Command Card drawn (British: 1, American: 0)
Sergeant Burns, the second in command of the Continentals is eager to see the men committed but must wait patiently for his commander Major Morris to issue the order.
American Command Card drawn (British: 1, American: 1)
British Command Card drawn (British: 2, American: 1)
British Command Card drawn (British: 3, American: 1)
The command card draw initiates a random event but it's one that has no impact on the units in play.
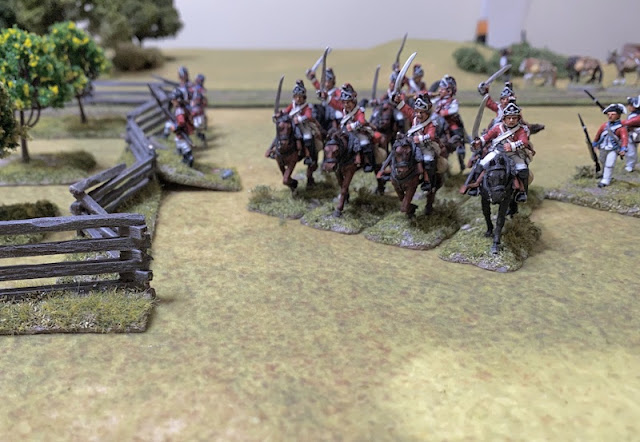
The rebels are now faced with the daunting sight of the arrival of Captain Carr-Clarke with his dragoons.
Nathaniel Brown of the militia senses the urgency. He needs to set to work lighting the beacon and try, if possible, to hold off the advancing British while he does so. He orders both his groups to move as fast as they can and run up the hill.
American Command Card drawn (British: 3, American: 2)
With the British column making its way down the road Lieutenant Carroll decides to take his militia skirmishers on a wide move around the flank. He wants to reach the woods opposite and from there threaten the British flank. While Carroll thinks this is a good idea, his men seem a little more reluctant. They set off slowly, much to Carroll's annoyance (read that as mine!).
Lieutenant Parker-Edwards is eager to bring his light infantry into the fight. He orders them to follow him to the orchard fence and unlike the more tardy rebel skirmishers the light bobs do so at a rapid pace.
American Command Card drawn (British: 3, American: 3)
American Command Card drawn (British: 3, American: 4)
I choose to make use of those four American command cards immediately before the opportunity slips away. Lieutenant Carroll seizes the moment to continue driving not only his group of skirmishers forward but also those of Lieutenant Smith towards the woods.
This time it is Smith's men who are slow off the mark and they edge forward cautiously.
And yet, perhaps not totally unwise given what is marching down the road in their direction.
On the other hand Carroll's men have been quick to cover the ground to the woods, realising that there is more safety to be had there than remaining in the open.
This puts the rebel skirmishers in a position to begin harassing the British column should it come any closer.
Not that the rebels' intentions do much to fluster Major Petrie, who with some swagger continues to march his column up the road.
British Command Card drawn (British: 4, American: 0)
Dave decides to hold out a bit longer before using his command cards. This is always a gamble and the arrival of the Tiffin card demonstrates just that.
Tiffin card drawn. Command cards available: British: 4 American: 0
All that is left to do is for Captain Winston-Smythe to continue moving his regulars forward toward the American right flank.
Turn 4
Lieutenant Smith finds his small group of skirmishers in the open, staring a column of redcoats in the face. This is not a good place to be for men accustomed to sniping at long range from cover.
Wisely he orders the men to beat a hasty retreat to the relative safety of the woods. Oddly enough, they have no reluctance moving in this instance and are swiftly back amongst the trees where they feel much more at home.
That puts them at a safer distance and in better cover. Sometimes it pays to stand your ground and trust to the fortunes of war, but this is not that moment.
Captain Carr-Clarke orders his dragoons forward at the canter. Frankly these terrify me as I have no idea how best to deal with them and I have visions of them cutting through my militia with ease.
They make their way between the light infantry at the orchard and the regulars on that flank. The dragoons pose a real threat to the rebels, particularly the militia who will be in some peril if charged.
Sergeant Burns, second in command of the Continentals, is beginning to get anxious and wants to see the men on the march, but once again, until Major Morris gives him the order he must bide his time.
Meanwhile Lieutenant Carroll continues to push his skirmishers forward and they make it into the woods.
I know I want them to threaten the British flank but they might be getting uncomfortably close. If nothing else, it will demand a response of some kind and they cannot be ignored.
British Command Card drawn (British: 1, American: 0)
With his militia now on the hill Nathaniel Brown gives one of his men a task.
He assigns him the job of lighting the beacon. It's going to take more than one turn to get the job done and he sets to it a little slower than Brown would like given the urgency of the situation.
American Command Card drawn (British: 1, American: 1)
Lieutenant Parker-Edwards is keen to get his light infantry into the fight and he orders his men over the fence and into the orchard.
True to their name the lights move swiftly.
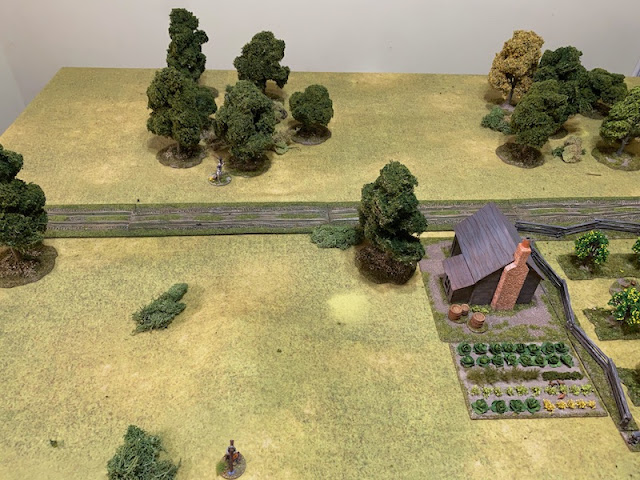
With British units closing from several directions I decide the best option is to make a dash to save Johnson. Josiah Nelson sends his skirmishers to the door of the farmhouse.
British Command Card drawn (British: 2, American: 1)
Captain Winston-Smythe continues to lead his regulars around the flank but they can't keep pace with Major Petrie's column on the road and they're in danger of being left out of the coming fight.
They still have some way to go before they can threaten the farm cabin or the militia on the hill.
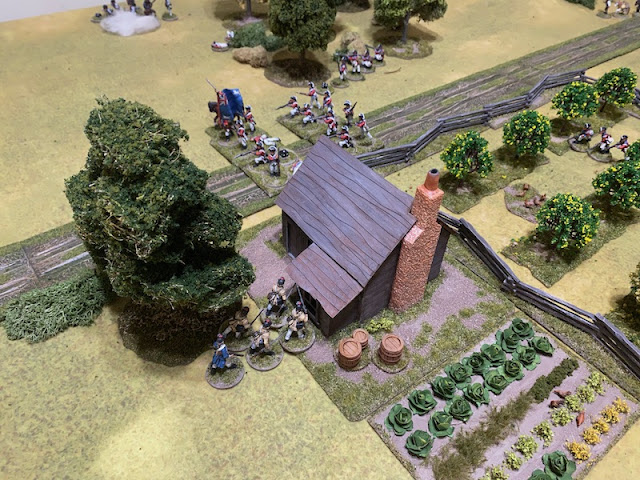
Major Petrie has noticed the rebel skirmishers slipping into the woods on his flank.
He promptly dispatches the light infantry to go and root them out at the point of their bayonets.
The skirmishers can see what's about to happen and try to evade, but the light infantry are fleet footed and the rebel skirmishers have left their departure too late. The redcoat light infantry have their blood up and come roaring through the woods to catch the skirmishers with their backs to them. This does not bode well, the odds are heavily in the lights' favour at 12 dice to 3.
If those rebel skirmishers are religious men then what follows might only be put down to a miracle. Neither side cause a casualty or shock to the other. The first round is a draw. Well, that was fortunate, but unlikely to be repeated.
In the second round the Americans roll two 6s and the British four 5s and unfortunately here we make a critical rules error. Being a bit rusty on the SP rules we were thinking a 5 resulted in shock and a 6 in a kill and shock. Where as it should be a kill on a 5 and a kill and a shock on a 6. As a result of our faulty calculations the British lose two men killed, whereas the Americans suffer eight points of shock (four shock doubled due to an attack in the rear) but none of the skirmishers are lost as casualties. As a consequence the British fall back appearing to have lost the fight against all the odds, leaving two of their men behind.
The shock on the Americans causes them to also fall back, however their force morale remains unchanged while British morale drops to ten.
Major Petrie is surprised to see the light infantry falling back through the woods but is determined to push on. He can't form the regulars into line in their current position due to the narrow space between the split rail fence and the woods, but he doesn't want to be caught in closed column either. He orders the formation to break up and for both groups to advance separately.
Tiffin card drawn. Command cards available: British: 2 American: 1
All units have been activated, so the turn ends.
Turn 5
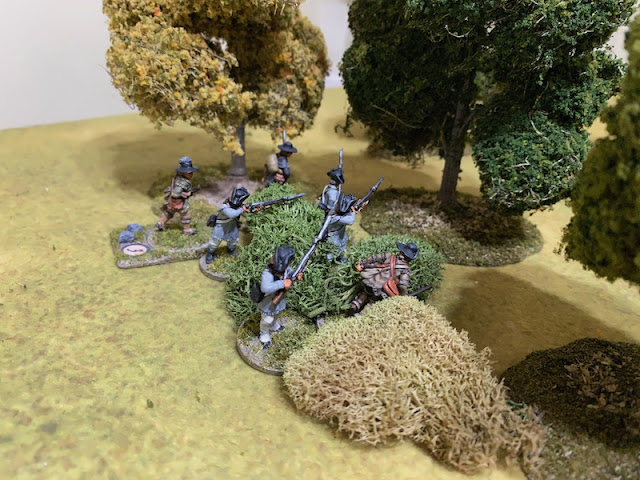
Lieutenant Smith's skirmishers are lining the edge of the woods with their muskets trained on the British, these are the sort of conditions favoured by irregular skirmishers and they open fire at long range from cover.
The lead group of redcoats takes two casualties and suffer a point of shock. The skirmishers hastily reload ready to fire again.
Having had a near miraculous escape from death Lieutenant Carroll's men sense their luck might be in and despite the shock decide to turn and fire at the regulars on the road, taking them in the flank.
With all the shock they don't offer much of a threat but it's enough to see another redcoat fall to the ground (given our previous error the impact of eight points of shock to the volume of fire they can generate is exactly the equivalent of losing four men, so while this doesn't entirely compensate for our failure to apply the correct rules, it does go some way).
There's a cost to turning and firing and that will leave them unloaded for now, but the rebel skirmishers are slowly taking their toll on the British.
Meanwhile at the farm house, Josiah Nelson detaches two of his men and sends them into the house to retrieve Jacob Johnson. "Not a moment too soon" exclaims Johnson pointing to the British all around him.
American Command Card drawn (British: 0, American: 1)
American Command Card drawn (British: 0, American: 2)
British Command Card drawn (British: 1, American: 2)
The random event caused by the draw of three consecutive command cards has no effect on play.
With Major Petrie's force engaged and taking casualties Captain Winston-Smythe is eager to press on with his regulars on the flank and bring them into action.
They still have some way to go and it gives my rebels an opportunity to focus all their attention on Major Petrie and his regulars on the road.
American Command Card drawn (British: 1, American: 3)
The Continentals cannot arrive a moment too soon and the three American command cards now available make it the ideal time to have Major Morris bring his men into the fray. The first two groups deploy in line across the road facing Major Petrie's regulars, while the third group deploys behind and to their right, ready to support the militia.
Major Morris can sense his moment has come and so do the men under his command. They are ordered to present arms and fire.
With their guns properly loaded and firing a volley in the controlled manner they have practised on the drill ground they unleash a devastating hail of musket balls at close range. Firing a controlled volley at close range as their first fire results in 18 hits.
The group of redcoats at the front lose another three men and suffer three more points of shock. That's enough to see them fall back 1", but for now British morale holds steady. The group behind suffer four points of shock.
The Continentals have made their appearance with impeccable timing and sent the redcoats reeling.
American Command Card drawn (British: 1, American: 1)
British Command Card drawn (British: 2, American: 1)
This produces another Random Event which leads to only more British misery. Major Petrie is hit and wounded and his Status Level drops down to II. The wounding of their most senior leader has a knock on effect on British morale which drops down to nine. Things are going well for the rebels but I need to be careful not to become over confident. The British still present a considerable threat.
Nathaniel Brown has his militia continue preparing the beacon while he orders the second group to close up on the men on the hill.
They may have only one opportunity to unleash a good volley and so I want to make sure that when the time comes they are ready to do so.
Sergeant Burns in the Continentals finds some satisfaction that he has had so little to do, with the men in good shape there isn't even any shock to rally.
British Command Card drawn (British: 3, American: 1)
Dave uses the three command cards to have Major Petrie try to get a grip on events along the road. He orders the two groups to form up into a closed column. I pause for a moment, could he really be thinking of forming column and charging the Continentals? They are currently unloaded but it still strikes me as a wild and crazy gamble given the British must be careful with their losses.
As it turns out, charging is about the last thing on his mind. Major Petrie orders the men to about-face and move off hastily down the road in the direction they just came.
Well, well, what a sight for rebel eyes! The redcoats turn and march away, no doubt with American jeers and insults ringing loudly in their ears.
This might be a blow for British prestige but Petrie does not plan on being humiliated. He orders the nearby light infantry to form a screen behind the column. The regulars may be falling back but under his command they will do so in good order.
Nonetheless the British casualties scattered about the road tell their own story.
The other group of light bobs under Lieutenant Parker-Edwards move through the orchard and line the fence by the road providing yet more cover for Major Petrie's withdrawal.
Captain Carr-Clarke can sense the danger and so he slows his dragoons to a walk and turns them towards the road. If the Americans are flirting with any ideas of pursuing the British he plans to give them a very nasty surprise.
British Command Card drawn (British: 1, American: 1)
Tiffin card drawn. Command cards available: British: 1 American: 1
With all units activated this turn the remaining command cards cannot be used by either side.
Turn 6
Josiah Nelson realises this is a good moment to try to bring Jacob Johnson to safety and he orders the men in the farmhouse to bring him out.
Johnson greets his rescuers cheerfully and hopes he can make good his escape.
Across the road, Lieutenant Smith has only three of his skirmishers with a line of sight that is not obstructed by the Continentals so he has them fire at the screen of British light infantry on the road.
They suffer a point of shock. That's enough to force them to make an involuntary withdrawal, which brings British morale down further to eight.
British Command Card drawn (British: 1, American: 0)
American Command Card drawn (British: 1, American: 1)
The random event would have seen the farmhouse set ablaze had the skirmishers been much closer than they are but as it transpires nothing happens.
Captain Carr-Clarke then walks his dragoons to the side of the road, keeping a watchful eye for any rebels closing in on the withdrawal of Petrie's men.
Lieutenant Parker-Edwards light infantry are not leaving without giving the Continentals a taste of their musketry and they fire from behind the orchard fence.
The Continentals suffer a single point of shock. The British lights are not to exact any revenge today.
They reload and then fall back to keep alongside the column of regulars.
British Command Card drawn (British: 2, American: 1)
British Command Card drawn (British: 3, American: 1)
It's now clear the British have decided to cut their losses and withdraw to fight another day and Dave uses the three command cards to have Major Petrie move further to safety. He orders the lights to form up with the column and they all move down the road away from rebels.
The British Mule train that has been slowly following the regulars also turns and makes its way towards the table edge.
British Command Card drawn (British: 1, American: 1)
Once again the British are on the receiving end of a random event. All future movement will be -1 pip to each die due to thirst. Today is just not their day.
As if any more evidence is needed of a British withdrawal, Captain Winston-Smythe turns his regulars and leads them back to woods.
Tiffin card drawn. Command cards available: British: 1 American: 1
It's now clear that the British plan to withdraw. While my rebels could try to pursue them and inflict more casualties I see no need to suffer a British riposte, not least from the dragoons, and so decide to hold the ground I have. With that we call the end of the game and a clear American victory.
Jacob Johnson, consummate politician that he is, takes the opportunity to deliver a rousing speech to the militia, all local men, many of whom he knows by name.
Finally the beacon is lit, alerting the district to the arrival of the British and increasing the chance more militia will be available in the next scenario.
Dave, by his own admission, paid the price of moving units forward unsupported. I don't believe the error with the fisticuffs had an impact on the overall outcome, the critical moment of decision was the ability of the Continentals to deliver a withering volley that left the British on the road heavily outnumbered and with little choice but to pull back. Two groups of regulars under Captain Winston-Smythe took no part in the action and the same is true of the dragoons and I think that cost the British any chance of turning the tide in their favour.
Casualties are important for the development of the campaign and so we need to make some adjustment to address the imbalance from the Fisticuffs fight between the skirmishers and the lights. We will assign the four casualties to the skirmishers for the purposes of calculating the impact of losses for the ongoing campaign.
The British lost a total of eight casualties - two from the light infantry and six regulars. Both of the lights die as a result of their wounds, as do two of the regulars. Two of the regulars will miss the next game while they recover and the remaining two are patched up quickly and return to their units. Similarly Major Petrie's wounds are tended and he will be ready to lead the men in the next scenario.
The Americans should have lost four casualties from the militia skirmishers as a result of the fisticuffs and so I roll to see the outcome of their injuries. Two of those die from their wounds but the other two have suffered only light wounds and are able to return to duty immediately.