'Go Sharp into the Desert' is a variant for Sharp Practice that appeared in
Lard Magazine 2021. I've played several games and all have been fast and furious with no shortage of action. Rather than the one-sided affairs you might imagine they've been closely contested. It's inspired me to write a detailed AAR of a recent game to convey how it all plays out.
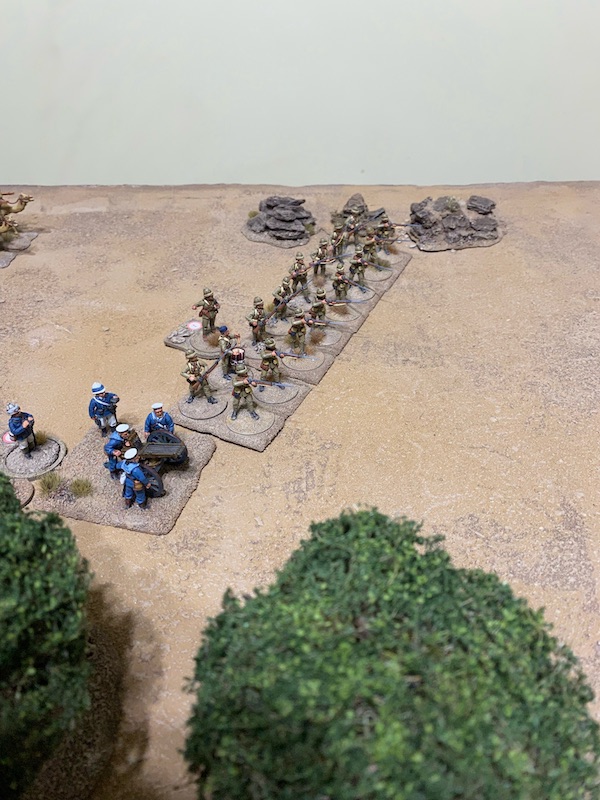
This game is based on the Escort Duty scenario in the main rule book. The British objective is to escort a camel train to safety through hostile territory.
The British start from the bottom of the table and must work their way to the opposite end. The Mahdist primary deployment point will be determined randomly once the camel train and its escort have made their opening moves, so the British must be wary that the Mahdists could emerge from either flank.
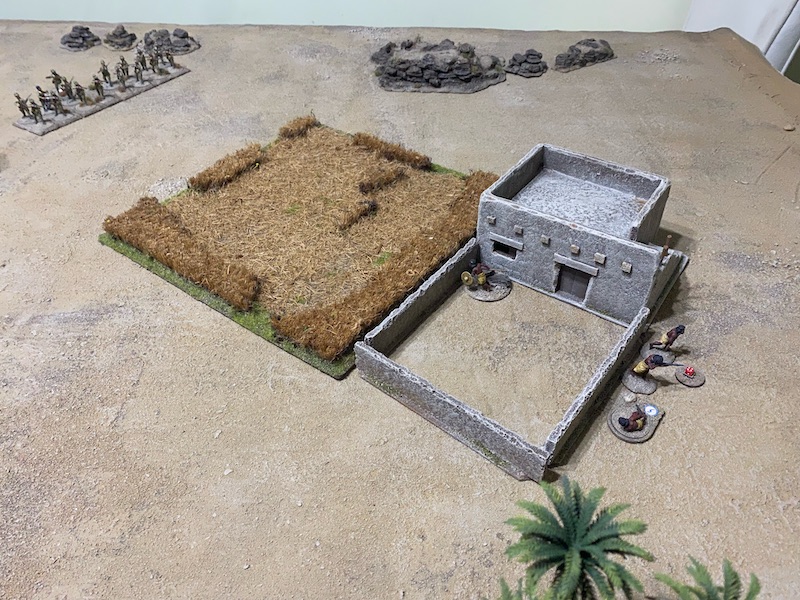
The wadi is at a lower level than ground level. Units in the wadi can be seen only by other units in the wadi or standing at the edge. Climbing into or out of it is like crossing a minor obstacle.
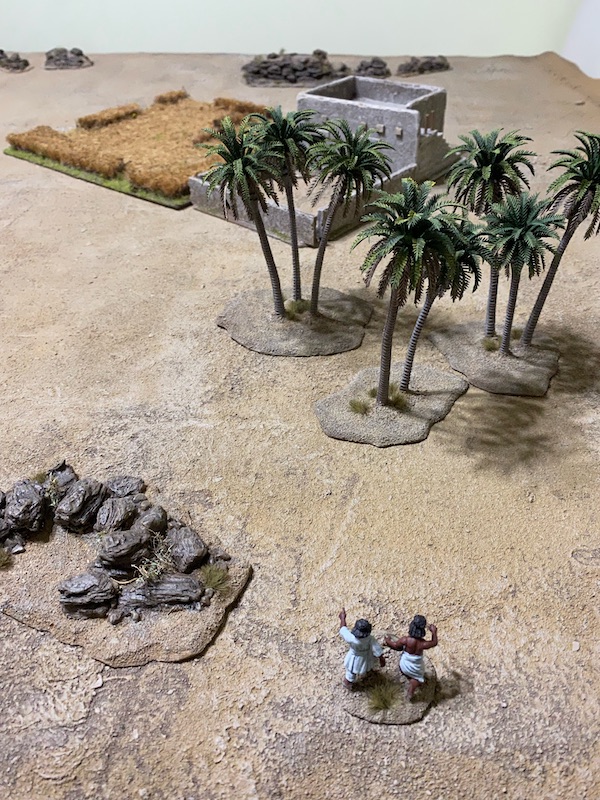
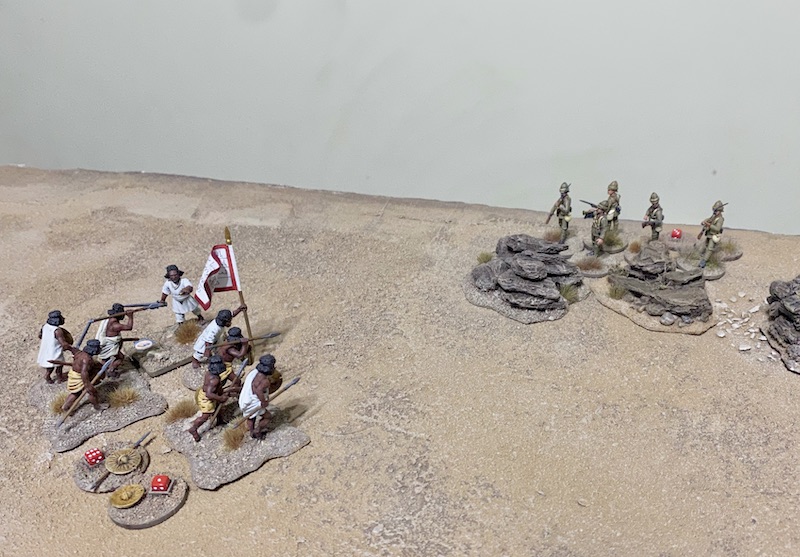
The rest of the table is fairly open. A few rocky outcrops and the house provide hard cover. The scrub, acacia trees, crops and palm grove offer only light cover. The patch of acacia trees can be seen into but block line of sight to any unit beyond it.
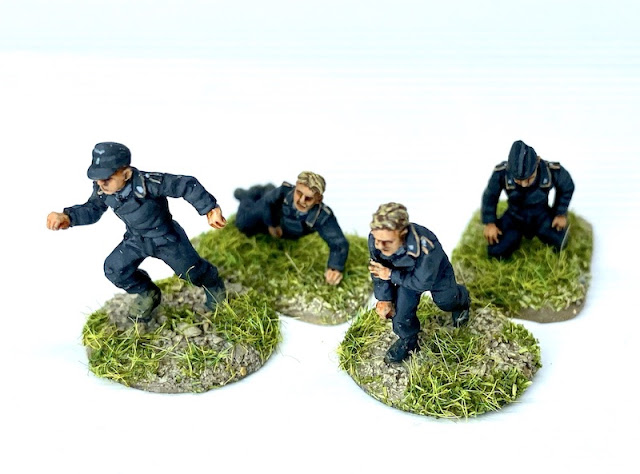
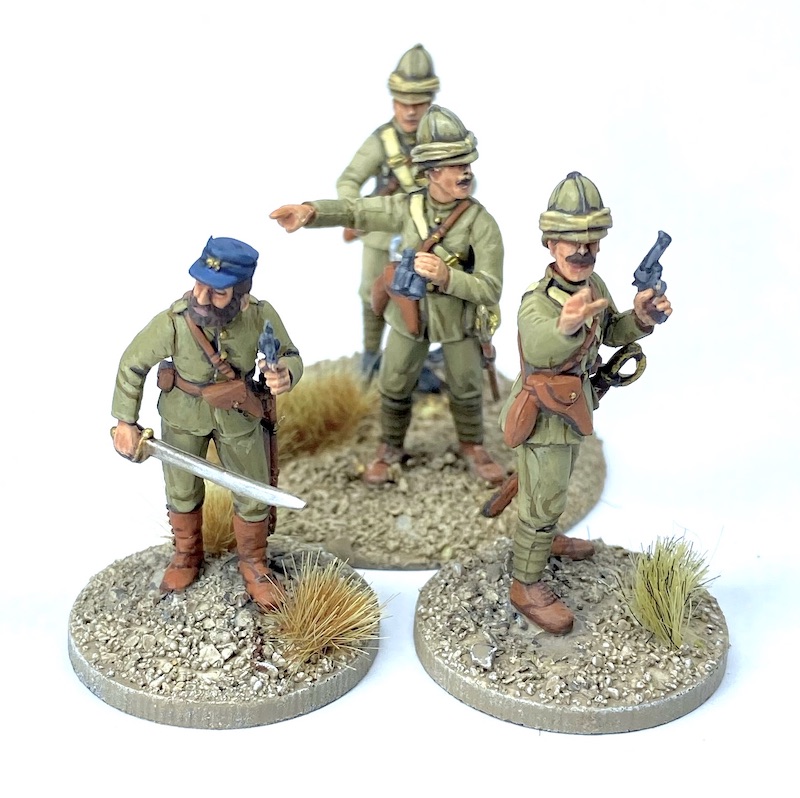
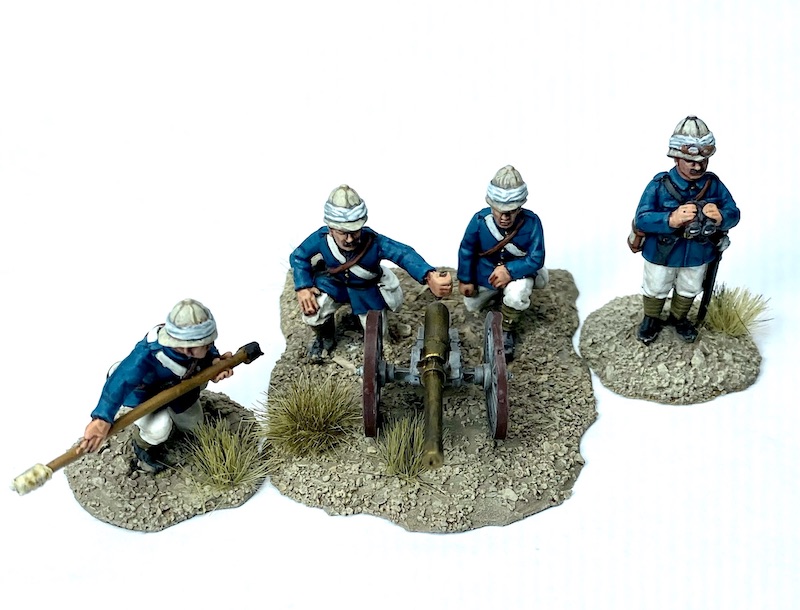
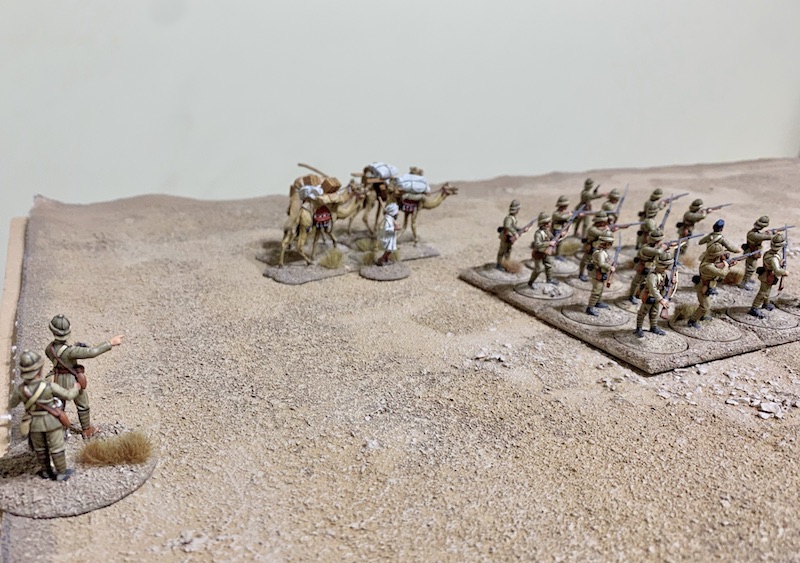
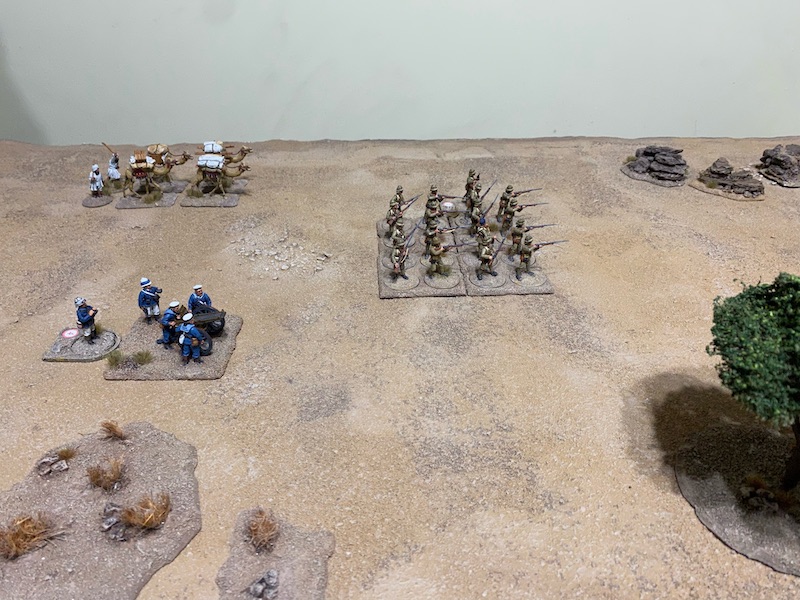
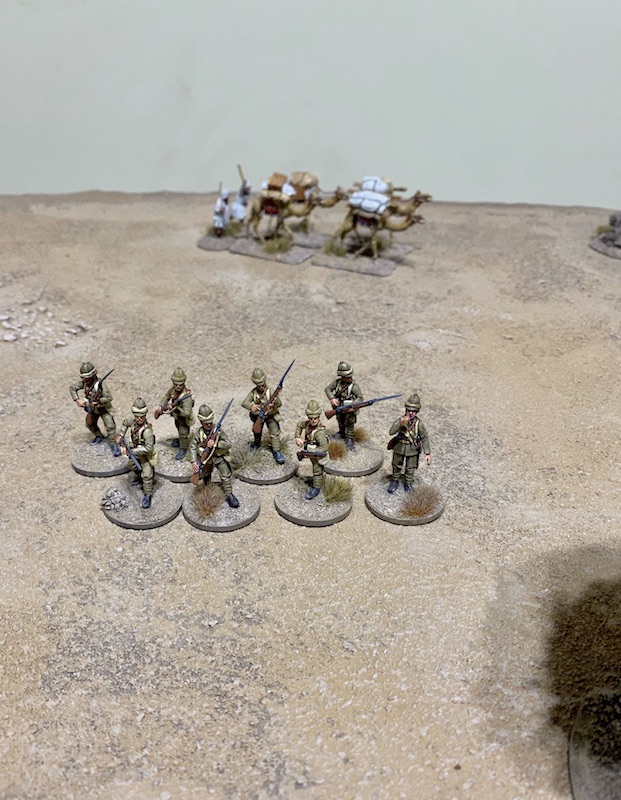
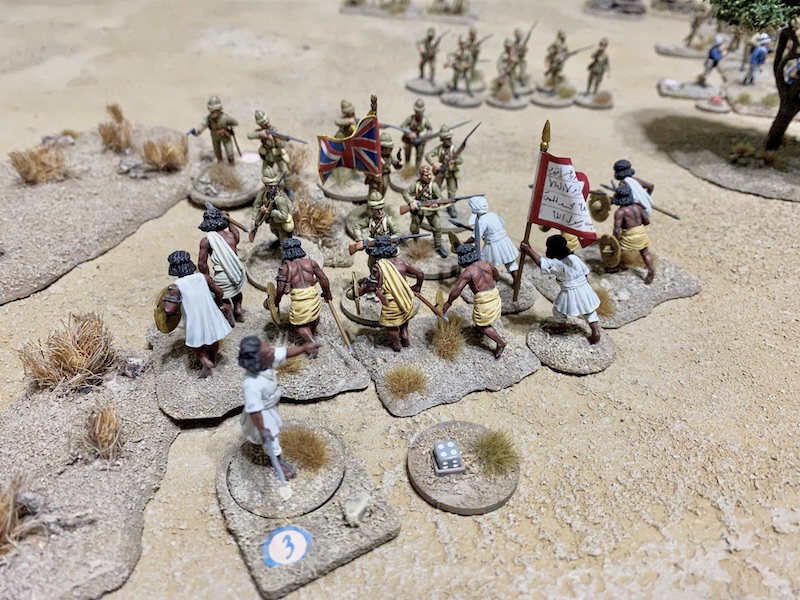
The British escort party consists of a small force of well trained regular infantry supported by a Gardner gun. They will be commanded by my regular opponent, Dave, who has played Sharp Practice many times before but not this Sudan variant.
Major (Status III leader)
Two groups of Regular British Infantry
Lieutenant (Status III leader)
Two groups of Regular British Infantry
Gardner Gun Commander (Status I leader)
One Gardner Gun with 5 crew
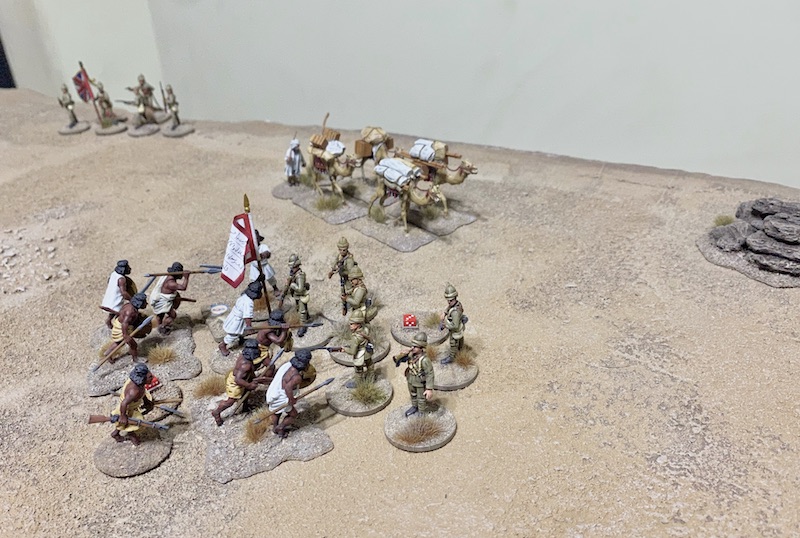
The camel train is made up of four animals and two handlers.
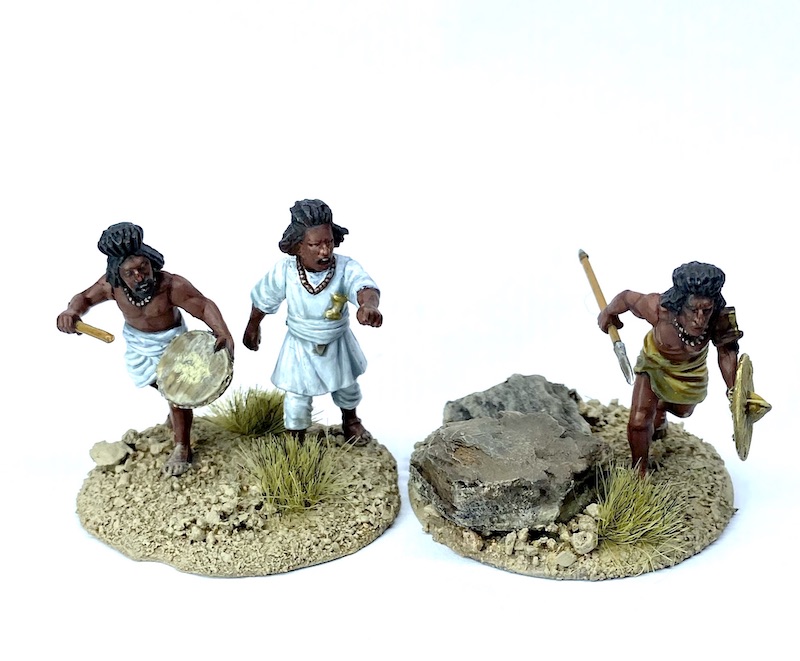
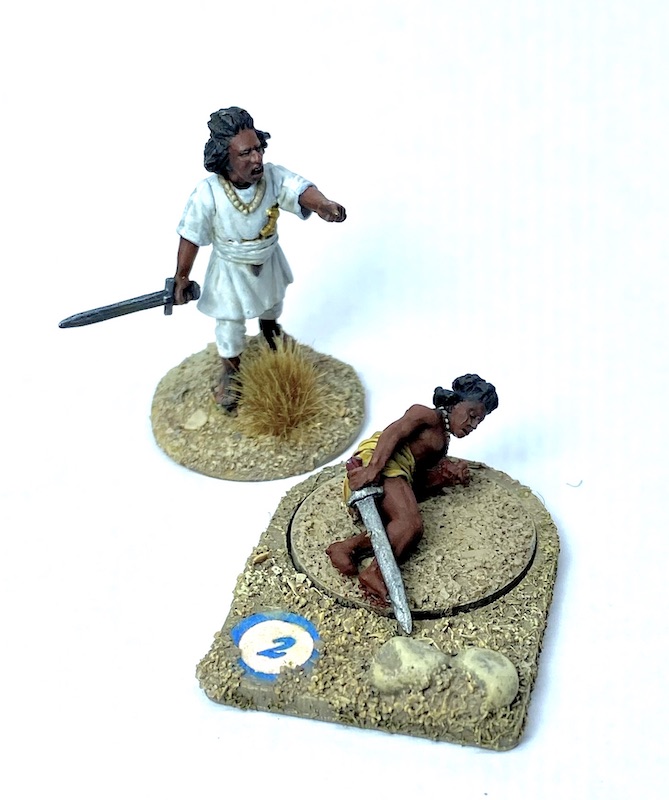
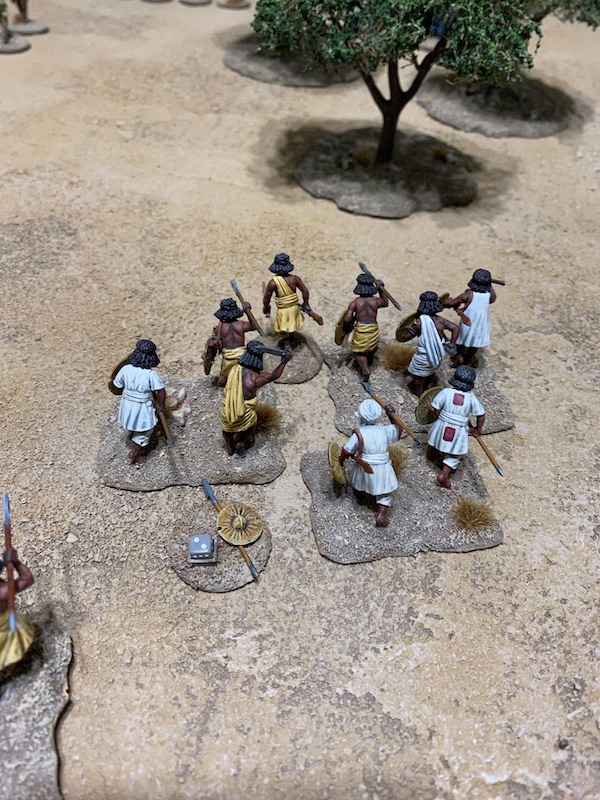
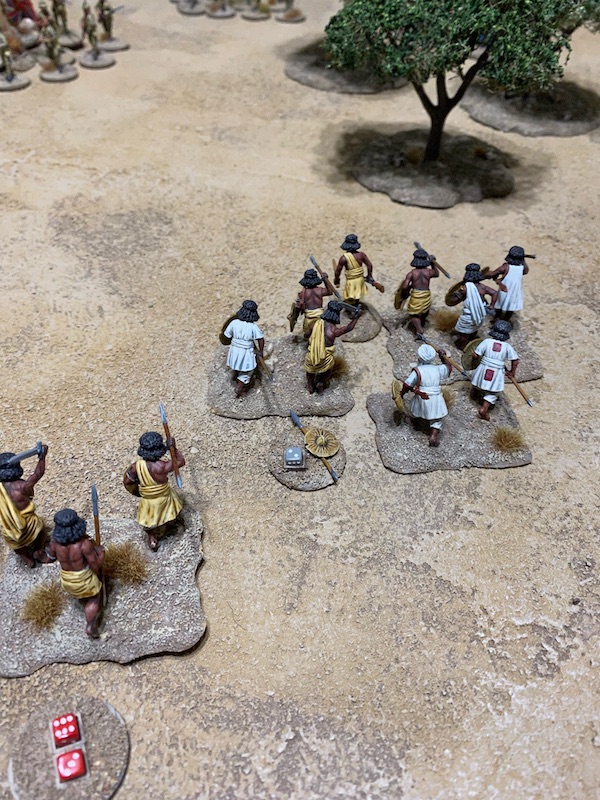
They are outnumbered 2:1 by a large Mahdist force of Beja spearmen accompanied by a few skirmishers. The Amir has also brought along a Mullah to provide inspiration for his men. I will be commanding the Mahdists.
Ansar Amir (Status III leader)
Ansar Leader (Status I leader)
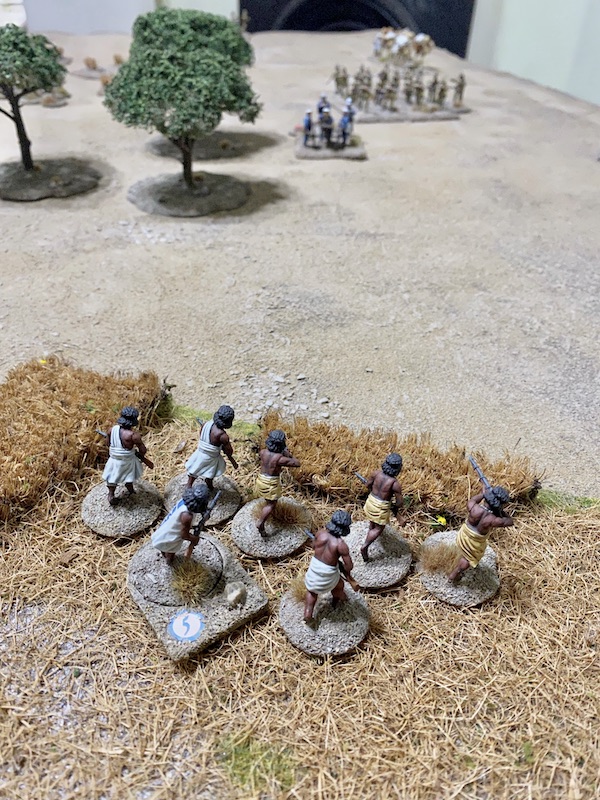
Three groups of Beja Spearmen
Ansar Leader (Status II leader)
Three groups of Beja Spearmen
Skirmisher Leader (Status I)
One group of Beja Skirmishers
Skirmisher Leader (Status I)
One group of Beja Skirmishers
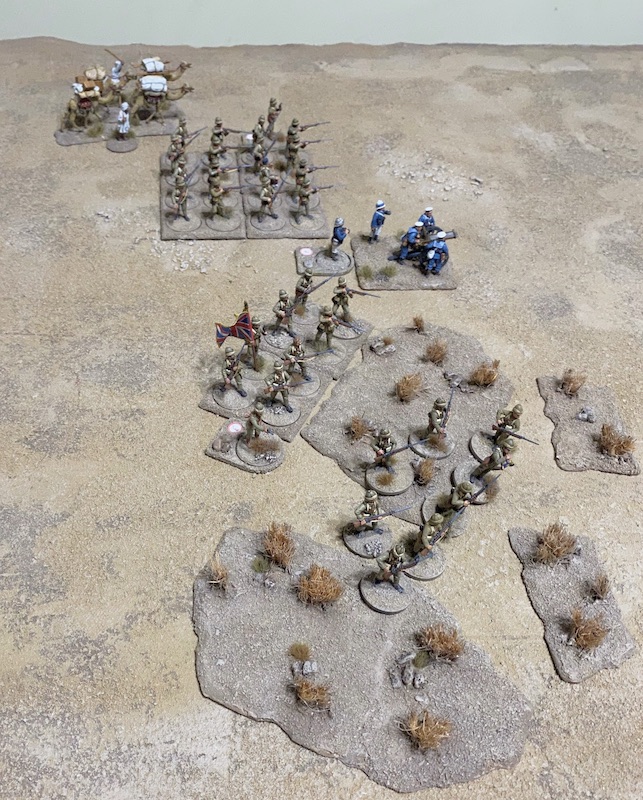
Force morale at the start has the British at eleven while the Mahdists are at ten. The British have one free turn of movement before the placement of Mahdists deployment points. That opening movement sees the arrival of the camel train and the full escort party.
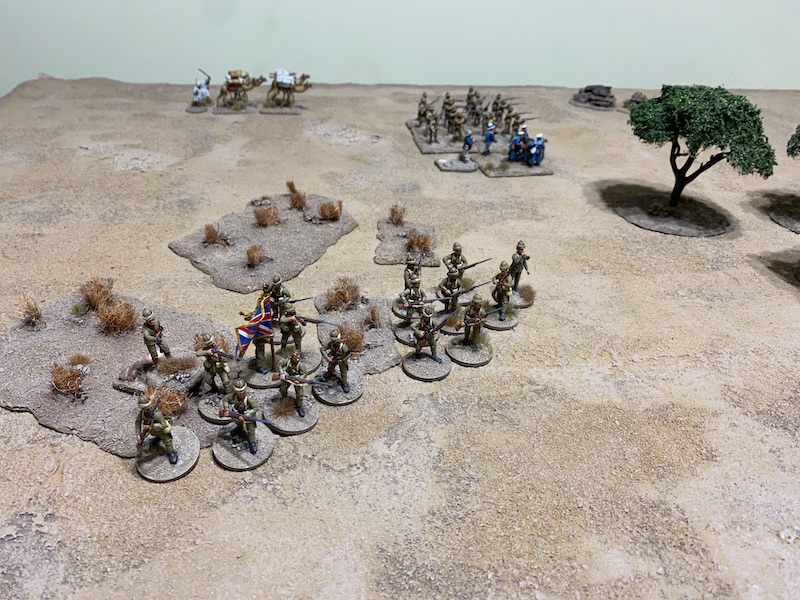
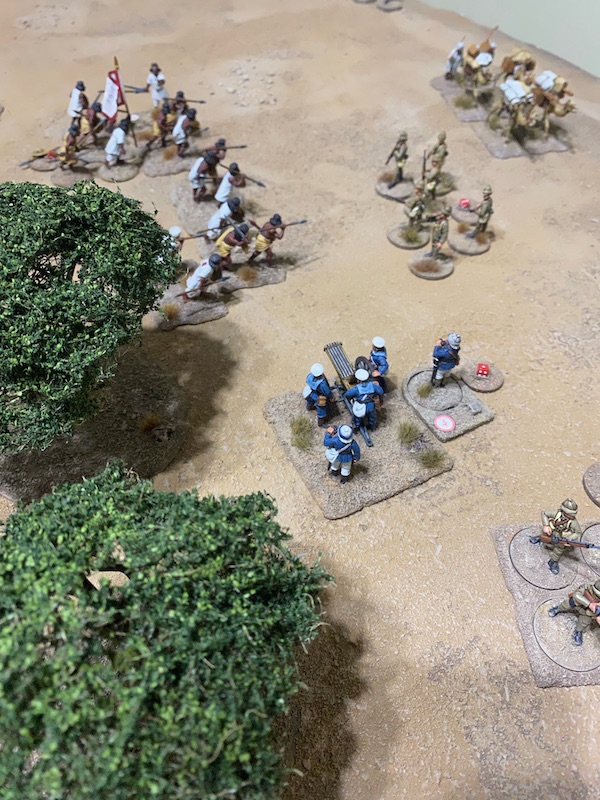
The camels are on the left accompanied by a column of two groups of regulars and the Major, the commanding officer.
The Gardner gun is in the centre.
On the right a group of regulars advance in extended order through the scrub. Behind them a second group with the Lieutenant remain formed up.
With the opening moves completed we roll for placement of the Mahdist primary deployment point.
It ends up at the far end of the large wadi. That puts it on the opposite side of the table from the British which could make things difficult. The further the Beja spearmen have to advance the more opportunity it gives the British to bring their superior firepower to bear.
The Beja skirmishers also have a movable deployment point which is placed in the centre of the table next to the house. That gives the Mahdists an opportunity to deploy units directly into the path of the escort party.
TURN 1
British command card (British: 1 Mahdist: 0)
The Mahdist commander and his mob of three groups of Beja spearmen deploy into the wadi but out of sight of the advancing British.
A roll is made to determine each group's level of fervour. They will need all the help they can get to carry them across the open ground and into contact with the British. I only hope this is enough (note that fervour acts like positive shock - allowing faster movement and absorbing the initial impacts of shock itself. It is temporary and will eventually reduce. Once it does shock will apply as normal).
Sensing impending danger the Lieutenant decides to move his men ahead quickly. He sends the first group through the scrub, but they are slow to make their way across the broken ground.
Then, using flexible drill, he has the second group form into extended order and move with him around the scrub.
Despite the advantages of moving in extended order they cover only a small distance.
Mahdist command card (British: 1 Mahdist: 1)
Tiffin (command cards British: 1 Mahdist: 1)
The column of British regulars continue to move forward and join the Gardner gun.
TURN 2
The Major keeps the advance moving and the camel train catches up with the troops.
The infantry column is ordered to press ahead.
They are joined by the Gardner gun.
While the British are keen to push forward and escort the camel train off the table they must remain wary of threats to their flank or rear. When the Mahdist force commander activates he leads his mob further down the wadi, all the while remaining concealed from the British.
The Mahdists will need to time their charge very carefully. Nonetheless they cannot be ignored and will force the British to divide their attention.
Mahdist command card (British: 0 Mahdist: 1)
Mahdist command card (British: 0 Mahdist: 2)
Tiffin (command cards British: 0 Mahdist: 2)
TURN 3
The Lieutenant can sense there is enemy activity in the wadi.
He orders each of the groups under his command to advance in extended order to cover the flank.
Tiffin (command cards British: 0 Mahdist: 0)
TURN 4
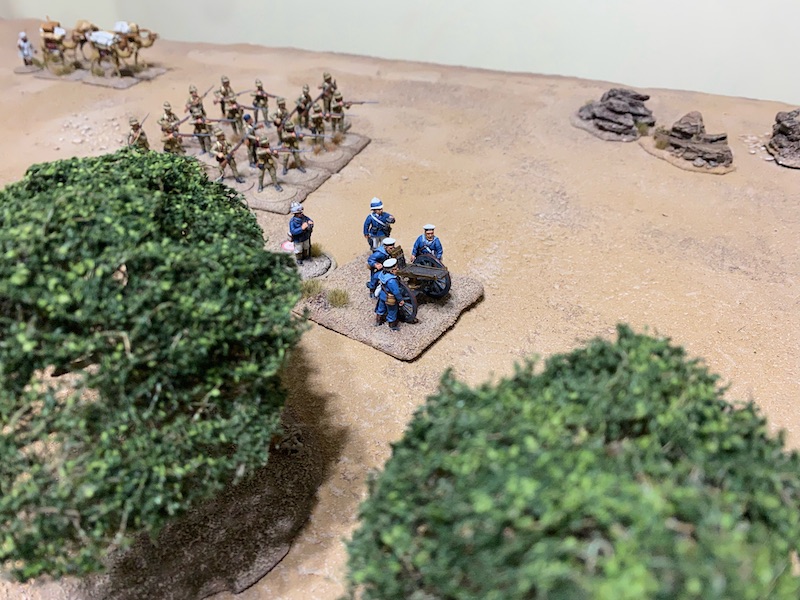
The commander of the Gardner Gun has the crew continue to push the gun forward.
Immediately to their front a group of Beja skirmishers make a sudden appearance in the crop field.
They open fire immediately at the advancing Gardner gun.
The initial round of fire inflicts the first casualty of the encounter, killing one of the machine gun crew who also suffer two points of shock.
Meanwhile the Mahdist commander continues leading his men further down the wadi. The presence of so many Beja spearmen lurking on the flank cannot be ignored. The British have been forced to divide their attention between fending off a possible attack from this direction and dealing with any threat to their front. The small copse of acacia trees blocks line of sight and I'm hoping an attack from both sides will make it difficult for the British to concentrate their fire on any single target.
Mahdist command card (British: 0 Mahdist: 1)
British command card (British: 1 Mahdist: 1)
The Lieutenant directs one of his groups toward the acacia trees to cover the flank of the column and the Gardner gun. They seem to sense the urgency and move quickly into position.
The Lieutenant follows with the second group and joins them.
Mahdist command card (British: 1 Mahdist: 2)
British command card (British: 2 Mahdist: 2)
Mahdist command card (British: 2 Mahdist: 3)
The draw of three consecutive command cards triggers a Random event that will see the Lieutenant's command suffer from thirst which will slow their movement.
The Major wants to drive off the Beja skirmishers in the crops and he uses two command cards to have the column use Step Out to move quickly and then form into line.
British command card (British: 0 Mahdist: 3)
Tiffin
Both Mahdists units have activated during the turn and so the three command cards cannot be used.
TURN 5
A short turn, the only command card is for the subordinate Status I Mahdist leader with the three groups in the wadi.
Tiffin
TURN 6
Mahdist command card (British: 0 Mahdist: 1)
Mahdist command card (British: 0 Mahdist: 2)
British command card (British: 1 Mahdist: 2)
The random event has no effect.
British command card (British: 2 Mahdist: 2)
Mahdist command card (British: 2 Mahdist: 3)
When the Mahdist force commander activates it seems as good a time as any to make a move on the flank. Using two command cards for Swift as the Desert Wind the mob's fervour increases a level and they pour out of the wadi towards the British. Unfortunately they won't reach them in a single move. I just have to hope they are able to move fast enough to avoid too many rounds of punishing British fire before charging into contact.
Those hopes are soon dashed when the Lieutenant, with impeccable timing, spots the danger and spurs his men into action.
He orders the group by the acacia trees to fire at the nearest spearmen.
The Beja lose a man and suffer two points of shock, taking their
fervour down to three. The British reload quickly and fire again.
The Beja lose another man and suffer four points of shock. That's enough to see them lose their fervour and begin to suffer the negative effects of shock. The ability of breech loaders to fire rapidly has an immediate impact in slowing the Beja charge.
The regulars don't want to be caught in extended order. They take advantage of their extra move action to withdraw and put some distance between themselves and the advancing spearmen.
The Lieutenant then has the group he is with open fire at the same spearmen. The rapid firing breech loaders produce a lot of smoke which will make the Beja harder to see when they fire again.
Nonetheless the hail of bullets inflicts seven points of shock, almost stopping the spearmen in their tracks.
The regulars reload and fire once more. The Beja lose another two men and suffer a further point of shock. That's enough to make them recoil in the face of all that gun fire, forcing them into an involuntary withdrawal.
Mahdists force morale remains steady but the British have been quick to demonstrate the effectiveness of rapid, disciplined fire. The Lieutenant then tries to pull his men back to conform with the others, but they are slowed by the scrub.
Tiffin (command cards British: 2 Mahdist: 1)
The Major tries to move the line of regulars into close range with the skirmishers before firing, but their move doesn't bring them quite close enough.
Despite that they can still unleash a powerful volley.
The skirmishers are making the most of their cover but it offers scant protection. They lose two men and their leader is wounded, reducing him to Status 0. That one volley has quite abruptly turned them into a much less threatening force.
They exact a small measure of revenge when they return fire and the British lose one man.
The skirmishers find they are in a very hot spot when the Gardner gun then fires a sustained burst in their direction (twelve fire dice).
This time their cover offers them better protection and they survive the initial round of fire unscathed. Wary of jamming the gun, the Gardner crew fire a more restrained burst with their second action (eight fire dice). Once again the skirmishers escape lightly, with only a single point of shock, but they are not going to be able to withstand this volume of fire for much longer.
TURN 7
The leader of the second group of Beja skirmishers activates but I see no point bringing them out to face a line of regular British infantry and a Gardner gun. I decide they are best biding their time until a better opportunity arises.
Mahdist command card (British: 0 Mahdist: 1)
British command card (British: 1 Mahdist: 1)
British command card (British: 2 Mahdist: 1)
The random event has no effect.
Mahdist command card (British: 2 Mahdist: 2)
The commander of the Gardner Gun decides to steady his men for future action and rallies off a point of their shock.
British command card (British: 3 Mahdist: 2)
The British use the three command cards to activate the Lieutenant.
He's a Status III leader and well positioned to order the men within command range. The first thing he does is have the Gardner gun continue firing into the crop field.
It's not proving particularly effective and the skirmishers suffer a single point of shock.
The crew decide to close the range and move the gun forward to join the firing line.
The Lieutenant then turns his full attention to the Beja spearmen in front of him. He orders the group near the acacia trees to open fire.
The Beja lose another man and are forced backwards once again.
Having brought one group to a standstill and then driven them back the British regulars focus on the next group of spearmen.
The fire inflicts two points of shock that reduces their
fervour.
If the Mahdists are subjected to much more of this withering fire I can see the whole charge grinding to a halt.
The British then move back towards the Gardner gun.
The Lieutenant has the second group fire on the spearmen.
I don't think I can afford to wait to see what happens. Using two Mahdist command cards the closest group of spearmen interrupt the British and rush towards them before they can open fire.
They will receive the charge in extended order. That puts them at a severe disadvantage and yet, against the odds, they actually manage to dish out more than they receive. Whilst losing only one man themselves and suffering a single point of shock they manage to kill two of the Mahdists and inflict three points of shock. That wasn't the result I was expecting (or hoping for!)
It doesn't go all their way. The Lieutenant is wounded and that's enough to bring British morale down to ten. The Mahdist leader also suffers a wound but he is a lowly Status I and this has no effect on their force morale.
The outcome means the fight will continue for one more round. This time there are no casualties but the British suffer a further point of shock. That leaves both groups locked in combat.
The activation of the Mahdist force commander allows for the mullah to arrive. He turns out to be a source of immense inspiration and reduces the group's shock from nine to four.
The Mahdist commander directs the group to his right to join the attack on the British.
They charge into contact and their arrival initiates another round of fisticuffs.
The bloody struggle continues and the British lose a man and suffer three more points of shock. In return they can inflict only a single point of shock on the Mahdists.
A second round of fisticuffs ensues and this time the British suffer badly. Three men are killed and the leader is wounded and knocked unconscious. To make matters worse they suffer a further seven points of shock. Defeated in fisticuffs they are forced backwards and that's only made worse when they break under the burden of so much shock. They retreat some considerable distance and are lucky to still remain on the table. The sorry episode is enough to bring British morale down two points to seven.
Having chased off the British the victorious spearmen move forward.
The Lieutenant is next to be activated, but he remains out of action and can't get back to his feet.

British command card (British: 1 Mahdist: 0)
When the command card for the leader of the second Mahdist mob comes up I decide to hold him back. Ideally his men deploy from the movable deployment and block the path of the camel train and its escort. However now is not that time. They would be arriving right into the face of a formed British firing line supported by a Gardner gun, not good odds for men armed only with spears. I think it's best to wait.
Mahdist command card (British: 1 Mahdist: 1)
Tiffin
The British line moves forward slowly.
Once in close range the men unleash another volley at the skirmishers in the crop field.
The fire is deadly. Two men are killed and the leader suffers a second wound. This time he's knocked out. That's enough to see the surviving men break and fall back. Their participation has been short lived but Mahdist force morale is unmoved and remains steady.
That does mean, for now at least, there is nothing to prevent the British escorting the camel train towards the table edge. I may need to plug the gap by deploying the second Mahdist mob sooner than I'd anticipated.
TURN 8
Mahdist command card (British: 0 Mahdist: 1)
When the Mahdist commander activates the mullah rallies the remaining shock from his group.
The commander then leads those men forward to join the other two groups.
Once within command range he orders them to charge the nearest British regulars by the acacia trees.
The spearmen hurl themselves at the British who are not formed up and must receive them in extended order. This time they pay the price for such a loose formation. Two are killed and they suffer three points of shock while inflicting only a single point of shock on the Beja.
The British fall back 3" which means they can avoid another round of fisticuffs. The Mahdists are close behind them, but not close enough to continue the fight.
This sudden breakthrough by a mass of spearmen now presents a serious threat to the camel train and the rear of the British line.
Desperate times call for desperate measures and the Gardner Gun commander has the crew turn the gun on the spot.
They open fire at close range into the mass of charging Beja.
The bullets strike home killing one of the spearmen and inflicting four points of shock.
British command card (British: 1 Mahdist: 1)
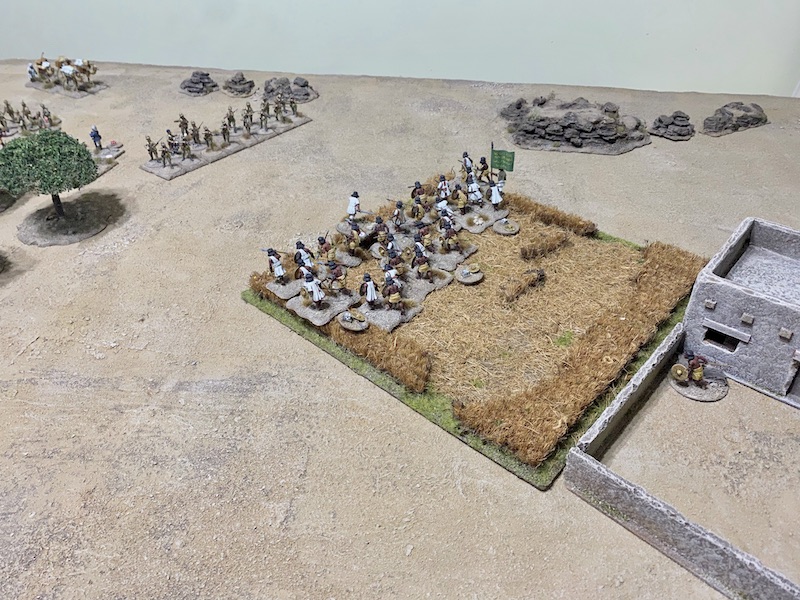
With the British casting one eye over their shoulder now may be the right time for the second Mahdist mob to arrive.
The three groups deploy into the crop field ready to take on the British line. The only consolation is that the Gardner gun is now distracted and facing the opposite direction.
Mahdist command card (British: 1 Mahdist: 2)
The second group of Beja skirmishers deploy onto the roof of the house. They have the Tactical characteristic and use two command cards to perform an ambuscade. Their fowling pieces are not very effective at this range but with the advantage of first fire and with double shock I'm hoping they can rattle the British line.
Their initial round of fire manages to inflict only two points of shock.
Nonetheless they reload and fire again. This time the British lose a man and suffer a further four points of shock.
That leaves the skirmishers unloaded, but at least they have reduced the amount of fire the British can return into the crop field.
The Mahdists have succeeded in dividing their enemy's attention, now they need to press home their charges and assault the British from both directions.
British command card (British: 2 Mahdist: 0)
Tiffin
The small group in extended order move further away from the charging spearmen.
From there they fire into the advancing ranks inflicting a point of shock and a casualty.
A second round of fire inflicts a further point of shock. With dwindling numbers and growing shock the Beja may find they are about to run out of steam.
On the other flank the British line opens fire at the mob in the crop field.
The Mahdists benefit from a small amount of cover and the fire inflicts only two points of shock which reduces their
fervour.
The regulars quickly reload and fire again.
It does no more damage other than to further reduce their fervour.
TURN 9
British command card (British: 1 Mahdist: 0)
The Lieutenant recovers consciousness and gets back to his feet. I suspect it may be some time before he can bring his small command to order, by which time I hope it will be too late to make any difference.
The Gardner Gun commander uses a command card to fire a crashing volley.
Fortunately for the Mahdists before the gun can commit much more carnage it jams. What fire it does manage before jamming kills one of the spearmen and inflicts further shock.
The loss and the growing shock forces the spearmen into an involuntary withdrawal which drags Mahdist force morale down to seven.
The gun crew try to clear the jam but they don't succeed.
As the result of an earlier wound one of the Mahdist junior leaders has had his Status reduced to zero. I make use of a command card so that he can activate the spearmen and have them charge.
There is a chance they won't cover the full distance to the British but as I really want them to avoid taking much more rifle fire they run and incur the additional point of shock. As a general rule I don't think that's an ideal thing to do before heading into fisticuffs however under these circumstances I think it's a small price to pay to ensure they make it into contact.
The spearmen swarm at the British once again and have no problem covering the distance.
Despite having the advantage of attacking a unit in extended order the Mahdists fail to overwhelm the British who suffer three points of shock but in return kill one of the spearmen and inflict two points of shock.
The indecisive result leads to a second round of fisticuffs. This time the British suffer a further two points of shock which forces them to fall back, but the Mahdists are able to follow up and remain in contact. The involuntary withdrawal brings British force morale down to six.
Tiffin
TURN 10
British command card (British: 1 Mahdist: 0)
The commander urges the crew to unjam the Gardner gun. This takes time and they only succeed at the second attempt.
British command card (British: 2 Mahdist: 0)
The time has come for the second Mahdist mob to make its charge from the crop field. If they are lucky they could cross the open ground in one quick sprint. Unfortunately they come very close, but not close enough.
The British Major is able to react immediately. Can he save the day?
First he rallies two points of shock from the men.
He then orders the formation to fire. This is where the disciplined fire of breech loaders could be decisive. The British have two command cards and they will use one for each fire action to make a crashing volley. That will be double shock - not once, but twice! The two volleys in quick succession kill four men and inflicts fourteen points of shock, wiping out all of the Mahdists' fervour.
The activation of the senior commander means any groups still locked in fisticuffs will see their fights continue. The struggle near the camel train goes on and here the British lose another man and suffer more shock, which forces them to fall back. British morale remains steady and even though the Mahdists can follow up their success they find that once again they can't keep in contact with the British.
Tiffin
TURN 11
The Lieutenant continues rallying his men.
British command card (British: 1 Mahdist: 0)
Mahdist command card (British: 1 Mahdist: 1)
British command card (British: 2 Mahdist: 1)
The command cards trigger a random event, a very fortunate one for the Mahdists. A cloud of dust blows up in front of the British line which will partially obscure their aim. From my point of view it couldn't have arrived at a better moment.
Mahdist command card (British: 2 Mahdist: 2)
British command card (British: 3 Mahdist: 2)
However the British are not done yet and Dave uses the three command cards to activate the Major.
The camel train dashes forward.
The Major begins barking orders furiously in all directions. First he directs the remaining men behind him to move to the cover of the rocky outcrops.
Once there they open fire on the pursuing spearmen.
They manage to inflict only a single point of shock. It may not seem like much but that shock is steadily accumulating making it much harder for the Mahdists to chase them.
Next the Major orders the Gardner gun to fire. It's not having a good day and jams again, having no effect on the spearmen. The crew spend their second action trying to unjam the gun, which they do successfully, but will it be too late?
Finally the Major commands the British line to fire a volley through the dust.
With their view obscured the fire is not as effective as it might be and the Mahdists lose only one man and suffer two points of shock.
The British fire a second volley. This one is a little more effective and the spearmen lose another man and suffer a further four points of shock. The British are pouring fire into the ranks of the Beja, slowly reducing their numbers and inflicting shock. It might be just enough to stop them.
The unconscious skirmisher leader remains out of action and doesn't get back to his feet.
The Mahdist force commander activates and uses two command cards for Swift as the Desert Wind.
This gives them a point of fervour and the ability to charge with 3D6 of movement.
They run through the acacia trees at the Gardner gun.
The small group of spearmen are too few to drive off the gun crew who stand by their weapon and fight off the Mahdists. They kill two of them and inflict two points of shock while the spearmen can only kill one of the crew and inflict two points of shock.
In the next round of fisticuffs the Mahdist come off far worse and are forced back with two killed. Despite this their force morale holds steady.
Mahdist command card (British: 0 Mahdist: 1)
The Mahdist leader facing the British line now has his moment. His command has suffered under sustained volley fire but he rallies a point of shock before urging his men to make a final charge.
Despite all the shock they don't have far to go.
All the groups of spearmen cover the distance and slam into the British line where a furious fight begins. In the first round the Mahdists kill four of the British and inflict nine points of shock, in return the British also kill four but inflict only four points of shock
With all the shock the British are forced to fall back, however their force morale remains steady. They only fall back 2" which is enough for the Mahdists to follow up and remain in contact. Another round of fisticuffs will ensue.
The second round is not as deadly as the first, nonetheless the British suffer three more killed and a further four points of shock, while the Mahdists lose two men and suffer another three points of shock.
However the consequences for the British are dire. One of the groups is reduced to two men and with seven points of shock it means they will fall back from the fisticuffs and then break. Their departure will also break the formation and all will combine to further degrade British force morale which is already low. It is difficult to see how they can possibly retrieve the situation from here. At this point Dave accepts the inevitable and concedes defeat.
This was another close game, with the Mahdists snatching victory just as it looked like they might run out of steam. I think what happened here is a very good illustration of why historically the British used the tactics they did during the campaign in Sudan. Their answer to the speed and violence of a Mahdist attack was to remain in very compact formations. While infantry forming square had long been abandoned on the battlefields of Europe in this campaign it made tactical sense. When combined with rapid, disciplined volleys from breech loading rifles the Mahdists found that their main successes came from surprise and not a frontal attack.
The British have the advantage of range and firepower. The Mahdists have numbers and speed backed up with a healthy dose of religiously inspired fervour. Both sides must play to their strengths which is what makes for such a fascinating contest.