When it comes to terrain it seems we can never have enough trees. Nothing brought that home to me more than when I embarked on the
Malaya 1942 campaign for Chain of Command. I needed jungle, a lot of jungle and that meant a lot of trees.
At the time all of my trees were meant for a more European or North American setting and yet there was no reason why those same trees couldn't help populate my jungle tables. Despite setting off on a major
jungle terrain build the European style trees still came in very useful.
If you follow the build for the jungle terrain at the link above you will see that most of the trees were pre-made and sourced through eBay. I made a few modifications to make them work the way I wanted but they were essentially already made for me. On the other hand my northern hemisphere trees were made myself and that's what I want to focus on in this post.
Here you can see a mix of tree types set up for one of the Malaya campaign games.
Here are the northern hemisphere trees in a French setting.
While those trees have served me well they were beginning to suffer from wear and regular use. In particular many had become detached from their bases and most had shed a lot of their foliage.
It was time to make repairs and rethink what to use for foliage. What follows is a sort of double tutorial on how I made the northern hemisphere trees with the main difference being between the two types of foliage. While these were made with 20mm in mind they are versatile enough for 28mm. After all a tall tree to a 20mm chap is a smaller tree for a 28mm man.
These particular trees are all built around the Woodland Scenics armatures which come in a variety of sizes and can be bought from model railway suppliers.
Don't be fooled by their two dimensional appearance when they come out of the packet. The arms of the trees can be bent into different shapes and the trunk can be twisted to create a fully three dimension shape.
Bitter experience has taught me that trees that are not mounted on a sufficiently wide base are not stable when gaming and have a nasty tendency to topple over at the slightest knock, so I base mine on ready-cut MDF coasters from a craft store.
The coasters themselves are a bit too uniform for my liking and so I use my Dremel rotary tool to sand down the edges to give them a less regular shape before adding texture. For these bases I've been using pre-coloured, ready mixed grout (an idea I borrowed from the excellent
Wargaming with Silver Whistle blog, which is full of great terrain ideas). It is easy to apply and not only gives the uneven surface you would achieve using a filler, it has a rough textured finish much like a fine covering of sand.
Once dry they are given a base coat in a dark brown acrylic paint, then finished off with a dry brush in lighter shades.
The trunks and branches are painted before any foliage is applied. I normally use the same brown base colour as the groundwork and then give this a number of dry brushes using various shades of grey. The bases are then flocked.
The foliage will be attached to clumps of rubberised horsehair, a material used in making furniture padding. I don't believe they use actual horsehair any longer, so technically it is rubberised coconut fibre. For our purposes it is the same thing.
You need to be sure you cut out the shapes into rough round clumps and then pull and tease out the fibres to give them a more natural shape. Try to avoid any unnatural looking straight edges or cubes.
The foliage is a two stage process - glue the coconut fibre to the armatures of the tree in random clumps. I use a PVA glue for this. As the fibre has quite a natural colour I have not felt the need to paint it, but there's no reason why you couldn't at this stage. Once the glue is dry then it is time to apply the foliage. While I use a regular PVA glue to stick the coconut fibre to the armatures these glues will dry gloss. That doesn't matter for the first stage as the glue won't be visible, however it's a different matter for the foliage.
My initial foliage for the trees was an excellent looking leaf product from Noch. To avoid the gloss finish of PVA glue I used Woodland Scenics 'Scenic Glue' (S190) as this forms a good bond, but most importantly it dries matt. I applied this with a brush.
The key with tree foliage is to avoid a solid uniform colour and so I mixed up a selection of shades of green.
Finally, to help keep all the leaves in place I applied a generous coating of hair spray. In essence these sprays are a water based varnish and as they are designed to hold human hair in place there's no reason why it won't do the job here. You can pick up a no-name brand very cheaply from your local supermarket (incidentally if you have as little remaining hair as I do then there is no shame buying this yourself, after all, it couldn't possibly be for you).
I've found this an inexpensive way to produce a lot of trees and they have served me well in recent years. Here they are with some 28mm Perry American Riflemen from their AWI range:
Here they are on a table with 20mm miniatures:
So, as we've seen these are now in a need of repair and it seemed timely to reconsider what I use for foliage if the Noch leaves are going to have trouble staying attached.
I had acquired four tubs of Woodland Scenic's 'coarse turf' in several shades of green and had not found a use for them yet. It dawned on me that they might work very well for this project. While the density of the original Noch leaf foliage doesn't look too bad in these pictures the trees have taken on quite a sparse appearance to the naked eye and fail to make much impact on the table.

As with the leaf foliage used earlier I wanted to make sure that the tree colour didn't look too uniform and unnatural. I chose to work from a base of medium green coarse turf and become progressively lighter as I worked towards the top and outer beaches. Instead of brushing on scenic glue, this time I sprayed Woodland Scenics scenic cement. There's quite a big difference between 'scenic glue' and 'scenic cement' with the latter a much thinner liquid ideal for spraying. Although to be honest I don't think the Woodland Scenics sprayer is the best. In future I will look for something that can apply the glue in a finer mist, but for now it does the job.
With the glue sprayed on and still wet I applied the first layer of flock. While this gave good coverage, as expected the colour was very uniform (in these pictures it looks quite bright on the trees but to the naked eye it actually looks more like the colour as you see it in the container).
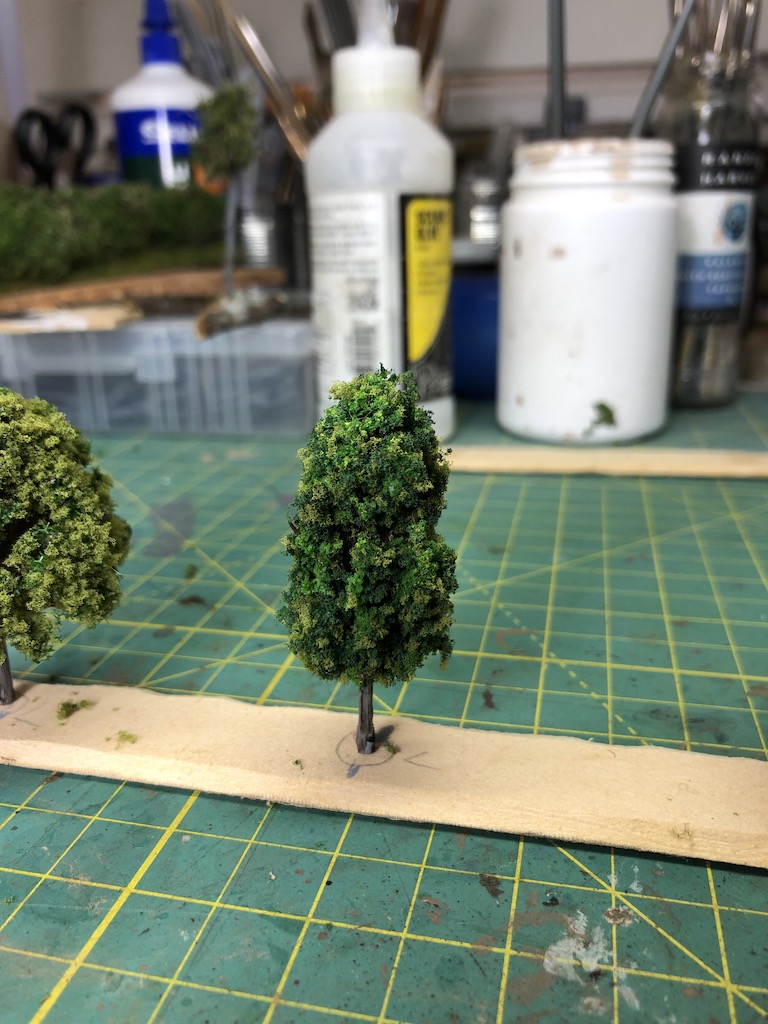
Once the glue had dried I repeated the process, but this time with light green coarse turf and only trying to apply it to the outer and top sections of each tree.
This worked well and broke up the colour nicely giving a more natural look. In some cases this was followed with a gentle dry brush of yellow-green paint over the top-most foliage and some of the outer leaves.
I then wanted to work on the bases and the first job was to put down a layer of flock.
When I was doing the jungle terrain build I found that using dried herbs helped create the look of fallen leaves and other natural debris, so I decided to repeat the process here but a little more sparingly than I had done with the jungle. Again, to break up the colours I mixed different herbs together.
Using a brush scenic cement was applied randomly to the base and the dried herbs sprinkled over it.
Lastly the whole tree and base were given a spray of scenic cement to help lock everything in place.
I'm pleased with the way the course turf has worked as foliage and equally pleased to have found a use for it. With several tree armatures, a quantity of rubberised fibre and some coarse turf left over I'm thinking my next terrain project might involve creating some unkempt hedgerows that could also work as bocage.
If you've found this post useful and would like to
Buy Me a Coffee to help cover some of the costs of running the blog you can click through at the link or on the tab in the right hand column of this page.