The Japanese have successfully pushed the Australians back to the final map in the campaign and yet, with victory so close, they were to find themselves repulsed at their first attempt to take it in the
previous game. With that went their chance of a campaign victory. If the Australians can hold the Japanese off for another two games this will award them a major victory and put a significant delay on the drive towards Singapore.
To make matters worse the Japanese found themselves driven back by a scratch platoon of rear echelon men, who nonetheless put up a very determined fight. The initial assault down the main road was led by a platoon of Ha Go tanks and while they found the going good, the infantry struggled to cross the exposed open ground into the village and suffered heavily.
For the next scenario I have the choice to attack down the road again or try an alternative approach into the village. I have opted to choose the latter. The terrain means I will be without armour support but benefit from a more covered avenue of attack for my infantry.
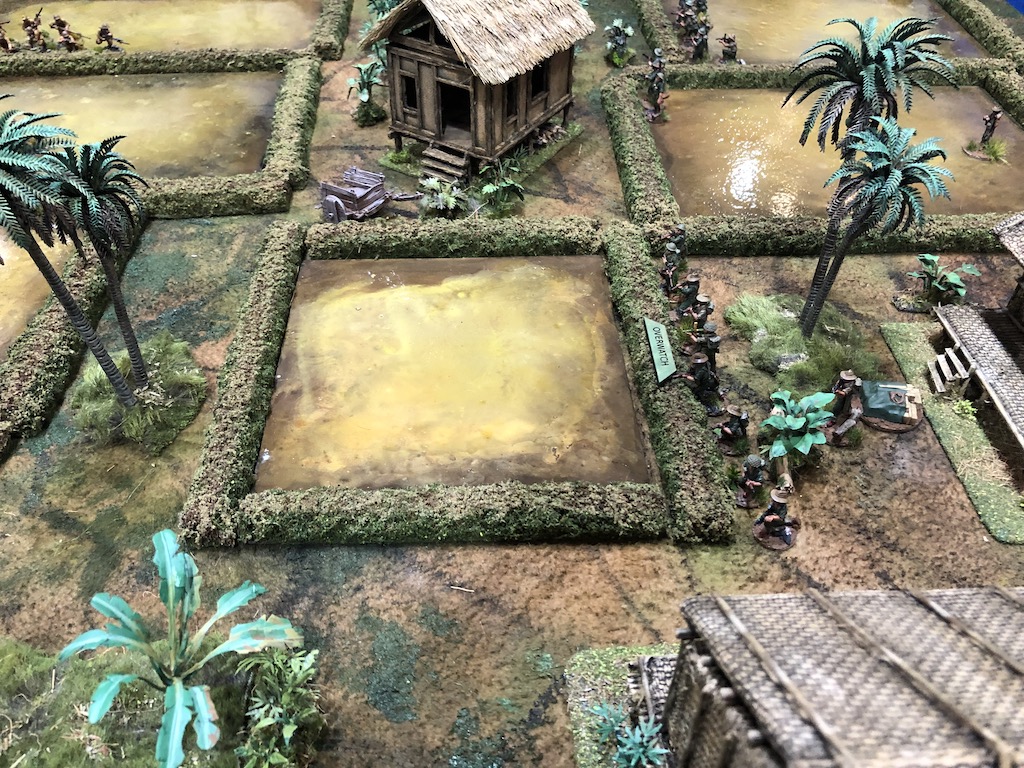
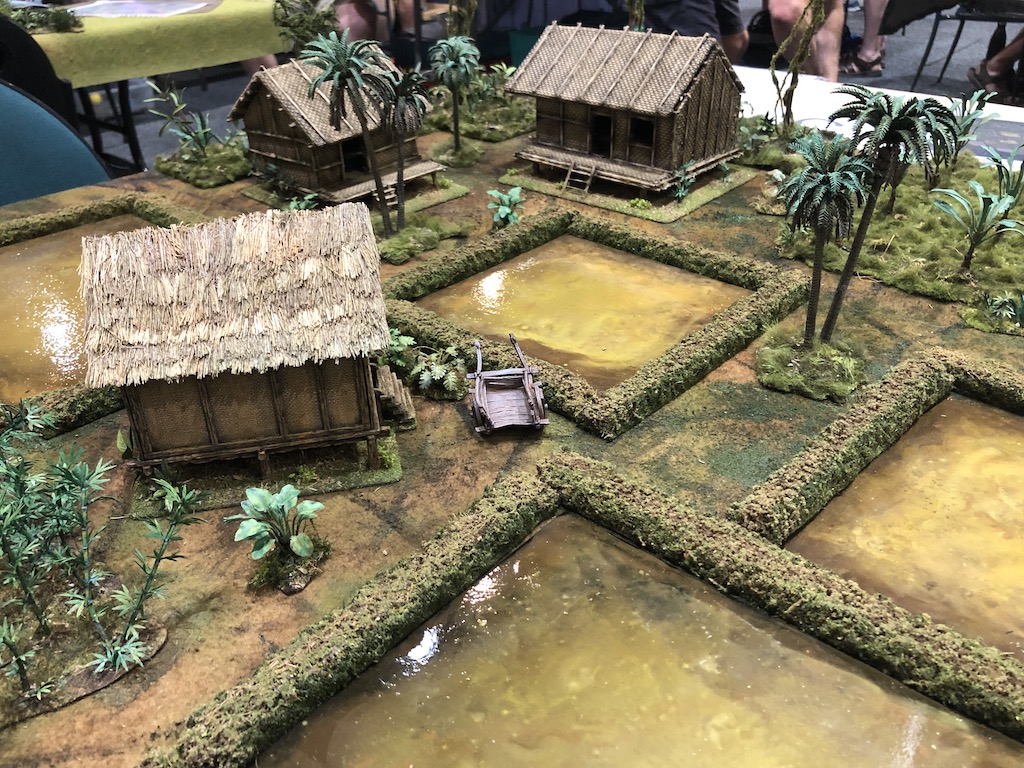
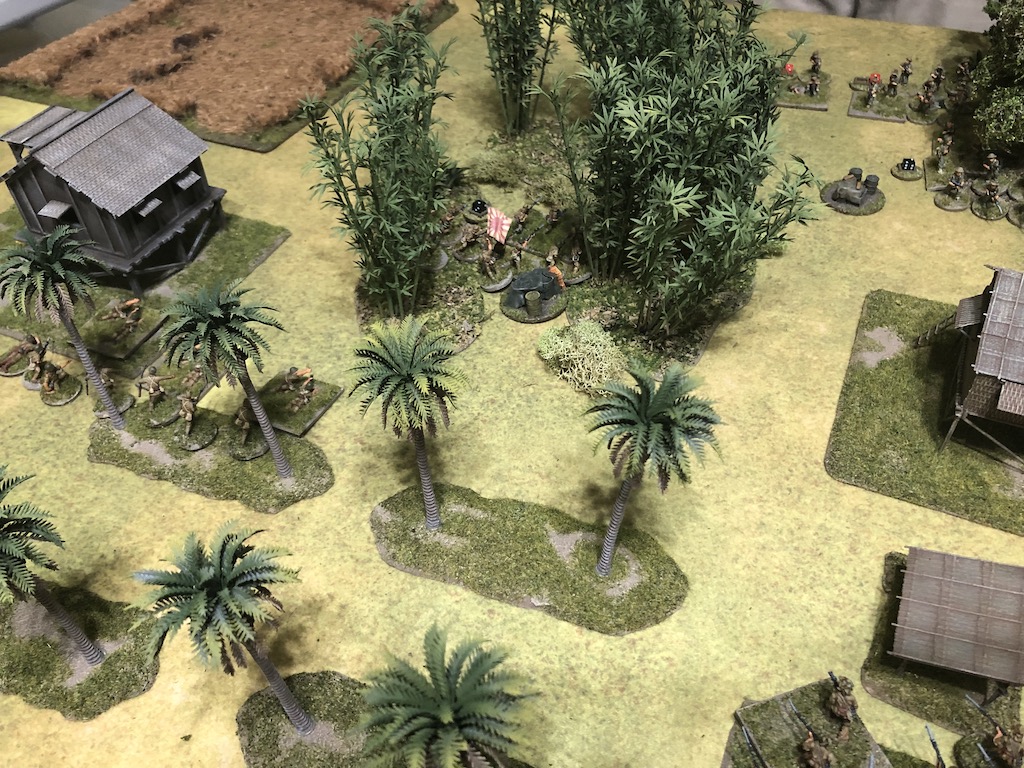
The new map will see the Japanese emerge from the jungle and traverse the agricultural land outside the village. This offers more cover and the opportunity to try to secure the protection of the paddy field banks as a base for the attack. Here the village huts are divided by a rubber plantation and a patch of wild bamboo and the terrain offers more covered approaches. While the surrounding jungle won't allow me to bring any armour to the battle I feel more confident that I can fight my way into the village via this route.
The Japanese start with a strong force morale of eleven, while the green Australian platoon will be at eight. My plan is to push aggressively as usual. Time is of the essence, as I fully expect the Australians to be calling on a mortar barrage. That means I need to try to close the distance as fast as possible and get in close with the Australian sections. For the patrol phase I will aim to try and locate my jump off points as close to the paddy fields near the village as I can.
The Japanese roll for two free moves at the start of the patrol phase, which goes well, and I am able to place my jump off points very close to where I had hoped. I spread them across the table to ensure I have options to push from either flank. The Australians on the other hand opt for a slightly rearward defence and concentrate around the objective point.

The support roll is eight. The Japanese have an additional two points thanks to the CO's opinion and that takes them up to ten. This gives the Australians four, to which they can add seven for the difference in force rating, taking them to eleven.
For Japanese support I select a pre-game barrage to try to hinder and slow Australian deployment. Thinking along similar lines I select a Ruse. If I can bring a jump off point that much closer in a surprise move I may be able to get units almost on top of the Australians before they have time to call in a barrage. While these first two supports will hopefully slow the Australians and speed my advance, I add a 70mm infantry gun and a flamethrower team to provide the additional firepower I might need to dislodge any determined resistance.
With that done we start the game. The first Japanese squad deploys on their right flank and takes up overwatch positions in one of the paddy fields.
Meanwhile, over on their left flank, the Japanese deploy the grenade discharger squad, who also take advantage of the cover offered by the paddy field bank.
The Australian opening phase provides three CoC points, but not many activation options. Their one attempt to deploy is stymied by the pregame barrage and so no Australians appear in the village.
The Japanese then roll a double phase and while this would normally be an absolute gift for the attacker given such an empty table, the roll of 66544 is less than ideal. There is no point in deploying the Rikugun now, as it would only make any future deployment more risky.
The subsequent roll in the next phase opens up many more possibilities with a 64333. This strikes me as a very timely opportunity to work to my plan and press forward hard, setting an aggressive pace. The pregame barrage has done its work and I need to try to close in before the Australians can deploy in numbers. I decide this is the moment to use the Ruse.
I select the JoP on my right flank where it can move the full 18" without coming within 12" of an Australian JoP or unit.
This brings the Japanese jump off point very close to two of the Australian jump off points, including the victory objective for the scenario.
From that point I deploy a squad the maximum 9" permitted for the Japanese and place them on overwatch, and as they are now within 4" of the nearest Australian jump off point they close it down.
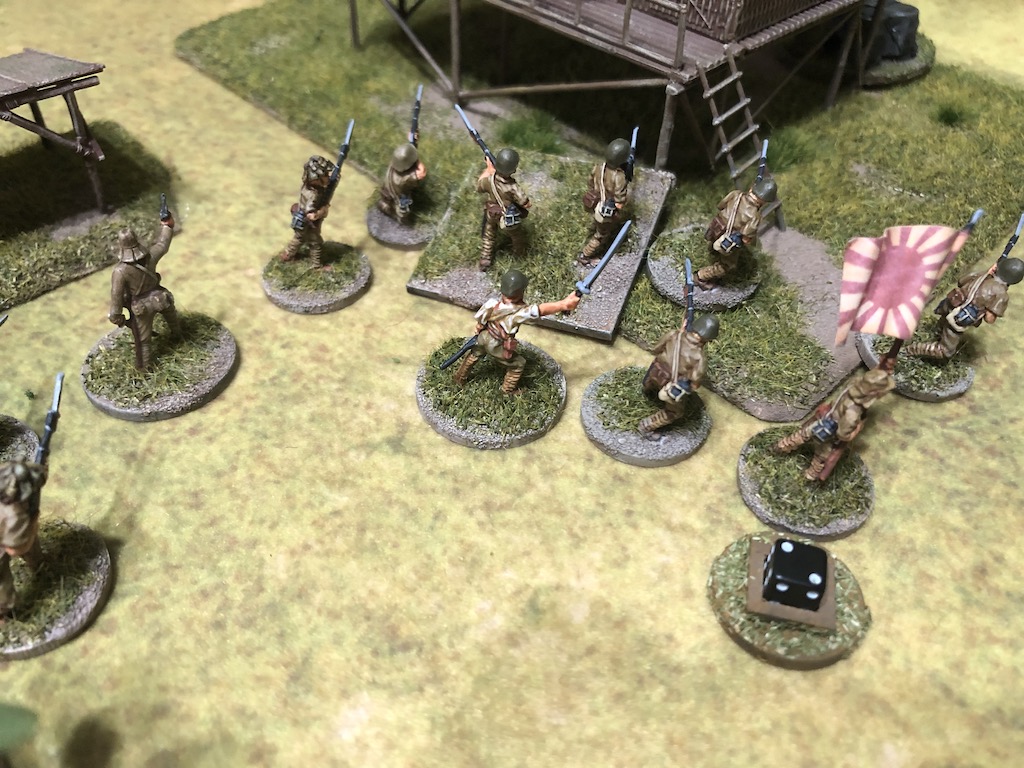
A second Japanese squad deploys to the left of the first squad and on the edge of the village huts. They also take up overwatch positions.
This now puts two Japanese squads in very close proximity to the objective point and we have yet to see an Australian in the village.
The squads are joined by the Gunso, who deploys into the banana grove within command range of both units. He will ensure I have a good range of command options to cover what may unfold, as I have no doubt that the Australians will want to make an aggressive response to this threat.
The Australian command roll of 65222 sets up the option to bring in a number of sections to deal with the Japanese. In previous games Dave has tried to deploy in force and preferably within range of his Thompson SMGs and from there to dish out as much firepower as possible. It has been a very effective tactic and this command roll gives him the potential to do this. There is however the matter of the pre-game barrage and this causes him considerable difficulties. The first two attempts to deploy are unsuccessful and so much now hangs on the attempt by his third section. To Dave's relief they make it through and deploy into the jungle by the objective point. They immediately open fire at the nearest Japanese squad.

The Japanese are caught in the open and the fire is devastatingly effective. The squad takes five casualties, including the Corporal who is left stunned. Japanese force morale remains unchanged, but that was quite a blow for the squad. Despite this setback they were on overwatch and so return the fire. Unlike the Australians though, this is totally ineffective.
In the following Japanese phase the squad moves tactically towards the protection of the hut, but only manages to move 1", nonetheless it puts the majority of the unit in better cover. The squad will need this if the Australians are to repeat that last round of fire, otherwise they won't be around for much longer.
The Japanese need to deal with the Australians in the jungle and so deploy the 70mm infantry gun on the right flank in the banana grove. Unfortunately the first round is totally ineffective, failing to score a single hit.
The flamethrower team was selected as a means of breaking the deadlock should I come across a particularly stubborn Australian defence. This may be premature, but I want to keep up the momentum of my advance and now seems a good as time as any. It deploys right into the front line to engage the Australian section.
While it only inflicts a single casualty on the rifle team, the experience is alarming and both Australian teams suffer four points of shock.
With the entire Japanese platoon and all the supports engaged, the Rikugun is free to deploy and joins the units on the right flank. His first command is to order the squad in the paddy field to advance into the banana grove.
This puts the weight of the Japanese attack heavily on their right. There is an element of risk in doing this, as a mortar barrage could quite easily close down this whole flank. However, there is no sign of a forward observer just yet and with any luck the pre-game barrage may hamper any attempt by him to deploy. For now I will have to take the risk.
In the next Australian phase, just as I feared, a forward observer team tries to deploy, but once again the pre-game barrage hinders Australian plans. However the platoon sergeant has less trouble and joins the section on the edge of the jungle. He immediately rallies off some of the shock inflicted by the flamethrower attack and with that done he orders the section to return fire.

At this moment we realise the Australians can concentrate all their fire on the flamethrower team as the attached squad is in better cover. This means the three man team, caught in open ground, is in real danger, and so it proves. All three men are killed and the team is wiped out, which knocks Japanese morale down two points to nine. A very satisfying result for the Australians and it takes the number of Japanese casualties so far to eight, for the loss of only a single Australian. The Japanese might be making a lot of ground, but they are taking significantly more losses than the Australians. Things were looking very good for the Japanese for a while there and this has been quite a setback.
The Japanese attack may have been temporarily stalled, but we still outnumber the Australians and are very close to a number of their jump off points. In the following Japanese phase the 70mm gun fires into the jungle, but once again the fire has no effect. So far the gun has been disappointing and failed to provide the additional support for which it was intended.
No matter, I need to seize the initiative back and so the Gunso orders one of the squads to advance into the rubber plantation towards the two Australian JoPs in that vicinity. They move quickly and manage to come close enough to shut both of these down. This will restrict future Australian deployment to a single jump off point.
Meanwhile the Japanese squad that has taken all the casualties returns fire at the Australians in the jungle, but only manages to inflict a couple of points of shock.
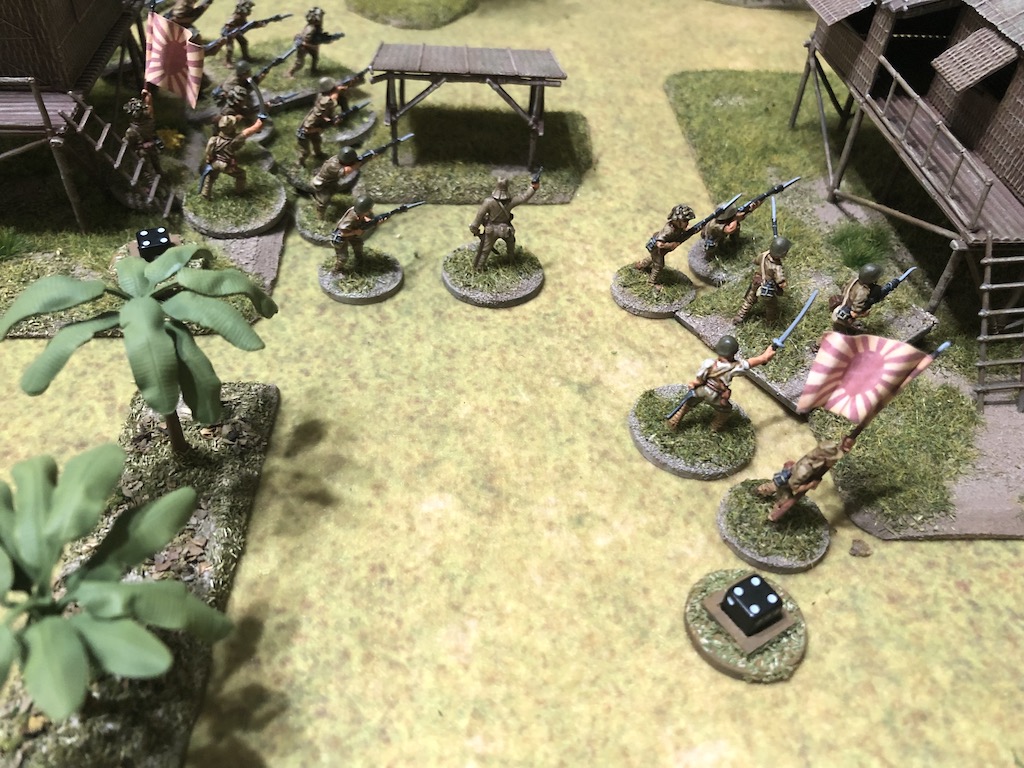
The Rikugun orders the rearmost Japanese squad to move up to the huts, which they do at a brisk pace and he then moves forward himself to be within command range of the two squads and the infantry gun.
The Japanese are still in a strong position. The most advanced squad has closed down the Australian JoPs in the rubber plantation and the bamboo, while a full squad has filled their place at the huts and is able to support the weakened squad facing the Australians.
On the left flank the grenade discharger squad joins the general advance and moves across the paddy field.
The Australians are now tied to a single jump off point with many of their units still to deploy. While the Japanese have taken some losses they can advance on both flanks and put a lot of pressure on the objective point.
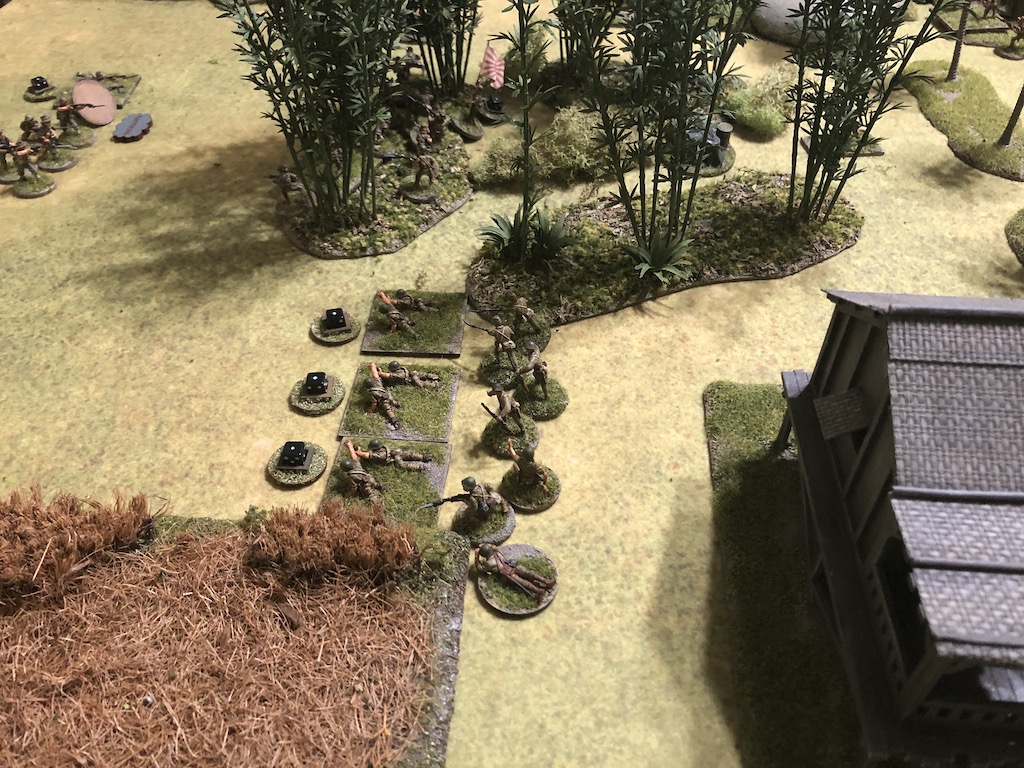
 |
| Australian JoPs in red are closed down |
While the Australians may be restricted to the objective jump off point, that is the one spot they are currently defending and enjoying the hard cover provided by the jungle. I've no doubt they will prove tough to dislodge.
The next Australian phase sees them acquire enough CoC points for a full CoC die. While that is always useful, at this moment having units deploy is probably their most pressing need. The forward observer fails to make his way through the pregame barrage, as does a sniper. To Dave's obvious relief another section is able to deploy, however the 4" deployment restriction of the green platoon and the single jump off point severely restricts their options. They manage to find some cover in the bamboo and open fire on the squads around the village huts.
Yet another man is lost from the weakened Japanese squad and they take more shock.
In the Japanese phase the Rikugun orders the 70mm gun to continue firing into the jungle, but once again the fire is ineffective.
He then orders the two squads at the huts to open fire on the newly deployed Australians in the bamboo. Despite taking fifteen hits they lose one casualty and suffer two points of shock. They may be a green platoon, but once again the Australians are proving to be a tough bunch. Meanwhile on the Japanese left the grenade discharger squad continues to press forward towards the bamboo.
The Australians in the bamboo need to be careful they are not attacked from the rear by the Japanese in the rubber plantation. It's not possible for the Japanese to do it in a single move and so the Japanese wheel around to face the bamboo. In so doing they capture one of the Australian jump off points (this won't be lost until the turn ends, so there is no roll for force morale at this point in time).
The Japanese squad is now well positioned to advance into the bamboo and attack the Australians from the rear. In so doing they will also capture yet another jump off point.
At the start of the next Australian phase Dave uses his CoC die to end the turn. That sees the end of the Japanese pregame barrage and will free up his deployment. The pregame barrage has been very useful and I am sad to see it go, but on the positive side I do see the stunned squad corporal get back to his feet, where he is much needed.
The turn end also means the removal of the recently captured jump off point and that sees Australian morale drop down to seven.
It is clear the Australians in the bamboo are in some danger and so the corporal removes a point of shock before ordering the section to fall back slowly while firing at half effect at the squads around the huts. The full strength squad takes a point of shock while the weakened squad loses yet another man.
That movement has the Australians lined along the edge of the bamboo, but most importantly, facing the Japanese squad that was approaching them from the rear.
With the pregame barrage out of the way the Australian FO makes his inevitable appearance. Have the Japanese closed in enough to make the barrage too difficult to bring down? We will have to see.
Meanwhile on the edge of the jungle the platoon sergeant rallies off some of the shock and then orders the section to continue firing into the huts. Both Japanese squads take one casualty and one point of shock. The Australians are slowly but surely chipping away at Japanese strength and they have been effective at bringing the advance on the Japanese right flank to a complete standstill.
The Japanese misery continues when a Vickers MMG team deploys into the open ground between the bamboo and the jungle and opens fire at the squads in the village huts.
The Japanese see another three men hit and this includes the Gunso, who is wounded and stunned. This is a blow to Japanese morale which falls two points down to seven.
Just at the moment I need all my Japanese to return fire my command roll is 65551. As always, CoC points are useful, but right now I could do with activations. The 70mm gun changes targets to the Vickers team and this time the fire is much more effective, killing two of the crew.
Dave senses this could be a moment for him and casually jokes ‘this roll could decide the game’. I then watch on in horror as he rolls a double phase (66441). He may well be right!
With the luxury of a double phase the platoon sergeant orders the FO to put down a ranging shot. In previous games, with pressure on the Australians, he has often risked calling down the barrage without first trying to correct it on to the target. While that risk has paid off for him in the past, in this instance our units are so close together there is a very real chance that if it is off target it could come down on top of him. The double phase has meant he can avoid that and is it transpires the ranging shot is only slightly off target.
The current position of the ranging shot would put the full barrage quite close to the Australians, but not close enough for my liking.
The sergeant then orders the Vickers team and the section to fire.
The larger Japanese squad loses a man and the weakened squad takes three points of shock. Only the presence of the Gunso saves them from pinning.
In the following phase the Australians finally deploy their sniper. He has a golden opportunity to try to take out the Rikugun who is isolated in the banana grove.
There is a tense moment when the sniper scores a hit on the Rikugun, but a roll of 1 on the hit table sees him escape unscathed. That was lucky.
Sensing the Australians in the bamboo are in danger of coming under the mortar barrage the sergeant orders them to fall back to join the Vickers team.
The Vickers team then fire at the Japanese at the huts.
It only results in one point of shock on each squad, but that's enough to pin the weakened squad.
Then, as the last act of the phase, it's no surprise to see the FO call down the mortar barrage. This does not bode well for the Japanese attack as nearly all of the squads will be trapped under the barrage. It looks like my risk hasn't paid off.
The larger squad at the huts takes two casualties and the squad in the rubber plantation loses a man and suffers a point of shock. The barrage has fallen perilously close to the Australians in the jungle, but they are just out of harm's way. Danger close.
This looks like the Japanese assault has been stopped in its tracks. The only glimmer of hope comes with the next Japanese command roll where a roll of 5 provides a critical CoC point that gives them a full CoC die. The Australians don't have a CoC die and so I have a chance to end the turn and see the barrage lift prematurely. I spend the remainder of the phase having the leaders rally off what shock they can so that the pinned squad will be able to rally at turn end.
With that done the turn ends and so does the barrage. The Gunso gets to his feet and the squad is no longer pinned.
While the barrage can't be activated all the Japanese are still obscured by smoke, so no firing will be possible for the next phase while there are no lines of sight. The critical thing will be for the forward observer to see if he can request another fire mission from the battery, an awful lot will hinge on the outcome. To my great relief the request is unsuccessful and the FO learns that the battery is no longer available to provide any further support. That comes as a real blow to the Australians.
The platoon 2” mortar deploys in the jungle and fires smoke at the 70mm gun, but the round drops short.
A third Australian section now deploys. However this is not quite as straightforward as it might seem, as the green troops have a short 4" deployment range and must do so from the single remaining jump off point. This puts all the Australians in a very confined area, if only I had a mortar barrage to call upon! Nonetheless, they are there, and they are all defending the objective point.
The end of the phase sees all the smoke from the barrage removed and we return to business as usual.
At the start of the Japanese phase the corporal from the weakened squad rallies off more shock.
They could be facing a lot more Australian fire and so need to get themselves into some sort of shape for the coming firefight.
The Rikugun orders the 70mm infantry gun to continue firing at the Vickers team and attached sections and the end result is that one of the Bren team is killed.
The Rikugun then orders the weakened squad to fire at the same groups of Australians. The fire is effective and the Vickers crew lose another member, as does the section's Bren team. Casualties are slowly accumulating for the Australians.
Having issued his orders the Rikugun then moves off towards the squad by the hut, as he does so one of the Australian sections on overwatch opens fire, but the Rikugun manages to come away unscathed.
Meanwhile the Gunso rallies a point of shock off the larger of the two Japanese sections and then orders them to fire at the Australians in the open.
This time the Australians take three casualties, including the section corporal who is wounded and stunned. Australian morale falls to six.
While the Australians seem to have blunted the Japanese advance and have kept the two squads in the village huts from making any progress, events have degenerated into a protracted firefight that has caused casualties on both sides. At this rate it can't continue for too much longer before one side gives way. I need to make the most of my two squads on the Japanese left and manoeuvre them into the firefight. With some Australian units out in the open and green, there are potentially some good targets if I can only bring down enough fire to bear.
I push the squad in the rubber plantation into the bamboo. They are still out of line of sight, but they overrun another of the Australian jump off points as they advance.
The grenade discharger squad also push forward, working their way around the patch of bamboo.
The Australians elect to continue the firefight in their phase. The section in the jungle fires into the huts, but only manages to inflict a single point of shock.
While the 70mm gun hasn't caused a lot of damage it still represents quite a threat and so the platoon 2” mortar fires a round of smoke that manages to land on target and blind the gun crew.
The platoon lieutenant deploys and orders the nearest section to work its way through the jungle to join the other section at the tree line.
They manage to do that quickly and immediately present a tough firing line along the edge of the jungle. Despite being green they are now in hard cover and between the two sections they can generate a lot of firepower.
The Vickers team move back into the cover of the jungle and the section in the open falls back, moving tactically.
In the Japanese phase the Rikugun tries to generate some action to break the deadlock. He rallies off a point of shock and orders the nearest squad to fire at the Australians in the open. However before they can fire Dave uses a CoC die to interrupt and the 2" mortar fires off a round of smoke.
The round lands right on target and the Japanese are unable to see their target.
Finally I decide the Rikugun would be better placed directing the squad in the bamboo and so he heads off in that direction, but makes slow progress. While he does that the 70mm gun team wheel their weapon to their left and try to find a line of sight not blocked by smoke.
The Australian sniper is determined to try to kill the Rikugun and he fires in his direction once again and while it misses the platoon leader is does inflict shock on the attached squad.
The 2” mortar continues to track the 70mm gun and manages to screen it off with another well placed smoke round. Meanwhile the corporal in one of the sections in the jungle transfers one of the riflemen to the bren team and then orders the whole section to fire, but it has no effect.
The lieutenant can anticipate the arrival of the Japanese on the edge of the bamboo and so puts the Vickers team on overwatch. He then takes a point of shock off the nearest section and orders it to fire, but it has no effect.
The Japanese now roll a double phase and with it an opportunity to shift the emphasis of the attack that will try to break the deadlock. The Rikugun finally manages to move quickly through the plantation and up to the bamboo from where he can command both the grenade discharger squad and the rifle squad.
He barks an order to the squad in the bamboo and they make their way to edge of the bamboo patch from where they can see the Australians.
As they arrive at the edge of the bamboo the Vickers, which is on overwatch, opens fire and immediately hits two of the squad and inflicts a point of shock.
The Rikugun continues to ramp up the pressure when he orders the grenade discharger squad to work their way forward around the left of the bamboo from where they can see the Australian section in the open.
The command roll of 55531 for the next Japanese phase is not the best, but it is enough to activate the Rikugun. He orders the grenade dischargers to use their rifles and join the squad in the bamboo firing at the Australians caught in the open. The Australians are in a bad spot and things only get much worse. The Bren team suffers six points of shock, while the rifle team has a man killed and accumulates another three points of shock. With total shock of thirteen points across both teams, this is enough to pin the section and bring them very close to breaking.
In the Australian phase the sniper takes a shot at the squad accompanying the Gunso, he misses the Gunso, but causes two points of shock, which is enough to pin the squad.
Both the lieutenant and sergeant spend the phase trying to reduce shock on the Australian units and then order the Vickers to fire into the bamboo. The Japanese squad corporal is the only man hit, but this kills him and inflicts two points of shock on the squad. That's quite a blow to Japanese morale which drops two points to five.
Both Australian sections at the jungle tree line open fire at the huts. With one squad pinned and in light cover, all the fire can be targeted at the more exposed, larger squad. A lot of fire comes their way, hitting three men and adding four points of shock, enough to pin them.
For several phases the Australians have brought the Japanese right flank to a complete standstill and inflicted many casualties along the way. With Japanese morale at five things could go down hill quickly if any of these squads break or are wiped out.
On the opposite flank the 2” mortar tries to provide some protection for the section in the open by firing smoke towards the grenade discharger squad, but it drifts harmlessly into some crops.
The game takes a dramatic turn with another Japanese double phase. This should be an opportunity to eliminate the Australians in the open and turn attention to the remainder in the jungle. The Rikugun's first commands are to have the two squads on the Japanese left open fire at the section in the open.

With green troops caught in the open there are nineteen hits. That sees the entire rifle team lost as casualties and wiped out. The stunned corporal takes a second wound, this times he is lightly wounded. The Bren team accumulates enough shock to break and routs off the table, and by doing so they take the attached wounded corporal with them. Altogether that's a lot of rolls on the FM table and sees Australian morale dive from six down to one. As we are playing for the campaign, Dave tells me he's fighting this one out to the bitter end and he has no desire to throw in the towel no matter how grim things may appear. After all, Japanese morale is not so great itself and a swing of fortune could change things quickly.
On the Japanese right the Gunso spends the phase rallying off some of the shock. While the 70mm crew exhaust themselves moving the gun yet again, trying to find a line of sight away from the smoke.
In the following Japanese phase the Rikugun rallies off shock from the squad in the bamboo and orders them to fire at the Vickers crew.
With so many Australians grouped in a small area the shots hit some of the other teams, killing another one of the Bren team and inflicting shock on the 2" mortar.
The grenade discharger squad needs to move in order to have a line of sight to the jungle, but I don't want to leave them exposed in open ground and so they move into the field of crops, but the move is slow and leaves them behind the smoke (no pictures I'm afraid).
On the other flank the squad corporal spends the phase rallying shock off the squad.
With only two command dice to roll the next Australian command phase sees two 6s. Not the time for a double phase, but at least the chance to roll again.
The next roll is little better, with a 6 and a 1. The sniper takes another shot at the squad with the Gunso. The Gunso isn't hit, but a crew member from the LMG team is killed. That squad has now lost ten men.
The following Japanese phase sees the 70mm gun return to targeting the Australians in the jungle, but as has happened so often, the fire has no effect. At the same time the corporals with the squads by the huts continue to try to bring down the shock on their respective squads.
On the opposite flank the grenade discharger squad moves through the crops until it has a good line of sight across the open ground to the jungle.
In the bamboo the Rikugun rallies off some shock and orders the squad to fire into the jungle. The Australians take a casualty in one of the rifle teams.
The next Australian phase is enough to activate one of the Australian sections who pour fire into the bamboo. Only one man is hit, but it's the Rikugun who is wounded and stunned causing Japanese morale to drop down to four. In addition the squad takes six points of shock. The Australians may be on the back foot but they are still dishing out some punishment and this game is coming down to the wire.
That said, it seems to be the Japanese day, as they roll another double phase, despite the fact they are now down to four command dice. The roll of 6652 means that only the grenade discharger squad is activated and they all fire HE rounds into the jungle. The fire is not particularly effective, but it does result in additional shock on the Australians.
The next Japanese phase offers a lot more options. The 70mm gun continues to fire optimistically into the jungle and this time is rewarded with a casualty in one of the Bren teams.
Once again the grenade discharger squad fire HE into the jungle. This time every single round hits their target.
The final crew member of the Vickers team is killed, leaving the gun manned solely by the junior leader. More significantly one of the 2" mortar crew is killed and a further point of shock breaks the surviving team member. That's enough to take the final point off Australian morale and bring it down to zero, handing the Japanese a scenario victory.
Well, that came very close and was a hard fought victory for the Japanese. The Australians bring credit to themselves once again for a very determined defence.
The victory doesn't change the overall outcome of the campaign, which is a minor Australian victory and an historical one. For a more significant victory the Australians needed to win not only this game but also the following one. Given the casualty rates experienced today that would have left the Australian platoon in pretty bad shape to face what would have been a fresh Japanese platoon had we gone to another game.
Casualties were very high all round, with the Japanese losing twenty men from the platoon plus three men from the flamethrower support team. The Australians took twenty casualties from their platoon as well. Quite a bloody ending to this campaign, but one well fought by the Australians who had to carefully harbour their resources across nine scenarios. I think we were both surprised at the excellent fight put up by the Australian rear echelon men, who repulsed the Japanese in their first encounter and gave them a very bloody nose in this, their last encounter.
A fitting end to another excellent pint sized campaign. Credit to Len Tracey for writing the campaign, it certainly delivered a great gaming experience. This was our first time playing with the Japanese and in the Far East theatre and so we've written a
postscript and some afterthoughts as we reflect upon what we've learned.
If you've found this post useful and would like to
Buy Me a Coffee to help cover some of the costs of running the blog you can click through at the link or on the tab in the right hand column of this page.
You can read all the AARs for Malaya 1942 and other pint sized campaign on the
Campaign AARs page.