Ten years ago my return to miniature gaming was inspired by the Crossfire rules. It was pure serendipity. My youngest son, who was then about eight years old, had a lot of pirate figures and I was looking online for a set of simple skirmish rules that might enable us to game together. I have no idea how I was taken off on a tangent, but somehow, I ended up reading about Crossfire. No structured turns, no measurements? That grabbed my interest and the rest, as they say, is history.
Crossfire appeared to be played mainly in 20mm, which suited me fine. In my teens it was the scale I had always used, in fact, it was the only scale at that time! Enthusiastically, I invested in box sets of Germans and Russians from the Plastic Soldier Company and set about amassing what I would need to stage games on the Eastern Front. Crossfire seemed to lend itself very well to urban fighting and I hastily constructed urban ruins, scratch building them from foamcore.
This hive of activity was all well and good, but there was one issue. I didn't have an opponent and not much idea where I might find one. At the time I was part of a very active group of historical board gamers, with a strong focus on the Second World War. While many of them had the right combination of interests - history and gaming - few expressed much enthusiasm for using miniatures. Nonetheless I persevered, working on the rather optimistic assumption that if you build it, they will come. It turns out that optimism wasn't misplaced and slowly I found opponents.
While it was Crossfire that brought me back to miniature gaming, it was the discovery of Chain of Command that really ignited my interest. Crossfire soon took a back seat and it wasn't long before I started rebasing individually many of the multi-based figure stands I had originally collected.
That said, I wasn't ready to let go of Crossfire entirely and kept enough multi-based figures to make up a company of British, Germans and Russians. However, over time that part of the collection drifted deeper and deeper into storage and there were times when I wondered if it was worth hanging on to them.
When I put together a 12mm collection for the Second World War with the intention of using it for the rules for O Group and I Ain't Been Shot Mum, I deliberately came up with a basing style that would mean the collection would also work for Crossfire. I started using those figures to run a few Crossfire games at a local historical miniatures club and they went well, reawakening the interest in some and making a good impression on those that hadn't tried it before.
So, to cut a long story short, there's a renewed interest at the club in playing Crossfire. While some had flirted with the idea of 12mm the consensus seems to be it should be 20mm. Well, that's a scale that suits me just fine.
I dug out the figures I had in storage. They looked rather sad. My painting style has not only improved, it's changed. Originally I'd been using Army Painter dip and that's a technique I no longer use. Despite that the figures didn't look that bad. The bases were a different matter and I was happy to lose them. I'd used 3mm MDF which I feel is too thick for 20mm figures and the ground work was nothing to get excited about.
There was a feeling at the club that round bases were more aesthetically pleasing than square ones and having seen a force of American figures based that way I was convinced that was a path to follow.
I decided to rebase all of mine and give them a refresh at the same time. That led me to thinking about how I wanted to do that. I've always liked how well Crossifre works in an urban setting and so I decided to make that the focus of this project. That led me to think about my urban terrain. I have quite a lot of it.
While much of it was made with Crossfire in mind it's versatile enough that I often use it for Chain of Command. With the prospect of it now getting even more use I thought it was long overdue a refresh. What had started as a modest little project was starting to grow. Yet unlike most new projects this one would require no new figures or terrain, putting no pressure on my wallet or storage space. I was getting to like the idea more and more.

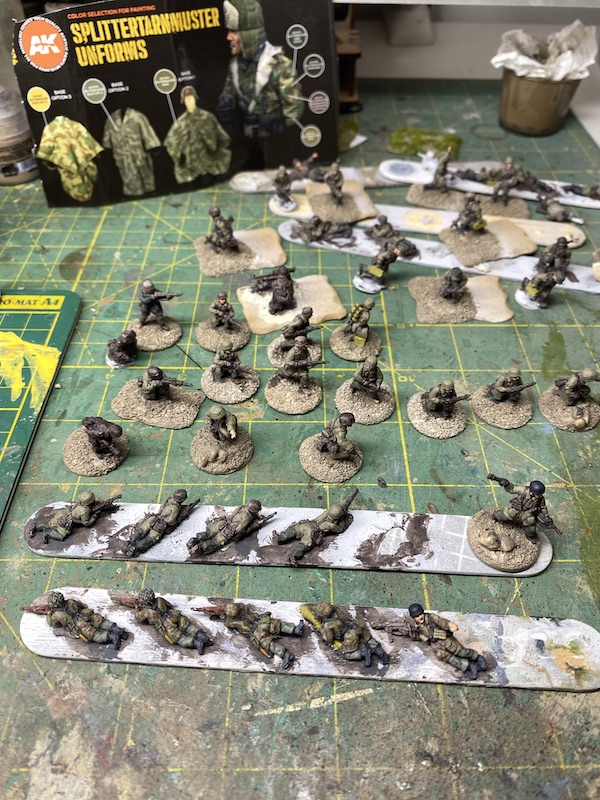
I would rebase my Germans and Russians, but put the emphasis on a look that reflected the terrain in which the figures would be used. I'd already given a bit of thought to a few straightforward ways I could refresh the terrain - I wanted to add a little bit more rubble and retouch the paint scheme. I would use the same colour palette for the figure basing to tie everything together. I've seen pictures of great urban tables for Crossfire but always thought it looked odd that all the figures were based for more rural terrain. The vibrant green grass bases looked at odds with the muted tones of the urban wasteland. I wanted to go down a different path and if occasionally the stands are used to fight out of urban situations I'll just have to live with the anomaly.
The Germans were the first to be rebased. There is no fixed basing convention for Crossfire, the rules are flexible as long as all squads are on stands the same size. Rather than the 40mm squares I had originally used I went with 40mm MDF rounds in a thickness of only 1.8mm. In Crossfire a single stand represents a squad and in most cases three squads will make a platoon. Each platoon commander is represented with a single figure and these I've mounted on a smaller 25mm round base. Three platoons make up a company, all under the command of the company commander mounted on a squad sized stand.
Here and there I retouched the painting on a few figures if I really didn't like it, but overall the combination of new basing and grouping the figures together on a base does much to draw the eye away from individuals and more toward the unit as a whole.
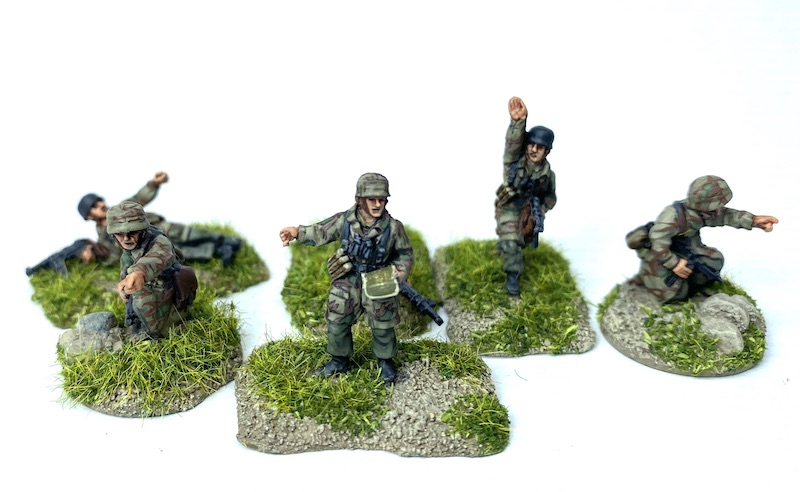
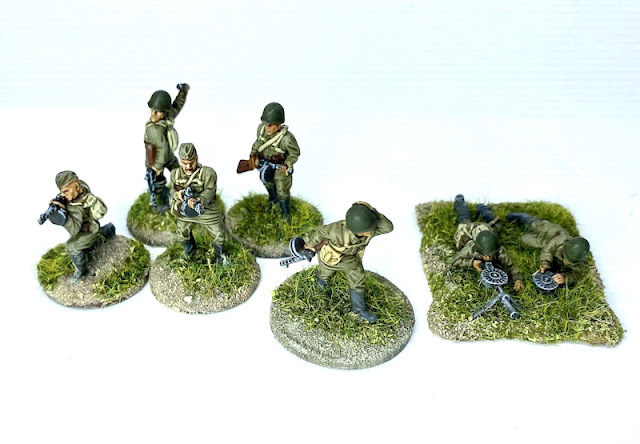
While many of those original PSC figures had been based individually for Chain of Command over time they in turn had been replaced with metals from AB Figures like the ones below.
As a result many of those PSC figures fill my spares box from where they've now been retrieved to fill gaps in the Crossfire ranks. Things have come full circle!
In the case of the Company Commander stand I've used a spare AB Figure from a German command set for the commander and a couple of Zvezda figures as radio operators (they started life originally as forward observers for Chain of Command but have since been replaced with more AB figures).
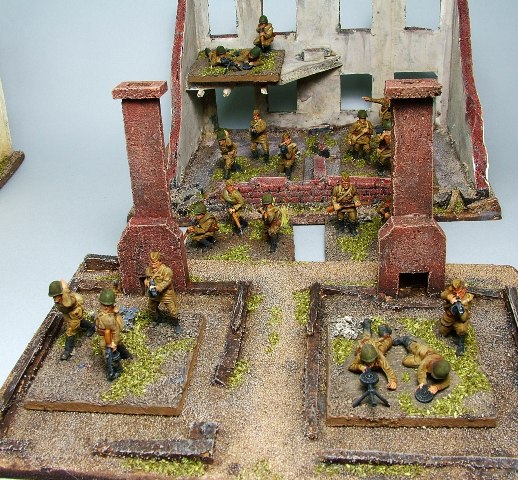
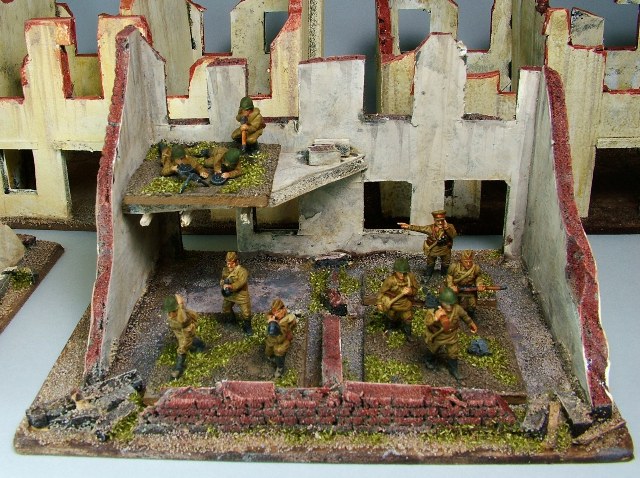
Using the same colour palette as the buildings ensures the figures and their bases look at home in the urban setting. I really like the way this looks, I think it will give a much more immersive and seamless feel to the table.
The German platoons can be equipped with infantry anti-tank weapons, in most case it's likely to be one squad in each platoon armed with either panzerfausts or a panzerschreck. With enough surplus German figures I've been able to make up squad stands using a figure with each of these weapons which will make it much easier to track which squad is armed with what weapons in the course of a game.
Someone at the club had already put together a US force and we were keen to play a game. So as it happened my urban based Germans had their first outing somewhere far removed from the devastated ruins I had in mind - they went to Normandy. If nothing else it was a good test to see exactly how out of place these bases might look in a more rural setting.
Fortunately the table included a small French village with a few buildings in ruins. My Germans certainly looked at home there.
That wasn't quite the case when it came to a field and a patch of broken ground.....
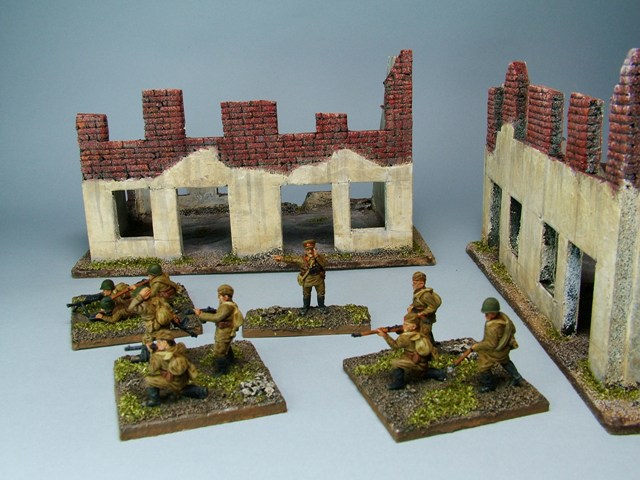
The next task was to do exactly the same for the Russians. The Russian rifle company varied in its composition as the war progressed, up until 1942/43 it is quite likely to be composed of three platoons each of four squads. As the war went on and manpower became scarce they were more likely to field platoons of three squads each. I will have enough for both options.
If you look closely it's possible to notice the different painting styles but overall I think it's hardly noticeable at playing distance. It was never something I intended to address and I certainly wasn't going back and repainting all the figures.
You may notice the two bottles on the crates near the company commander. At the risk of racial stereotyping I couldn't resist finding a use for these. They were left over from a model of a Japanese Isuzu truck. Of course they could be bottles of anything, water even, they don't have to be vodka.
A Russian platoon will often have one squad armed with an anti-tank rifle. As with the Germans I had enough spare figures to make up a few bases that include a figure with an AT rifle so that I can replace a normal rifle squad stand with one of these if need be.
The spares box also supplied many other support weapons including 50mm mortars, Maxim MGs, snipers and forward observers.
The PSC Russian sets comes with many SMG armed men and there were enough figures to create an SMG company.
There's not a lot of variety in the poses but I've mixed them up as best I can.
The SMG company also needs a company commander and in this case I've painted him in an NKVD uniform so he can also serve as a commissar if needed.
That's the core infantry units. As for armour and other support units I won't need to worry too much about those, I think I'm fairly well covered in that respect.
Having worked to get the units based to match the urban ruins I began to ponder how I would handle the few game markers that are required. For the more recent games in 12mm I had been using MDF tokens for the Force on Force rules.
A player at the club has a better solution that is both simple and elegant. He uses small stones. Brown ones for pinned and black ones for suppressed. That gave me an idea. I had made up a lot of rubble using cork floor tiles when I was working on the urban terrain and I had enough left over to make up similar markers but ones that would blend in well with the terrain. It was a simple matter of sticking the cork to 20mm MDF round bases, adding some sand and painting them.
I intend to use one marker to represent pinned and two for suppressed.
They match the terrain and help to keep that immersive feel to the gaming table.
Although in some case I must confess I might have done this too well and the markers simply merge into the surrounding rubble!
That left one other status marker that needed to be considered - No Fire. This didn't seem quite so simple so I hunted through my spares box to see if anything could inspire me. While No Fire doesn't represent a unit running out of ammunition (although there is no reason why it couldn't) I like the idea of using something that spoke to this. I found two things that would work.
I had kept a number of small arms ammunition boxes from a 1/35 scale model set and I thought if I make those up and have them open they could serve this purpose well. I had only four of those and so I hunted around for something else just as suitable. The PSC anti-tank gun sets include a number of opened ammunition boxes and while it's not exactly small arms ammunition they convey a similar idea.
I particularly like the way the small arms ammunition boxes work.
Another thing that needs to be recorded are the number of fire missions available to a forward observer. In the past I've used piles of small game tokens kept at the side of the table. It's a slightly messy system so I took an idea from O Group where a small vignette is kept at the back of the table with a dice frame to record the number of missions. For these I mounted a rectangular base with a model of a mortar that corresponded to the calibre of the mission available to the forward observer. While I don't think it's likely to be an issue I chose the different shaped base to ensure they weren't confused with stands that are in play.
The PSC German heavy weapons set includes 120mm mortars that I have never needed but I had kept in the spares box. The Russian equivalent was a very similar looking weapon so I made up one for each side.
The same was done for 80mm mortars.
Smaller mortars, like the Russians 50mm variant, are used on the table and act as their own observers. There was no need to make up an entire base just to record their missions and so I made up a base just for the dice. These can be used on the table with the weapon stand itself.
Alternatively they can be kept with the other fire mission bases.
Overall this has given a new lease of life to a part of my collection that I was beginning to doubt would ever see a wargame table again. It's allowed me to plunder the spares box and draw on resources I already have to hand and so the net expense has been zero. It's not very often you get to say that in this hobby.
Crossfire might just hit the sweet spot for club night games. The rules are simple yet elegant and can be learned very quickly. Games with a company a side can be played on a 3x3 or 4x4 table in a few hours which lend themselves well to the limited time in an evening. If it has any downside it is in the amount of terrain it requires, but that's not really an issue for me and certainly no hindrance to running games on a club night.