As a miniature gamer I've always loved the look of a table filled with great terrain, who doesn't? Over time I've focussed more and more on trying to create tables where the terrain looks seamless to the eye.
I think the key is to focus on how the individual terrain pieces blend in with the table surface regardless of whether it's a textured board, a game mat or whatever other material you choose to use. When I first returned to miniature gaming I was placing the finished model directly onto a printed game mat. It wasn't a disaster but to my eyes this always looks like the model wasn't part of the landscape, it was just sitting on top of it.
The most obvious solution is to attach the building to a base and dress it with terrain. Some of my first attempts were simple and straightforward, like this 20mm barn from Charlie Foxtrot Models.
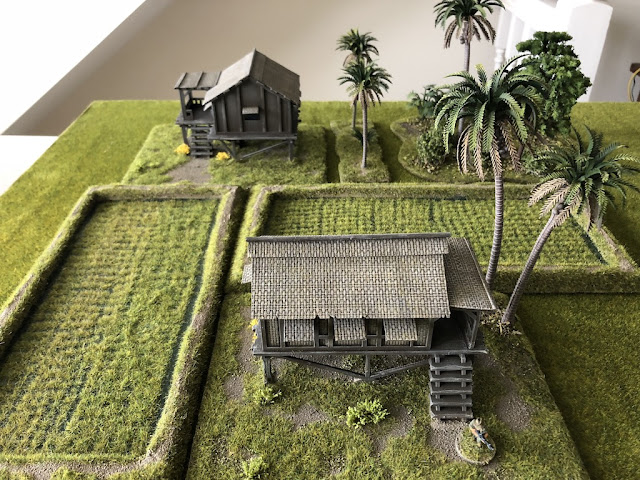
For these 20mm village houses for the Far East from Sarissa Precision I went for something a little larger and more elaborate.
Sometimes I've been inclined to take things a step further. I had built a small workshop from Charlie Foxtrot Models and this worked well as a general industrial/agricultural building. However, as you can see below, without a base to integrate it into the ground it tends to look detached from its environment.
This led to a quite radical transformation that involved turning it into a French garage mounted on a base and with lots of added elements to make a more evocative piece (you can follow this build in more detail in this post).
Yet it doesn't have to be that complex. I think the greenhouse project below shows what a difference a relatively small base can make. While I was writing up an AAR for one of the Chain of Command campaigns every time the greenhouse appeared in one of the pictures I couldn't help but notice how bare it looked.
Using odds and ends of spare terrain and scratch building with balsa wood I made up a simple interior on a textured base of MDF to bring it to life.
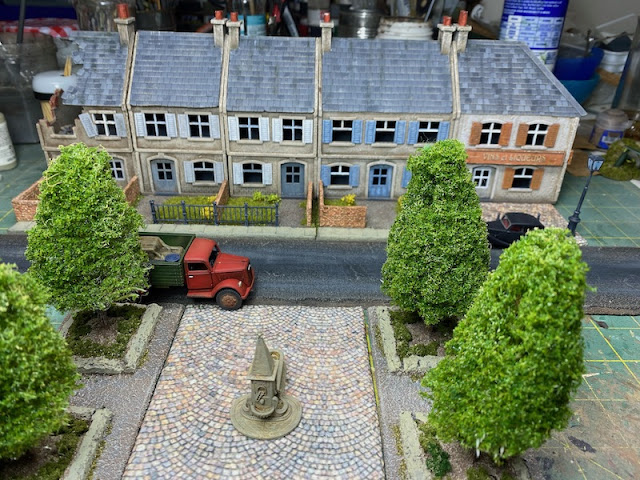
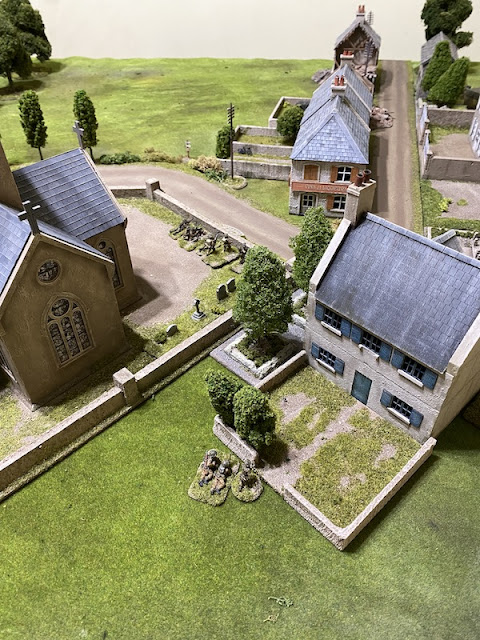
This type of basing works well, but it can restrict how versatile you can be with the buildings in different settings. One alternative is to make modular bases where the buildings are not attached permanently. I settled on this technique when creating front and backyards for houses in European villages. Where as French villages are often characterised by house fronts lining the street Dutch villages often feature front yards. To be able to make up both using the same buildings meant a more modular approach offered a solution.
Bases were made that could accomodate various combinations of model buildings.
This allows me to join them together without doubling on the fence lines, like so:
The base with all four sides fenced can then butt up against the open end to make a row of three houses. As part of the same project I created several individual pieces of fence that can be used to close off one of the open sides should I want a different configuration.
This gives me scope to line up several together.
The house models can then be arranged in different combinations.
Having the open end on two of the bases allows me to use my other freestanding fences to make larger areas or different shapes.
It was also versatile enough to become the home of a rubber plantation owner in Singapore when we played the Last Stand on Opium Hill campaign. In this case I simply substituted a colonial style building from Sarissa Precision and added a couple of palm trees.
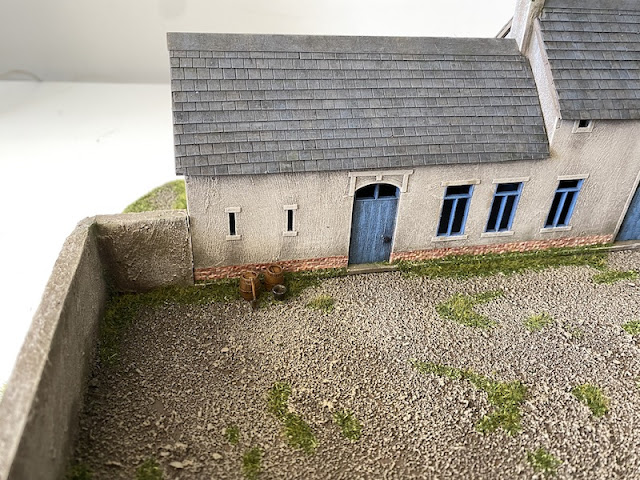
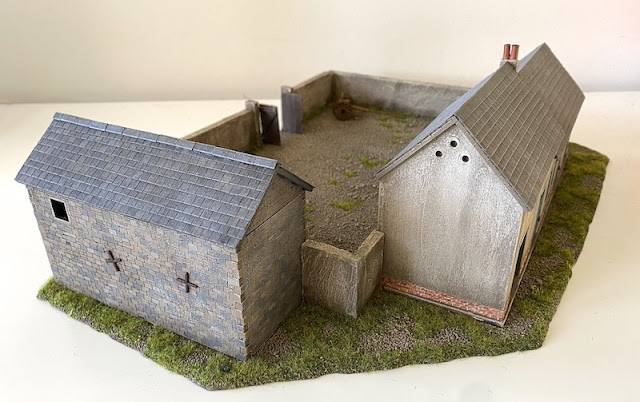
While this next project is not quite as versatile as the one above, I've always wanted to have a sturdy looking stone French farm compound but without losing the versatility of my farm buildings. In this instance the base is similar to the front and backyard project but it's designed around two very specific farm buildings.
As usual the base is a piece of MDF cut to size. The walls are cut from cork floor tiles and have been arranged to allow the positioning of a main farm building and a barn.
Last but not least I need to mention the game mats themselves. As I mentioned earlier the key aim is to have the buildings blend in with the table and the challenge is to have a table surface or a mat that matches. For use at home I have mounted mats of static grass from railway supplier Noch onto MDF boards.
These match the blend of static grass I use for my terrain perfectly (as you can see quite clearly with the Eastern front village pictured earlier) and these have seen use recently when I've been teaching a friend how to play Chain of Command.
As you'll notice from some of the other pictures in this post I haven't always been able to use a matching base mat when I travel to the club or a friend's places to game. Up until now I've been using a mat from Cigar Box Battle, which is in every other way an excellent mat but it doesn't match the building and terrain bases in the same way. However I think I now have the solution. I was fortunate to buy an old Citadel grass mat from someone at the club and as you can see below that does the job very well indeed.
Now it appears I have a solution for both games at home and away. Result.
If you've found this post useful and would like to Buy Me a Coffee to help cover some of the costs of running the blog you can click through at the link or on the tab in the right hand column of this page.









Thank you, very enjoyable. I am ‘guilty’ of stopping at plonking buildings down on a mat and had already decided to do a few bases, cutting my first base the other day, but your article has inspired me to do a better and more thorough job.
ReplyDeleteI like the idea of permanent basing, but I just don’t have the storage space, so going modular is the way for me. It is both strange and a shame that GW stopped doing the Citadel game mat. It was ahead of its time and I would imagine would continue to be a big seller if still available.
Thanks Norm, it’s always a dilemma to get the mix right so that you have attractive terrain but it remains functional and versatile. As always you can’t forget about how you’ll store it.
DeleteA fine blog post there full of inspiration, it is nice to see your terrain piece together on one blog post out of their game environment too.
ReplyDeleteThanks Phil, it was good going back through various projects and pull them altogether like this.
DeleteGreat stuff - buildings do look better based but it does make them less flexible - your idea of having a base but making the building removable is good and I will try that. I think given limited storage space it would be good to be able to set up buildings as part of tight packed village, as well as more spread out, so the modular bases seem like a good idea.
ReplyDeleteIt’s that eternal balance between function, form and storage. The wargamer’s dilemma!
Deleteexcellent work and ideas there! Very elegant solution with the separate bases and buildings. The end result is great.
ReplyDeleteThanks Ben.
DeleteStunning as ever, and all very professional in approach and delivery, though I do wonder about the storage requirement for all this. I would be interested to see a photo or two of your storage arrangements. Your matching flock and mats (especially in the Eastern Front photos) really make the terrain look integral to the table. Of course like many I'm damned by the many periods, scales and styles that I game in (or at least want to).
ReplyDeleteHa, you’re beginning to sound a bit like my wife, whenever I get a new delivery through the post the first thing she says is, where is all this stuff going to go? I’ll have to post some pictures but most of it lives in plastic tubs in a cupboard in a converted attic.
DeleteSomeone should remake the GW style mat. It was and is the best out there far better than neoprene. It was proper 3d!
ReplyDeleteIt’s a very good mat that works well with any terrain using static grass on the base. I don’t mind the printed mats on cloth but not a fan of vinyl or neoprene.
DeleteThat is some great terrain and the versatility is genius.
ReplyDeleteVery kind sir, thank you!
DeleteVery enjoyable post. The more I wargame the more interested I get in terrain. I enjoy making it more than painting miniatures and it’s the terrain that does the heavy lifting in settings the whole scene/ battle.
ReplyDeleteAgreed!
DeleteI agree Stew. Well painted miniatures won’t save a table with bad terrain, but good terrain can make even the most basic paint job on miniatures look so much better. As you say, it’s the terrain that does the heavy lifting in setting the scene.
DeleteI always base my buildings but need to give more thought to how they work together, as you have. Thanks for the idea.
ReplyDeleteA common colour palette can really help do that and a common basing style but the one thing that then ties it altogether is the base mat or boards. Not always easy if you want the terrain to be reasonably versatile.
DeleteWonderful tutorial - so talented AND clever!
ReplyDeleteThanks Joe, that’s very generous of you to say!
DeleteGreat post, very useful concept
ReplyDeleteI have just found your blog and spent a good 30 minutes just scratching the surface. Love what I have seen so far so will be coming back for more over the coming week. This post is especially valuable as I have a number of 20mm WWII buildings painted and many many more to build and paint but your post has hit precisely on what was buggign me - they just looked 'plunked' down in the middle of the table.
ReplyDeleteOne thing I noticed was the cobbled wallpaper - could you please let me know where it has come from? Thanks.
Richard
Thanks Richard, glad you've found the blog and are enjoying what's here. The wallpaper was bought on eBay from a seller in Greece. Here's a link to one item but look at what else he sells and check the scale (he does everything from N scale to 1/16) https://www.ebay.com.au/itm/393938169886?hash=item5bb88b701e:g:feAAAOSwOY9iC75Z
ReplyDeleteGreat - thanks mate. Now to sit down while I discover postage to Sydney.
DeleteI’m in Sydney too as it happens (Surry Hills). I bought mine some time again and can’t recall postage cost. Just checked out your blog, are you part of the Cumberland group by any chance? I suspect we know people in common.
DeleteI've sent you a PM on the Wargamer's Forum
DeleteGreat stuff as we have all come to expect! How about a couple of photos of your storage system? Please, That is the major limitation of scenery, I find.
ReplyDelete0k
ReplyDelete