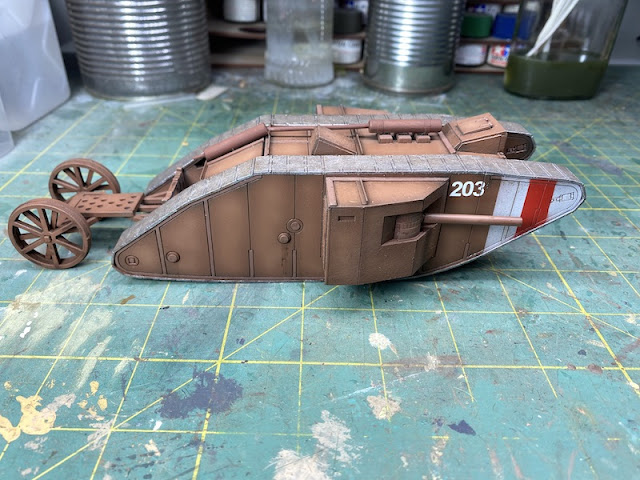
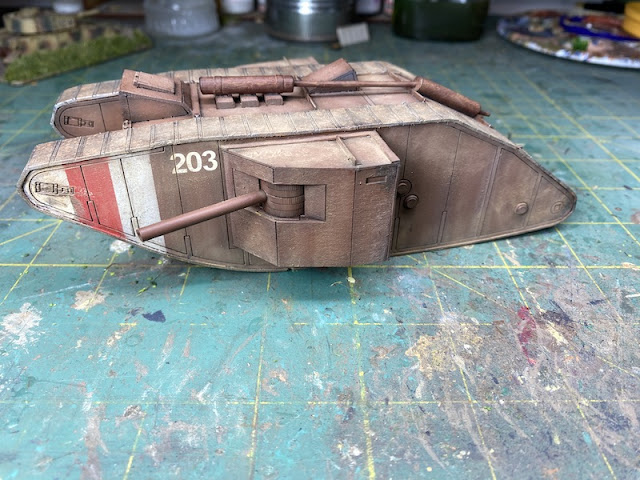
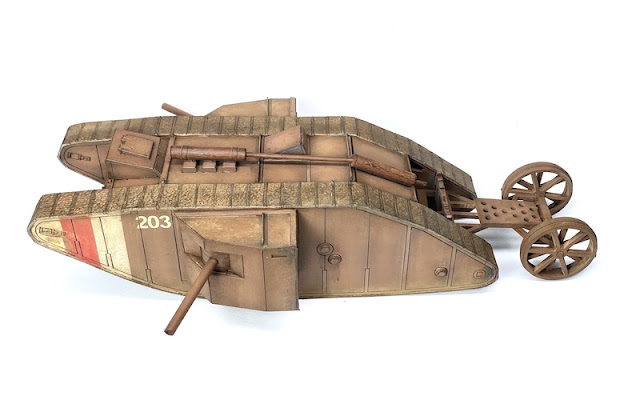
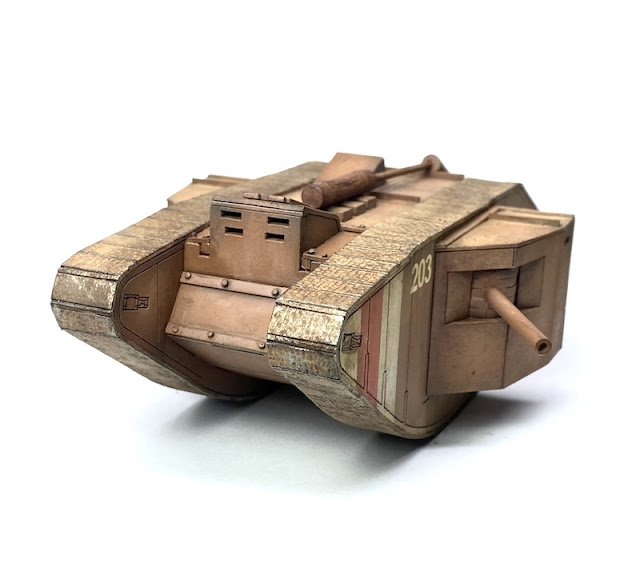
When I first embarked on a 28mm First World War project I was tempted by a very affordable MDF kit of a Mk1 Male tank produced by Warbases. It was a fraction of the price of a resin model and although I wasn't quite convinced MDF works for something like this I thought I'd give it a try.

I have to be honest and say that my first impressions were not great. While the model is to scale and certainly has the right shape it lacks an awful lot of detail. Most notable are the hundreds of rivets that are such a striking feature of these tanks. The one at the Tank Museum at Bovington is a slightly later model but having seen it up close it's hard not to notice that the tank is literally covered in them.
I also have fond memories of the 1/72 scale Airfix Mk1 Male tank that I made as a youngster back in the 1970s. In fact I have such fond memories that a few years ago I made one again, this time adding a few extra details and replacing the exhaust system on the roof. The rivets were certainly a very obvious feature of that model.
Around the same time a friend gave me the Emhar 1/35 plastic kit of a MkV female tank as a birthday gift. It came with options for German decals and so I opted to make a captured version. I'm no expert, but I guess it might be fair to say I'm reasonably familiar with these tanks and their details.
Having made a half hearted attempt at starting the MDF kit I soon lost interest and packed it away. A recent reorganisation of my hobby space led to a bit of a clear out. The part completed model was taking up space and I seriously considered giving up and throwing it away. However that's not something I usually do. In the end I decided to see what I could make of it and I'm glad I did.
As you can see below the base kit is very short on detail and I had already replaced the gun barrels with a piece of plastic tube.
While it did cross my mind to try adding rivets, it seemed too big a task and time I'd rather spend on other projects. That said, there was still room to add a few extra details.
The main item was to replace the exhaust with one made from wood dowel and toothpicks.
I did end up adding a few rivets, and by that I really do mean a few. Those were cut from plastic rod and used to embellish areas that were particularly short on detail. I kept on reminding myself this was a gaming project not a scale modelling one. What I was aiming for was an impression of a Mk1 rather than a replica.
With those added the model was primed. This was the point at which it started to look more complete. For the first time I began to think that if I can give it a decent paint job it might be enough to make a presentable model for the tabletop.
I chose a brown colour scheme and painted it using a tonal method with an airbrush. With a couple of Great War Miniatures figures next to it I could begin to see how this might work in a game.
The tracks were then painted as were other markings.
I found some decals in my spares box and added those.
The last job was to add weathering, which I did with a mix of oil paints and finally pigments.
The pigments are used in layers with each one fixed by spraying pigment fixer over the top. When first applied the pigments can look excessive.
The pigment fixer is essentially a matt enamel varnish which tones down the pigment and secures it to the model making the finished look more subtle.
Overall I think the combination of a few minor additions and a paint job lifts this considerably. It was hard to envisage this finished result when I first opened the bag containing the MDF pieces.


I'm glad you persisted. It's a nice looking end result and as a wargaming model, I'm sure everyone will look past the lack of rivets. I enjoyed reading this post very much. Thanks.
ReplyDeleteThanks, I agree, it's not one for the rivet counters that's for sure but I think it look more than good enough for the table.
DeleteNice work Mark with a MDF vehicle kit.
ReplyDeleteThanks John, I wasn't convinced at first but in the end it worked out okay. Not sure I'll be in a hurry to buy another MDF vehicle though!
DeleteThat turned out pretty good, much better than I would've expected for an MDF kit. As you say rivets would've helped but only if you had half a lifetime to spare. If you'll forgive a hindsight comment, I think a slight taper to the gun barrels would've been worth trying.
ReplyDeleteI think that was the issue - could I make it into a better model? I'm pretty sure I could. Do I have the time or inclination to do so? That's a different matter altogether. I did think about tapering the barrel, or at least trying to but again it was a time thing.
DeleteThat has turned out very nicely. Certainly good enough as a gaming piece. Adding rivets would have made it look a lot better, but I wouldn't had the patience to do that either.
ReplyDeleteIndeed, I certainly don't have the patience and to be honest it wasn't about trying to save money, if I really want one with rivets then I'd splash out on a resin one, it was more about seeing if it could be salvaged into something useful and I think I managed to do that.
DeleteYou did indeed - I wouldn't buy an MDF vehicle kit but I think you've proved that if you have one a bit of effort can make it into something useful.
DeleteYou have worked that up nicely, adding the rivets, therein madness lies and you can guarantee someone will say you have missed some out😂
ReplyDeleteHa ha, yes indeed. If it was 20 or 30 rivets, then maybe, but I'd hate to imagine how many there are on one of these. The way to madness for sure!
DeleteNice work- a big improvement!
ReplyDeleteThanks, I'm glad I persevered.
DeleteI can quite understand why you were a little underwhelmed to begin with. But the end result is splendid! Well done indeed 👍
ReplyDeleteCheers
Matt
That came out remarkably well. Rather splendid in fact. Nice job! My one ended up in the army surplus box for very much the same reason. One thing I did decide was to use GW flight stands for the guns, as they have a very nice taper, but yours look perfect as they are.
ReplyDelete