The scenario generates three support points for the Japanese. The Japanese force rating is +1 and the Australians' is -2 so the difference of three means the Australians will be able to draw on a total of six support points.
My plan is fairly simple - to use the classic Japanese tactic of pinning the enemy in the centre while trying to outflank their position. I want the flexibility to attempt the flank move from either left or right depending on how the Australians deploy and so will try to ensure I have jump off points placed accordingly. The Japanese are able to move patrol markers 14" with a 14" distance between markers, which should enable me to get my markers close to where I want them.
In terms of supports I don't have a lot of choice. I decide to take a Ha Go tank to support my thrust in the centre as the jungle terrain will restrict it to the road. With my one remaining point I add a rifle grenadier to one of my squads.
Dave will have a few more options. Knowing I could have tanks he may want to call on the 2 Pounder, but as he has an anti-tank rifle team as an inherent part of the platoon he may not deem this necessary. Among his many options are a Vickers MMG team, an additional section or a Forward Observer so I could have some nasty surprises waiting for me.
Force morale ends up even, with both sides at nine to start and the Australians win the roll for initiative to start the patrol phase. I opt for three patrol markers as I want to move fast and ensure I can cover both flanks. Dave opts for four markers.
Playing across the table and with the Japanese markers moving 14" means the patrol phase is fairly brief. Jump off points are as below (Japanese in red, Australians in blue) and as you can see I managed to place these pretty much where I was hoping.
The Australians start by deploying a section on overwatch in the centre of the table by the road. To their rear two 2" mortar teams deploy behind the hut on their right flank.
You will have to excuse the British 2" mortar team above and their 1944 battle dress, but I only have a single Australian 2" mortar team, so we had to fly in some support from Britain.
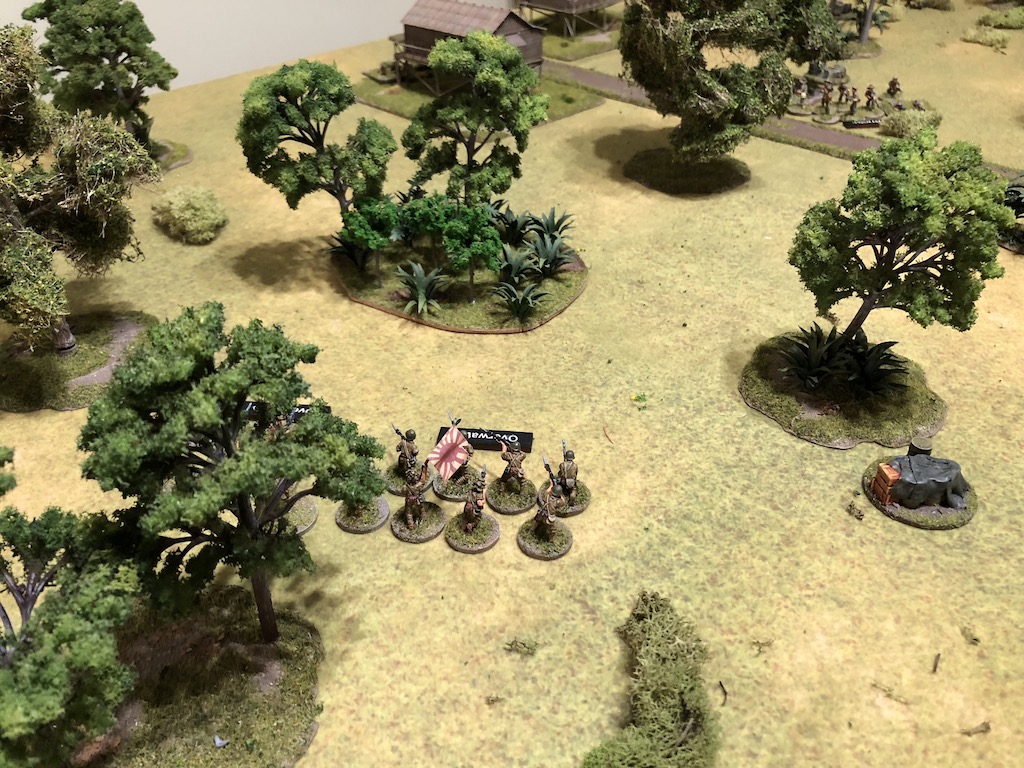
As planned I deploy my first Japanese squad to the centre and they take up tactical positions opposite the recently deployed Australian section.
I decide to make an early move around the left flank in an attempt to put the Australians off balance and deploy a second squad on overwatch.
The line of sight rules for the jungle mean that anything beyond 12" will require a dice roll to determine if targets are visible. A second Australian section deploys in the centre and they spot the Japanese squad and open fire. A Japanese soldier is killed and the unit suffers a point of shock. First blood to the Aussies.
More supporting fire for the Australians arrives in the form of a Vickers MMG team accompanied by the platoon sergeant. They deploy into the hut near the mortar teams taking up overwatch positions. The Sergeant has heard the firing across the road and barks an order to the 2" mortars to use some of their limited HE rounds to support the firefight, but the rounds fall harmlessly into the jungle.
Dave has now shown his hand in terms of support, with the Vickers and additional 2" mortar, so I now have a good idea of what I am going to have to deal with.
The Japanese then roll a double phase and I immediately deploy the grenade discharger section into the centre to the right of the squad that deployed earlier. They can see the Australians who have just fired and they send a flurry of HE rounds their way.
These prove uncannily accurate and their three hits result in three kills. One of those is the section corporal who suffers a light wound, but his men are unmoved and their morale stays steady. That was some very effective fire from the grenade dischargers.
The Ha Go is sent on to provide additional firepower to the Japanese centre but the thick jungle either side of the road makes it impossible to spot any of the Australians.
 |
| The Ha Go is just visible on the road |
In the following phase the Japanese deploy the platoon second in command, the Gunso, to provide direction to the units in the centre.
He rallies off some shock and orders the squad to fire on the Australian sections if they can spot them. They manage to see them through the thick jungle and open fire inflicting two points of shock on the bren team.
The Gunso directs the grenade dischargers to fire, but they have trouble locating the Australians through the jungle and hold their fire
(note: in hindsight I've realised that the Gunso, the platoon second in command, operates as a junior leader, not a senior leader, so we wrongly allowed him three command initiatives throughout this scenario).
The Australians follow this with a double phase of their own, but the roll of 66552 leaves them with limited activations. The section alongside the road moves forward carefully to join the section in the jungle and together the present an imposing firing line to face the Japanese. With a movement roll of one they only just make it.
The next Australian phase provides many more options and so a third section deploys to join the firing line in the centre. They are ordered to engage the enemy but are unable to identify any targets through the thick jungle foliage.
With all three sections of the platoon now deployed the platoon Lieutenant joins his men on the front line. It's now clear Dave is hoping to win the firefight here and inflict casualties on the advancing Japanese. The first section spots one of the Japanese squads in the jungle and inflicts three points of shock on the enemy.
The Lieutenant orders the next squad to fire but despite a good line of sight their fire has no effect.
At this point the anti-tank rifle team deploys and takes aim at the Ha Go. They are on target and inflict a point of shock taking the tank gunner out of action for the next phase. As the gunner is also the tank commander we played this effectively took the tank out of action for the phase.
A ferocious firefight is developing here in the centre and in the Japanese phase the Gunso rallies a point of shock off the squad and then orders it and the grenade discharger squad to fire. This inflicts more shock on the Australians.
With the Australian platoon now fully committed in the centre I decide it is time to make a move on the left flank. I have the squad that is already there make a wide hook through the jungle and to my delight they move quickly through the unfamiliar terrain.
I feel reasonably confident I can hold my own in the centre and so decide to commit my final squad to join the move on the left flank. The aim is to make a strong push to drive into the Australian flank and rear.
Dave is determined to ignore the threat on his flank in favour of winning the firefight in the centre. To improve his odds he wants to close the range so that the men armed with Thompson sub-machine guns can bring their firepower to bear. He plans to have the Lieutenant direct each section to move forward slowly and fire at half effect, but before that the corporals rally off some of the shock.
What follows is agonising for the Lieutenant as each squad in turn has real problems finding their way through the jungle. Dave rolled three movement rolls of 1 in succession which meant due to shock one section failed to move at all. Then, to compound matters, they couldn't see the enemy through the jungle and couldn't fire. The remaining sections edged slightly closer but only managed to inflict a single point of shock on the Japanese.
On the other hand the anti-tank rifle team are much more successful, hitting the Ha Go again, this time killing the driver and adding a further two points of shock.
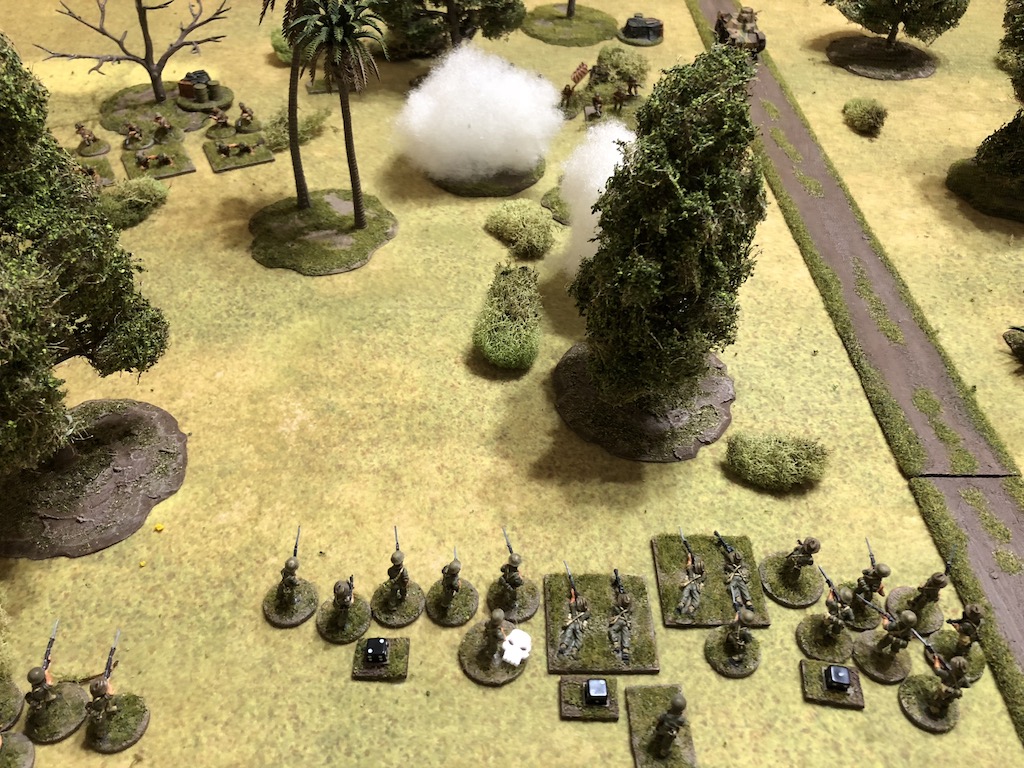
Back at the huts the platoon sergeant orders the mortars to fire smoke and provide cover for the sections in the centre. One is on target and the other falls short, but both effectively screen off the Japanese squad.
The Japanese have another double phase and so I decide to really push hard on the left flank. I deploy the Rikugun, the platoon leader, and he orders both squads to move through the jungle and up to the tree line opposite the hut. Both squads are quick on their feet and navigate the jungle with ease.
They are now within sight of the Vickers MMG team who are on overwatch and they immediately open fire. They score severals hits but the hard cover of the jungle trees provides excellent cover and the fire has no effect.


The Ha Go commander has gathered his senses and rallies off a point of shock before firing the turret MG at the anti-tank rifle crew but it has no effect.
The next Japanese phase presents some interesting choices - how aggressive do I want my flanking attack to be? I have two full squads against the Australian platoon Sergeant, a Vickers MMG team and two mortar teams. Do I want to charge into close combat? I outnumber him, but I will be attacking a medium machine gun frontally. I suspect I would 'win' the combat, but at what cost? On the other hand, if I stand and shoot it out for another phase or two will I have lost the initiative and see the Australians reinforce the flank? Decisions, decisions.
In the end I decide I need to try to soften up the units around the huts before charging in with the bayonet. There is calculated aggression and then there is rash aggression, best to hold my horses here I think. I decide I need to soften them up with more fire before attempting to charge the hut.
From the centre the Gunso orders the grenade dischargers to bombard the huts with HE.
One round lands directly on the hut and kills one of the MMG crew. That's one less Australian to deal with. I'm about to have both the squads at the tree line fire into the huts, but then decide to fire one of them first just in case we end up causing more shock and casualties than I would otherwise expect. It might just make a close assault from the other squad a possibility.
The fire is reasonably effective and inflicts shock on the Vickers and a mortar team. It doesn't give me enough confidence to close for an attack and so I have the other squad fire instead of advance. More shock is added to all the teams. One mortar team has been pinned, but the support 2" mortar team takes a casualty which is enough to see them break and rout off the table. Australian force morale drops to eight.


That has put me in a much better position. The Australians took two casualties that phase and saw another man rout off the table. That makes the Sergeant and the Vickers team a lot more vulnerable. This gives Dave some pause for thought. While the Vickers team is a support and its loss won't impact the platoon strength, the loss of the Sergeant would be a real setback. As this is only the initial patrol scenario Dave decides that this calls for a withdrawal. There is nothing more to be gained by fighting on other than needless Australian casualties. I suspect he is right and this is a sound decision.
Things went pretty much to plan for the Japanese. As always, making the most of a double phase and some faster than expected movement did much to help keep things on track. The Vickers was not that daunting and without more support it found itself quite exposed and vulnerable in the end. That said, with fairly light casualties the Australians have fallen back in good order. This is important given the level of reinforcements they can expect, although I suspect Dave was hoping to cause the Japanese more losses before retiring from the table.
Casualties ended up with one for the Japanese and four for the Australians (two from the supports and two from the core platoon). With the Japanese holding the table with a superior force morale the single Japanese casualty will return to the platoon. The Australians have lost one man permanently and have another man wounded who will miss the next game.
The scenario ends with the Japanese CO's opinion at +2 and the men's opinion also at +2, it's been a good start. The Australians are a little less certain, the CO is not impressed to see the unit pushed back and his opinion is at -1, the men are less concerned as casualties were light and their opinion is at 0.
Having pushed the Australian patrols back the Japanese will now press on with a Probe action to try to find the main Australian force. Here is the after action report for the next scenario
Scenario 2 Find the Enemy.
That was a fairly brief opening scenario for the campaign. Our most notable impression was what a significant difference the Japanese patrol marker 14" allowance makes. It really allows the Japanese to move fast in the patrol phase and the Australians will have take this into account for future scenarios. When you add to this the Japanese ability to deploy 9" from their JoPs there is a real threat that their attacks will develop very quickly.
It was great to make use of my two Airfix Jungle Outpost huts. I managed to track these down on eBay a few years ago and there's a post on the blog where you can follow how I
constructed them. Talking of terrain I thought that by combining my Pacific trees and my European trees I would have enough to make a fairly decent jungle table, well as you can see, the jungle on this table was a little bit sparse in places. Looks like I might be making a few more trees then.....