As I expected my JoPs are all positioned within the school, but as you can see below the Germans have been able to place a JoP very close to the school at the rear. That's a real concern.
The Russian force morale is at ten, which is a good start and a considerable help. The Germans are at nine.
The Russian platoon took a number of casualties in the last scenario and are down four men for this game. I've decided to field one very weak squad of three men (LMG crew plus one SMG man) and their Serzhant (JL). That will enable me to have close to two full squads from the remainder of the platoon (one full squad and one down one man). Effectively it is a platoon of two squads and one LMG team, not a big force by any means, so I'm hoping I can make up the numbers by calling on supports.
 |
| The SMG platoon back when it was at full strength |
The support roll is as high as it could be, with the Germans receiving ten support points to the Russian seven. This opens up a lot of possibilities and as the Russians I'm hard pressed to decide what to call upon. There's a very good chance I could see some German armour and I need to have some contingency to deal with that, however I desperately need more men, so an additional squad at four support points is high on my list of priorities. That would then leave only three support points and I could really do with a ranged weapon like an MMG or HMG, as my SMGs are effective only at short range. If I go down that route then I have nothing left to deal with armour. To make matters worse I have a threat to my rear with a jump off point alarmingly close to the school and that cannot be ignored. What to do?
I need to prevent an assault from the rear of the school and so I decide on two minefields, at one support each, to seal off that avenue of approach. I don't think Dave will suspect this and I very much doubt he will have an engineer team to clear them. That's two support points I could have used for something else had I been a bit smarter during the patrol phase.
I think I have no choice but to call on another squad of infantry to make up numbers and so that leaves a single remaining support point which I will use to add a Panzerfaust 60 to one of my squads. Let's hope the Germans haven't decided to call on armoured support as that Panzerfaust will be my sole anti-tank weapon.
Just prior to the start of the first phase I place the two minefields as planned at the rear of the school.
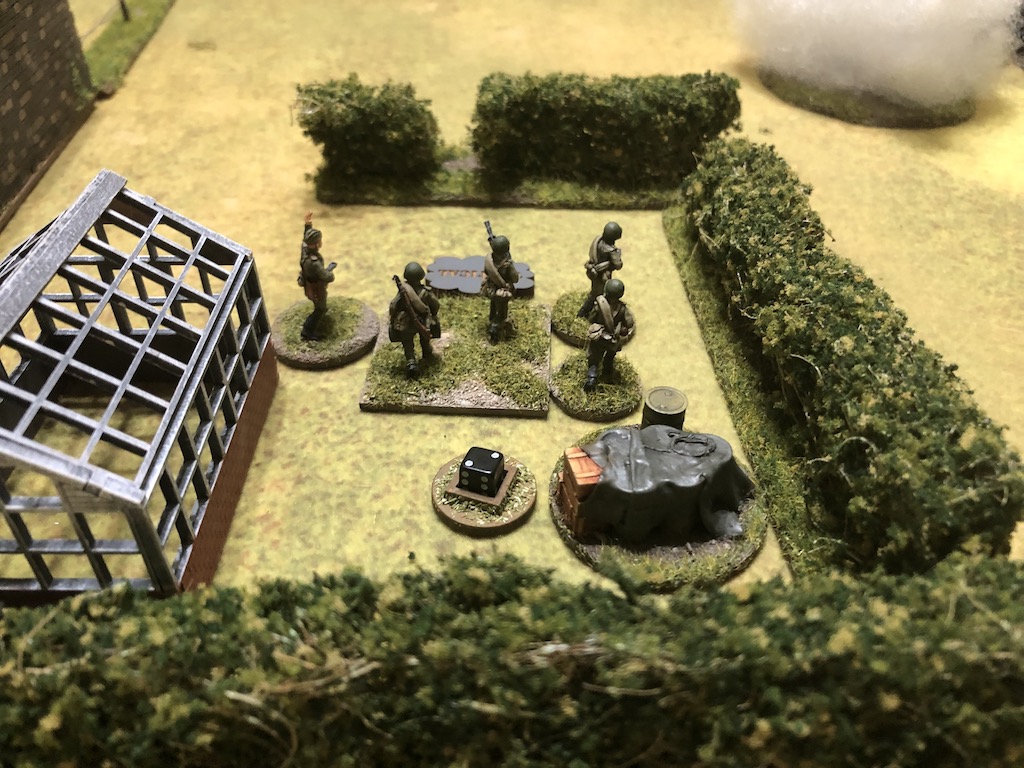
In the opening phase the Germans deploy a squad on their short flank behind the hedgerow and place them on overwatch facing the school.
A second squad deploys to their right in the open ground and they take up tactical positions.
Lastly, an infantry gun deploys behind the road in an overwatch position.
Under the cover of the gun and with a squad on overwatch the Germans are well set up to begin their assault.
The Russians start with a double phase, but given the short range of their SMGs it's not something that can be fully exploited. However this is too good an opportunity not to be utilised and I do have LMGs.
The Russians deploy the weakened squad (effectively an LMG team) and the support squad into the school buildings facing the recently deployed Germans. The SMGs are out of range but both LMGs can target the squad in the open, which they do.
The German LMG team take one casualty and a point of shock. The rifle team take two casualties and a point of shock. One of the men hit is the squad's Obergefreiter who is wounded and stunned. German morale holds, but first blood goes to the Russians and they have another phase.
Before the Russians can have their next phase the German squad behind the hedge and the infantry gun, both of which are on overwatch, return fire.
The German fire is equally effective and each Russian squad loses one man and takes a point of shock. Fortunately none of the squad leaders are hit. I need to be careful with my small squad, it won't take many casualties or much shock to pin or break them (or see them wiped out!).
In the following Russian phase the LMGs both continue firing at the Germans in the open. This time it is less effective, but the rifle team accumulates another two points of shock. Dave was wise to deploy them tactically, that extra bit of cover is making a difference.
In the German phase the infantry gun returns fire and it is joined by the LMG team from the squad behind the hedge.
Once again the German fire is effective. The small Russian squad takes a point of shock, but the support squad takes two casualties, one of which is the Serzhant (JL) who is lightly wounded. Russian morale remains steady. Despite the hard cover of the school the Russians are accumulating casualties almost as fast as the Germans.
Finally the German rifle team behind the hedge puts down covering fire on the two school windows from where the Russian LMGs are firing.
The Russians may be taking more casualties than I would like but luck is definitely favouring them when it comes to the command dice, as I roll another double phase. The roll is 66552 so it limits what I can do, but it will be enough to allow one of the LMGs to continue firing. Once again it targets the Germans in the open, however this time it will need 5s and 6s to hit because of the covering fire.
Despite the covering fire the Germans still take four hits, which causes another loss from the rifle team and another point of shock. Reduced to six men and with five points of shock the squad is in danger of pinning.
The covering fire is removed at the end of the phase which will mean the Russians should have a chance to inflict further damage.
In the following phase both Russian Serzhants can activate. The wounded Serzhant with the support squad uses his single CI to order the LMG team to fire again. The other Serzhant removes a point of shock and also orders his LMG crew to fire.
The German rifle team lose another man and take a point of shock, while the LMG team accumulates another two points of shock. With eight points of shock and five men that's enough to see the squad pinned.
The German squad is caught out in the open and yet is so tantalisingly close to better cover and the other squad.
The Germans seek to redress the balance and the infantry gun fires off another round of HE into the school. This causes a casualty in the weakened squad that sees them reduced to two men and adds a point of shock to the support squad.
I need to be careful here, I'm in a good position to inflict casualties on the Germans but both my units are now quite weak and I cannot afford to lose them.
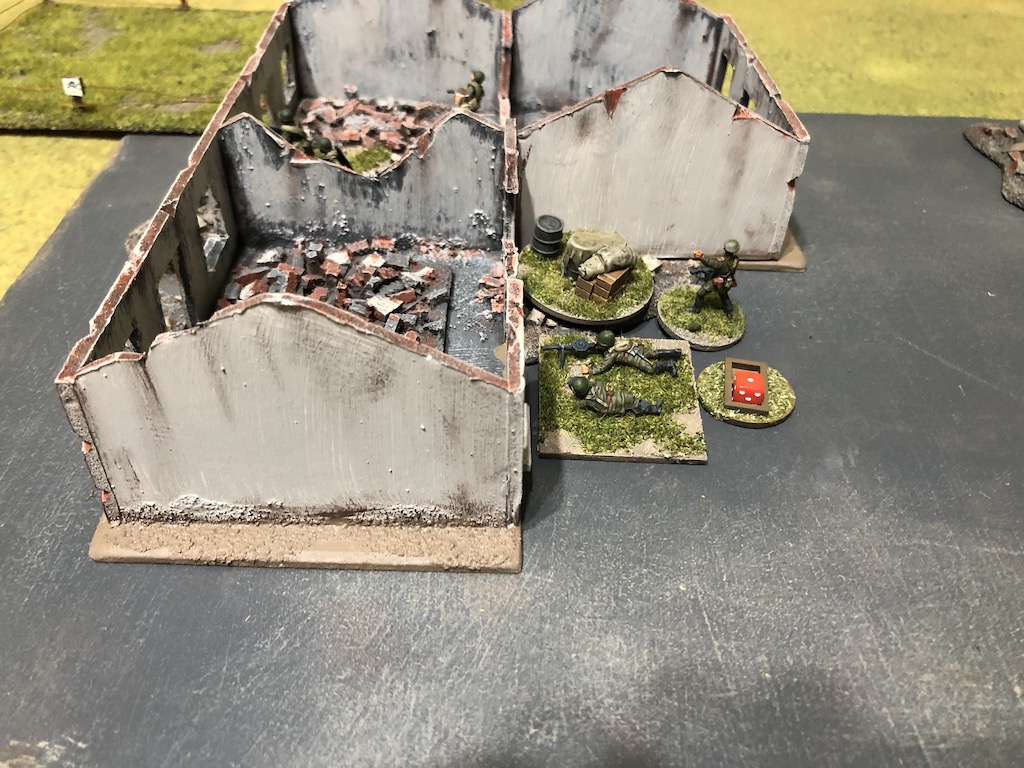
While I had felt confident my minefields had secured the flank there is an alarming development from the German jump off point at my rear - the sudden arrival of a German engineer flamethrower team. Dave has made a bold and risky move to seize back the initiative and it could well pay off. While the engineer team may be exposed in open ground, their dastardly weapon is comfortably in range of the school. Allowing the Germans to get behind me in the patrol phase has been a costly mistake.
The damage could have been much worse as the flamethrower only manages four hits with its first squirt. The Russian support squad loses a man killed. Two points of shock on the small squad is enough to see them pinned. I've got away lightly here, but I could be in a lot more trouble in the coming phases.
At this point Dave makes another bold decision and deploys his Unterfeldwebel (SL) behind the hedge. Without an Adjutant this now means his future deployments could be delayed, but clearly he is keen to try to regain the initiative.
The Unterfeldwebel is within 4" of the pinned squad in the open and he rallies a point of shock from the rifle team before ordering the squad behind the hedge to fire at the school. The fire is disappointing and has no effect on the Russians. With that the Unterfeldwebel has a man throw a smoke grenade to try to provide some cover for the pinned squad.
The man has a good throwing arm and the grenade is hurled forward 10".
I had hoped for a moment that the long throw might have blocked the line of sight from the infantry gun to the school, but alas it was not to be.
The luck of the command rolls is very much favouring the Russians, as I now roll yet another double phase, this time with a turn end. This is getting embarrassing. Having said that, I'm under quite a bit of pressure, I have a pinned squad and a reduced squad and we are in range of a flamethrower. The double phase couldn't come at a better time.
The command roll is 66622, and I use the 2s to run a risk like Dave and deploy the Russian Leytenant. With a turn end about to happen I need to make sure I can rally off enough shock to have the pinned squad back in action and the only way I can do this is for the Leytenant to step up and do his job.
He rallies off two points of shock and then orders the support squad LMG to fire at the flamethrower team who lose a man.
When the turn ends the German squad leader in the open ground gets back up on to his feet.
The Russian squad is no longer pinned.
And the smoke from the grenade is removed.
The next Russian command roll is....yes, you guessed it, another double phase. The Russians seem to be having it all their own way at the moment.
The Leytenant rallies off more shock and orders the support squad LMG to fire once again at the flamethrower team.
The fire is devastating. All six fire dice are hits, resulting in four kills, more than enough to wipe out the flamethrower team. The loss of a support team sees German morale drop down to seven. Not only that, I can sense Dave's personal morale take a slump and I sympathise.
With the flamethrower team wiped out the other Russian LMG targets the German squad in the open, but for once the fire has no effect.
I cannot complain about any bad luck, the run of double phases has been incredibly fortunate and it only continues when the following Russian command roll has yet another double phase. At this point I raise with Dave that perhaps we use one of the many house rules that cover these eventualities and we turn the second six into a five instead, but to his credit Dave says let's stick to the rules as written, that there's no point changing rules mid-game because we don't like the outcome. I tend to agree, but I feel his pain.
The Leytenant rallies off the remaining shock and orders the support squad LMG to continue targeting the Germans in the open.
The Germans take two more casualties and a point of shock on each team, which is enough to break the squad and they run back 11". The sight of which brings German force morale down to six.
At least this now brings them out of the line of sight of the school buildings and into relative safety.
To Dave's obvious relief the next Russian command roll means the Germans will get the following phase. While things are going well from a Russian perspective I decide not to risk more losses to the small squad from the core platoon and so in the Russian phase I pull them back from the windows to behind the school building.
The Leytenant orders the support squad LMG to fire at the Germans behind the hedge and this causes one casualty and inflicts two points of shock. The Leytenant then moves himself back out of harm's way. I may be causing the Germans a lot of problems but I don't want to risk too many casualties from the core platoon, least of all the platoon leader.
When the German phase arrives Dave gives some serious thought to withdrawing and ceding this scenario. However he is loath to accept a German defeat so early in the campaign, particularly one where he has just rolled for the maximum possible supports. He may not be so fortunate in a subsequent game and so decides it is worth continuing the fight. So far I've only seen German supports up to list six which means he has other supports that are yet to deploy as well as a squad from the core platoon.
With the Unterfeldwebel on the table the Germans now attempt to deploy a squad, but without direction from the platoon leader they fail to arrive on time. Despite that the infantry gun continues to target the school. A round of HE crashes into the building causing yet another casualty in the Russian support squad, which is now reduced to two men and their Serzhant.
The Unterfeldwebel rallies a point of shock off the squad behind the hedge and then has them target the remaining Russians in the school. That fire inflicts a further casualty that sees the support squad reduced to a single man and the Serzhant.
With that done the Unterfeldwebel moves back towards the broken squad in the hope that he can rally them and return them to the firing line.
Just as the Germans attempt to get their house in order the Russian command roll is 66631, yet another double phase and a turn end. As always with a roll like this there are not a lot of activation choices, but in this instance the Leytenant orders the support squad LMG to fire once again at the Germans behind the hedge, who sustain another two points of shock.
The Leytenant then sends the two remaining men from the core platoon further back into the school buildings away from German bullets.
When we resolve the turn end it becomes obvious how drastic this is going to be for the Germans as the broken squad now routs off the table taking their Obergefreiter and the platoon Unterfeldwebel with them. German force morale drops one point down to five for the routing Obergerfreiter, but then takes a massive three point drop when Dave rolls six on the force morale table for the Unterfeldwebel routing. That brings German morale crashing down to two. Even if it were possible for the Germans to drive the Russians from the school, this scenario requires their morale to stay at three or more to achieve victory.

With that the Germans call it a day and the scenario ends with an unexpected and somewhat unusual Russian victory. The series of Russian double phases made it extremely difficult for the Germans to press their attack with any vigour and yet the initial stages of the game had boded well for the Germans. The patrol phase went well and allowed placement of a jump off point at the rear and very close to the school building. They had maximum support points giving them a wide choice for supports. The opening phases saw the Germans set up a base of fire with the infantry gun and a squad, while another squad was poised ready to close in on the school building, all sensible tactics. Despite a Russian double phase, the early exchanges of fire were evenly matched, with both sides taking casualties and accumulating shock.
It was only after that things started to go pear shaped. Obviously the Russian double phases had an impact on the outcome, but other events may have been equally or more significant. Not least of which was the catastrophic drop in force morale when the Unterfeldwebel and an Obergefreiter routed from the table with the broken squad.
On reflection Dave said he should have deployed a support squad into the open ground rather than a squad from the core platoon. This was significant because the main damage the Russians were able to do during the double phases was to inflict casualties on that squad and the long term implications of this for the campaign weighed heavily on Dave's mind. There is of course a point to argue that deploying
any squad into that open ground so close to the hard cover of the school buildings was to risk trouble, but particularly to do so with one from the core platoon.
This also led to the decision to take a risk and deploy the flamethrower team in the open, close to the buildings. The success or failure of the move was entirely in the hands of fate. A good roll for the first fire attack could have broken the Russian defence, but failure to do so could spell trouble for the flamethrower team. As it happens their first shot scored only four hits, managing one kill and two points of shock. Yet in a later phase a Russian LMG managed six hits from six fire dice resulting in four kills that wiped out the flamethrower team. While Dave took a risk deploying the flamethrower team as he did, their first shot could have been much more damaging to the Russians and that would have put a completely different complexion on the game.

Despite all the Russian phases and the German squad taking casualties and breaking, the casualty balance when the leaders routed from the table was seven Russian to ten German. Not a bad exchange considering the Germans were attacking defenders in hard cover. However the Russians had taken only two casualties from the core platoon, with the other five from the support squad. The Germans on the other hand had taken seven casualties from their core platoon and only three from supports.
The Germans never deployed their full force and had two full squads still available, one from the core platoon and a support squad. As it happens I made a good call taking only one panzerfaust. Dave had spent his ten points on the flamethrower team, the infantry gun and a regular infantry squad. There was no German armour.
Force Morale ended with the Russians at ten and the Germans at two. That means the two Russian casualties from the core platoon can be collected from the battlefield, patched up and returned to their unit. Not so for the Germans who had seven casualties from the core platoon. This may have been partly avoided if the squad that had deployed into the open ground in the first phase was the support squad instead of one from the core platoon. They also lost three men from the flamethrower team, for a total of ten German casualties. This means their platoon has now lost four men permanently (three as a result of this game and one from the previous) and two men wounded, so they will be down six men in total for the next game. The Russians will see the two wounded men from Scenario 1 return to the platoon and so will be down only two men.
The German CO's Opinion drops two points as a result of this defeat, going down from +2 to 0. The Men's Opinion drops even further from +1 to -2 as a result of the high casualties. The Platoon Commander's Outlook has gone from Cheerful to Relaxed.
The Russian CO's Opinion has gone up two points from -1 to +1 and similarly the Men's Opinion has risen from 0 to +2. The Platoon Commander's Outlook has gone from Relaxed to Cheerful. It's amazing what a scenario victory will do to change the mood of the platoon.
So we will return to this map once again for campaign game three and you can find out what happened next in
Flank Attack at the Girls School (round two).
The Westwind Königsberg Campaign appears in the Too Fat Lardies Summer Special 2014. You can purchase this as a downloadable pdf from TFL Summer Special 2014.
You can find all of the AAR game reports for our Chain of Command campaigns on the
Chain of Command AARs page.