We now reach the last map and the seventh game of the campaign. If the Germans can defeat the Americans then they will succeed in delaying them for long enough for other German units to make their escape across the bridge at Isigny. On the other hand an American victory will bring the campaign to an end and reward them with a major victory, so there is much to play for.
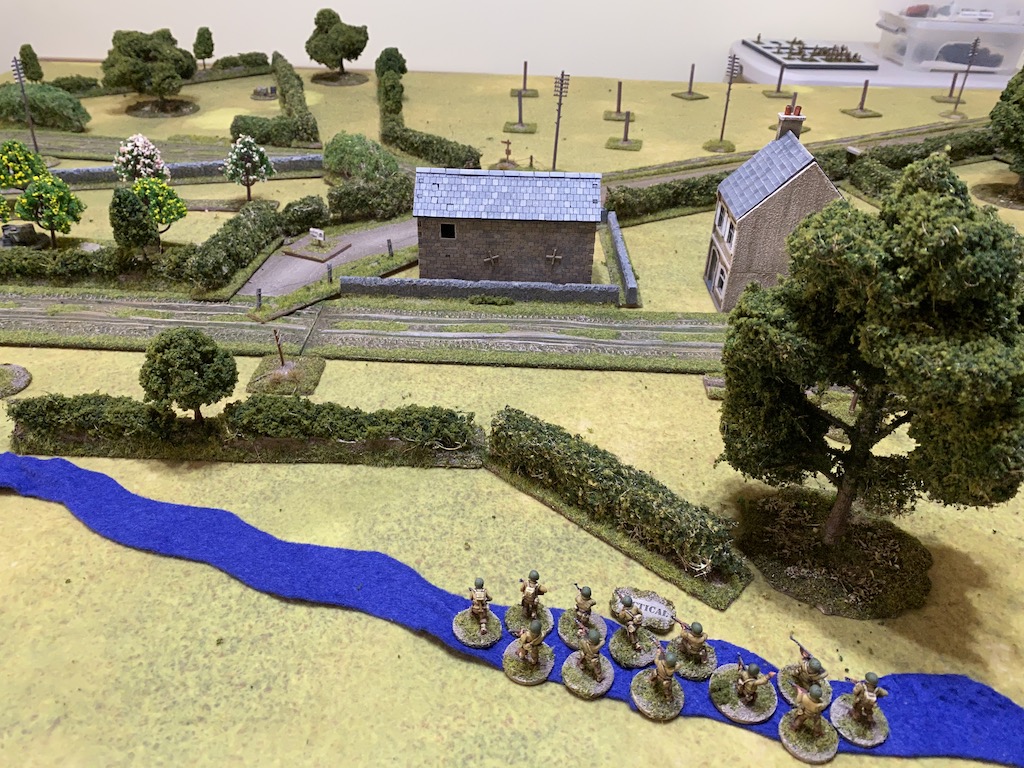
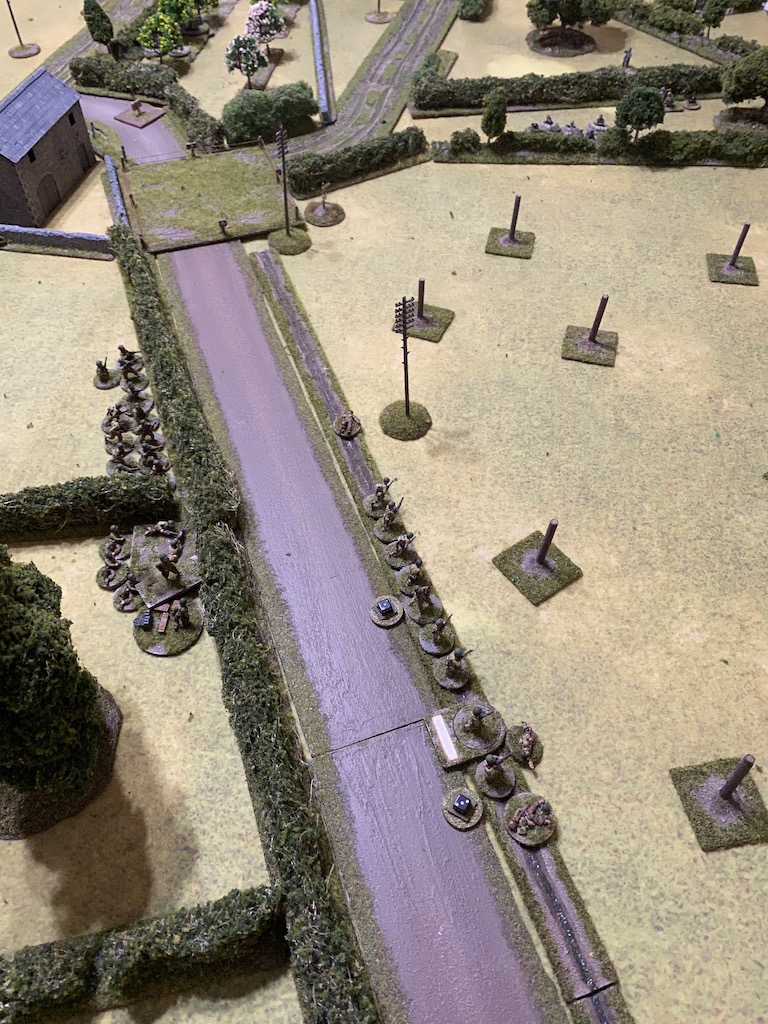
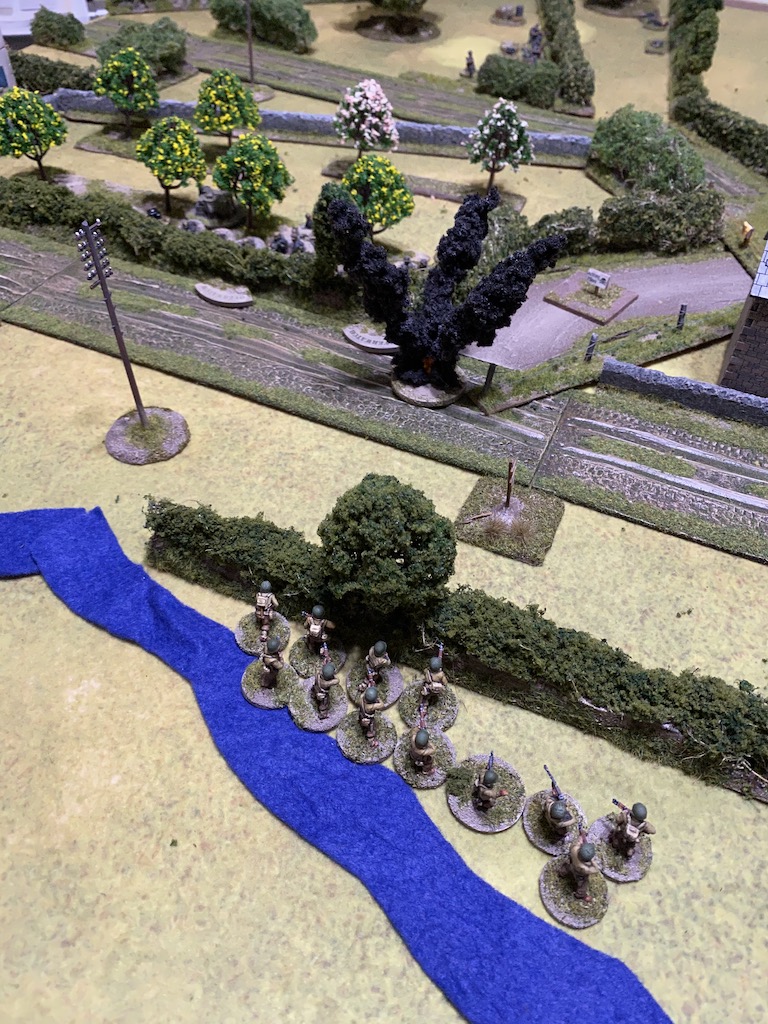
The terrain here features fairly dense hedgerows and orchards interspersed with areas of open ground on the flanks. This should make for good defensive terrain and I hope to make the Americans work hard to evict me. Talking of terrain, I'll have to apologise in advance for our 'stream'. In the absence of a suitable piece of scenery we've settled for a length of blue felt. Not quite the look we are after, but it will serve its purpose.
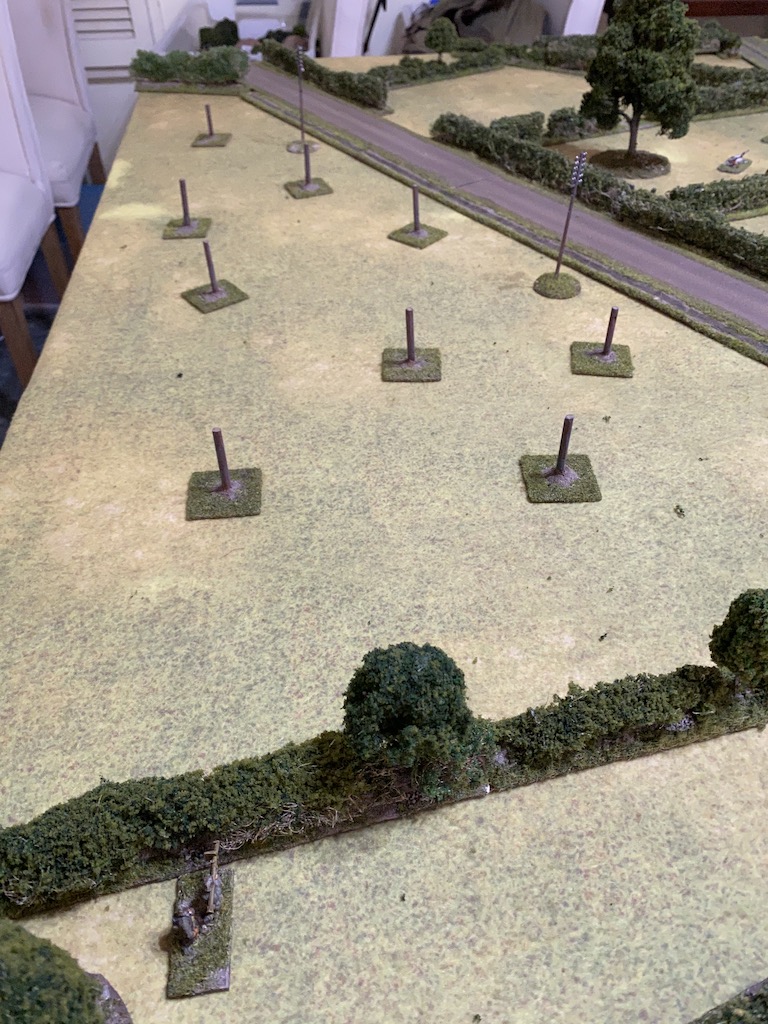
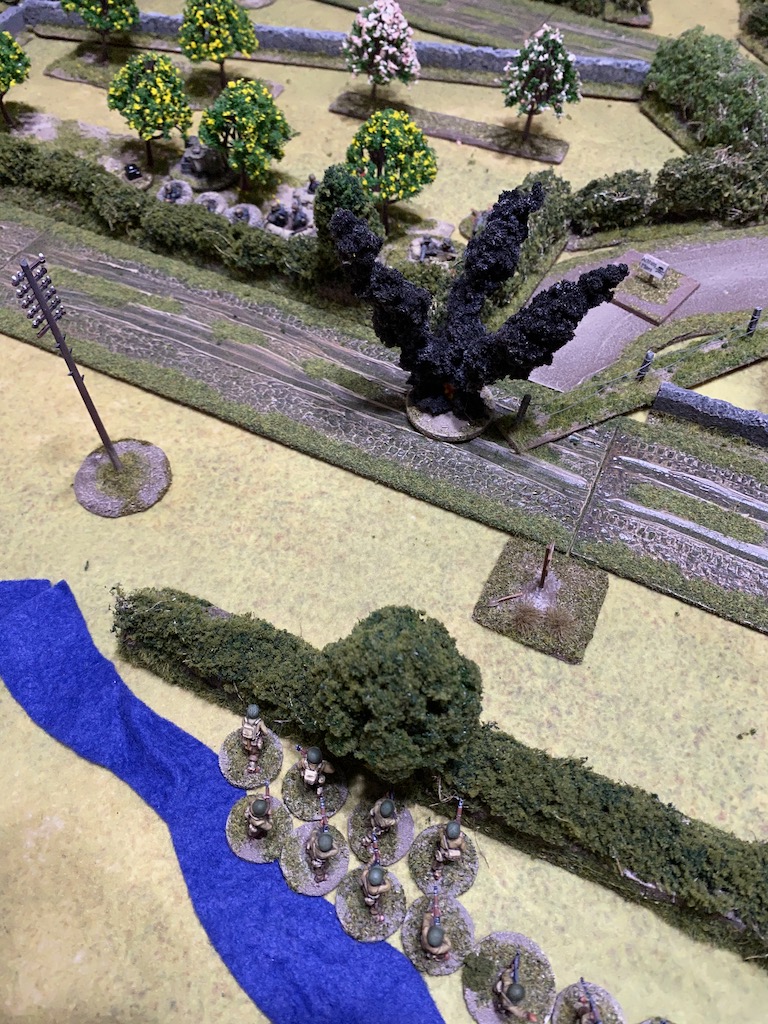
The upright poles in the field on the German left represent Rommel's Asparagus. These rudimentary anti-glider obstructions were erected across Normandy prior to D-Day. They don't block line of sight and present no hindrance to infantry. However, they have Teller mines mounted on top and are enough of a hazard that vehicles will not enter the field. I made these by recycling bases from a rebasing project and mounting pieces of wooden dowel on each one. A quick, cheap and simple bit of terrain building and you can read more about them
in this post.
This scenario is an 'Attack on an Objective' where the Germans are defending their headquarters, located in a building at the rear of the table. The Americans will attack with a fresh platoon and nineteen support points (six of which must be spent on at least one Sherman).
The Germans will have the remnants of the platoon that we last saw defending in
Scenario 2 Delaying Action at Arthenay. They have lost seven men permanently so will start the game with quite a handicap. The scenario allocates the Germans thirteen support points, but I will have only twelve for this game due to the CO's low opinion. Nonetheless it does give me a few choices.
Dave has not made much use of armour in the campaign. The terrain is close and the Germans are equipped with panzerfaust, panzerschrecks and support options for AT guns. For that reason I'm not expecting to see more than the one obligatory Sherman in this game. Nonetheless they present quite a threat. Up until now the American tanks have been content to sit back and provide support at a range that makes it difficult or impossible for the German infantry anti tank weapons to hit them. I cannot ignore that threat, however a powerful anti-tank gun like the Pak40 at seven support points will really limit what else I can call on for support.
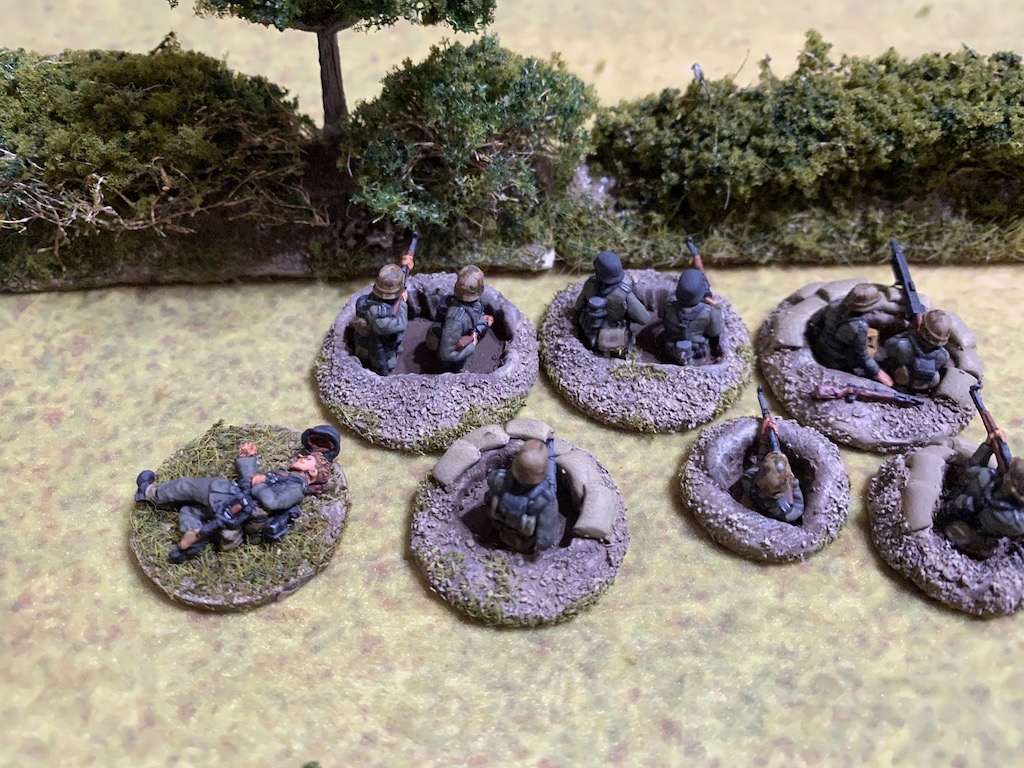
I need to bring the platoon up to strength, but unfortunately the only available replacements are Hilfswillinge. Their presence will have a negative impact on my force morale but at this stage I'm desperate and any men with guns will have to do. I've considered a mortar barrage but at four support points I'm concerned it's a gamble. It could be very useful but that all depends on not losing the forward observer or a premature end of a turn. When it works it can work well but I think I need something more reliable. I've decided I will draw on fixed defences - laying mines and entrenching squads.
Dave may well think that I'm not expecting armour and try to surprise me, so for insurance I will call on a second panzerschreck team. As a result my twelve points of support will be: an adjutant (1); Hilfswillinge replacements (3); entrenchments for four teams (4); two minefields (2), and a panzerschreck team (2). The platoon ends up receiving five replacements, which leaves them only two men short of full strength.
The Americans start the patrol phase with three free moves. I'm happy with the German jump-off-points. I wanted them concentrated in good defensive terrain near the objective building (marked with a yellow ring), but not so concentrated that an American mortar barrage could cover them all.

We start with American force morale at eleven and the Germans at nine. I can't complain, it's better than I expected. Just prior to the start of play the minefields are placed.
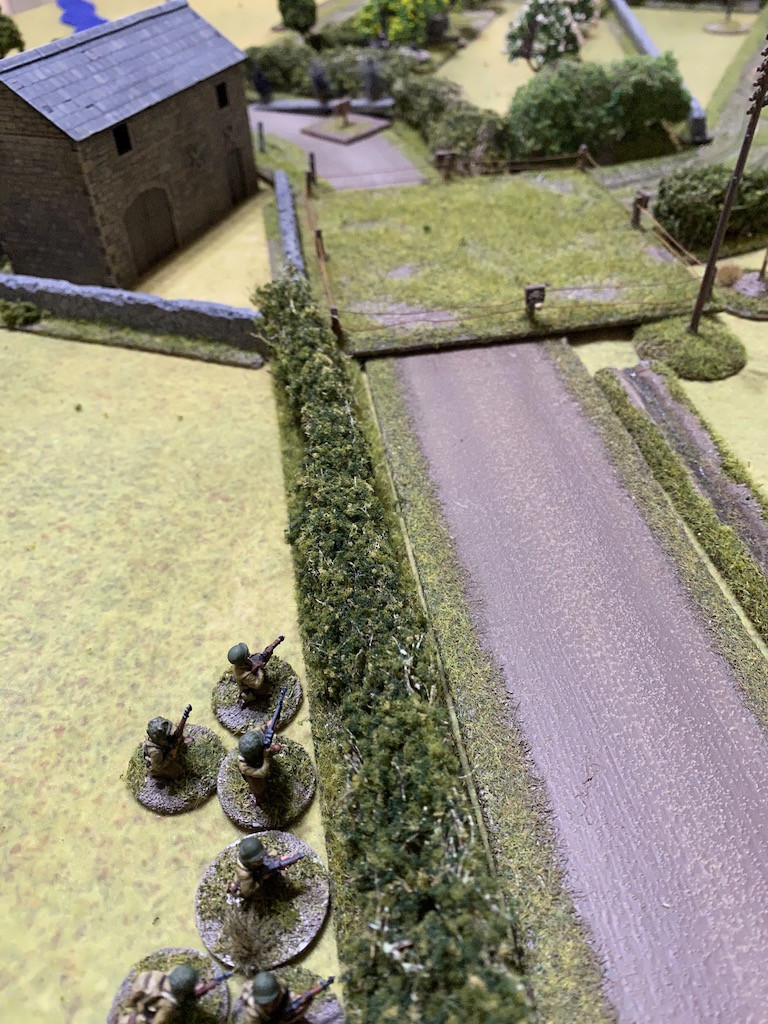
The Americans get off to a brisk start with a double phase and a squad deploys into the stream.
In the centre a 30 cal MMG team deploys behind the hedges.
They are joined by the platoon sergeant.
In the following phase the squad in the stream move forward cautiously, so cautious in fact they only move 1".
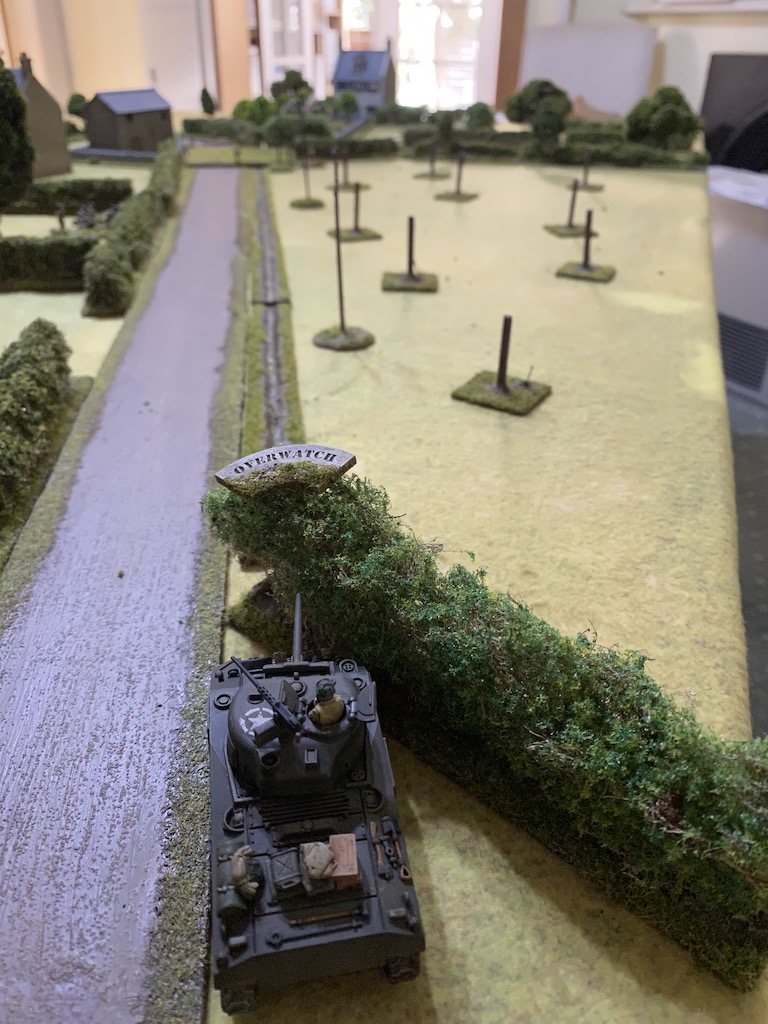
At the rear a Sherman appears and takes up overwatch positions looking across the field of Rommel's Asparagus.
From there it can cover much of the table including the upper level of the German headquarters building. If Dave follows his customary practice it will provide fire support from where it is and I don't expect it to move too far from there.
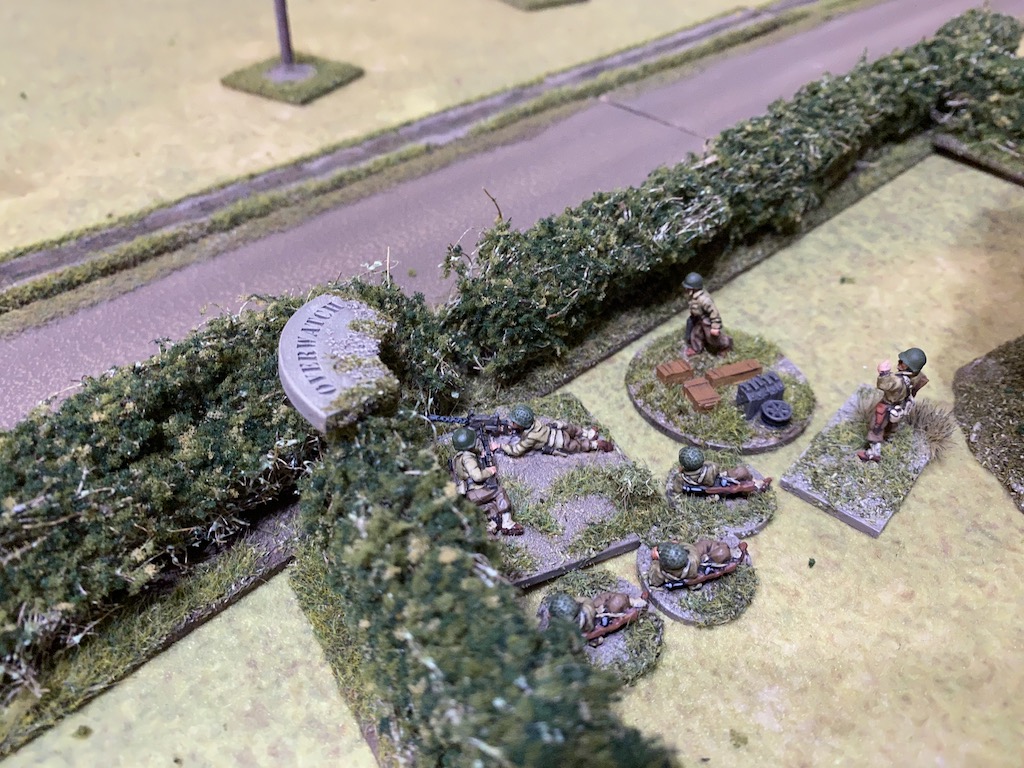
An American forward observer team deploys behind one of the farmhouses in the centre of the table.
Obviously they plan to find a suitable location that offers good cover and more importantly, a line of sight into the German defences.
The platoon sergeant puts the 30 cal MMG team onto overwatch.
I let the German phase pass without any deployment and wait to see what develops. In the American phase the sergeant moves along the hedgerow towards the forward observer.
Once within command range he orders them to move into the house.
The squad in the stream manage to pick up their pace and move a little faster through the water.
The next German command roll is 66641. The double phase is welcome, as is the turn end. I decide it might be worth deploying one of the panzerschreck teams and trying to take out the Sherman. I suspect it won't advance much beyond its current position so I might as well try to damage it where it is. That said the tank gunner is on overwatch, but he won't be once the turn ends, so I choose to delay any deployment until the next phase.
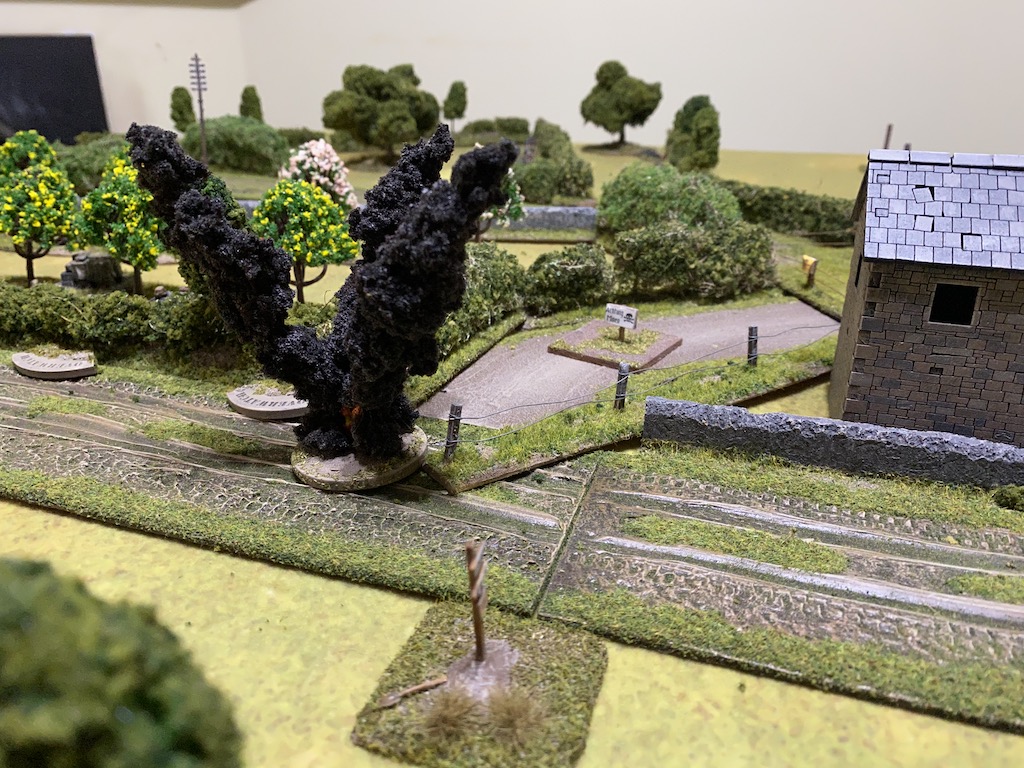
Once the turn ends and the tank gunner is no longer on overwatch I deploy one of the panzerschreck teams and they fire at the Sherman.
Their target is partially obscured and at long range, so I need a 9 or more to hit. The odds aren't great but I don't think they are likely to improve.
Unfortunately the rocket falls wide of the mark and misses the Sherman.
It comes as no surprise that in the American phase the Sherman returns fire.
An HE round crashes into the hedgerow and kills one of the panzerschreck team.
The Americans are not yet finished. The 30 cal MMG sends a stream of bullets across the field at the same target.
The machine gun rounds rip into the hedgerow and kill the surviving member of the panzerschreck team. That's the team wiped out and German morale drops down to eight. Well, they didn't last very long.
With the threat of the panzerschreck dealt with in no uncertain terms a second American squad deploys, this time into the drainage ditch that runs alongside the road.
The squad sergeant puts both teams onto overwatch, facing towards the hedgerow.
The following German command roll is 66431. That's a welcome double phase and I sense a good opportunity to deal with the American squad in the drainage ditch while it is quite exposed.
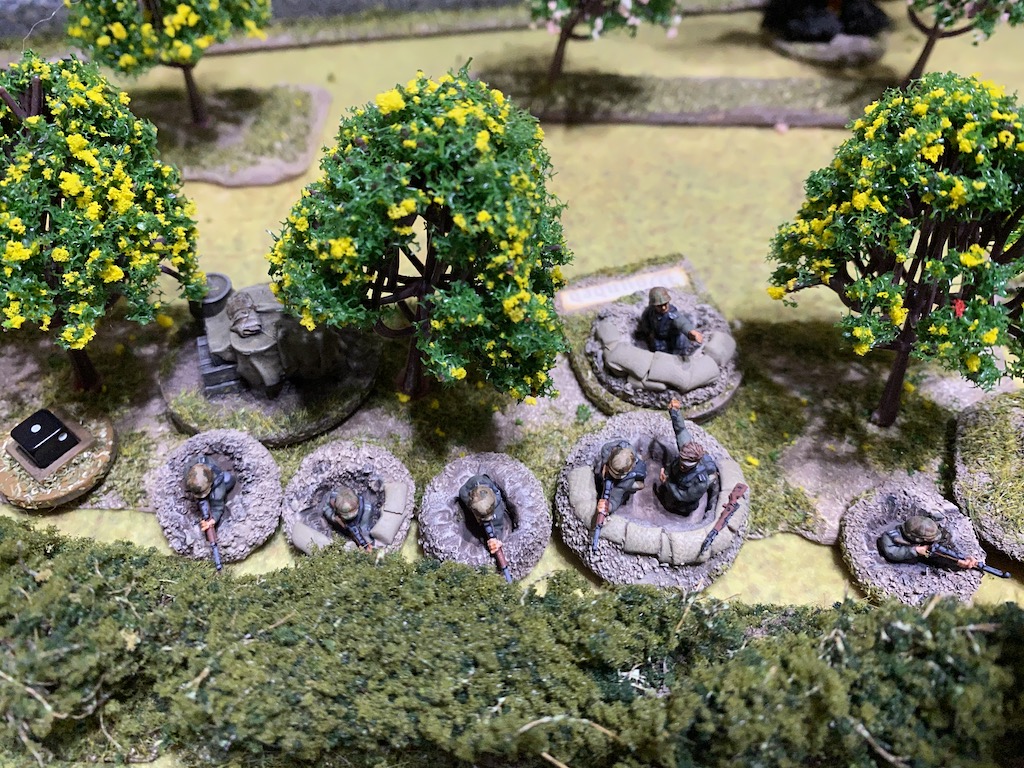
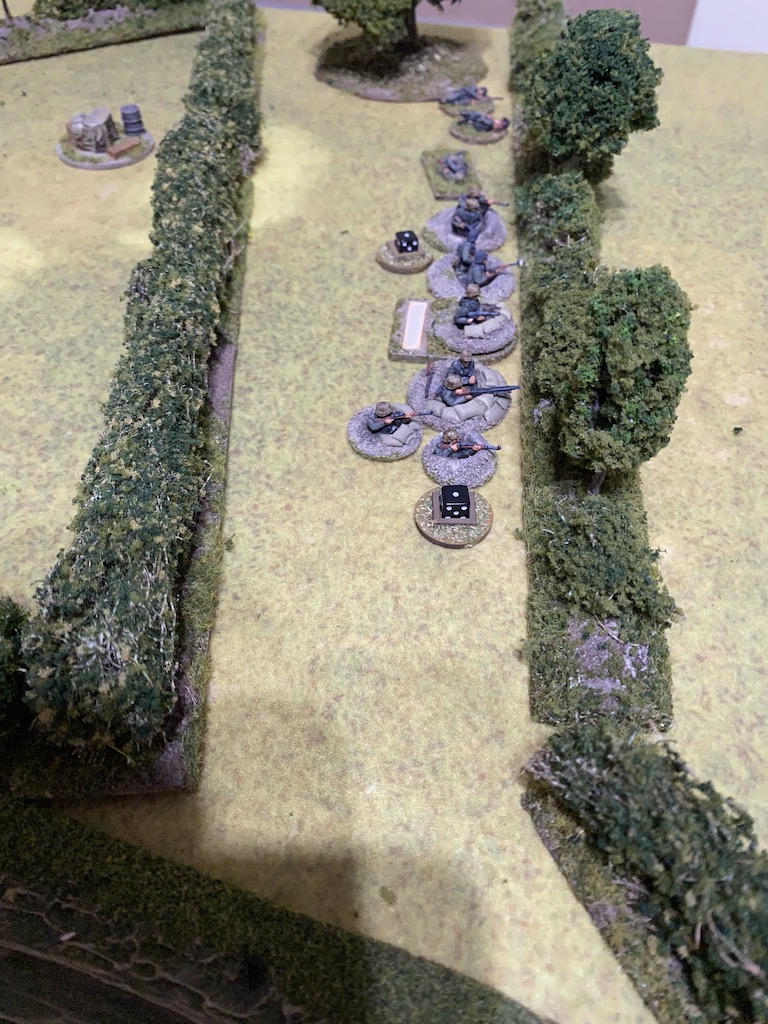
A squad deploys on the German left behind the hedges. I'd prefer to hold back until enemy units have come within close range, but I sense this double phase is too good to let pass. My men are dug in and so should be in a better position to win a firefight than the Americans, who enjoy less cover in the drainage ditch.
The German fire produces nine hits which results in three points of shock on the rifle team and two on the BAR team.
The Americans are on overwatch and return fire immediately.
Despite the hard cover the Germans lose one man in the rifle team.
I decide to use the double phase to have another crack at taking out that Sherman. The second German panzerschreck team deploys alongside the squad (and close to their recently killed comrades from the other anti-tank team). They fire off another rocket at the Sherman.
Fortune is favouring the Sherman at the moment and the second 88mm rocket misses its target.
In the following German phase the panzerschreck team fire once again and this time they find their mark. The Sherman's armour is insufficient to cope with an AP strike of eight and the tank is knocked out. Luckily for the crew it doesn't explode and so they make their escape. Nonetheless that takes US morale down to ten and sees the end of that particular threat.
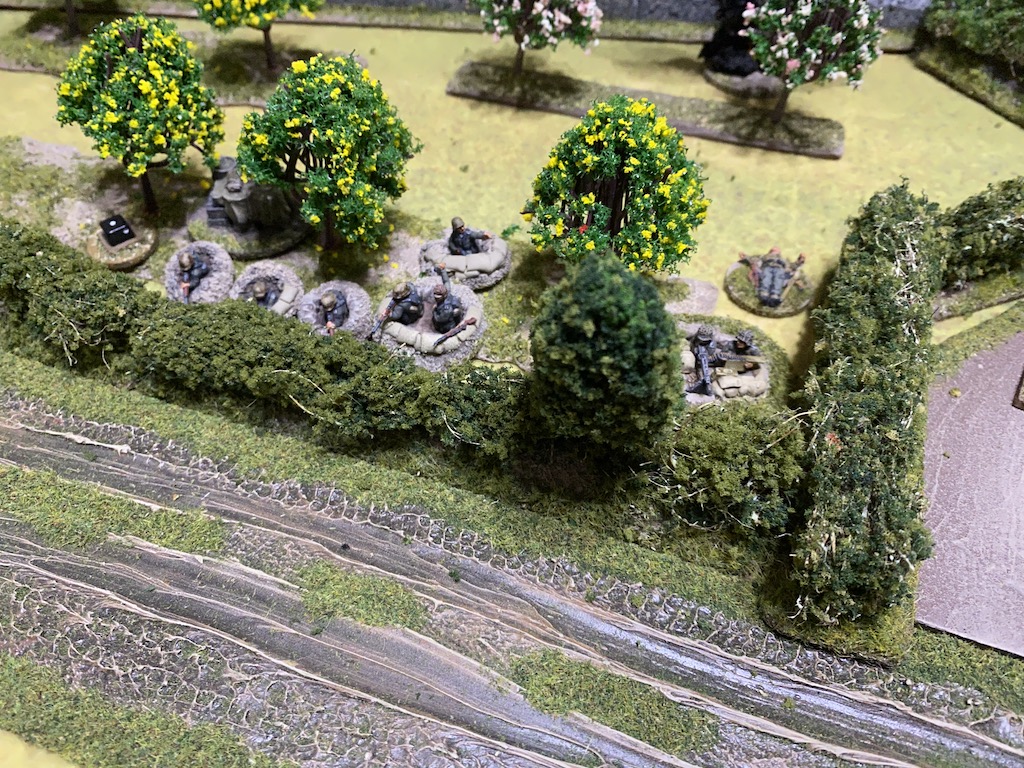
The squad behind the hedge fires again at the Americans in the ditch but it has little effect, inflicting a single point of shock on the BAR team. However there is an opportunity to catch them in a crossfire and so a second squad deploys into the orchard.
They are dug in and the LMG team is positioned at the corner with a line of sight up the road to the Americans in the drainage ditch.
It's a good position because it will allow them to cover an important area of the battlefield including any advance from the stream. In anticipation of an American move from that direction the squad's rifle team are put on overwatch.
The MG42 team is ordered to fire on the Americans up the road.
They lose one man from each team and the squad sergeant is also hit. He is wounded and out of action for the rest of this turn, which takes US morale down to nine.
To make matters worse for the Americans the 30 cal MMG team are unable to target the Germans behind the hedge as their line of fire is obstructed by friendly troops.
In the American phase the platoon sergeant sends the forward observer to the upper level of the house.
He then moves back to the jump-off-point and orders the squad in the drainage ditch to pull back away from the Germans. He wants to clear the line of fire for the 30 cal MMG.
The squad withdraw and in so doing they clear the line of sight for the 30 cal gunner.
American firepower then builds further when a third squad deploys alongside the 30 cal MMG team and opens fire at the Germans opposite.
All of the German units suffer shock and it won't take much more to pin or break the panzerschreck team.
The firefight on this flank is now unevenly balanced in favour of the Americans. I'm either going to need to reinforce the position or pull back.
The German command roll is 65541 and this really limits my options. The LMG team in the orchard fire once again at the Americans in the drainage ditch.
A second member of the BAR team is killed.
Both shock and casualties are beginning to accumulate for this exposed squad.
I won't be able to reinforce the left flank this phase, even if I wanted to, but on reflection I don't think it would be a good idea. It's not a critical position and I think one squad can delay the Americans here. With that the Feldwebel deploys on that flank. I have an adjutant for just this moment and so I can bring the Feldwebel into action without worrying about later deployments.
The first thing he does is bring the panzerschreck team out of the firing line. They are not dug in and they have served their purpose for now.
He rallies a point of shock off the panzerschreck team once it is attached. Then he orders the squad to maintain their fire on the Americans in the ditch. Unfortunately it has absolutely no effect.
That squad will be facing a lot of fire in the next phase and it might have been wiser to have them fall back.
An American command roll of 44322 allows for a lot of activation. The squad in the stream continues to make its way forward cautiously.
The BAR team behind the hedge is ordered by the squad's sergeant to lay down covering fire along the orchard to suppress the fire of the German LMG.
The sergeant then has the squad's rifle team fire at the German squad behind the hedge.

At the same time the platoon sergeant orders the squad in the ditch and the 30 cal MMG team to also fire on the same target.
Despite the heavy weight of American fire the dug in squad suffers only a point of shock on each team and one casualty. However it's the the squad obergefreiter who is hit and he is lightly wounded. Fortunately German morale holds steady.
The next German command roll is 65541, identical to the roll in the previous phase. The suppression from the covering fire will make it harder for the LMG team to hit their target but they continue firing into the drainage ditch.
In spite of the covering fire and the range, the MG42 inflicts another American casualty on the rifle team.
The Feldwebel rallies the last remaining point of shock from the panzerschreck team and calls them back over the hedge, directing them to the rear jump-off-point.
The squad at the hedgerow is now under far too much American fire for comfort and so he also orders them to fall back.
The LMG team are fast enough to climb the hedge. On the other hand the rifle team have further to go and more shock and so they don't make it as far.
Nonetheless, they are out of harm's way for now.
This is a timely withdrawal and not a moment too soon - the next American command roll is 66531. They could have experienced a very uncomfortable couple of phases on the receiving end of a lot of American fire. Yet I have no grounds for complacency. Over on the other flank an engineer flamethrower team deploy into the stream.
The squad ahead of them continue to move forward slowly.
In the subsequent American phase the engineers move and catch up with the squad.
The squad near the farmhouse in the middle of the table move towards the wall.
To screen their comrades in the ditch from the Germans in the orchard the squad sergeant throws a smoke grenade into the road.
The men in the drainage ditch are told to make the most of what cover they can find and take up tactical positions.
The Americans are continuing to push forward. With the move on their right stalled their emphasis is starting to shift to the more covered approaches on their left.
The German command roll is 55433 and gives them their first full CoC die. On their left the wounded obergefreiter rallies a point of shock from the rifle team.
The Feldwebel then rallies another point of shock from the same team before ordering them to pull back over the hedge.
With the weight of the American attack shifting to the other flank the Feldwebel is needed elsewhere. Having formed a new firing line at this second hedgerow he will leave the wounded obergefreiter and his squad to hold this flank. With that accomplished he and the panzerschreck team move at the double towards the rear jump-off-point.
The Americans in the stream are drawing closer to the orchard. The obergefreiter has the LMG team turn and focus their attention in that direction, putting the gunner on overwatch.
In the American phase the platoon sergeant orders the squad in the middle to keep on pressing forward towards the wall.
Now that the Germans have withdrawn from the hedgerow the sergeant orders the squad in the drainage ditch to work their way forward moving tactically.
He then accompanies the 30 cal MMG team forward over the hedge.
The Germans may have inflicted a few casualties but not enough to halt the steady advance of the Americans.
The forward observer calls for a ranging shot but it falls off target, landing close to the orchard.
Fearing German fire from the upper level of the headquarters building the engineer flamethrower team take up tactical positions.
The German command roll of 43332 is very useful. On the left the obergefreiter rallies a point of shock from the LMG team.
The squad then move tactically along the hedgerow to a point where they can cover the road junction.
The Feldwebel orders the panzerschreck team over the hedge to the jump-off-point. They may not do much more this game but at least they can ensure the capture of that jump-off-point won't be a complete pushover for the Americans.
The Feldwebel then moves towards the headquarters building.
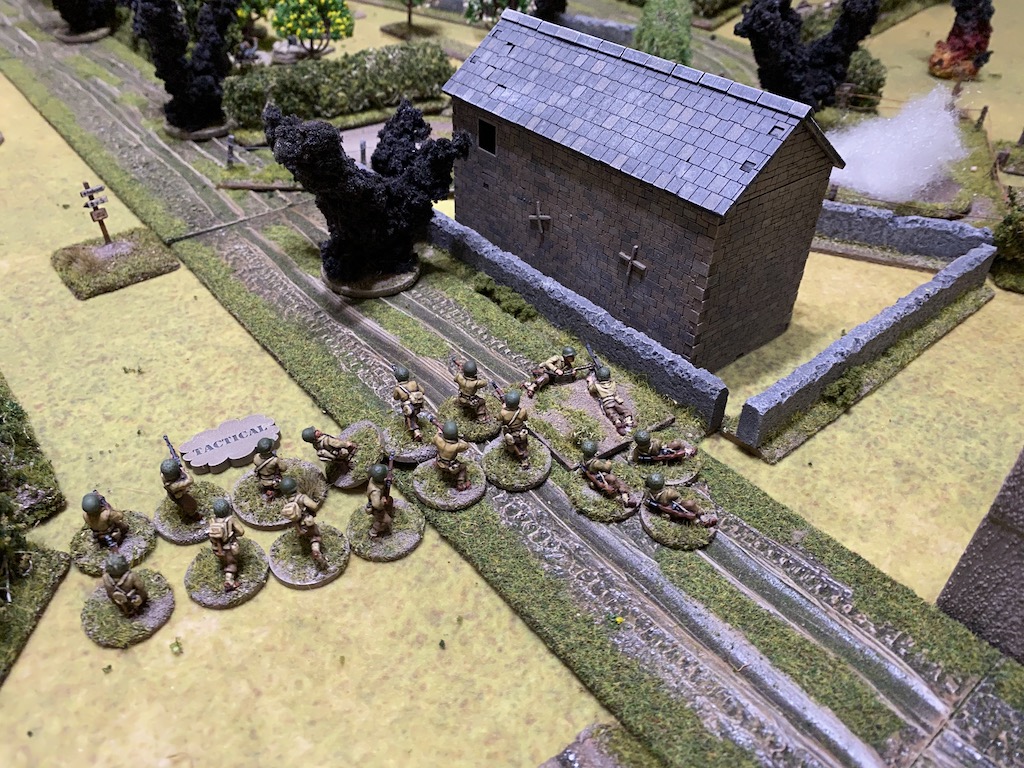
In the American phase the platoon sergeant orders the squad behind the wall to move out into the road using marching fire to engage the Germans in the orchard as they do so.
That's an aggressive move and can only herald the beginning of an American assault on the orchard.
The marching fire is effective and the Germans suffer a casualty in the LMG team.
The platoon sergeant then moves with the 30 cal MMG team to the corner of the wall and hedge by the road junction.
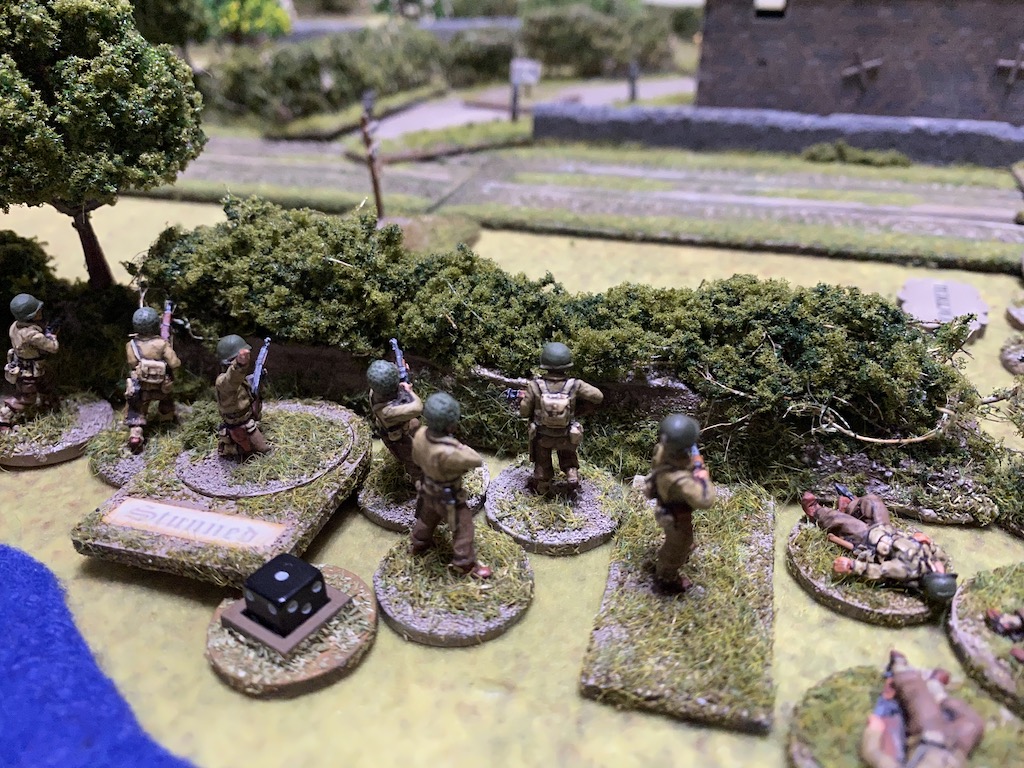
With all the Americans deployed the platoon lieutenant joins his men in the stream on the left flank.
He orders the squad to move out of the stream and use marching fire once they can see the Germans in the orchard.
The squad's move is slow and uncoordinated and only the rifle team move fast enough to reach the hedgerow and engage the Germans.
They fire into the orchard. It has no effect on the entrenched Germans who are on overwatch and return fire immediately.
The Americans suffer three points of shock. Despite the setback the lieutenant then orders the flamethrower team out of the stream and they are more successful (I must have found the prospect of the flamethrower very off-putting because it was one of the rare occasions when I forgot to take a photograph).
Meanwhile the forward observer calls in a new aiming round. Once again it fails to come down on target, this time landing on the other side of the orchard.
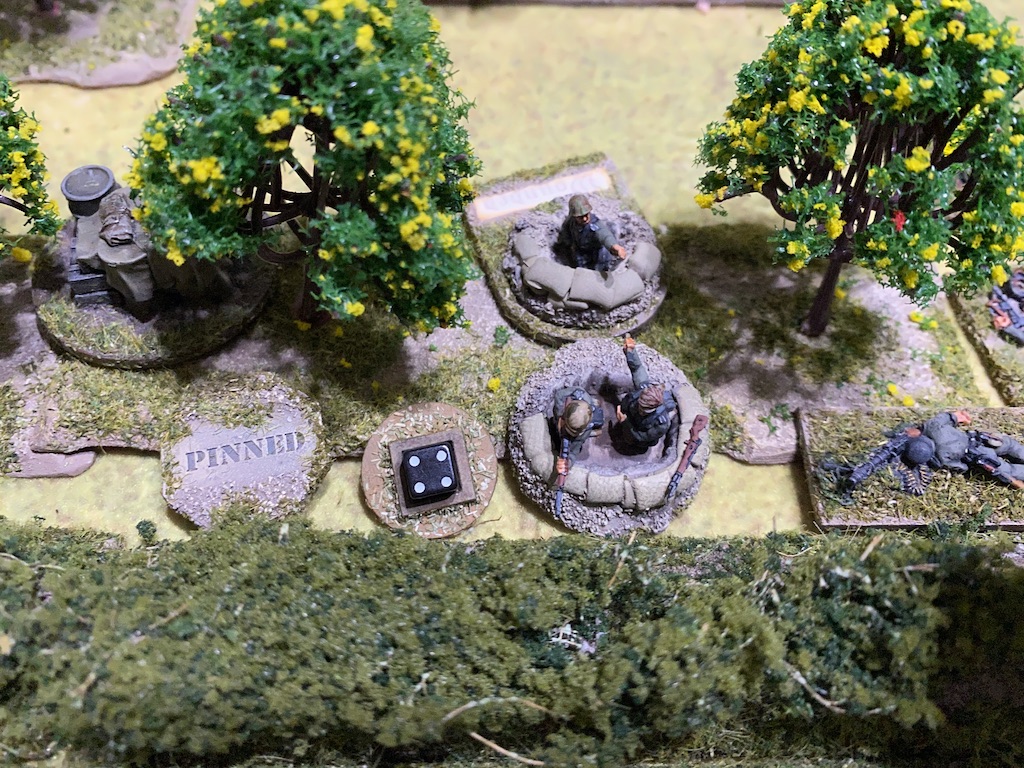
In the German phase the squad in the orchard opens fire on the Americans opposite.
This time it is much more effective, causing a casualty in the flamethrower team and two casualties and more shock on the rifle team.
With the prospect of an imminent mortar barrage and the resumption of an American advance on my left flank I think the squad might be wise to return to their foxholes. They manage to clamber over the hedge but not far enough to reach their foxholes. It could get ugly if the barrage catches them in the open like this.
With American pressure building on the German right flank the third squad deploys into the upper level of the headquarters' building.
They fire on the American squad in the road. The target may be beyond close range but they are in open ground.
Despite four hits and the lack of any cover the squad survives unscathed.
In the American phase the lieutenant moves forward up the stream to join his men.
He orders the squad to use marching fire so that the BAR team can make it to the hedgerow. It doesn't take much foresight to anticipate that the the flamethrower team will join in the attack. This could prove deadly. I have a CoC die that I was planning to use for an interrupt, but I was thinking that would be so that the squad on the left could move into their foxholes should the mortar barrage threaten them. However, I think this presents a much greater danger and so use it now to interrupt the American fire.
The German fire inflicts another point of shock on the rifle team.
The flamethrower engineers are down to two men and the team suffers two casualties. If there was ever a time Dave was hoping one of his leaders take the hit and thereby keep the engineer team alive this is it. Luckily for me his leaders come away unscathed, which means the engineers are wiped out before their dreadful flamethrower has a chance to do its work.
The loss of a support team drops US morale to eight. I sense Dave's personal morale take a slump at this point too. Funnily enough, I have no problem remembering to take a picture to record the event.
With the German interrupt complete the American squad moves and fires.
The obergefreiter is hit and he is lightly wounded which takes German morale down to seven.
The Americans in the road also open fire on the orchard.
This time they only manage to inflict one point of shock on the MG42 team.
The German command roll is 65542 and helps them move towards another CoC die. It also allows the squad on the left to activate and they move quickly into their foxholes.
The Feldwebel then orders the squad in the upper level to continue firing at the Americans in the open.
This time it's the American turn to use a CoC die to interrupt and the squad goes to ground taking up tactical positions.
The move pays off as the German fire has no effect.
The Feldwebel then moves forward to the rear of the orchard and to within command range of the squad that is dug-in there.
He orders them to maintain their fire.
That fire is effective once again and the rifle team loses a man and both teams suffer more shock. If I can maintain this level of fire that squad is very close to becoming pinned or breaking.
The American command roll of 55521 is not helpful and neither of their senior leaders will be able to activate this phase. The squad in the open loses its tactical stance and opens fires on the orchard.
This is where their semi-automatic rifles make a big difference. Their fire yielded only four hits, but included four 1s in the initial roll. When they are re-rolled every single one becomes a hit. That doubles the original number of hits to eight. The result is ugly, with the German LMG team losing two men thereby reducing the crew to a single man. The squad also suffer a man killed in the rifle team. So much for being in hard cover.
The forward observer then calls down the full mortar barrage. The only German unit it strikes are those in the orchard, but this time their foxholes provide adequate protection and they are unscathed.
The Germans then have some luck with a command roll of 66555. While I cannot activate any units the CoC points and double phase could be very useful. The subsequent roll is 65541. This gives enough points for a full CoC die and the ability to end the turn. The Americans used their only CoC die for the earlier interrupt which means I can bring the barrage to a premature end.
Before that happens the LMG team on the German left fires at the Americans in the drainage ditch.
The squad sergeant is hit and wounded. He is already stunned from that earlier wound but now he is lightly wounded. This time US morale remains steady.
At this moment in time there is not much the Feldwebel can do. One of the squads in command range is pinned under the barrage while the other, in the upper level of the house, has its line of sight blocked by the same barrage. All he can do is put the squad on overwatch (which on reflection was a pointless exercise, as I intend to finish the turn).
With that done I use the CoC die to end the turn. That brings the American mortar barrage to an end. The squad sergeant in the ditch is no longer stunned, but still carries the effects of the more recent light wound.
The next American command roll is 55544, the sort of roll that only benefits a platoon with two senior leaders. On the left the platoon lieutenant rallies three points of shock from the rifle team.
The platoon sergeant orders the squad in the open to move forward tactically.
He then instructs the 30 cal MMG team to move into the road.
That enables them to join the squad and add to the growing American firepower on that flank.
Finally, to ensure he stays within command range, the sergeant himself moves along the wall.
With that the phase ends and the residual smoke and explosions from the mortar barrage are removed.
The odds are starting to build up around the orchard but the Germans are in hard cover and there is really nowhere else to go. They must stand and fight. The wounded obergefreiter uses his single command initiative to assign a man from the rifle team to join the LMG team. That brings the team back to two men and so the LMG can fire at full effect.
The Feldwebel orders the squad in the upper level of the headquarters to continue firing at the squad and MMG in the open.
It results in only one point of shock on the MMG team and one point on the rifle team.
Now that the MG42 in the orchard has been restored to a two man team the Feldwebel orders the whole squad to open fire.
The American squad sergeant is wounded and knocked out of action for the remainder of the turn. That takes US morale down to seven.
Over on the German left flank the squad at the hedgerow fires on the Americans in the drainage ditch.

They take two casualties, with a man lost on each team plus two points of shock.
The man lost in the BAR team was the last remaining member of that team and so they are wiped out. However US morale holds steady. Both sides are seeing casualties creep up and it is difficult to work out which side, if any, has the edge at the moment. I certainly feel under pressure as American numbers and firepower are starting to tell, but I also sense Dave is feeling the impact of his accumulating losses too.
In the American phase the lieutenant rallies more shock from the rifle team.
He then moves out of the stream to join the men at the hedge.
From there he orders the 30 cal MMG team to lay covering fire on the upper level of the headquarters building.
The squad at the hedge by the stream opens fire into the orchard.
They are joined by the squad in the open.
Together they can bring a great deal of fire to bear.
In a deadly burst of fire the two men manning the MG42 team are killed and so that team is wiped out, which brings German morale down to six.
The rifle team also lose a man and suffer three points of shock.
Which means the few surviving men are now pinned.
Over on the other flank the squad sergeant in the ditch has one of the men throw a smoke grenade into the field to screen the remaining men from the Germans behind the hedge.
With the losses that just occurred in the orchard the German position has become very fragile suddenly, so a command roll of 66331 is very welcome. It's time to see what I can do to shore up the position. The squad behind the hedgerow abandons its foxholes once more and moves at the double towards the Feldwebel.
Meanwhile the Feldwebel himself orders the squad in the upper level to fire at the Americans in the open.
The Americans choose to interrupt using a CoC die and the squad goes to ground taking up tactical positions. The combination of covering fire from the MMG, the range and the Americans taking cover means the fire results in a single hit that has no effect.
The Feldwebel then moves towards the squad that has come from the left. He rallies the shock from the recent move off the LMG team.
In the subsequent phase the Feldwebel has the squad advance to the wall and take up firing positions.
He then moves back towards the headquarters and orders the squad there to fire once again.
This time their fire is far more effective and the Americans lose a man in the MMG team and in the squad's rifle team.
In the American phase the lieutenant rallies shock from the rifle team and orders the squad to fire into the orchard.
The result is truly deadly. The squad suffers three kills. That's enough to wipe out the two remaining men in the rifle team, but fortunately morale holds steady. However, the wounded obergerfeiter takes a second wound and that is enough to kill him. This time the death of one of their squad leaders is enough to bring German morale down to four.
That squad stood its ground quite literally to the last man, but will the sacrifice have been enough to save the game?
The platoon sergeant then orders the squad in the open to fire at the Germans in the upper level of the house.
It's enough to kill one of the rifle team and inflict shock on both teams.
The sergeant then has the 30 cal MMG team lay more covering fire on that upper level.
The forward observer tries his luck to see if he can contact the battery for another mission and discovers that yes, one is available immediately. Meanwhile the squad sergeant in the drainage ditch rallies shock from his rifle team.
The Germans are now down to four command dice and a roll of 6554 is not very useful. All that I can do is have the Feldwebel rally shock from the squad at the orchard wall.


In the American phase the NCOs rally shock from their squads and then the Lieutenant orders them both to fire into the upper level of the headquarters.
The fire results in nine hits and despite the hard cover I manage to roll five kills. That's a disaster. The obergefreiter is wounded and that brings German morale crashing down two points to two. The rifle team is wiped out and that brings their morale down a further point to one.
The Americans are not quite finished yet and the platoon sergeant commands the MMG team to fire on the same target.
That fire kills one of the LMG team which reduces that team to a single man, who together with the wounded obergerfreiter are the sole survivors of that squad. In only a few phases the German defenders seem to have melted away before my eyes.
The final ignominy comes when the forward observer calls down a spotting round that lands close to the squad by the orchard wall.
At this point it's clear the Germans have little hope of holding on and when my phase arrives I call it a day. For a while it looked like the Germans might be able to hold the Americans, particularly with the loss of the Sherman, the flamethrower team and the premature end to the mortar barrage. Credit though to Dave, who despite these setbacks, made a calm assessment and realised he still had enough strength to keep on pushing and force the issue.
One should never underestimate the benefits the Americans gain from their semi-automatic rifles. Re-rolling 1s might not seem like a major factor but these add up across an entire game and give the Americans a notable edge. Add to that the benefit of marching fire and they can apply that significant firepower and still maintain their movement. Used well it can prove very effective.
Looking back on the campaign there are a few things I would do differently. I now think scenario 1 presents the Germans with one of their better opportunities to stall the Americans. I would certainly take a different approach in hindsight. I didn't exploit the off table 88mm gun enough nor did I force the Americans to take greater risks coming forward to find the Germans. The same can be said of scenario 2. I'm not suggesting it is easy to stop the Americans here, only that I could have done a better job than I did.
A Pak40 as a support choice is hard to justify given the limited number of support points available. However that should be considered against the benefits of destroying a Sherman. A knocked out, burning Sherman has the potential to drop American force morale by four points (two for loss of support and two for loss of a junior leader). If the Americans have two tanks and you can do that to both there's a very good chance of winning the scenario by that element alone. Now that's easier said than done but it's a factor worthy of some serious thought. Even the best made plans can go awry and when Sean Devenish and John Mumford played scenario 1 recently the Germans made a very deliberate attempt to take out the two Shermans only to have bad fortune play its part (Sean's excellent AAR can be read here
https://smartwargaming.wordpress.com/2020/05/19/29-lets-go-part-1-probe-near-la-cambe/).
Dave was well aware of that risk and used his Shermans very carefully (which was one reason why in this game just played I was happy to deploy my panserschreck teams as I did, knowing there was little chance the tank would come any closer or provide any better target). Worth noting that in the previous game
The Radar Station at Cardonville he didn't even deploy his Sherman at all.
Should I have tried for a more aggressive defence in the later games? Overall my support choices were passive - entrenchments, minefields, adjutant etc. Perhaps it might have been better in this last game to select far more aggressive supports like a mortar barrage and/or an MG42 MMG? It's hard to say, as the entrenchments have generally helped my Germans deal with the large amount of American firepower. In an ideal world I'd take both approaches.
Take no credit away from Dave, whose tactics were difficult to fault. His approach of building up a strong base of fire before advancing nearly always paid dividends. The only defeat he suffered was in the first playing of
Scenario 4 The Radar Station at Cardonville when he allowed his advance to become uncoordinated and his squads lost the mutual support they have made such good use of in other games. There was a danger of that happening in the early stages of this game when he hit difficulties on his right flank. However he soon made adjustments, concentrated the platoon and forced the issue on the opposite flank. Most importantly when things were not going well he didn't lose heart. He assessed the situation and acted accordingly. A well earned campaign victory for the Americans.
Once again another great campaign that lets the Chain of Command system really shine. As always, the toughest decision at this stage is to decide which one we play next. Thanks to everyone who has been following the campaign and postings their comments, both Dave and I really enjoy hearing your thoughts and observations.
If you've enjoyed following along and would like to
Buy Me a Coffee to help cover some of the costs of running the blog you can click through at the link or on the tab in the right hand column of this page.