
They will receive a fresh Volksgrenadier platoon at Assembly Point A and will keep secret any moves by their other platoons between the assembly points. At the start of the previous campaign turn the Americans received ten support points and used it to call up a Sherman and two bazooka teams. However the Germans had other plans. A Volksgrenadier platoon at Assembly Point D interdicted the road and they were successful at turning back the tank and both teams. At the start of this new campaign turn I will make another attempt to get those assets through to the platoons in Consthum village, but success or otherwise will be determined by the roll of a D6.
Things start off very badly. The Sherman is ambushed and destroyed. That's quite a blow to my beleaguered Americans who could do with all the armour support they can get.

The first bazooka team are spooked by the loss of the Sherman and they turn back. However the other team are made of sterner stuff and manage to find a way through. I assign them to Map 4 which is not well equipped to deal with German armour (it is where the Sherman would have been assigned...... had it arrived).
The Germans announce they will be making two attacks this turn - on Maps 3 and 4. I regret not having the Sherman available to help defend Map 4 but at least I have an extra bazooka team. The first game we will play is the attack on that map. Dave can see that when the time comes to attack Map 5 his troops will benefit from more cover if they can come from Map 4 rather than Map 3, so this game is being played with one eye on the future.
Campaign Turn 8 scenario 1 The Outskirts of Consthum
This will be the second attack on this battlefield. Dave tried a coup de main in the first assault and with better luck may very well have pulled it off. I'm not sure what he has planned for today but I suspect it will be a different approach.

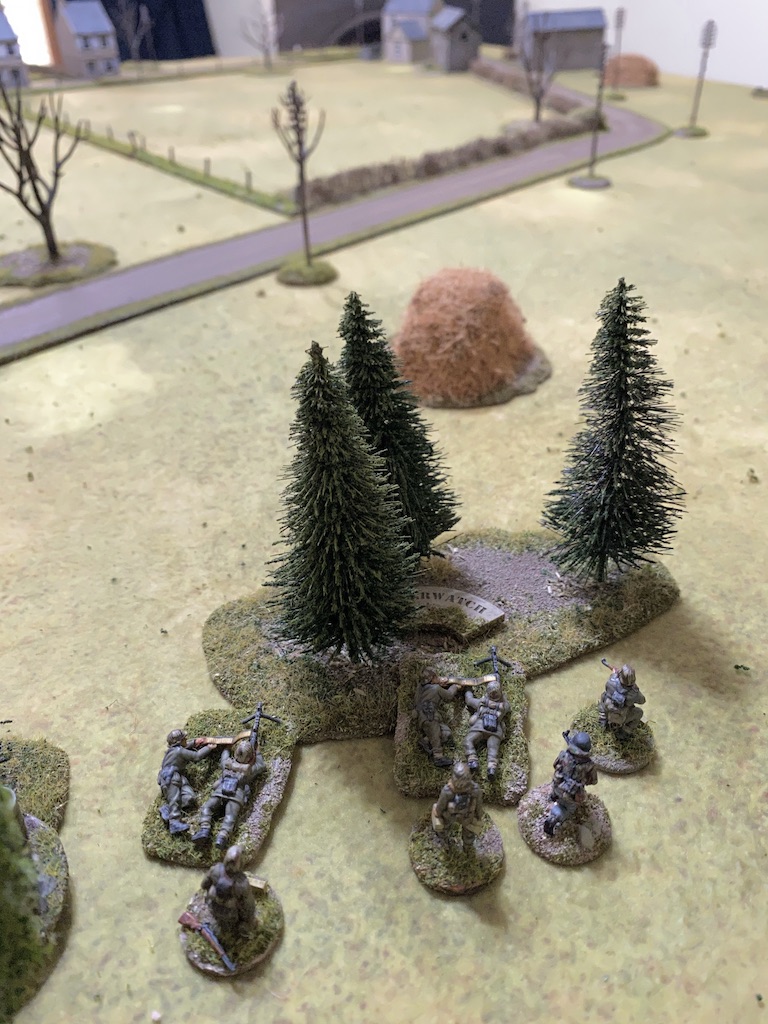
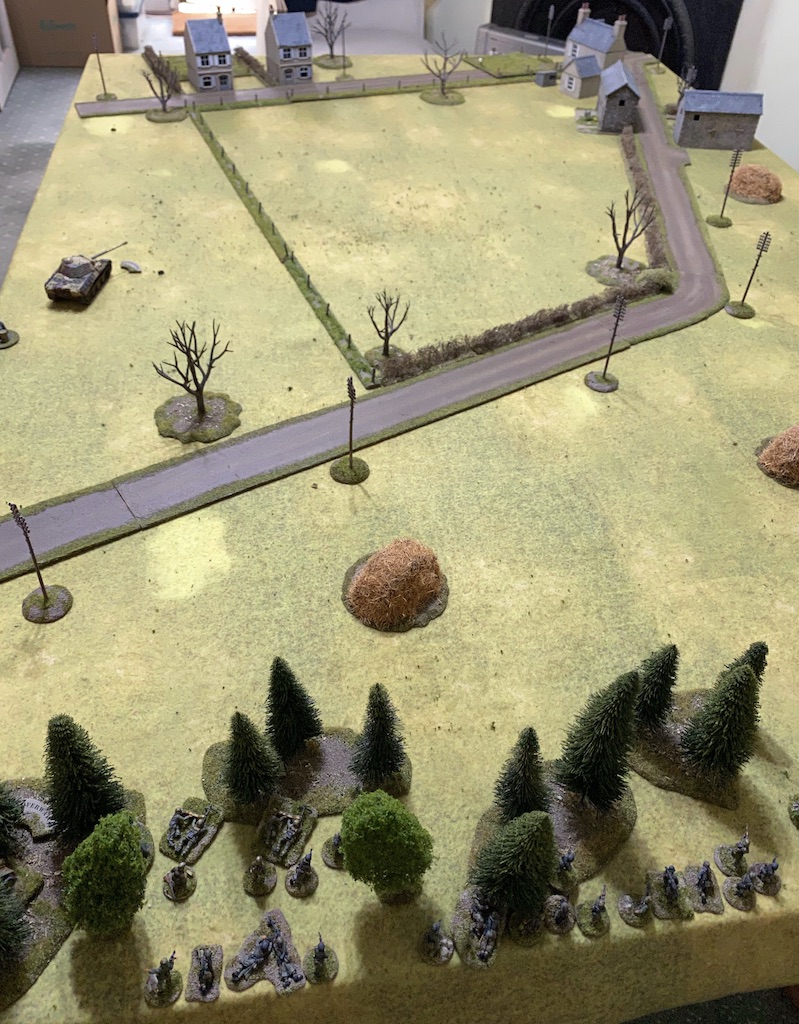
He plans to come through the wooded area, from the direction of Assembly Point C and, as before, will play this as a Probe scenario. The Americans start with three free moves in the patrol phase and are successful at restricting the Germans to jump-off-points around the edge of the table. I assume the Germans will have armour, but as they are approaching from Point C they will not have access to a road. That means they will have to take care when crossing the soft ground as moving any faster than slow will risk the tanks bogging. As they have to cross the table longways they have some way to go to reach the other edge, so they will have to risk either moving slowly and receiving American fire, or, driving fast and bogging down. How I wish that Sherman was available.

The American platoon is at full strength and the recently arrived bazooka team will join a Bofors AA gun as support. The Bofors has both HE and AP and while the armour piercing rounds are not particularly powerful the gun remains a reasonably potent weapon to deal with either infantry or armour. In addition two minefields were placed in the previous game and they will remain where they were. There are entrenchments available for three teams.
They will face a German Volksgrenadier rifle platoon that is understrength, having attacked Skyline Drive unsuccessfully in the first scenario on Campaign Turn 3 and lost five of the platoon. They will field two weak rifle squads and a third squad composed of an enlarged LMG team. However they will have twenty support points for this scenario, which should be a considerable help.
American morale starts high at eleven while the Germans, suffering from the low men's opinion, are only at eight. With the higher force morale the Americans have the first phase. The first command roll is 66532, but other than acquire a CoC point they choose to stay concealed. The same occurs in the following phase.
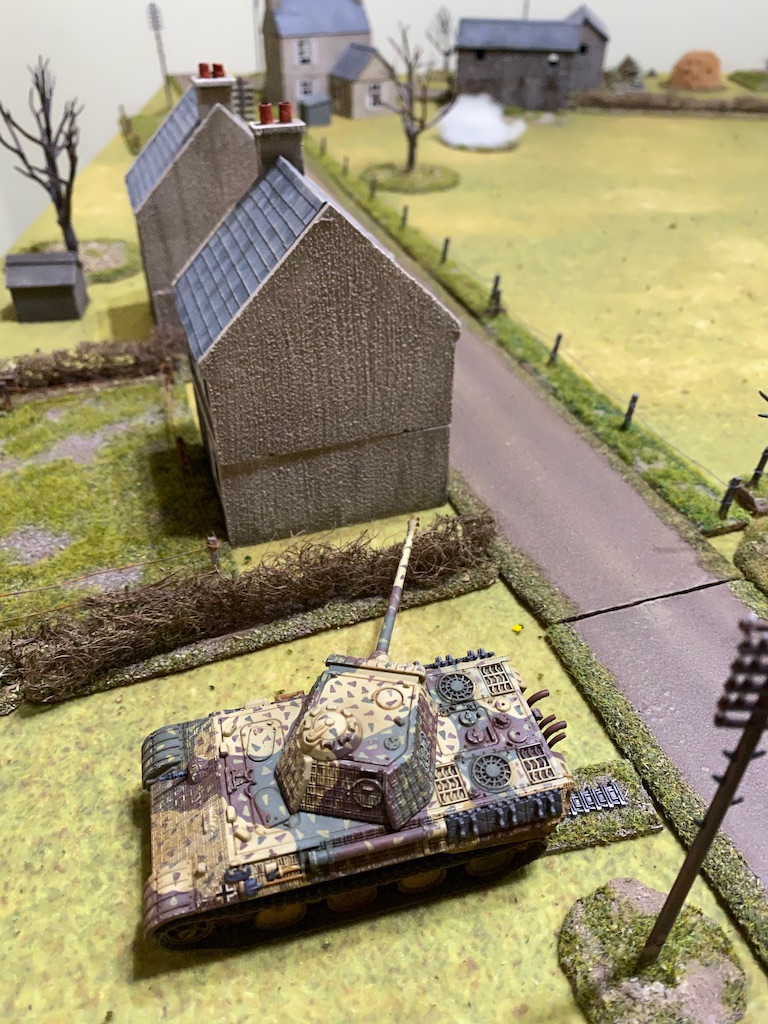
The opening German command roll is 66641. This is the third time in the campaign the Germans have had an opening roll with 666 and a turn end. A relief then that this is a Probe scenario and a pre-game barrage is not a support option. In this and the following phase the first few German units deploy. There is little surprise to see a Panther appear at the tree line in the woods. Although I note that it deploys using the 4, which means it is commanded by a senior leader and is not rated Green.

A support LMG squad deploys and both teams are placed on overwatch.


The Panther moves forward slowly taking care not to bog on the soft ground. The commander has the gunner maintain a vigilant eye on overwatch.


German squads start to deploy into the woods but are careful to keep back from the tree line and hidden from view.


The next American command roll is 65532. That provides sufficient points for a CoC die and helps make up my mind. I won't get a better shot at the Panther than this and so the Bofors deploys in a dug-in position and opens fire.


Events don't unfold any better when the Germans roll 66211 in their following command roll. While it may be tempting for Dave to make the most of the double phase and rush the Panther off the table, that would risk the chance of bogging. Instead the tank continues to moves slowly while the commander orders the gunner to remain on overwatch.

The following German command roll is 66663, which heralds a double phase, a turn end and a random event. The luck is certainly going their way at the moment as the random event has them discover a hidden wine cache which lifts their force morale to nine.
From the woods the LMG squad opens fire at the Bofors crew. The gun may be out of action but there is an opportunity for the Germans to take out a junior leader and wipe out the crew.

Another member of the crew is killed, which is sufficient to see them pinned.

The next German command roll is 55321. It will see an end to the run of phases but provide enough points for a CoC die and allows for a couple of activations. The first of these has the LMG squad continue to fire on the Bofors crew.

Another American is killed and that's enough to break the survivors. They fall back and that takes them off the table. The loss of the support and a junior leader routing off the table has a big impact on American force morale which drops from eleven to seven. I have to say that so far this has been an awful start.

Meanwhile the Panther continues to traverse slowly across the muddy field with the gunner looking menacingly toward the American positions.

Events take a turn for the better with an American command roll of 66444. Not the most useful set of dice but I decide to deploy the platoon sergeant behind one of the barns. If I can bring on both of my bazooka teams I'd like to have the sergeant available to help control their fire.

Fortune now favours the Americans with a subsequent command roll of 66421. This is another opportunity to hit the Panther in its side armour and I have no hesitation in calling forward one of the bazooka teams. They find a good position at the corner of a barn and fire another rocket at the German tank.

This time their aim is good and the rocket strikes the side of the tank. It makes an AP strike of three which results in one net hit. The Panther crew suffer a point of shock and the tank receives some damage to the engine. It will mean losing the lowest dice in any future attempt to move fast or flat out. Given the chance of bogging in the soft ground that sort of move appears unlikely, but you never know how desperate the crew may be. As a marker to help us remember this I use a base with a piece of track - you can see more about how I made that and other tank markers in this post about AFV markers.

The Panther gunner is on overwatch and returns fire at the bazooka team with a round of HE. The solid stone walls of the barn may provide good protection but the explosion kills one of them.

The Americans have the next phase and a command roll of 65411 is a perfect opportunity to try and inflict more damage on the Panther. The lone bazooka man prepares to fire again, but Dave uses his CoC die to interrupt. Wisely, the Panther commander pivots the tank to present its thicker armour to the enemy.


The platoon's inherent bazooka team are now called forward. They take up position on the other side of the barn and fire.


Their shot is accurate and another bazooka rocket strikes the Panther. The result is one net hit which inflicts more shock on the crew and the same engine damage. That's the third time the hit has resulted in engine damage, very frustrating when almost any other result on the one net hit table would be preferable to repeating this same result!
Nonetheless with three points of shock the crew are rattled and very close to abandoning the tank. This is where the senior leader commanding the tank has proven his worth, had he not been there a Green crew suffering this much shock would have bailed out.

The American run of phases comes to an end with a command roll of 43222. That roll means the bazooka teams would be unable to activate, so it is just as well I had deployed the platoon sergeant earlier. He demonstrates the value of having a good leader at the point of decision by ordering both bazooka teams into action. His first command is to call the lone bazooka man back to the jump-off-point to look for more ammunition.


He moves back quickly, searches for more rockets and finds some.

That's good news and hopefully he can return to deal with the Panther. Then the sergeant orders the second bazooka team to maintain its fire. There is an awful lot at stake here and the outcome of the scenario really does hang in the balance. A bazooka hit that manages to inflict a further point of shock will see the crew abandon the tank. If that happens I feel fairly confident I can hold off the German infantry.
The bazooka rocket sails through the air and hits its target. Unfortunately it explodes harmlessly against the thick frontal armour and has no effect.

Well that was a good run of American phases during which they hurled as many bazooka rockets as they possibly could at the Panther, but in the end it was not quite enough to put it out of action.
In the following German phase the experienced Panther commander is able to draw on his three command initiatives to instil courage in the crew. He rallies off two points of shock and, as he does, I watch all the hard work by the bazooka teams slipping away.


They suffer a single point of shock. With the Bofors destroyed I'm having to rely on the small and brittle bazooka teams to tackle the Panther, but can they survive long enough to put it out of action?

Both sides are rolling a lot of 6s today and the next American command roll is 66642. Is this another chance to try and cripple the Panther?
Once again the platoon sergeant takes control of the situation. The first thing he does is direct the bazooka man who has just replenished his ammunition to return to the corner of the barn.


The sergeant then makes his way to join the other bazooka team and tells them to use their last round to fire at the Panther.

Yet another bazooka rocket strikes the German tank. There is an AP strike of one but the tank's armour can only just negate this, resulting in zero net hits. That causes the tank to halt and engage the bazooka team in its next phase.
American good fortune continues with a subsequent command roll of 66411. That will be ideal for what I hope to achieve in the phase. The platoon sergeant rallies the shock from the bazooka team and then sends them back to the jump-off-point to search for more ammo. They are also successful and find another three rockets.


The following American command roll sees the run of phases come to an end, however I will be able to activate the sergeant. Now that the second bazooka team has replenished their ammunition he sends them back to the barn.


He then instructs the other bazooka to fire, but once again it fails to find the target.

The sergeant then makes his way back to the jump-off-point from where he can command both bazookas without risking himself as a casualty.

Finally the German phase arrives. Despite another flurry of bazooka rockets Dave is pleased to have the Panther still operational. Over in the woods one of the Volksgrenadier squads makes its way to the tree line.


The Panther commander rallies the last remaining shock from the crew and then orders the gunner to fire HE at one of the bazooka crews. The team is hugging the stone walls of the barn which provides good protection and they survive unscathed.

The bow machine gunner targets the single man with the bazooka and his fire proves much more deadly, killing the soldier and so wiping out the bazooka team.

That's a blow in a number of ways. It sees American force morale drop to six and it reduces the platoon's anti-tank weapons to the single remaining bazooka team. Will it be enough?
Trying to look at things optimistically I need to plan for what may follow if the Panther is knocked out or immobilised and so I focus attention on the German infantry. In the American phase the first squad deploys entrenched facing the woods and opens fire on the Volksgrenadier squad.

One of the LMG team is a casualty and the rifle team suffers two points of shock.

A second American squad deploys at the road junction.


I want to protect the bazooka team and the squad leader has one of the men hurl a smoke grenade.


The next German command roll seems them acquire their second CoC die. That could come in very useful at this stage of the game. Their first move of the phase is to have the LMG squad move along the tree line to a position where it can target the entrenched American squad.


The commander of the Panther orders the gunner to fire another round of high explosive at the bazooka team.
The smoke grenade does a good job of limiting the impact and the team suffer a single point of shock.

The smoke performs a similar role when the bow machine gunner fires and that has no effect. Lastly the commander orders the driver to turn and drive the tank toward the road.


The next American command roll could not be worse - 33332. For once neither the platoon sergeant or the bazooka team are focussed on the urgency of the moment. Instead the squad fires into the woods.

The Germans lose another man and the LMG team suffers two points of shock.


The next German command roll of 66532 brings mixed fortune. They do have a double phase however the Panther won't be activating in the first phase. The Obergefreiter of the squad in the wood rallies a point of shock and orders the men to fire on the entrenched Americans. They are joined by the LMG squad who also engage the same target.


The Americans suffer a casualty in each team and two points of shock on the BAR team.

In the following phase the Panther commander orders the driver to continue driving. It doesn't move far enough to conceal itself completely behind the protection of the houses and so the Americans may yet have one last chance of stopping it reaching the table edge.


Well that was a very tense game. I'm not sure there was much more the Americans could have done to try to stop the Panther. They fired at the tank nine times, eight times with bazookas and once with the Bofors. They managed six hits on target, three of which were on the side armour. Despite inflicting shock on the crew and damaging the engine it was never quite enough to immobilise the tank or force the crew to abandon it. At the close range at which CoC is played tanks can prove very vulnerable and rarely survive two or three shots. That was not the case today.
The game ended with German force morale at nine and American at six, which means the two German casualties can be patched up immediately and returned to the platoon. That's given Dave a good incentive to use the 'blitzkrieg' rule to take this force and move immediately to Map 5 for an additional game in this campaign turn. Could this be the result that allows the Germans to win back some of the time they have lost?
We move directly to this game next and you can follow the progress of the Volksgrenadier platoon in this game report.
You find reports for all the games in this campaign and many other campaigns on the Chain of Command Campaign AAR page here.