The German success on the outskirts of Consthum village in the previous scenario allows them to conduct an immediate blitzkrieg onto the next map and into the village itself. However it must be made with the force that finished the game and before any of the usual adjustments for casualties and men's opinion. This campaign specific rule makes it possible for an additional attack beyond the two normally permitted each campaign turn.
This particular Volksgrenadier rifle platoon is short of five men, all casualties from an earlier game. Fortunately they suffered no further losses in the previous scenario which leaves them in reasonable shape. Together with their support units (a Panther, a Volksgrenadier LMG squad and a leIG18 infantry gun) they hope to exploit their success and forge ahead to the next map during the current turn. In many ways this is a ‘free’ game, so even if they fail to capture the village anything they do to weaken the American position here could be very helpful in the future.
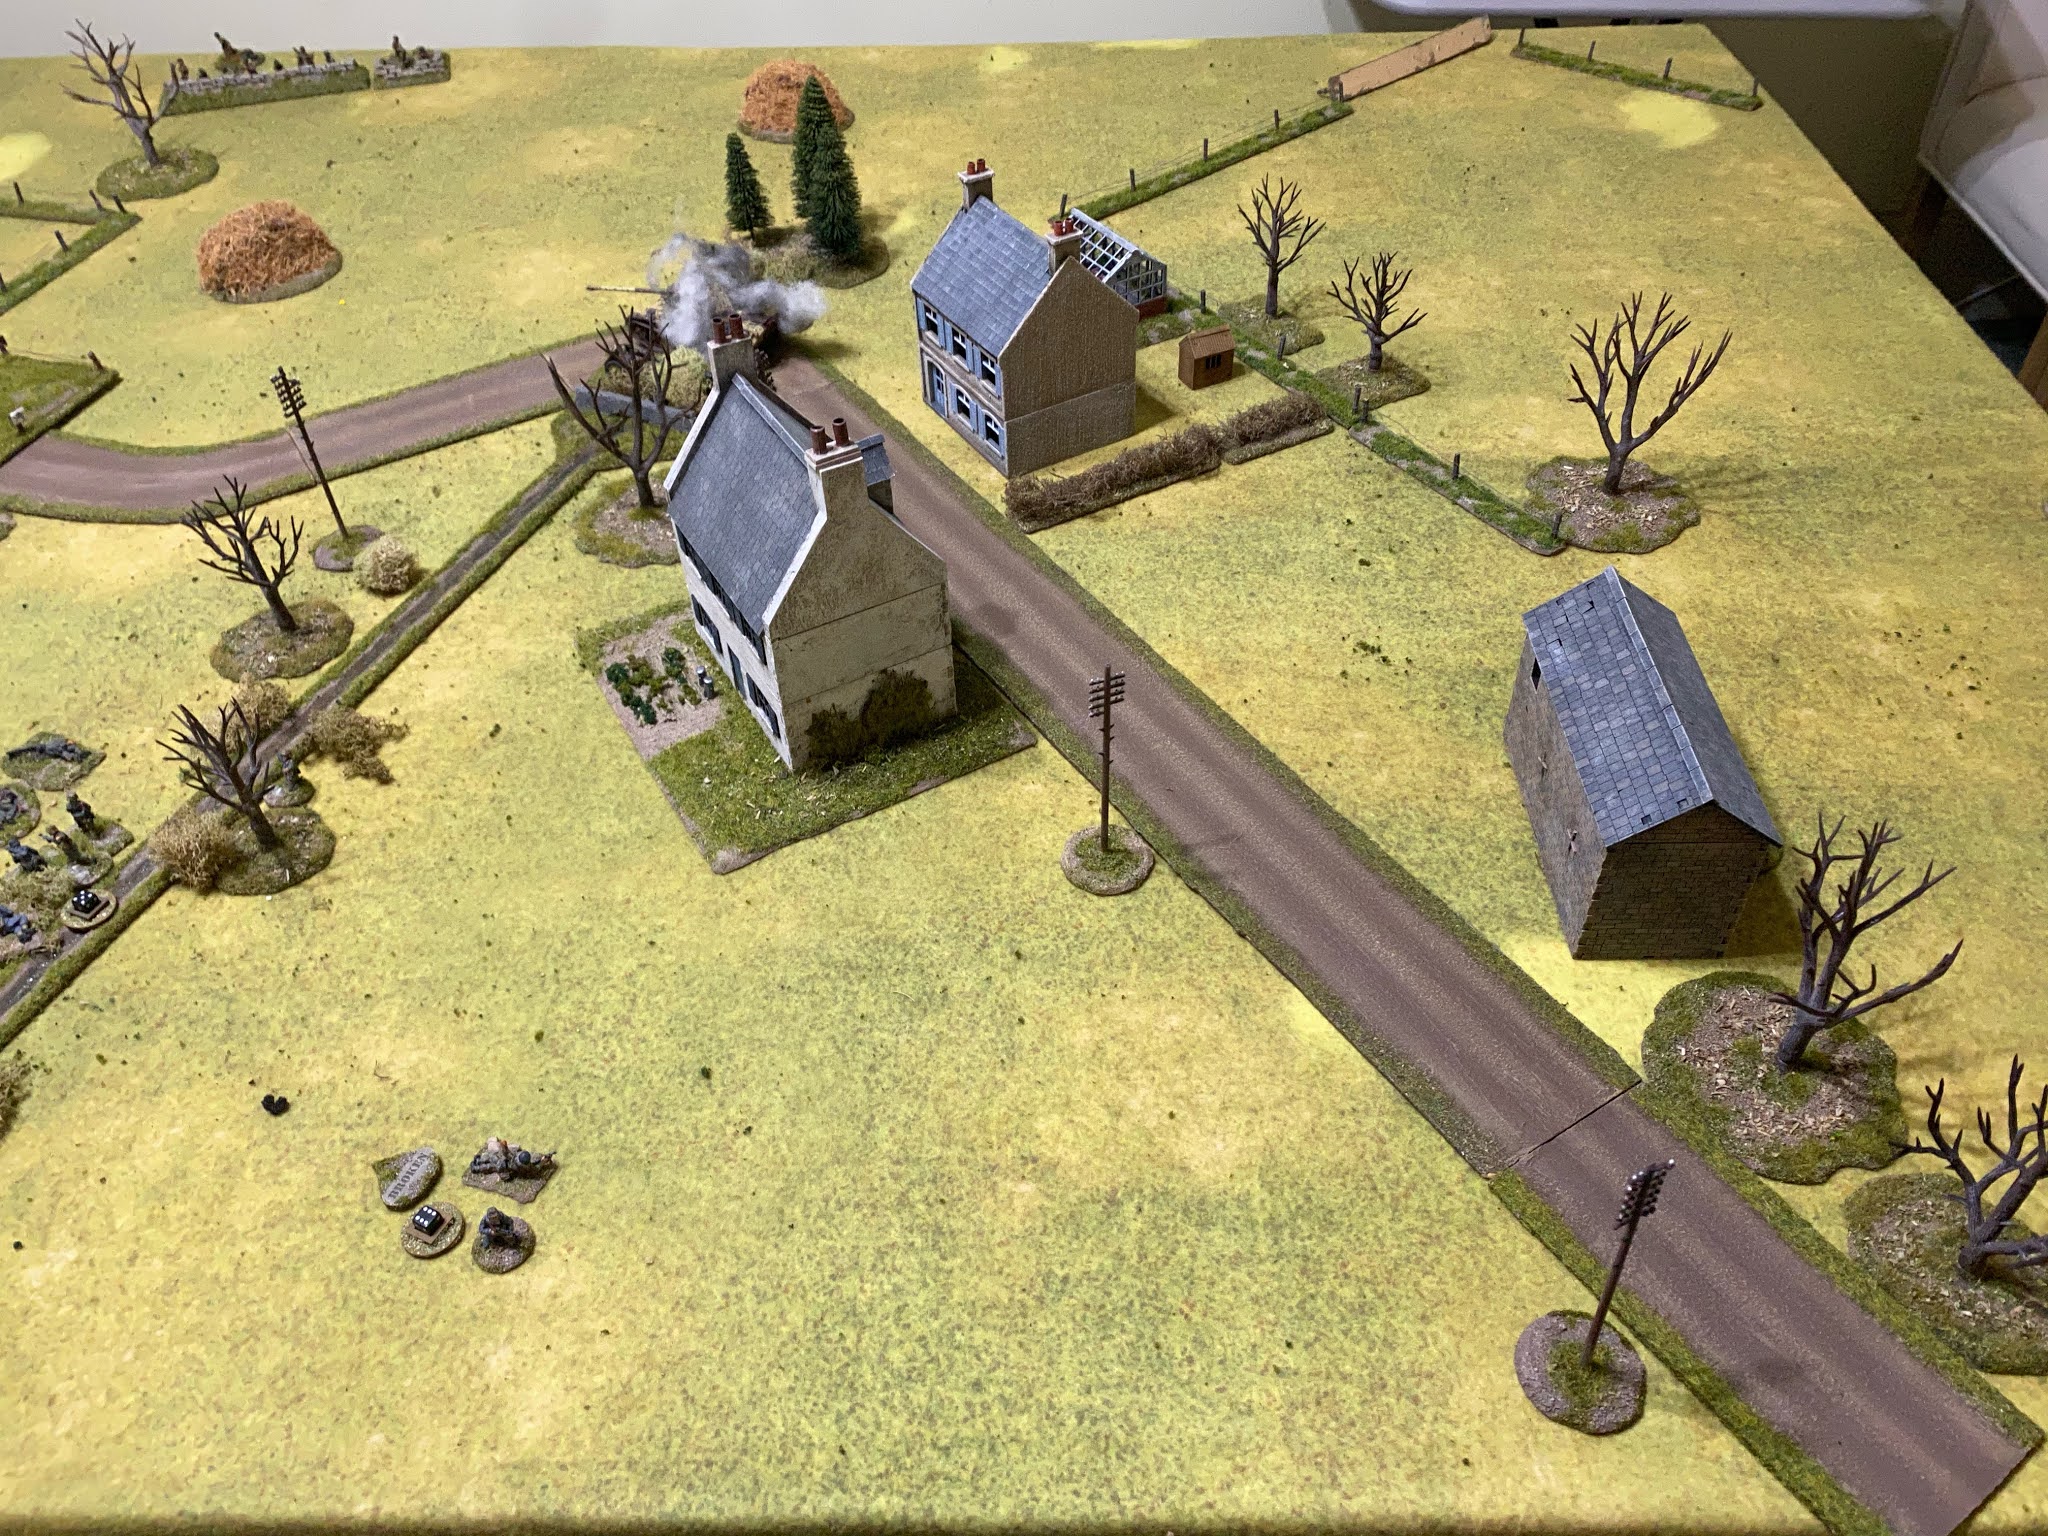
This brings us for the first time in the campaign to Consthum Village (Map 5). Having captured Map 4 in the previous game the Germans will attack from that direction (as marked by the number 4 on the map below). This will be an Attack & Defend scenario.
The Americans are defending with a fresh platoon that has yet to see action in this campaign. They have two minefields and entrenchments for two teams to help strengthen the position. Since the campaign began additional support has arrived in the shape of a Sherman although whether that will be sufficient to deal with the Panther is another matter entirely.
The patrol phase sees two American jump-off-points in the village and one on their left flank. That last jump-off-point is in an exposed position but could be a deployment point for a bazooka team to hit the side armour of the Panther. If nothing else it should keep the Germans from trying anything too bold while that threat exists.
American force morale starts at nine and the Germans at eight. The last detail is to place the minefields before the game starts. The village buildings don't face the direction from which the Germans are attacking so I place the minefields to keep their infantry from approaching this blind side and to prevent German armour entering the village via the road.

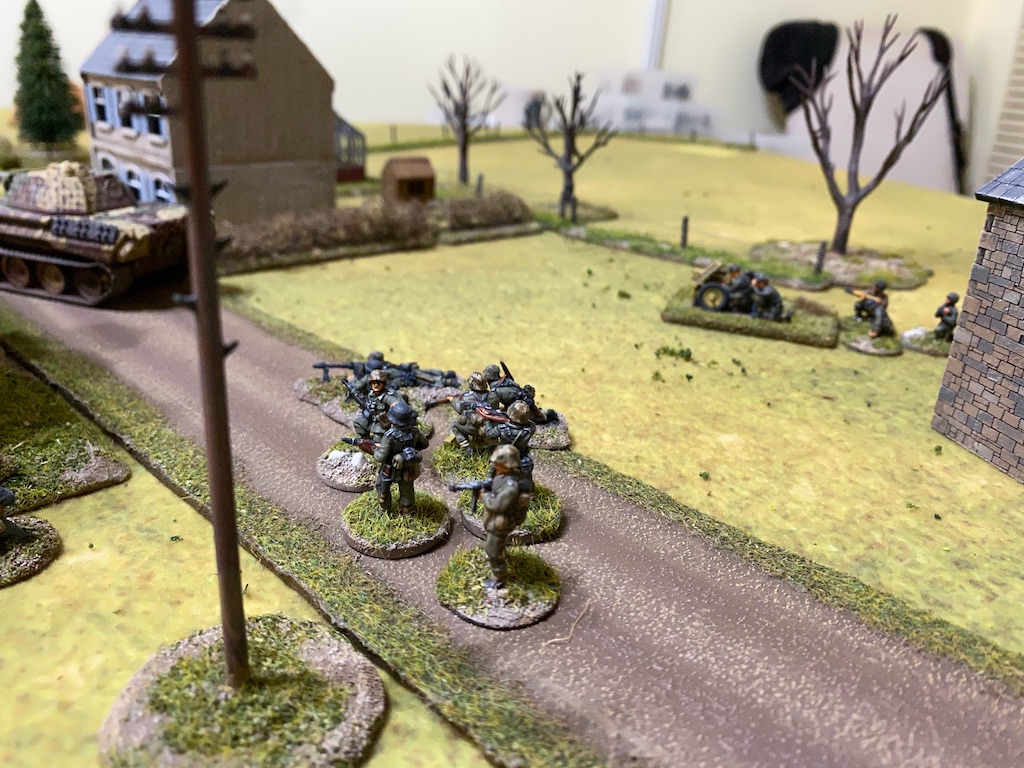
The opening deployment is made by the Germans and it sees the return of the Panther. This is the same one that defied both American bazooka teams in the last game and was responsible for the success of the attack on that map. Has it come to taunt me once again?
As this is exactly the same German force that finished the previous game I know exactly what I'm up against. The leIG18 infantry gun is the next unit to make an appearance and the gun commander places the crew on overwatch.
A rifle squad deploys from the jump-off-point behind the barn.
It looks very much like the main German attack is going to be coming from this direction, but for now there is little for the Americans to do other than wait patiently.
The Germans then enjoy a double phase. The soft ground means the Panther must move slowly if it wants to avoid bogging and it carefully makes its way towards the road in search of firmer going. The squad move up tactically alongside one of the farmhouses. All under the watchful eye of the leIG18 gun crew.
They are joined by a second rifle squad at the barn.
The German build up is cautious but the Panther makes its way forward and soon reaches the road. Given my misfortunes with the bazookas in the last game I'm not sure how best to deal with the tank.
The crew of the leIG18 infantry gun push their weapon following the Panther. It won't be too long before both the 75mm gun from the tank and the artillery piece will be able to target the village.
I hold back from deploying any Americans and so the Germans continue to work their way forward, benefitting from another double phase.
Their following command roll is 66664 and initiates a random event. To my amusement it is 'Jabos' and so we can only assume a brief break in the clouds has allowed a few American aircraft to patrol the skies. That said, it will have little impact on the game other than the nuisance value of preventing German movement in their next phase. The only action of the current phase sees the senior leader commanding the Panther order the driver to advance along the road until they reach the culvert.
Once again I let the American phase pass without taking any action. The main threat is the Panther, if I can deal with that then I'm confident I can handle the German infantry. In this sort of situation I think a defender is faced with two options, one is to concentrate on eliminating the Panther, the other is to ignore the tank and focus on hitting the infantry to drive down German force morale. I have a better chance of achieving the latter but Dave is not about to gift me any targets if he can avoid it. I suspect any advance by his infantry will be watched over very carefully by the tank and infantry gun. The American response will call for careful timing and I'll just have to be patient to await the right moment.
As if to confirm my thinking, in the next German phase the tank commander orders the gunner onto overwatch and the Panther sits menacingly facing the village.
From the jump-off-point on the German left flank the Volksgrenadier LMG squad deploy and take up overwatch positions.
The leIG18 team do their usual splendid job of moving their gun forward at a good pace. For some reason this model leads a charmed life when it comes to movement, often outpacing the vehicles.
The LMG squad move tactically toward the stream. The Germans will soon have a good base of fire to support the assault, with two MG42s, the leIG18 infantry gun and the Panther all lined up to provide protective fire.
The commander of the Volsgrenadier platoon deploys at the barn ready to coordinate the advance on the village.
He orders the squad at the house to take up tactical positions.
Next he directs the squad in the road to move to the other side of the house.
The Americans then have a moment of good fortune, rolling command dice of 66652. This is going to present a few opportunities. The roll of 5 is sufficient to make up a full CoC die. The lull in the action caused by the turn end will see German crews no longer on overwatch. And, just as significantly, there will be another American phase. With that in mind I choose to do nothing in this phase and prepare to act in the next one.
The following command roll is 66641. That gives me two options. I could use my CoC die for an ambush with the bazooka team, or I could save the CoC die and deploy the bazooka team normally. With another phase to come that would allow for two shots at the Panther and by deploying the platoon sergeant I would increase the chances of activating the bazooka team a second time should it be needed. However, in the end I decide to opt to conduct an the ambush and do so for one critical reason - it allows the team to deploy out by the minefield and target the Panther's side armour.
The ability to use an ambush to deploy 12" from the jump-off-point makes all the difference between a shot on the side or one on the frontal armour.
After the disappointing performance of the bazookas in the previous game my expectations for success are low. Despite that I have the initial satisfaction of at least seeing this bazooka round hit its target. The question is, will it penetrate?
Unlike those in the earlier game, this rocket has hit a weak spot and impacts with the maximum possible seven AP strikes. Dave rolls four armour saves, but that won't be enough and to my delight the Panther is knocked out at the very first attempt.
It doesn't explode in flames, but there are no complaints from me, that's a great result which immediately changes the complexion of the game.
The tank commander escapes with his crew, nonetheless the loss of the tank sees German morale drop to seven.
After conducting a near perfect ambush the work of the bazooka team is done and they slip quietly away. The next American command roll is 55531, which immediately replenishes half of a CoC die, but with no reason to deploy any infantry I decide to do no more and await the German response.
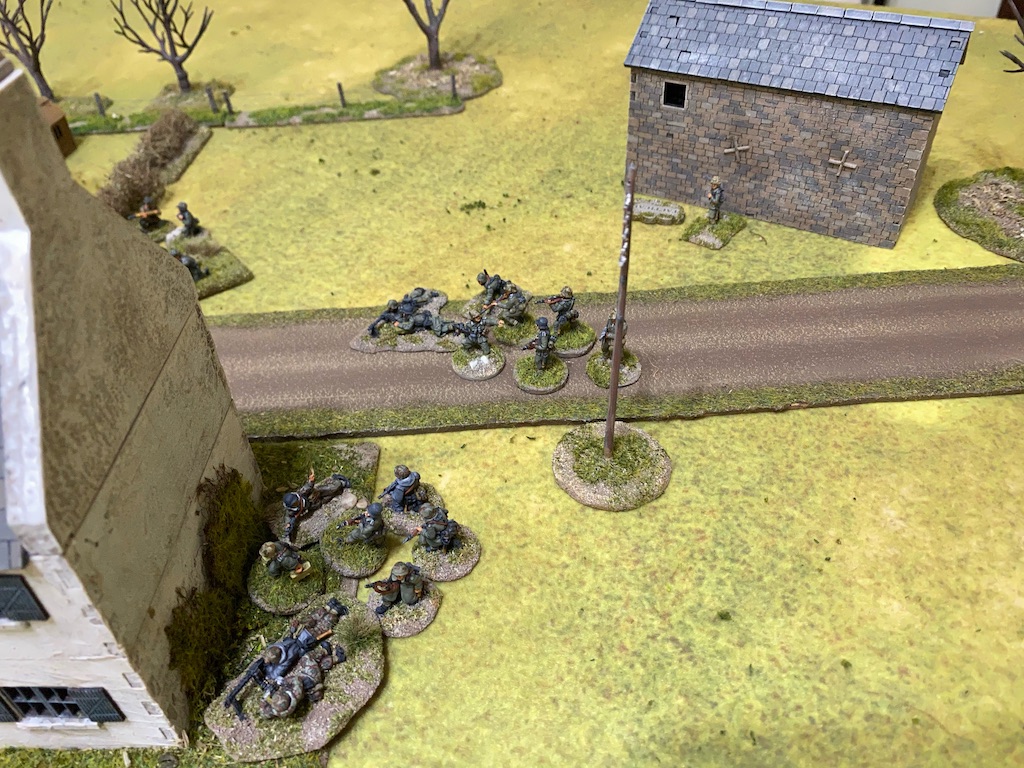
The following German command roll is 66222 which gives them an opportunity to swing into action. The Unterfeldwebel runs from the barn to join the squad alongside the house. He then orders that squad and the one at the other side of the house to move forward towards the stream.
In the following German phase the LMG squad moves tactically, heading in the direction of the stream.

The Unterfeldwebel puts the squad nearest him on to overwatch.
Meanwhile the squad on the other side of the house makes its way forward cautiously.
The leIG18 crew continue to push their gun along the road in the direction of the culvert.
With the Unterfeldwebel busy commanding units in the assault any remaining German unit must roll to deploy.
This is last squad in the Volksgrenadier platoon and is certainly the weakest link. Commanded by a man recently promoted from the ranks following the death of the original squad leader, it is composed of just one enlarged LMG team. Nonetheless a MG42 is a potent weapon and the Germans will need all the firepower they can get. Despite the absence of a senior leader they deploy successfully near the barn.
One of the issues facing the American defenders is the lack of good defensive positions in the village buildings as few windows face towards the stream. The minefields will prevent the Germans approaching along the blind side but until they make their way around the village and into line of sight there is little reason for the defenders to reveal themselves in the houses. For that reason I let the American phase pass without taking any action.
In the German phase the leIG18 moves up alongside the disabled Panther.
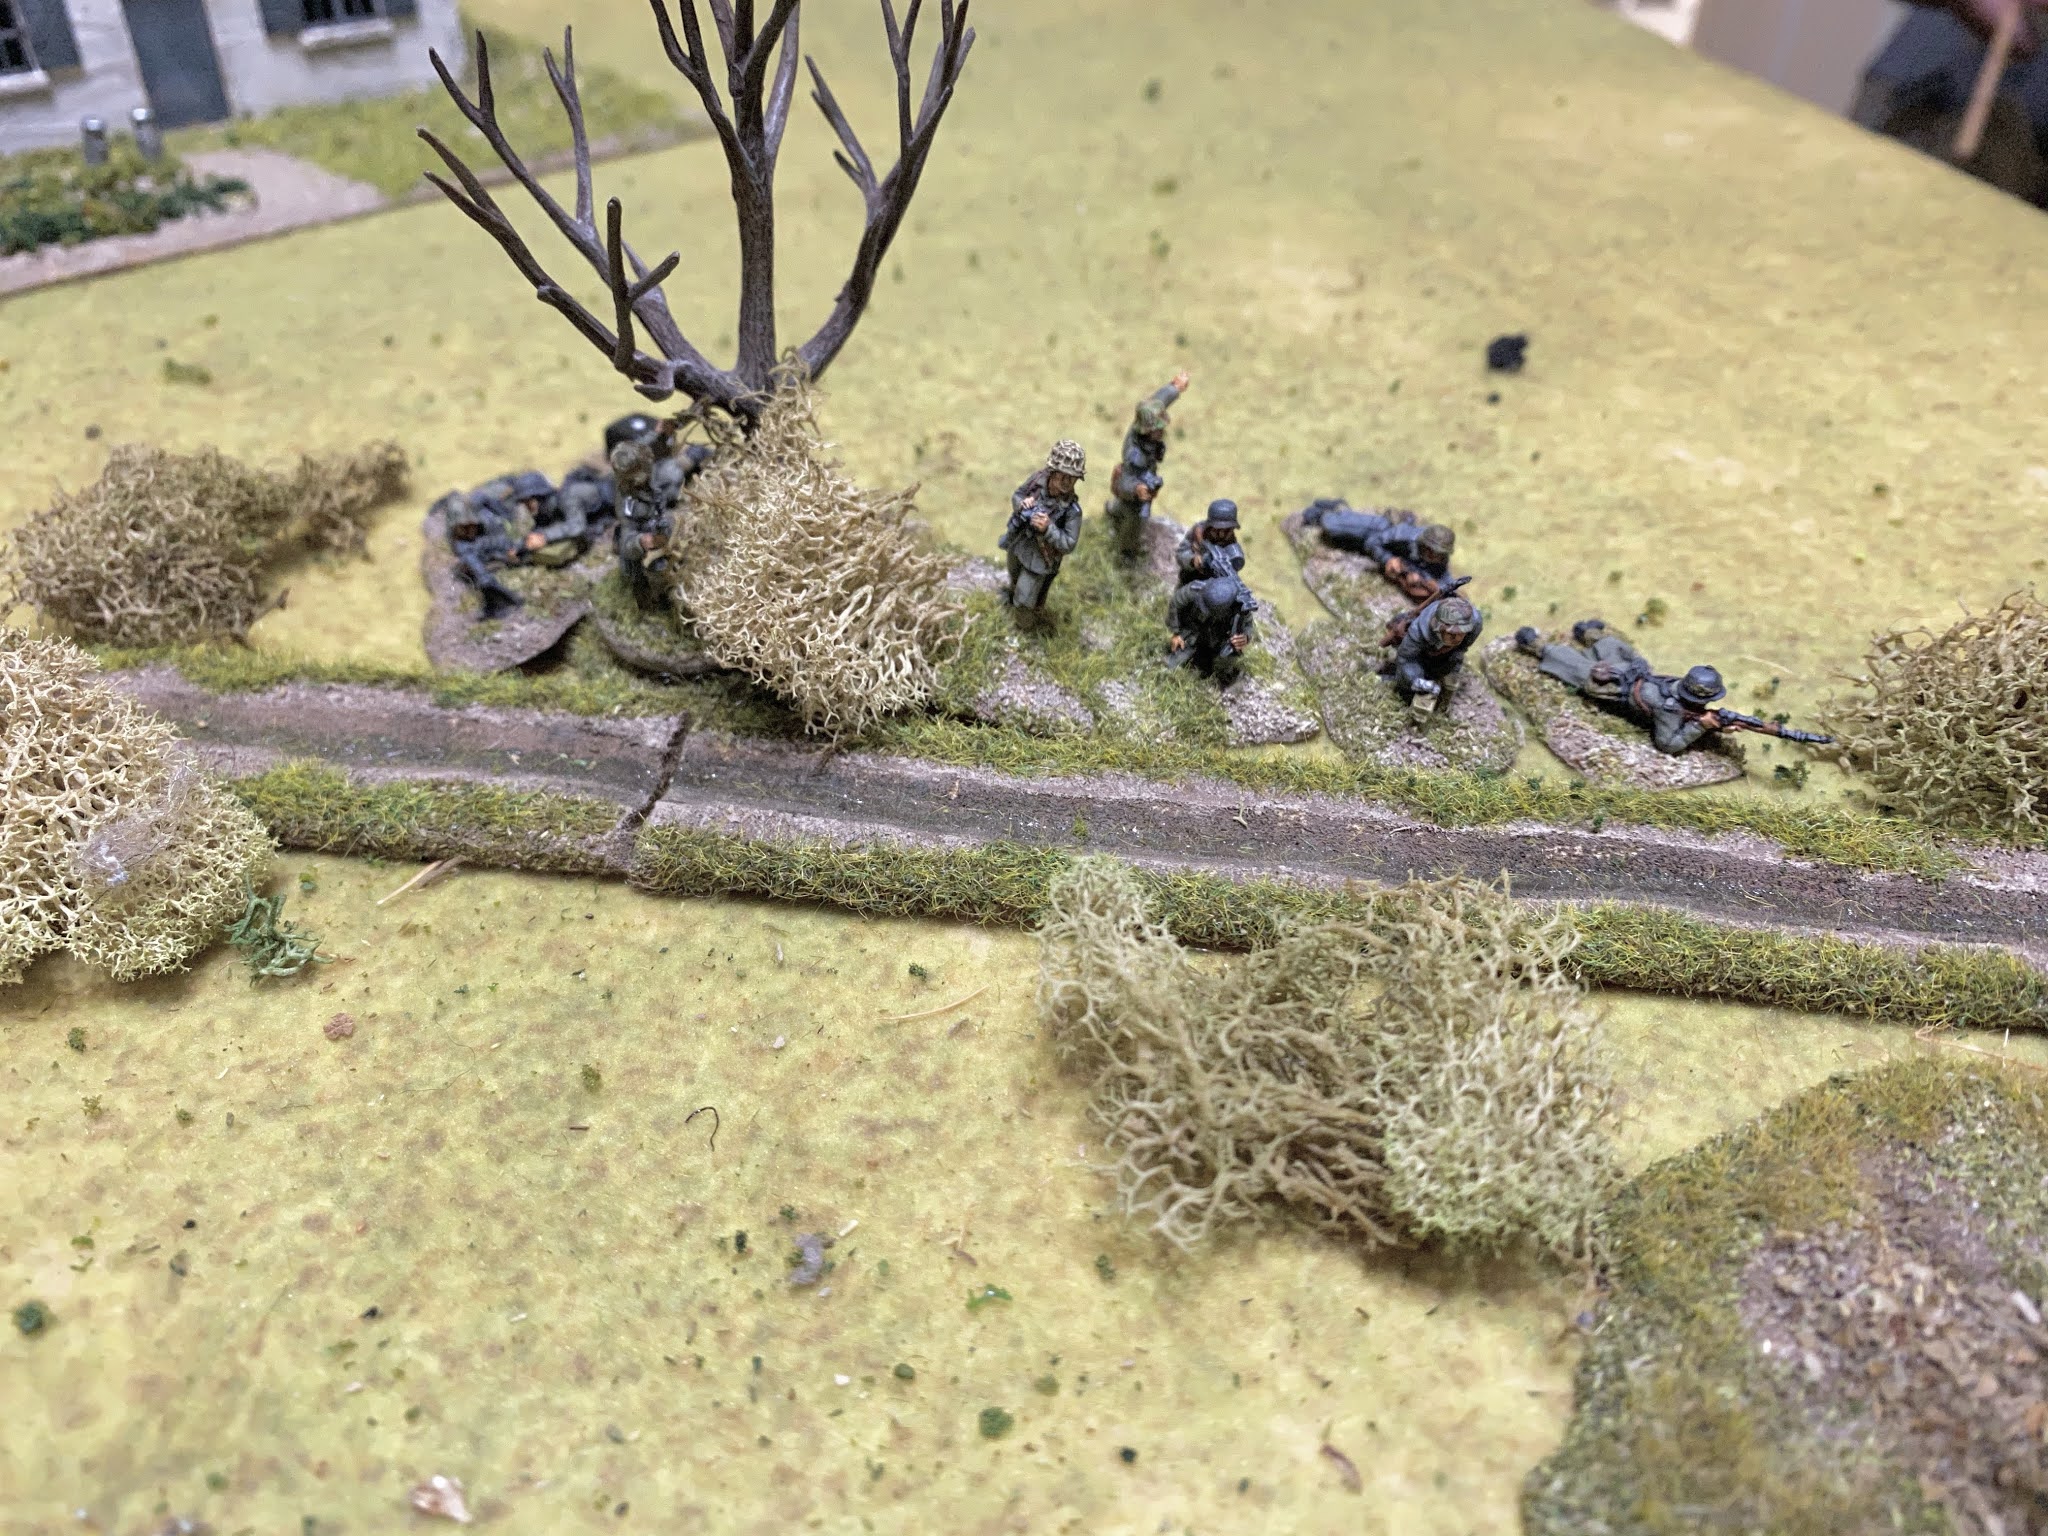
The Unterfeldwebel orders one of the squads to move tactically to the stream.
He then calls the understrength squad forward.
The LMG squad moves up to take tactical positions lining the stream.

In the American phase I decide to take advantage of the fact that there's a line of sight down the road to one of the German squads. This could be a job for the Sherman. It can use the cover afforded by the houses and yet selectively target enemy units. The tank arrives and the gunner fires a round of HE at the Volksgrenadiers.
The gunner’s aim is good and the 75mm round explodes killing two of the rifle team and inflicting two points of shock. These are casualties the small German squads can ill afford.
The Sherman commander then orders the bow machine gun to fire on the same target.

The fire is almost as deadly as the main gun and two more riflemen are killed, enough to see the team wiped out. The LMG team also lose a man and suffer more shock. The loss of the rifle team sees German morale drop to six.
The next German command roll is 66644, which is a mixed blessing. While there will be a double phase only the Unterfeldwebel can be activated this phase and the turn end will see several units no longer in tactical positions or on overwatch.
Despite that it's an opportunity to move the squad out of the line of sight of the Sherman, which is his first order.
He then instructs the centre squad to move up to the stream.

That now puts two rifle squads and the LMG squad at the stream. They may not be full strength but you don't want to argue with four MG42s in a row.


Lastly, the Unterfeldwebel calls the understrength squad to move up to him.
In the subsequent German phase the Unterfeldwebel moves forward bringing the newly arrived men with him.
He then orders the remnants of the squad hit by the Sherman to move alongside the others lining the stream.
With little left to lose it was now time for the Germans to make a move toward the village and so the Unterfeldwebel orders the LMG squad forward across the stream.
The sight of Germans moving in the open is too much of a temptation for the Sherman commander. He orders the driver to move forward slowly to where he has a line of sight between the houses.
That's a very inviting target and wisely Dave decides to use his one CoC die to interrupt and have the LMG team move out of danger.
While that may have moved them successfully out of sight of the Sherman, they can now be seen from several of the houses. That invites an American response and a rifle squad deploys into a farmhouse and opens fire.
They are shooting within close range at Green troops in open ground and it is little surprise that the result is deadly. Five men are hit and one of those is the squad's Obergefreiter, who is killed. The remaining men suffer three points of shock and the death of the squad leader takes German morale down to five.
Despite the losses the Germans continue to push forward and one of the rifle squads moves across the stream.
The Unterfeldwebel leads the weak squad to the stream and when they get there he rallies shock from the LMG team that was hit by the Sherman.
Despite the bruising fire from the Americans the Volksgrenadier LMG squad can still generate a respectable amount of fire from their two MG42s and they return fire at the house. It's enough to hit a man from the rifle team and one from the BAR team.
The leIG18 crew are aware there are Americans in the house and even though they cannot see them they can target the building itself.
Dave wishes aloud for a quadruple 6 in the hit roll and the collapse of the building. That would certainly make his day and he comes very close to seeing that wish fulfilled when he rolls 666551. The building doesn't collapse, but it has become unstable.
The squad also suffers a further two casualties and a point of shock.
The BAR team is down to a single man and the first thing the squad leader does in the American phase is to assign one of the riflemen to that team to make up the numbers. Given the building is unstable and it may collapse with a sudden turn end I could opt to leave the house, but regardless from which side I choose to exit the men will be exposed to enemy fire. I think I'd rather take the risk of a house collapse and keep on trying to inflict casualties on the Germans.
The squad leader orders his men to maintain their fire on the LMG squad.
There are nine hits. With only three men remaining and no cover it comes as little surprise that both of the squad's teams are wiped out. The loss of a full squad is a further blow to German morale which takes another drop to four.
That limits the Germans to four command dice and it's difficult to see how they can possibly make any progress in these circumstances. However Dave is determined to press on, I suspect he's written this platoon off and is prepared to let them go down fighting.
The Unterfeldwebel leads both the units with him over the stream and toward the village.
The commander of the leIG18 gun continues to have the crew target the house.
This time the fire is less effective and inflicts only a point of shock on each team.
I sense the opportunity to finish off the German attack and so deploy a second squad from the jump-off-point on my left flank. They are entrenched which gives them good cover and even though the Germans are at effective range they are in open ground and they are Green, so I fancy the odds are in my favour.
They have made for inviting targets and the American fire cuts them down. Five men are taken casualty, which wipes out one of the LMG teams and leaves an Obergefreiter as the lone surviving member of that squad. The other squads suffer shock. Despite the loss of a team German morale holds steady, but their casualties are mounting rapidly.
The US platoon sergeant deploys into the house and rallies off all the shock.
The commander of the Sherman senses another opportunity and orders the driver to reverse slowly until he has line of sight. He then fires at the Germans in the open.
The LMG team lose another man killed.
In the German phase the Unterfeldwebel orders the lone Obergefreiter back across stream and away from the attentions of American fire.
He then commands the squad to throw a smoke grenade in the direction of the Sherman. It won't provide a great deal of protection, but it's better than none.
The two MG42 teams then turn their attention to the entrenched American squad and prepare to open fire. Before they can do that I use a CoC die to interrupt and have the squad shoot first. The fire takes out one of the crew from an MG42 reducing the team to a single man and adding more shock to both. That reduces the amount of German firepower, which then has no effect given the Americans are in hard cover at effective range.
It appears the last ray of hope for the Germans is the leIG18 infantry gun and once more it fires at the Americans in the farmhouse.
The gun has been steadily inflicting casualties and the rifle team lose another man.
The game takes another turn in the Americans' favour with a command roll of 66521. The entrenched squad opens fire once again, this time killing the last remaining man in the LMG team and wiping it out. Shock starts to accumulate on the remaining teams and the loss of the LMG team sees German morale drop to three.
In the following American phase the same squad fires again.
One of the rifle teams loses a man. That leaves the Obergefreiter and a single rifleman carrying six points of shock.
That's enough for the team to break and fall back which brings German morale down to one.
That leaves the Unterfeldwebel and a handful of Volksgrenadiers as the sole remnants of the platoon and they are suffering five points of shock.
The drop in German morale sees a jump-off-point removed and given the likliehood the Germans will be forced to withdraw shortly I remove the nearest one in the hope of increasing the chance the remaining men cannot get away successfully.
In the last act of the American phase the platoon sergeant rallies shock off the squad in the house.
The Germans are reduced to two command dice and so a roll of 31 turns out to be reasonably useful. The Obergefreiter by the stream rallies a point of shock off the LMG team and has them fire at the entrenched Americans. Once again the hard cover provides more than adequate protection and the German fire has no effect.
The leIG18 continues firing away at the farmhouse but this time only manages to inflict a point of shock on the BAR team.
In the American phase the entrenched squad maintain their deadly fire on the exposed Germans.
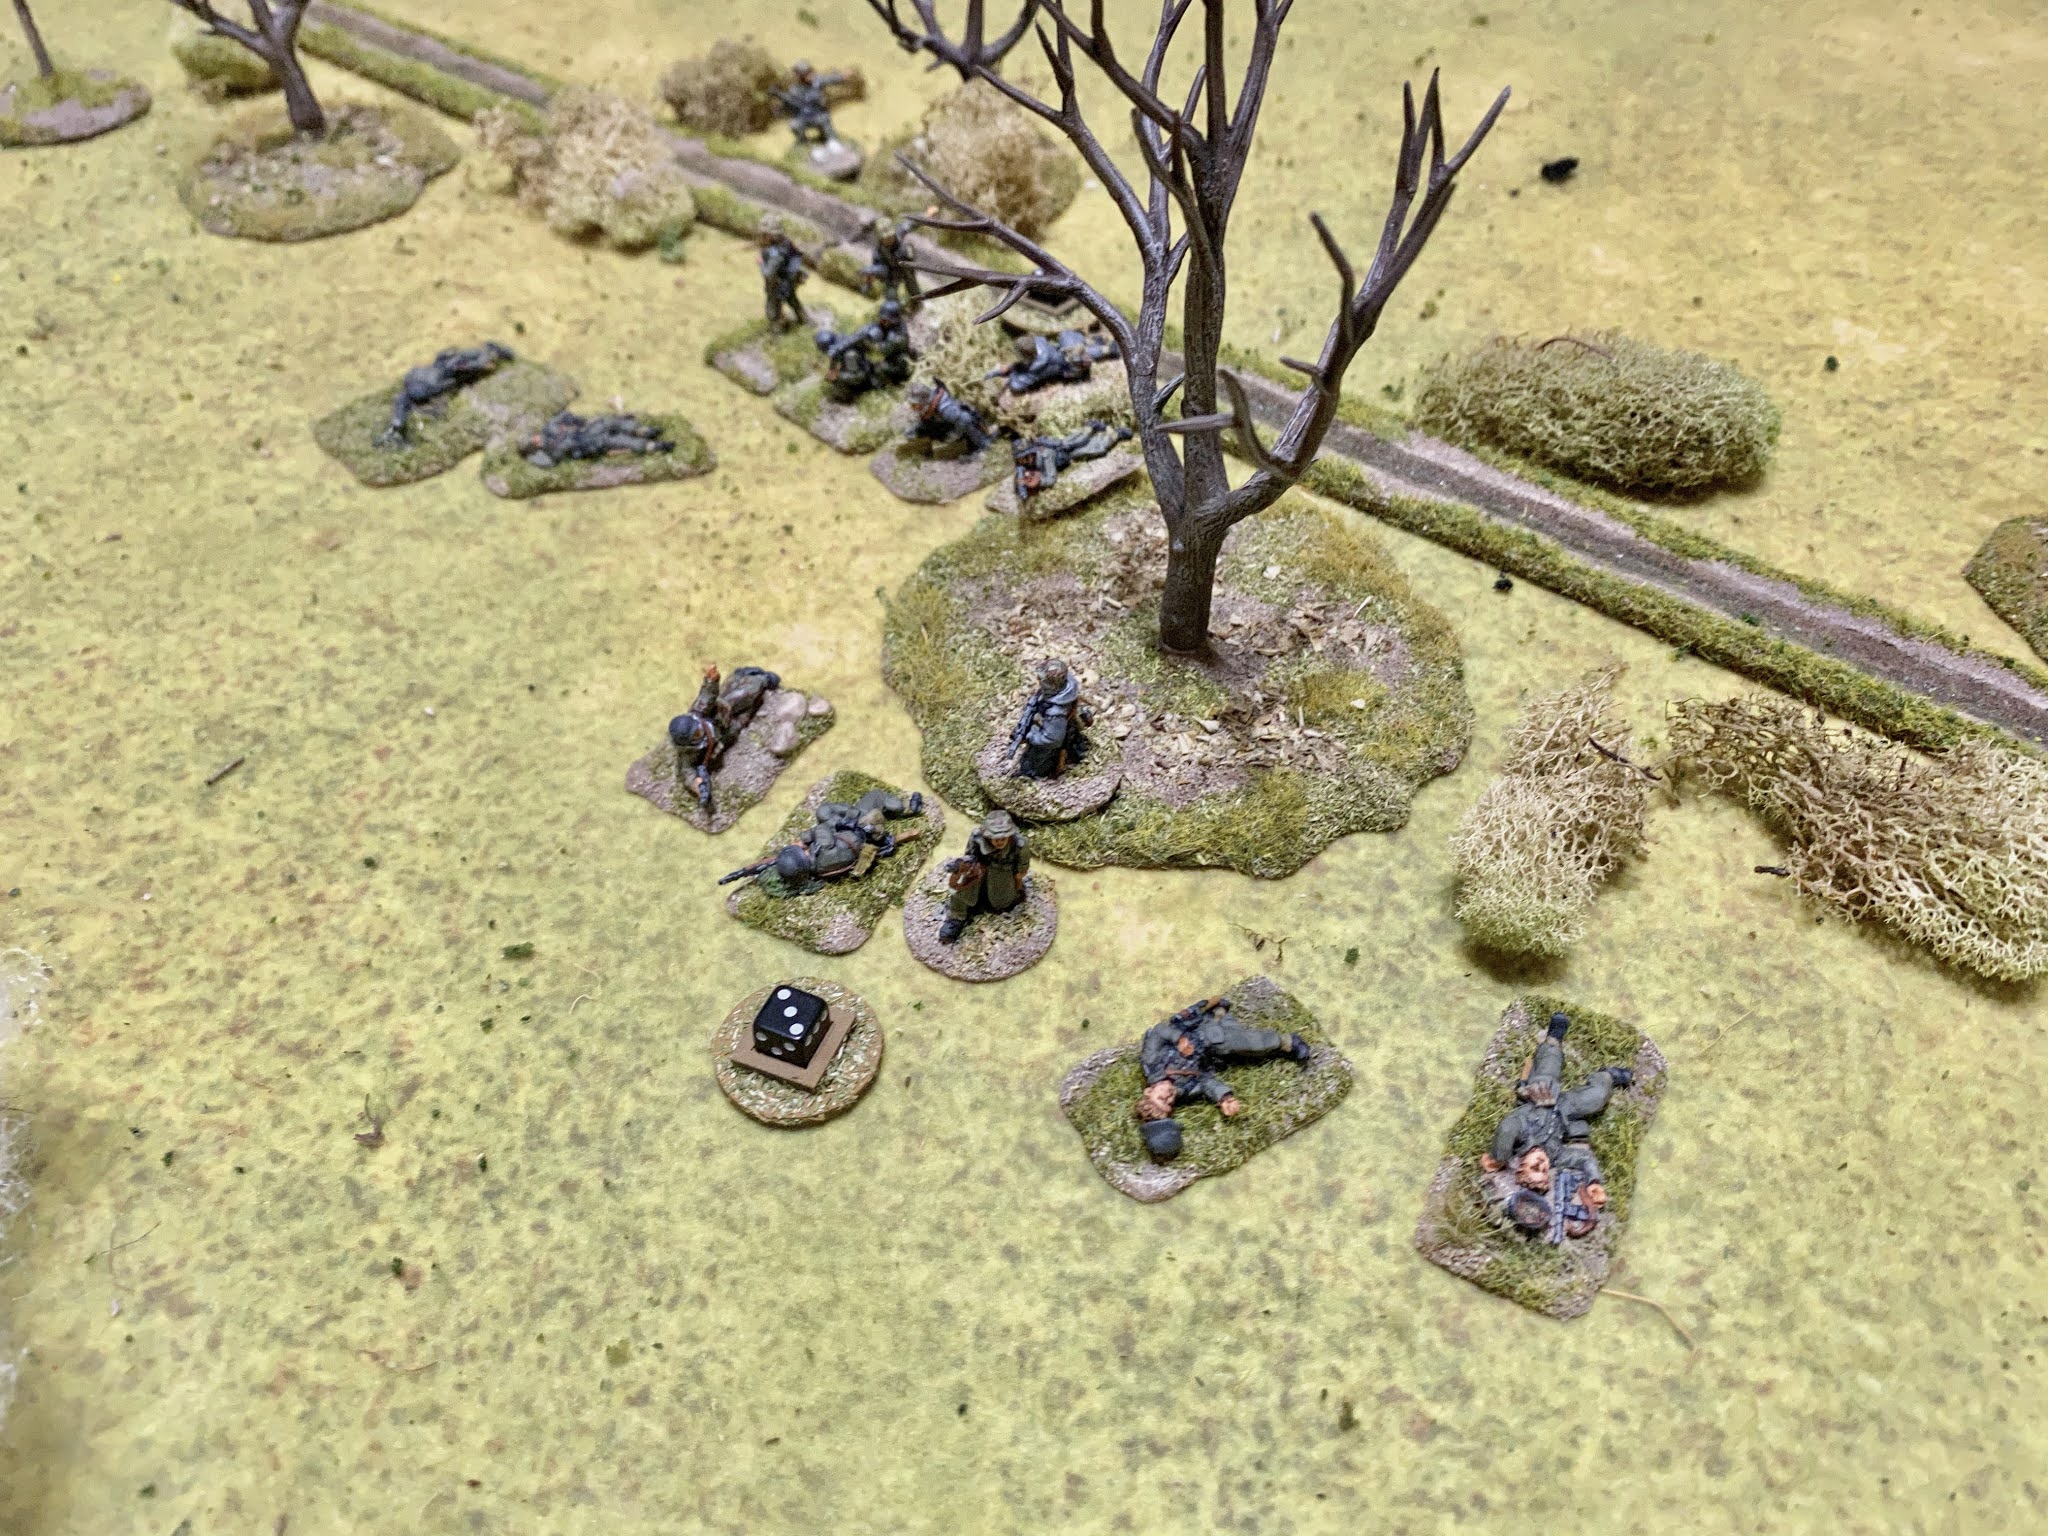
They lose another two men and suffer more shock.
Surely this is nearing the end for the Germans? To try and make quite sure a third American squad makes a very bold move and deploys out of the village in the open and pours fire into the few remaining Volksgrenadiers.
The Germans lose yet another man and suffer three points of shock, which is enough to see the remainder pinned.
Salt is rubbed in the German wound with a command roll of 52 which leaves them unable to activate. The American command roll of 65443 is limiting in a different way but it's enough to allow the entrenched squad to continue firing.
A seemingly never ending hail of American bullets strikes yet again and kills the two remaining men in the LMG team, wiping it out. Miraculously the leaders have survived while their men have not.
The loss of the LMG team brings about what has been inevitable for some time now and German morale collapses to zero forcing an involuntary withdrawal.
The few remaining Germans end up scattered. One Obergefreiter withdraws successfully, but the Unterfeldwebel, an Obergefreiter and one rifleman are dispersed. The newly promoted man has had a bitter taste of combat in his new rank and he ends up going into captivity.

The Americans suffered a total of five casualties but with their force morale at nine and the Germans at zero that means all five can be recovered, patched up and returned to the platoon.
The same cannot be said for the Germans who suffered eighteen casualties from the core platoon and saw a support squad wiped out. Given their losses from previous games, even if the wounded are returned, the strength of the platoon falls to below sixteen men which will see it withdrawn permanently from the campaign.
I think there's little doubt that the pivotal moment of the game was the successful ambush of the Panther. That very same tank had seemed impervious to all the Americans could throw at it in the previous game, surviving six hits with only minor damage. Perhaps it pushed its luck one time too many? Regardless, without the threat that it represented the German attack began to falter and once again revealed how brittle the Volksgrenadiers become when caught in the open. That said this attack was well worth a try after the German success earlier and was an opportunity to capitalise on that victory. Had things gone differently, even if they had lost the scenario, they may have been able to inflict casualties on the Americans that would make their next defence that much more difficult.
Next we return to Map 3 Holzthum Village for the second of the German attacks for Campaign Turn 8 and you can find the full report of that game here.
You find reports for all the games in this campaign and many other campaigns on the Chain of Command Campaign AAR page here.


As always great AAR, a British 2"mtr with smoke rounds to block LOS would be great for the Germans advancing over open ground, the US played well with nerves of steel to hold off deploying for a while. thanks Mark
ReplyDeletecheers John
Thanks John, yes, the Germans would have found some smoke very useful but losing the Panther was a real setback for them.
DeleteAs ever splendid and gripping reportage accompanied by fine and informative photos which always leaves us eager for the game. The Americans played a blinder this time, the ambush has you say being turning point.
ReplyDeleteAfter following your campaigns I am coming to the conclusion that CoC plays and looks a lot better when played in 20mm.
Thanks Phil, after the problems I had with the Panther in the previous game it was good to take it out so quickly in this one. While I didn't choose 20mm for CoC (I already had stuff in that scale), I'm very happy that I do, I think it works very well, with just the right sense of space on the table.
DeleteWell played indeed. It takes nerve to hold fire for that long, but the opportunity came and you seized it. Destroying that Panther was the game-changer.
ReplyDeleteThe Germans had a fair bit of firepower so there seemed little point gifting them targets, but there's always that anxiety that you won't be able to deploy when you really need to or the Germans have a run of phases and catch you napping.
DeleteGreat report and definitely the right choice with the bazooka ambush. It really needs the flank shot to have a decent chance on the panther.
ReplyDeleteChris
Thanks Chris, yes I agree and that flank shot proved the difference (that said I did get a few flank shots in the last game but couldn't quite do enough damage to knock the tank out or force the crew to abandon - no problems this time though!).
DeleteI'm concluding that the German infantry are a busted flush.
ReplyDeleteStop the tank and win the game.
Without armour support the Germans will find it very hard to break into the American positions, if the Americans can take out the armour then it’s enough to bring the assault to a grinding halt.
Delete