Showing posts with label Blotz. Show all posts

Friday, 1 October 2021

Pillboxes in 20mm for the Netherlands 1940

In preparation for playing the Chain of Command campaign There Are Many Rivers to Cross set in the Netherlands 1940 I've needed to make a few pillboxes that we can use to represent the various Kazemat pillboxes that the Dutch built prior to the war. The Dutch have these as a support option with a maximum of two in any one scenario.
The campaign is featured in the 2018 Lard Magazine and is designed to be a fairly generic one, in the sense that players could adapt it to be the defence of any river/canal line in the Netherlands, Belgium or France in 1940. In our case we have chosen Holland as Dave my regular opponent has recently painted a Dutch platoon to oppose his existing force of early war Germans that last action in our Taking the Gembloux Gap campaign. The Chain of Command 1940 Blitzkrieg Handbook includes lists for the Dutch as well as rules to cover fortifications including the Kazemat.

My research has indicated that their style of pillbox was not that dissimilar from those built in Britain in the early stages of the war. Helpfully Blotz produce a range of MDF pillboxes for Britain in 1940 and so I decided to use those as the base for mine. 

All the MDF models are to scale which led to the realisation that our figures would not fit inside on their current bases. Rather than start changing bases it was much easier to settle on having the pillboxes unoccupied and to keep their occupants off the table during a game. After all, you can't see them when they are in the pillbox anyway and with a maximum of two in play at any one time it was not going to be difficult to track which was occupied and by whom. Blotz do three styles of pillbox. They are inexpensive and so I ordered two of each, that way I covered all options. 

Without the need to worry about how I would place figures inside I could make them up as whole units and attach them permanently to a suitable base, which I made from pieces of MDF.

The Dutch supports lists provide three Kazemat options - one for a single team (two support points), one for two teams (four support points) and finally one with a 47mm AT gun (five support points). The first two types come without the occupying teams which must be assigned from their core platoon or an additional support team.

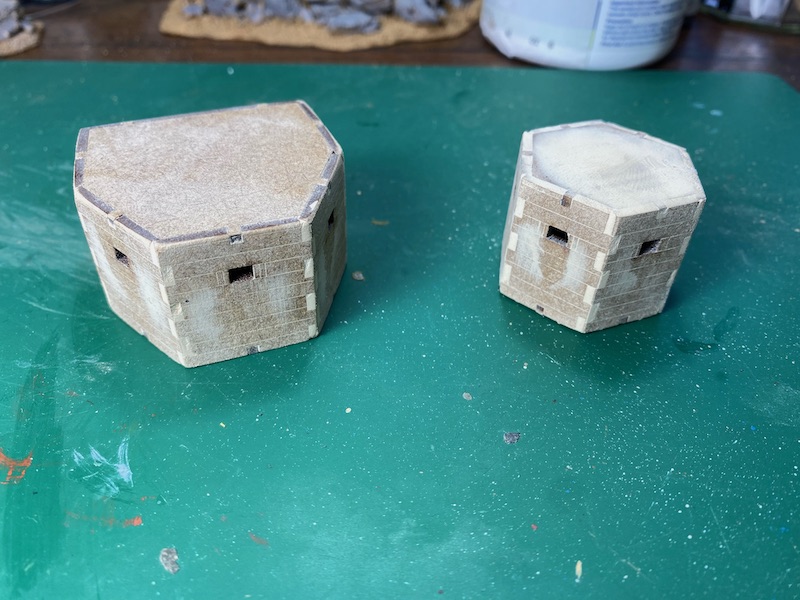
The MDF kits assemble quickly but as is invariably the case they bore all the characteristic we come to associate with laser cut MDF, not least of these are the obvious teeth for joining walls and so the first thing to do was to fill those.

The next thing was to give the walls more texture. The laser cut lines in the original models are supposed to represent the imprints of the wooden boards used in the form work for the concrete but I wanted to give these a bit more character. I used a cheap household filler to cover the models and then used the handle of a craft tool which was the same thickness as the laser cut lines in the models to make impressions in the wet filler.


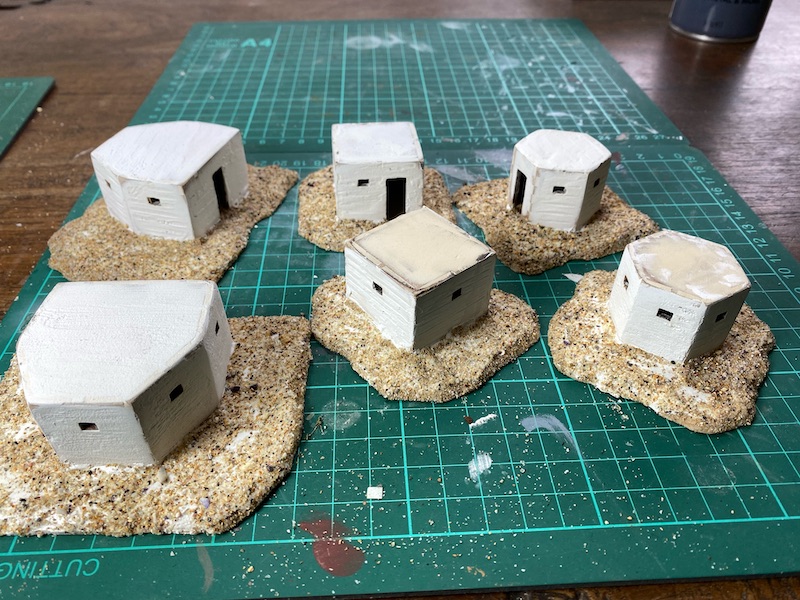
They were then glued to their bases and more filler was used to texture the ground and blend the pillboxes into their environment.


Once the bases were dry they were coated liberally with PVA glue and my homegrown mix of coarse sand was sprinkled over it.


They were then primed with a grey primer and the bases painted with Dulux acrylic emulsion.


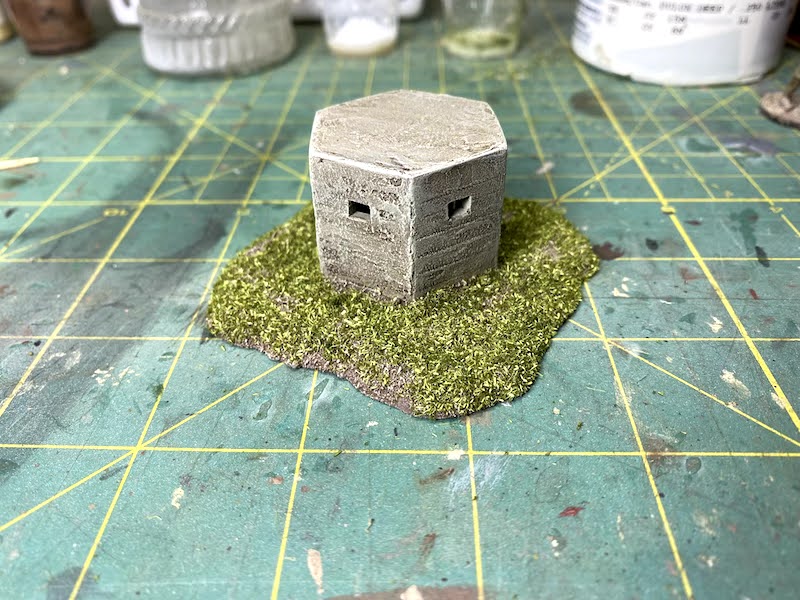
I'm always tempted to paint pillboxes grey, probably for the same reason I'm inclined to paint rocks grey, it seems a default setting much like water should always be blue.... even if it's muddy water in a paddy field. I made a conscious effort to avoid this and looking at lots of pictures of concrete buildings that are only a few years old decided on a base of Vallejo Stone Grey which has a slight green hue to it.


I began the ageing process by washing them in Citadel's Agrax Earthshade which immediately toned down the brightness and brought out the texture of the walls.


They were then dry brushed with Vallejo Stone Grey and highlighted with a mix of this lightened with Ivory White. To make sure it looked right with some ground cover I added a first layer of flock just to get a rough idea of how things were working.


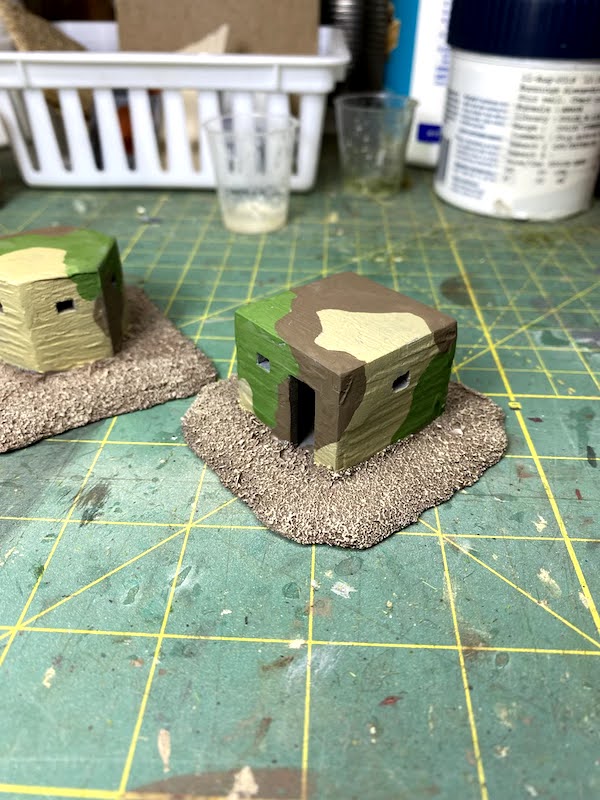
I was happy with the way the colour worked, but at this point I was doing more research about Dutch defences and discovered that they were often camouflaged in a number of different ways, including painting. That gave me an idea to add some variation and so I decided to paint one set in camouflage colours. From what I could gather from sources there was no standard camouflage technique, it was often left to individual units to carry this out. That left scope for variation even in the same small area represented by a Chain of Command table and that was all the excuse I needed to try something different.


I thought these worked particularly well and would add more colour and life to a table. They received the same Agrax Earthshade wash as the other pillboxes, followed by a dry brush of a mix of Vallejo Khaki and Iraqi Sand. For some reason the dry brushing makes the photographs of the pillboxes appear as though they are gloss, however that's not the case to the naked eye.


This gave a mix of pillboxes to choose from and broke away from the monotony of the plain concrete.


The final addition was to add static grass and a few tufts to each of the bases and these were done.


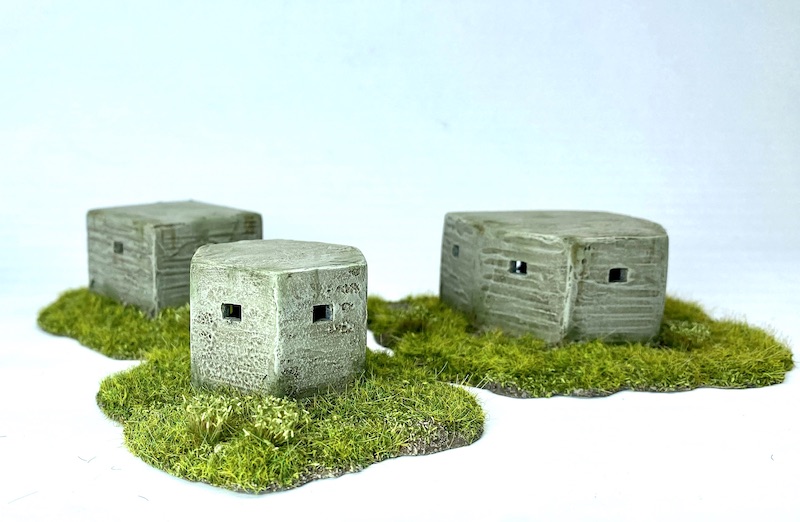
The plan is to use them as follows. The small hexagonal pillboxes will be used for those that can be occupied by a single team.


The slightly larger square ones will be those occupied by up to two teams.


The largest will be used to house the 47mm AT gun and crews.


Naturally there's no reason why they can't be mixed up and used in other ways if we want, but for now this gives three very usable types for the forthcoming campaign and hopefully for other games in other theatres in the future.


Sunday, 27 August 2017

20mm Eastern Front villages

For some reason, while 20mm or 1/72 is extremely well catered for in terms of figures and vehicles, the same can't be said for terrain and in particular MDF buildings. I have several from the Charlie Foxtrot Models range that I particularly like and use regularly for games set in Normandy or other parts of Europe. So, it's always good to hear about new ranges in 20mm and I was particularly pleased to see the 20mm buildings from Sarissa Precision for the Eastern Front.


I have a few of the small Russian village houses from Blotz but I've always wanted to add some more variety. I particularly liked the idea of a church and that's one of the offerings from Sarissa. They also have a nice looking Russian house that would add variety to those I already owned.


What I liked about their buildings is the addition of the greyboard fine features that add a level of detail that lift the buildings. My only issue was with the dome on the roof of the church which clearly shows the limitation of MDF.  I wasn't overly concerned and thought a bit of work with some filler or similar would sort that one out.


At the same time I put together the Russian village house and the two will work well together and look good to scale with my figures and vehicles.


There were two things that I wanted to change or improve. I wanted to add roof tiles to the church and add planks to the house roof, but the most obvious thing to work on was the church dome. Since embarking on this project I've seen articles in other forums suggesting you use the dome moulds designed for the end of curtain rails. A bit late now! I had already decided to use some kitchen paper towel soaked in diluted PVA to wrap the dome.

The roof tiles were from Charlie Foxtrot. They are easy to apply and work very well with absolutely no wastage.


Next I went to work on the dome and decided to try a papier mache approach.


This worked reasonably well, but not well enough, so once it had dried I also gave it a coat of plaster and was then a little happier. Here it is with roof tiles and the dome but, as is plain to see, the dome looks far too large. Perhaps it would all tie in with a coat of paint?


I wanted a faded dark wood effect for the church and a gold dome. I didn't think painting it gold would work so went for a faded yellow/brown. It's not quite as bright as it looks in the pictures but it still looked very wrong. This wasn't going to work.


I decided to abandon the MDF dome altogether and find something elsewhere. While researching pictures of real Russian churches I began to think the domes were not dissimilar in shape from the end fittings for curtain rails (which I now know are called finials. It's amazing what you learn while making little model buildings). So, off to the hardware store I went and I found these.


With a little bit of surgery I removed elements from the top and the bottom to get the desired shape. I then re-used the MDF cross from the original Sarissa model and attached that to the top.


These domes can sometime be gold plated, but I'm assuming a fairly modest Russian community for most of my villages and it looks like blue domes are also popular. I did however indulge them with a gold cross. I think this is much improved and I'm happy with the result. A great enhancement for little cost and little work.


The village house worked well among my existing houses. These I had painted in a hurry for a game I was putting on and I have never been totally happy with them. So I decided I would give all of the houses a new roof and a new paint job. Unfortunately I didn't take an work in progress shots for that bit of work, but here's a before shot.


With the village houses repainted and re-roofed here they are in a game setting.  


Wooden fence are very characteristic of these villages and they tend to be the tall type with reasonably close boards like these:


I wanted to create something that would serve as a base for a village house, but I wanted flexibility on how I could use them. So I started with a base for a single house surrounded by a fence.


Having a house permanently attached to a base was too rigid a solution and so they were made in a way that allows different houses to be placed in different ways. 


At the same time, as you can see from one of the contemporary pictures, these houses were often adjoining and so the fences form a continuous line. With that in mind I made another two bases of the same size, but this time I left one side open.


This allows me to join them together without doubling up on the fence lines, like so:


The base with all four sides fenced can then butt up against the open end to make a row of three houses. I also made a fence that could close off one of the open sides should I want a different configuration.


This gives me scope to line three up together.


And then with houses:


Having an open unfenced side on two of the bases allows me to use my other freestanding fences to make up larger areas or different shapes:


I also wanted to have a few replacement fences for those that have been breached by vehicles, so I made a couple of those in different sizes.


Lastly I also wanted a few destroyed wooden houses and reworked a couple of earlier ones I had made using cork floor tiles. There is nowhere near enough debris around them, but I wanted them to be functional for figure placement, so I'm happy enough with the way they've turned out.


And so for the effect of some HE, or a drive through by a heavy vehicle here's a 'before and after' shot.


Many of these had their first use in our Chain of Command campaign 'Storming the Citadel' and you can see how they worked in this after action report.