
For this game we return to Map 4 and the scenario Get the Guns! At first playing this was a Swift to Support scenario as described in the Blitzkrieg 1940 Handbook, but for second and subsequent playings it reverts to an Attack & Defend scenario. Fresh reinforcement platoons are unavailable for either side and so we will play with the current platoons. Having suffered men killed and wounded they are not at full strength and the toll in officers and NCOs means many of the leaders are newly promoted men operating with reduced command ability.
The French platoon is missing nine men. One of those killed was the Lieutenant and so the Sergeant-chef has stepped up to fill that role. He is yet to be accepted by the men restricting him to two command initiatives and a 6" command range. No replacement has been found to fill the vacant sergeant-chef position.

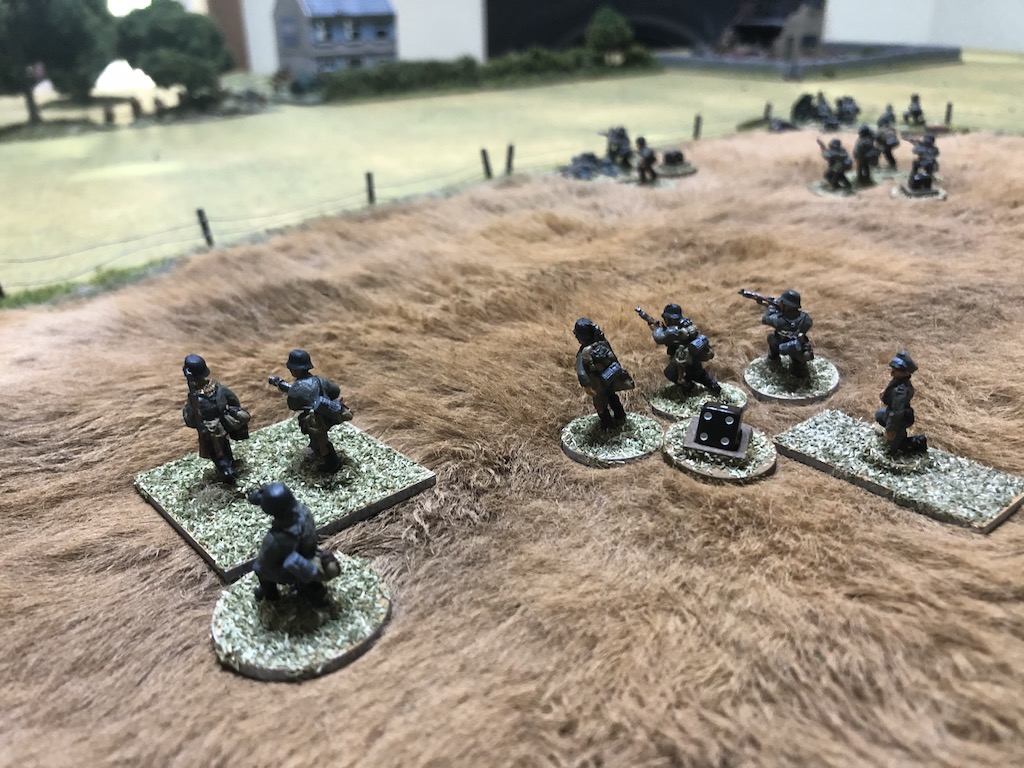
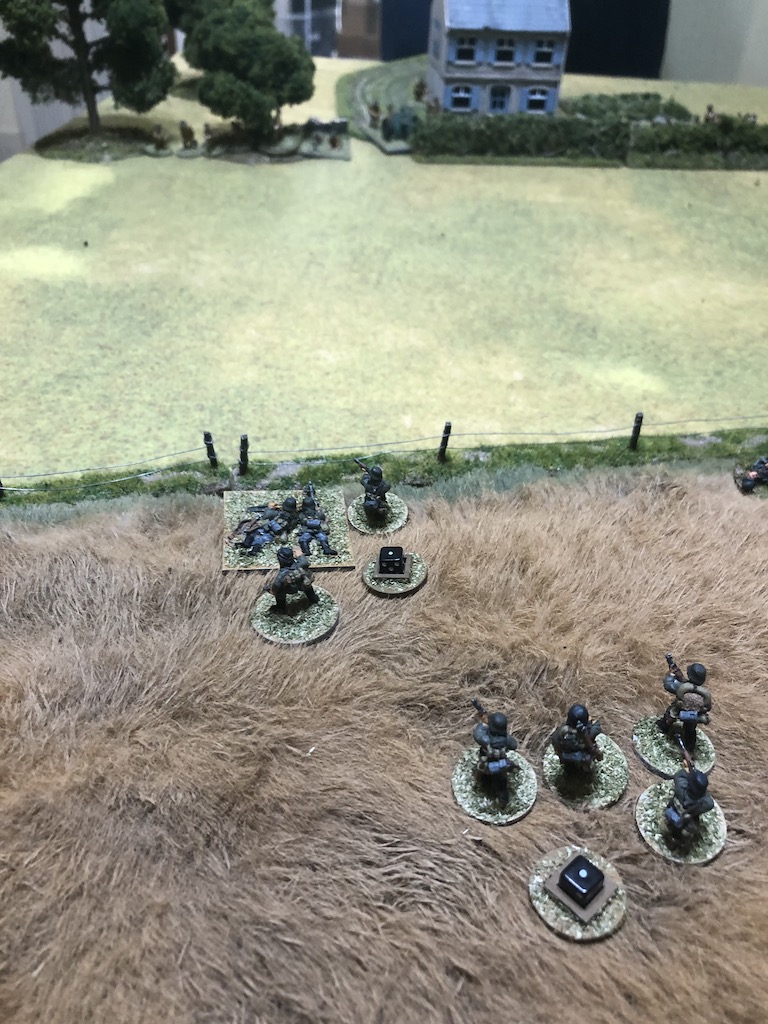
Two of the sergeants leading the Groupe de Combat are also newly promoted from the ranks and they too have limited command abilities. They are placed on a special sabot base to indicate they have a single command initiative and a 3" command range. Despite this the French platoon remains a tough opponent.

The Germans have lost seven men killed. Unlike the French they have been able to call for replacements and so five new men have arrived recently to fill some of those ranks. With three wounded men also returning to the platoon it will be closer to full strength, short only two men. One of the Obergefreiters was recently promoted from the ranks to replace a killed leader and now he has been accepted by the men. This puts the German platoon in better shape than their opponents.

For this scenario the Germans will have thirteen support points and the French seven. Time is less critical in this game and so I've decided not to call on a Stuka bombardment. I will settle on trying to disrupt their deployment with a pre-game barrage. I fully expect to see French armour and so need to ensure there is adequate anti-tank support. For that I will call on an leIG18 75mm infantry gun. It has reasonably good AP and HE capability so can play a number of supporting roles. Another squad is always useful and if I can bring all the German firepower to bear it may prove difficult for the French to hold their ground. Finally, I add a red dice to ensure I can get the most out of all of my units.
The French have the higher force morale and so begin with the initiative. Before the first phase starts they learn of the German pre-game barrage. Dave was expecting another Stuka bombardment and it turns out he had chosen AA MGs as a support. They won't be needed today.
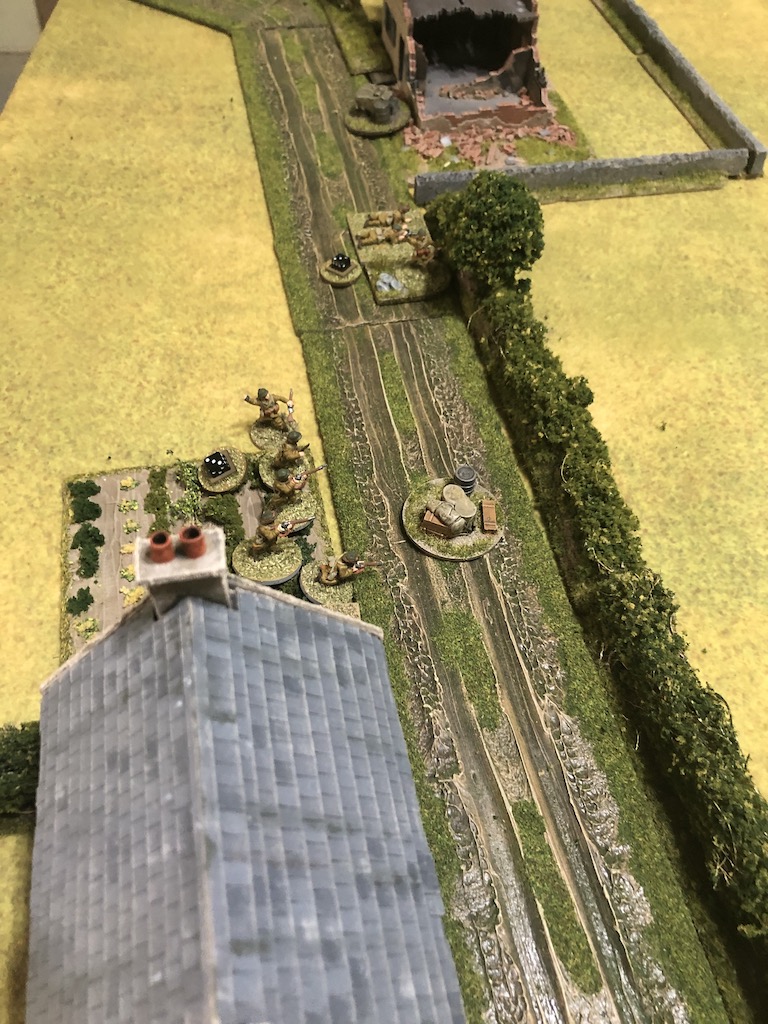
The French jump-off-points are similar to the previous encounter, but the Germans puts more of a focus on the wooded area on their right flank, but to keep all options open to exploit the other flank a third is positioned in the crops.

As is usual when faced with a bombardment or barrage, Dave tries to deploy units as early as possible. The first two Groupes de Combat fail to make it through the barrage but a third one composed of a single LMG team manages to deploy in the centre.

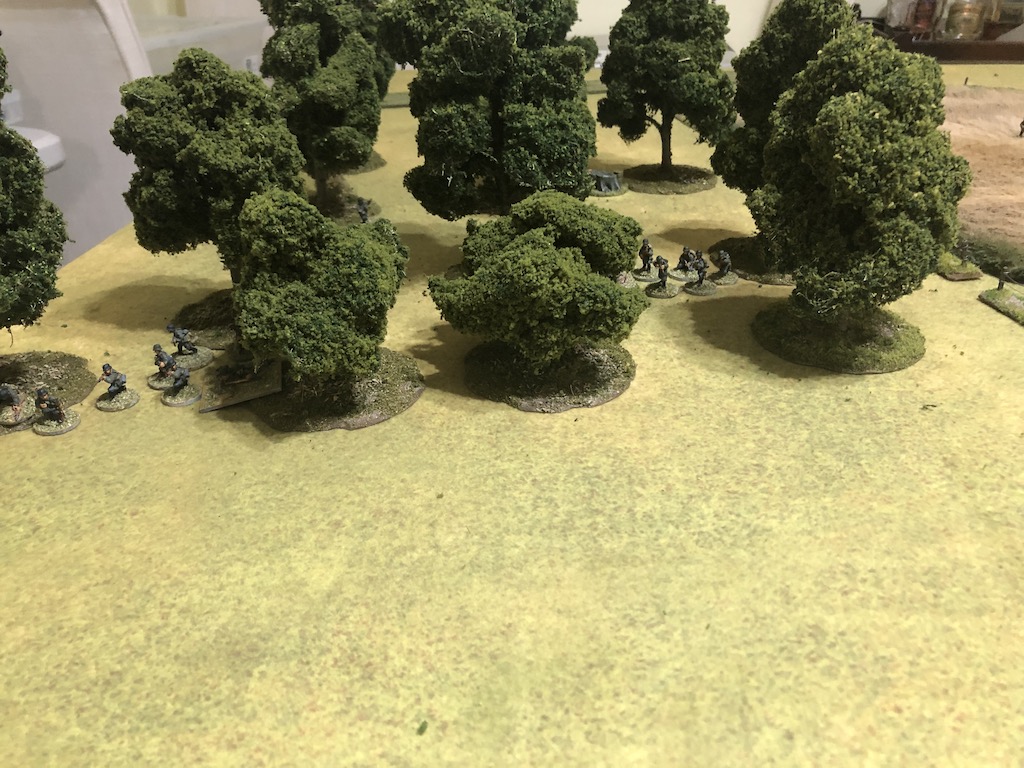
The Germans have no reason to delay deployment and the Feldwebel and one of the squads appear in the woods on the right flank.


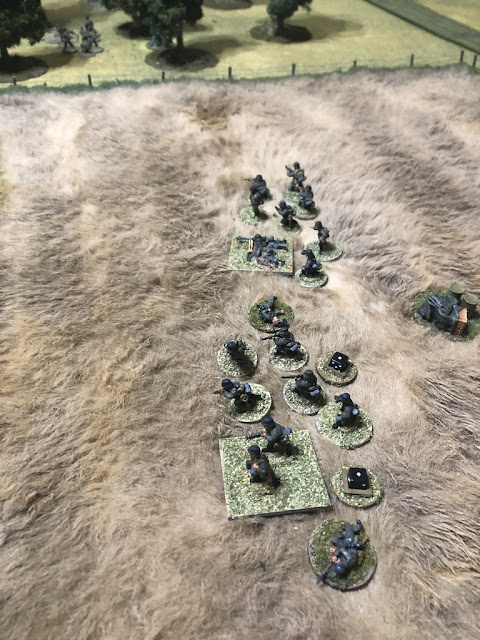
The French then have the good fortune to roll a double phase, an ideal opportunity to deploy as many units as possible. However the recently promoted platoon Lieutenant fails to make his way through the barrage, but the full strength Groupe de Combat does succeed. It joins those who deployed earlier behind the hedge row in the centre.

They are all placed on overwatch, ready for the appearance of any Germans at the tree line.

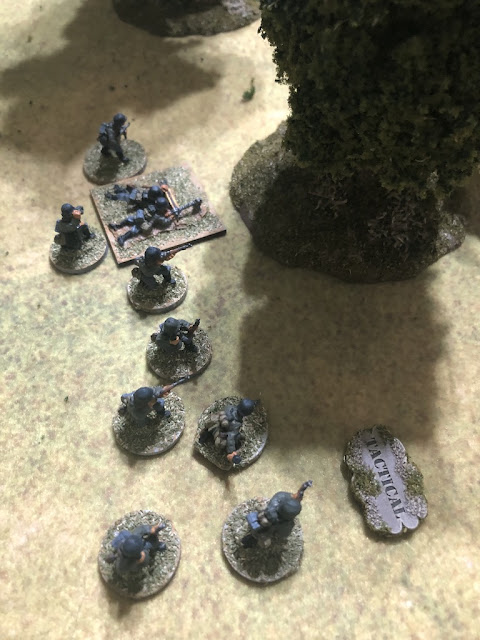
The second of the platoon's weakened Groupes de Combat deploys into the woods on the French right taking up tactical positions.

They are all placed on overwatch, ready for the appearance of any Germans at the tree line.

The second of the platoon's weakened Groupes de Combat deploys into the woods on the French right taking up tactical positions.


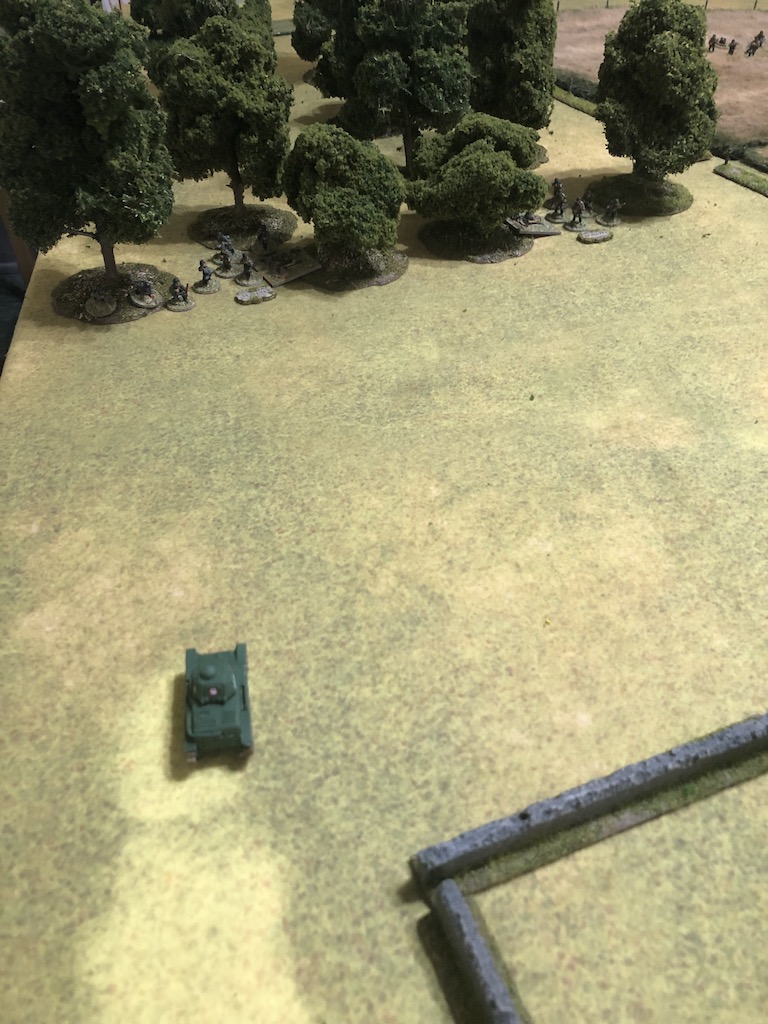
The French have the following phase but the platoon Lieutenant remains conspicuous by his absence, as once again he fails to deploy. The platoon's VB rifle grenadier team are equally unsuccessful. There is more success on the French left where the rumble of a tank engine heralds the arrival of a Renault R35. The gunner is placed on overwatch. My suspicion that the French would bring armour is justified and I'm pleased to have the support of a decent anti-tank weapon in the shape of the leIG18 infantry gun.

The German phase provides a good opportunity to bring more squads onto the table and to begin the push forward. A second squad joins the one on the right flank in the woods.


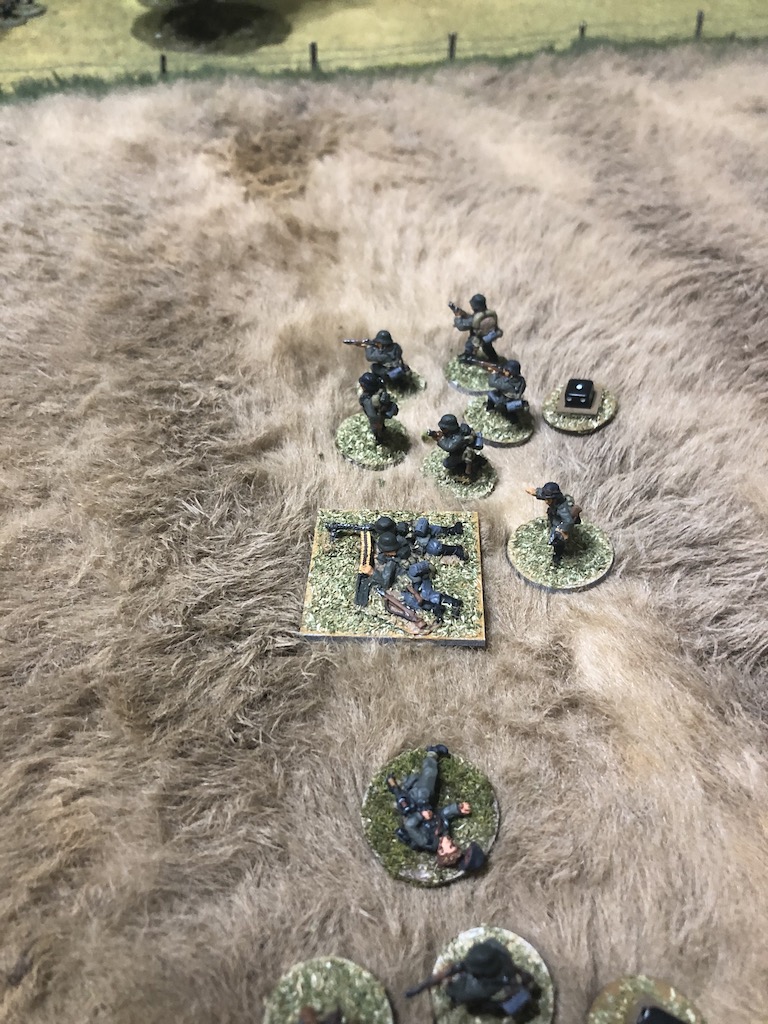
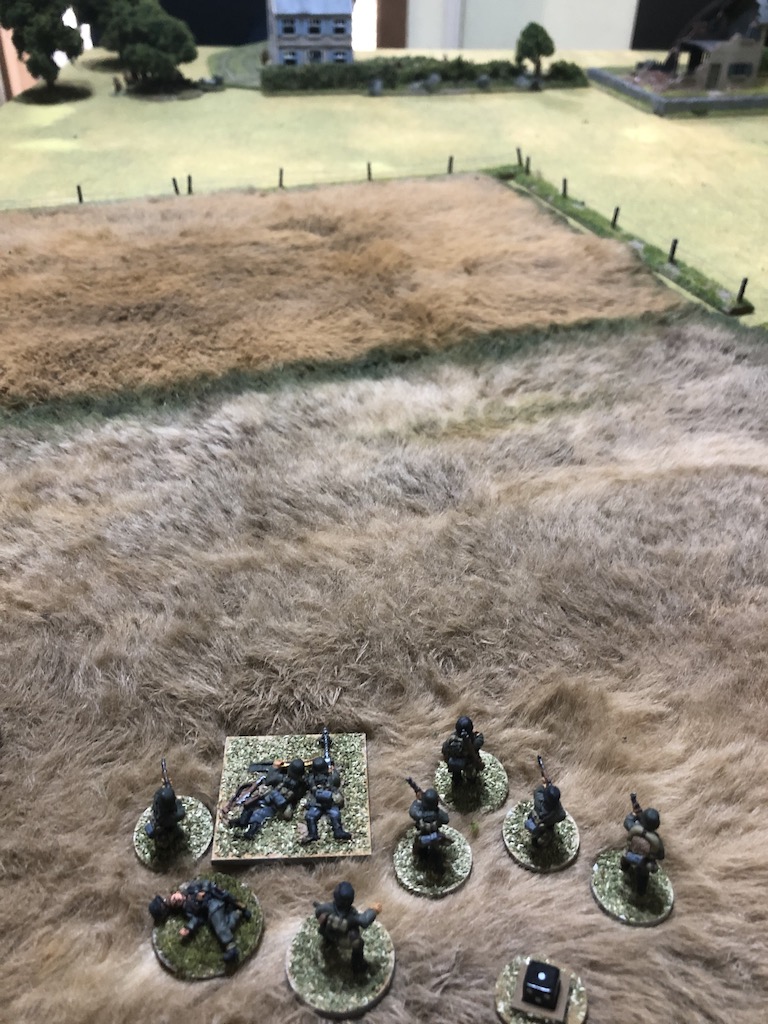
The support squad deploys into the wheat field and the Obergefreiter has them place covering fire along the hedgerow.


The French behind the hedge return fire immediately.

That fire is very effective and the Germans suffer three casualties and a point of shock on each team.

A fourth squad deploys into the wheat and fires in turn at the French behind the hedge.
They inflict two casualties and a point of shock.

The R35 gunner is also on overwatch and he responds to the arrival of more Germans by engaging the squad with the tank's MG.

The LMG team lose a casualty and suffer a point of shock.


The support squad deploys into the wheat field and the Obergefreiter has them place covering fire along the hedgerow.


The French behind the hedge return fire immediately.

That fire is very effective and the Germans suffer three casualties and a point of shock on each team.

A fourth squad deploys into the wheat and fires in turn at the French behind the hedge.

They inflict two casualties and a point of shock.

The R35 gunner is also on overwatch and he responds to the arrival of more Germans by engaging the squad with the tank's MG.

The LMG team lose a casualty and suffer a point of shock.
Despite the pre-game barrage the double phase has enabled the French to deploy many of their units prior to the arrival of the Germans. More significantly several units were placed on overwatch ready to react immediately to enemy deployment. That quick response cost the Germans four casualties in the opening exchanges.
With men dropping to enemy fire in the wheat field the Feldwebel tries to avoid unnecessary losses by ordering the squad on the right to move forward tactically towards the tree line.

The squads in the wheat field are at effective range and for as long as they are not moving they enjoy light cover. If I can bring the squads on my right to the tree line I should be able to suppress much of that French fire and enable the squads in the crops to make their way forward.

The French platoon Lieutenant finally deploys. He wants to keep up the pressure on the Germans in the wheat and he orders the Groupe de Combat at the hedge and the LMG team in the woods to fire.


They both target the support squad which takes nine hits. Fortunately this only result in a point of shock on the rifle team and two points on the LMG team. Nonetheless I need to relieve the pressure on these squads before one is pinned or breaks.

The French have not quite finished with that squad yet. The R35 moves forward slowly firing its MG.

It may add only a single point of shock to the rifle team, but the total shock is starting to accumulate and reduce the squad's effectiveness.
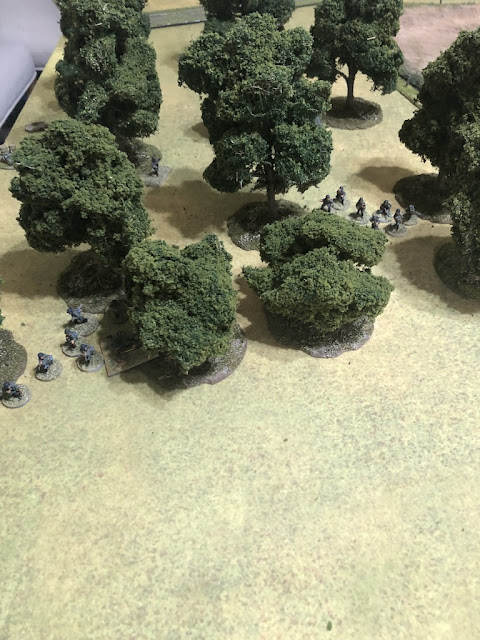
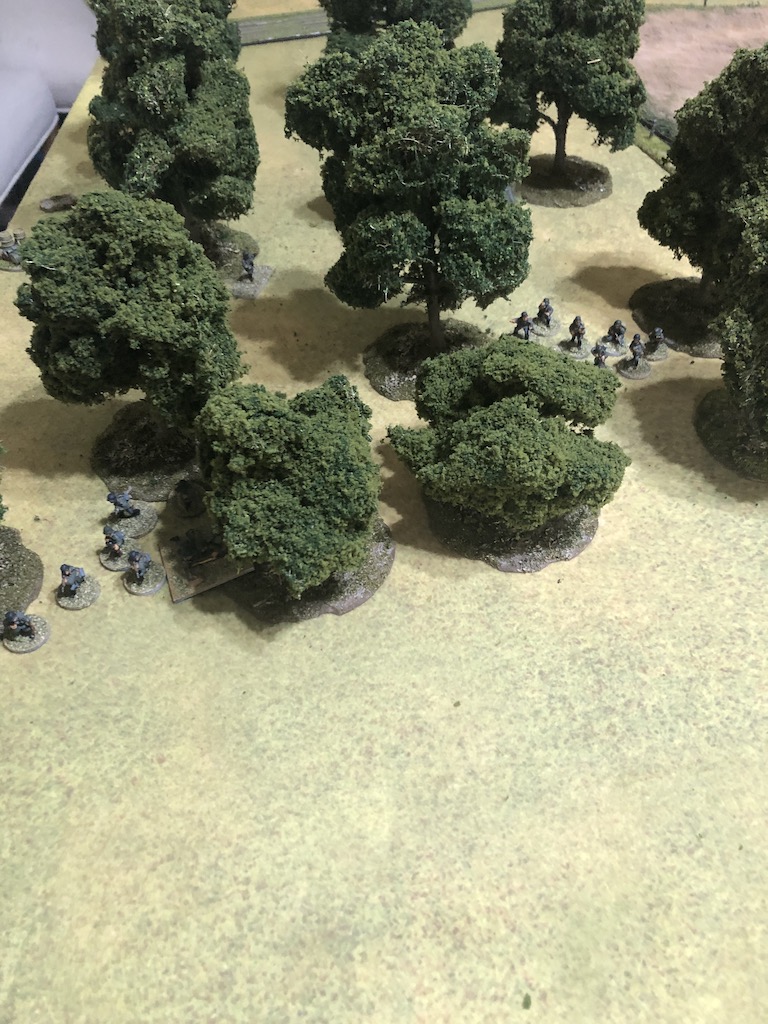
In the German phase the two squads in the woods move forward. The one on the right makes it to the tree line.

The other doesn't move quite as fast but comes close enough to the edge of the woods to see out.

With both squads now able to fire out of the woods I hope to take some of the pressure off the squads in the wheat.

Meanwhile in the wheat field the Obergefrieter of the squad from the core platoon assigns a man from the rifle team to the LMG team.


The squads in the wheat field are at effective range and for as long as they are not moving they enjoy light cover. If I can bring the squads on my right to the tree line I should be able to suppress much of that French fire and enable the squads in the crops to make their way forward.

The French platoon Lieutenant finally deploys. He wants to keep up the pressure on the Germans in the wheat and he orders the Groupe de Combat at the hedge and the LMG team in the woods to fire.


They both target the support squad which takes nine hits. Fortunately this only result in a point of shock on the rifle team and two points on the LMG team. Nonetheless I need to relieve the pressure on these squads before one is pinned or breaks.


It may add only a single point of shock to the rifle team, but the total shock is starting to accumulate and reduce the squad's effectiveness.

In the German phase the two squads in the woods move forward. The one on the right makes it to the tree line.

The other doesn't move quite as fast but comes close enough to the edge of the woods to see out.

With both squads now able to fire out of the woods I hope to take some of the pressure off the squads in the wheat.
Meanwhile in the wheat field the Obergefrieter of the squad from the core platoon assigns a man from the rifle team to the LMG team.

He then orders the whole squad to place covering fire on the hedgerow.

The French are determined to wipe out the support squad and the platoon Lieutenant has the units at the hedge and the Groupe de Combat in the woods all fire at the same target.


The squad comes off relatively lightly considering the volume of fire that hits it, but one of the LMG crew becomes a casualty and the additional shock is enough to see the squad pinned.

Over on the other flank the Renault R35 drives flat out towards the wooded area.


The squad comes off relatively lightly considering the volume of fire that hits it, but one of the LMG crew becomes a casualty and the additional shock is enough to see the squad pinned.

Over on the other flank the Renault R35 drives flat out towards the wooded area.

With all the German squads now able to target the French the following phase sees a burst of activity. The Feldwebel orders the two squads in the woods to open fire at the hedge row.

Now it's the turn for German firepower to take its toll. The French suffer thirteen hits that result in five kills. Only some good fortune prevents the Groupe de Combat sergeant being hit, but those losses and the resulting shock suddenly make the French firing line appear more brittle.

This is a good opportunity to try to break that French line and so the IeIG18 infantry gun deploys into the wheat field. For now it will also target the hedge row but it's also in a position to try to deal with the R35.

The 75mm HE round crashes into the hedge. The French suffer another casualty and see their shock increase.

In an effort to maintain the pressure the squad adjacent to the infantry gun also targets the hedge but this time German fire proves ineffective.

After suffering under the attention of all that French fire finally I feel my firepower is coming to bear and making life very uncomfortable for the defenders.

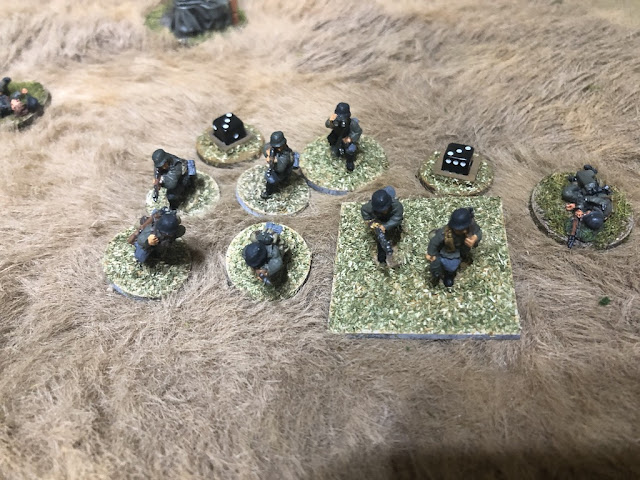
The platoon Leutnant deploys into the wheat and rallies shock off the pinned squad (keep in mind that due to the men's very low opinion the Leutnant is operating with only two command initiatives and a shorter command radius).


Dave sees that this is developing into a firefight he is likely to lose and in the following French phase the Lieutenant orders the Groupe de Combat in the woods to fall back and out of sight.


He gives the same order to the Groupe de Combat at the hedge.


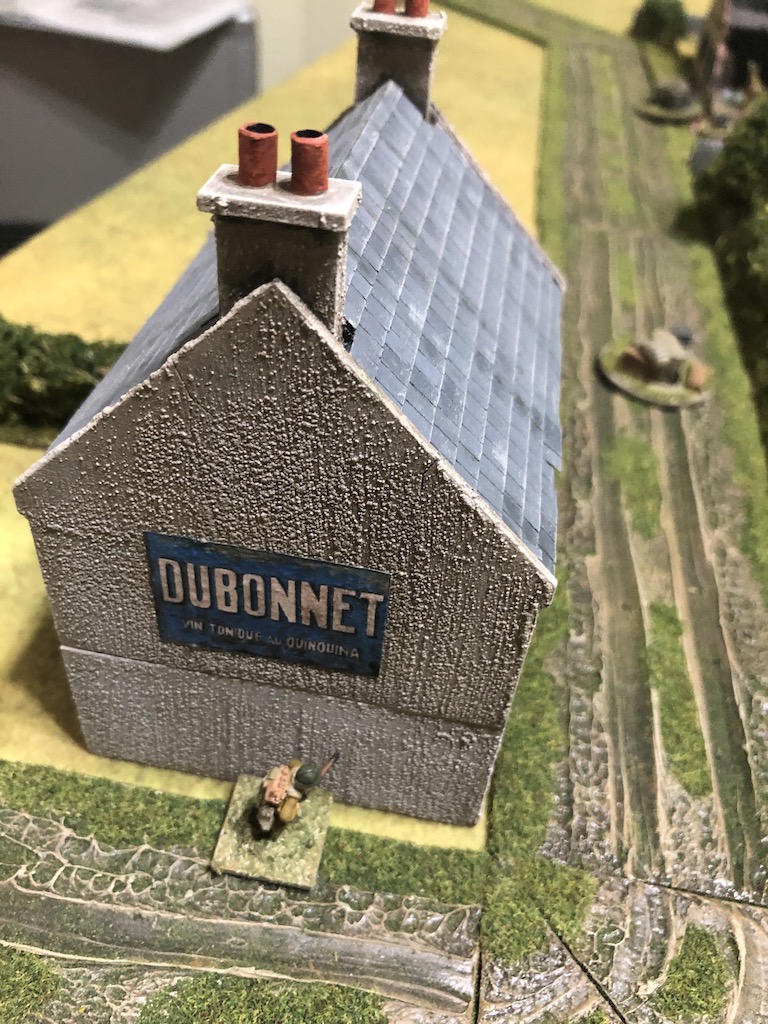
The LMG team also moves away from the hedge, slipping into the rubble of the farmhouse.


With that, all of the French infantry have withdrawn from German sight. On the other hand the R35 commander is feeling very aggressive. He fires the tank's MG into the woods while the driver moves forward slowly (very slowly as it happens, only 1”).

The fire has no effect on the Germans who are in good cover.


He gives the same order to the Groupe de Combat at the hedge.

The LMG team also moves away from the hedge, slipping into the rubble of the farmhouse.


With that, all of the French infantry have withdrawn from German sight. On the other hand the R35 commander is feeling very aggressive. He fires the tank's MG into the woods while the driver moves forward slowly (very slowly as it happens, only 1”).
The fire has no effect on the Germans who are in good cover.

In the next phase the Feldwebel orders the squad on his left to move tactically to the edge of the woods and then moves himself to a more central position from where he can command both squads.

With the R35 prowling around and making a nuisance of itself the squads will stay tactical and make the most of the available cover until I can find a way to deal with the tank.

With that in mind the Leutnant rallies a point of shock off the pinned squad before ordering the crew of the leIG18 to shift their target from the hedge to the R35. With that they fire off a round of AP.

The line of sight is tight but this might be the last opportunity to hit the tank before the gun crew lose sight of it behind the trees.

Despite being a fairly straightforward target a low to hit roll of 3 sees the shot miss the diminutive tank. I have a feeling this will be the last shot at the R35 for a while so an opportunity to do some damage has passed for the moment.

The support squad Obergefreiter spends the phase rallying more shock off his men.


With the French infantry no longer in a position to target the wheat field the squad on the right of the infantry gun makes a move forward.

The French then roll a double phase and with it an opportunity for the R35 to escape the attentions of the leIG18. It moves forward slowly, firing its MG into the woods as it does so.

The squads are in good cover and so only suffer a point of shock on the rifle team.

The VB rifle grenadier team attempt to make their way through the barrage but they fail to deploy. The Lieutenant takes advantage of having no enemy in line of sight to rally shock off the Groupe de Combat in the centre who are not attached but within his command range.

The R35 continues to pour MG fire into the woods.

That fire is not very effective, inflicting only a further point of shock on the rifle team.

The driver then moves forward slowly to within very close range of the squad. I have a horrible feeling that tank intends running down my men.

The Germans roll a triple 6 in their phase, not only will it be a double phase but the turn end should be an opportunity to return the pinned squad to normal. First, the other squad continues its forward movement across the wheat.


The Leutnant rallies a point of shock off the pinned squad and then orders the crew of the leIG18 to move the gun forward in the hope they can find a position to target the R35.


With that the turn ends and the squad is no longer pinned.

In the following phase the Leutnant moves to within command range and orders the leIG18 crew to continue manhandling the gun forward, which they only manage to do slowly.

The squad continues to move forward but does so now with a bit more caution, creeping forward tactically.

The prospect of being run down by the R35 is enough for the Feldwebel to order the squad to fall back on him where he rallies off the shock on the rifle team.


With the Germans encroaching forward the French Lieutenant decides its time for his men to return to the firing line and he orders the Groupe de Combat in the woods to move forward.

Meanwhile the sergeant with the LMG team in the rubble rallies off some of their shock.

The R35 is determined to chase off the Germans but a movement roll of 2" sees it only just enter into the woods. It's enough to be able to see the German squad but the MG fire has no effect.

An Escouade de Fusiliers Motocycliste deploy and they join the LMG team in the rubbled building where they are placed on overwatch. The French have an adjutant in support and that has allowed the team to deploy despite the fact their sole senior leader is already on the table.


I feel as though I'm making some progress, but the R35 is causing chaos on my right flank and I really need to deal with it. At this point the Germans roll another double phase, could this provide the opportunity to deal with that pesky French tank once and for all? The command roll includes two 4s, which should allow me to use both senior leaders to their full advantage.
The support squad is no longer pinned and so they begin to make a move forward.
The support squad is no longer pinned and so they begin to make a move forward.

The Leutnant then makes his way forward to within command range of the leIG18 and urges the crew to keep on pressing ahead. Meanwhile the most forward of the German squads advances up to the wire fence surrounding the wheat field.


In the woods the Feldwebel orders the nearest squad to take up tactical positions and then he moves towards the other squad.


The next German command roll doesn't provide many activation options but it is enough for the leIG18 crew to move their gun into a position where it will be able to target the R35.


The squad at the wire takes up tactical positions.


The squad at the wire takes up tactical positions.

The R35 is now in a precarious position which is not helped by a French command roll of 64222. The tank commander's attention is obviously distracted with other things and he hasn't noticed the looming threat of the German infantry gun. With the tank unable to activate and the French infantry not yet willing to engage in a firefight the phase passes without any French activity.
If that was a frustrating command roll for the French then the one for the Germans is not much better - (5)55542. The leIG18 commander cannot be activated and despite a roll of 4 neither of the German senior leaders are within command range.
The Leutnant cannot move at the double through the wheat field and with a command range of 6" his chance of moving to within range of the gun crew is almost nil.


There is still hope to activate the gun though. The Feldwebel moves as quickly as he can through the woods toward the leIG18, but frustratingly he can’t quite make it to within command range.


This is a fleeting chance for the leIG18 to put a round of AP into the side armour of the R35. Regrettably the gun crew have failed to see the opportunity and despite their best efforts neither of the platoon's senior leaders can alert them.
The next French command roll is 65432, so it looks like the R35 may be able to take evasive action after all. First though, the Lieutenant puts the Groupe de Combat in the woods on overwatch.

He does the same for the LMG team in the centre.

With the Germans now advancing across the wheat field the French need to be ready to receive them again. The pressure is on the Germans to attack and so there is no need for the French to put themselves at risk until the moment is right. A wise decision considering how devastating German fire had been in previous phases.

The R35 commander continues to push on aggressively and orders the driver to take the tank forward into the woods, firing the MG as it goes.

The tank drives right into the German position.

The squad has no shock and can evade without any problem. They move off 7" in the direction of the wheat field.

While the tank is a nuisance it is less of threat while it remains in the woods. If I can move out of there towards the French position it will have to expose itself to the leIG18 should it choose to pursue my men.
In the German phase limited activation dice means that all that takes place is the Leutnant continuing to move forward and as he does so he orders the support squad to continue forward as well.


In the French phase the R35 continues harassing my squads, moving forward slowly firing its MG. While it's not causing any casualties it is disrupting my attempt to develop the attack on this flank.

The VB rifle grenadier team make their appearance finally. They deploy into the upper level of the house and unleash a volley of rifle grenades at the crew of the leIG18.


The grenades explode around the gun killing one of the crew and inflicting a point of shock.

The Germans need to respond to the threat of the rifle grenadiers and with the R35 hidden within the woods the leIG18 commander activates the gun crew, but before they can turn and fire the French interrupt. The VB rifle grenadiers unleash a second volley of grenades.


This time they only inflict another point of shock.


Over in the woods I need to decide what to do about the French tank. I cannot let the R35 tie down those two squads. My best choice appears to be continuing to advance on the French position. If by doing so I can draw the Renault tank into sight of the infantry gun then so much the better. With that in mind the Feldwebel orders one of the squads to break out of the cover of the woods and move at the double across the open ground towards the rubbled house.

This is a gamble as I could be caught in the open. Yet if I can make it to the cover of the wall I may be able to put the French under a lot of pressure.

Having sent the squad forward the Feldwebel then moves with the other squad to the corner of the woods from where he is in command range of the leIG18.


The squad at the fence in the wheat field open fire on the VB team.

It's enough to kill one of the grenadiers and inflict a point of shock.

Just when I've taken the risk of a dash into the open the French roll a double phase, the last thing I wanted to see. Not unexpectedly the French suddenly swing into action.
The Lieutenant orders the Groupe de Combat in the woods to his right to move forward to the tree line.


From there they are in effective range of the squad in the open.

The VB grenadiers unleash their final volley of grenades at the leIG18. There are two hits but they have no effect.

The Groupe de Combat in the centre returns once more to the hedge row.

The members of the VB team disband and return to their respective Groupes de Combat in the centre and the LMG team in the rubble.


Things take a turn for the worse when the next French command roll is 66511. Not the best activation dice, but another double phase nonetheless.
The French 75mm gun makes a reappearance. It lost three of its crew killed in the first German attack on the position but with two surviving crew members and a gun commander it is still quite a threat. The gun fires at the leIG18.
The French 75mm gun makes a reappearance. It lost three of its crew killed in the first German attack on the position but with two surviving crew members and a gun commander it is still quite a threat. The gun fires at the leIG18.

The German gun crew suffer another two points of shock.

Lastly, the Escouade de Fusiliers Motocycliste team move out of the rubble and up to the wall.

I'm sensing my squad in the open could be in a lot of trouble.

The pain is not over yet. The following French command roll is 66533. This is beyond my worst case scenario! The Escouade de Fusiliers Motocycliste are about to open fire on my squad and so I use a CoC die to interrupt. I move them tactically so they have better cover and try get as far away from the other French units so that they will be at effective range. I'm grasping at straws here but doing what I can.


The motocyclistes open fire. The squad Obergefreiter is hit, wounded and stunned. German morale drops to seven. The LMG team suffer three points of shock and the rifle team two. This is not going well and I have to face at least one more French phase.


The motocyclistes open fire. The squad Obergefreiter is hit, wounded and stunned. German morale drops to seven. The LMG team suffer three points of shock and the rifle team two. This is not going well and I have to face at least one more French phase.

The next French command roll is 53332. No double phase but a host of activation options. First off the Escouade de Fusiliers Motocycliste continue to fire at the squad in open.

The rifle team has a man hit and more shock is added to the LMG team. The squad is close to pinning.

The motocylistes are not done. Despite an 8" range they hurl out a grenade which hits the target. The Obergefreiter takes another wound, this time he is lightly wounded and the LMG team accumulates another point of shock. The only consolation is that German morale holds steady.

The French 75 fires another round of HE at the leIG18, but despite one hit there is no effect on the crew.


The Groupe de Combat in the woods on the French right fire into wheat and inflict a point of shock on each team.


The Groupe de Combat at the hedge row turns its attention to the crew of the leIG18 and opens fire.


There is one casualty and it's the gun commander who is lightly wounded. This time German morale drops down to six. The crew also suffer three points of shock and that's enough to see them pinned. That's the gun as good as out of action.

The French are not quite done yet. As if things aren't going badly enough the R35 emerges from the woods firing its MG as it goes, but it has no effect.

Well that was a painful series of French phases, but all is not lost as the Germans still have three squads in action. The Obergefreiter with the support squad assigns a man from the rifle team to join the LMG team and bring the MG34 back to full effectiveness. He then rallies off the remaining point of shock.


With the Obergefreiter busy putting his squad into order it is left to the Leutnant to move up and order them to fire at the woods opposite. Unfortunately it leaves the French unscathed.
The Obergefreiter with the squad at the wire fence rallies shock off the rifle team and orders the squad to also fire at the Groupe de Combat in the woods.

It too has no effect.

The Feldwebel orders the squad at the tree line to fire at the Escouade de Fusiliers Motocycliste at the wall. Despite three hits the defenders benefit from the hard cover and survive unharmed.


That was a frustrating phase where I couldn't seem to manage to bring any effective fire to bear on the French.
The next phase sees the driver of the R35 commanded to drive flat out and tear through the Germans in the open.


The squad are in real trouble, caught between the hammer of the R35 and the anvil of the Escouade de Fusiliers Motocycliste. There is nowhere to go.

The R35 driver accelerates and the tank ploughs into the hapless German infantry.


The LMG team, with six shock, cannot escape. They are all crushed by the tank including the Obergefreiter who is killed. German morale drops two points to four. The LMG team has also been wiped out, but German morale holds steady in this instance. What a disaster.

The R35 drives through to reach the wall, leaving behind a trail of destruction. Well I was hoping to draw the tank out into the open, but not quite like this.

The French platoon Lieutenant orders the Groupe de Combat in the woods to fire once again into the wheat field.


The Germans suffer a casualty in each team.

The 75mm gun then fires a round of HE at the same target.

This time the HE round hits with devastating effect. The squad suffers three casualties and that sees the LMG team wiped out. It's yet another blow to German morale which drops down to three.

Well, no surprise, that's the last straw for the Germans and they withdraw. How did things turn so bad, so quickly? It wasn't that many phases ago that their prospects were looking quite good, but the gamble sending the squad forward was punished with a run of four consecutive French phases which brought all German ambitions crashing to nought.
With the Germans failing to take this table the French have managed to hold on and earn themselves a narrow campaign victory. Vive La France! That brings our Gembloux Gap campaign to a close. A tough struggle for the Germans who paid the price of their early failure to take Perbais in the first scenario. Eventually consuming five games and requiring the Germans to call on both of their reinforcement platoons it was always going to make the subsequent games a tough proposition. However, take nothing away from the French, they conducted a splendid and determined defence in the face of all the Germans could throw at them and so another excellent pint-sized campaign reaches its conclusion.
Despite suffering a humiliating defeat there is something immensely satisfying about playing out an entire campaign. Rather than feel as though I've lost a game, I genuinely feel as though I've had a very rewarding gaming experience. It speaks much to the quality of the design of the Chain of Command rule system and the accompanying pint sized campaigns.
Now all that remains to do is decide which campaign to play next......
If you've enjoyed following along and would like to Buy Me a Coffee to help cover some of the costs of running the blog you can click through at the link or on the tab in the right hand column of this page.
You can find the AARs for all the games in this campaign and several other campaigns on the Chain of Command campaigns AAR page.