

This campaign is played over ten turns, so we have two games remaining. If, by the end of that tenth game the French still hold on to map four (the one they defended successfully in the previous game) then they have achieved a narrow campaign victory.
One benefit of the recent French success is the option now to launch a local counter-attack. There are several good reasons for them to consider doing so. If nothing else, forcing the Germans to fend off a counter-attack will delay them for a whole campaign turn. Perhaps more significantly, should the French win they would force the Germans back to map three and a successful French defence there on turn ten would earn them a major campaign victory. It comes as little surprise then to discover Dave has decided to attack.
The campaign has not gone well for my Germans whose ambitions are now reduced to trying to limit French success. If we can defeat them in this game and then go on to capture map four in the final game then that would be enough to deny the French a narrow campaign victory. It's the best we can hope for in the circumstances and still gives us much to play for.
For the counter-attack we will return to some of the ground captured by the Germans on map three (pictured below).

Assuming the Germans now hold the village we have constructed a table for an Attack & Defend scenario by extending the table and creating terrain that will allow the French to approach from the left side of the map.

The table as seen from the French side:

The Germans suffered a number of dead and wounded in the last engagement. As a consequence the platoon is composed of two under-strength squads and a third reduced to a solitary LMG team under the command of a newly promoted Obergefreiter.


The Germans suffered a number of dead and wounded in the last engagement. As a consequence the platoon is composed of two under-strength squads and a third reduced to a solitary LMG team under the command of a newly promoted Obergefreiter.

The French platoon is in a similar state, but has suffered severe casualties amongst its NCOs. The sergeants of all three Groupes de Combat are newly promoted and the platoon is led by a lieutenant who was only recently promoted himself. Formerly the sergeant-chef, he only assumed the command role when the original platoon leader was killed. The men are yet to fully accept him, which means he is limited to two command initiatives and a command range of 6".

The French have eleven support points for this game - ten for the scenario and an additional point due to their CO's opinion. Normally they are permitted only one AFV in their support choices, however in the case of a counter-attack they may choose any number of Renault R35 tanks (up to their support point total). Alternatively they could call on support from a Hotchkiss H39 and a Somua S35. These latter AFVs represent stray elements of the 2eme and 3eme DLMs which may each be selected once only during the entire campaign.

Given the weakened states of our respective platoons I suspect both Dave and I will want our support units to bear the brunt of the fighting. With that in mind I'm expecting to see the French call on the support of their armour to lead the counter-attack. With eleven points they could opt for three Renault R35s which would allow them to form a tank platoon under the command of a senior leader. On the other hand a Hotchkiss H39 and a Somua S35 would represent a more powerful combination, as both have better armament than the R35 (and better armour in the case of the Somua). Regardless of choice I'm certain I'm going to be facing an armoured attack.
The German platoon can call on greater levels of support and with seventeen support points have a significant advantage (the scenario gives them eighteen support points, but this drops to seventeen because of the CO's low opinion). Like the French there are some limitations on German armour selection. The 3rd Panzer Division was made up of predominantly light tanks (PzI and II) and normally the Germans may select either no more than one PzIII or one PzIV per game - unless facing a French counter-attack - when two may be selected.
While I'm expecting armour I also want to be sure I can deal with enemy infantry. There is a good incentive for the French to push hard in this scenario and I can't assume this will be an encounter dominated by armour, so I decide that two PzIIIs will have to be sufficient to tackle any French AFVs.

To these I add a leIG18 75mm infantry gun. It has reasonable AP and good HE, providing an anti-tank capability and the ability to deal with French infantry. An MMG team will provide additional fire support. Lastly, to ensure I can get the most out of this large force I will add a red dice to my command dice (note that whenever I document the German command roll the result of the red dice will be in brackets).
The game starts with French force morale at nine and German morale at eight. In the patrol phase the Germans are successful in keeping the French from placing a jump-off-point in the orchard on their right flank. Other than that jump-off-points are spread evenly across the table for both sides.

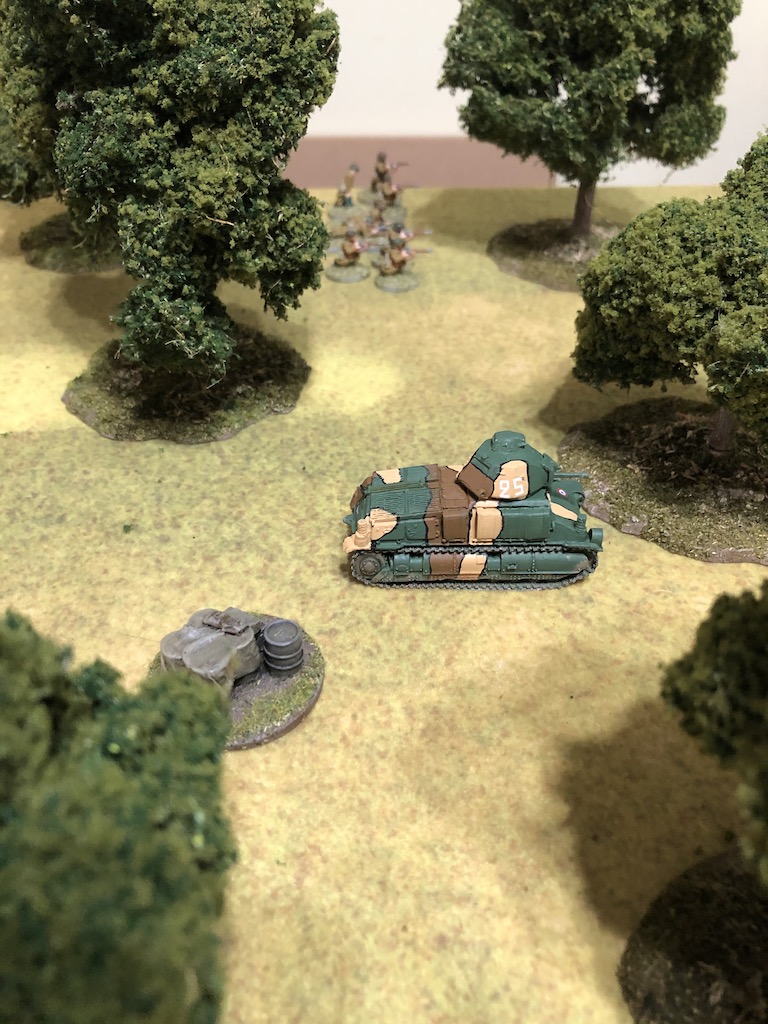
The French have the opening phase. It begins with the ominous rumble of a Somua S35 approaching through the wooded area on their left flank. With thick armour and a powerful gun this is going to quite a beast for my PzIIIs to tackle.

Given the weakened states of our respective platoons I suspect both Dave and I will want our support units to bear the brunt of the fighting. With that in mind I'm expecting to see the French call on the support of their armour to lead the counter-attack. With eleven points they could opt for three Renault R35s which would allow them to form a tank platoon under the command of a senior leader. On the other hand a Hotchkiss H39 and a Somua S35 would represent a more powerful combination, as both have better armament than the R35 (and better armour in the case of the Somua). Regardless of choice I'm certain I'm going to be facing an armoured attack.
The German platoon can call on greater levels of support and with seventeen support points have a significant advantage (the scenario gives them eighteen support points, but this drops to seventeen because of the CO's low opinion). Like the French there are some limitations on German armour selection. The 3rd Panzer Division was made up of predominantly light tanks (PzI and II) and normally the Germans may select either no more than one PzIII or one PzIV per game - unless facing a French counter-attack - when two may be selected.
While I'm expecting armour I also want to be sure I can deal with enemy infantry. There is a good incentive for the French to push hard in this scenario and I can't assume this will be an encounter dominated by armour, so I decide that two PzIIIs will have to be sufficient to tackle any French AFVs.

To these I add a leIG18 75mm infantry gun. It has reasonable AP and good HE, providing an anti-tank capability and the ability to deal with French infantry. An MMG team will provide additional fire support. Lastly, to ensure I can get the most out of this large force I will add a red dice to my command dice (note that whenever I document the German command roll the result of the red dice will be in brackets).
The game starts with French force morale at nine and German morale at eight. In the patrol phase the Germans are successful in keeping the French from placing a jump-off-point in the orchard on their right flank. Other than that jump-off-points are spread evenly across the table for both sides.


The Somua moves forward rapidly, crossing through the wooded area in a single phase.

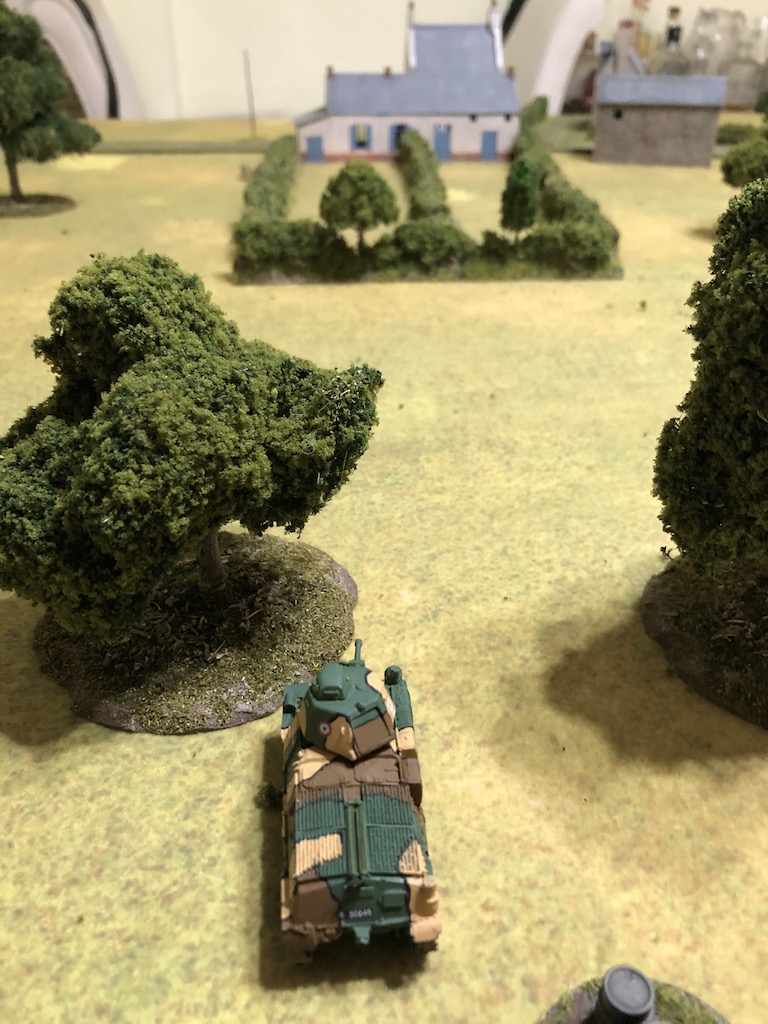
A Hotchkiss H39 then appears on the road with the main armament on overwatch.

So, the French have decided to lead the attack with their two most powerful tanks. The PzIII's 37mm main gun is going to find the thick armour of these two tanks something of a challenge.

On the French right a Groupe de Combat deploys near the orchard and takes up tactical positions.


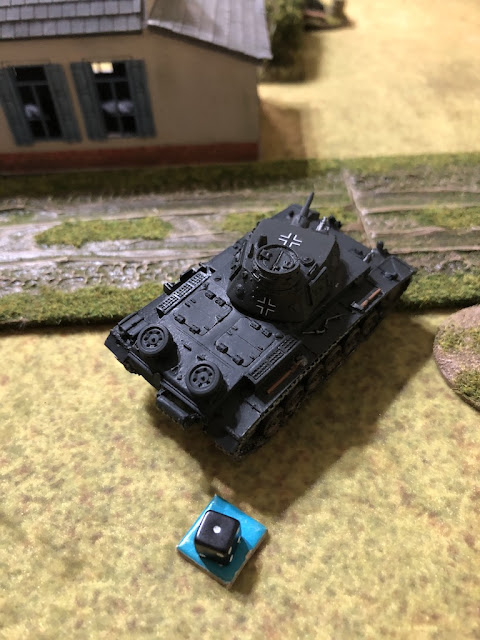
In the German phase I decide there is a good opportunity to take on the H39. With that the first PzIII appears on the road and targets the Hotchkiss.

It's a clear shot but the gunner's aim is off and AP round misses the target. That's unfortunate and not made any better when the Hotchkiss takes advantage of being on overwatch to return fire.

The Hotchkiss's AP round strikes its target and the PzIII receives one net hit. The crew suffer a point of shock and the tank will be unable to activate in the following phase. That wasn't what I had planned and now I face the prospect of receiving more French fire without the ability to fire back in my next phase.

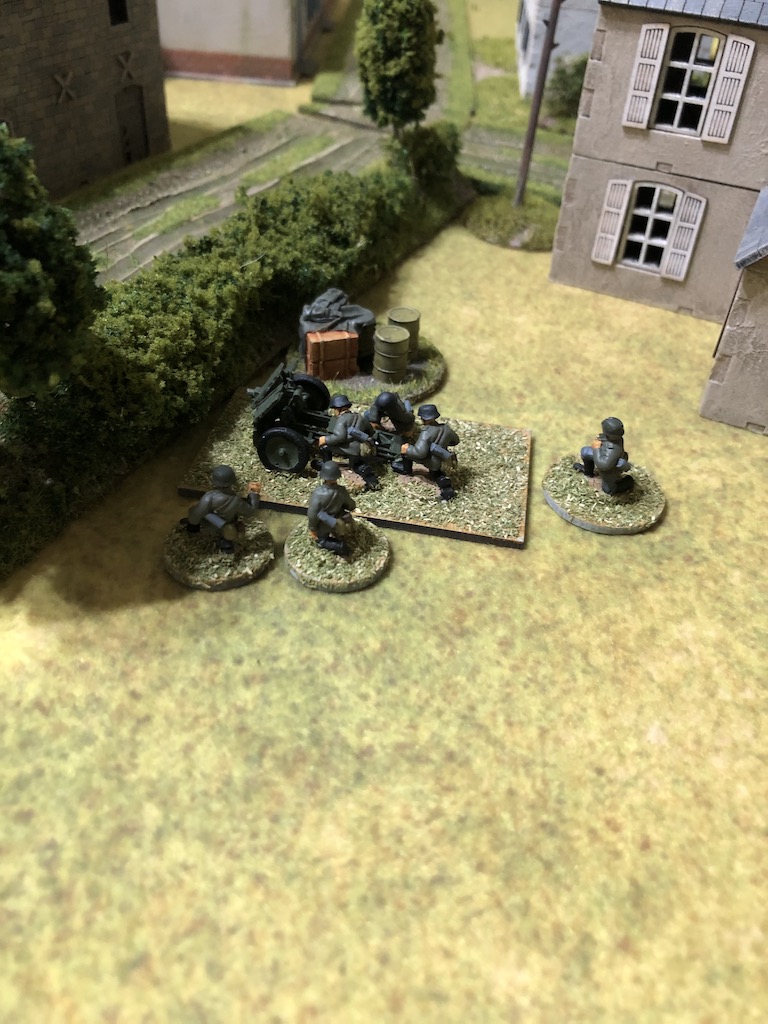
That demands a response and so I deploy the leIG18 75mm infantry gun in the centre from where it can see the Hotchkiss.


The gun crew have better aim and the Hotchkiss reels from the impact of the AP round, taking a point of shock and reversing 6" back up the road. That pushes it behind the wooded area from where it loses its line of sight to the PzIII.

It's a clear shot but the gunner's aim is off and AP round misses the target. That's unfortunate and not made any better when the Hotchkiss takes advantage of being on overwatch to return fire.

The Hotchkiss's AP round strikes its target and the PzIII receives one net hit. The crew suffer a point of shock and the tank will be unable to activate in the following phase. That wasn't what I had planned and now I face the prospect of receiving more French fire without the ability to fire back in my next phase.


The gun crew have better aim and the Hotchkiss reels from the impact of the AP round, taking a point of shock and reversing 6" back up the road. That pushes it behind the wooded area from where it loses its line of sight to the PzIII.

Things have started at quite a pace, with AP rounds flying the length of the table in both directions. We've each landed a blow, but no knock-out punches just yet.
The French command roll of 54221 limits the options for their armour and means only one of the tanks will be activated this phase.
While the H39 can no longer see the PzIII it remains a potential target for the 75mm gun. Dave has the option to fire the Somua at the PzIII or move the H39 out of harm's way, but not both. He decides it may be best to bring the H39 out of danger. The commander rallies off the point of shock and orders the driver to head into the woods towards the Somua.

That takes it out of sight of the 75mm infantry gun.

Lastly, the Groupe de Combat moves forward to the hedge surrounding the orchard.


On the French right the Groupe de Combat continue moving forward, clambering over the hedge and into the orchard.


A German command roll of 55522(5) was not what I was hoping for and means that I won't be able to move the PzIII in this phase either. It does give me a full CoC die, but that's about it. Fortunately the French roll of 44221 is not much better, nonetheless it's enough to activate the Somua and the gunner opens fire once again on the PzIII.
It's at this moment I don't regret my previous command roll and use the newly acquired CoC die to interrupt. The driver of the PzIII receives the command to go flat out and find shelter behind one of the buildings. He clearly understands the urgency of the task and despite carrying some shock the tank scuttles off out of harm's way. That's a relief.


A second Groupe de Combat deploys into the woods next to the Somua.

The commanders on both sides are having trouble coordinating the action of their armour at the moment. The Germans find they are only able to activate a single tank in their phase. The priority is the PzIII that has suffered so much shock and the commander rallies his crew and prepares them to face the enemy again.

After a flurry of activity and some early excitement both sides now try to draw breath and regroup. The H39 driver is told to head towards the Somua, but he encounters some sort of problem in the woods and they crawl forward only 2".

To make room for the imminent arrival of the Hotchkiss the Groupe de Combat shift over to their left.

To make room for the imminent arrival of the Hotchkiss the Groupe de Combat shift over to their left.
German coordination problems continue with a command roll of 65544(1) that sees no activations. The French then roll 66442. It may herald a double phase but the 4,4 and 2 are of little use right now. The next roll is 66441 and I'm relieved to see that offers even less options that the previous roll. The series of consecutive phases doesn't end there and the French then roll 66643. The ending of the turn will not bring anything significant at this stage of the game, but they will have yet another phase. All that occurs in this phase is a move forward by the H39. This time it moves considerably faster and emerges at the tree line.


This brings both tanks within sight of the German right flank.

The run of phases comes to an end finally. The solitary French activation is to put the Somua's gunner on overwatch.

Well I'm relieved to see nothing significant materialise from that run of four French phases. In the following German phase command coordination improves and both of their tanks activate. The commander of the PzIII on the right rallies off the remaining point of shock and orders the driver to move forward slowly to the edge of the building.

Meanwhile the other PzIII advances forward to the road junction. The location doesn't offer a wide field of fire but it does allow the gunner to cover some of the area approaching the German right flank.


Then the Somua moves forward out of the woods. Here come the French!


The Germans are unable to target any of the enemy AFVs and so in anticipation of their arrival the PzIII at the road junction and the 75mm infantry gun are placed on overwatch.


The French tanks take turns advancing and covering each other. The Somua now takes up an overwatch position while the H39 moves forward.


The French infantry in the orchard and the woods both bide their time and take up tactical positions.


The French infantry in the orchard and the woods both bide their time and take up tactical positions.


With no shock remaining the PzIII on the German right reverses carefully to take up a position to cover the flank. The pressure is on the French to advance so I'm in no hurry to expose myself to any fire just yet, I simply want to be sure I'm well positioned to cover that area.


The French tanks alternate between taking up overwatch positions and moving.


The following command roll of 55552(3) is frustrating, but at least the red dice allows me to activate the infantry gun. It targets the Somua, but before it can fire off a round of AP Dave uses a CoC die to interrupt and the Somua moves forward.


While that movement takes the Somua out of line of sight of the gun, it brings it into line of sight of the PzIII at the road junction, which is on overwatch. It fires immediately at the Somua and hits the target. Despite an AP strike of four the thick armour of the Somua repels the round with five armour saves. I had a feeling this tank's thick armour was going to be a problem.


While that movement takes the Somua out of line of sight of the gun, it brings it into line of sight of the PzIII at the road junction, which is on overwatch. It fires immediately at the Somua and hits the target. Despite an AP strike of four the thick armour of the Somua repels the round with five armour saves. I had a feeling this tank's thick armour was going to be a problem.

In the French phase the H39 roars at full speed to come into line with the Somua.


The Somua gunner targets the PzIII, but now it is my turn to use a CoC die to interrupt and fire first.


The Somua gunner targets the PzIII, but now it is my turn to use a CoC die to interrupt and fire first.

The panzer gunner's aim is good and the AP round hits the Somua. It's a powerful AP strike of five that results in two net hits. The outcome could not be better. The round has hit the Somua's 47mm main armament and disabled it. That effectively takes the Somua out of action.

The following German command roll of 6533(3)2 is just what I need to take advantage of the situation. Firstly the PzIII at the crossroads fires at the Hotchkiss H39. It's partly obscured, a small target and moved flat out in its previous phase and so I'm not totally surprised to see the shot miss.

The PzIII on the German right moves forward slowly in order to get a line of sight on the Hotchkiss and opens fire. Much like the shot from the previous PzIII it's a tricky shot as the small tank is partly obscured by the hedgerow. It too misses.

Finally the commander of the 75mm infantry gun orders the crew to manhandle the gun into a better position and they find a location which gives them a line of sight to the H39.


The Germans can bring two tanks and the infantry gun to bear against the French. Without the main armament on the Somua that only leaves the Hotchkiss to worry about. Despite this the H39 is a small target with decent armour and it's proving difficult to hit.
The French can only activate one tank in their phase and so the H39 returns fire at the PzIII directly in front.

The shot smashes into the German tank, damaging the gun sights and inflicting a point of shock. That is going to make it even more difficult to return fire at a target that's already proving a problem to hit.

The platoon's VB rifle grenadier team deploy into the woods and unleash a volley of grenades at the crew of the leIG18. These have no effect but subsequent volleys at the same target could prove hazardous for the gun crew. I may need to consider loading some HE and returning fire, although I'd much rather focus on dealing with the French armour.


The dice are kind and the next German command roll of 666532 offers another opportunity to silence the French armour. The commander of the PzIII on my right rallies off the point of shock on the crew and has the gunner target the H39 once again.


With the broken gun sights and the partially obscured, small target the PzIII needs to roll a nine or more to hit but does so successfully. Despite rolling five dice there is not a single AP strike on the fortunate Hotchkiss. The diminutive H39 is proving a very difficult target, the German gunners can't seem to hit it and when they do the AP rounds appears to bounce off harmlessly. With that the turn ends, but nothing of any significance occurs.


With the broken gun sights and the partially obscured, small target the PzIII needs to roll a nine or more to hit but does so successfully. Despite rolling five dice there is not a single AP strike on the fortunate Hotchkiss. The diminutive H39 is proving a very difficult target, the German gunners can't seem to hit it and when they do the AP rounds appears to bounce off harmlessly. With that the turn ends, but nothing of any significance occurs.
The subsequent command roll of 64421(4) means I won't be able to take full advantage of the double phase, allowing the activation of a single tank. The PzIII at the road junction fires at the Hotchkiss but misses again.


The VB team then unleash a full volley of rifle grenades at the infantry gun.


Several of these land on target, killing two of the crew.

The H39 is determined to stand its ground and the gunner targets the nearest of the PzIIIs.
I use another CoC die to interrupt and the PzIII at the road junction opens fire. This time the gunner has found his aim and the AP round hits the Hotchkiss.
The H39's armour proves too tough for the 37mm round to penetrate, but the hit does result in a point of shock and the driver unable to activate in the next phase.

The H39 fires in turn at its intended target.

The PzIII reels under the effect of an AP strike of three, which results in two net hits. It's enough to kill the driver and inflict two points of shock. That H39 is proving very difficult to deal with and having survived numerous shots is now dishing out punishment of its own.


The German command roll of 665(4)21 sees another double phase. The activation options are not great but I use one of the 4s to deploy the Feldwebel. He orders the 75mm infantry gun to fire AP at the Hotchkiss, but they are off target and miss.

The commander of the PzIII on my right activates and rallies a point of shock off the crew and orders the gunner to fire at the H39, but that shot also misses.

The commander of the PzIII on my right activates and rallies a point of shock off the crew and orders the gunner to fire at the H39, but that shot also misses.

That Hotchkiss is enjoying something of a charmed life. Surely I can make the most of this double phase to finish it off? The subsequent command roll of 5(5)3331 is a chance to do just that. The PzIII at the road junction fires at the H39.

This time the round hits, but once again the French armour proves tough. Despite an AP strike of three it only results in zero net hits. With the driver already inactive for a phase the result 'halt and engage firer in next phase' makes little difference.

The PzIII on my right fires and also hits the Hotchkiss.
This time the AP strike of four results in two next hits. That kills the gunner and inflicts two points of shock. It will take time to replace the dead gunner and that puts the tank in a spot of jeopardy. Not only that, the H39 gunner is also the commander, his loss will see the tank become a leaderless vehicle. With his death French force morale drops two points down to seven.

Lastly the 75mm infantry gun also targets the H39. Despite hitting the tank it only results in zero net hits and no further adverse effect on the battered AFV. The Germans have expended a lot of ammunition on that little tank and it has taken a succession of hits to finally reduce its effectiveness.

This time the round hits, but once again the French armour proves tough. Despite an AP strike of three it only results in zero net hits. With the driver already inactive for a phase the result 'halt and engage firer in next phase' makes little difference.

The PzIII on my right fires and also hits the Hotchkiss.

This time the AP strike of four results in two next hits. That kills the gunner and inflicts two points of shock. It will take time to replace the dead gunner and that puts the tank in a spot of jeopardy. Not only that, the H39 gunner is also the commander, his loss will see the tank become a leaderless vehicle. With his death French force morale drops two points down to seven.


With prospects looking grim for the French tanks it comes as no surprise that Dave announces his intention to withdraw. He cannot afford losses to his core platoon and without armour support his chances of executing a successful counter-attack look extremely unlikely. It's a sensible decision. While the chance of a major campaign victory has slipped away he now has a reasonable chance of a narrow victory if he can win the next and final game of the campaign.
The French tanks proved tough opposition. The Hotchkiss H39 in particular, which was fired at twelve times. Six of those shots missed and although six hit the target, it was only enough to damage the tank and kill the gunner, not knock it out completely. A timely strike on the main gun of the Somua was decisive in rendering that tank ineffective.
The French CO is disappointed to see the counter-attack fail and his opinion drops to +3. The men are less concerned and are simply pleased to have suffered so few casualties. Their opinion rises to +4. The platoon leader's outlook rises to Energetic.
The German CO's opinion improves slightly with the success and is now -2. Nothing it seems will improve the men's opinion. Having suffered modest casualties, but nonetheless more than the French, their opinion drop to -9. The platoon leader's outlook remains In Shame.
The newly promoted leaders from both platoons are now tested to see if they are accepted by their men. The Obergefreiter is successfully accepted by the men under his command. The French on the other hand still reserve their judgement on the new Lieutenant, as they do with two of the sergeants commanding two of the Groupes de Combat. Only one sergeant has endeared himself enough to those under his command to be accepted.
The newly promoted leaders from both platoons are now tested to see if they are accepted by their men. The Obergefreiter is successfully accepted by the men under his command. The French on the other hand still reserve their judgement on the new Lieutenant, as they do with two of the sergeants commanding two of the Groupes de Combat. Only one sergeant has endeared himself enough to those under his command to be accepted.
The Germans are unable to replace the platoon with a fresh one but they are able to call for replacement men to fill the missing ranks of the current platoon and so five new men will be available for the final game.
For that game we return to map 4 for the final scenario of the campaign. Will the French be able to hold their ground and claim a narrow campaign victory, or will the Germans succeed in restoring some of their lost honour and deny the French their success? You can read the full report of that game here.
For that game we return to map 4 for the final scenario of the campaign. Will the French be able to hold their ground and claim a narrow campaign victory, or will the Germans succeed in restoring some of their lost honour and deny the French their success? You can read the full report of that game here.
Ooh that was a fantastic and exciting game!
ReplyDeleteA real treat to read too, thank you. Plus I found it quite instructive as we've not used a lot of armour in our games.
Matt
Great AAR, very tense, and I am looking forward to seeing the outcome of the next game.
ReplyDeleteFascinating stuff! This was a very enjoyable read. Thank you!
ReplyDeleteAnother great AAR with inspiring photos. The game and the campaign are proving a real nail biter.
ReplyDeleteGreat AAR as usual, can't wait to see the outcome of the next game. Real edge of the seat stuff this campaign.
ReplyDeleteOnce again, a terrific game. The French are proving to be a tough nut to crack. I'm looking forward to the denouement.
ReplyDeleteAnother great read! Rarely had armour on armour encounters in CoC which were that intense.
ReplyDelete