

The Australian campaign overview, Dave's perspective
I have to say that the Malaya 42 campaign was, as with the other CoC campaigns I have played out with Mark, a most enjoyable gaming exercise. A great game system, lovely figures, great terrain, and a close win in a nail-biting finish – what more could one wish for?In the end, I got blown away on the ninth game as the Japanese forced the crossing and continued the ‘rolling advance’. As per the campaign victory conditions if the campaign goes to nine or ten games the result is a (marginal) Australian win, with seven or eight games being a narrow Japanese win and the historical result. Having played it I don’t think many games would go to eleven plus for a decisive Australian win, on the other hand, I could see the Japanese blowing through against an inexperienced or inexpert defender for a decisive win in less than seven games. How so? Let’s have a look.

In retrospect the crucial factor was the counterattack following the initial Japanese repulse in Scenario 3 Fix the Enemy. Although unsuccessful tactically and resulting in a hasty withdrawal, it bought an extra campaign turn which in the end proved the difference between winning and losing. I looked on it as a limited objective counterattack being pulled back on meeting firm resistance. This in my view fitted the operational narrative nicely. Following this the Japanese launched the bloodless attack that forced me out of the main position, but again this fitted the narrative – a sudden Japanese thrust with a short sharp bombardment surprising the Aussies as they were regrouping. This is one of the strengths of the CoC campaign system – it can generate a surprisingly credible narrative beyond the tactical level on the table.
One thing I felt I did in this campaign better than previously was playing the long game, such as withdrawing quickly to avoid taking excessive losses. Obviously the aim of the campaign is to delay the Japanese, but force preservation is an important factor, particularly with one platoon. Bear in mind that the Japanese will always have a full-strength platoon on the attack. In a sense, if the engagement cannot be won, it is often better to withdraw since the campaign game turn has already been used and nothing further can be gained except casualties.

What would I do differently? Probably not much I suspect, except for support selections in some cases. The critical thing for the Australians is taking the opportunity to counterattack – every one uses up a campaign game turn and adds to the delay imposed on the Japanese, even if you skive off after a couple of phases – a benefit far greater than consolidating defences.
One aspect of the campaign that I feel was not fully thought through was the potential deployment of Australian reinforcements in the shape a green platoon (presumably made up of REMF’s). As per the campaign rules as written, this platoon can only be deployed if the regular platoon is cut off and destroyed following a defeat in scenario four. In other words, if the regular platoon is destroyed in any other scenario or simply cut up and too weak to continue, the replacement green platoon cannot be deployed. This doesn’t really make sense. If the platoon is available, deploying it should be a command (i.e. player) decision, rather than depending on a particular combination of scripted circumstances. In the end we played it this way.
The Japanese campaign overview, Mark's perspective
At first glance the Japanese seem to have most of the advantages in this campaign. They have almost unlimited access to reinforcements, which allows them to push aggressively, and support is more readily available. Their national characteristics give them some distinct advantages in this terrain and if worked together in combination can catch out an unwary Australian player.
The one thing the Japanese don't have is time. Where as the Australians must shepherd their resources carefully, the Japanese player must be prepared to take losses by pushing hard to achieve objectives. In this sense the Japanese require a little less subtlety to play, your objective is clear and it will be achieved by being aggressive. This style of play comes easier to a wargamer than that required for the Australians, who must balance the need to delay the Japanese with good judgement on deciding when it's time to withdraw. Knowing when to fight and when not to is the key. Quite a balancing act, which I think Dave managed to pull off to very good effect.
I agree with Dave's assessment that his decision to mount a counterattack after winning the first game at Map 3 was critical. It takes a single Australian scenario victory and one counterattack to put the Japanese timetable in serious jeopardy. I made the mistake of assuming Dave would not risk a counterattack, as that seemed to go against everything he was trying to achieve with a careful fighting withdrawal. What hadn't even crossed my mind was that Dave was quite prepared to 'lose' the counterattack scenario. He was playing for the campaign and the fact that the counterattack stalled the Japanese push was the 'victory' he was looking for. He left his options open for that scenario, had things gone well he could have continued fighting, but the delay was the key and once it was clear the Japanese had the upper hand he was quick to disengage. Wise move and good play.

What might I have done differently? Well, given how pivotal that first playing of Scenario 3 ended up being for the campaign, two things come to mind, one very specific and one general. The specific one was the poor decision not to form a small team and have them run down the paddy bank to close down the Australian jump-off points in the early stages of the scenario. That had an excellent chance of succeeding and could have resulted in a very different outcome. Poor tactics on my part. The second was a more general one. Perhaps I could have delayed my decision to withdraw and seen how things played out? If I was going to lose anyway then taking more casualties was not an issue, as I could replace the platoon with a fresh one. Given the consequences of losing that scenario, I should have made a more determined effort to continue. That was a case of doing the opposite to Dave and not thinking longer term.
Overall I felt the campaign was well balanced, however it does need some very careful play from the Australians. A bold and forward defence is very unlikely to work and the Australians could face defeat very quickly, so much so it could give the impression the campaign is hopelessly lopsided in favour of the Japanese. The fact that Dave made a conscious choice to lose the counterattack scenario, but did so understanding the true value of fighting that encounter in the context of an overall campaign victory, speaks volumes about the sort of thinking required.
As Dave says, it makes for a very credible and compelling narrative.
The tactical perspective - the Australian view
Winston Churchill once remarked that “Going into the jungle to fight the Japanese is like going into the water to fight a shark”. I have to say I know how he felt. The Japanese are a tough force and in the jungle with hard cover and limited lines of sight they become very tough to stop. Why so?
The Australians are a fairly ‘standard’ platoon (if there is such a thing) in CoC, with three sections of 10 men generating 12 dice plus an SMG, two SL’s and a 2” mortar with unlimited smoke (a valuable asset) plus a Boys ATR team (useful enough against the Ha-Go but not to be relied upon). Their national characteristics are the same as the British – Five Rounds Rapid and Concentrated Fire – plus the additional one of ‘Curly on the Tommy gun’, which is a passive ability (requires no activation) and will allow the odd re-roll and generate the occasional extra hit.

The Japanese are a large platoon more like the early war models, with three 14 man sections generating 15 dice each, the mortar section which generates 6 light mortar dice or 13 rifle dice at short range, the SL and the Gunso. The Gunso is treated as a JL which is a significant disadvantage in activation terms (since 3’s are always in demand) but he can still command two sections nonetheless.
Their special abilities are a mixed bag. Aggressive in close combat rarely comes into play – it’s unlikely even the Japanese will rush an unpinned Bren frontally. The +1 on the force morale dr is useful, and the -1 on all BTH rolls is good, particularly as any roll of 1 – even on a SL dying for example – becomes a 0 which is no effect. The final two are massive – Neo-Bushido allowing the first two points of shock to be ignored in combination with the large 14 man sections means the Japanese are very hard to pin or break. And Jungle Fighters – 14” move/separation for patrol markers and 9” deployment - may not look like much but allows significant patrol phase mobility and great deployment options, particularly when combined with the Ruse support.
Overall the Australians have a three point advantage (-2 rating versus +1). However it doesn’t necessarily feel that way. Because of the value of the Japanese special abilities (not included in the force rating) combined with the cheap cost of the Japanese supports (generally a point less than the Australian equivalent) the defenders are seriously outgunned, and playing the Australians needs to take account of that reality. The Japanese ‘feel’ more like a +3 squad than a +1 squad.

Tactically some things worked and some didn’t. Using one section as a blocking force doesn’t work – after a couple of phases of fire, the Australian section with 4-5 casualties and 4-5 points of shock is on the verge of pinning, while the Japanese squad with 4-5 casualties and 4-5 points of shock is still very functional. It was critical to mass firepower and hit the leading Japanese squad hard and try and shatter that squad before it could be reinforced – using two or even three Australian sections to achieve this. Unfortunately the Japanese pre-game barrage if selected can really hamper any attempt to do this. So if things look dicey, you have to be ready to withdraw tactically. The other thing that worked well (on more than one occasion) was using mortars to break up the attack (which they did historically). I never selected the two pounder AT gun as a support – given the unpredictability of the Japanese selecting tanks and the certain value of the other 4 point options (FO, squad and Vickers) I chose to just grit my teeth and hope no Ha-Go’s appeared.
This starts right at the patrol phase. As Dave mentions, the Jungle Fighters characteristic allows 14" move/separation for the patrol markers. It's surprising how much difference this makes and allows the Japanese to achieve both width and penetration in this phase. The result is jump-off points spread across the table, providing deployment options that help to counter the restrictions created by a barrage and keep the defender from concentrating for fear of not being able to cover all flanks.
This has further benefits when you consider the support option for a Ruse (two point support that allows one JoP to be moved 18" as long as it's not within 12" of an enemy unit or JoP). While this is an early war support that is unlikely to be available as the war progresses when combined with an aggressive patrol phase it enables the Japanese to spring quite a surprise. There were few scenarios where I didn't use one and they were very advantageous, so much so in fact that we wondered whether it was too powerful or should be limited in some way (limited uses per campaign, or higher support cost).
When you add a pre-game barrage to the advantages in the patrol phase and the Ruse, you have a powerful combination that can have astounding results as we witnessed in the playing of the second Japanese attack on Map 3, where the Australians could deploy only a single leader before the Japanese had overrun all of their jump-off points.
The four squad platoon is a bit unwieldy, especially with the limitations of a single senior leader. I found using historical Japanese tactics most effective, whereby the grenade discharger squad and a rifle squad worked together to form a base of fire. Normally I assigned the Gunso (a junior leader who can use his two CI as if a senior leader) to command these. Their presence was enough that it required an Australian response, which would enable the Japanese to pin down at least one if not more Australian sections. This then freed up the remaining two rifle squads and the Rikugun to work together from one flank or attempt a pincer movement, often in combination with a sudden and surprise move of a JoP using a Ruse. This is important, as the Australians can generate a lot of firepower once they can concentrate as a platoon, for this will allow them to exploit fully their two senior leaders; their national characteristics like Five Rounds Rapid, and, bring their SMGs to bear. A threat to one or both of their flanks will force them to disperse, which should work to Japanese advantage.
We saw very little close combat, generally the Japanese achieved their victories through fire and movement, with the threat of close combat enough to force the Australians out of a position. Close combat would inevitably take a high toll in casualties, one thing the Australians must work hard to avoid and so the threat alone was often enough for them to withdraw. On the other hand, while you don't want to be reckless with the Japanese, casualties were less of a concern, other than impacting the Men's Opinion.
The grenade discharger squad are a very versatile addition to the platoon. The grenade dischargers themselves will fire together using 6 dice, hitting on a 4, 5 or 6 (with direct line of sight) and reducing cover by one level. In other words they pack the equivalent HE punch of the 75mm gun on a Sherman. They have only one smoke round each, but that allows them to lay down a very effective smoke barrage 9" wide and 3" deep once per game. Finally, you have twelve men and a corporal who can always resort to their rifles if need be and provide a full squad for fire and movement purposes.

Japanese armour had little advantage given the close nature of the terrain and despite the temptation (who doesn't want a tank on the table?) I could rarely see the value they could bring. Not only that, the Australian platoon Boys anti-tank rifle is sufficient to inflict serious damage. Other than my attempt to use a platoon of Ha Go tanks to rush the village at the first playing of Scenario 6 Securing the Crossing, I felt they were too confined by the terrain to be of much value in this particular campaign.

As has been mentioned already the Ruse was one feature which proved devastating in its effectiveness. In the dense terrain of the jungle this was most notable, especially when combined with a double phase. How so?
Simple. As usual the patrol markers will lock when 12” apart. The JoP markers, in dense terrain, will generally start 24” apart, perhaps slightly more. The Ruse allows the Japanese JoP to be relocated forward to 12” from an Australian JoP (or unit). The Japanese immediately use the ‘Jungle Fighter’ characteristic to deploy 9” from their recently moved JoP, potentially shutting down one or more Australian JoP’s immediately. In combination with a double phase the Japanese can use the Ruse, deploy and then with a good movement roll move forward up to 12” providing the ability to shut down a defending JoP located up to 43” away (move JoP 18" + deploy 9" + move 12" to point 4" from enemy JoP)! I think this amply illustrates the magnitude of the issue. When combined with a preliminary bombardment that successfully hinders deployment, it is almost impossible to combat.
This would be one item we would suggest requires a house rule or some sort of revision. While it's a very creative and historically appropriate support the full implications of what can happen in play may not have been apparent when it was created. Nor the impact its repeated use can have across several scenarios. We tended to be of the view that the Ruse should either cost more (perhaps three or four support) or more realistically be limited to one or two uses. This would reflect the defenders ‘wising up’ to the use of the Ruse and would encourage the Japanese to use it as part of a plan for a particular engagement rather than selecting it as a standard option to hyperspace forward.

Anyway when the invasion came she was unable to escape and was interned by the Japanese. In 1943 she was reportedly murdered by a member of the kempatai. He was tried after the war but acquitted, for lack of evidence I believe.
So I like to think that in this alternate future we created on the wargames table – our ‘synthetic experimental evaluation’ as Philip Sabin would say – with the Japanese advance slowed down behind its historical pace by the defiant Australian resistance, maybe Dulcie was able to escape the Japanese onrush, perhaps even reaching Singapore and being evacuated on one of the Qantas Empire flying boats that were desperately evacuating civilians from the SW Pacific theatre of war. Or catching the last boat out. Who knows?
The Australians are a fairly ‘standard’ platoon (if there is such a thing) in CoC, with three sections of 10 men generating 12 dice plus an SMG, two SL’s and a 2” mortar with unlimited smoke (a valuable asset) plus a Boys ATR team (useful enough against the Ha-Go but not to be relied upon). Their national characteristics are the same as the British – Five Rounds Rapid and Concentrated Fire – plus the additional one of ‘Curly on the Tommy gun’, which is a passive ability (requires no activation) and will allow the odd re-roll and generate the occasional extra hit.

The Japanese are a large platoon more like the early war models, with three 14 man sections generating 15 dice each, the mortar section which generates 6 light mortar dice or 13 rifle dice at short range, the SL and the Gunso. The Gunso is treated as a JL which is a significant disadvantage in activation terms (since 3’s are always in demand) but he can still command two sections nonetheless.
Their special abilities are a mixed bag. Aggressive in close combat rarely comes into play – it’s unlikely even the Japanese will rush an unpinned Bren frontally. The +1 on the force morale dr is useful, and the -1 on all BTH rolls is good, particularly as any roll of 1 – even on a SL dying for example – becomes a 0 which is no effect. The final two are massive – Neo-Bushido allowing the first two points of shock to be ignored in combination with the large 14 man sections means the Japanese are very hard to pin or break. And Jungle Fighters – 14” move/separation for patrol markers and 9” deployment - may not look like much but allows significant patrol phase mobility and great deployment options, particularly when combined with the Ruse support.
Overall the Australians have a three point advantage (-2 rating versus +1). However it doesn’t necessarily feel that way. Because of the value of the Japanese special abilities (not included in the force rating) combined with the cheap cost of the Japanese supports (generally a point less than the Australian equivalent) the defenders are seriously outgunned, and playing the Australians needs to take account of that reality. The Japanese ‘feel’ more like a +3 squad than a +1 squad.
Tactically some things worked and some didn’t. Using one section as a blocking force doesn’t work – after a couple of phases of fire, the Australian section with 4-5 casualties and 4-5 points of shock is on the verge of pinning, while the Japanese squad with 4-5 casualties and 4-5 points of shock is still very functional. It was critical to mass firepower and hit the leading Japanese squad hard and try and shatter that squad before it could be reinforced – using two or even three Australian sections to achieve this. Unfortunately the Japanese pre-game barrage if selected can really hamper any attempt to do this. So if things look dicey, you have to be ready to withdraw tactically. The other thing that worked well (on more than one occasion) was using mortars to break up the attack (which they did historically). I never selected the two pounder AT gun as a support – given the unpredictability of the Japanese selecting tanks and the certain value of the other 4 point options (FO, squad and Vickers) I chose to just grit my teeth and hope no Ha-Go’s appeared.
The tactical perspective - the Japanese view
The biggest fear I had as the Japanese was being caught under a mortar barrage. Nothing was more effective at bringing the platoon to a standstill. As a consequence manoeuvre is a key to Japanese success. Fortunately they have some advantages in this area.
This starts right at the patrol phase. As Dave mentions, the Jungle Fighters characteristic allows 14" move/separation for the patrol markers. It's surprising how much difference this makes and allows the Japanese to achieve both width and penetration in this phase. The result is jump-off points spread across the table, providing deployment options that help to counter the restrictions created by a barrage and keep the defender from concentrating for fear of not being able to cover all flanks.
This has further benefits when you consider the support option for a Ruse (two point support that allows one JoP to be moved 18" as long as it's not within 12" of an enemy unit or JoP). While this is an early war support that is unlikely to be available as the war progresses when combined with an aggressive patrol phase it enables the Japanese to spring quite a surprise. There were few scenarios where I didn't use one and they were very advantageous, so much so in fact that we wondered whether it was too powerful or should be limited in some way (limited uses per campaign, or higher support cost).
When you add a pre-game barrage to the advantages in the patrol phase and the Ruse, you have a powerful combination that can have astounding results as we witnessed in the playing of the second Japanese attack on Map 3, where the Australians could deploy only a single leader before the Japanese had overrun all of their jump-off points.

The four squad platoon is a bit unwieldy, especially with the limitations of a single senior leader. I found using historical Japanese tactics most effective, whereby the grenade discharger squad and a rifle squad worked together to form a base of fire. Normally I assigned the Gunso (a junior leader who can use his two CI as if a senior leader) to command these. Their presence was enough that it required an Australian response, which would enable the Japanese to pin down at least one if not more Australian sections. This then freed up the remaining two rifle squads and the Rikugun to work together from one flank or attempt a pincer movement, often in combination with a sudden and surprise move of a JoP using a Ruse. This is important, as the Australians can generate a lot of firepower once they can concentrate as a platoon, for this will allow them to exploit fully their two senior leaders; their national characteristics like Five Rounds Rapid, and, bring their SMGs to bear. A threat to one or both of their flanks will force them to disperse, which should work to Japanese advantage.
We saw very little close combat, generally the Japanese achieved their victories through fire and movement, with the threat of close combat enough to force the Australians out of a position. Close combat would inevitably take a high toll in casualties, one thing the Australians must work hard to avoid and so the threat alone was often enough for them to withdraw. On the other hand, while you don't want to be reckless with the Japanese, casualties were less of a concern, other than impacting the Men's Opinion.
The grenade discharger squad are a very versatile addition to the platoon. The grenade dischargers themselves will fire together using 6 dice, hitting on a 4, 5 or 6 (with direct line of sight) and reducing cover by one level. In other words they pack the equivalent HE punch of the 75mm gun on a Sherman. They have only one smoke round each, but that allows them to lay down a very effective smoke barrage 9" wide and 3" deep once per game. Finally, you have twelve men and a corporal who can always resort to their rifles if need be and provide a full squad for fire and movement purposes.

Japanese armour had little advantage given the close nature of the terrain and despite the temptation (who doesn't want a tank on the table?) I could rarely see the value they could bring. Not only that, the Australian platoon Boys anti-tank rifle is sufficient to inflict serious damage. Other than my attempt to use a platoon of Ha Go tanks to rush the village at the first playing of Scenario 6 Securing the Crossing, I felt they were too confined by the terrain to be of much value in this particular campaign.
The theatre specific aspects
The theatre specific rules seemed to work pretty well and reflected the realities of the terrain well enough in our limited experience. The variable line of sight (rolling a d6 to determine the LOS) might seem significant, but it only really played any notable role in one scenario. One thing that seemed a bit zealous and that was house ruled was the ‘getting lost on a 1 in 6 chance when moving’. This seemed inappropriate given the scale of the game. We house ruled that a unit was only subject to getting lost if it could not see another unit, or a terrain feature e.g. a hut or a road, clearing etc. In effect a unit only had to take the lost roll if it was isolated in the jungle. Given that firing and yelling would be occurring within 50-100 yards it seemed a bit extreme for units to be continually getting lost.
As has been mentioned already the Ruse was one feature which proved devastating in its effectiveness. In the dense terrain of the jungle this was most notable, especially when combined with a double phase. How so?
Simple. As usual the patrol markers will lock when 12” apart. The JoP markers, in dense terrain, will generally start 24” apart, perhaps slightly more. The Ruse allows the Japanese JoP to be relocated forward to 12” from an Australian JoP (or unit). The Japanese immediately use the ‘Jungle Fighter’ characteristic to deploy 9” from their recently moved JoP, potentially shutting down one or more Australian JoP’s immediately. In combination with a double phase the Japanese can use the Ruse, deploy and then with a good movement roll move forward up to 12” providing the ability to shut down a defending JoP located up to 43” away (move JoP 18" + deploy 9" + move 12" to point 4" from enemy JoP)! I think this amply illustrates the magnitude of the issue. When combined with a preliminary bombardment that successfully hinders deployment, it is almost impossible to combat.
This would be one item we would suggest requires a house rule or some sort of revision. While it's a very creative and historically appropriate support the full implications of what can happen in play may not have been apparent when it was created. Nor the impact its repeated use can have across several scenarios. We tended to be of the view that the Ruse should either cost more (perhaps three or four support) or more realistically be limited to one or two uses. This would reflect the defenders ‘wising up’ to the use of the Ruse and would encourage the Japanese to use it as part of a plan for a particular engagement rather than selecting it as a standard option to hyperspace forward.

A final word - Dave and the personal connection with Malaya
As a final note this campaign has a personal connection for me. My maternal grandmother Dulcimer (Dulcie to her friends and family) was in Malaya when the Japanese invaded. Why wasn’t she with my grandfather, mother and aunt? Well let’s just say that in middle-class Adelaide in the 1930’s there was a bit of a family scandal and leave it at that. My aunt said that the family were writing to her in 1940 and ’41 asking her to come back to Australia as it was obvious war was coming, but she was obviously determined to stand by her (new) man and stayed put.Anyway when the invasion came she was unable to escape and was interned by the Japanese. In 1943 she was reportedly murdered by a member of the kempatai. He was tried after the war but acquitted, for lack of evidence I believe.
So I like to think that in this alternate future we created on the wargames table – our ‘synthetic experimental evaluation’ as Philip Sabin would say – with the Japanese advance slowed down behind its historical pace by the defiant Australian resistance, maybe Dulcie was able to escape the Japanese onrush, perhaps even reaching Singapore and being evacuated on one of the Qantas Empire flying boats that were desperately evacuating civilians from the SW Pacific theatre of war. Or catching the last boat out. Who knows?
A splendid epilogue to a wonderful campaign, it is most pleasing to have an insight into each side's plans and how they turned out, most informative. I really must get a PSC started, do you think they would work for solo play?
ReplyDeleteThanks Phil, glad you enjoyed it. I’m afraid I’m not much help with solo play, it’s not something I’ve ever done.
DeleteThe first PSC I played was Martlet. I was to Game Master the campaign at the club so I played it solo beforehand - I probably enjoyed playing it solo more than the players in the campaign - who definitely did enjoy it also. I have used other PSCs to play individual solo games, which works also. The challenge in a solo campaign is simulating strategic uncertainty so you may want some campaign decisions to be decided by a dice roll
ReplyDeleteThat's good to know, I have Storming the Citadel, I will give a try.
DeleteA great write up of your combined thoughts. I think you're correct in your opinion that the Ruse is too powerful a tool for its current given points value.
ReplyDeleteYour grandmother's experience was poignant to read. My Aunt and Uncle were in Singapore when the Japanese invaded. As civilian medical personnel they should've been treated as non-combatants, but wound up in Changi jail. They survived the war, but were never the same after. Such times they were. :(
Yes, being interned by the Japanese was not pleasant.
ReplyDeleteNice post script to the campaign and I liked the post analysis.
ReplyDeleteThere are a lot of families with a history of tragedy during times of war. I’m sorry yours is one of them.
Thanks Stew, the tragedy was in Dave, my opponent’s family, not mine, not that it makes it any less of a tragedy. My family had its own share when my father’s elder brother was killed flying for the RAF over Libya in 1941. My mother in law lost one of her brothers when he was shot down over Holland in 1944. I’m certain most families of our generation have similar stories of one kind or another.
DeleteThis may seem bold of me but, I would appreciate any thoughts you have on solo play or direction to a site that does. I am desperate to play but far away from opponents. Emai steffey.daniel@gmail.com
ReplyDeleteI wish I could help but I’ve never been a solo gamer. A great thing about CoC is the elegant way it handles fog of war, that will be the hardest thing to replicate solo. Somehow you need a mechanic to surprise yourself and I’m sure there are ways of doing this, unfortunately I’m not the one who can be of much use in this respect. Perhaps ask the question in the TFL forum or he CoC Facebook page?
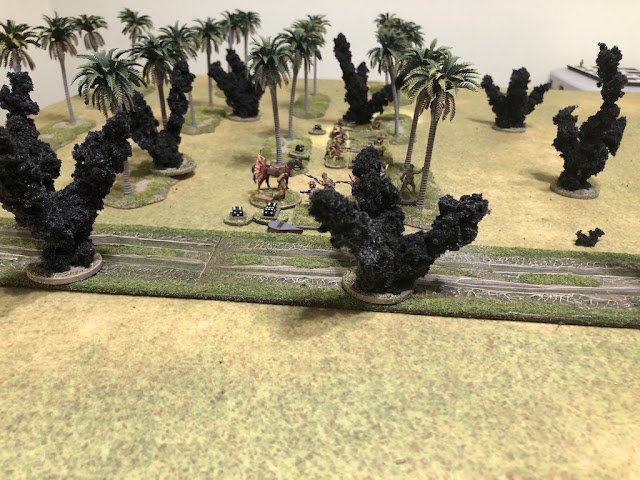
DeleteA splendid and atmopsheric table, looks great!
ReplyDeleteThat's a fantastic Campaign.
ReplyDeleteThe poor old Diggers are up against it, what with big Japanese platoons, prelim bombardments and ruses.
Reading the closing comments, I think there are a couple of candidates for a revision.
First up, the Ruse - identified above. How about escalating its cost by a point for each subsequent use.
Second, the effect of the pre-game bombardment. My reading on WW2 has artillery as a weak point of the Japanese forces. Fewer, smaller guns with less input to divisional headquarters.
Russian bombardments are especially effective, reflecting their mass commitment to artillery.
I wonder whether Japanese bombardments should be geared down because of their scarcity (or increased in support cost).
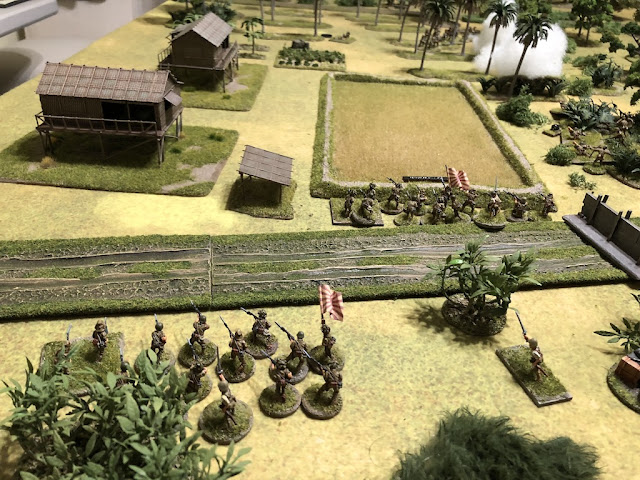
Ayhhow, beautiful pictures, great commentary and a wonderful story.
5 Stars, would read again.
Thanks Steve, glad you enjoyed it. I take your point on both the ruse and artillery. The campaign and specific rules were drafted by Len Tracey and published in a Lardy special. Len is former commander of the Australian Army Jungle Training School and knowledgeable on the campaign, however these rules were his creation and with various further modifications some have been incorporated into the forthcoming Far East Handbook. The ruse is different for one thing and other new rules have been added while some of Len’s are no longer there in the same form. From what I’ve seen so far these address several of your concerns.
Delete