

Victory in the last game has allowed the Germans to make three support rolls to discover what other ad hoc units join the kampfgruppe (see this earlier post for full details on how the campaign is structured). Once more they are joined by a mixed bag of units - a green infantry squad, a panzerschreck team and a truck.
The truck may not sound like much, but it's very welcome. In the course of their retreat the Germans stand to benefit from all the transport they can find and this takes them to a total of three trucks and one car.

A chaotic withdrawal increases the likelihood those are abandoned due to breakdown or lack of fuel. Without sufficient transport vital heavy equipment and men are more likely to be left behind and captured by the rapidly advancing British. If the Germans are to maintain their orderly retreat and not sustain excessive losses much will depend on the outcome of today's encounter.
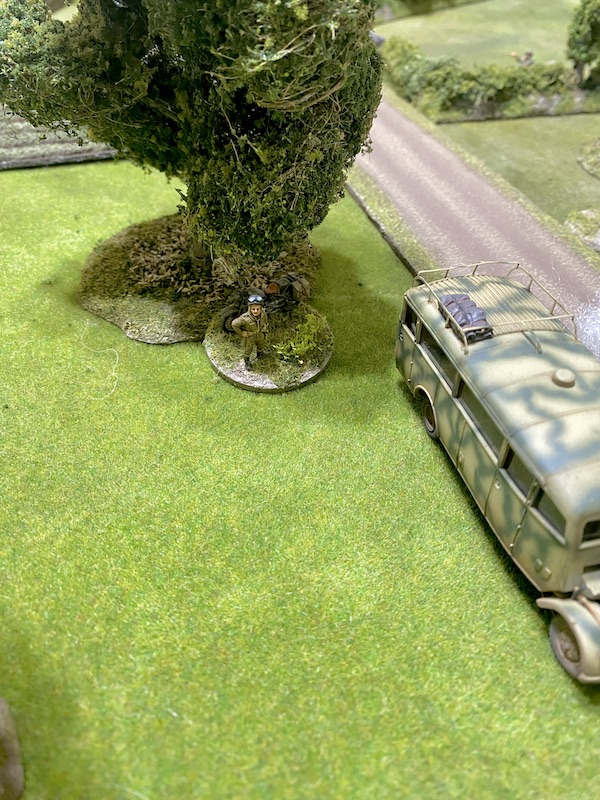
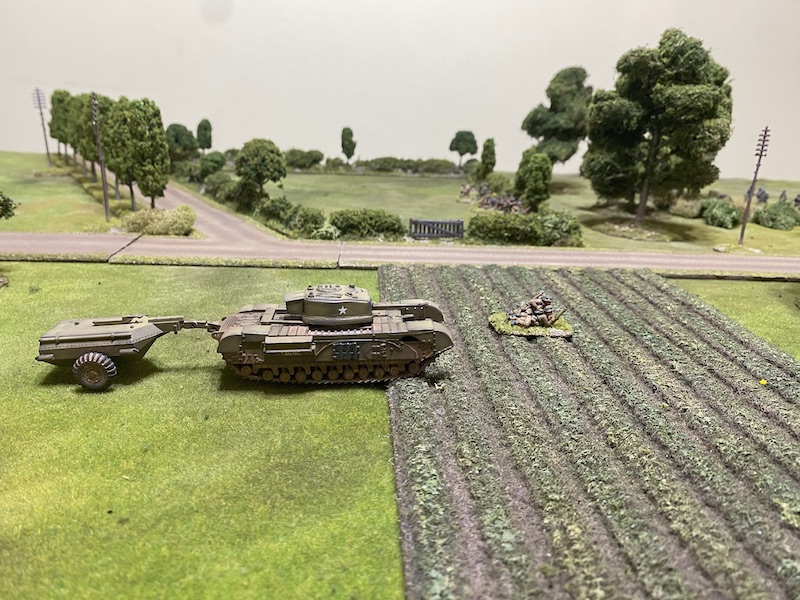
This gives me the perfect excuse to use an Opel Blitz Omnibus model that I made recently as scatter terrain. It has the option to be made with the hood open and the engine visible, which was perfect for games like this one. I've put a few figures of mechanics on a small base and arranged them so they can be positioned around the front. It goes without saying that the appearance of the British will be enough to see that base of figures make a hasty exit.

This is an Attack & Defend scenario and the British have a good start, rolling six free moves at the beginning of the patrol phase. They push hard on their right flank and manage to prevent the Germans placing any jump-off-points in advanced positions. Even at this early stage that puts the defenders under a bit of pressure.

The bright start continues for the British with their force morale at nine and the Germans' at eight. That only gets better with a support roll of sixteen (from 3D6) giving them a total of twenty two support points. The only downside is that they need to replace their initial platoon with a fresh one and the time lost in rearranging their advance guard will cost them two campaign victory points. Nonetheless it looks like the Germans will have quite a fight on their hands.
With that we are ready to start and the British announce that a pre-game barrage will be in effect. An opening command roll of 66542 sees their flying start continue. The first section deploys into the open ground on their right flank ready to exploit the opportunities presented by the double phase. Obviously Dave intends to press forward aggressively before the Germans have had a chance to deploy.


In the following phase the platoon sergeant joins the section.

The platoon's 2” mortar team take up position near the edge of the woods.


A second British section deploys into the field on their left flank.


More disconcerting is the arrival of a Churchill Crocodile. That's an ominous development!

The British are making rapid progress toward the woods and with the delays caused by the pregame barrage I'm eager to deploy a German squad as quickly as possible to be ready to meet them. Unfortunately the barrage does its work and the squad fails to deploy.
In the British phase the sergeant sends the 2” mortar team forward.

He then orders the section in the ploughed field to make their way to the woods and he follows behind.


Meanwhile the Churchill Crocodile makes slow but steady progress forward.

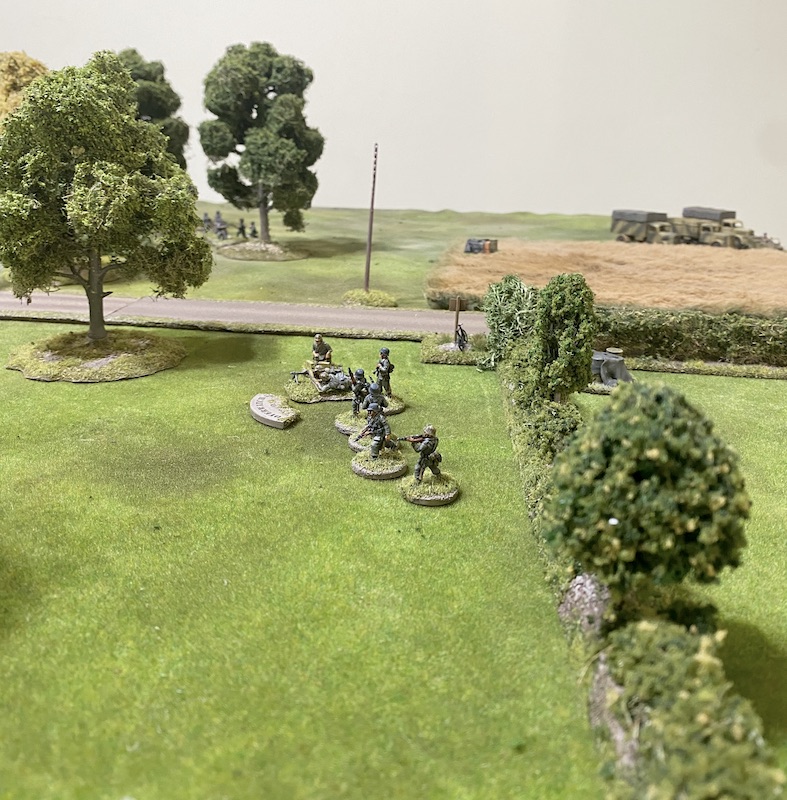
On the British left flank the platoon lieutenant deploys with a flamethrower team. It looks like they are determined to burn the Germans out of this position. Very nasty indeed.

The lieutenant then directs the section forward to the hedge line.

In the German phase I make another attempt to deploy a squad. Yet again it fails to make its way through the barrage. It feels like the British are having it all their own way at the moment.
The following British command roll is 55311 and on the left flank their relentless advance continues. The flamethrower team and accompanying lieutenant move to the hedge to join the rifle section.

Over on the other flank the rifle team from the section move deeper into the woods. Dave is eager to make ground while he can but the limited command options mean that he can move only the rifle team. There's a risk in advancing a small team but if British fortune continues they might be able to close down the German jump-off-point on that flank.

The reason the rifle team moved ahead on its own becomes clear when the final command die is used to activate the Churchill Crocodile commander and he orders the driver to advance.

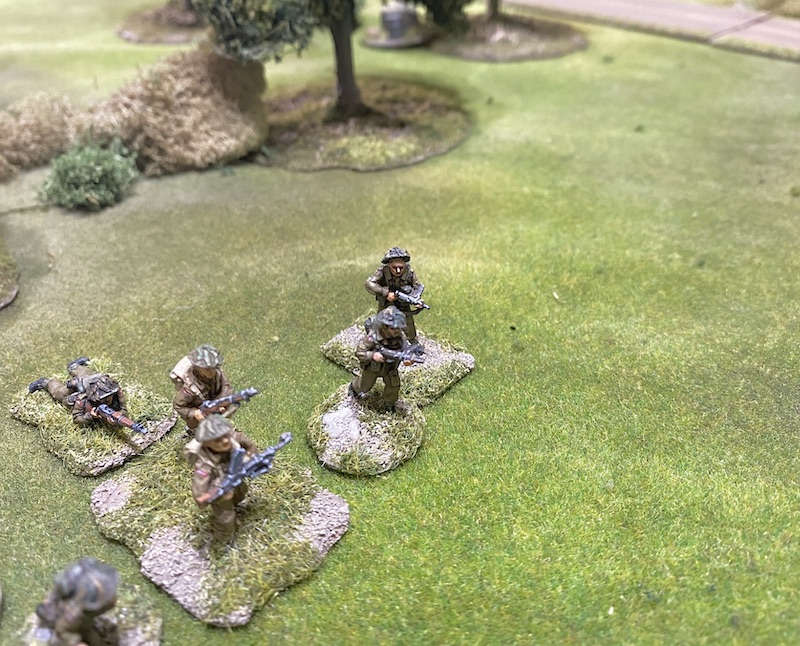
In the German phase a squad manages to finally find its way through the barrage. Not a moment too soon it seems. They deploy and the obergefreiter puts the teams on overwatch.

They are a squad of hardened veterans who are classed as elite and I sense they might be the right men for this job.
A second German squad also manages to make its way through the barrage. This is the newly arrived green squad and they deploy on overwatch into the woods on the right flank.

Wisely they keep their distance and remain out of sight. I'm not certain how well they can hold that flank but at least there are some German units ready to oppose the British advance.

In the British phase the sergeant orders the 2” mortar team forward.


He's close enough to be attached to the nearby section's Bren gun team and he moves with them to join up with the rifle team in the woods.


From there he orders the rifle team forward tactically.


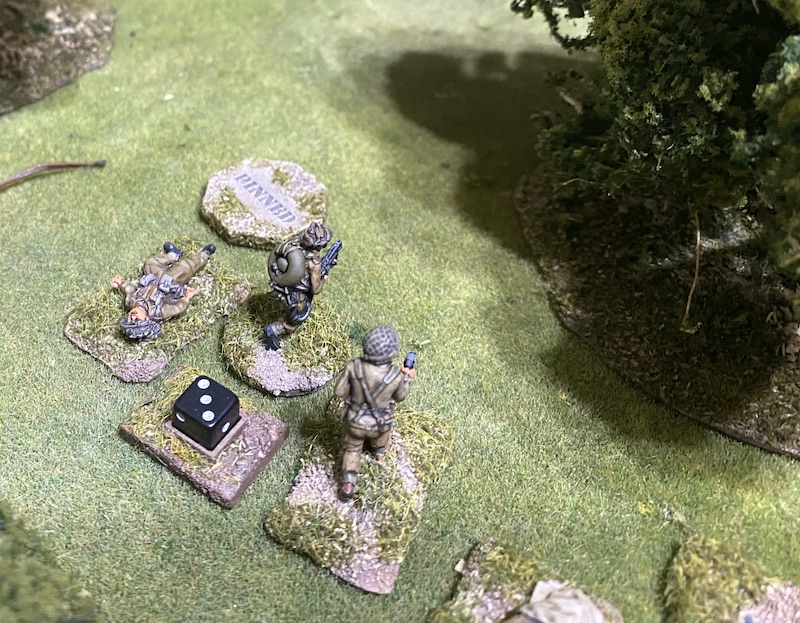
Their initial round of fire is deadly and the British lose two men immediately.

The rifle team have pushed ahead for a good reason and that becomes apparent when Dave uses a CoC die to move one of his jump-off-point forward into the woods.

From there he deploys a third section into a very advanced position.


A second 2” mortar team deploys from the same jump-off-point.


Meanwhile the Churchill Crocodile continues its move forward.
In the German phase the platoon's MG42 MMG team deploy into the crop field.


The elite squad are in danger of being trapped in the open with their backs to the hedge. I wonder whether it would be wise to move them but decide that for now at least they will hold their ground. They fire into the woods targeting the remaining men of the British rifle team.


The next British command roll is 66542 and the double phase could present the Germans with some serious problems. The lieutenant wastes no time and orders the flamethrower team and section over the hedge.


The move brings them into line of sight of the German squad who are on overwatch. They open fire and the British lose one man from the flamethrower team and another from the section's rifle team. While I have no complaints about that result I do fear what may be coming my way in return.

On the British right, the recently deployed section moves with one dice towards the edge of woods and once in line of sight they fire at the Germans at half effect.


The odds fall in favour of the Germans who will roll seventeen dice to the British eleven.

It's a vicious fight. The British manage to inflict three kills on the Germans, but the Germans inflict six kills in return. It's not a good result for the British who see the rifle team wiped out, one of the Bren team taken casualty and the section corporal lightly wounded and out of action for the remainder of the turn.
The survivors fall back 12” suffering two points of shock and British force morale drops two points to six.

The Germans have lost three men but the losses are spread across the two teams and the squad's obergefreiter is unharmed. The close combat has left both units severely battered and the Germans are in only slightly better shape than the British. That was as brutal as it was unexpected.

While that may have reduced one British threat the continuing advance of the Churchill Crocodile is a completely different matter. In the following phase it makes its way into the woods.

The section on the left flank fires at the green German squad opposite.


Far more threatening is the flamethrower which directs a jet of burning fuel at the same squad.

That proves much more deadly and the Germans lose three men and suffer two points of shock. I'm lucky, it could have been worse.

Then, just as it looks like the green infantry squad must be doomed, the German command roll is 66551. Can anything be salvaged from the situation? While not the best command roll for activation it does provide the Germans with a full CoC die and a double phase. All that is left to be done in this phase is to have the LMG team fire back at the flamethrower team.
They suffer only a point of shock but the nearby Bren team lose a man.

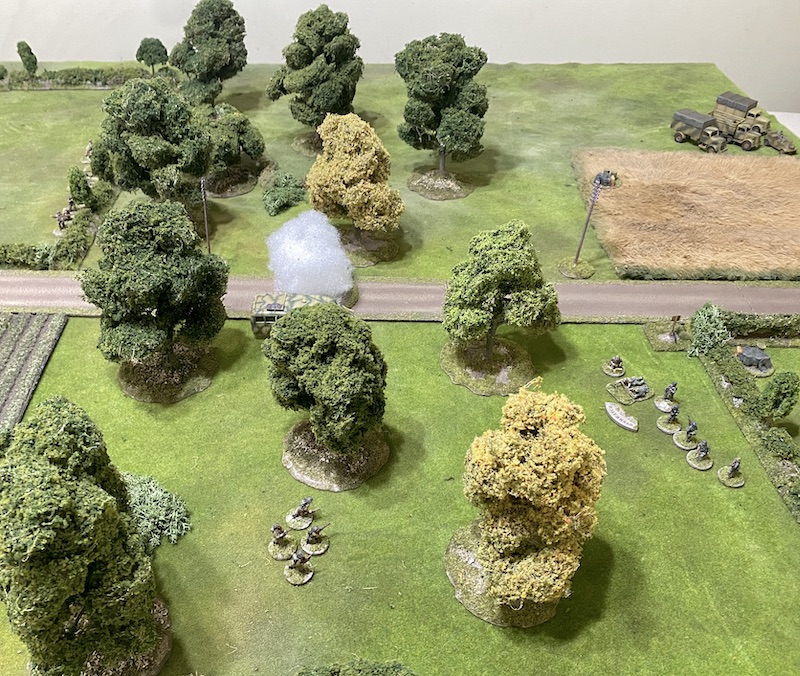
The prospect of a double phase is promising, but the pregame barrage has the ability to scupper any German plans. They need to fully exploit what limited opportunities they have before the flamethrower team and the Crocodile make their presence felt. It makes sense to use the CoC die to end the turn and with it the pregame barrage. I decide to do that.
That also sees the British 2" mortar smoke removed.


And the wounded British section leader return to his feet.

The next German command roll is 66422 and vindicates my decision to end the turn, as it now frees up my deployment options. However I don't want to get ahead of myself, if there's one thing I've learned it's to expect the unexpected. In case things don't work out, the first thing I do is move the few survivors from the elite squad back over the hedge and into better cover. I think they've chanced their luck in the open for long enough.

The green squad don't have anywhere else to go and so they continue the firefight in the woods.

The British rifle team lose one man and the Bren team suffer a point of shock.

With only a single senior leader and still with units to deploy I'm not prepared to bring on the platoon's feldwebel just yet and so make the next German command roll. To Dave's horror it's 66431 and he must face even more German phases.
The obergefreiter with the green squad rallies a point of shock and has the men maintain their fire.

The British rifle team suffers three points of shock.


I can't see a good use for the remaining dice and so make the next command roll. The run of consecutive German phases will come to an end but a command roll of 54322 will give the Germans many options before the phase passes back to the British.
The obergefreiter from the elite squad reassigns the remaining man from the rifle team to join the LMG team.


The green squad continues targeting the British in the woods.

Their fire inflicts a further two points of shock on the rifle team; kills one of the Bren team, and, puts a further point of shock on the flamethrower team. That's enough to see all of the teams pinned.

I sense an opportunity to drive the British out of the woods, I just need to bring more fire to bear. With the pregame barrage no longer in effect the Germans having nothing to prevent one of the squads from the core platoon joining the green squad in the woods. They deploy and open fire immediately.

It's not particularly effective and the rifle and Bren team both suffer only an additional point of shock. This brings them all very close to breaking, but it's not quite enough.

I decide this is the time for the platoon's feldwebel to thrust himself up to the front line and try to push the firefight to a decision. To bring him forward now is to run the risk of making any later German deployment unreliable, but I sense there is an opportunity to be grasped here and he may just be the right man in the right place.
He deploys into the woods and has the squad throw a grenade. The range is 7" and so they need to roll an eight to hit. Unfortunately, it's a seven and a miss...


He's determined to make a difference and hands the squad his final grenade. Surely, this time.....

Finally a grenade hits the target. It doesn't have a huge effect, inflicting only a single point of shock on the flamethrower team.


However it adds to the cumulative effect of all the fire that has come the way of the British. Even the presence of the platoon lieutenant is not enough to prevent the flamethrower team from breaking.

They fall back taking the lieutenant with them. Without the presence of the lieutenant the shock on the rifle section is enough to see them break. They also fall back.


That proved a punishing run of consecutive phases and completely turned the tables on that flank. It still required the commitment of another German squad and the platoon's senior leader to fully exploit the moment but it was enough to finally break the British. It may also have broken Dave's personal morale in the process!


Over on the other flank, the Bren team and corporal from the section that were driven back after the close combat return to the fray and join the 2” mortar team.

Before the start of the German phase I consider my options. My suspicion now is that the British will wait for the Crocodile to come up. Until then their infantry will avoid exposing themselves to German fire. The question is, how hopeful am I that I can destroy the Crocodile before it can inflict too much damage on my force?
I'm conscious that now I've committed the platoon's only senior leader there is no guarantee the panzerschreck team or the Pak40 AT gun will appear when I may need them most. Who knows, a British run of phases as the Germans have just enjoyed has the potential for the Crocodile to run amok and cause debilitating damage?
British force morale has been reduced to less than 50% of its starting level which means now the Germans can choose to make a voluntary withdrawal. While that sort of withdrawal is not ideal, gambling on knocking out the Crocodile and aiming for a complete scenario victory needs to be balanced against how much damage the Crocodile might inflict before that happens (assuming it would happen at all). I think it's best to quit while I'm ahead and so I declare the Germans will make a voluntary withdrawal.
The British suffered fairly high casualties losing thirteen men from the core platoon and two from the flamethrower support team. Despite ending in possession of the battlefield British force morale was lower than the Germans so they won't recover any of those casualties. That results in six permanent losses from the platoon and four wounded who miss the next game.
The Germans suffered seven casualties, all from support squads. Those support units will stay with the core platoon throughout the campaign but all their combat losses are permanent, which means the elite squad have lost four men and the green squad three men. However German losses won't stop there. In the case of a voluntary withdrawal any units without transport run the risk of additional losses due to men swept up and captured by the Allied advance.
First, we check to see if any vehicles are lost due to breakdown or fuel shortage. That sees the Germans forced to abandon one of the trucks and the last remaining car. Regrettably less transport means fewer Germans are going to be able to make a safe getaway.

The Pak40 anti-tank gun will be towed by one truck which also carries the gun crew and the MG42 MMG team. One of the core platoon's squads and the feldwebel will go aboard the second truck. The remaining units must roll to see how many men are left behind.
- The second squad from the core platoon lose two men, reducing them to a three man LMG team, two riflemen and their squad leader.
- The green squad lose two men, reducing the squad to a two man LMG team and their squad leader.
- The elite squad don't lose any men and remain a three man LMG team with their squad leader.
- The regular infantry squad (who arrived in the last scenario and are yet to make an appearance in the campaign) lose two men, reducing them to a three man LMG team and a two man rifle team with their squad leader.
- Both the sniper and the one man panzerschreck team are lost, but the recently arrived two man panzerschreck team gets away.
While the core German platoon remains in reasonable shape the support squads are greatly reduced in strength.
A successful voluntary withdrawal gives the Germans one victory point. That brings their total for the campaign to three. The British lose two victory points for the delay imposed by replacing their initial platoon. With a differential of five points the British are under real pressure to win the next scenarios and close the gap in victory points. Time is running out, but victory is not yet beyond their grasp. You can discover what happens in that game in this post.
If you've enjoyed following along and would like to Buy Me a Coffee to help cover some of the costs of running the blog you can click through at the link or on the tab in the right hand column of this page.
You can find links to all the games in this campaign and several others on the Chain of Command Campaign AAR Page (link from here or at the top of this page).
Another splendid instalment in your campaign. Really enjoyed the AAR. Lovely table too.
ReplyDeleteThanks for posting.
Cheers
Matt
Thanks Matt, glad you're enjoying following this one.
DeleteIt must have been very tempting to press on for a complete win, but on the whole i think it was a good decision. The Crocodile is a scary beast. If you had CoC dice built up for a schreck ambush, perhaps. I am not sure the Pak40 is a reliable leveller given the thick Churchill armour.
ReplyDeleteIt was tempting, but I suspect I may have been tempting fate. With the senior leader on the table I ran the risk of now AT weapons turning up and I bet you any money the British would have had a double phase or more once the Crocodile rolled into action.
DeleteA cracking instalment of your campaign, a fine result for Germans especially when put on the back foot at the start of the game, I can imagine Dave's deflation. Your reports are always a joy to behold and read, can't wait for more.
ReplyDeleteThanks Phil. Yes I really thought it was going to be one of those games where the British had it all their own way. A run of German fortune managed to turn the tables. An enjoyable game from my perspective, less so from Dave's!
DeleteA huge shift due the run of firing opportunities for the German mid game. Great looking game.
ReplyDeleteYes, I think that, combined with the British section blundering into a disastrous close combat on the other flank were the turning points of the game.
DeleteSuperb as always, a really enjoyable read with my Sunday morning coffee.
ReplyDeleteThank you Norm, glad you enjoyed it (and your coffee!).
DeleteWhat a tough game! Looks brilliant
ReplyDeleteFortune certainly swung both ways for the British, it all seemed to be going well, until suddenly it didn't!
DeleteThanks for another great report. It seems that the early British momentum wasn't enough to carry them to the finish line.
ReplyDeleteThanks Dennis. I thought the Germans were under a lot of pressure early on but suddenly things turned against the British. Losing almost an entire section in an unintended close combat was compounded by the German run of phases that allowed them to deal with the British units on the other flank.
DeleteA tale of double sixes and movement dice that generated quite an unpredictable chain of events. The impact of the 'voluntary withdrawal' on the German OOB was quite harsh and makes me shudder at the thought of what a 'forced withdrawal' would do. The Brits took quite a hit on their core platoon - makes me wonder why 'sacrificial' sections from the support list weren't selected to lead the way.
ReplyDeleteFantastic looking game and report.
ReplyDeleteEnjoyed all your campaigns but this has to be the most challenging one yet, with the potential for things to collapse very quickly for the Germans. Couple of questions if you don't mind, would the British mortar have been able to fire from within a wood and also what after effect would the flamethrower of had being used within a wood, eg visibility or impassibility due to heat and smoke? Thanks once again for sharing your superb reports with us.
ReplyDeleteThanks Pat and sorry for the late reply, I normally receive an email alert but don’t appear to have got one. The mortar was at the edge of the woods on the tree line so we didn’t see any issue with firing from there. I don’t think CoC has a rule for flamethrowers in a wood in terms of any after effects, I think it only covers buildings and we didn’t factor anything in.
Delete