

Much will depend on the reinforcement roll for the Germans, but a roll of four meant that nothing would be forthcoming The Fallschirmjager would have to try to attempt this alone. I decide to disband the panzerschreck team and assign the men to the squads. Each squad has two panzerfausts, so I feel as though I can afford to lose the panzerschreck in order to bring some of the squads up to strength.
The British on the other hand will be able to field a complete platoon by disbanding one of the weaker platoons and assigning men to bring another to full strength. Not only that, they will have at least 14 support points to draw on, possibly as much as 24.
In the previous game I found my defence over stretched and now, with less men, I needed to make sure I could concentrate my squads more effectively. That's easy to say, but I fully expect the British to call on a mortar barrage for support, which means any concentrated defence faces the prospect of being neutralised under the barrage. I need to concentrate to provide a tough defence and I need to spread out to avoid being caught in the barrage. Talk about being caught between a rock and a hard place.
My right flank is partly protected by some wire and that may have to be the extent of my defence on that flank. Any defenders run the risk of being isolated across the road, as happened in the last game, so I will ensure I can cover the wire, but it will be from the other side of the road. I don't plan on deploying to that flank. My defence will congeal around the centre of the table, where I think I can cover any movement around my flanks. I'd like to find ways for all my squads to deploy into mutually supporting positions and so that's how I plan to play the patrol phase.
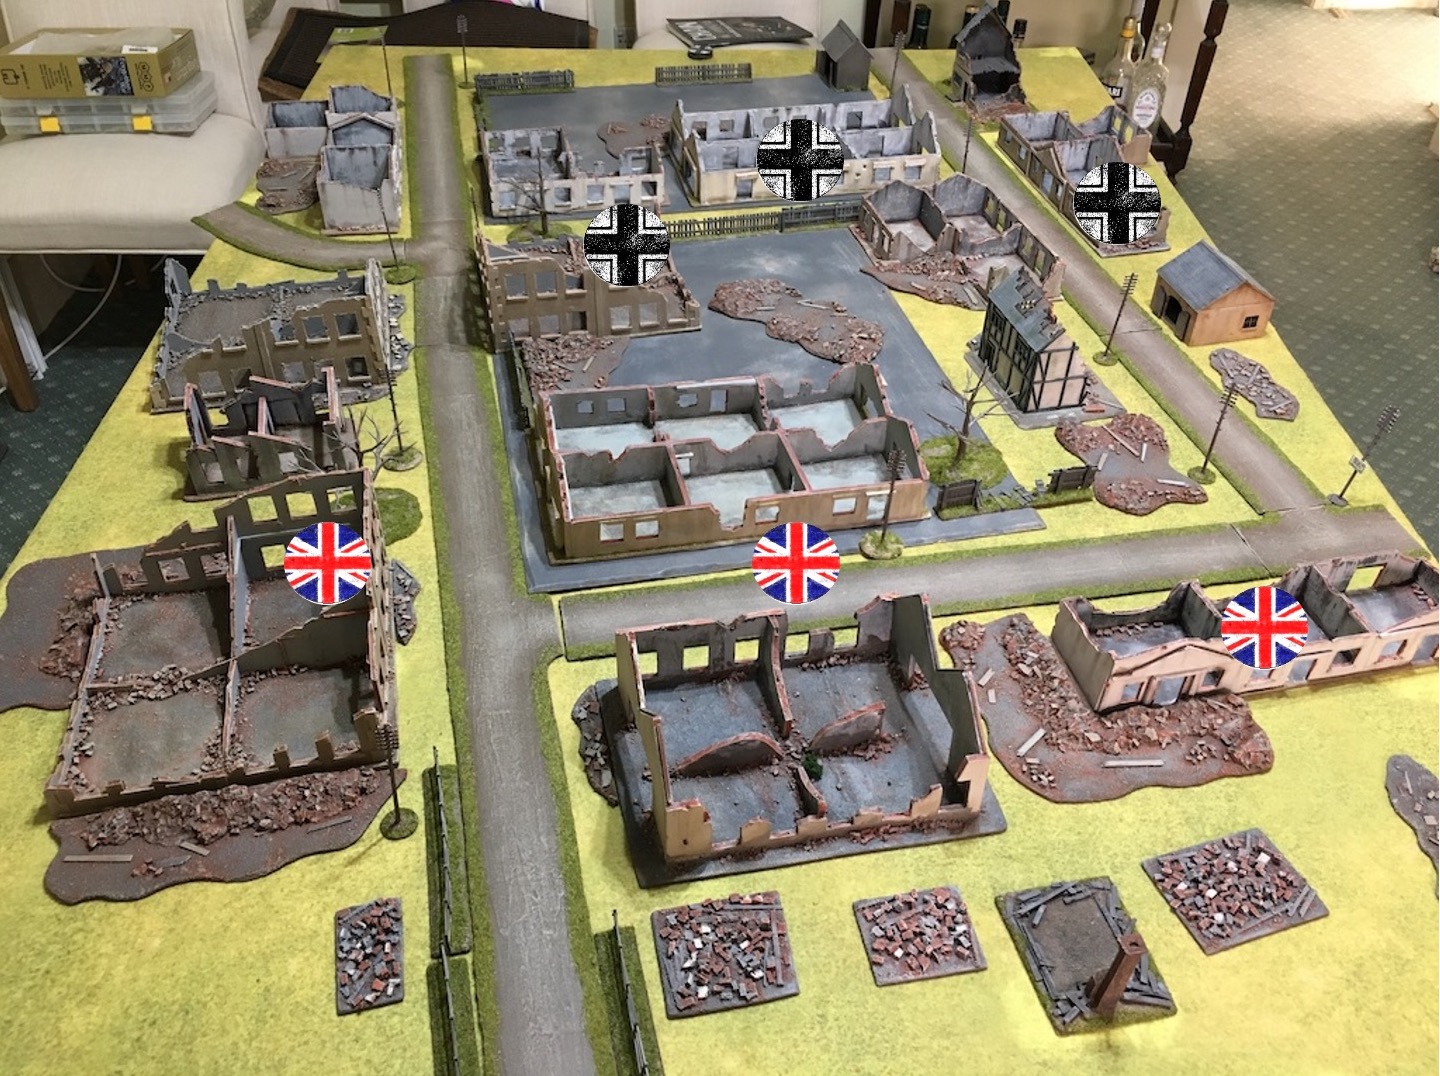
I decide a JoP on my left flank would allow me to cover the stretch of open space that runs across the table. If I can fall back to the rear buildings and have a squad on the left covering that open space, it may make it difficult for the British to take those final buildings. It's going to be tough, I will be outnumbered and face a lot of British support.
The British start with force morale at 11, while the Germans are only at 9. The British manage one free extra move in the patrol phase and so the phase goes as well as I could have hoped and leaves me with JoPs that give reasonable options for deployment.
 |
| Two German JoPs in the centre of the table |
Before we start the Germans are greeted with the roar of British artillery pouring down in a pre-game barrage, deployment may prove tricky.
The British waste no time deploying themselves. A section moves into the buildings in the centre, while a 2" mortar team take up position in cover behind them.

A section of carriers drives down the main road with the bren guns trained to cover any movement (or unwelcome panzerschreck teams!).

The Germans are in no hurry to reveal themselves and bide their time. The British continue to build up. The carriers advance down the road, while another section deploys, this time on their left flank, the one I don't intend contesting.


The platoon sergeant positions himself in the centre building and orders the section there to move up to the windows.


To be honest I'm not sure how to react or how to time that reaction. Revealing myself too soon is to play into British hands, so once again I let my phase pass without taking any action.
The British carrier section takes a sharp right turn and comes behind the buildings in the centre.

Meanwhile on the British left the newly arrived section begins to work its way around that flank.

In the centre the platoon sergeant orders the section to take up overwatch positions and then orders the 2" mortar team to move tactically to the fence from where they will have a better line of sight. More ominously, but not at all unexpected, a Forward Observer turns up on the centre building.

Not content with one 2" mortar, a second deploys on the British right flank and immediately fires smoke, which drifts slightly off target.
 |
The carrier section drives a little further forward before stopping and the bren teams both disembark. They are slow collecting their gear and fail to make it up to the fence line as quickly as the corporal had wished.

While the section on the left flank slowly continues to edge forward, the platoon lieutenant deploys on the opposite flank and orders the mortar to continue laying down smoke. The team are yet to find their aim and the smoke round drifts into exactly the same spot as the previous one.
 |
| The platoon lieutenant arrives |

In the German phase I decide to do nothing. The FO is a tempting target for my sniper, but until he moves up to the windows he's out of sight. However I'll need to be aware that he's attached to the centre section who are also on overwatch.
The British advance continues to develop, once again it's on a broad front and I can't quite work out the main axis just yet and so I wait. More smoke arrives, this time on target.

In the centre the FO moves up to the windows and as expected he is within 4" of the section on overwatch. A tempting target nonetheless.

The section on the British left has now made its way to the building in front of my wire, they are now beginning to pose a threat to my most forward JoP and will demand a response from me soon.

In the German phase I decide it's time to bring out the sniper, but the pre-game barrage has played havoc in my rear and the sniper can't make his way to the front.
In the British phase things start to really develop on their left as the section moves up to the windows that face the main road. I will be tempted to deploy and engage in a firefight, but they will be in hard cover and with the FO on the table I will likely be smothered in a barrage before I know it. What to do?

In the centre the FO makes contact with the battery, while the sergeant orders the carrier bren teams to take up position along the fence. A PIAT team deploys on the right. Dave is not sure if I've received any reinforcements and given this could come in the form of a Hetzer or PzIII N (with a very useful 75mm gun) he's not taking any risks. The British firepower is slowly building up.

The Germans need to start to responding to these developments and small as it is, the sniper finally makes his appearance and takes a shot at the FO and centre section. He hits and gets a kill but it's a rifleman, not the section corporal or the FO. First blood to the Germans. The sniper is positioned out of sight of the section on overwatch, so escapes any retribution.
 |
| The sniper appears |
 |
| The FO team directly ahead is his target |
In the British phase the lieutenant puts the carrier teams on overwatch and orders the PIAT team forward. The sergeant is busy controlling things in the centre and he puts the 2" mortar on overwatch and asks the FO to call in a ranging round. After spending time making a nice new set of barrage markers I didn't bring them to the game, so you will have to excuse the mix of elements we use to represent the explosions.

 |
| down comes the ranging shot |
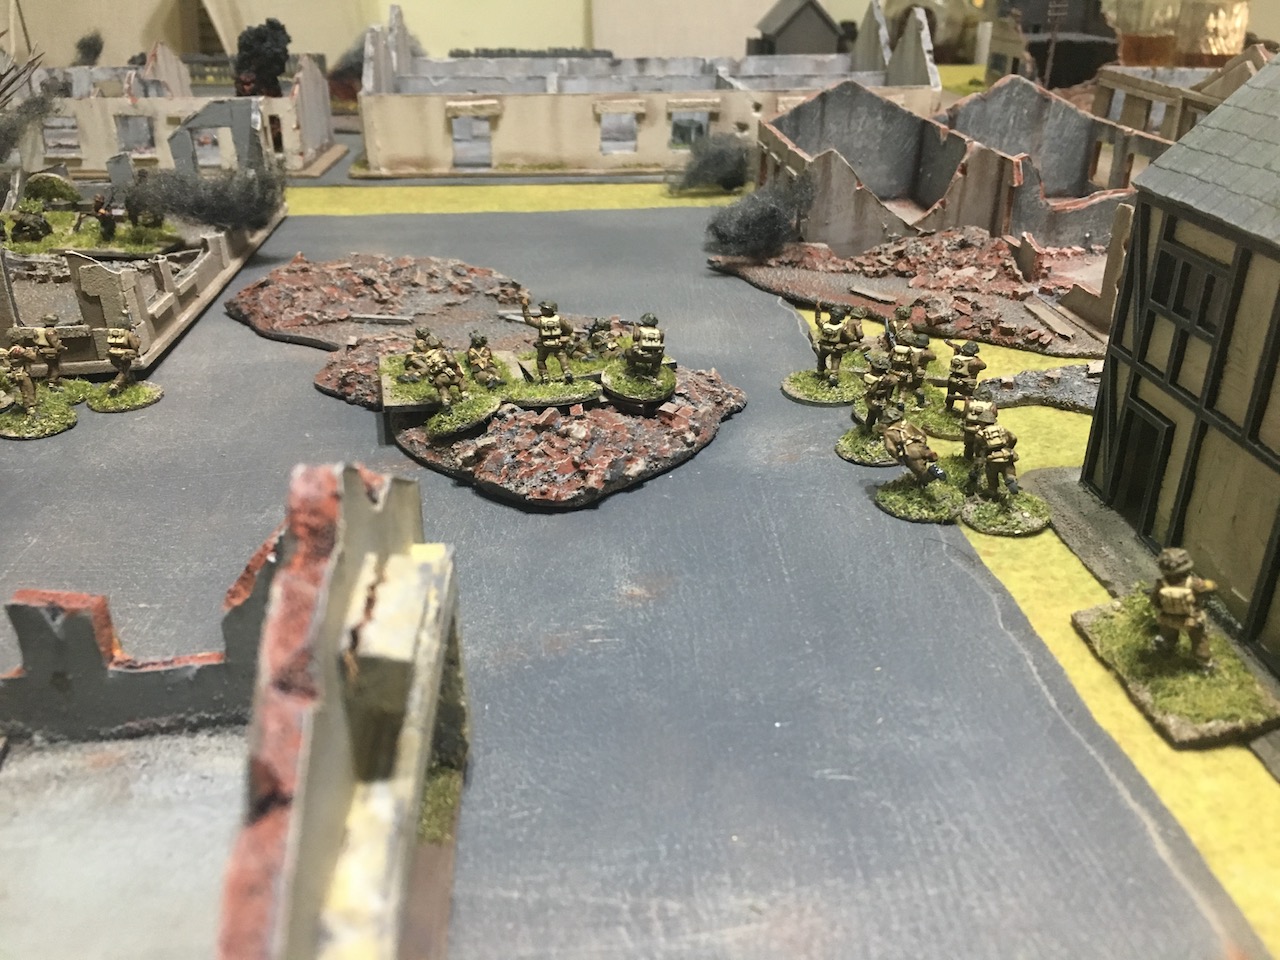
With the prospect of a covering barrage the British feel very confident and the centre section move out of the buildings and towards the building with the forward German JoP. On the British left the other section advances out of the building and across the road. My JoP is now under a lot of pressure and it really is time to act.


The German sniper can now make the FO team his sole target, this is a great opportunity to stop that barrage coming down, but his aim is off and he misses. A bit of luck here with that shot and that could have had a big impact on the game.
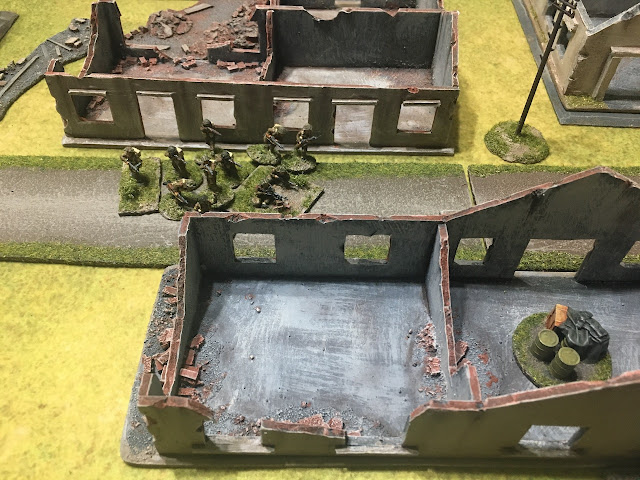
With that it's time to bring the first German squad into action and they deploy the other side of the building wall to the section on the British left. We are close enough for close combat, but there is not a clear path to contact and so I opt to fight it out from the windows and take advantage of the superior German firepower. We make the decision that as the British section was already at the wall, they also benefit from its protection and so both units will be in hard cover.
The Germans pour fire out of the building and inflict three casualties on the British. The corporal is one of those hit and his wound stuns him for the rest of the turn and the bren team is now reduced to a single man. British FM remains unchanged. To add insult to injury the Germans fling a grenade out of the window and another rifleman is killed. That has put an immediate halt to that flank move.


That doesn't mean the Germans aren't under pressure. The section in the centre moves up to the building, my squad is in danger of being hit from two sides. Meanwhile the third British section deploys on the right flank. This section is led by a newly promoted man and his lack of command ability means he can only put the bren team on overwatch. Nonetheless, there's now a lot of firepower on that flank.

Dave doesn't intend leaving his section on the left at the mercy of my squad and he deploys an engineer section onto this flank. No surprise they include a flamethrower team. It's starting to look very ugly for the Germans.
 |
| Engineers with a flamethrower |
Despite the pressure I have to take advantage of the weakened British section and try to see if I can break them. My squad fires again and kills the bren gunner, that sees the team wiped out and British FM drops to ten. The obergefrieter orders the squad to grab their last grenade and fling it out of the window, killing another two riflemen. In two phases the British section has gone from full strength to three riflemen and a wounded leader.

The British move in the centre needs a German response. Having virtually wiped out one section there's an opportunity to do some damage to another. There is a risk though that I will be caught in a mortar barrage. My only saving grace is that the British section is now close enough to be caught in the barrage as well. So with that I roll to see if I can deploy a second squad through the pre-game barrage. I'm successful and we take on the newly arrived British section in the central building, but for all the German firepower the British only suffer two shock.

The British decide to pull the section back out from the central building and call down the mortar barrage.

In the British phase there's more grief for the section that's just taken all the fire. Now reduced to a single team and a stunned leader they need a 1 to be able to activate and nothing is forthcoming. It looks like they will have to face a further round of German fire. Dave is more decisive on other fronts and the section in the centre moves into the building, but not quite far enough to neutralise the German JoP. While that is happening the lieutenant orders the 2" mortars to fire HE at my squad, but they only manage one hit and it has no effect and with that he orders the section on the far right to move forward.
The British move in the centre needs a German response. Having virtually wiped out one section there's an opportunity to do some damage to another. There is a risk though that I will be caught in a mortar barrage. My only saving grace is that the British section is now close enough to be caught in the barrage as well. So with that I roll to see if I can deploy a second squad through the pre-game barrage. I'm successful and we take on the newly arrived British section in the central building, but for all the German firepower the British only suffer two shock.

The British decide to pull the section back out from the central building and call down the mortar barrage.
 |
| Down comes the barrage |
Only one German squad and the sniper are hit by the barrage and the squad takes a casualty. The British take advantage of the cover offered by the barrage and a section on the right moves forward.

The British engineers decide they need to move quickly and move at double time to come around on their left flank.

The Germans try to wipe out the remnants of the British section in the street and when they inflict six shock it's enough to see the team break and British FM drop to nine.

The end of the phase seems like a good moment to expend a CoC die to end the turn and force the corporal to rout from the table. When he does British FM drops a further two points to seven. Dave has a CoC die himself and so I fully expect him to play that to keep the barrage in play and naturally he does.
In the British phase the sergeant moves forward and takes shock off the centre section and has the FO shift the barrage to the left. The barrage manages a few hits but only a single point of shock across the two German squads. However, as I feared, I now have two squads neutralised under the barrage.

As a result the platoon lieutenant takes full advantage to move units forward on the right and orders the 2"mortar to lay down some covering smoke to replace that lost at the turn end. On the left the engineers climb into the rubble and advance towards my squads.

There's not much I can do in the German phase as I don't want to deploy my final squad just yet, for as long as Dave doesn't know where they are he will need to be cautious. All I can do is rally any shock off the squads under the barrage.
The British are now getting poised to hit my squads once the barrage lifts and there isn't much I can do about it. The FO walks the barrage back 6”, it still covers both my squads and also limits the use of my central JoP.

I'm fortunate when the barrage has no effect on either squad, but with the barrage now further back the section in the centre moves back to the building.

On the right the lieutenant directs the carrier section teams and the section to move up on the right flank.

I'm going to have to try to ride out the storm, at some point the barrage has to lift and while both my squads are in reasonable shape the British will have their hands full dealing with them.
The British flamethrower team is now facing my squad across the road. They are comfortably in range and ready for when the barrage lifts.


The barrage comes down with more force this phase and kills the German sniper, dropping German FM to eight. One of the obergerfrieters is wounded and stunned, but I use the campaign Fallschirmjager rule to opt not to take the morale check, the other squad suffers some shock.

The lieutenant moves forward and directs the carrier teams and the other section to keep pressing ahead.


The Germans use their phase to rally shock but otherwise I wait to see how things develop. This is where I could have done with some reinforcements!
The next British command phases sees the first double phase of the game. The barrage continues to come down, killing a rifleman and inflicting more shock. Meanwhile the British squads and teams close in for the kill.

The British follow this by rolling another double phase. Things are not looking good. The British move into place and are now poised for the barrage to lift.


Things go from bad to worse when the next British command roll is a triple 6. That may end the turn and the barrage, but I sense it has already done its work and won't be missed.
The FO moves the barrage back 6" and exposes both my squads to British fire. Two sections pour fire into the building causing three casualties, one of which is the obergefrieter, who is killed. I opt not to take this morale check, using up my two options to refuse these in a single game.

Next up the flame thrower spurts flames across the street. It could be worse, but it's bad enough that I take a casualty, eight points of shock and end up pinned.


At that point the turn ends and the barrage ceases, although the smoke and explosions will remain for one more phase to block line of sight.
The British roll for their next phase and it's a relief to see no more double phases. The British sections pour more fire into the building and it inflicts enough shock to break the squad who fall back in disorder.


The flamethrower fires again and this time only manages four hits, resulting in one kill that reduces one of the LMG teams to a single man.

British pressure comes from all directions, as the section on their right makes a move towards my left flank JoP.


In the German phase the squad fires back at the engineers and despite being pinned they manage to kill two members of the demolition team and inflict some shock on the flamethrower team. It won't be enough to stop that flamethrower making a final shot though.
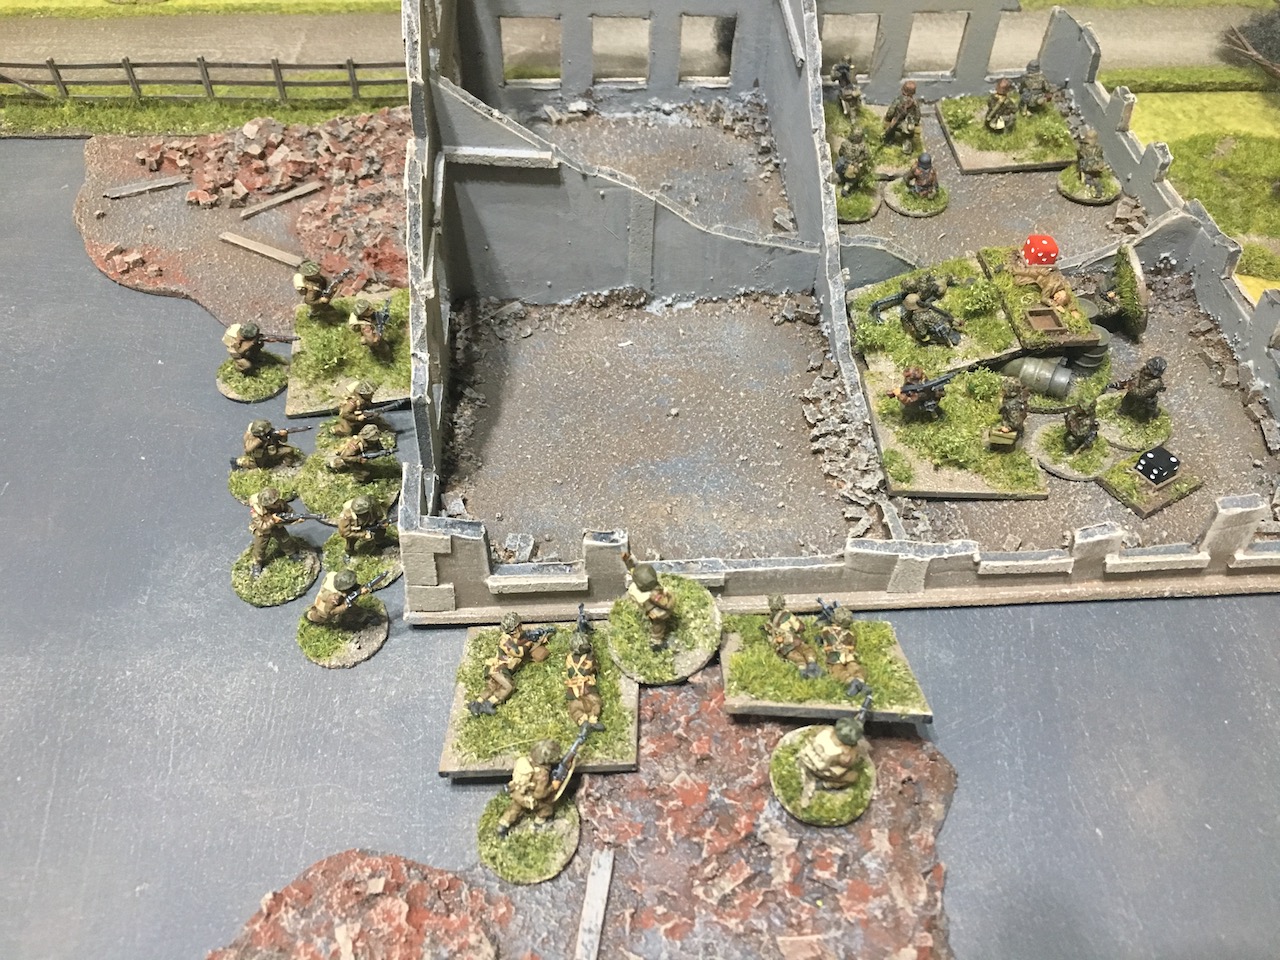
With the mortar barrage gone and no pregame barrage to worry doubt I deploy my final squad from the central JoP. They can catch one of the British sections in the centre in the open and their opening round of fire causes three casualties, one of which is the corporal who is lightly wounded, but British FM remains unchanged.


No surprise to see the flamethrower make a final squirt in the next British phase. The results are predictable and with two casualties and more shock a team is wiped out and the remaining team breaks. I use a CoC die to miss one of the morale checks, but the other brings German FM down to five. That's two squad broken, but I have two senior leaders yet to deploy. It doesn't look hopeful, but I might be able to rally the squads and get them back into action.


The British sections in the centre get ready to move onto my central JoP, while the section on the British right does the same for my other JoP and there's precious little I can do to stop them.

At this point Dave uses a CoC die to end the turn and both my broken squads rout off the table. Not only is that a blow to my already fragile force morale, but it leaves me with a single squad to somehow protect all my JoPs while I'm outnumbered by four to one. I think it's fair to say the writing is on the wall and it's time for the last defenders of Bremen to accept the inevitable.
With that the campaign comes to an end. It's an honourable draw. The Germans cannot win this one, so my aim was to lose with as much style as possible and under the circumstances I will happily settle for a draw. I'll only have to wonder if a bit more fortune with my reinforcement rolls would have been enough to tilt the balance and enable my doughty Fallschirmjager to hold on for another campaign turn? We will never know, but it's been one of the most enjoyable campaigns I've played, with plenty of interesting twists to keep me completely engaged. Those twists and variations alone would give this great replay value, as no two campaigns would play alike.
As Rich Clarke points out in the campaign briefing, this type of campaign structure could lend itself to late war campaigns on both the western and eastern fronts and is a great model to work from for anyone thinking of working something up for other campaigns in other settings.

The British engineers decide they need to move quickly and move at double time to come around on their left flank.

The Germans try to wipe out the remnants of the British section in the street and when they inflict six shock it's enough to see the team break and British FM drop to nine.

The end of the phase seems like a good moment to expend a CoC die to end the turn and force the corporal to rout from the table. When he does British FM drops a further two points to seven. Dave has a CoC die himself and so I fully expect him to play that to keep the barrage in play and naturally he does.

As a result the platoon lieutenant takes full advantage to move units forward on the right and orders the 2"mortar to lay down some covering smoke to replace that lost at the turn end. On the left the engineers climb into the rubble and advance towards my squads.

The British are now getting poised to hit my squads once the barrage lifts and there isn't much I can do about it. The FO walks the barrage back 6”, it still covers both my squads and also limits the use of my central JoP.

I'm fortunate when the barrage has no effect on either squad, but with the barrage now further back the section in the centre moves back to the building.

On the right the lieutenant directs the carrier section teams and the section to move up on the right flank.
 |
| The lieutenant is controlling the move on the right flank |

I'm going to have to try to ride out the storm, at some point the barrage has to lift and while both my squads are in reasonable shape the British will have their hands full dealing with them.
The British flamethrower team is now facing my squad across the road. They are comfortably in range and ready for when the barrage lifts.


The barrage comes down with more force this phase and kills the German sniper, dropping German FM to eight. One of the obergerfrieters is wounded and stunned, but I use the campaign Fallschirmjager rule to opt not to take the morale check, the other squad suffers some shock.


The Germans use their phase to rally shock but otherwise I wait to see how things develop. This is where I could have done with some reinforcements!
The next British command phases sees the first double phase of the game. The barrage continues to come down, killing a rifleman and inflicting more shock. Meanwhile the British squads and teams close in for the kill.

The British follow this by rolling another double phase. Things are not looking good. The British move into place and are now poised for the barrage to lift.

Things go from bad to worse when the next British command roll is a triple 6. That may end the turn and the barrage, but I sense it has already done its work and won't be missed.
The FO moves the barrage back 6" and exposes both my squads to British fire. Two sections pour fire into the building causing three casualties, one of which is the obergefrieter, who is killed. I opt not to take this morale check, using up my two options to refuse these in a single game.

Next up the flame thrower spurts flames across the street. It could be worse, but it's bad enough that I take a casualty, eight points of shock and end up pinned.


The British roll for their next phase and it's a relief to see no more double phases. The British sections pour more fire into the building and it inflicts enough shock to break the squad who fall back in disorder.


The flamethrower fires again and this time only manages four hits, resulting in one kill that reduces one of the LMG teams to a single man.

British pressure comes from all directions, as the section on their right makes a move towards my left flank JoP.


In the German phase the squad fires back at the engineers and despite being pinned they manage to kill two members of the demolition team and inflict some shock on the flamethrower team. It won't be enough to stop that flamethrower making a final shot though.
With the mortar barrage gone and no pregame barrage to worry doubt I deploy my final squad from the central JoP. They can catch one of the British sections in the centre in the open and their opening round of fire causes three casualties, one of which is the corporal who is lightly wounded, but British FM remains unchanged.


No surprise to see the flamethrower make a final squirt in the next British phase. The results are predictable and with two casualties and more shock a team is wiped out and the remaining team breaks. I use a CoC die to miss one of the morale checks, but the other brings German FM down to five. That's two squad broken, but I have two senior leaders yet to deploy. It doesn't look hopeful, but I might be able to rally the squads and get them back into action.


The British sections in the centre get ready to move onto my central JoP, while the section on the British right does the same for my other JoP and there's precious little I can do to stop them.


At this point Dave uses a CoC die to end the turn and both my broken squads rout off the table. Not only is that a blow to my already fragile force morale, but it leaves me with a single squad to somehow protect all my JoPs while I'm outnumbered by four to one. I think it's fair to say the writing is on the wall and it's time for the last defenders of Bremen to accept the inevitable.
With that the campaign comes to an end. It's an honourable draw. The Germans cannot win this one, so my aim was to lose with as much style as possible and under the circumstances I will happily settle for a draw. I'll only have to wonder if a bit more fortune with my reinforcement rolls would have been enough to tilt the balance and enable my doughty Fallschirmjager to hold on for another campaign turn? We will never know, but it's been one of the most enjoyable campaigns I've played, with plenty of interesting twists to keep me completely engaged. Those twists and variations alone would give this great replay value, as no two campaigns would play alike.
As Rich Clarke points out in the campaign briefing, this type of campaign structure could lend itself to late war campaigns on both the western and eastern fronts and is a great model to work from for anyone thinking of working something up for other campaigns in other settings.
Postcript 2024. So six years after playing this game I've had a chance to recreate the table again as I've been taking a new player through the campaign. It's something I've always wanted to do because I think I could now do a much better job. The one thing that bugged me about this table was the green mat, it just wasn't suited to an urban game. I addressed that by making my own urban mat using a piece of fleece fabric and painting it. The other addition was scattering rubble. Not really that much given the amount of destruction but it's amazing how well it ties a table together. Most of the buildings will look familiar. A few have had some paint touch ups or added rubble since then but essentially they remain the same.


Very nicely done.
ReplyDeleteThanks John, a great campaign and nice to take it right down to the wire.
DeleteThanks Mark, great AAR,
ReplyDeletequestion in regards to German Sniper caught in the barrage.
I asked a question on the CoC forum regarding targeting a section in a building with HE. this building also housed a Sniper, the response I got was that the sniper would not be targeted.
Good to see that your Germans on the other side of the building staring into the Brits on the other side, you used your option not to enter into Close Assault as they was not a clear path, normally players I have played in the past would insist that it would be a auto close assault.
looking forward to reading a AAR on a new campaign.
cheers John
Hi John, the sniper rules say 'for game purposes...they are treated as a single Team'. Step 2 of a barrage says 'roll...for every Team within the barrage area'. No mention that snipers are immune to a barrage and no good reason why they shouldn't be. Where as small arms fire has to aim to try and hit them, a barrage is less discriminatory and a sniper is just another target.
DeleteI can see how the close combat one could be argued either way. If you can move up to a building and not enter close combat but throw grenades through the window, then surely this was a very similar situation. I could not deploy in a way that I could be on the other side of the wall and I cannot move after deploying, so we both accepted there was no clear path to close combat at the moment of deployment and in that respect we satisfied the rules. It is an area that is open to interpretation though.
Hi John, I recall reading that in Stalingrad, if the Germans knew there was a Soviet sniper in a building and they couldn't spot him, an artillery barrage would be called in to neutralize them. Historical precedent and nothing in the rules to specifically disallow it. I always take the feelpinions on the CoC firum with a grain of salt, to be honest.
DeleteGreat AAR as always yet another nail biting finish
ReplyDeleteJust on the clear path issue , from the FAQ:
Q: Close combat demands the attacker to have a clear path to the enemy in order to engage them.
Do windows or doors constitute a clear path?
A: Windows and closed doors constitute a clear path if the attacker wants them to do so. Open doors
always constitute a clear path.
So, if the attacker chooses to leap through windows in order to initiate close combat he may do so.
However, if he elects to move up and throw a grenade through the window then that does not
initiate close combat. If the same attacker advanced to the open door, then close combat is
automatically initiated when he comes within 4”. But don’t forget, grenades can be thrown at any
point in a Phase, even mid-movement, so if you have the grenades and the Command Initiative, you
can throw a grenade from 5”, the effect of which is worked out before the movement is completed
and close combat begins. Equally, if a door is present then we always assume that it is closed. Open
doors only exist where there is no door or it has been destroyed somehow.
Thanks TT. I think we played this one correctly then. There were no doors, only windows and rubble. I was aware of that FAQ but had missed the bit about assuming doors are always closed unless otherwise specified, that’s useful to know if there’s ever debate over interpretation of the rule.
DeleteYeah only thing it doesn't cover is what happens if your opponent rigs up a grenade to the closed door handle? :)
ReplyDeleteIndeed it does not, but I like your thinking.
DeleteVery nice. I was actually thinking of doing this in the Eastern Front - Koinigsberg perhaps?
ReplyDeleteGood idea, the only think you might want to consider is that the Germans are less likely to want to surrender, the Eastern front equivalent is probably just to melt away?
DeleteWhat a nail biter thanks for taking us along this journey.
ReplyDeleteGReg
Thanks GReg glad you enjoyed it.
DeleteExcellent campaign! Do you plan on doing citadel part 2?
ReplyDeleteYes, it’s on the list. We were going to do it straight after Citadel part 1, but decided to take a break from the Eastern front. We plan to get to it eventually.
DeleteGreat AAR and finale to the campaign. Musch better than the “i played a game and took some pictures” type AARs I often find. I was rooting for you the whole time! Do congrats on the draw.
ReplyDeleteI wouldn’t be too concerned about getting the rules right: and TFL rules are often somewhat vague at times. Still a great set of rules CoC is. Sounds like you guys just focused on having fun and it really comes through. 😀
Thanks Stew, good to know someone was on my side! It was a very good campaign, with lots of twists along the way, so it made for a great narrative.
DeleteThoroughly enjoyed that. Great campaign reports that really captured the experience. The only thing that would have improved it would be a set of reports from the British player! What's next I wonder.
ReplyDeleteThanks Doug, I'm glad you enjoyed it. You are right, it would be great to have a commentary from the other side of the hill and it's something Dave and I have occasionally discussed. As it happens in the last game in our current Malaya 1942 campaign he has provided some commentary to give the reasoning behind his decision to withdraw his Australians in that particular scenario. We will try to do more of this, as you're not the first person to suggest it and it will add another perspective to the AAR.
DeleteRereading through this one from start to finish years later and came across your 2024 update. Fantastic looking urban table! Given the great replayability of this campaign, how did you find the second play-through differed from the first?
ReplyDeleteThanks. It was against a different opponent and a much less experienced one, so it wouldn't be an equal comparison. That said, as the Germans, he made interesting choices. He put up a very stiff resistance early on that made it difficult for the British to make progress and keep to schedule. It also helped that all of his platoons put up a fight (!) and none surrendered. Despite that, I just managed to eke out a victory for the British but it came down to that last table and a city fight in Bremen. Had it been against a more experienced player like Dave, it might not have been possible. I suspect that's what makes it such a good campaign, it's never going to play out in similar ways.
DeleteJust to clarify, when I say he put up a stiff resistance early on, he loaded up the first maps with his best units (Fallschirmjager) and a hefty amount of the support. I would normally caution against that and suggest more defence in depth, but it very nearly paid off. Once I'd broken through those early tables the lack of depth began to tell but there was a stage early on in the campaign when I thought it was a strategy that might just pay off.
Delete