Monday, 13 November 2023

Goodbye to Crossfire? Oh no, not yet.

Ten years ago my return to miniature gaming was inspired by the Crossfire rules. It was pure serendipity. My youngest son, who was then about eight years old, had a lot of pirate figures and I was looking online for a set of simple skirmish rules that might enable us to game together. I have no idea how I was taken off on a tangent, but somehow, I ended up reading about Crossfire. No structured turns, no measurements? That grabbed my interest and the rest, as they say, is history.

Crossfire appeared to be played mainly in 20mm, which suited me fine. In my teens it was the scale I had always used, in fact, it was the only scale at that time! Enthusiastically, I invested in box sets of Germans and Russians from the Plastic Soldier Company and set about amassing what I would need to stage games on the Eastern Front. Crossfire seemed to lend itself very well to urban fighting and I hastily constructed urban ruins, scratch building them from foamcore.
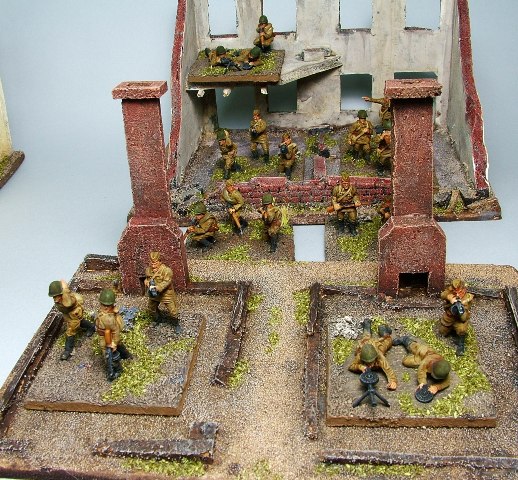
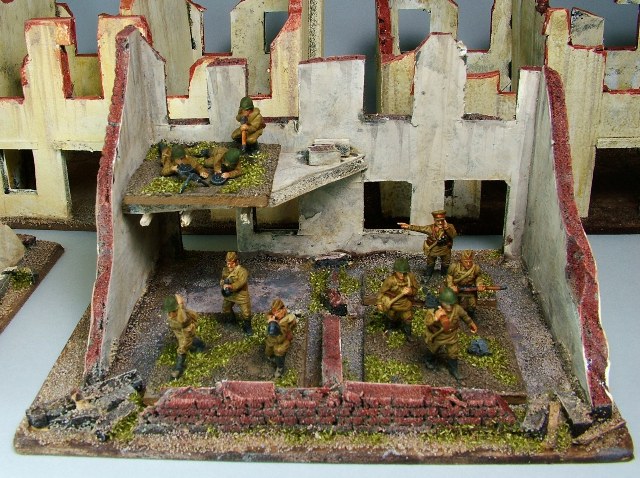
This hive of activity was all well and good, but there was one issue. I didn't have an opponent and not much idea where I might find one. At the time I was part of a very active group of historical board gamers, with a strong focus on the Second World War. While many of them had the right combination of interests - history and gaming - few expressed much enthusiasm for using miniatures. Nonetheless I persevered, working on the rather optimistic assumption that if you build it, they will come. It turns out that optimism wasn't misplaced and slowly I found opponents.

While it was Crossfire that brought me back to miniature gaming, it was the discovery of Chain of Command that really ignited my interest. Crossfire soon took a back seat and it wasn't long before I started rebasing individually many of the multi-based figure stands I had originally collected. 
That said, I wasn't ready to let go of Crossfire entirely and kept enough multi-based figures to make up a company of British, Germans and Russians. However, over time that part of the collection drifted deeper and deeper into storage and there were times when I wondered if it was worth hanging on to them.

When I put together a 12mm collection for the Second World War with the intention of using it for the rules for O Group and I Ain't Been Shot Mum, I deliberately came up with a basing style that would mean the collection would also work for Crossfire. I started using those figures to run a few Crossfire games at a local historical miniatures club and they went well, reawakening the interest in some and making a good impression on those that hadn't tried it before.


So, to cut a long story short, there's a renewed interest at the club in playing Crossfire. While some had flirted with the idea of 12mm the consensus seems to be it should be 20mm. Well, that's a scale that suits me just fine.

I dug out the figures I had in storage. They looked rather sad. My painting style has not only improved, it's changed. Originally I'd been using Army Painter dip and that's a technique I no longer use. Despite that the figures didn't look that bad. The bases were a different matter and I was happy to lose them. I'd used 3mm MDF which I feel is too thick for 20mm figures and the ground work was nothing to get excited about. 
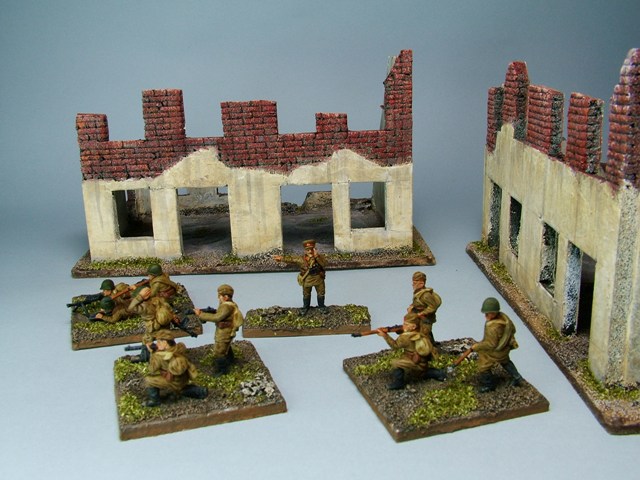
There was a feeling at the club that round bases were more aesthetically pleasing than square ones and having seen a force of American figures based that way I was convinced that was a path to follow. 

I decided to rebase all of mine and give them a refresh at the same time. That led me to thinking about how I wanted to do that. I've always liked how well Crossifre works in an urban setting and so I decided to make that the focus of this project. That led me to think about my urban terrain. I have quite a lot of it. 

While much of it was made with Crossfire in mind it's versatile enough that I often use it for Chain of Command. With the prospect of it now getting even more use I thought it was long overdue a refresh. What had started as a modest little project was starting to grow. Yet unlike most new projects this one would require no new figures or terrain, putting no pressure on my wallet or storage space. I was getting to like the idea more and more.
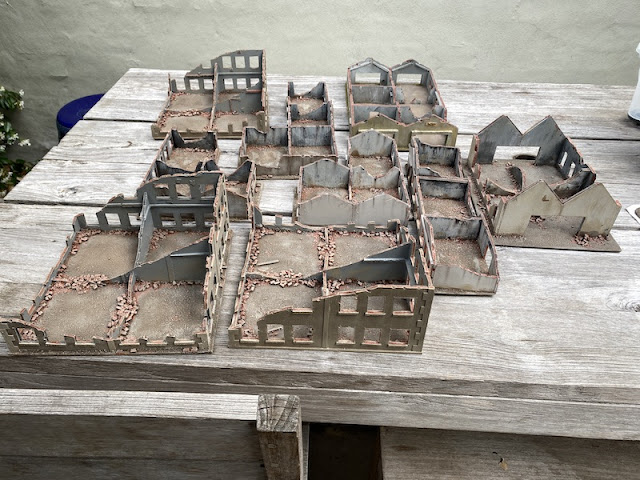

I would rebase my Germans and Russians, but put the emphasis on a look that reflected the terrain in which the figures would be used. I'd already given a bit of thought to a few straightforward ways I could refresh the terrain - I wanted to add a little bit more rubble and retouch the paint scheme. I would use the same colour palette for the figure basing to tie everything together. I've seen pictures of great urban tables for Crossfire but always thought it looked odd that all the figures were based for more rural terrain. The vibrant green grass bases looked at odds with the muted tones of the urban wasteland. I wanted to go down a different path and if occasionally the stands are used to fight out of urban situations I'll just have to live with the anomaly.

The Germans were the first to be rebased. There is no fixed basing convention for Crossfire, the rules are flexible as long as all squads are on stands the same size. Rather than the 40mm squares I had originally used I went with 40mm MDF rounds in a thickness of only 1.8mm. In Crossfire a single stand represents a squad and in most cases three squads will make a platoon. Each platoon commander is represented with a single figure and these I've mounted on a smaller 25mm round base. Three platoons make up a company, all under the command of the company commander mounted on a squad sized stand.


Here and there I retouched the painting on a few figures if I really didn't like it, but overall the combination of new basing and grouping the figures together on a base does much to draw the eye away from individuals and more toward the unit as a whole.

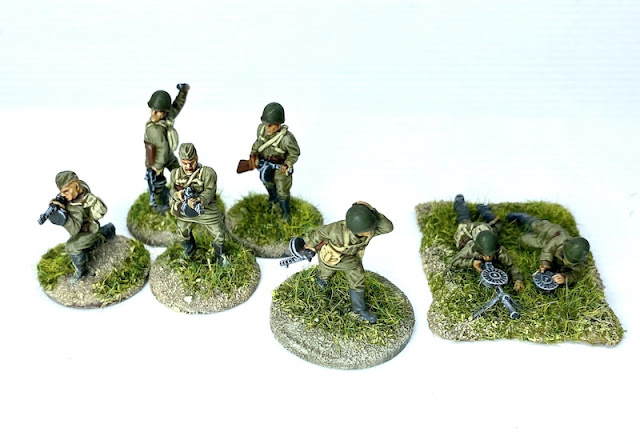
While many of those original PSC figures had been based individually for Chain of Command over time they in turn had been replaced with metals from AB Figures like the ones below.


As a result many of those PSC figures fill my spares box from where they've now been retrieved to fill gaps in the Crossfire ranks. Things have come full circle!

In the case of the Company Commander stand I've used a spare AB Figure from a German command set for the commander and a couple of Zvezda figures as radio operators (they started life originally as forward observers for Chain of Command but have since been replaced with more AB figures). 


Using the same colour palette as the buildings ensures the figures and their bases look at home in the urban setting. I really like the way this looks, I think it will give a much more immersive and seamless feel to the table.


The German platoons can be equipped with infantry anti-tank weapons, in most case it's likely to be one squad in each platoon armed with either panzerfausts or a panzerschreck. With enough surplus German figures I've been able to make up squad stands using a figure with each of these weapons which will make it much easier to track which squad is armed with what weapons in the course of a game.


Someone at the club had already put together a US force and we were keen to play a game. So as it happened my urban based Germans had their first outing somewhere far removed from the devastated ruins I had in mind - they went to Normandy. If nothing else it was a good test to see exactly how out of place these bases might look in a more rural setting. 

Fortunately the table included a small French village with a few buildings in ruins. My Germans certainly looked at home there.


That wasn't quite the case when it came to a field and a patch of broken ground.....


The next task was to do exactly the same for the Russians. The Russian rifle company varied in its composition as the war progressed, up until 1942/43 it is quite likely to be composed of three platoons each of four squads. As the war went on and manpower became scarce they were more likely to field platoons of three squads each. I will have enough for both options.


If you look closely it's possible to notice the different painting styles but overall I think it's hardly noticeable at playing distance. It was never something I intended to address and I certainly wasn't going back and repainting all the figures.


You may notice the two bottles on the crates near the company commander. At the risk of racial stereotyping I couldn't resist finding a use for these. They were left over from a model of a Japanese Isuzu truck. Of course they could be bottles of anything, water even, they don't have to be vodka.


A Russian platoon will often have one squad armed with an anti-tank rifle. As with the Germans I had enough spare figures to make up a few bases that include a figure with an AT rifle so that I can replace a normal rifle squad stand with one of these if need be.


The spares box also supplied many other support weapons including 50mm mortars, Maxim MGs, snipers and forward observers.


The PSC Russian sets comes with many SMG armed men and there were enough figures to create an SMG company. 


There's not a lot of variety in the poses but I've mixed them up as best I can.


The SMG company also needs a company commander and in this case I've painted him in an NKVD uniform so he can also serve as a commissar if needed.


That's the core infantry units. As for armour and other support units I won't need to worry too much about those, I think I'm fairly well covered in that respect.


Having worked to get the units based to match the urban ruins I began to ponder how I would handle the few game markers that are required. For the more recent games in 12mm I had been using MDF tokens for the Force on Force rules.


A player at the club has a better solution that is both simple and elegant. He uses small stones. Brown ones for pinned and black ones for suppressed. That gave me an idea. I had made up a lot of rubble using cork floor tiles when I was working on the urban terrain and I had enough left over to make up similar markers but ones that would blend in well with the terrain. It was a simple matter of sticking the cork to 20mm MDF round bases, adding some sand and painting them. 


I intend to use one marker to represent pinned and two for suppressed.


They match the terrain and help to keep that immersive feel to the gaming table.


Although in some case I must confess I might have done this too well and the markers simply merge into the surrounding rubble!


That left one other status marker that needed to be considered - No Fire. This didn't seem quite so simple so I hunted through my spares box to see if anything could inspire me. While No Fire doesn't represent a unit running out of ammunition (although there is no reason why it couldn't) I like the idea of using something that spoke to this. I found two things that would work. 

I had kept a number of small arms ammunition boxes from a 1/35 scale model set and I thought if I make those up and have them open they could serve this purpose well. I had only four of those and so I hunted around for something else just as suitable. The PSC anti-tank gun sets include a number of opened ammunition boxes and while it's not exactly small arms ammunition they convey a similar idea.


I particularly like the way the small arms ammunition boxes work.


Another thing that needs to be recorded are the number of fire missions available to a forward observer. In the past I've used piles of small game tokens kept at the side of the table. It's a slightly messy system so I took an idea from O Group where a small vignette is kept at the back of the table with a dice frame to record the number of missions. For these I mounted a rectangular base with a model of a mortar that corresponded to the calibre of the mission available to the forward observer. While I don't think it's likely to be an issue I chose the different shaped base to ensure they weren't confused with stands that are in play. 


The PSC German heavy weapons set includes 120mm mortars that I have never needed but I had kept in the spares box. The Russian equivalent was a very similar looking weapon so I made up one for each side.


The same was done for 80mm mortars.


Smaller mortars, like the Russians 50mm variant, are used on the table and act as their own observers. There was no need to make up an entire base just to record their missions and so I made up a base just for the dice. These can be used on the table with the weapon stand itself.


Alternatively they can be kept with the other fire mission bases.


Overall this has given a new lease of life to a part of my collection that I was beginning to doubt would ever see a wargame table again. It's allowed me to plunder the spares box and draw on resources I already have to hand and so the net expense has been zero. It's not very often you get to say that in this hobby.

Crossfire might just hit the sweet spot for club night games. The rules are simple yet elegant and can be learned very quickly. Games with a company a side can be played on a 3x3 or 4x4 table in a few hours which lend themselves well to the limited time in an evening. If it has any downside it is in the amount of terrain it requires, but that's not really an issue for me and certainly no hindrance to running games on a club night.


Friday, 3 November 2023

My article on scratch building in Wargame, Soldiers & Strategy #127

I wrote a post for the blog on scratch building with foamcore (which you can see here) and was invited by Guy Bowers, the editor of Wargame, Soldiers & Strategy magazine, to write an article on the same subject for the current issue (#127) which is now available. 

The main focus is a tutorial showing how I used foamcore as the base material to construct a damaged factory building for use in my 10/12mm games of O Group and Crossfire. 


As most of the article covers the construction I won't repeat that here, but as there were space limitations in the magazine I thought I'd include a few of the pictures that didn't make it into the magazine to give more of an idea of the finished model.


If you want to find out more about the construction it's only natural I suggest you get hold of a copy of the magazine which is available in hard copy from newsagents and other retailers or as a pdf direct from Karwansaray Publishing.


Monday, 16 October 2023

Underused tactics in Chain of Command

One of the things I like about Chain of Command is the way it allows you to combine a range of historical tactics to try and achieve your objective. Not all of these are apparent to new players and I've often watched games where they rely too heavily on one tactic alone - firepower, and they don't exploit the full range of options. With that in mind I thought I'd list a few of those rules mechanics that I think are under utilised. Hopefully some players will find this useful. 

1. Covering Fire

Covering fire is a very good way to suppress enemy fire and reduce its effectiveness. The relevant rule section says:

Pg 20 Covering Fire: Only Leaders may instruct a Team or Section to put down Covering Fire. A Team giving Covering Fire will target a piece of terrain with 4” frontage or 9” frontage if the whole Section or Squad is firing. Any enemy forces moving, deploying or already in that area will fire with a ‐1 on dice rolled to hit due to the suppressing effect of this fire.

Covering Fire lasts until the end of the next Phase, whether that Phase is friendly or enemy. While giving Covering Fire, a Unit may do nothing else.

The wording of the rule can confuse some people - what it means is that the to hit number needed on each dice rolled suffers a -1 modifier if the firer has been targeted by covering fire. In other words, units suppressed with covering fire will now hit a target on only a 5 or 6 at close range (instead of a 4,5 or 6) and a 6 at effective range (instead of a 5 or 6).

Reducing the chance of a hit at close range from 50% to 33% is a notable difference. It can make approaching an enemy across open ground or through light cover a little less hazardous. Sometimes it's more effective to suppress enemy fire than it is to try to inflict casualties and shock, especially when the chances of doing so are greatly reduced by hard cover.

The added bonus is that covering fire remains in effect for two consecutive phases. So, for example, if in your phase you are facing an enemy unit on overwatch you could lay down covering fire with one unit before moving with another. If the unit on overwatch chooses to fire they will suffer the -1 to hit penalty for each dice rolled when they do. The same will apply if they try and fire in the following phase.

Laying down covering fire is a useful tactic that reduces the effects of machine guns or well armed units like panzer grenadiers. At the same time it allows you to manoeuvre other friendly units forward and threaten the enemy with close combat or a move around their flank.

As covering fire remains in effect for the current and following phase I found it useful to make up a few simple markers like the one above to help record that on the table, you can see more about them here.

2. Assigning men between teams

This is a simple rule that can easily be forgotten in the heat of a game, but it can play a very important role in maintaining the effectiveness of your platoon. The rule states:

(Pg19) 4.5.3 Commands Which are not Activations - Some commands given by Leaders are not considered activations and do not prevent a Unit being activated at another point in the same Phase.

Junior Leaders may ... use one Command Initiative to transfer one man from one Team to another if both Teams are within 4” of him and under his command.

When would this be considered something worth doing? The most obvious example is when a squad's LMG team is reduced to a single crew member. This creates two problems: First, it reduces their firepower (as per the relevant notes for each type of machine gun in the Master Arsenal Table on pg37). Second, a single man team is very vulnerable to being wiped out. The loss of that LMG team will reduce the firepower available to the platoon for the rest of the game and that is only compounded by the potential negative impact on force morale. Both of those can be avoided by taking advantage of this rule (note that it only applies to a junior leader doing this for his own command ie his squad or section).

While it does require the junior leader to expend one command initiative it's not considered an activation for either of the two teams and does 'not prevent a Unit being activated at another point in the same Phase'. In other words, other than the cost of one of the junior leader's command initiatives it's a free move.


So for example a German squad with a junior leader, a five man rifle team and an LMG team reduced to one man would generate ten fire dice (five for the rifle team and five for the belt fed LMG with the crew reduced to one man - for the purposes of this example let's assume the junior leader's SMG is out of range). If the junior leader uses one Command Initiative to assign one man from the rifle team to the LMG team he brings the LMG team back to full strength. He then uses his second Command Initiative to activate the whole squad to fire, now generating twelve fire dice instead of ten (four for the rifle team now less one member but eight for the LMG team now that the crew is greater than one). Not only has the leader increased the squad's firepower by 20%, he's also doubled the size of the LMG team thereby reducing the chance of losing the team altogether.

3. Deploying tactical

This is a simple 'free' action that is always worth doing. This was clarified in the FAQ and Errata published in 2017 and it is clear that a unit may deploy in a tactical stance (but cannot move). You have nothing to lose and if for some reason your enemy has a sequence of phases or surprises you with a deployment your unit is in the best cover. 

4. Smoke grenades

The British player is normally quick to exploit the benefits of smoke from the platoon's 2" mortar, it's a very useful weapon that's not present in other platoons. However smoke grenades are available to most squads of nearly all nationalities and while not as plentiful or with the same range as the 2" mortar they can play a very useful role.  

I should point out that since the rulebook was published in 2013 there have been a few rule changes and clarifications with regard to smoke grenades. In the original rules the number of grenades available to a squad were unlimited as long as you didn't throw them in consecutive phases (9.2.3 pg 41). This was amended in the Errata and FAQ and the total number of grenades that could be thrown was equal to the leader's command initiative level. This has since been further refined with the publication of the 1940 Handbook where the number of grenades is limited by squad and the quantities available are defined in the army lists. In the vast majority of cases this amounts to three explosive grenades and one smoke grenade per squad or section. 

The actual mechanic for throwing grenades remains unchanged (as per 9.2 on pg40) - each grenade thrown requires a command initiative from a leader. Throwing a grenade does not constitute an activation.

9.2.2 Smoke Grenades

A smoke grenade is thrown exactly like a normal grenade. Players identify the target location and roll 1D6 or 2D6 to determine where it lands. The area covered by the smoke is 3" in diameter but it does not completely block line of sight. Any Team which has men firing through smoke will apply a -1 to any roll to hit their target for the whole Team.

The effect on firing is much the same as with covering fire. The rules then clarify further:

Troops may not fire covering fire through smoke. However, they may fire covering fire and then deploy smoke in the same Phase, with the covering fire being effective for the next Phase. The effect of covering fire and smoke in that situation is cumulative, with a -2 being applied to any to hit roll for any unit affected by both.

Smoke lasts until the end of the turn, so that while a squad may have only a single smoke grenade it could quite possibly provide cover for multiple units over several phases depending on conditions. It would make crossing an exposed stretch of road or other open ground a much less risky proposition.

5. Moving a jump-off-point 

This is a tactic that allows you to move units very rapidly to the forefront of the action. It's particularly useful for an attacker, but it does require two things - a CoC die and units held off the table in reserve. It's one reason why you might want to delay some of your deployment. 

CoC allows for a great deal of fog of war and the system of jump-off-points is a key mechanic for doing this. Keeping your opponent guessing where the main focus of your attack is going to be makes good tactical sense. Being able to take an opponent completely by surprise by moving a jump-off-point forward up to 18" and then deploying one or more units can prove decisive. As always, timing is everything, but if timed right the result can be devastating, as your opponent may not be able to react quickly enough.


Pg 23 Move a Jump‐Off Point

A player may only move a Jump‐Off Point during his own Phase. One friendly Jump‐Off Point may be moved a maximum of 18” in any direction to a position at least 6” to the rear of friendly troops which is either in or behind cover from any deployed enemy Unit.

Once the Jump‐Off Point has been moved, it can be used immediately in the current Phase in order to deploy troops onto the table, assuming the relevant Command Dice are available.

You can see how it can be used in this game.

6. Moving

While it seems I may be stating the obvious I have watched many a game bog down into a protracted fire fight. One that invariably ends in stalemate as casualties and shock build up to the point movement is almost impossible.


While your units are often well armed this is not a game that is always determined by firepower alone. A combination of fire and movement will often be the key to success. While the battlefield is a dangerous place, moving in combination with the suppressive effects of covering fire; the extra cover provided by a smoke grenade; the support of units on overwatch, and, using the benefits of tactical movement means that quite often an enemy can be forced to vacate a strong position due to the threat of encirclement rather than from the effects of gunfire.

While moving at double time comes at a cost in shock, it might be a small price to pay to cover dangerous ground or close down an enemy jump-off-point. You shouldn't let yourself live in fear of a poor movement roll, players are quick to bemoan their bad fortune but rarely remember when the dice were kind. Sometimes it's down to managing the risk - have you sent the unit out without putting down covering fire first? or throwing a smoke grenade? More often than not we make our own bad luck by not exploiting all the game mechanics and historical tactics have to offer.

If you've found this post useful and would like to Buy Me a Coffee to help cover some of the costs of running the blog you can click through at the link or on the tab in the right hand column of this page.

Thursday, 28 September 2023

Bunkers, spider holes and soft skins for the Far East

I've played two campaigns using Chain of Command set in the Far East - Malaya 1942 and Last Stand on Opium Hill. Both take place during the early stages of the war when the Japanese were in the ascendancy and on the offensive. They are a challenging side to play and to play against and this made for excellent gaming. Once the Far East Handbook is published I expect to be playing a lot more in that theatre. Invariably there will be games set later in the war with the Japanese on the defensive and so with an eye to the future I've gone about making suitable fortifications.

The Japanese made much use of bunkers, very often as part of intricate and mutually supporting positions that combined other bunkers with entrenchments and spider holes (one-man weapon pits). They were notable for being particularly well concealed and of solid construction using local materials like palm logs. The illustrations below come from the publication Japanese in Battle published by GHQ, India Military Intelligence Directorate in May 1943 and provide very useful descriptions of typical bunkers and weapon pits.

As you can see the majority of the bunker is below ground level which presents a few problems when it comes to the wargame table. 

While it would be ideal to put figures into the bunkers I couldn't find a workable solution. In the end I decided to focus more on having them conform to the terrain, which meant figures would have to be placed off table in some sort of holding box (I have in mind a variation of my platoon boards). 

I've made four types of bunker and the construction was the same for each. Given they weren't going to have removable tops it was very straightforward, essentially all you are making are glorified mounds of earth. The core construction elements were a base of MDF and then a shaped piece of XPS insulating foam. Bamboo BBQ skewers would be used to simulate the wooden logs.


With the XPS foam cut to shape the skewers were used to construct the bunker apertures. The mound was then textured with household filler which was covered with sand and cat litter.


It was then just a matter of painting and adding vegetation. This has given me five bunkers in total. Having said it wouldn't be possible to place figures in them I couldn't resist the temptation to populate them in some way. In this instance I've used a few old plastic Japanese figures and cut them to size to be visible through the bunker aperture. They add a bit more character to each piece.

The first two are small LMG bunkers that will be used for a squad's defensive position.

Here you can see a few of the added figures. I think they help to create the illusion that much of the bunker is below ground level.

These were supported by individual weapon pits for the riflemen of the squad, sometimes referred to as spider holes. These would be positioned in mutually supporting positions close to the LMG bunker. 172 Scale Miniatures make a set of these and all I've done is put them on slightly larger bases so that I could texture the terrain to match the bunkers. They include a mix of figures including men in caps and camouflaged helmets which match well with my Japanese figures from various other manufacturers.


The second bunker type is slightly larger than that for the LMG and houses an MMG team. The MMG barrel is another spare from one of the plastic figure sets.

Of a similar size is a bunker to accomodate a small anti-tank gun. Once again I've raided the spares box for a suitable barrel (or not so suitable in this case, I think it's a Russian 45mm barrel from one of the PSC sets, but who's to know?).

I think having the protruding barrels works well and I'm pleased with the way those two have come out. If I can't have the bunkers occupied with figures from the game I can at least have them looking like they are.

Last, but not least there is a double bunker that can house two teams.


The larger plant to the left of the bunker was an experiment using a set of full colour, laser cut plants from Gamers Grass that I picked up at a local wargame show. I think they are very effective but they are relatively expensive for the number of plants you can make, so I'm not certain they are viable for making large expanses of jungle terrain. Great for adding detail like this though.


The majority of my Japanese figures are standing and charging. That's perfect for early in the war but less so for the later campaigns when they are on the defensive.


When I was ordering the spider holes from 172 Scale Miniatures I also picked up a set of prone and kneeling figures that add more variety of poses.


172 Scale Miniatures also do a Kurogane car and I've been wanting to add a few more Japanese soft skin vehicles to the collection as they will come in useful to represent LoC units, particularly for things like Chindit campaigns.


IBG Models do a very lovely Isuzu truck. It's more a modeller's model than a gaming model - it includes a full engine with photo-etch parts. I couldn't resist building the engine and so then it only made sense to have it on display. I think this will make a good piece of scatter terrain for a Japanese retreat or as part of an LoC depot.


Hasegawa also make an Isuzu truck, in this case one with a fuel bowser. I think it's intended to go with their aircraft range as part of an airfield diorama but from what I can understand the army would have used the vehicle for exactly the same purposes. It also comes with a trolley and oil drums.


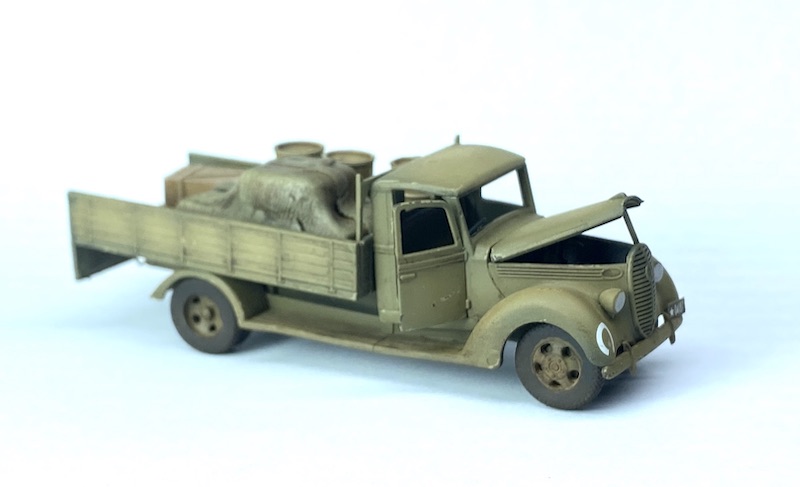
They join another truck that I converted from a die cast commercial Ford truck. It was left over from a project where I converted die cast trucks into civilian vehicles suitable for China in the 1930s and 40s.


Finally, I have an Austin Armoured car. While it's technically not a soft skin it is fairly lightly armoured. These saw service with the Japanese but only until the early 1930s, so I'm not sure how much use I will get out of this. That said I think it can proxy for any number of interwar armoured cars in service with the Japanese, particularly in China.


Altogether a range of interesting vehicles to use as game pieces or scatter items.


If you've found this post useful and would like to Buy Me a Coffee to help cover some of the costs of running the blog you can click through at the link or on the tab in the right hand column of this page.