
The previous game was a chastening experience for the British. A combination of poor tactics, ill fortune and bad decision making on my part all combined to see the attack on the bunkers fail. That said, defeat is often the best teacher and there were many useful lessons learned (which I summarise at the end of the report of that game, so won't repeat here).
We haven't made any changes to the scenario. This is an attempt to see if a more effective attack can be mounted using different tactics. I've decided to stick with the same supports - an extra Lee tank, a Red command dice and an engineer demolition team. I still feel that's a good combination for what I am attempting to achieve. As with the last game the British platoon automatically receive one Lee tank and a pre-game barrage. The Japanese have four support points and I won't discover what they are until they appear.
The patrol phase plays out in a similar fashion leaving both sides with deployment options across the table.

The early phases of this one saw the British deploy and approach the hill ready to mount an assault. The Japanese simply watched and waited. I don't think there's any need to track those individual movements and deployments phase by phase, so I'll provide just an overview.
The two Lees were the first arrivals as they had the furthest to travel. While I wasn't expecting to see the Japanese this early in the game there was no harm having the gunners on overwatch.

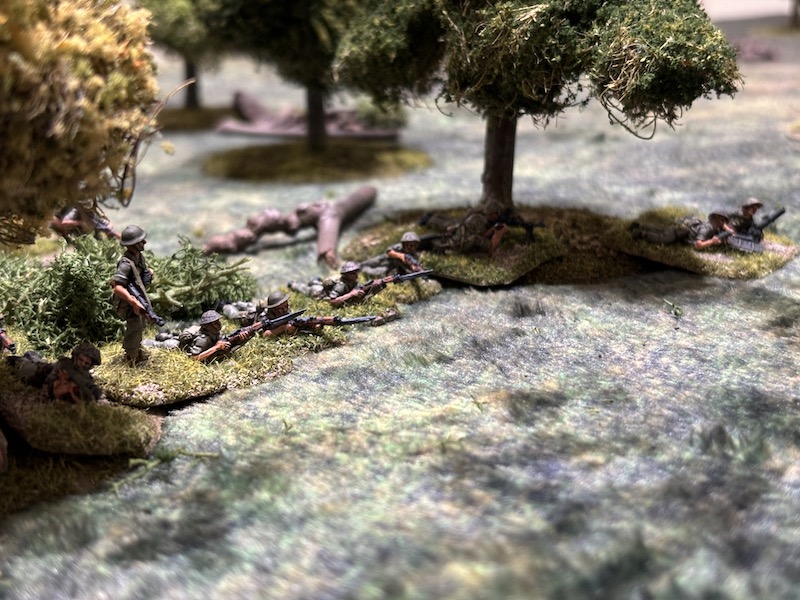
The platoon's second in command, the Havildar organised a base of fire from the edge of the woods on the right flank near the hill.


The two tanks took it in turns to move flat out while the other stood on overwatch.


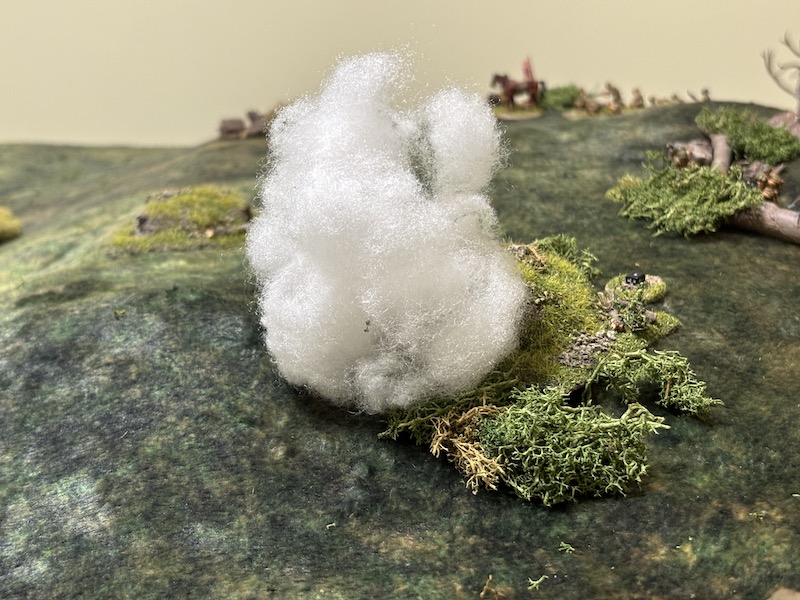
While the location of the Japanese bunkers remains unknown I'm hoping the smoke will begin to restrict line of sight and make it difficult for all the bunkers to focus on any one area of the battlefield or offer each other mutual support.

The Lee keeps watch over an eerily quiet hill.


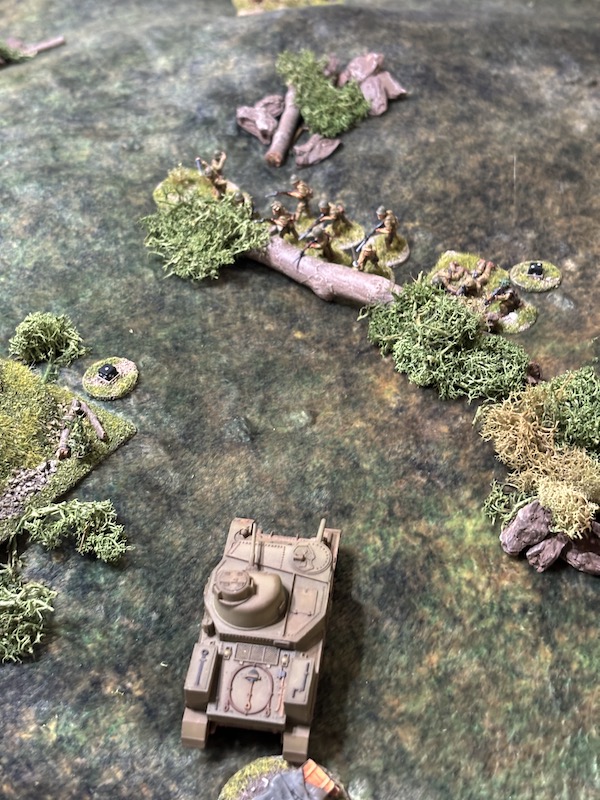
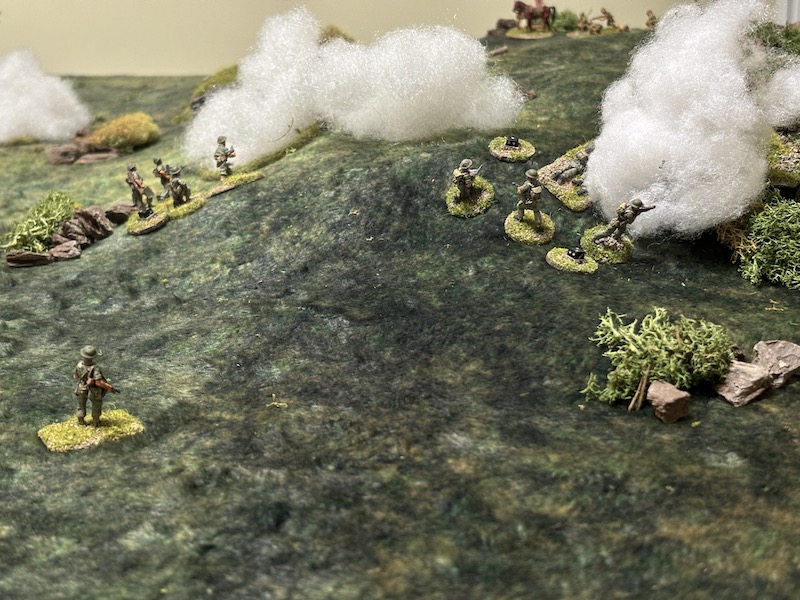
The Japanese continue to remain hidden. In the next British phase the Naik with the section in the woods assigns three men to form a scout team and he sends them forward tactically. The moment the team comes close to threatening a Japanese jump-off-point I expect to see a response.

To support the push on this flank the Lee in the centre drives flat out to join the other tank.

The Japanese remain quiet. In the next phase the commander of the Lee puts the gunner on overwatch.

The scout team remain cautious and advance tactically toward the hill. At some point I'm going to have to cross this ground to reach the hill but I'm in no hurry to do that now. I certainly don't want to gift the Japanese an easy target or an opportunity to wipe out a team.

The 2” mortar team tries to provide more cover but their smoke round drifts off to the right.

Still the Japanese hold their fire. The Havildar urges the scout team to move faster and make for the cover of the smoke to their right.

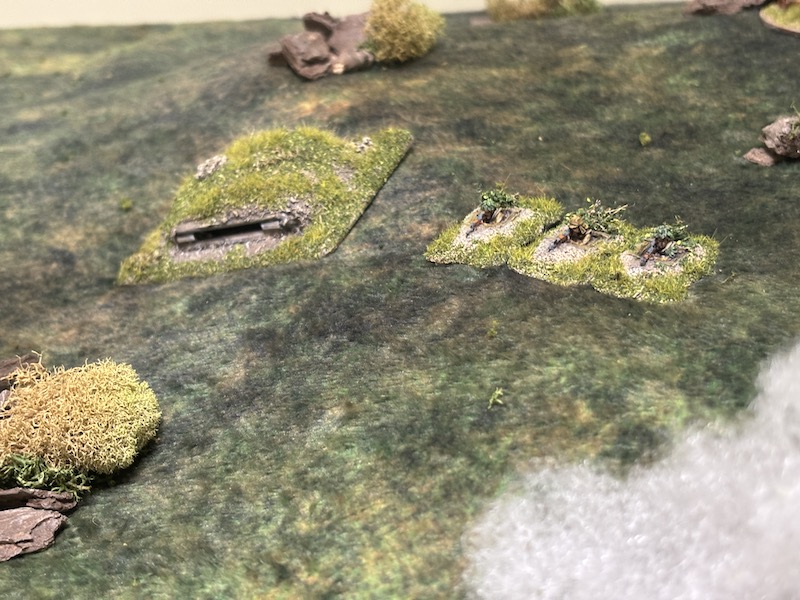
As they do, an ambush bunker appears unexpectedly and a sudden burst of MMG fire greets the scout team from the hill.


The scout team's section are on overwatch and return fire at the bunker immediately.

It has little effect other than to inflict a point of shock on the MMG crew.

In the British phase one of the Lees drives flat out to gain a direct line of sight into the bunker.

With one of the bunkers located I deploy a second section into the woods.

The Havildar orders the Bren team to lay covering fire on the bunker aperture.

The Japanese have been spurred into action but the pregame barrage does its work and two squads fail to deploy. In the British phase the command roll brings a mixed blessing. They will have a double phase but there will also be a turn end. That will see the barrage cease and the mortar smoke disappear. Nonetheless there is an opportunity for the British to push ahead while there are so few Japanese in action.
Under normal circumstances I would withdraw the surviving scout back to cover to avoid the risk of having a team wiped out. However, the chance to close down or capture the nearest Japanese jump-off-point is too good to pass up. He moves forward quickly getting to within 7". With any luck it will be closed down or captured in the coming phase.

The Lee engages the MMG bunker with the main gun but fails to hit the target.

One of the Bren teams in the woods also fires at the same target.

With that the turn ends as does the pregame barrage. With the smoke now removed the hill offers little in the way of covered approaches.

In the following phase the lone scout heads toward the jump-off-point. Unfortunately he moves slowly and although he manages to close it down, it isn't captured. I have a CoC die and would readily use it to end the turn if it would mean its permanent removal. Alas it won't happen just yet.

If the scout is to have any hope of holding his position he will need some help. The 2” mortar team send a round of smoke to try to screen him from possible Japanese positions higher up the hill. Unfortunately the team's aim is off and the resulting plume of smoke will offer little in the way of protection.

One of the sections at the edge of the wood fires at the MMG bunker.


The Bren team with the other section lays down covering fire on the same target.


He orders the MMG crew in the bunker to also target the scout.

While the covering fire does a good job of reducing some of the impact of that fire the lone soldier also proves to have a charmed life and suffers only a further point of shock.


The platoon's grenade discharger squad also deploys.


From there they can see the 2” mortar team and send an initial round of three grenades in their direction, inflicting a point of shock.

Fortune then looks kindly on the British with a command roll of 66521(1). As is so often the case, it's a double edged sword as the command options for this phase prove limited. What it will allow me to do is try to close down the nearest jump-off-point. The Lee drives flat out towards it.

The 2” mortar team aims a round of smoke toward the MMG bunker and this time their aim is true.

The following British command roll is 66421(6), can I make the most of this opportunity? The Lee drives slowly through the jump-off-point.

It then targets the Japanese trench with a round of HE from the 75mm gun.


With the MMG bunker shrouded in smoke the Havildar seizes the opportunity to push forward the assault.


He then orders the 2” mortar team to target smoke at the LMG bunker.


In the next British phase the 2” mortar team fires smoke again and this time it lands perfectly in front of the bunker.


The Lee in the centre drives flat out toward the hill.

The other Lee unleashes a round of canister from the 37mm gun at the Japanese in the trench.
One of the LMG crew is killed and the rifle team suffer a point of shock. Rather disappointingly a round from the more powerful 75mm gun fails to do any damage at all.

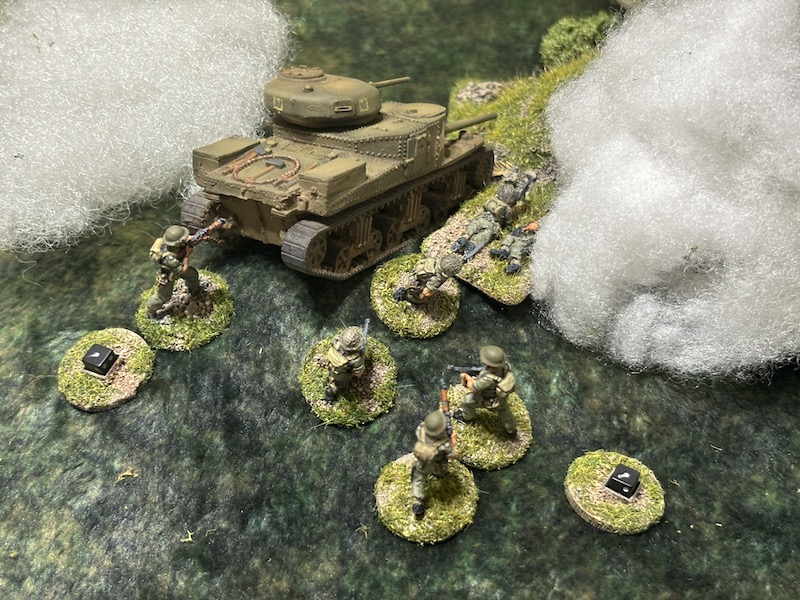
In the Japanese phase I'm in for a nasty surprise. I'd grown over confident that there were no threats to my tanks and I suspect Dave knew that might be the case. While I should have seen this coming I'm utterly disheartened to see a tank hunter team burst out from the nearby jump-off-point.

It's close enough to bring the tank hunters into contact with the Lee. I think I know how this ends. Where is the tank's infantry support when they're needed?

The hollow charge is thrust against the Lee's armour and the powerful blast has little problem knocking out the tank. Fortunately it doesn't explode in flames and the crew are able to bail out. Nonetheless it takes British morale down to seven and once again I am punished for failing to provide the tanks with close infantry support.

The Gunso rallies shock off the LMG team and the Japanese squad remains firmly in place having seen off the first attack.


That brings them closer to the hill. With the support of the remaining tank and cover from the mortar smoke there's a chance for them to close with the bunkers.

The Lee moves up the hill going flat out.

The engineer demolition team are called forward and they deploy into the tree line.

In the Japanese phase the Gunso rallies the last remaining point of shock off the squad in the trench. He then orders the LMG team to fire.

They are the only men under his command with a line of sight to the advancing British.


The Gocho then puts the entrenched squad's rifle team on overwatch.

The LMG bunker may be blinded by smoke but the squad's rifle team open fire from their spider holes.


The result is deadly. Another rifleman is killed, as is the Naik, the section's commander. That's a real blow and I decide to use a CoC die to avoid a potentially hard hit to force morale.

While the loss of the Naik is a setback I'm determined to continue pushing the assault ahead. A command roll of 44321(2) really helps and demonstrates the tactical value of a red command dice. The Jemadar deploys with a section from the central jump-off-point right in front of the hill.

The Jemadar takes command of the rifle team and orders them to fire five rounds rapid at the spider holes.


The section's Naik then works with the Bren team. He has them use concentrated fire to focus all their attention on the same team of Japanese riflemen. The Bren does the job and kills the remaining two men.

The section without the Naik charges toward the other spider holes, but they fail to close with the enemy.

The Havildar orders the 2” mortar team to fire one of their limited rounds of HE at the spider holes but it fails to have any effect on the occupants.

He then orders the nearby section to fire on the same target.

Last, he sends the demolition engineers forward.


Up on the hill the Lee targets the entrenched Japanese with both canister and HE.


In the Japanese phase the riflemen in the spider holes shoot at the oncoming section, but with only two fire dice it's little surprise the fire is ineffective.

Once again the Gunso is quick to rally shock from the men in the trench.


In the British phase the Havildar orders the section near him to maintain their fire at the spider holes.


The Havildar then runs forward to give directions to the leaderless section.


Despite that Japanese morale holds steady.

The Jemadar presses forward with his section having them move at the double towards the hill.


With his last command initiative he directs the 2” mortar team to fire smoke on the LMG bunker that recently appeared. It's off target but does succeed in covering one of the teams in the spider holes.


The Lee continues firing on the entrenched squad. This time they suffer another casualty and shock on both teams.

In the Japanese phase first the grenade discharger squad and then the LMG bunker and spider holes pour fire at the section with the Jemadar.

The Gocho rallies a point of shock before ordering the squad forward out of the trench. Realising there is little to be gained from sitting under the guns of the Lee and taking continuous punishment Dave decides to take the initiative and seek out the British infantry. Unfortunately they move far less quickly than he would have liked.

Seizing the chance to catch the Japanese moving in open ground I interrupt using a CoC die and have the Lee fire its co-axial machine gun.


However I have no grounds for complaint. The following British command roll is 663331 and I can certainly try to make the most of that. First the Lee uses its last round of canister and a round of HE from the 75 to fire at the advancing Japanese.

The fire fails to inflict any casualties but it does see the squad's shock start to build.

The Jemadar rallies two points of shock from the section he's attached to.

He uses his last command initiative to order the section to his right to move up to the MMG bunker.


The Naik with the section accompanying the Jemadar rallies another point of shock and leads the men up the hill.


However the British have the next phase and a good command roll of 65441(2) means the assault can continue to push forward. The Havildar moves up to stay within command range of the section at the MMG bunker.

He uses his remaining two command initiatives to have the men 'post' grenades into the bunker's aperture.

The Jemadar rallies off a couple of points of shock from the section he is with prior to having them move toward the other bunker.


A fairly bloody round of combat ensues. The British inflict heavy losses on the occupants but not enough to wipe them out. The Gocho is wounded and three of the four LMG crew are killed. However the defenders sell their lives dearly. The British lose five men, including the Naik who is killed.


The Lee moves normally toward the Japanese squad hoping to take advantage of their shock and scatter them.


In the Japanese phase the Gocho rallies shock and leads the men against the nearest British section.

The odds certainly don't favour the Japanese. This is no more than a desperate attempt to drive down British morale before the bunkers are eliminated. Unfortunately things don't work out well for them. The British drive them off with their Bren gun and submachine guns, inflicting six casualties and three shock while they themselves lose only two men and suffer a single point of shock.

The Gocho is one of the casualties and he is wounded. However the losses have left the two leaders leading a single soldier and having been defeated in close combat they break and fall back 18".

The survivors of the British section stand and hold their ground. They may have lost their Naik but they have continued to soldier on valiantly without him, taking out the MMG bunker and driving off the Japanese squad.

The Jemadar then sends the three remaining men of the section with him to the aperture of the LMG bunker.

They will be in position to post grenades in their next phase but the Jemadar hopes that won't be necessary. He calls over the men from the section who drove off the Japanese squad.

He joins them at the rear door of the bunker in an attempt to finish off the occupants once and for all.

It proves enough to do the job, killing the Gocho and wiping out the remainder of the LMG team. The Jemadar is wounded in the process but it matters little, his men have eliminated a second Japanese bunker and that's enough to secure victory for this scenario.

At the end of the previous game I expressed my opinion that it was not the tanks that were the bunker busters it was the infantry and so this game has proven. In fact that one rifle section can take credit for much of the effort. Despite losing their section commander they went on to wipe out a team in spider holes; destroy an MMG bunker in a grenade attack; drive off a Japanese squad in close combat and, last but not least, deliver the coup de grace to one of the LMG bunkers. They're made of stern stuff.
That was a much more satisfying game for the British and I'm pleased we were not too hasty in making any changes to the scenario based on the initial game. It still remains tough for the British but by no means impossible. A combined arms attack certainly reaped better rewards than one overly reliant on a single arm.
One thought on playing the Japanese in this setting. In the first game Dave was successful using a fairly linear defence and concentrating as much fire as possible on the British infantry as they tried to approach the hill. That worked well in that situation, mainly because I played into his hands. I wonder if the Japanese should give thought to a defence with more depth given only one fortification can deploy from each jump-off-point? Until it could be suppressed or blinded by smoke I felt the entrenched squad at the back of the bunkers was effectively positioned to cover the approaches and protect the rear.
While the Japanese don't want to be outflanked I wonder if a more compact position with bunkers and entrenched infantry offer depth and mutual support would make for a more difficult position to break? Perhaps two jump-off-points forward and one back or vice versa? It would depend on circumstances but it certainly gives me some food for thought about how a Japanese defence might be woven together.
That finishes our play test of the campaign. Dave and I will share some thoughts and notes on any final adjustments we feel need to be made before we try to find a way to have this published and made available to more people.
Another great report. Sounds like it should be a fun campaign.
ReplyDeleteThanks, in the meantime I’m doing a bit or research and firing out questions to people who might know to determine the situation with those bow MGs in the Lee. You were correct to point out they were removed (and from what I can see one was removed in them in Feb ‘42 and the other by June of the same year. That said I’ve now read two first hand accounts from tankers in Burma in ‘44 talking about firing the bow MG. Given the Lees were brought to Burma specifically to suppress/destroy Japanese bunkers perhaps it was felt there was a role for the bow MG. More research needed on this.
DeleteGreat stuff - a tough battle but winnable for either side it seems. Looking forward to seeing the final pint-sized campaign emerge in due course.
ReplyDeleteThanks for following along, it’s been an interesting journey.
DeleteA very interesting post, enjoyed seeing these games, your table and miniatures are top notch.
ReplyDeleteThank you, glad you’ve enjoyed following our progress.
DeleteBrilliant! It's so good to see that tactical choice is a strong determinant on the outcome. It was interesting to see a number of lacunae in rules concerning close combat vs the bunker and the Japanese 'keep close' rule - do let us know any resolution to these. Also, I don't recall seeing a tank overrun before. So, all in all, quite an instructive game - you seem to have yourself a campaign.
ReplyDeleteThanks, a good outcome I think, just goes to show that often it’s not the scenario that is broken, it’s the player’s tactics. I’ve seen this often at the club where players deride a scenario as a bad one but then you see how it was played and you question the tactics rather than the scenario design. Agree, it would be good to get clarity on a few of those rules. I can see a case for considering an attack on a bunker from the rear door as one from the rear, after all the occupants haven’t seen the enemy approach and the first thing they are aware of is the door being kicked/blown open. A nasty surprise I’d imagine.
DeleteA great game report! The improved tactics paid off. I've got to feel for that lone scout, running like hell for cover with Japanese bullets kicking up the dust at his heels.
ReplyDeleteYes indeed, but with that sort of luck it would be a good day to buy a lottery ticket! Thanks for following along, glad you enjoyed it.
DeleteWell that went well for the Imperial forces, it certainly endorsed your decision to play the scenario again.
ReplyDeleteI absolutely loved these. I would absolutely consider a bunker attacked by the rear door to be attacked in the rear tho.
ReplyDelete