
We reach the final map and the main Japanese position in our Nunshigum Ridge campaign, a feature the British referred to as the 'Northern Bump'. It was here that the Japanese had built a network of bunkers and were determined to hold their ground.

The difficulty in evicting them was the principal reason the 3rd Carabiniers had gone to such lengths to bring their Lee tanks up onto the ridge itself. It was now the task of the Dogra Regiment to work in tandem with the armour and break the Japanese position.
As I've said in the earlier posts on this campaign, this is a play test of a draft campaign and a trial of the new bunker rules that feature in the Chain of Command Far East Handbook. As such there is a double learning curve for us. First, to ensure we end up with an enjoyable campaign that gives both players a reasonable chance of achieving their objectives. Second, to learn how the bunker rules play out in practice so that we can achieve that first aim.
The Japanese have two platoons and must assign them across the three maps before the campaign begins. Dave has decided this is the key position and assigned an entire platoon to hold it. That alone may make this a tough proposition for the British. This final scenario is based on 'Fight for the Chaung' in the Far East Handbook and the Japanese defenders benefit from two squad prepared positions, one MMG ambush bunker and four support points.
The British have a fresh platoon and automatically receive one Lee tank and a pre-game barrage. They can also choose supports up to ten points. Their objective for this scenario is to knock out two of the three bunkers.

The Japanese have the numbers and several strong defensive positions but the one thing they don't have is much in the way of anti-tank weapons. They must rely on tank hunter teams. The British are able to add a second tank to their force should they choose and it would appear on the surface that this gives them a very strong advantage.
However, before the tanks can deal with the bunkers the infantry will have to find them. The question is, can they do so without taking excessive casualties?
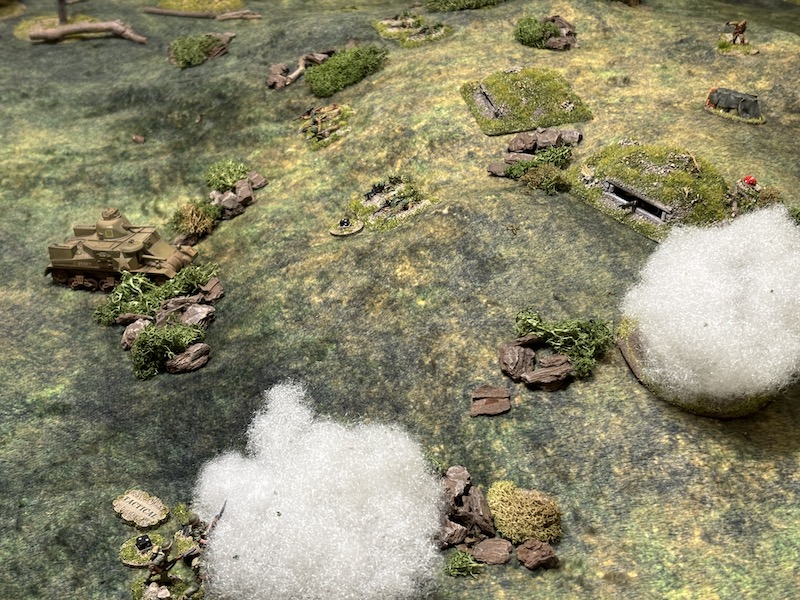
The patrol phase is fairly straightforward and the Japanese are positioned to cover all sides of the main hill. While the British also have deployment options across the table this is a position that will prove difficult to outflank.


The Japanese elect to remain hidden and so in the next phase the Lee moves flat out towards their central jump-off-point.

It's joined by a rifle section and the Naik puts both teams on overwatch.

The second Lee arrives and the gunner is placed on overwatch (I know, I know, that's not a model of a Lee. A Grant will serve in that role today. I trust we can all agree it's close enough).

The Japanese then have a run of phases, initially Dave decides to remain hidden, but as the run continues he begins to rue not trying to deploy and deal with the British. Hindsight is a wonderful thing! When the run of five phases comes to an end he has nothing to show for it but a single CoC point.
When the British phase arrives the gunner in the Lee in the centre is placed back on overwatch.

On the right flank the Havildar (a senior leader and the platoon's second in command) arrives with one of the sections and he places the men on overwatch.

That establishes a fairly strong base of fire that will hopefully allow the British to approach the hill.

Once more the Japanese choose to remain hidden and so in the British phase I decide to move one of the tanks to the right to support a push around this flank. The Lee goes flat out to join the section.


In the centre the platoon's 2” mortar team deploys.

With tanks and infantry in place I decide now is the time to try to probe forward to the hill and search out the Japanese bunkers. The Naik on the right flank assigns three men to form a scout team.


The Havildar moves to the rear of the Lee. From there he can use a command initiative to operate the tank telephone and direct the fire of the gunner. I'm hoping that gives me as many options as possible should the Japanese suddenly show themselves.

The movement of the scout team provokes an immediate Japanese response. A sniper fires from a concealed position on the British right.

He targets the scout team, but they survive unscathed.

Their section is on overwatch and attempt to identify where the shots have come from but they fail to spot the sniper.

In the British phase the 2” mortar team fires smoke towards the hill to cover the advance of the scouts.


The scouts then move swiftly to gain its cover.

The Lee in the centre makes its way forward in support.

I don't want to leave the scout team too isolated. With the smoke as cover the Naik leads his section out of the woods.


That provokes a further response from the Japanese. One of their rifle squads deploys successfully through the barrage into an entrenched position.


The sniper can no longer see the scout team and so he shifts his attention to the rest of the section following them.

This time his aim is true. A rifleman is hit and killed.

The following British command roll is 66533(3) providing a double phase and quite a few command options. The Lee on the right move flat out so that it can gain a line of sight around the smoke to the recently arrived Japanese.

The Lee in the centre moves more slowly to the base of the hill.

Despite approaching close to their jump-off-points the Japanese are yet to reveal any of their bunkers.

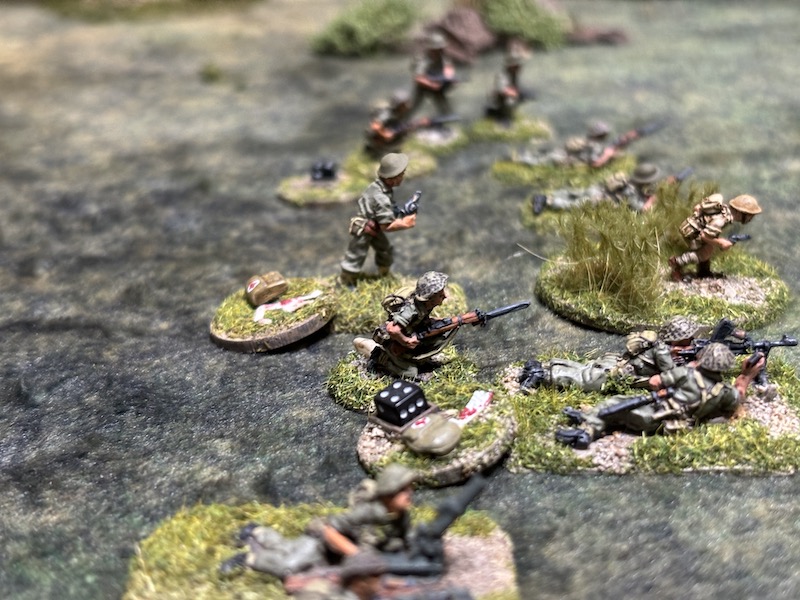
The Naik then leads his section toward the cover of the smoke.

That move is violently interrupted by a sudden and unexpected burst of fire from a hidden MMG ambush bunker on the hill.


It catches the section moving in the open. Two of the rifle team are cut down and the Bren team suffers two points of shock. The infantry may have succeeded in locating a bunker, but this is an expensive way to do it!

In the subsequent British phase the Lee in the centre targets the bunker with a round of HE from its 75mm gun. Unfortunately it's not on target.

The Jemadar, the platoon commander, deploys in the centre and orders the section to fire at the bunker.

Despite five hits the solid construction of the bunker means the crew survive unharmed.
He then orders the 2” mortar team to fire smoke but they fail to hit the target. In hindsight it would have been far more useful to have the section lay covering fire on the bunker. It may not harm the crew but would limit their effectiveness.

The section at the base of the hill move tactically toward the smoke and much needed cover. Despite carrying a couple of points of shock they all make it there successfully.

In the Japanese phase the Gunso fails to deploy through the barrage but a second squad does succeed. They appear in a prepared position with an LMG bunker and spider holes for the rifle team.


The Jemadar is hit. He's wounded and out of action for the rest of the turn. That's a blow to British morale which drops to seven.


Another Japanese squad deploys successfully and once again they are in a prepared position.


At this point Dave has spotted an opportunity and he's about to punish me for making an absolute 101 newbie error. In my haste to have the Lee support the section on the right it set off and left the Havildar out in the open. He makes for a very attractive target and it's no surprise to see the newly deployed squad pour all their fire in his direction.

I'm fortunate he escapes with only a wound, but it's enough to see British morale fall to six.

The Chui, the Japanese platoon leader, deploys at the rear of the bunkers.


He's not about to let this opportunity to hit the Havildar pass by and he orders the MMG to open fire.

Somehow the Havildar manages to survive but he is wounded again. That takes his command initiative down to one and drops British morale to five.
The wounding of the Jemadar was unlucky and just one of the fortunes of war. However the wounding of the Havildar in these circumstances and the blow to the platoon's morale can only be put down to my incompetence. The wounding of both senior leaders has hit the platoon hard.
In the British phase the Lee at the base of the hill fires a round of canister into the nearby spider holes.

The riflemen suffer two points of shock.

The gunner then fires a round of HE at the MMG bunker.


This time his aim is good and the round hits. It's enough to suppress the MMG and kill two of the crew. That's what the tanks are here to try and do, but can British force morale hold up for long enough?

Before he becomes a complete liability the Havildar moves into the cover of the woods and out of line of sight of the Japanese.

The Lee on the right moves ahead slowly.


Unfortunately it has little effect other than to inflict a point of shock.

As if to show disdain for the nearby Lee the Gocho rallies shock off the moment the Japanese phase arrives.

The Chui now shifts all the fire from the squad prepared positions to the British section in the centre.


The Jemadar is hit once again. It's not a good day to be a junior officer or NCO in this platoon. This time it's a light wound that reduces his command initiative. Unsurprisingly the wounding of a senior leader is another blow to British morale which drops to three.

The Bren and Rifle teams also suffer more shock.

Not everything is going the way of the Japanese and their grenade discharger squad fails to deploy through the barrage.
In the British phase the Lee in the centre continues to target the MMG bunker with its 75mm gun but fails to hit the aperture. In hindsight I can already identify a tactic that I have been failing to exploit and it's a major omission. While it may be difficult for machine gun and small arms fire to inflict casualties or shock on the occupants of the bunkers there is absolutely no good reason why I shouldn't be using both the tank bow machine guns and the infantry sections to put down covering fire.
I think the suppressive effect could severely limit how damaging their return fire can be. Rather than bog down in a firefight I should be taking advantage of that suppressive effect to move on the bunkers and look to eliminate them with grenades, close combat or with the engineer demolition team. Definitely a lesson learned from the experience of this game.
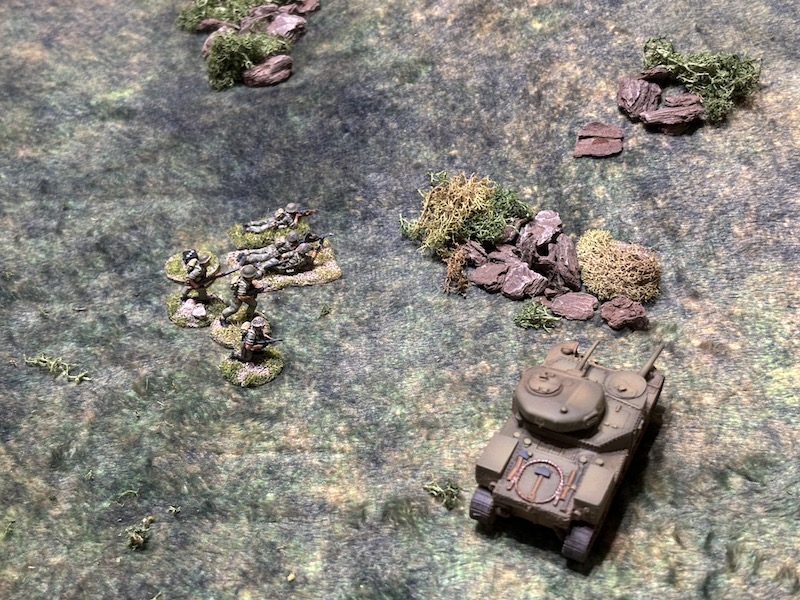
The Lee to the right of the hill moves slowly around the smoke.

Once the commander has a line of sight to the MMG bunker he orders the gunner to fire, but he too fails to hit the target.

In the Japanese phase the Chui has both squads fire again from their prepared positions.

The fire doesn't inflict any casualties but the shock is starting to mount.

At the second attempt the grenade discharger squad manages to deploy through the barrage successfully.

They too target the section in the centre. The Bren team take another casualty and that reduces the crew to a single man.

The British are reduced to three command dice and a roll of 651 illustrates how difficult any cohesive command and control has now become. The 2” mortar team fire a round of smoke and manage to screen off one of the bunkers and the grenade discharger squad.

It proves a worthless exercise. Before he rolls his command dice Dave uses a CoC die to end the turn. All the smoke is removed.


In terms of the scenario design it's apparent that we may need to look at the two forces. At the moment it looks like it could possibly favour the Japanese. Giving the British more force seems less like the solution. A bigger force is only likely to stretch their ability to command effectively. If anything, reducing the Japanese force is probably a more viable alternative. Dealing with three bunker positions presents quite a challenge in itself, is the third Japanese rifle squad and the grenade discharger squad too much? Or does that swing the advantage too favourably toward the British? We are not sure about either solution at this stage.
Then again, have we let the slightly unusual circumstance of so many wounds to senior leaders warp our evaluation? Which brings us to consider what the British might have done better tactically to break the Japanese defence.
While the campaign was designed to try out the bunker busting rules, I suspect I've put too much weight on that task being performed primarily by the tanks when in practice it was more a combined arms operation. Applying the rules in the FE Handbook then the likelihood of armour hitting the bunkers with their main armament is about 17% or 1 in 6. Not great when you consider your chance of success may come only once in every six activations. That's a lot of command dice used up for little effect. However, if the commander spends an additional command initiative to lay the gun the odds improve quite substantially to 28%, almost 1 in 3.
Now, if an infantry leader uses the tank telephone then they too can direct the gunner. This costs a single command initiative and gives the same benefit as the tank commander laying the gun. This was the reason I moved the Havildar to the Lee during the game. This ability to activate a tank without the use of a command dice and to simultaneously improve the likelihood of a hit is considerable. That greatly increases tactical flexibility because it still leaves the leader with command initiatives to use. For example, a junior leader using a tank telephone could activate the tank gunner to fire with one CI. If the HE fire doesn't have the desired effect he can then use his second CI to have his section lay down covering fire on the bunker. Alternatively if the bunker is suppressed he's free to use that second CI to have the section move. All this from a single command dice roll of 3.
While the Far East Handbook makes reference to Shermans having telephones there is also evidence of the Lees at Imphal having them. During the battle 'B' Squadron, 3rd Carabiniers were sent to support a large supply and engineering depot on the Kohima Road which was coming under increasing pressure from the Japanese. This anecdote is enlightening:
"A Corporal from 864 [Engineer] Company received a few choice words from a tank commander when he climbed onto one of the tanks and banged on the hatch cover to attract his attention. The Corporal was left in no doubt that if he needed to talk to the tank commander he should use the telephone at the back of the tank!"
Evidence it would appear that at least some of the Lees had telephones - even if the men from the Engineer Company had no idea of their intended use.
There also appears to be photographic evidence. Pictured below are two Lees in Burma from 1944/45 and both appear to have a TIP (tank infantry telephone) situated at the left hand rear of the tank. This is something you don't see in images of these tanks earlier in the war, which would support the view that these are later additions.


The rear box attachment certainly bears a strong resemblance to the one in the picture below situated on the rear of a Sherman on Okinawa. This is most definitely a TIP and an infantryman can be seen using it.

Nonetheless even with a 28% chance of a hit, it's quite clear that the outcome of a bunker assault cannot be dependent on the success of the armour. So, what else can be done?
A full British section engaging the occupants of a Japanese LMG bunker in close combat should have a distinct advantage. The Japanese may benefit from hard cover but as any close combat attack must be made via the bunker's rear door their LMG won't contribute to the defence. That means three to four Japanese riflemen and a junior leader (9 dice) will have trouble holding off an Indian army section composed of seven riflemen, two men with submachine guns and an SMG armed junior leader (17 dice). Assuming average dice the British should expect to inflict 5-6 kills while the Japanese can do only 3 in return. In most cases we can expect a full section to wipe out the occupants in a single round of close combat.
Alternatively there is the option to approach the aperture from outside the firing arc and move into position to post grenades. The British grenade always uses 3D6 and if successfully posted the number of kills is doubled. The section's full complement of three grenades can expect to kill six occupants on average dice. Another resounding case for allowing infantry to finish off the destruction of a bunker.
Of course the key to success in either of these situations is to create the conditions where the infantry can actually move close enough to carry this out. That's certainly never as easy as it sounds.
That brings us to look at ways of suppressing the bunkers rather than killing the occupants. If the infantry will deliver the coup de grace how do we get them there safely? Covering fire is certainly something I neglected to use in this game and I can see now that it's something that needs to be used much more.
Given how difficult it is for infantry fire to inflict casualties or shock on a Japanese fortification it seems that engaging in a firefight with one seems like a fool's errand. During this game the fire on my section in the centre from the bunkers and spider holes was at effective range. Had the Japanese been under covering fire their chance of a hit would have gone from 1 in 3 to 1 in 6. That's a substantial difference. Both the infantry sections and the tank bow or coaxial machine guns can perform this suppressive role and I think it's key to finding a solution.
The other very useful tool is the 2" mortar and its smoke rounds. It may not be effective in suppressing or causing casualties but the ability to blind a bunker or screen one can't be overstated.

If it is going to be difficult to neutralise the bunkers with firepower alone then ideally all of the elements above should combine to create the circumstances whereby infantry can close with them. Once out of their firing arcs the infantry have a much better chance of eliminating the occupants. I'm no longer seeing the solution here as the armour busting the bunkers, rather I'm seeing the infantry doing the actual busting and the armour providing the suppressive fire that lets them reach the target. If the armour can inflict damage in the process, so much the better, but it shouldn't be dependent on their success.
With that all said we've decided to give this one a replay without making any further changes. Let's see if the British can do better with improved tactics and without the slightly unusual impact of so many wounds to senior leaders to drop their force morale. You can see if they manage to be more successful in this post.
You can follow all of the games in this campaign and in many others on this page.
If you've enjoyed following along and would like to Buy Me a Coffee to help cover some of the costs of running the blog you can click through at the link or on the tab in the right hand column of this page.
A fine read there Mark, it's certainly worthy of a replay before making any changes given the high leader hits and the thing we won't mention but I am sure have all been guilty of at some point
ReplyDeleteA good analysis of the British options - always easier after the event! I think a second go at the scenario is the correct option.
ReplyDeleteYour analysis seems sound to me and worth trying. I’m sure you’ve seen it but does the George MacDonald Fraser book have anything on the tactics used?
ReplyDeleteI don’t know the CoC rules but one thing that strikes me is that the Japanese start with higher morale. I wonder if this was really the case. They are certainly fanatical but are past the stage of easy victories and they were often starving as their logistics had collapsed. On the other hand, the Allies are on an upward curve, haven’t been defeated for a while and are well supplied with (relatively) modern equipment.
This touches on a bugbear of mine in WW2 games. The Axis always seem to have better morale (and for the Germans, better equipment). If this was really the case, why did they lose?
Keep on the good work. These blogposts are fascinating.
The unsporting allies committed greater numbers in frontline and support when attacking.
DeleteToo often the defending players can simply sit tight and shoot.
And many scenarios (or point systems) provide far too few troops to attack with.
I think there's a reference to phones for this very unit in "forgotten armour". One thing I do note about the historical battle is the number of TC casualties from small arms whilst directing unbuttoned. Not doable in CoC really, and the risk of a tank falling off the mountain!
ReplyDeleteAnother great report. As a reminder, the Grant/Lee doesn't have a bow machine gun. Early models had 2 fixed forward firing ones controlled by the driver but probably not in 1944. I think directing fire for an improved to his roll should probably limited to the tank leader. An infantry officer activating positions in the vehicle by phone makes sense but not to the degree off involvement of aiming the gun versus just designating a target.
ReplyDeleteOn the other hand, "No, I can see it better than you. You're overshooting by about 10 yards" would seem to improve aim.
DeleteThanks Chris. Just a follow up to your comment on the first game about bow machine guns. I posted this quote as evidence that seems to be to the contrary:
DeleteI’m currently reading Bowsher’s Forgotten Armour and this is quoted in the account of Nunshigum:
“They stormed in with pole charges, Freer opened fire, but the Lee’s bow machine gun only elevated and depressed, there was no traverse. He could spray up the side of the tank to deter the Japanese, hitting anyone who crossed the line of bullets he fired, but little else.”
Forgotten Armour: Tank Warfare in Burma by Jack Bowsher
Do you have a source that confirms the removal of the bow in the Lee because this quote would suggest at least some retained them.
As for directing the gun from the phone, evidence I’ve found suggests the less restricted line of sight from the phone actually allowed the gun to be targeted more accurately and talked on to the target. Not without some risk of course, as the officer is far less protected than the crew in the tank. The intention of the phone was always to allow the infantry to better direct he tank towards targets in their support of the infantry.
Very interesting AAR - looking forward to reading the follow up refight.
ReplyDeleteReally pleased you’re playing this again unchanged. The different tactical approach is something worth trying, and if it works demonstrates how CoC is a great tactical problem solving set of rules.
ReplyDeleteI did wonder about having the tanks walked up to the bunkers by someone on the phone, but presumably there is no way they can move together without risking the foot slogger being left behind?
A steep learning curve, but lessons were learned. Looking forward to the rematch.
ReplyDelete