

In the previous game the Firefly was knocked out by an entrenched PzIV.

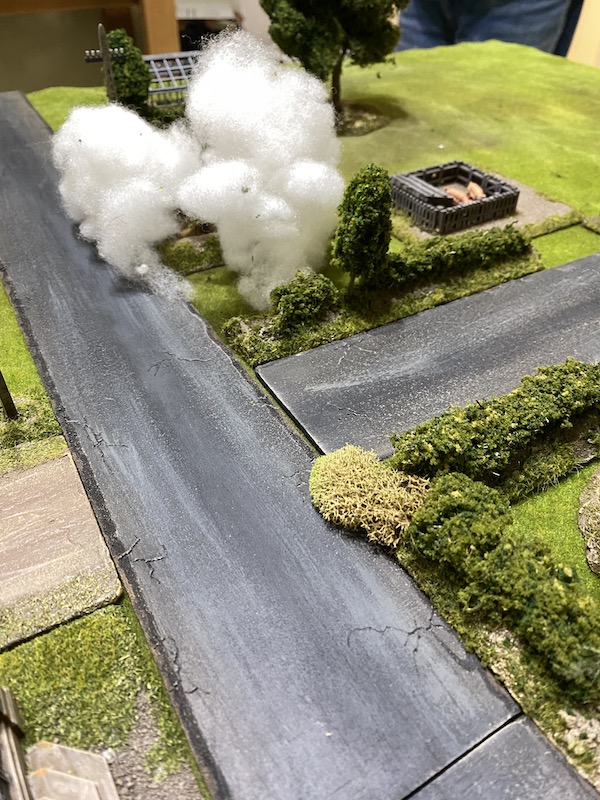
As historically these games occur only hours apart we will keep the entrenchment on the table for this second game. Whether it is still occupied by a tank will remain unknown for now, but at least the British have an idea a threat could emerge from there (and yes, I did make an empty tank scrape for moments like this!).


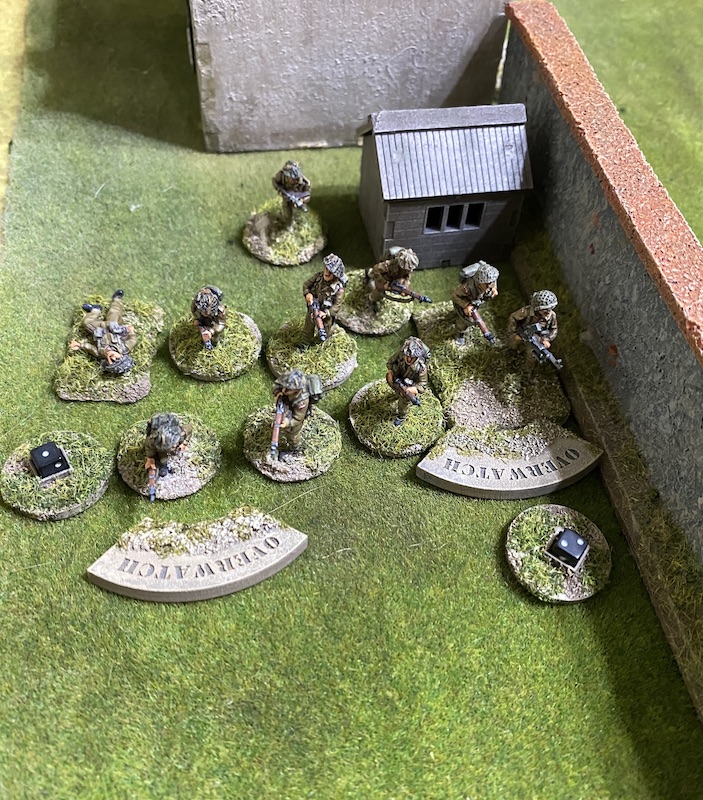
They take up overwatch positions facing out towards the crossroads.


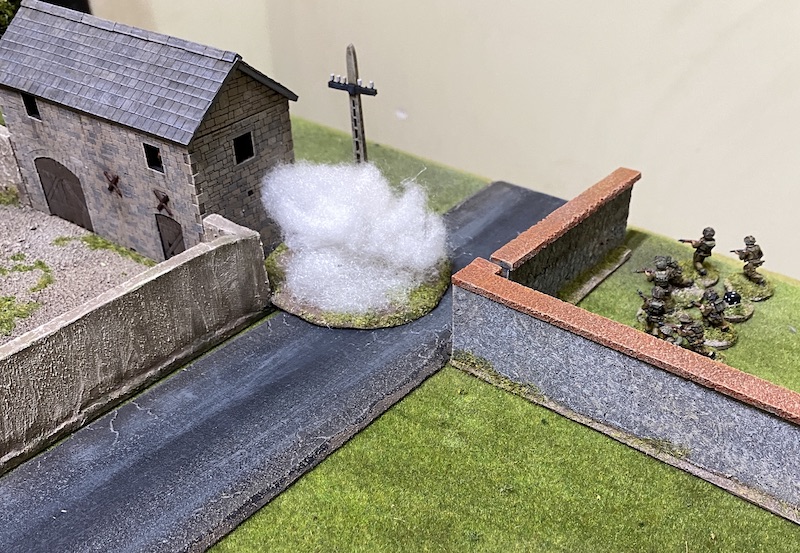
The round lands on target and blocks the line of sight. That's a relief and should enable the section in the open to move to cover before it can be fired on again.

The corporal rallies a point of shock and orders the section to move at the double to the wall.

They don't quite reach it but do come close enough to be concealed from the the barn should the smoke disappear.


For the moment that will put a stop to any thoughts I might have of sending that British section over the wall.


A well placed round of HE smashes into the farm building and the Germans suffer shock and another casualty.

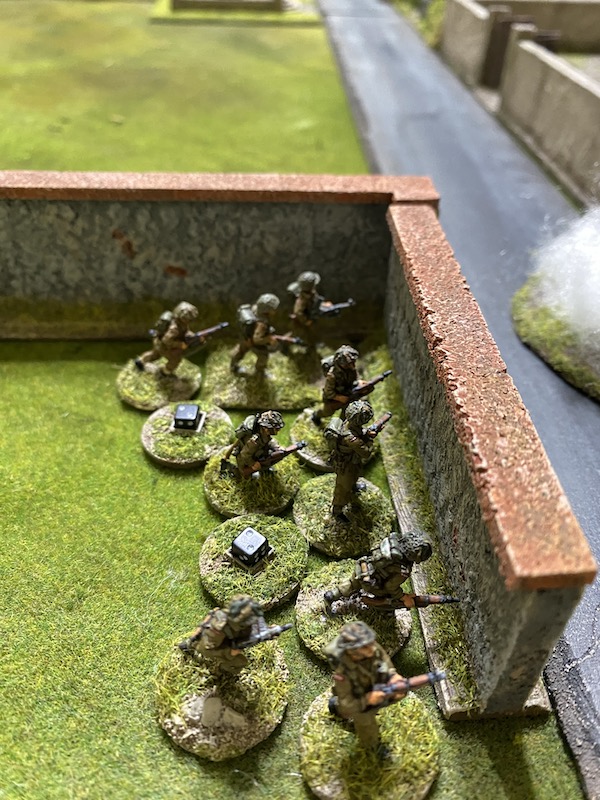
The British section then moves right up to the wall, ready to clamber over should it become safe to do so.


Without a direct line of sight themselves the mortar team's aim is not as good as it might be. The smoke round misses and lands on the jump-off-point beyond the tank scrape.


For now the British section is safe behind the high farm wall, but with the smoke gone it would be very unwise for them to consider climbing over just yet.

The tank commander controls the gunner's fire and orders him to target the Sherman. He needs only a 4 to hit and to my relief and Dave's consternation he rolls a 2.


That's a lucky escape and for now at least the Sherman survives.


He puts the two teams of the nearby entrenched squad on overwatch.


This time it lands on target.

That's effective enough, but sadly it's too late for the Sherman crew.


I was hoping to block the crossroads and make it difficult for any Germans deploying from the jump-off-point on that flank from targeting the open field. Unfortunately the smoke was off target although it does fall around the PzIV and block all of its line of sight in that direction, so it wasn't totally wasted.


As per the campaign notes the jump-off-points on this table remain as they were at the end of the first game.

The British have fourteen support points and I decide to stick with my original plan to lead the way with armour. Support will come in the form of an M4 Sherman, a Firefly and an Adjutant.
We begin with British force morale at eleven while the Germans are at nine. That high morale should allow the British to maintain the tempo of the assault even if losses are suffered.
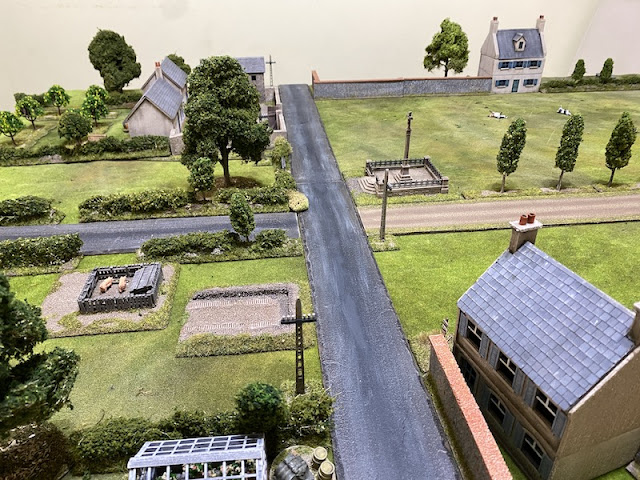
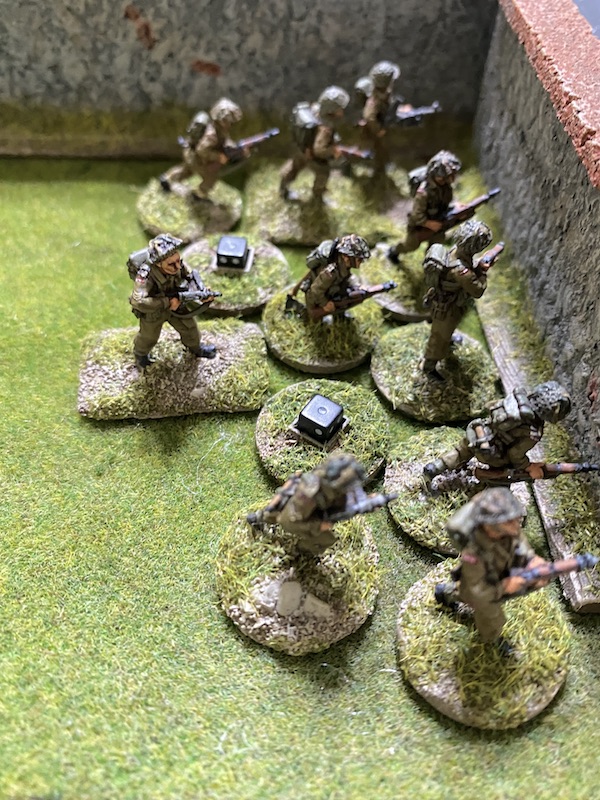
They have the opening phase and it begins well. Their first section deploys successfully near the farmhouse and the corporal puts both teams on overwatch.


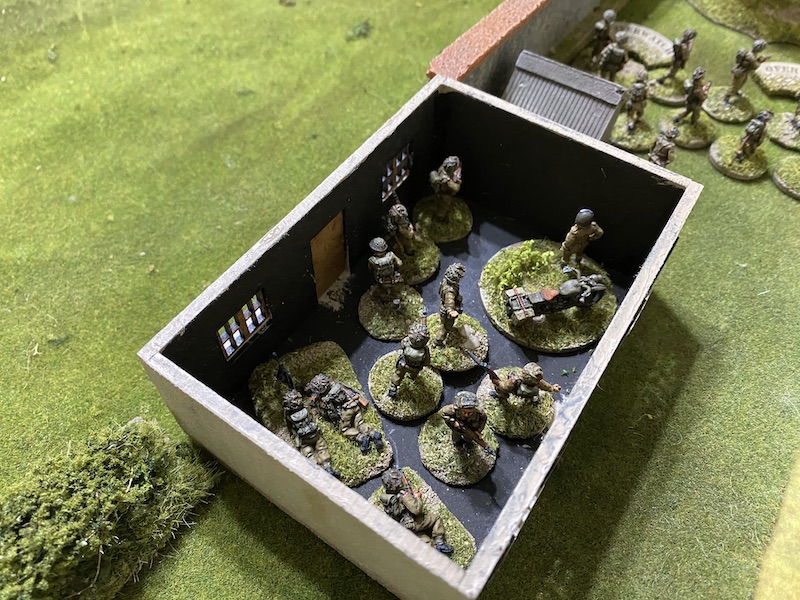
A second section also deploys successfully, this time into the ground level of the farmhouse.

The platoon sergeant sets out to join them but he is lost in the mist and won't be able to attempt to deploy again until the following turn. I can't complain, this is a much brighter start than the British experienced during the first game.
In the German phase one of their squads deploys successfully through the barrage. They appear in the barn at the main farm with one MG42 team taking up position facing out towards the recently deployed British section.

Their platoon in this campaign is under strength and with only six men and a junior leader the squads can be quite brittle. At this point I note that Dave has taken the wise move of using one of his support options to draft in five additional riflemen to disperse among the squads to increase numbers.
Fortunately for the British the barn has only one window facing toward them allowing only a single MG42 team to take that position. Nonetheless, the squad's scharführer uses the German characteristic maschinengewehr to maximise the amount of fire that they can pour onto the British section.

They are caught in open ground and the rifle team loses one man and both teams suffer shock. First blood of the campaign goes to the Germans but the British are fortunate, it could have been worse.

The section is on overwatch and they return fire.
Despite their hard cover the Germans suffer three kills and a point of shock. However it's at this point the British discover the Germans have strengthened this building and turned it into a bunker, so the first kill will be ignored. Nonetheless that's a result neither of us expected and those are casualties the Germans can ill afford.

The platoon's oberscharführer (senior leader) attempts to join the men in the barn but he fails to find a way through the barrage.
In the British phase the platoon's 2” mortar team makes a welcome appearance beside the farmhouse. I'm hoping a well placed round of smoke will blind the Germans in the barn.


The following German command roll is 55531 which quickly adds CoC points. That's something I sense could be critical in these games. A timely interrupt or ambush could have a major influence on the outcome.
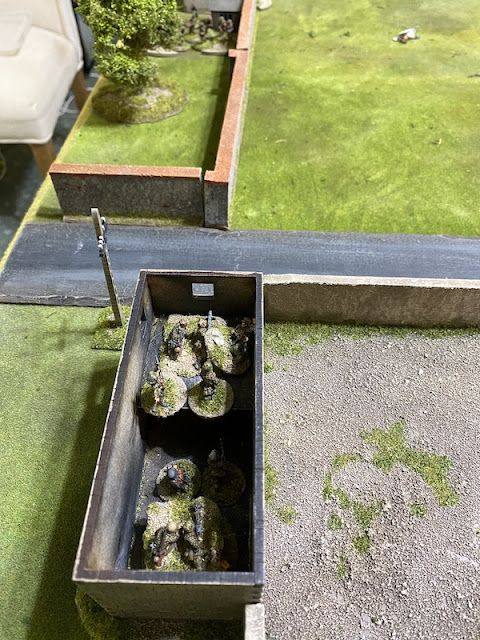
A second German squad deploys successfully on their left flank. They are entrenched by the barn and placed on overwatch.


The following British command roll is 66431 and the double phase is very welcome. Can I make the most of it? The M4 Sherman arrives through the mist and immediately targets the barn.


Unfortunately the platoon's lieutenant is lost in the mist and so he joins the platoon sergeant wandering in the gloom in search of their command. Hopefully they will have more luck finding the platoon in the second turn.
The section in the farmhouse has line of sight to the tank scrape and so the 2” mortar team fires smoke in that direction.


The following German command roll is 66631 which creates an interesting turn of events. Not only will it bring a double phase, the turn end will lift the restriction the pregame barrage has put on German deployment. That's a worrying development for the British. Fortunately the barrage is still in effect for this phase and when the Germans attempt to deploy the PzIV it fails.
In the barn the MG42 team drop down to the ground level, no doubt to try and avoid the attentions of the Sherman.

When the turn ends all the smoke is removed. If there is any consolation the start of a new turn will mean the British can make a second attempt to deploy the platoon's two senior leaders.


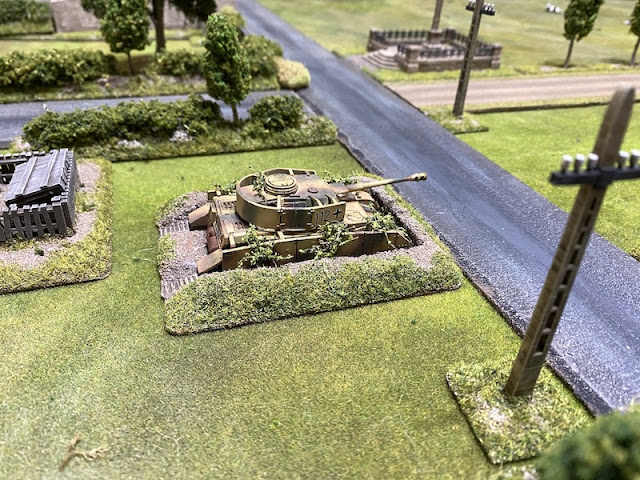
Things begin to look more ominous when the next German command roll is 66653. Not only another double phase it also sees them acquire a full CoC die. To make matters worse now the PzIV has no problem deploying and as I had suspected it was still concealed in the tank scrape.


The following command roll is 65422 which will see the run of German phases end and to my relief it won't see the PzIV commander activate in this phase.
The platoon's oberscharführer deploys behind the main farm.


He then orders the squad to leave the barn.

When the British phase arrives the command roll is 64421. This presents me with a real dilemma. I could try to deploy the Sherman Firefly. If it can hit the PzIV it has a very good chance of knocking it out, but.... it may not make it through the mist. If that happens there is no opportunity for the M4 Sherman to act. I'm guaranteed being able to activate the M4 but there's only a 50% chance of deploying the Firefly. I think it's a case of the bird in the hand with this one and so I decide to activate the commander of the Sherman. I think the best option is to hope for a hit on the PzIV, if that's unsuccessful then I'm hoping the 2” mortar team can drop a round of smoke to block the line of sight.
While that seems like a decent plan I've forgotten one critical thing - the Germans have a full CoC die and before the Sherman can fire off a round of AP the PzIV commander interrupts and the tank opens fire.

This time it makes no mistake and hits the target. Inflicting six AP strikes which the Sherman's armour is unable to resist. It is knocked out and explodes taking British force morale down to eight. The table is turning into a tank graveyard!
On reflection, perhaps it might have been worth taking a gamble on deploying the Firefly? Had it been successful it would have been able to fire off at least one round of AP without the PzIV interrupting. Too late now.

The platoon sergeant's second attempt to deploy succeeds and he joins the 2” mortar team. He orders them to send a smoke round towards the PzIV.


Fortune is favouring the Germans today and their next command roll is 66442 and another double phase. With the threat of the Sherman removed the panzergrenadier squad heads back to the barn.


In the following phase one of the squad's LMG teams returns to their former position in the upper level.
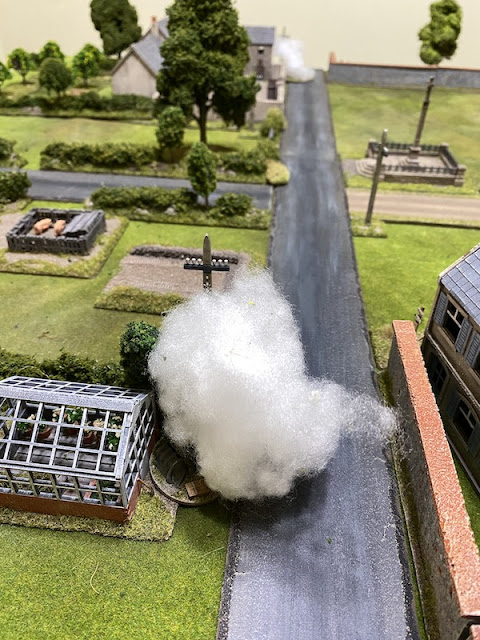
The following British command roll is 66542 and it's their turn to try to exploit a double phase. The platoon sergeant has the 2” mortar team send another smoke round towards the barn.

He then moves forward to catch up with the section near the wall and once close to them he rallies off a point for shock.

With one German squad tied up covering the flank by the barn and the other in the barn itself I sense there might be an opportunity for the British to push forward. I suspect the Germans have only a single squad left to deploy and that might be an opportunity to try and make some ground. The section in the farmhouse moves out into the field.

In the next British phase the platoon sergeant orders the 2” mortar team to fire more smoke to help cover the advance across the field.

The sergeant then moves up to join the section and rally off more shock.

The section in the field moves forward tactically.

The platoon's third section deploys successfully through the mist and takes up overwatch positions in the upper level of the farmhouse to help cover the other section's advance across the field.


With the full platoon deployed the British are now in a much better position to press forward. My main concern is dealing with the PzIV. For now it is blinded by the smoke but hopefully I can find a way to deploy both the PIAT team and the Firefly to deal with it.
Dave senses that the advantage may be swinging towards the British. He has one squad tied down guarding the flank, the other is in the barn but it cannot effectively block any British advance towards the centre or the other flank. That leaves only his tank and the still to be deployed squad to handle that threat. He's certainly in a position to cause the British a few problems but he's also running the risk of losing his very valuable PzIV if there's an unexpected turn end that sees the smoke lift and the Firefly come into action (although at this stage he's guessing I have the Firefly, I could equally have other supports like the Churchill AVRE). Having delayed the British for one turn he decides he won't risk any further losses and announces that the Germans will withdraw while they are in good shape.
Casualties have been light on both sides. The British have one man who is wounded and will miss the next game. Those light casualties see the men's opinion rise to +2. The CO takes a much high opinion of the success and his opinion rises to +1.
The Germans suffered three casualties and so one returns immediately, one is lost permanently and the other is wounded. Despite the relatively light casualties the men's opinion drops to -1 and the withdrawal sees the CO's opinion drop to 0.
With that we will move on to the second map and see if the British can maintain their tempo and continue driving the Germans back. You can read what happens in that game in this post.
If you've enjoyed following along and would like to Buy Me a Coffee to help cover some of the costs of running the blog you can click through at the link or on the tab in the right hand column of this page.
You can find all the game reports for this campaign and for many others on the Chain of Command AAR page.
Hugely enjoyable (as always), thanks.
ReplyDeleteThanks Norm.
DeleteGreat to see you back with WW2 CoC. That Pz IV was definitely your biggest problem. The gunner is heading for Ace status.
ReplyDeleteThanks Carole. The Firefly was supposed to turn up and take it out, but things never quite work out that easily, do they?
DeleteAn interesting AAR, lots of double turns but as remarked in the rules it's not the end of the World as if you throw lots of 6's you don't have much else you can activate with. Also, a clear demo of the value of campaign games - when else would you see a German force in a wargame pull back like this to conserve its strength for another day?
ReplyDeleteYes indeed. Dave is in this for the long game and with only two platoons and understrength ones at that he's going to need to play these very carefully if he intends to go the distance. Fine with me, I'm in it for the long game too and if that means the occasional short game that's okay, it's all part of the campaign narrative.
DeleteI agree that the campaign format encourages players to take a long view rather than just focusing on the current game. Great pictures to compliment your gripping narrative. Thanks.
ReplyDeleteThanks Dennis.
DeleteAn excellent report! I love the play by play explanation. Looking forward to the next game.
ReplyDeleteThanks AJ, a bit more action in this one and hopefully much more to come.
DeleteAnother fine report hot on the heels of the last one, verily we are blessed. Here's to the next game.
ReplyDeleteLOL, given how short the first game was we simply had a bite of lunch and started again.
DeleteAnother AAR clinic. Total respect for the hull-down Mk IV AND the empty tank scrape!
ReplyDeleteAh, you know me, I couldn't resist that extra little bit of detail (and it was simple enough to make).
DeleteGood write up - and as a bonus I found there were 2 AARs before I had even read the first one!
ReplyDeleteThanks. Not sure the first game counts as much of an AAR - PzIV shoots, Sherman goes bang, British withdraw! At least there was more to read in the second one and I'm sure plenty more in coming games.
DeleteI am late to the party, but I appreciate your work on this - a pleasure to read. Thanks!
ReplyDeleteNever too late! Thanks.
DeleteNew to the game. Great reading these aar.
ReplyDeleteHaving played some games and getting the psc, I'm rereading the aar to understand where I'm getting the rules confused.
This mission gives the Germans six support points. You see entrenchments, two at one point. Dug in AFV at two points and five man team at three points. Total of seven. What have I missed?
If you are new, you may not have your hands on a copy of At the Sharp End (v2 is due any day now, so v1 is no longer on sale). In that, a side that successfully defends a map receives a bonus, free entrenchment in the next game defending that table. I think that explains the second entrenchment. To be honest, it’s been a while since we played, but I think that explains the extra support point.
Delete