
The first of these takes place on Map 1 Skyline Drive, the second will take place on Map 3 Holzthum Village (see previous campaign post for where these are on the campaign map). Skyline Drive presents an attacker with a tough assignment, not least of which is crossing a great deal of open ground to reach and clear the crossroads. This is a task that would be made easier with armour, but German pioneers will not have bridged the River Our until campaign turn 4 or later. Until then, and with time working against them, the Germans must conduct their assault with the assistance of only light supports.

The crossroads are defended by 1st Platoon under the command of Lieutenant Brynner. I think this is a location where the Americans can cause the Germans considerable delay and I have assigned eleven of the 48 available support points here. The platoon's firepower will be strengthened by equipping all the squads with an additional BAR. More significantly they will be backed up with a 50cal HMG team. The benefit of the HMG is that it reduces cover by one level and I fully expect the Germans to try to establish a base of fire from the wooded area. The 50cal should make that position a little less tenable.

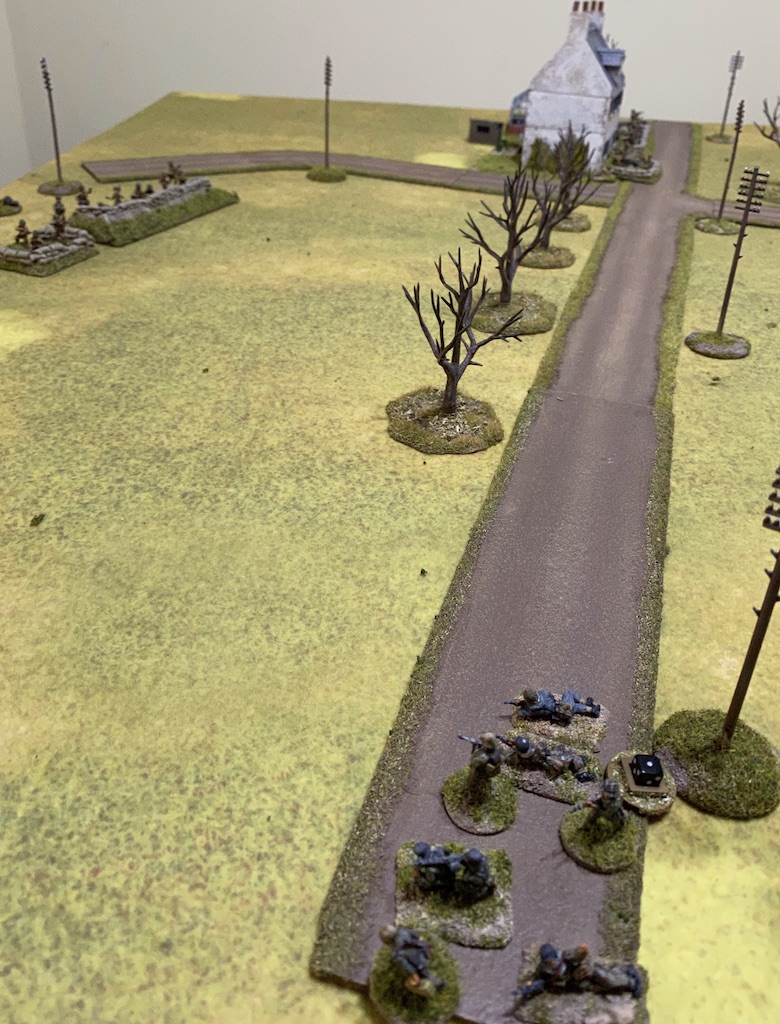
There is hard cover in the farm house at the crossroads, however it can only accomodate one squad to fire effectively. Which means the remainder of the platoon will need to hold the ground from more exposed positions and for that reason I will have five entrenchments as support. Those entrenchments will allow two squads and the 50cal to be deployed in hard cover and with a much wider field of fire than that offered from the house. My plan is simple. I will wait for the Germans to advance across the open ground and then aim to deploy in force. I want to apply as much firepower as I can and rely on the hard cover to handle the return fire.

At this stage I'm uncertain whether I face a Volksgrenadier Sturm platoon or a Rifle platoon, but in either case I know the platoon will be rated Green. My intention is to take advantage of this by engaging them at effective range where I will be able to hit on a 4, 5 or 6. Well, that's the theory, let's see how it holds up in practice.
The Germans announce they will field one of the Volksgrenadier Rifle platoons. These have a force rating of -2 and so, with the American platoon rated at +1, they will receive an additional three support points to add to the twelve provided by the scenario, giving them a total of fifteen.

This is an Attack & Defend scenario and the Germans start the patrol phase with five free moves. There are not many options for placement of jump-off-points but they do manage to have one in a fairly advanced position on their left flank at the table edge. Otherwise this is much as I had expected.


He establishes a strong base of fire by putting all three teams on overwatch.

The Germans begin with their force morale at eleven while the Americans are at nine. With that we are ready to start and just before play begins Dave announces that the Germans have a pre-game barrage. That could make a coordinated American deployment a bit tricky.
A German squad deploys from the forward jump-off-point on their left flank and takes up tactical positions.

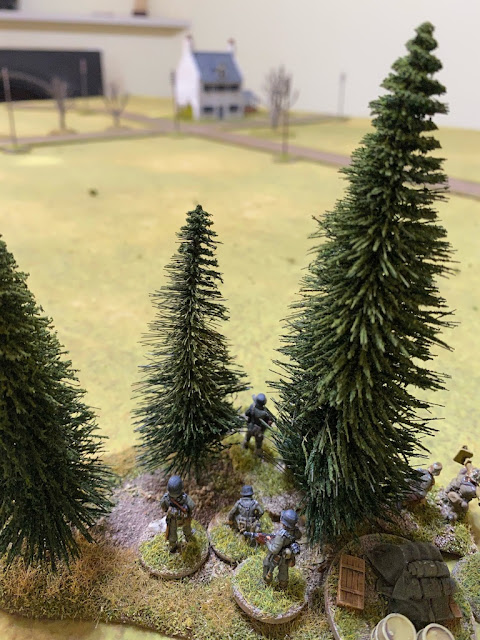
An LMG squad has been called upon to support the platoon and they deploy into the fir trees, also taking up tactical positions. As expected it looks like they will try to set up a base of fire from the tree line (by the way, you may note a panzerschreck team in amongst this squad, it is standing in as a substitute for an LMG team, as I didn't bring enough with me for this game).

The LMG squad are then joined by a tripod mounted MG42 MMG team and they also take up tactical positions. This makes for a powerful base of fire.
A sniper team make an appearance, lurking in an exposed position in the fields in front of the farmhouse.


I can see little advantage in deploying any of my platoon and so the phase passes back to the Germans. An Unterfeldwebel, a second senior leader brought in as support for the platoon, joins the LMG squad and the MG42 MMG team in the woods.


With a base of fire established, the squad on the German left flank begins to move forward cautiously.

The time is soon approaching for the Americans to make a response but a command roll of 65531 is not optimum. With the pre-game barrage there's the possibility only a single unit deploys which would mean facing all that overwatch firepower alone. I decide to risk the potential delays that could come about due to the barrage and hold off deployment until the Germans have committed themselves to a more general advance.
In the German phase two squads deploy from the jump-off-point on their right. They are in open ground and face the farmhouse. The teams in both squads are placed on overwatch and while they might be in an exposed position there is a strong force now arrayed on overwatch ready to take on any Americans that might reveal themselves.


The American command roll is 66441 but my initial elation at the prospect of a double phase recedes once I realise how limited are the activation options. I could try to deploy the 50cal, but even if successful I could expose the small five man team to a considerable amount of return overwatch fire, followed by more fire in the following German phase. Not an attractive prospect.
I consider an option to deploy to the rear of the farmhouse out of the line of sight of the German teams in the woods but with a line of sight down my left flank. While it gives me targets without exposing my team to the full might of German firepower it will leave the HMG team in a poor tactical position for what may be a small gain. So reluctantly I do nothing this phase.
The subsequent command roll of 54441 is no better and regrettably I let a double phase pass without taking any action. It's a case of not letting the command dice dictate my plan. My aim is to deploy in force and hopefully when the Germans have presented me with several inviting targets. Hard as it is to let a double phase pass, I will wait for the right moment.
This turns out to be a rather wise decision. The next German command roll is 66654. It may herald a double phase but crucially for my deployment plans the turn end will see the lifting of the pre-game barrage.
The Unterfeldwebel in the woods orders the LMG team to follow him and move forward. Then, forgetting the turn is about to end, Dave has the Unterfeldwebel put the MMG team on overwatch (I've been guilty of doing the same myself and neither of us realised the wasted activation until we carried out the turn end activities).

With that the turn ends and I'm relieved to see the lifting of the pre-game barrage. With all the overwatch markers removed it means the German leaders will have to use some of their future activations focussing their men's attention back on watching for enemy activity if they want to return those team to overwatch.
The subsequent command roll of 63211 certainly assists in making that possible. The LMG squad by the woods is placed on overwatch. On the opposite flank the Unterfeldwebel puts one squad on overwatch and sends the one to his right dashing forward at the double. They move briskly and cover 13".


Despite the protection of the entrenchment one of the American rifle team is hit.

A second squad deploys at the rear of the table.


The next German command roll is a very useful 63321. With the squad on the right pinned down it's time for the squad on the left flank to move forward, but given what has just happened on that other flank they decide to be cautious and creep forward tactically.

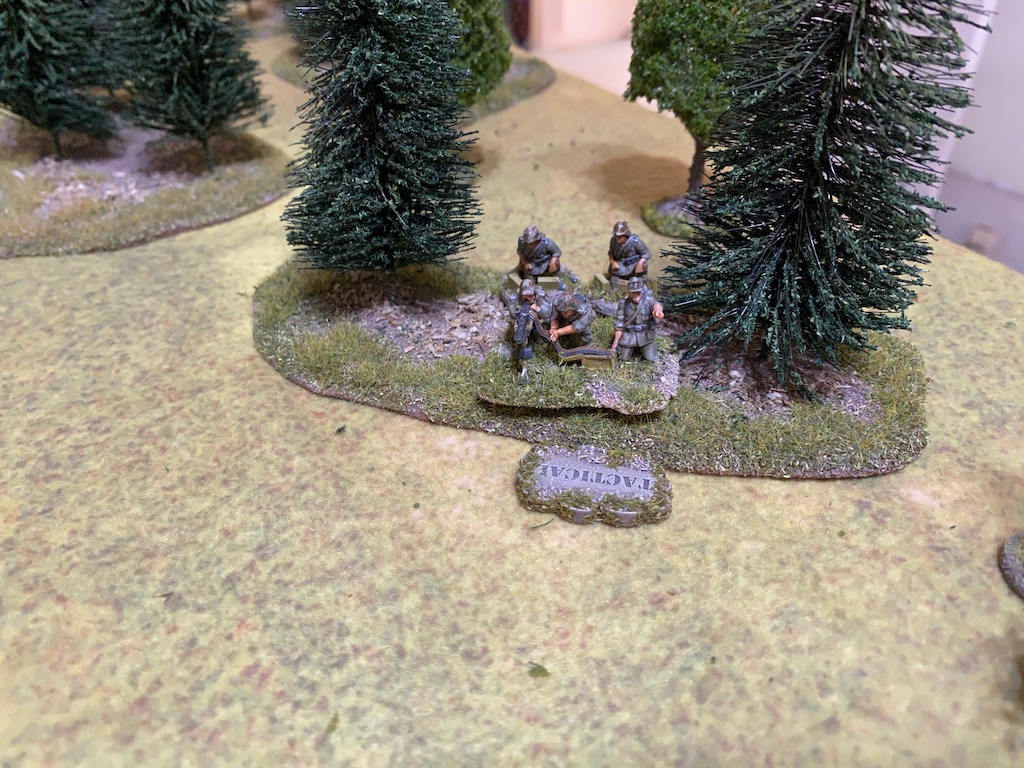
The squad in the centre opens fire on the Americans at the farmhouse.

Firing at effective range at a target in hard cover results in a single point of shock inflicted on the squad's rifle team.

Back near the woods the LMG squad engages the Americans opposite them. Thanks in large part to the covering fire the German LMGs have absolutely no effect (they rolled six 5s and no 6s, with the covering firer negating all of those 5s).

Meanwhile the sniper takes aim at the farmhouse.


The American command roll of 64441 limits action but does allow the platoon sergeant to join the squad across the road from the farmhouse. He rallies shock and orders them to maintain their covering fire on the German LMG squad and MMG team.


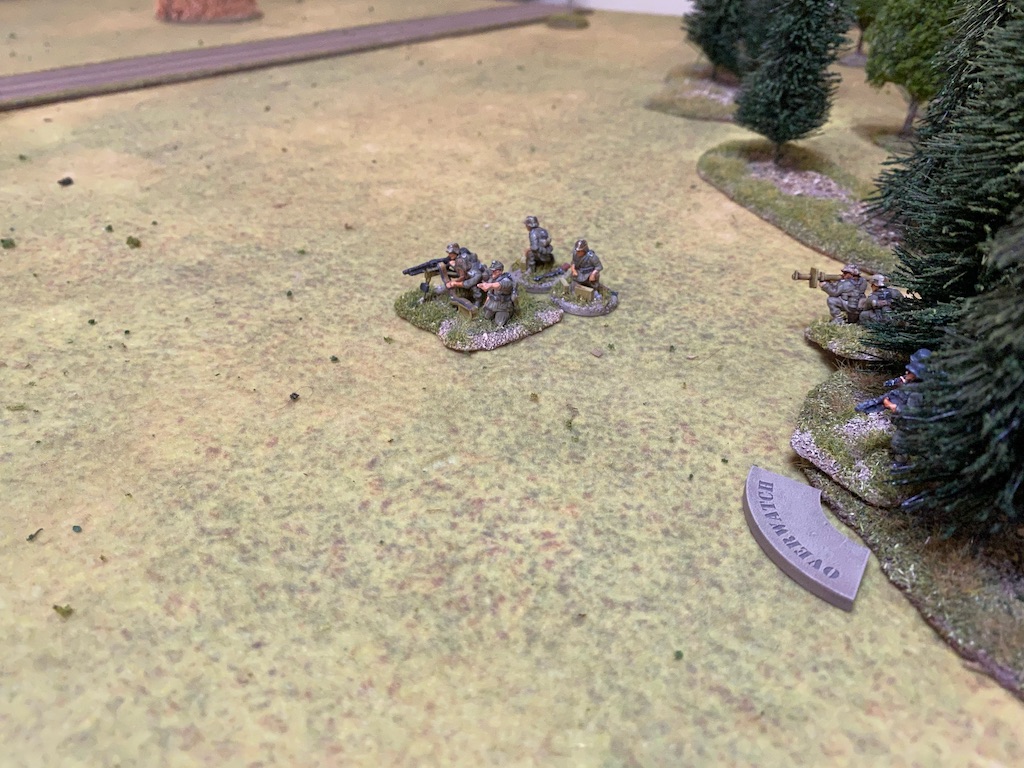
With one German squads pinned down and effectively out of action, the 50 cal team turn their attention to the squad and rifle grenadiers in the centre of the table, killing one of the grenadiers and inflicting shock on the LMG team.


The sniper takes aim once again, but this time he misses.


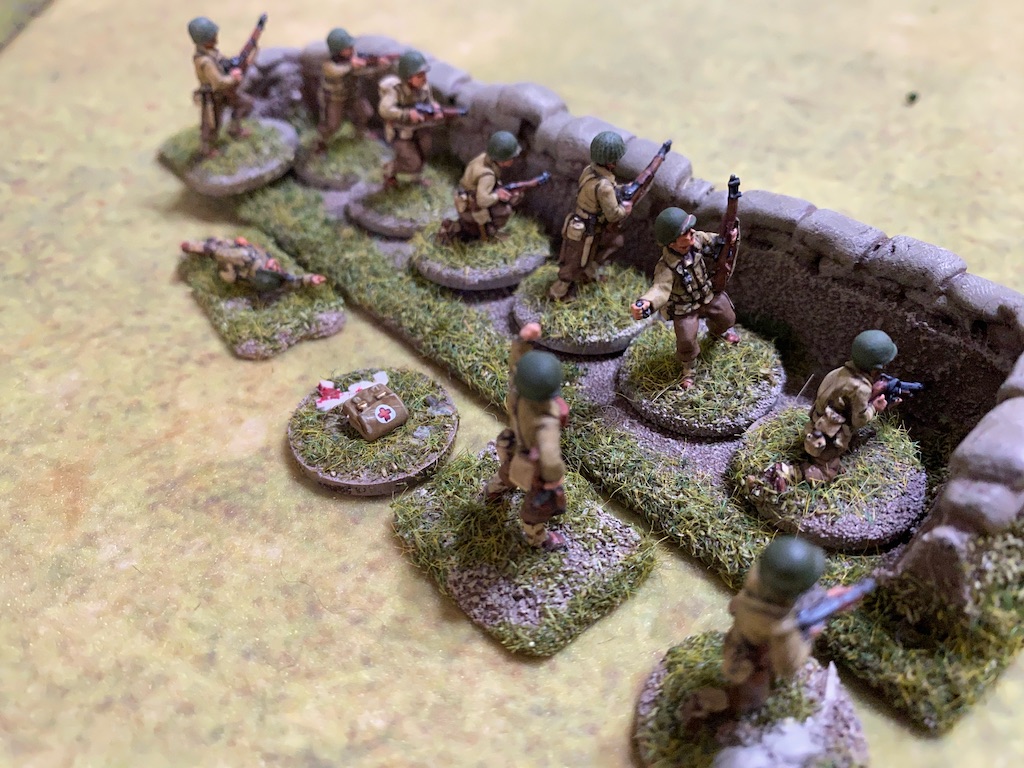


I'm beginning to sense the German attack is running out of steam already. There are so many targets in open ground I want to try and bring all my fire to bear and drive them off. In the American phase the platoon's last squad deploys into the upper levels of the farmhouse. There they are joined by the platoon lieutenant who orders both squads at the house to open fire on the German LMG squad and MMG team.

A large amount of firepower comes their way and with no cover it's hardly surprising that six men are hit. One of those is the LMG squad Obergefreiter who is wounded. While it has no negative impact on German morale the sudden loss of five men and the wounding of a leader is quite a blow. The losses are spread across all teams and so while they can still operate their weapons at full effect the small number of survivors and the growing amount of shock means they cannot hope to hold their ground for much longer.

The platoon lieutenant orders the 50 cal team to turn their attention onto the same target.

While the fire inflicts no more casualties the shock builds up to the point where the LMG squad becomes pinned.

The squad in the open fires at the Germans that have advanced to the road.

They suffer the loss of a man from each team and their Obergefreiter is wounded. This time German morale takes a hit and drops two points to nine. With six men and six points of shock this squad is very close to becoming pinned.

I think at this point it's pretty clear which way things are going and it comes as no surprise that when the German phase arrives Dave announces his intention to withdraw. However it won't be straightforward as two of the squads are beyond 12" of a friendly jump-off-point. To make matters worse one of them is also pinned. The squad on the left at the road manages to withdraw all the men safely, but things do not go so well on the right flank. The Obergefreiter and two of the men are dispersed, although they will eventually find their way back to the platoon. Not so for three other men, who are captured and will not be seen again in this campaign.

A fairly comfortable victory for the Americans. Unfortunately I wasn't able to drive German morale low enough that I could recover some of my casualties, nonetheless these are light with one man lost permanently and two wounded who will miss the next game. The same cannot be said for the Germans who add two men killed to the three men who were captured, for the loss of five men permanently. They have two wounded men to add to those who were dispersed and they will all miss the next game. That's a total of ten men who won't be fit or available for action.
As the Americans still hold the table they are entitled to strengthen their defence and so I will add a minefield. With the prospect of German armour it might be wise to find a way to slow them down and keep them off the road.
This was always going to be a tough game for the attacker and I think Dave's plan to assist his squads cross the open ground by relying on the suppressive effect of a powerful fire base at the woods backed up with a pre-game barrage to disrupt American deployment was sound enough. The early arrival of a turn end scuppered one half of the plan and American firepower did the rest. These were pretty much Dave's thoughts after the game:
'Alas, the early turn end saw me with my force caught in the open and no more barrage. I continued the attack for a few phases in an attempt to at least inflict some permanent casualties on the US, but against men entrenched at long range even that proved futile, so I withdrew the platoon before it was destroyed. At least I now know what the defending force is.'
While this battle was being fought another German platoon was making an attack on Map 3 Holzthum Village. You can find out what happened there in this game report.
You find reports for all the games in this campaign and many other campaigns on the Chain of Command Campaign AAR page here.
Great story telling as always. Brings back memories of my brave GIs acting as “speed bumps” to slow the Germans assault. I’m already tempted to replay this PSC.
ReplyDeleteAs the PSC says, the Americans cannot win this in the traditional sense, they need to do what was done historically and that's put up determined resistance and hold their ground for as long as possible. Lots of options for both sides which certainly makes this very repayable.
DeleteA very fortunate end of turn roll for the US I feel. Those 27 dice on overwatch could have made deployment painful.
ReplyDeleteYes indeed. Hard to fault Dave's tactics but the untimely end of the barrage was a real setback.
DeleteExcellent write up as always. This map is always difficult for the Germans.
ReplyDeleteAgree, very hard to see how they can be expected to cross all that open ground without heavy support.
DeleteGreat game. The Germans had a good plan but the turn ed is a killer for plans. Maybe he should have rushed a squad, trading shock for speed. It's really inspirational to see how you dress your table, the map looks really bare, but the addition of a couple of posts and some scatter terrain with haybales and stuff really makes the table shine.
ReplyDeleteThanks! It certainly is a bare table, so I did my best to add some character to it but still keep the sense of open space.
DeleteA fine report there Mark, can't fault Daves plan. It was truly scuppered by the early turn end I feel, but cest le guerre. Look forward to the next game
ReplyDeleteYes, you can make your plans but then the fortunes of war have their say. It's a tough table for the attacker under any circumstances.
DeleteA great AAR as always. Nice to read your analysis of each turn, it's very helpful for other CoC players.
ReplyDeleteThanks A J, I find writing the AARs a good way to reflect on how we played the game and so I try to put some of that thinking into the report to share with others.
DeleteAce as usual, I think me and Mr Noakes might have a go at this once we redo our Old Hickory campaign.
ReplyDeleteThanks Iain, lots to like about this one.
DeleteLovely game as always. The early turn end was the tipping point. We played this campaign and that US firepower can hurt. Btw wouldn’t the green units morale be at -2?
ReplyDeleteThanks. Good point on the FM. Men's Opinion starts at +3 for the Germans so they have a +1 modifier, however we forgot about the -2, so it should have been a net -1. They would have had FM10 at best. As things turned out it made little difference but is certainly something we will apply in future games (and naturally, as the Americans, that suits me just fine).
DeleteI’m a bit partial to the Yanks. 🙂 as always reading all of these great reports makes up for some of the gaming we’re missing. Cheers
ReplyDeleteBeen waiting for this - it is one of the more original PSC's. Fascinating.
ReplyDeleteYes agree, there is something very appealing about the way it is structured, almost like two games in one.
DeleteMy son and I are new to COC. We love your AARs. They have helped us with the game. I am totally confused about the covering fire in this game. Where are the rules for covering fire? Regards
ReplyDeleteCovering fire is on page 19, section 4.5.2 Unit Activations:
Delete'Activate one weapons Team, Section or Squad to put down Covering Fire into an area of terrain.'
Then on page 20 in section 4.5.4 Unit Actions Defined:
'Covering Fire: Only Leaders may instruct a Team or Section to put down Covering Fire. A Team giving Covering Fire will target a piece of terrain with 4” frontage or 9” frontage if the whole Section or Squad is firing. Any enemy forces moving, deploying or already in that area will fire with a ‐1 on dice rolled to hit due to the suppressing effect of this fire
Covering Fire lasts until the end of the next Phase, whether that Phase is friendly or enemy. While giving Covering Fire, a Unit may do nothing else.'
There is some contention as to what is meant by targeting a piece of terrain and whether open ground qualifies. We have no issue with this in open ground, given the enemy unit is in plain sight. We also assume that while our open ground in miniature may be featureless and flat it doesn't always follow that is exactly what is represented. I think an order along the line of 'put suppressive fire on that group of men in the field' is just as valid as 'put suppressive fire on that patch of woods'. I hope that helps.
One other thing to note, some people are confused by what it means by 'Any enemy forces moving, deploying or already in that area will fire with a ‐1 on dice rolled to hit due to the suppressing effect of this fire'. What this means is that when that unit fires weapons will hit with a -1 on each die rolled for firing. So if they would normally hit a target rolling a 4,5 or 6, they now will only hit on a 5 or 6.
DeleteThank you for detailed reply. Cheers
ReplyDeletePretty tough mission for the Germans (even without rolling 6,6,6 to end your own barrage :)) without armour or more importantly mortars. Might be inclined to take 3 Assault squads and throw some smoke grenades and hope for a double turn to get close enough to do some damage in CA. Certainly no point in trading shots with dug in US platoons esp when you are green.
ReplyDeleteMy thoughts are the Green penalty counts less in close assault than it does in a shooting match. Also with rof 3 for the Stg 44 and handgranarten maybe some shock before the assault?
Very tough considering all that open ground. If the Sturm platoon can get within 18" then maybe their firepower can start to take effect, but they have a long way to travel before they get there. I'm inclined to think the Germans should not even consider attempting this table until armour is available.
DeleteGreat AAR, love the wound markers and prisoners, nice touch.
ReplyDeleteThanks, glad you enjoyed it. There’s a post about the wound markers here if you’re interested http://thetacticalpainter.blogspot.com/2020/12/wounded-leaders-for-chain-of-command.html
Delete