

As the Japanese I benefit from a larger force than the British with three platoons available for this campaign as opposed to the two available to the Malay Regiment. That allows for fairly aggressive play. The current platoon has lost one man permanently and will be missing another who is wounded. Those two casualties in the rifle squads will be made good by transferring men from two of the grenade discharger teams. As a side note, this transfer of men is what happened historically. As the war progressed and the Japanese found it more difficult to replace men the grenade discharger squad diminished in size so that by late in the war it was often composed of a single team.

The British Malay platoon have suffered higher casualties. Three men have been lost permanently and two who were wounded in the last scenario will miss this game. With five men short they will field under-strength rifle teams in all their sections.

I suspect Dave will not want to bring in the second platoon until the last map where I'm certain he plans to make his most determined stand. If that is the case then he's going to want to avoid too many casualties in this encounter to give the platoon a realistic hope of putting up a decent fight in the next game. With that in mind my plan is straightforward - to aggressively seek out the enemy and inflict maximum casualties.
 |
| Map © Rosio Espin and Karwansaray BV Originally published in Wargames, Soldiers and Strategy #101. |
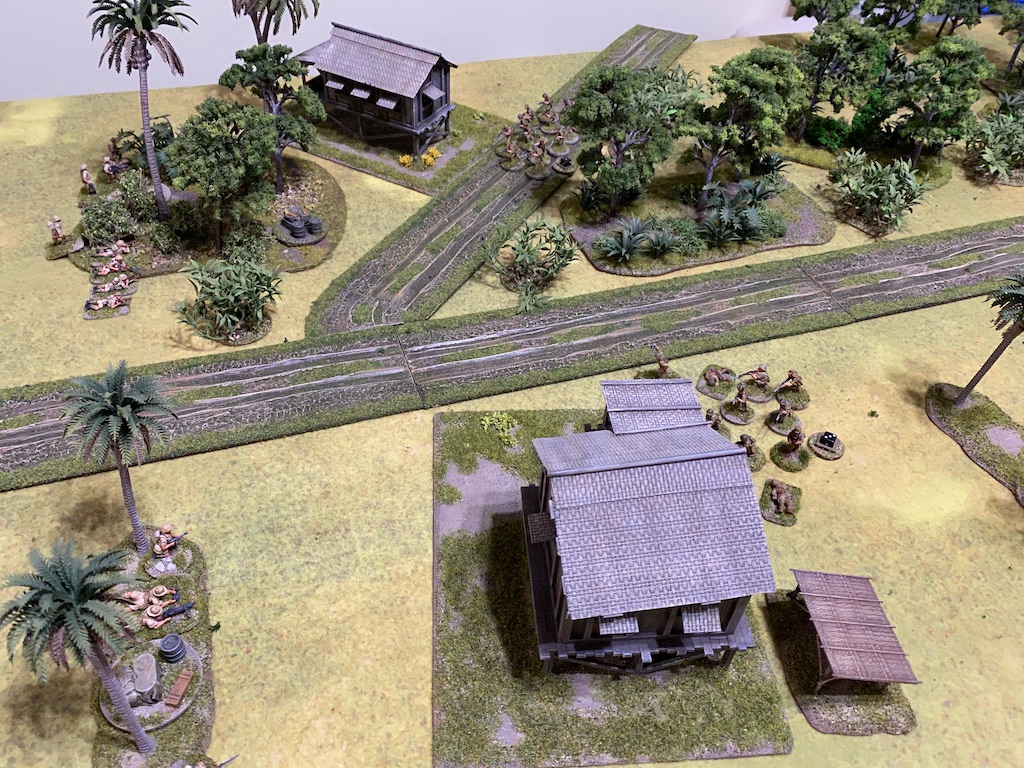
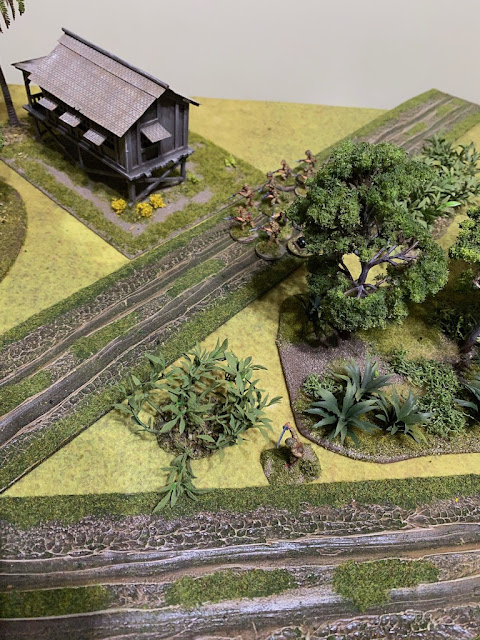
The table is divided by a road, with dense secondary jungle to one side and more open plantation on the other.

The Japanese will start with force morale at nine while the British will be at eight. Potentially there are ten support points available to the Japanese, the actual amount will be determined by a dice roll. So there is a good possibility that the attack can be supported with armour and/or a barrage. However, there is a special rule for this scenario where the Japanese must spend two of their available support points on a Ruse (this is to reflect their historical use of a human shield of civilians as they advanced toward the village). So, with high expectations my attack might be supported with a Ha Go or Chi Ha I was crestfallen to roll only two for the support. That meant I was limited to the Ruse and nothing else.
The British received half of that roll plus three points for the difference in force rating for a total of four. As this is a delaying action they cannot make use of any fixed defences or a pre-game barrage, nonetheless they have enough points to call on an additional rifle section or even a mortar barrage (although, with only two mortars in the battery, the barrage is limited to a 10"x10" area). The intelligence gained from knowing there will be no armour accompanying this assault allows Dave to disband the anti-tank rifle team and assign those two men to the rifle sections.
The patrol phase sees jump-off-points spread evenly across the table, with the British preferring to set theirs toward the back. Their central jump-off-point is the objective for the Japanese, they must hold it to the end of a turn, or drive down British morale and force a withdrawal from the table.
 |
| Map © Rosio Espin and Karwansaray BV Originally published in Wargames, Soldiers and Strategy #101. |
I see no reason to save the Ruse for any particular stage in the game and my thoughts are to play this very early on and push forward as aggressively as I can.
The Japanese have the initiative and the first phase, opening the game with a command roll of 66211. An excellent start and a double phase. I hope to make the most of this. There is no reason to hold back on using the Ruse and the first Japanese action is to play the Ruse to move their right hand jump-off-point forward 18" in the jungle.


A second squad deploys from the same jump-off-point, this time to the Japanese right flank. I hope to prevent the British platoon from concentrating against me and so a threat on this flank alongside one through the plantation should achieve that.

In the following phase the squad on the right moves tactically to the tree line but finds the jungle tough going and they only cover a small distance. It's not as far as I would have liked, but it is far enough to have a line of sight out of the jungle.

They are already closing in on a British jump-off-point and with a line of sight they can cover any forward deployment from that point with fire.

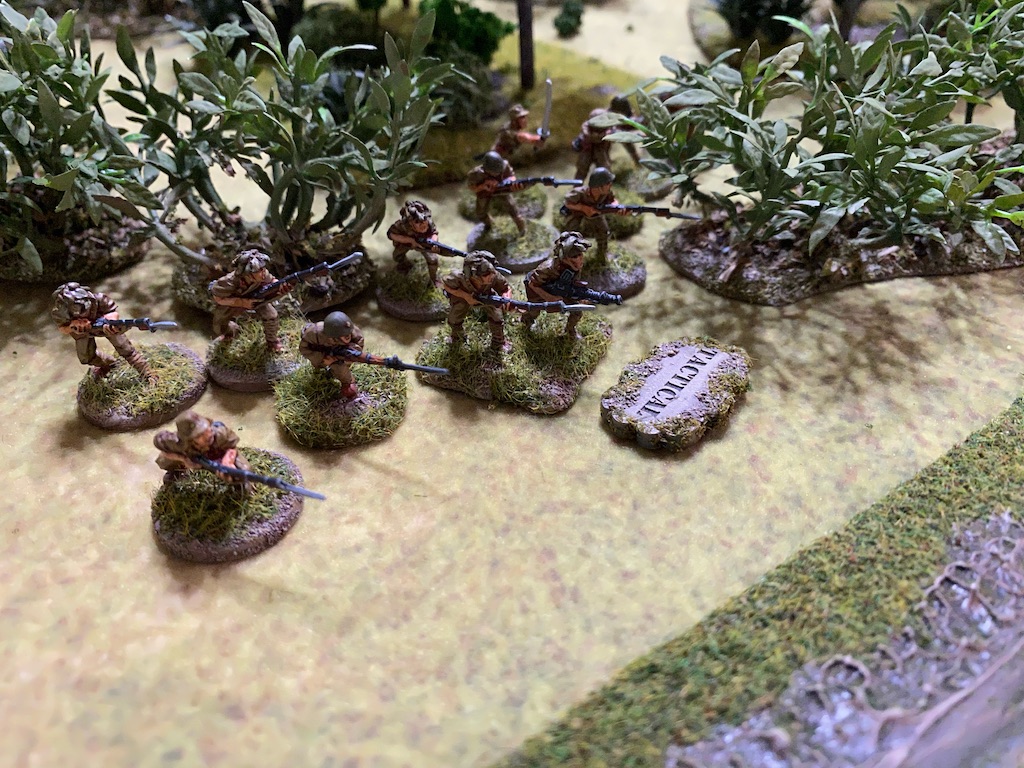
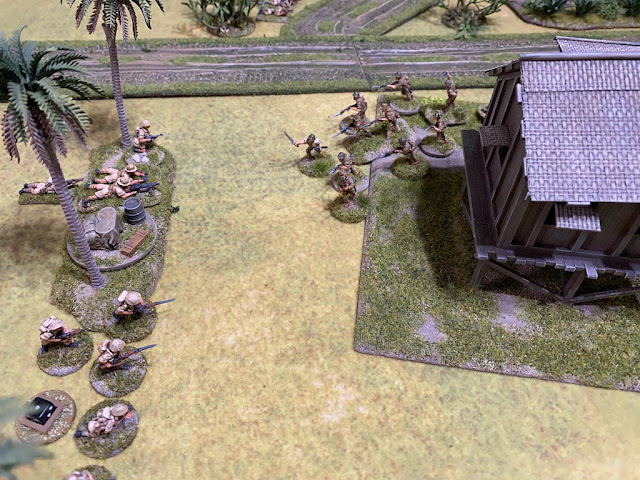
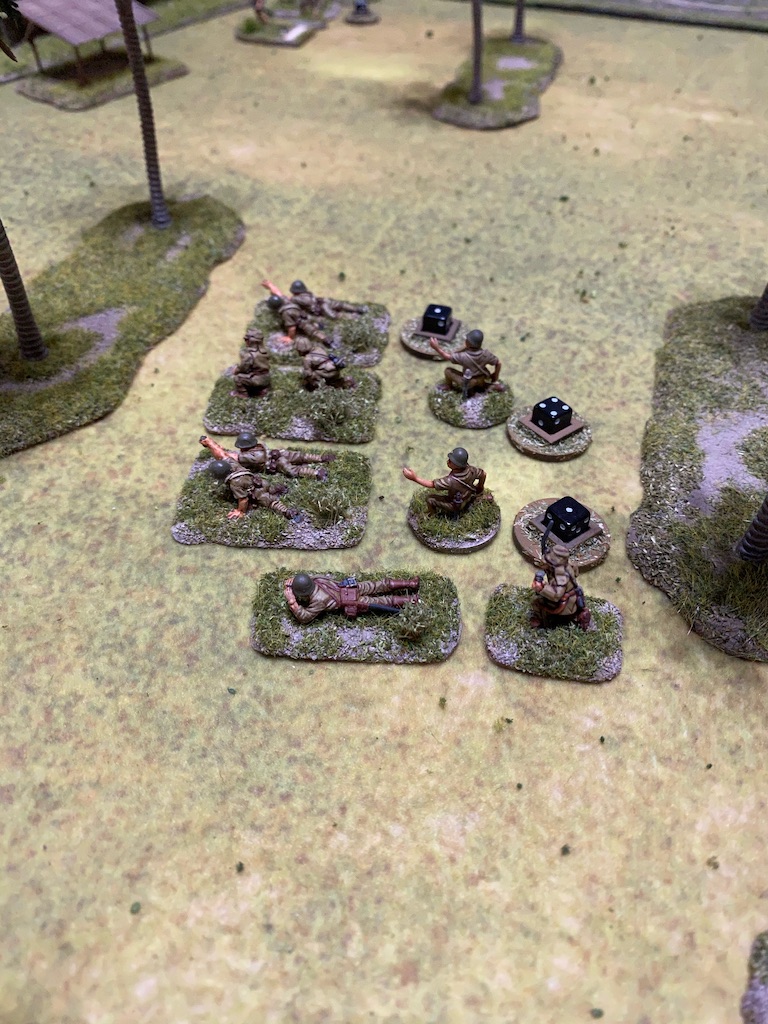
Meanwhile over in the plantation a third rifle squad deploys and takes up overwatch positions.


Despite the Japanese advance on their left flank the British choose to remain concealed. That strikes me as a decision fraught with risk given how close the Japanese have advanced. However the Japanese don't roll a double phase so cannot capitalise on the opportunity. Instead the grenade discharger squad deploys and joins the squad in the plantation.


The Gunso, the platoon second in command, deploys into the plantation from where he can command both the rifle squad and the grenade discharger squad.

The first thing he does is order the rifle squad to advance.


With the entire platoon deployed it was time for the Rikugun, the platoon commander, to take a more active role. He comes forward to join the squad by the road.

He orders the men to take up overwatch positions.


This presents a real threat to the British jump-off-point.


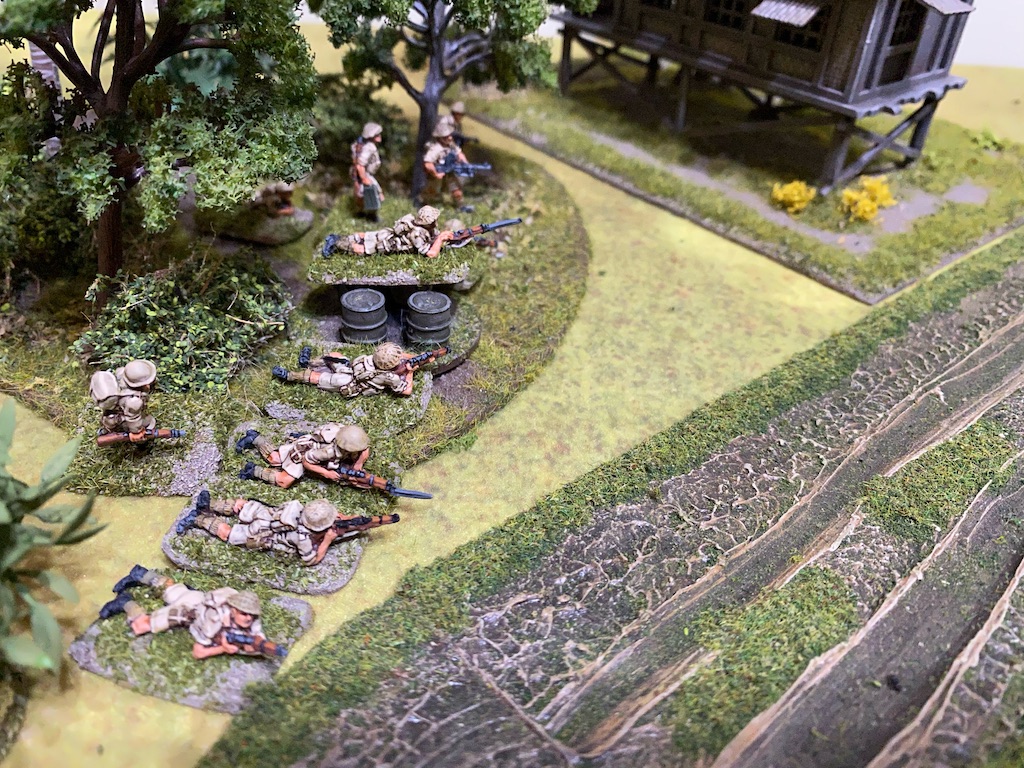
Not surprisingly this latest Japanese move provokes a response from the British. A support section, under the direction of the platoon sergeant, deploys in the jungle.


At the same time the platoon's 2” mortar team deploy at the rear of the plantation.


The appearance of British units is the spur for the Japanese to start pushing forward aggressively. The squad in the plantation moves at the double, making good speed through the lanes of evenly spaced trees.


The grenade discharger squad also advance, accompanied by the Gunso. While I want to advance quickly, I need to be careful I don't leave individual squads isolated where they can be overwhelmed by the waiting British.


The Rikugun leads the squad out of the jungle and across the road into the plantation.

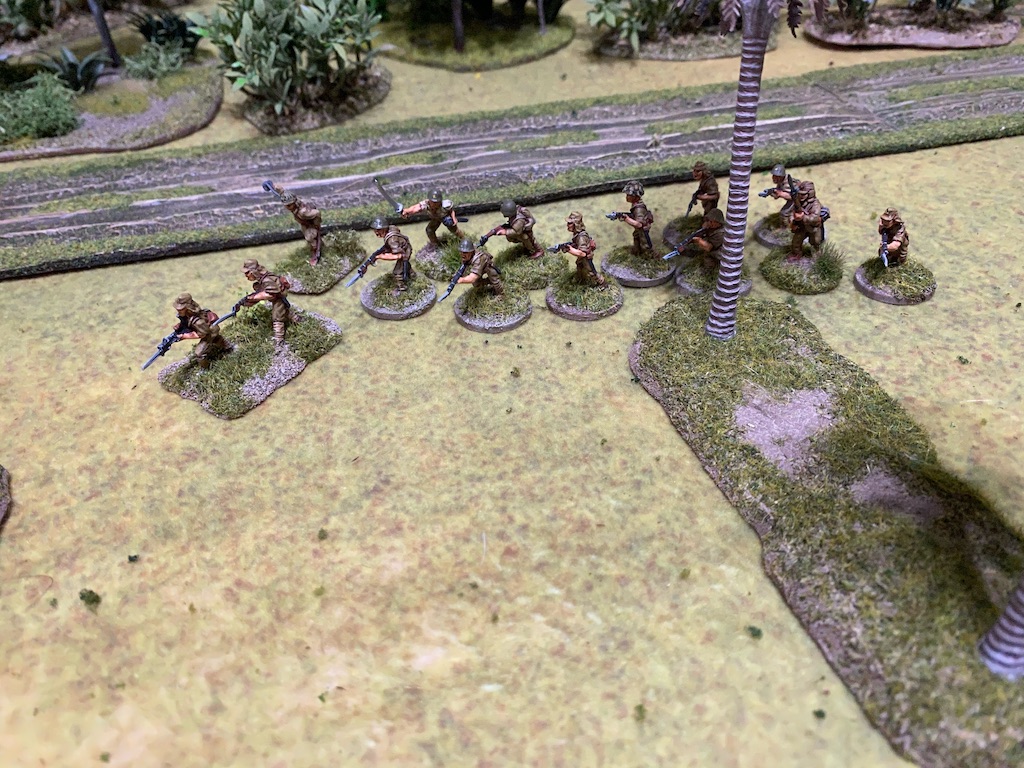


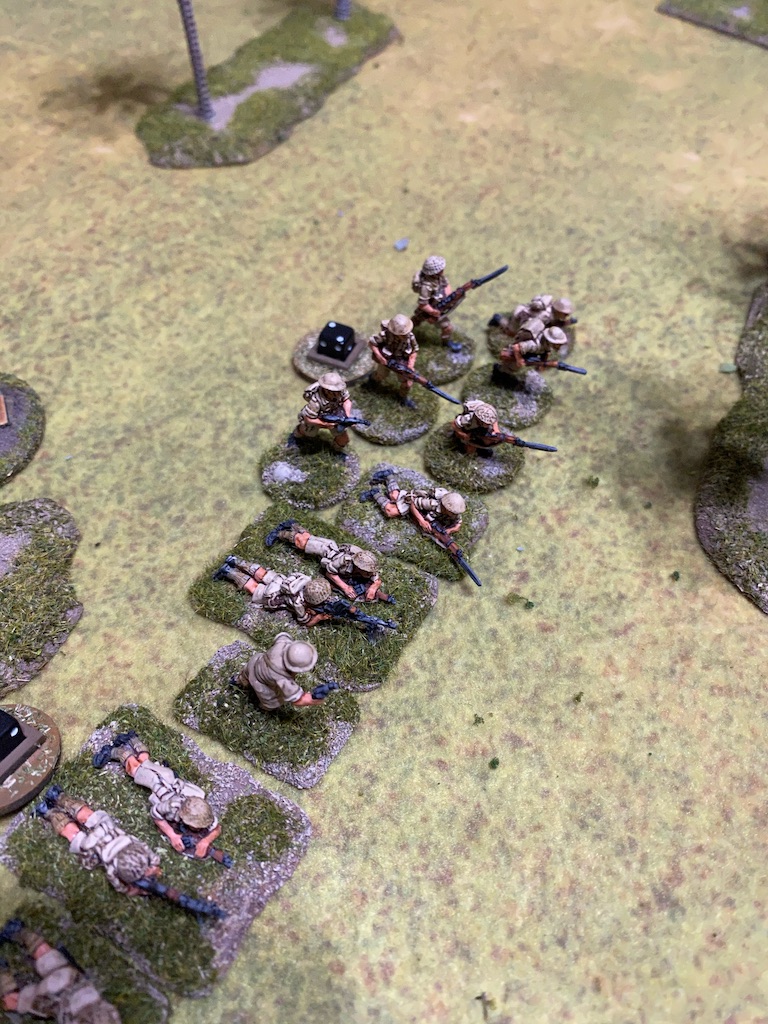
In the plantation the waiting British break concealment suddenly and in force. Two sections and the platoon lieutenant emerge, ready and waiting.

They scrutinise the plantation and, despite the distance, they are able to identify the approaching Japanese and target them.


The platoon lieutenant takes control of one of the rifle teams and orders them to fire 'five rounds rapid' while the section corporals have the remainder of the men open fire on the lone Japanese squad. That's a lot of firepower coming their way.

The opening volley of fire cuts down four of the Japanese, including the squad corporal, who is killed. That's a blow and the loss of an NCO brings Japanese morale down two points to seven.


The squad makes good ground and reaches the hut nearest the jump-off-point.


Not surprisingly this draws a reaction and the final section from the British platoon deploys. Reduced in strength due to casualties and with only a Lewis gun as the section's light machine gun, this is the weakest of the platoon's sections.


Two Japanese are hit, but fortunately none of the leaders. The squad also suffers three points of shock.

Despite withdrawing deeper into the plantation the Japanese rifle squad can still be spotted by the Malay's platoon lieutenant and he orders both sections to open fire again.

This time the Japanese rifle squad benefits from their improved cover and survive the incoming fire unscathed, but the grenade discharger squad lose a man and suffer shock.

In the Japanese phase the Gunso rallies shock from the grenade discharger squad and orders them to move forward where they hope to have a better line of sight.


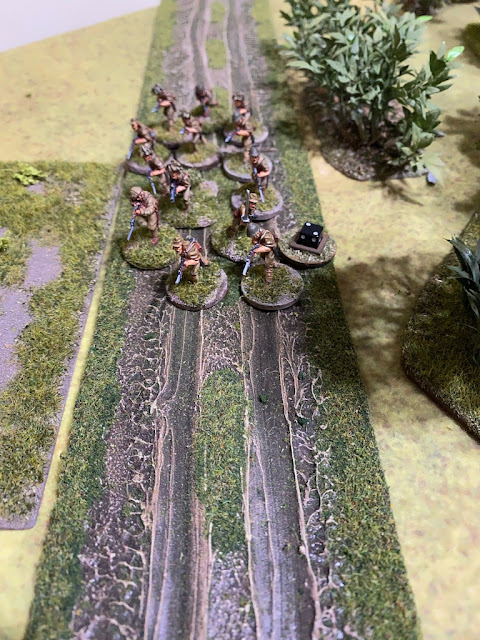
The squad on the Japanese right flank moves directly down the road towards the sound of gunfire. There's an element of risk in being so exposed but I want to bring this squad into action as soon as possible to put pressure on the key jump-off-point.


I don't want to become bogged down in a protracted firefight but nor do I want to risk needless casualties by throwing men into close combat prematurely. In the centre the Rikugun rallies shock from the squad.

The Lewis gun and rifle teams both suffer a point of shock.


So far the British have managed to inflict a number of casualties on the Japanese without any loss to themselves. Dave contemplates withdrawing at the start of his phase. Withdrawal now, having inflicted greater casualties on the Japanese, would constitute a 'losing draw' with little negative impact on the CO's opinion. Perhaps more importantly, it keeps this platoon in good shape ready for the next scenario. As always in a campaign it's important to think beyond the current game. In the end Dave decides to stay and see if he can inflict a few more losses on the Japanese before slipping away.
In the British phase the section corporal rallies the Lewis gun team before he orders the whole section to return fire.

The Japanese lose another two men and suffer more shock. I've been fortunate neither the squad corporal or the Rikugun have been hit, nonetheless this squad has taken a lot of casualties. At this rate I won't have enough of the squad left to commit to close combat.


With the Japanese closing in fast on the jungle jump-off-point the platoon sergeant orders the support squad to move slowly through the jungle and fire on the Japanese if they can cover enough ground to see out. This section may be Green but they have no problem understanding their instructions and cover the ground quickly.


Just as things are looking tough for the Japanese their next command roll is 66531. This heralds a double phase and what I hope will be an opportunity to really take the fight to the British. Dave rues his decision to keep his platoon in action, this could end up being more costly than he planned.
Knowing there is a second phase to come I plan for the Rikugun to have the squad fire before moving ahead slowly. While I want to close with the Lewis gun section I'd like to take advantage of the double phase to soften them up first before going in with the bayonet. First though, the Rikugun rallies shock from the squad before they open fire and move.


The advance turns into a mad charge.


They may have held their ground, but that British section are reduced to five men and a wounded corporal.


The Japanese on the other hand have been roughly handled and leave many of their comrades behind.


In the centre the Rikugun rallies shock from what remains of the squad and then orders them to fire.


He then orders the adjacent rifle squad to open fire at the British sections opposite.


There are no casualties inflicted but the sections suffer some shock.


The Rikugun then orders the squad in the road to ignore the nearby squad in the jungle and fire at the section with the Lewis gun.

Not all the squad are able to fire, but it doesn't stop those that can from being very effective. Two men are hit and one of those is the section corporal, who receives a second wound which is fatal. 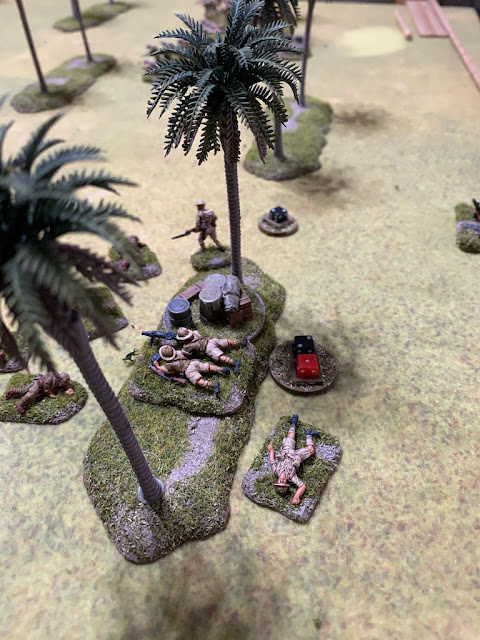
That leaves two men remaining in the section and with four points of shock that's enough to see what is left of the section break.


When it comes to the British phase Dave decides it's time to limit casualties and withdraw the platoon before they suffer any further losses.


The fire is effective and the British take their first casualty when one of the Lewis gun team is hit.

The squad then moves forward, however they do it so aggressively that they charge headlong into the British section. I was planning on close combat, but not this soon. The Japanese urge to close with their enemies has seen them throw caution to the wind.


The odds are fairly even but slightly favour the British who will roll twenty dice to the Japanese sixteen. Unfortunately the dice rolls favour the British who inflict six casualties and three shock on the Japanese who, in return, manage to cause only three casualties and one shock. Both the British section corporal and the Japanese squad corporal are wounded. I use a CoC die to negate the morale roll for the Japanese and British morale remains steady.
With that the remnants of the Japanese squad fall back to behind the hut from whence they came. That wasn't quite what I had intended and although I have come off worse these are casualties I can afford which the British cannot.


While that was not the outcome I was hoping for, the Japanese have the advantage of another phase. Their next command roll is 66544 presenting them with a run of phases where they can continue to apply pressure on the British.
The Gunso is able finally to order the grenade discharger squad to fire, but their first volley is not well aimed and has no effect.

The Gunso then orders the squad forward to join the firing line.


In the centre the Rikugun rallies shock from what remains of the squad and then orders them to fire.

The British lose another man from the rifle team and that sees the section reduced to four men and the corporal.

The Rikugun then moves across the road to the edge of the jungle from where he can issue commands to both of the nearby Japanese squads.


In the next Japanese phase the command roll of 43211 sees an end to the run of consecutive phases, no doubt much to Dave's relief. However the roll will allow for a number of command options. Firstly the Gunso rallies shock from one of the grenade discharger teams.

He then orders the adjacent rifle squad to open fire at the British sections opposite.


The corporal of the grenade discharger squad rallies a further point of shock and then orders the men to fire.

The grenade dischargers have been fairly ineffectual so far and that continues when they manage to inflict a single point of shock.
In the centre the Rikugun orders the few men remaining in the rifle squad to fire. They might not generate much firepower but it's enough to see another casualty in the Lewis team which is now down to a single crew member.

The Rikugun then orders the squad in the road to ignore the nearby squad in the jungle and fire at the section with the Lewis gun.


That leaves two men remaining in the section and with four points of shock that's enough to see what is left of the section break.

The two survivors fall back and leave the table. The sight of them breaking takes British force morale down two points to six.

The Malay Regiment put up stiff resistance and inflicted a number of casualties on the Japanese but the fortunate arrival of a triple phase enabled them to inflict losses in return. Had the Malays remained in position there was a possibility they could have stopped the Japanese, but that was to take quite a risk, as the casualties incurred in so doing could prove crippling for future games had they failed. Nonetheless the casualties they have inflicted on the Japanese today will undoubtedly be enough to see that platoon withdrawn from the campaign and replaced with a fresh one.
The Japanese took thirteen casualties while the Malays suffered only six. The Japanese CO's opinion has risen to +2 with a second victory, however the men's opinion is less positive given the high casualties and the death of an NCO and so drops to -2. The Japanese platoon has suffered seven permanent losses in the campaign so far and will see a number of men missing the next game due to their wounds. This makes it highly likely the current platoon will need replacing for the coming scenario on Map 3.
The British CO's opinion drops to 0 and the men's opinion falls to -1. Casualties so far in the campaign have seen the platoon lose five men permanently and they will have two men missing with wounds for the next game. The question facing Dave is whether he wants to commit a fresh platoon now or wait to see the outcome of the next game? You can find out what happens next in the campaign in this post.
You find reports for all the games in this campaign and many other campaigns on the Chain of Command Campaign AAR page here.
If you are interested in more action set in the Far East you can follow another campaign between the Australians and Japanese that takes place in Malaya a few weeks prior to this current campaign. Click here for the first game report for the Malaya 1942 campaign.

Lovely report, thanks for putting all of the time in to share this.
ReplyDeleteThanks Norm, glad you enjoyed it.
DeleteFine looking table and narrative as ever. The British are putting up a stuff resistance, the decision on when to retire is very challenging.
ReplyDeleteThanks Phil, I agree, do you stay and try and inflict a few more casualties or go while things are going well? The risk of an enemy run of phases always needs to be considered. Depending on whose perspective you take that triple phase couldn’t have come at a better/worse time.
DeleteFantastic as usual, many thanks.
ReplyDeleteThanks Iain.
DeleteAnother great report, cant wait for the next game
ReplyDeleteThanks Tom, hopefully another game this week, Sotheby’s next is not too far away.
DeleteExcellent set-up and AAR. For a moment I thought the Malay Regt. might hold the onslaught there.
ReplyDeleteThanks A J. Agree, a bit of luck for the Japanese helped swing the game in my favour (or at least make Dave question if it was worth fighting on).
DeleteTerrific report, the malay regiment very unlucky to face a triple phase, and the Japanese could have been in serious trouble. I am not sure I wouldn't have been tempted as the British player to try another phase before retiring.
ReplyDeleteNice report and seemed like a hard attack for the Japanese but it seemed that some lucky command rolls pulled it off. Good reading! 😀
ReplyDelete