

The French platoon is not at full strength with several men killed and wounded during the last game. Most notable of those was the death of the platoon commander. As a result the sergeant-chef, the second in command, will step up to fill that role. However, with only two command initiatives and a 6" command range his ability to control the platoon is limited. That command situation is not made any easier when no one can be found to fill the now vacant position of sergeant-chef, leaving the platoon with a solitary senior leader. The demise of the lieutenant has been compounded by the loss of one of the sergeants from a Groupe de Combat. A man has been promoted from the ranks to replace him, but much like the sergeant-chef he will take time to find his feet and be accepted by the men.

On the other hand the German platoon has come through the last three games without taking any permanent losses and is in good shape. This is important, as I have drawn on all of the allotted reinforcements for the campaign and this final platoon must go the distance. We need to continue winning scenarios but also keep a sharp eye on casualties if we are to see the campaign through to completion.

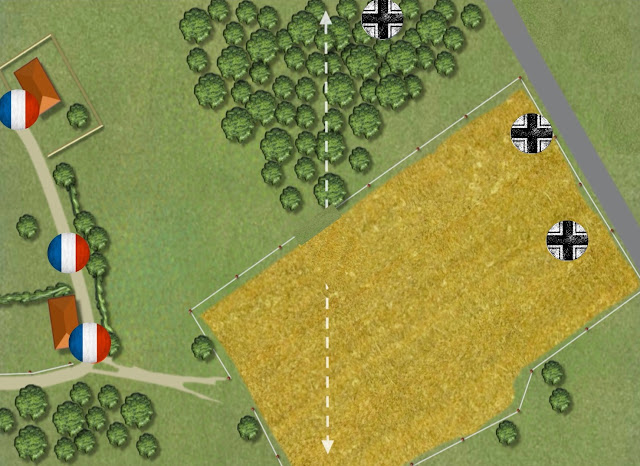
The premise for this scenario is simple, the Germans must capture all of the French jump-off-points or drive their morale down to zero. This is based on the Swift to Support scenario from the 1940 Blitzkrieg Handbook where time is of critical importance due to the delayed arrival of the French support units. This gives the Germans a brief window to push hard and take advantage of the weak French platoon before it can be reinforced.
Looking at this from the French perspective I would be aiming to have my jump-off-points far back on the table in order to buy as much time as possible for the first turn to end. The two buildings and the surrounding wall all offer ideal locations for this rearward defence.

I have twelve support points available for the Germans. Considering the importance of the two buildings I will call on a Stuka bombardment. It can serve two purposes, firstly, with some luck, it may damage or destroy the buildings and secondly, it may delay early French deployment giving me more time to close in on the jump-off-points.
To add further disruption to French deployment I will call on a 5th columnist. A rifle squad will also be assigned to the platoon to provide more tactical options and firepower. Lastly, to ensure I can make the most of the four squads under my command, I will add a red dice.
The French have nine support points (which includes an additional one due to their CO's opinion). The scenario also provides them with one Canon de 75 m1897, the redoubtable 'soixante quinze'. While the 75mm gun is available from the start I hope to be tackling no more than that gun and what remains of the existing platoon before the arrival of the French support on turn two (which I hope will arrive too late in the game to be of much help).
We commence with the Stuka bombardment. As in the previous game the French are expecting an aerial attack and have called on AA guns for support. These guns will make it harder for the Stukas to hit the buildings and reduces the amount of shock that can be inflicted on units as they deploy.

The first Stuka attack fails to hit its target.

With the AA guns reducing the chance of a hit I am not optimistic as the Stukas dive down on the second building.

However this time the strike is on target, hitting the building and making it unstable.

That's a pleasing result which effectively denies the building to the defenders for fear it will collapse upon them. The surrounding wall is also denied as a position because it is within 4" of the farmhouse and so subject to falling rubble.
The patrol phase plays out much as I had imagined and the French have set their defence to the rear of the table.
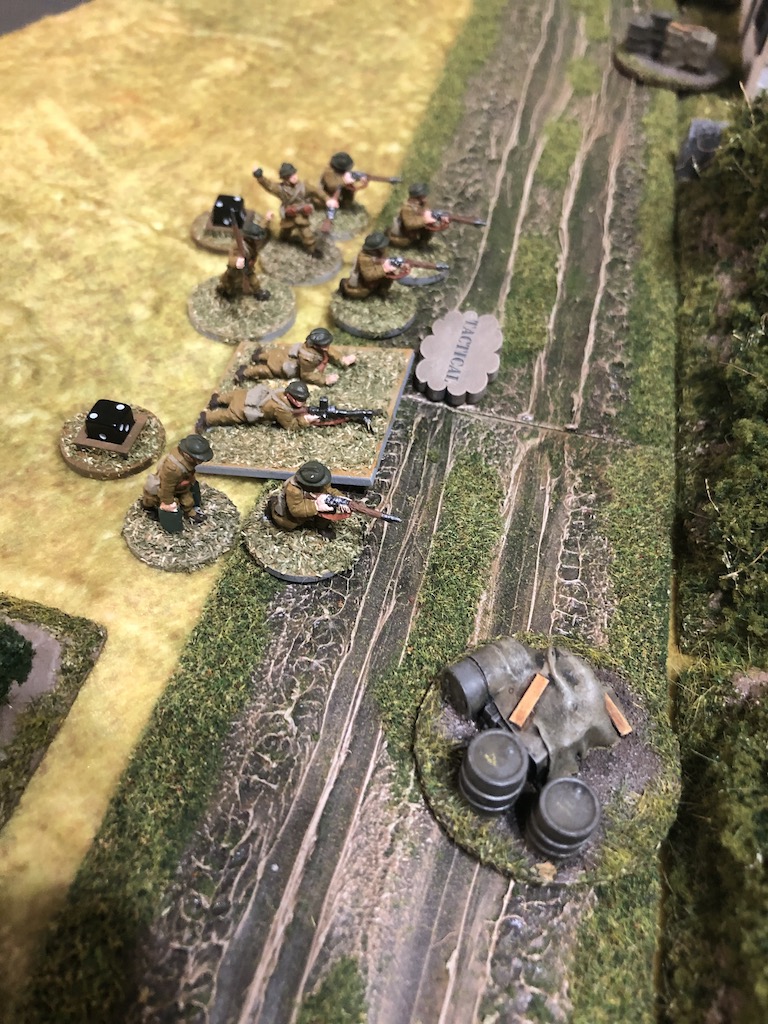
They have the initiative and so the first phase. In previous games Dave has not enjoyed much luck trying to deploy through Stuka bombardments and so has decided it's best to try to deploy units as soon as possible. His first attempt to deploy a Groupe de Combat fails, but a second Groupe de Combat succeeds.
They arrive with each team having taken three points of shock and deploy back from the hedges where their sergeant can try to rally off that shock before moving them up to the firing line.


A third, weakened Groupe de Combat made up of a single LMG team and their newly promoted sergeant fail to deploy, as does the VB rifle grenadier team. As Dave observes, that's one deployment out of four, maintaining his average for this campaign. I have no complaints, naturally.
The German command roll of 644441 is not what I was hoping for, so much for moving quickly and early. All I can do is deploy the platoon's 50mm mortar team and the Feldwebel into the woods.


An attempt to deploy a second Groupe de Combat fails. The 75mm gun is more successful and arrives with a single point of shock which the gun commander rallies off immediately before placing the gun crew on overwatch.
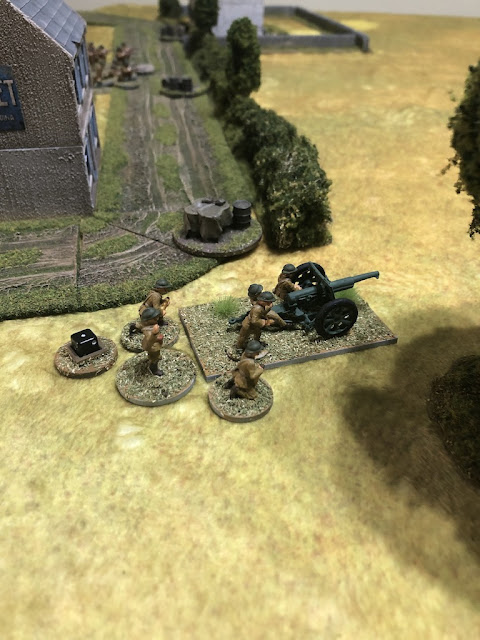

The weakened Groupe de Combat has more success deploying this phase and arrives through the barrage with three points of shock to take up a position near the 75mm gun. Like the previous Groupe de Combat they sit back from the hedgerow to recover from the shock.

This puts quite a few French units on the table before the German platoon has even started to deploy. I have a horrible feeling my plan is starting to fall apart.

The next German command roll of 666322 is a real mixed blessing. While a double phase is always welcome, the end of the turn so early in the game most certainly is not. That will see the end of the Stuka bombardment and the release of the French support units. I'd happily forego the double phase to prevent the turn end, but that is not to be. I need to start moving quickly before the French have time to build up a formidable defensive position.
The first German squad attempts to deploy into the woods and is distracted by the presence of Franc Tireurs and so they fail to deploy. With a single jump-off-point in the woods this really limits my actions. Deploying into the wheat field in the face of the French 75 is not an attractive option and so I persevere trying to deploy squads in the presence of the Franc Tireurs. The second squad also fails to deploy. Hmmm, this is a double phase going nowhere fast. I persist and thankfully the third squad rolls a six, enough to see off the Franc Tireurs and deploy.


This is not the dynamic start I was hoping for, it looks like I might have quite a fight on my hands by the time the full platoon is deployed.
With the turn end the unstable building collapses. While this reduces it to light cover I would have much preferred it to remain unstable and too hazardous for the French to occupy.

The following German command roll is 665521. Again a mixed blessing. Great to have another double phase but with only a 2 and 1 for deployment or activation I'm not able to take full advantage of the good fortune. Things take another turn for the worse when the movement roll for the squad in the woods is 1,1. The dice are really toying with me today! The mortar team move a little faster, but this is not feeling like blitzkrieg.

Things are no better in the following phase, where a roll of 655111 proves equally frustrating. I continue to push forward with the squad and mortar team, who at least move a little faster this time around.

The Escouade de Fusiliers Motocyclistes are then placed on overwatch in anticipation of the arriving enemy. This is really looking like a tough nut to crack for the Germans.
The next German command roll is 66221(5). Perhaps my patience is being rewarded and I can take advantage of this double phase to move to the edge of the woods and engage the French?
The activation options are not ideal and so I decide to deploy my platoon Leutnant despite the fact I still have a squad to deploy. I need to make the most of this opportunity while I have it. He orders the left hand squad to move to the edge of the woods. I want to be sure they reach their destination so forego moving tactically. I may receive some fire from the overwatch units but I'm prepared to take the risk.


With both senior leaders on the table the Germans are able to activate all their units in the next phase. The Feldwebel orders the mortar team to target the 75mm gun. One round hits the target but with the protection of the gun shield the crew escape unharmed.


The squad to their left opens fire on the Escouade de Fusiliers Motocycliste.

The motocyclistes lose a man and take a point of shock.


As planned the German squad in the centre moves slowly and fires at half effect at the Escouade de Fusiliers Motocycliste. Their fire is devastating, hitting three men. The junior leader is unscathed but the remainder of the team is wiped out. French morale drops a point to nine.

The platoon Leutnant makes his way forward so that he has better control over the platoon and he orders one of the squads to fire at the French at the hedgerow.


They suffer a casualty and it's their sergeant who is killed. French morale takes another blow and drops to eight.

With the Leutnant issuing commands, the Obergefreiters are free to activate and set about rallying shock from their squads. Lastly, I decide to deploy my final squad into the wheat field. With all senior leaders on the table this requires a die roll, but the squad passes and takes up tactical positions. My intention is that they can apply suppressive covering fire to assist the units in the woods while exerting a threat to the French right flank.


The Obergefreiter of the nearest squad is hit and stunned and the squad's LMG team take a point of shock. German morale stays steady.

The 75 fires, but is made less effective by the covering fire. Nonetheless there are two hits, but these have no effect on the Germans.


The firefight continues in this vein for several phases with both sides swapping losses and shock. Another sergeant, this time from the Groupe de Combat alongside the 75 is wounded and stunned which takes French morale down to seven. Their command situation looks perilous. They have seen a sergeant killed and another wounded. The third Groupe de Combat is commanded by a man only recently promoted from the ranks and the entire platoon is under the sole command of a newly promoted Lieutenant.

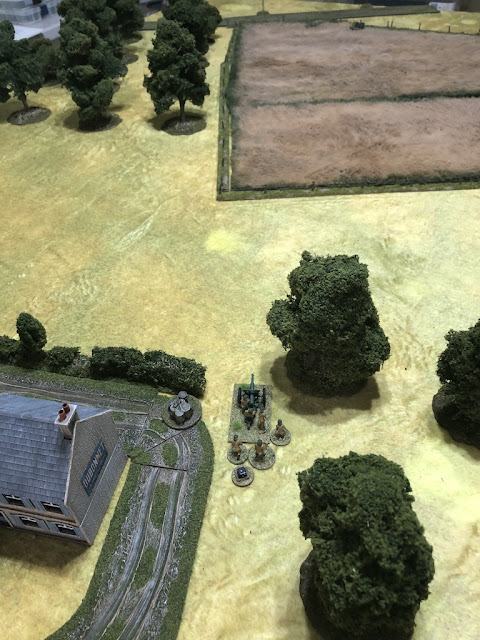
While the firefight blazes away across the open ground the Panhard armoured car, emboldened by the knowledge that the German infantry are without an effective anti-tank weapon, begins to make its presence felt. Edging forward slowly it fires into the woods.

With the large Groupe de Combat at the hedge pinned down the French bring the weakened Groupe de Combat forward to join the fight.

They soon become the subject of German attention and in a short period accumulate seven points of shock.

In the following phase they are hit with more fire, losing their sergeant killed and acquiring enough shock to pin. This sees French morale drop down to six.

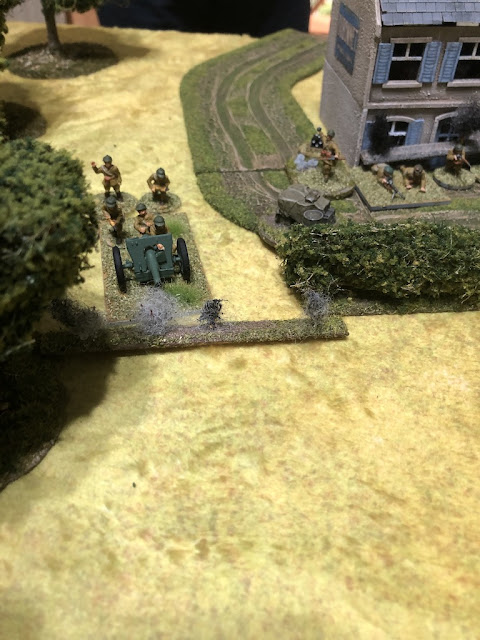
Just when the Germans appear to be gaining the upper hand the French 75 hurls a few very effective rounds into the woods.

The Obergefreiter of the centre squad is killed, which is a blow to German morale taking it down from seven to five. Fire from the Groupe de Combat next to the 75 manages to kill a crew member from two of the LMG teams. Shock and losses are starting to accumulate for the Germans.

The biggest threat comes from the 75 and the Panhard, both of which are starting to take their toll.

Despite being pinned and carrying significant shock even the French at the hedgerow manage to kill one of the German mortar crew with their limited fire. This is followed by a burst from the Panhard which brings the mortar team close to pinning, saved only by the proximity of the wounded Feldwebel.

While the Germans in the woods continue to try to inflict casualties on the remaining French infantry and the 75, the squad in the wheat field maintain their covering fire. While it's reducing the effectiveness of French fire I can't quite do enough to tip the balance in the firefight.


In the following French phase the 75 inflicts another casualty to a squad in the woods and adds to their shock. I may be overestimating the threat from the Panhard and I feel it's time to get the platoon moving rather than fighting it out like this, but where to go?

The VB team then fire off their final volley into the woods and that's enough to see the mortar team pinned.


Meanwhile the Panhard continues to be a complete menace. It moves forward boldly firing into the woods. The MG fire causes a casualty and its the stunned Feldwebel who is hit again. He takes a second wound and is stunned again. This proves to be a turning point for the Germans as their morale drop two points down to three.

With force morale this low the Germans not only lose the red dice but two normal command dice. While they can still apply a fair amount of firepower, rolling only three command dice means their prospects are not looking great.


The squads fire at the Groupe de Combat and the 75. Their fire is still very effective and the French see their wounded sergeant killed and further casualties from the gun crew and LMG team. French morale drops to five. The French have seen all three sergeants from their Groupes de Combat killed. Can the Germans do enough to drive down French morale and grab an unlikely victory?

The French have other ideas and the Panhard continues to spray the woods, killing a member of one of the LMG crews. If it wasn't for the Panhard the Germans could possibly break out from the woods and try to assault the French position, but the prospect of my men being caught out in the open and mown down by the Panhard's MG is enough to make me think twice.

Unlike the Germans the French cannot apply quite as much firepower in return, but what they can do continues to add shock to my squads.


Casualties are mounting for both sides and we both need to keep our platoons in reasonable shape to fight again, but I think we each sense the other is close to tipping point and it's worth staying in the fight. German fire kills another member of the 75 crew and one of the nearby LMG team.

The Obergefreiter in the wheat field orders the rifle team to put more covering fire on the 75 while the LMG team are ordered to fire at the gun crew, but it has no effect.

Just as events seem finely balanced the French roll a double phase. The 75 continues to pump out punishment and the Germans take two casualties which make the squad nearest the gun very close to pinning. The French LMG team are less successful, but at least they have another phase.

Matters only get worse with another French command roll including a double six. The


With the AA guns reducing the chance of a hit I am not optimistic as the Stukas dive down on the second building.

However this time the strike is on target, hitting the building and making it unstable.

That's a pleasing result which effectively denies the building to the defenders for fear it will collapse upon them. The surrounding wall is also denied as a position because it is within 4" of the farmhouse and so subject to falling rubble.
The patrol phase plays out much as I had imagined and the French have set their defence to the rear of the table.

They have the initiative and so the first phase. In previous games Dave has not enjoyed much luck trying to deploy through Stuka bombardments and so has decided it's best to try to deploy units as soon as possible. His first attempt to deploy a Groupe de Combat fails, but a second Groupe de Combat succeeds.
They arrive with each team having taken three points of shock and deploy back from the hedges where their sergeant can try to rally off that shock before moving them up to the firing line.


A third, weakened Groupe de Combat made up of a single LMG team and their newly promoted sergeant fail to deploy, as does the VB rifle grenadier team. As Dave observes, that's one deployment out of four, maintaining his average for this campaign. I have no complaints, naturally.
The German command roll of 644441 is not what I was hoping for, so much for moving quickly and early. All I can do is deploy the platoon's 50mm mortar team and the Feldwebel into the woods.


The French enjoy a much more useful command roll of 32211. The sergeant begins to rally the shocked teams under his command.


The weakened Groupe de Combat has more success deploying this phase and arrives through the barrage with three points of shock to take up a position near the 75mm gun. Like the previous Groupe de Combat they sit back from the hedgerow to recover from the shock.

This puts quite a few French units on the table before the German platoon has even started to deploy. I have a horrible feeling my plan is starting to fall apart.

The next German command roll of 666322 is a real mixed blessing. While a double phase is always welcome, the end of the turn so early in the game most certainly is not. That will see the end of the Stuka bombardment and the release of the French support units. I'd happily forego the double phase to prevent the turn end, but that is not to be. I need to start moving quickly before the French have time to build up a formidable defensive position.
The first German squad attempts to deploy into the woods and is distracted by the presence of Franc Tireurs and so they fail to deploy. With a single jump-off-point in the woods this really limits my actions. Deploying into the wheat field in the face of the French 75 is not an attractive option and so I persevere trying to deploy squads in the presence of the Franc Tireurs. The second squad also fails to deploy. Hmmm, this is a double phase going nowhere fast. I persist and thankfully the third squad rolls a six, enough to see off the Franc Tireurs and deploy.


This is not the dynamic start I was hoping for, it looks like I might have quite a fight on my hands by the time the full platoon is deployed.
With the turn end the unstable building collapses. While this reduces it to light cover I would have much preferred it to remain unstable and too hazardous for the French to occupy.

The following German command roll is 665521. Again a mixed blessing. Great to have another double phase but with only a 2 and 1 for deployment or activation I'm not able to take full advantage of the good fortune. Things take another turn for the worse when the movement roll for the squad in the woods is 1,1. The dice are really toying with me today! The mortar team move a little faster, but this is not feeling like blitzkrieg.

Things are no better in the following phase, where a roll of 655111 proves equally frustrating. I continue to push forward with the squad and mortar team, who at least move a little faster this time around.

Well, that was three phases in a row and all I have to show for it is the deployment of one squad and a collective move forward of 7" for that squad and the mortar team. So much for the advantages of a series of consecutive phases.
The French are now free of the disruption caused by the Stuka bombardment and free to deploy their support units. I still have the option to use the 5th columnist which I had been holding back while I wait to see how my attack developed. I was hoping to use it at a critical point to prevent a French response on one of the flanks, but with most French units deployed it seems that moment has passed. When the French attempt to deploy a Groupe de Combat from their central jump-off-point the 5th columnist is used successfully to prevent their arrival.

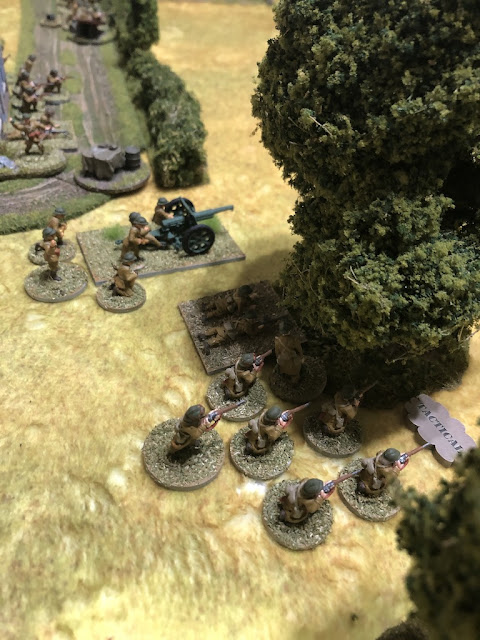
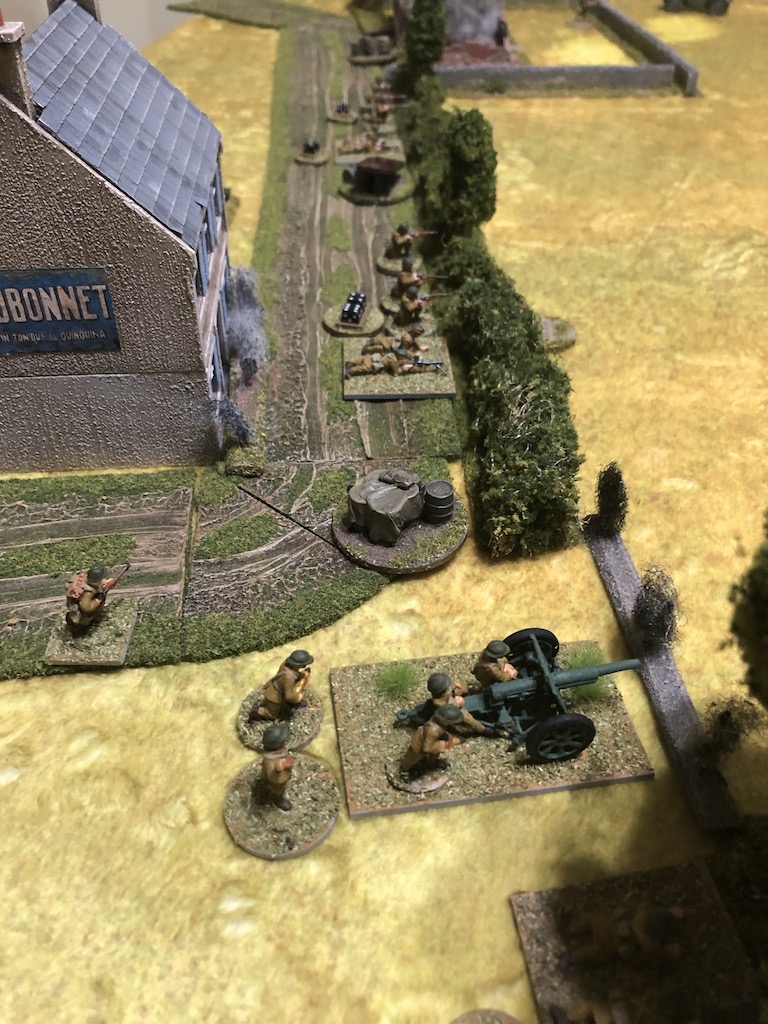
Next, taking advantage of their 9" deployment range, an Escouade de Fusiliers Motocycliste deploy behind the wall in front of the ruined farmhouse.

On the French right the newly promoted platoon lieutenant deploys and immediately takes shock off the Groupe de Combat before ordering them forward to the hedge.


The French are now free of the disruption caused by the Stuka bombardment and free to deploy their support units. I still have the option to use the 5th columnist which I had been holding back while I wait to see how my attack developed. I was hoping to use it at a critical point to prevent a French response on one of the flanks, but with most French units deployed it seems that moment has passed. When the French attempt to deploy a Groupe de Combat from their central jump-off-point the 5th columnist is used successfully to prevent their arrival.

Next, taking advantage of their 9" deployment range, an Escouade de Fusiliers Motocycliste deploy behind the wall in front of the ruined farmhouse.

On the French right the newly promoted platoon lieutenant deploys and immediately takes shock off the Groupe de Combat before ordering them forward to the hedge.


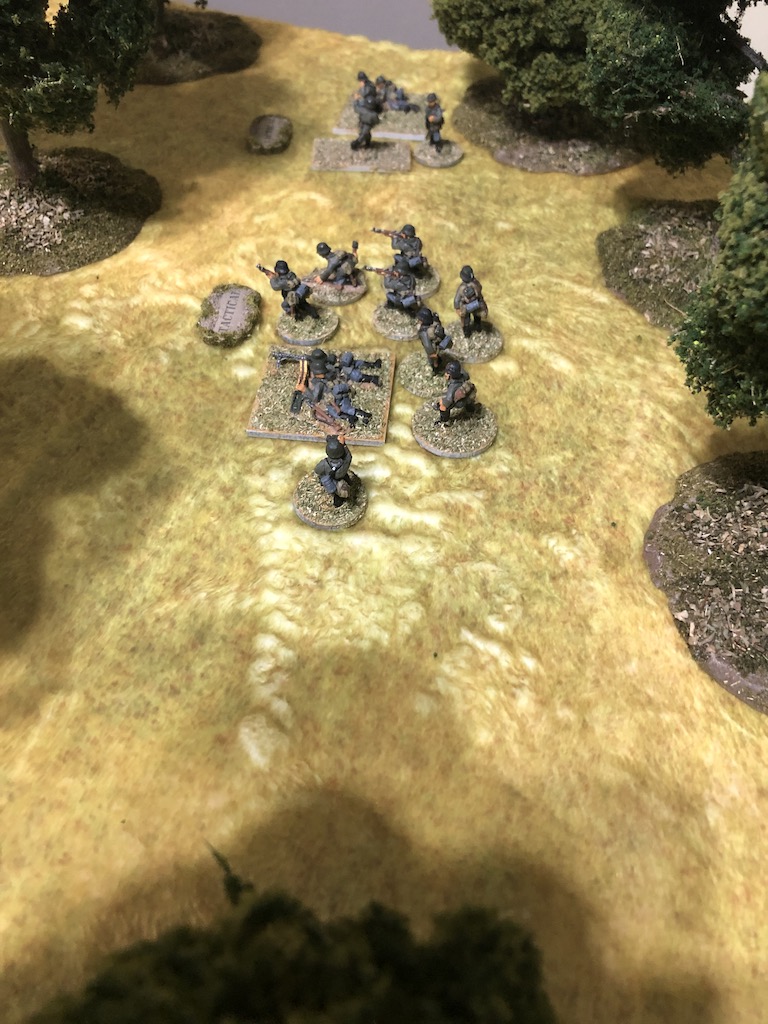
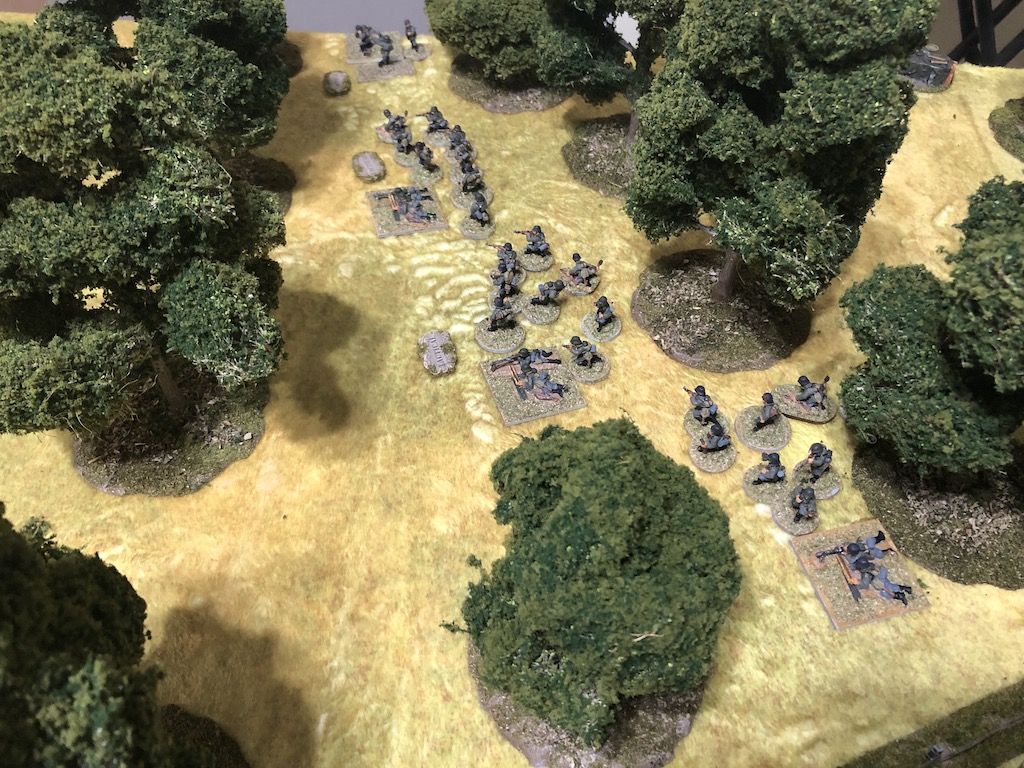
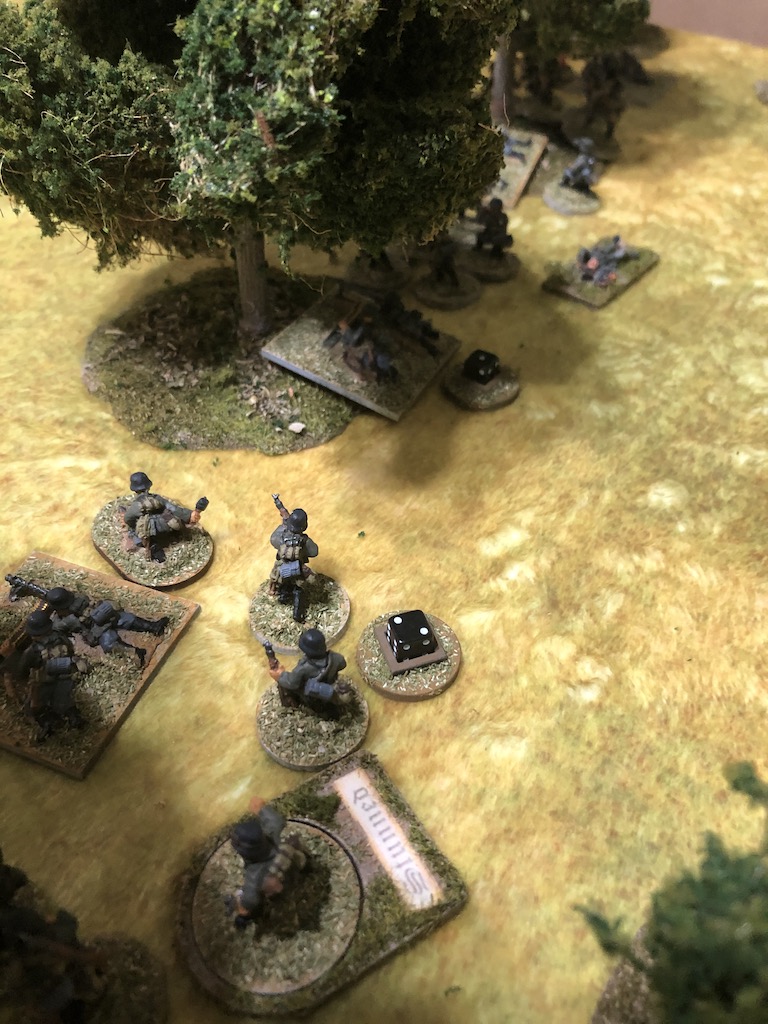
Eventually the Germans are able to move into action and in the following phase two squads deploy into the woods.

Meanwhile the Feldwebel orders the mortar team and squad to begin moving cautiously towards the edge of the treeline.

Despite my frustration I'm in no hurry to bring these two units into sight of the French before they have the support of other friendly units. If I arrive piecemeal I shall probably be destroyed piecemeal and there is nothing to be gained from that. The time for a bold rush forward has passed, so I need a little bit of patience and to avoid the urge to do anything rash.
The French command roll of 44442 provides little scope for action, but with most units on the table and ready to receive the Germans they have less sense of urgency. The platoon's final Groupe de Combat deploys, taking up tactical positions in the woods alongside the 75mm gun.

The platoon Lieutenant rallies shock from the Groupe de Combat at the hedge and puts their LMG team onto overwatch.


Meanwhile the Feldwebel orders the mortar team and squad to begin moving cautiously towards the edge of the treeline.
Despite my frustration I'm in no hurry to bring these two units into sight of the French before they have the support of other friendly units. If I arrive piecemeal I shall probably be destroyed piecemeal and there is nothing to be gained from that. The time for a bold rush forward has passed, so I need a little bit of patience and to avoid the urge to do anything rash.
The French command roll of 44442 provides little scope for action, but with most units on the table and ready to receive the Germans they have less sense of urgency. The platoon's final Groupe de Combat deploys, taking up tactical positions in the woods alongside the 75mm gun.


The platoon Lieutenant rallies shock from the Groupe de Combat at the hedge and puts their LMG team onto overwatch.


At this point I take a moment to consider my options. Is there any reason to continue here or should I withdraw? I'm serious. I know it seems crazy when not a bullet has been fired, but most of the German advantages have gone. The key was speed and a disrupted French deployment before turn 2 arrived. None of this has happened and now I will have to face a protracted firefight against a French force fully deployed and ready for my arrival. Most importantly I can't afford a bloodbath, I need to keep casualties at a manageable level.
With the element of surprise now gone all I have left to rely on is my one remaining asset - German firepower. I have four well equipped squads, the benefit of two senior leaders and a red dice. The French cannot afford too many casualties either, so perhaps if I play this carefully I can bring my remaining advantage to bear and find a way to overcome the defenders.

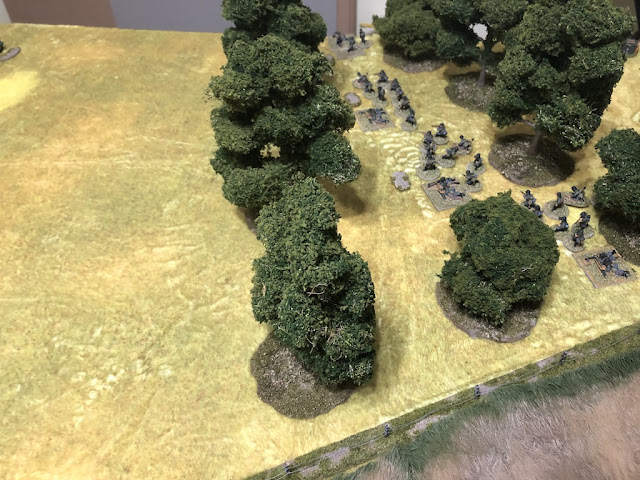
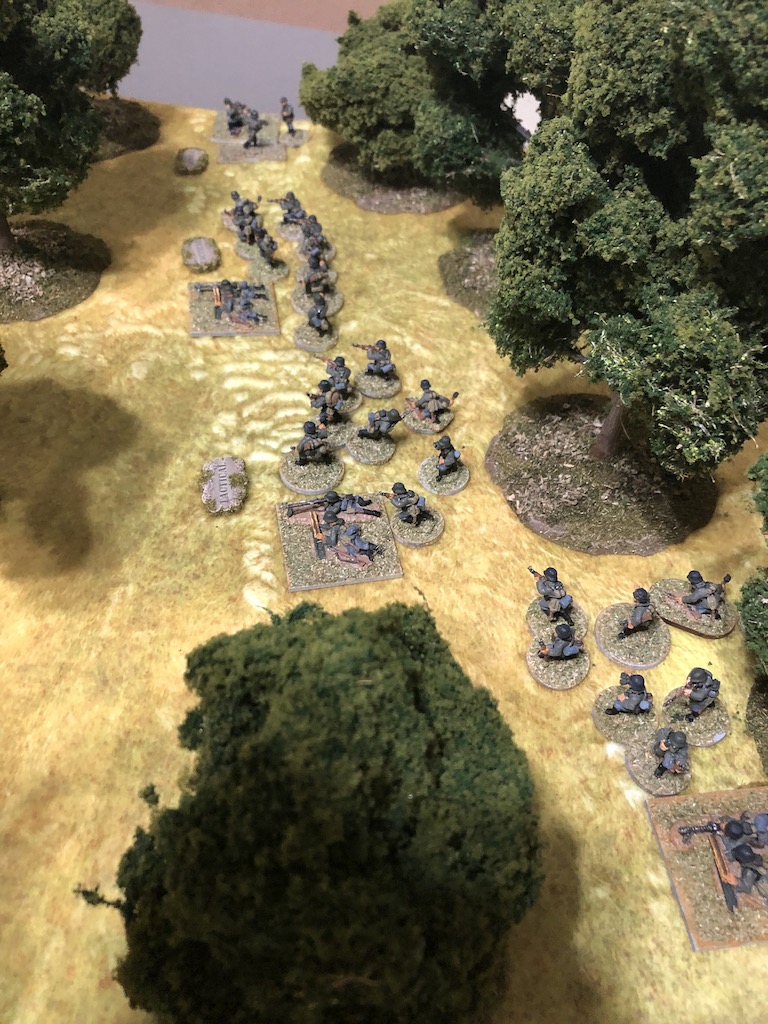
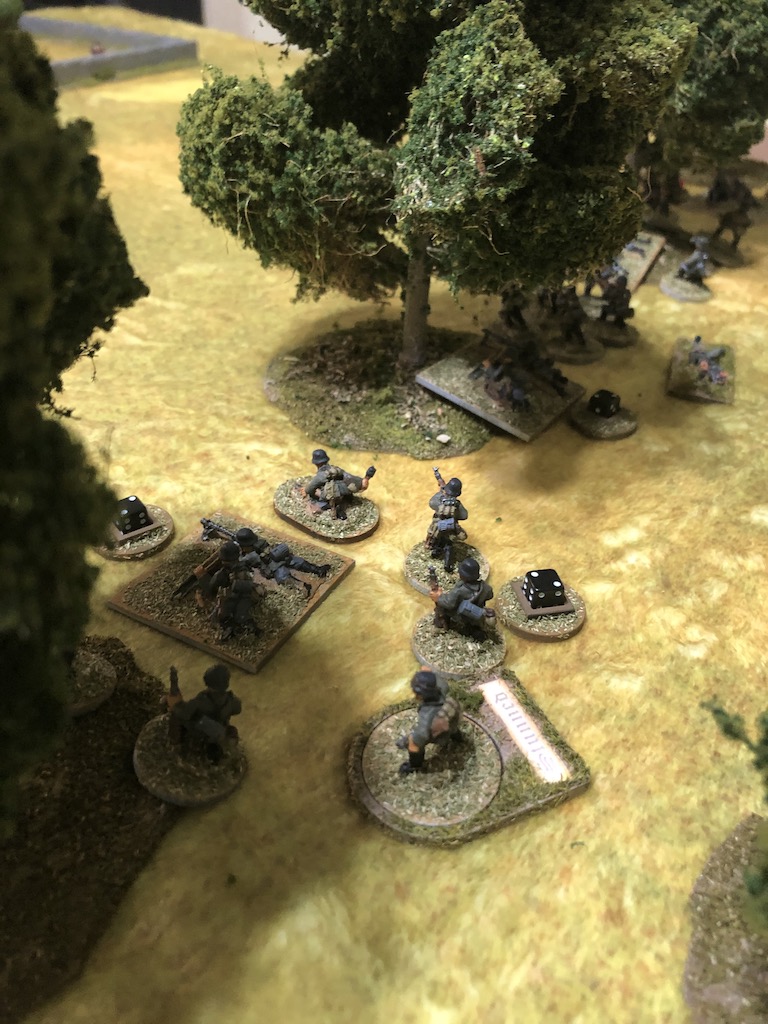
The next German phase sees a careful move forward in the woods. Ideally all German squads and the mortar team arrive at the treeline at the same time and present the French with the full force of their firepower.

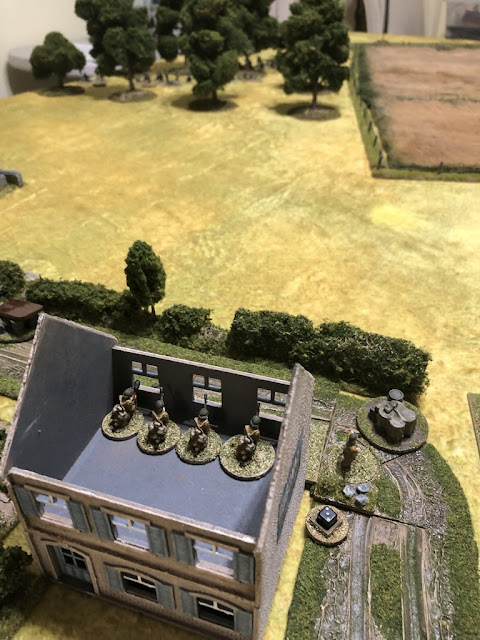
The French deploy the platoon's VB rifle grenadier team into the upper level of the undamaged house.

With the element of surprise now gone all I have left to rely on is my one remaining asset - German firepower. I have four well equipped squads, the benefit of two senior leaders and a red dice. The French cannot afford too many casualties either, so perhaps if I play this carefully I can bring my remaining advantage to bear and find a way to overcome the defenders.

The next German phase sees a careful move forward in the woods. Ideally all German squads and the mortar team arrive at the treeline at the same time and present the French with the full force of their firepower.

The French deploy the platoon's VB rifle grenadier team into the upper level of the undamaged house.


Somewhat more alarmingly a Panhard armoured car arrives on the French left flank. As I write this I realise at that point we missed one of the Stuka Bombardment rules. Unlike infantry, when it comes to vehicles and AFVs the effects of the Stukas last beyond the first turn. In their case they continue to roll to deploy, on the assumption the bombardment has damaged and blocked roads to the rear with longer term consequences.


The next command roll sees the Germans accumulate a full CoC die which could come in useful. Meanwhile the squads all continue to edge forward carefully.

As the slow German build up takes place the French prepare themselves. The Lieutenant rallies shock off the nearest Groupe de Combat.


The next command roll sees the Germans accumulate a full CoC die which could come in useful. Meanwhile the squads all continue to edge forward carefully.
As the slow German build up takes place the French prepare themselves. The Lieutenant rallies shock off the nearest Groupe de Combat.

The Escouade de Fusiliers Motocyclistes are then placed on overwatch in anticipation of the arriving enemy. This is really looking like a tough nut to crack for the Germans.
The next German command roll is 66221(5). Perhaps my patience is being rewarded and I can take advantage of this double phase to move to the edge of the woods and engage the French?
The activation options are not ideal and so I decide to deploy my platoon Leutnant despite the fact I still have a squad to deploy. I need to make the most of this opportunity while I have it. He orders the left hand squad to move to the edge of the woods. I want to be sure they reach their destination so forego moving tactically. I may receive some fire from the overwatch units but I'm prepared to take the risk.


Unsurprisingly the LMG team from the Groupe de Combat behind the hedge opens fire.

The Germans take a point of shock on each team.

With the squad in the centre closer to the edge of the woods I decide they can be cautious and move tactically, unfortunately they are over-cautious and don't move far enough. However the squad to their right is more successful, but their arrival invites a response from the Escouade de Fusiliers Motocycliste and the Panhard, both of which are on overwatch.


The French efforts are meagre with only three hits resulting in a single point of shock on the rifle team. The German squad is then joined by the mortar team which also moves tactically.

This puts me in a good position for the following phase. It's a shame that one of the squads didn't move quite far enough but in the next phase they should at least be able to move with one dice and fire at half effect.

With both senior leaders on the table the Germans are able to activate all their units in the next phase. The Feldwebel orders the mortar team to target the 75mm gun. One round hits the target but with the protection of the gun shield the crew escape unharmed.


The squad to their left opens fire on the Escouade de Fusiliers Motocycliste.

The motocyclistes lose a man and take a point of shock.


As planned the German squad in the centre moves slowly and fires at half effect at the Escouade de Fusiliers Motocycliste. Their fire is devastating, hitting three men. The junior leader is unscathed but the remainder of the team is wiped out. French morale drops a point to nine.

The platoon Leutnant makes his way forward so that he has better control over the platoon and he orders one of the squads to fire at the French at the hedgerow.


They suffer a casualty and it's their sergeant who is killed. French morale takes another blow and drops to eight.

With the Leutnant issuing commands, the Obergefreiters are free to activate and set about rallying shock from their squads. Lastly, I decide to deploy my final squad into the wheat field. With all senior leaders on the table this requires a die roll, but the squad passes and takes up tactical positions. My intention is that they can apply suppressive covering fire to assist the units in the woods while exerting a threat to the French right flank.


There is a danger the game may descend into a protracted firefight but I don't want to make any moves forward until I'm confident I have suppressed enough French fire. As always the threat of taking high casualties sits at the back of my mind. I don't want to risk being caught in the open.
The French continue to return fire in their phase. The platoon Lieutenant has the VB team and one of the Groupes de Combat fire into the woods. Before they do that I use my CoC die to interrupt and fire at the Groupe de Combat behind the hedge. I want to dominate this firefight and so it seems worthwhile to use the CoC die to gain whatever advantage I can.

The French lose a man from the rifle team and the LMG team suffer a point of shock. The loss of their sergeant will mean they will have trouble rallying should that shock start to build up.

The VB team and Groupe de Combat take their turn to fire back.


The Germans suffer three casualties including the Feldwebel who is wounded and stunned. German morale drops to seven.

In the German phase the firefight continues unabated. The mortar fires at the 75 but has no effect. The Leutnant then orders two of the squads to fire at the hedgerow.

The LMG team loses a casualty and more shock accumulates.

Without a leader to help them rally I feel this Groupe de Combat is now quite vulnerable and so the Leutnant uses his last command initiative to have the third squad target the same unit.

The LMG team loses another man and the resulting shock means that the Groupe de Combat is now pinned. That's a good result, effectively removing the threat from one French unit. This makes the French left flank weaker and if it wasn't for the presence of the Panhard it would be tempting to try to break through on that side.

As planned the Obergefreiter in the wheat field has the LMG team place covering fire on the upper level of the house with the VB team while he has the rifle team lay down similar covering fire on the woods where the 75mm gun is situated.


With limited command options (not helped by their shortage of leaders) the French return what fire they can against the Germans in the woods. From their right the LMG team opens fire.


The Obergefreiter of the nearest squad is hit and stunned and the squad's LMG team take a point of shock. German morale stays steady.

The 75 fires, but is made less effective by the covering fire. Nonetheless there are two hits, but these have no effect on the Germans.


The firefight continues in this vein for several phases with both sides swapping losses and shock. Another sergeant, this time from the Groupe de Combat alongside the 75 is wounded and stunned which takes French morale down to seven. Their command situation looks perilous. They have seen a sergeant killed and another wounded. The third Groupe de Combat is commanded by a man only recently promoted from the ranks and the entire platoon is under the sole command of a newly promoted Lieutenant.

While the firefight blazes away across the open ground the Panhard armoured car, emboldened by the knowledge that the German infantry are without an effective anti-tank weapon, begins to make its presence felt. Edging forward slowly it fires into the woods.

With the large Groupe de Combat at the hedge pinned down the French bring the weakened Groupe de Combat forward to join the fight.

They soon become the subject of German attention and in a short period accumulate seven points of shock.

In the following phase they are hit with more fire, losing their sergeant killed and acquiring enough shock to pin. This sees French morale drop down to six.

Just when the Germans appear to be gaining the upper hand the French 75 hurls a few very effective rounds into the woods.
The Obergefreiter of the centre squad is killed, which is a blow to German morale taking it down from seven to five. Fire from the Groupe de Combat next to the 75 manages to kill a crew member from two of the LMG teams. Shock and losses are starting to accumulate for the Germans.


The VB team then fire off their final volley into the woods and that's enough to see the mortar team pinned.


With force morale this low the Germans not only lose the red dice but two normal command dice. While they can still apply a fair amount of firepower, rolling only three command dice means their prospects are not looking great.

The squads fire at the Groupe de Combat and the 75. Their fire is still very effective and the French see their wounded sergeant killed and further casualties from the gun crew and LMG team. French morale drops to five. The French have seen all three sergeants from their Groupes de Combat killed. Can the Germans do enough to drive down French morale and grab an unlikely victory?

The French have other ideas and the Panhard continues to spray the woods, killing a member of one of the LMG crews. If it wasn't for the Panhard the Germans could possibly break out from the woods and try to assault the French position, but the prospect of my men being caught out in the open and mown down by the Panhard's MG is enough to make me think twice.

Unlike the Germans the French cannot apply quite as much firepower in return, but what they can do continues to add shock to my squads.


The Obergefreiter in the wheat field orders the rifle team to put more covering fire on the 75 while the LMG team are ordered to fire at the gun crew, but it has no effect.


Groupe de Combat by the 75 fires into the woods.

The Obergefreiter from the nearest squad is hit and wounded. He's already carrying a light wound but this time he is stunned, so doesn't die. I use a CoC die to avoid the force morale roll for his wounding, but things are becoming desperate.

The Panhard targets the German mortar team and that's enough to see the team wiped out. German morale drops down to two.

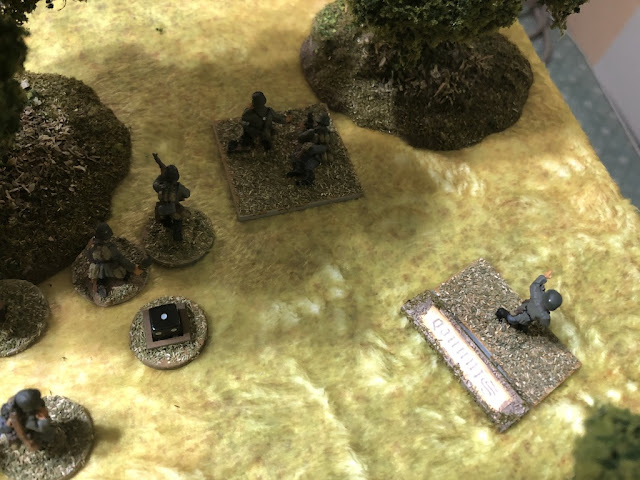
With force morale at two the Germans must move a unit to a jump-off-point. The squad at the corner of the woods is the most vulnerable and so it makes sense to pull them back from the firing line.


The French run of phases comes to an end but not before they have a chance to inflict more shock and another casualty on the Germans.


It comes as no surprise that at the start of the next German phase I announce my intention to withdraw. I can see no point in continuing and taking further losses, especially with my force morale so low.
That leaves the French in possession of the battlefield. Casualties have been high on both sides and the toll of French leaders has been significant. All the sergeants from the core platoon were killed and they were lucky this didn't have a greater impact on their force morale. The 75mm gun proved a very useful weapon, despite the loss of three of the crew.

The French units left holding the hedgerow were leaderless and pinned, but they were still there. German firepower was heavy but not enough to force the issue.


The Obergefreiter from the nearest squad is hit and wounded. He's already carrying a light wound but this time he is stunned, so doesn't die. I use a CoC die to avoid the force morale roll for his wounding, but things are becoming desperate.

The Panhard targets the German mortar team and that's enough to see the team wiped out. German morale drops down to two.


The French run of phases comes to an end but not before they have a chance to inflict more shock and another casualty on the Germans.


It comes as no surprise that at the start of the next German phase I announce my intention to withdraw. I can see no point in continuing and taking further losses, especially with my force morale so low.
That leaves the French in possession of the battlefield. Casualties have been high on both sides and the toll of French leaders has been significant. All the sergeants from the core platoon were killed and they were lucky this didn't have a greater impact on their force morale. The 75mm gun proved a very useful weapon, despite the loss of three of the crew.

The French units left holding the hedgerow were leaderless and pinned, but they were still there. German firepower was heavy but not enough to force the issue.


The Germans suffered fifteen casualties from the core platoon including the loss of one of the Obergefreiters. That results in seven permanent losses and four wounded who will miss the next game.
The defeat means the German CO's opinion drops down to -3 and the heavy losses see the men's opinion drop to -8. The platoon leader's outlook falls from Insecure to In Shame.
The French held the field with force morale of five to the German two, which means three of their casualties are returned immediately. While they suffered a total of seventeen casualties many of these were from support units such as the 75mm gun and the Escouade de Fusiliers Motocycliste. This means they have lost only three permanently from the platoon with two wounded and missing the next game. However they did lose every single one of their sergeants which means they will need to be replaced with men promoted from the ranks.
With the French victory the CO's opinion rises to +4, however the loss of so many NCOs sees the men's opinion drop to +1. The platoon leader's outlook goes from Sad to Short Tempered.
The French now have the option to launch a local counterattack or to stay and defend this table. As a counter attack would force further delay on the Germans it increases the chance of a major campaign victory for the French and so for the next game we will return to the previous map and see the French on the attack. You can find out what happened in that game in this report.
You can find all the reports for all the games in this and other campaigns on this page.
The dice gods certainly wanted to impose a sitzkrieg in the early turns, your tenacity nearly paid off though. Another fine report of an exciting game, great to see the Stuka shots again, it is a pleasure to view, unless your French of course.
ReplyDeleteIndeed. No plan survives first contact with the dice. I almost let my frustration tip me into doing something rash, but common sense prevailed and I tried to adapt the plan to the circumstances. As you said, it nearly paid off. When I first decided to make the Stuka I wondered whether I was taking things a little far, but I'm so pleased I did, it has worked far better than I imagined in telling the story in the AARs.
DeleteAgreed, the Stuka was well worth it for the AARs--it adds a great visual element.
DeleteThis is simply a superb battle report! Riveting action almost non-stop. One could learn a lot by carefully reading your AAR. The French Panhard was a real beast and kept your Germans from maneuvering for victory.
ReplyDeleteGreat stuff!
Thanks Jonathan for those generous words, glad you enjoyed it. I really enjoy putting the AARs together. While one aim is to tell the story of our games I also hope it helps others learn about the mechanics of CoC and perhaps pick up a few hints on how to play (or how not too in some cases!).
DeleteExcellent game and report. The lack of any anti-armour capabilities in early war German platoons definitely seems to be a problem in scenarios where they cannot take armoured supports but their opponents can. I suppose that a leIG 18 might be one answer?
ReplyDeleteThanks Carole. Yes, even an AT rifle would have been useful. I did consider the leIG18 for both it’s HE and AP capability, but opted in the end for the Stukas. When they work, they work very well and if I can hit the infantry hard the armour is less of a concern. Things don’t work out quite so well in this game though.
DeleteOh no another defeat, poor Germans are having a rough time in this campaign. Still rooting for you though but don’t be surprised if I put money on the French coming out on top. 😀
ReplyDeleteGreat AAR.
ReplyDeleteI'm late to the show, but man, what an exciting read!
ReplyDelete