
The next scenario calls for the French to demolish two important culverts in the vicinity of Noirmont. The Germans must stop them in order to maintain the pace of their offensive (this is supposed to be blitzkrieg after all). French engineers must first set their charges and then use a full CoC die to detonate them. Time is not on their side, they must act quickly while the platoon and whatever support it can muster keep the Germans at bay. If the French succeed this delays the Germans for an additional campaign turn which would be enough to see them run out of time and face defeat. Consequently my Germans must win this table at the first attempt. Like I said earlier, there is no margin for error.

Here is the table from the French perspective with a small culvert on their right flank and a large one at the rear.

The charges for the small culvert require six task points to set. Each time the engineers are activated they roll 1D6 to determine how many task points they have accumulated during the phase, which makes it quite possible that could occur in only one or two phases.


The Germans must find a way to disrupt French deployment while moving as quickly as possible themselves. The key to the game is the small culvert. If it can be captured before the French destroy it then I believe there is a good chance of winning.
The French have a full strength fresh platoon, but that same platoon must fight all the actions on this and the next two tables so they cannot afford to take too many losses.


The Germans can call on armoured support for this scenario and with eleven support points available it's certainly an option I've considered (note that it should be twelve support points for this scenario but the low opinion of the German CO has reduced the amount available). I suspect Dave will be expecting something like this and will have adequate anti-tank support. Nonetheless I do give serious thought to a PzIV because its 75mm HE rounds could be very useful if the French defenders prove stubborn, yet in the end I decide against it.
I will call on a motorcycle reconnaissance squad to not only provide extra men but the ability for rapid movement should an opportunity arise. In order to maximise leadership on the table the platoon will have the support of an adjutant. A Stuka bombardment will attempt to disrupt the French defence and hamper their deployment and finally, a shabby Nazi trick in the form of a 5th columnist should further disrupt French coordination.

The game starts with German force morale at eight and the French at nine, giving them the initiative and the opening phase. During the patrol phase I try to make some headway on my left flank towards the small culvert, but the French respond quickly and so two of my jump-off-points are in fairly exposed positions. I place my third over on my right flank which will provide a covered approach towards the large culvert.

Before we begin the Stukas arrive to soften up the defence. Unfortunately the first bombs miss the building closest to the small culvert. I was really hoping to cause it damage and so limit its use to the French, but no matter, there are more Stukas to follow.


The final Stuka hits the building on the German right flank making it unstable and hazardous to occupy.

That Stuka bombardment was more successful than the one during the first playing of the scenario at Perbais, so there can be no complaints. Damage has been inflicted and this should make it a little more difficult for the French to build a cohesive defence. I'm now hoping the bombardment is just as successful in disrupting their deployment.
Things don't get off to a great start when the first French command roll delivers a double phase. Time is against them and this is just the sort of start they need. The only consolation is that the command roll does not allow an engineer team to activate.
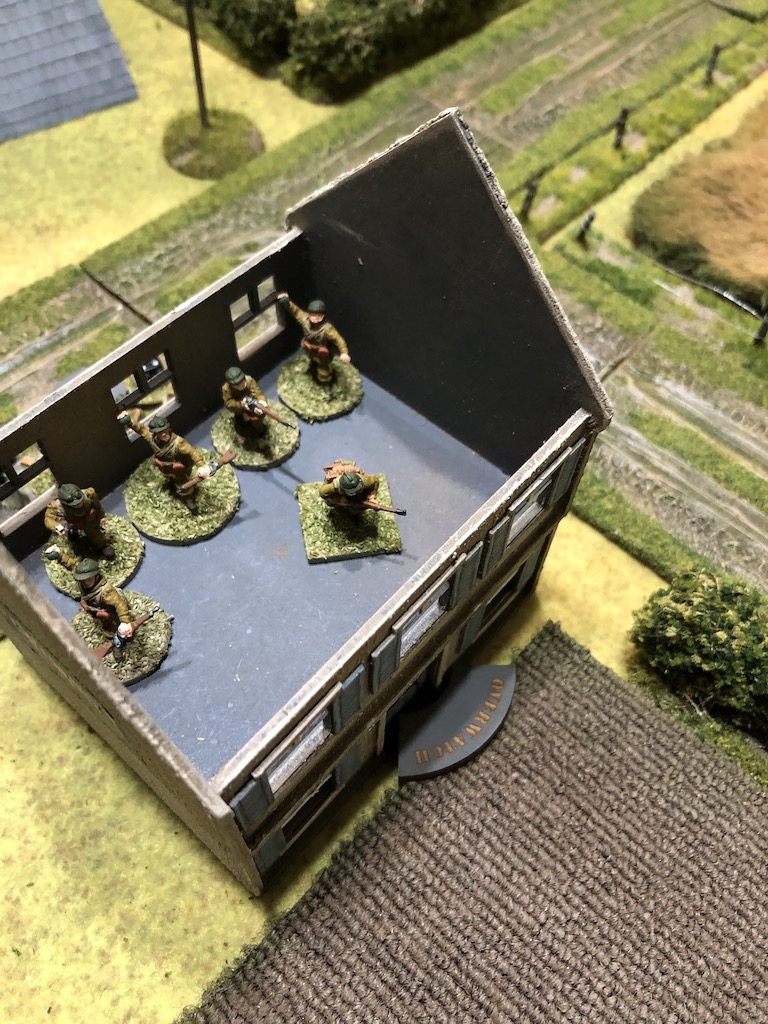
A Groupe tries to deploy but fails to make it through the Stuka barrage. An attempt by a second Groupe does succeed and they deploy into the house by the small culvert, just the one I was hoping the Stuka attack would deny them. Had I been a bit more alert I should have used my 5th columnist. My attention was distracted by the amount of shock the Stuka bombardment may place on the deploying Frenchmen.
A Groupe tries to deploy but fails to make it through the Stuka barrage. An attempt by a second Groupe does succeed and they deploy into the house by the small culvert, just the one I was hoping the Stuka attack would deny them. Had I been a bit more alert I should have used my 5th columnist. My attention was distracted by the amount of shock the Stuka bombardment may place on the deploying Frenchmen.

In the end it proves to be quite a lot with four points of shock on each French team. The Groupe Sergeant uses his command initiatives to immediately rally a point off each of those units.

The next French command roll is 54443, not the most useful and it means we won't see the appearance of any engineers this phase either. The platoon sergeant deploys through the Stuka bombardment and joins the Groupe in the upper level taking the opportunity to rally more shock off them as he does so.


In the following phase the first German squad deploys on their right flank and takes up tactical positions along the hedgerow.


The 50mm mortar team deploys and does fire, but it has no effect. This elicits a response from the French rifle team in the upper level who are on overwatch and they inflict a points of shock on the mortar team.


The next French command roll is 63211 and that means there is an opportunity for the engineer demolition team to begin work setting their charges on one of the culverts. First though, the platoon sergeant takes more shock off the rifle team and then has them move out of sight towards the back of the building.

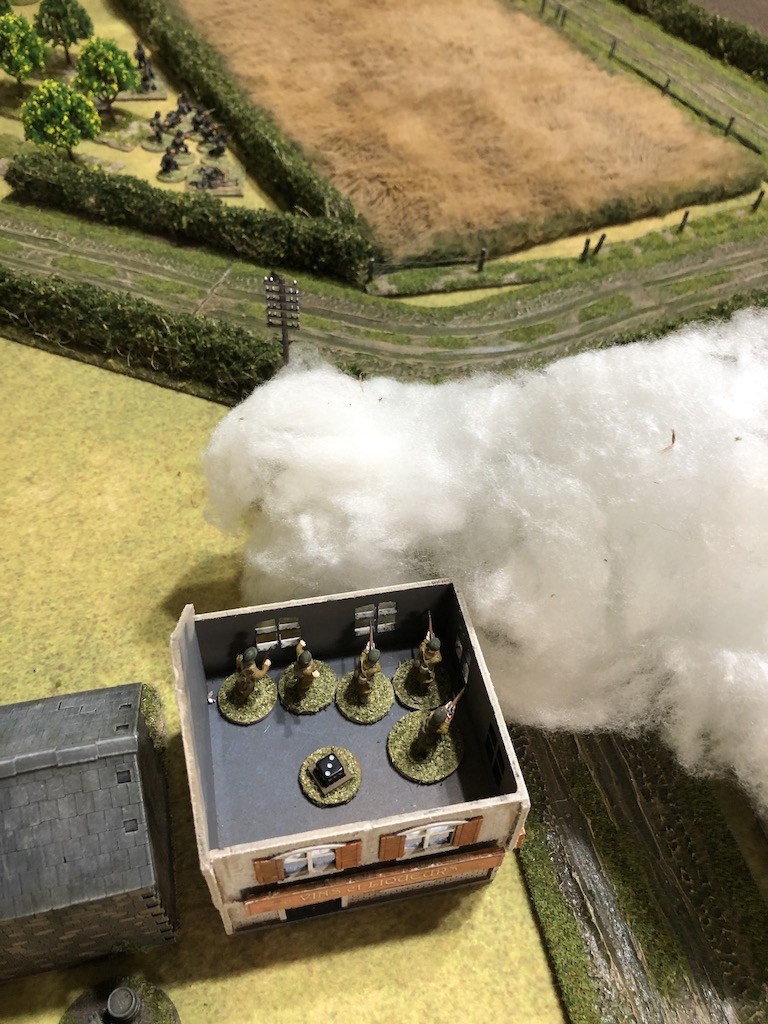
It's no surprise to discover that the French engineers will try to work their way through the Stuka bombardment and deploy, which they do successfully. Dave is being cautious and so they don't go straight to the culvert but remain out of sight behind the building. It turns out to be a wise decision as they have taken five points of shock from the Stuka attack which sees them pinned.

In the German phase the Feldwebel orders the squad and mortar team to move forward along the hedge row. This they do at a good pace, moving 9" and 8" respectively.


Another squad deploys in the centre. They are in open ground and so take up tactical positions as they can be targeted from the upper level of the house.


In the French phase the platoon sergeant rallies the last point of shock off the rifle team before moving downstairs to where he can rally shock off the engineers. Meanwhile on the lower level the Groupe sergeant takes two points of shock off the LMG team. Despite arriving with a fair amount of shock the presence of two leaders and the early double phase has enabled the Groupe to gather its senses ready for the fight ahead.
In the German phase the Feldwebel continues to urge the squad and mortar team forward. Once again they move at a good pace and that brings the LMG team within sight of the French engineers.


Having said that I want to keep pressure on the French. I was holding back the motorcycle squad in case of a double phase or an unexpected opportunity to try a coup de main that would see them come roaring up the road on their motorcycles. Instead I decide on something a little more pedestrian (literally and figuratively). Taking advantage of their ability to deploy 9" from a JoP I bring them on as far forward as possible on my left flank. They will be exposed in open ground and so they too take up tactical positions, but they won't need to move far to come outside of the arc of fire from the windows in the house.


The French platoon sergeant uses the next phase to rally two points of shock off the engineers.


Another French Groupe tries to make its way through the Stuka bombardment and this time they are successful. They plan to deploy from the JoP on the French left near the large culvert but I announce the presence of a 5th columnist. Unfortunately luck is not running my way and a roll of six sees the Groupe recognise him for who he is and they despatch him. With that the Groupe deploys into one of the houses hidden by the pall of smoke from the burning farmhouse.

In the German phase the Feldwebel takes the chance to hit the engineers behind the house and orders the LMG team to open fire.


The Feldwebel then orders the rifle team and mortar crew to come forward and join the LMG team from where they will all have a line of sight to the engineers.


In the centre the squad advance tactically up to the hedgerow ready to create a base of fire prior to any assault on the house.


On my left the motorcycle squad advance tactically across the open ground and just out of the arc of fire of the French at the windows of the house.


I don't feel the German assault is moving fast enough but I'm conscious of casualties and so prefer to take this slowly. The downside is it is allowing the French to recover the shock inflicted by the Stukas and sure enough in the following phase the sergeant of the recently deployed Groupe spends the phase further reducing the levels of shock.


Once again there is only one casualty and yet again it's a leader, the squad's obergefreiter who suffers a light wound. My leaders seem particularly vulnerable today.


The following German command roll of 61111 is not ideal but it does allow me to do the two most important things. On the left the rifle team move at the double and run up to the building which takes them within 4" of the French jump-off-point.


The last act of the phase is to have the squad opposite the house open fire, but they only manage to inflict a single point of shock.


At this point Dave decides he has little chance to destroy both culverts and stands only to suffer casualties which he can ill afford. With that the French platoon withdraws leaving both culverts undamaged and in German possession for a scenario victory.
That was a good outcome from my perspective, not only a scenario victory which was essential, but one achieved at no cost in casualties to the core platoon.
The only German casualty was the obergefreiter from the motorcycle squad which was a support unit. Similarly the French lost a single man from the engineer demolition team. A victory without heavy casualties is just the turnaround my platoon needs although we still move to the next scenario with the Men's Opinion at -9 and the CO's Opinion at -4. The platoon leader's outlook moves from the rather disgraceful 'In Shame' to a slightly improved 'Insecure'. The light casualties see the opinion of the French men rise to +8, however the scenario defeat sees the CO's Opinion drop to +4. The platoon leader's outlook moves from 'Happy' to 'Short Tempered'.
The campaign now moves on to Scenario 3 'Blitz on Villeroux' and you can follow the events of that game in this post.
The campaign now moves on to Scenario 3 'Blitz on Villeroux' and you can follow the events of that game in this post.
Excellent report. Interesting balance between aggression and not getting too many men killed.
ReplyDeleteAs I suspected though hard enough blowing one culvert let alone two. Nice action shots of the Stuka BTW
Thanks. Yes, a tough one for the French, any engineers near the small culvert are likely to be easy targets and if they are wiped out or break it's hard to see how the French can come back without a counter attack that's likely to cost them casualties they cannot afford.
DeleteEnjoyed reading - thank you.
ReplyDeleteThanks Norm, glad you enjoyed it.
DeleteNice report and beautiful looking table. The Stuka shots are Ace!
ReplyDeleteFrank
Thanks Frank. Having a Stuka bombardment without any pictures of Stukas just didn't seem right, it was worth making the model just for this.
DeleteA fine read Sir, well played out and quite a turnaround in the Germans fortunes. Like that Stuka, the aerial shots are particularly well done too.
ReplyDeleteThanks Phil and yes, it's nice to be winning a few scenarios for a change! Glad you liked the Stuka shots, I must admit I was very pleased with the way they came out.
DeleteExcellent report as always. A quick question can one capture a jump off point with enemy units with 4'of it and you move within the required 4'to capture it? I think not but may be mistaken. The rules state that if the original owner of the JOP move back onto the captured JOP thus within 4'he recaptures it. In your case the section in the house never left the 4'distance from the JOP so you were not actually able to capture the left JOP. If you were then they would automatically recapture it as they are still within 4'of it. Hope this makes sense?
ReplyDeleteThere's a difference between capturing a JOP (where enemy troops have moved onto or over it) and closing it down (where enemy troops have been moved to within 4" of it). In the former case, if it has been recaptured by friendly troops moving onto/over it then it isn't lost at the end of the turn; in the latter case it doesn't matter that you have friendly troops within 4" - the presence of enemy troops still closes it down.
DeleteHi Tamsin Capturing and closing down are the same and occur when enemy troops move to within 4" of JOP. As a result of the capture it is closed down for use for the remainder of the turn. We assume no friendly troop are present hence the capture as I can't see you capture anything while troops are present or within 4" of JOP. Here the 3rd paragraph of RAW come to play that one needs to move friendly troops back into 4" before turn end to recapture from the enemy or JOP will be lost and BTH, hinting to the fact that no troops were present during capture hence the need for them to return to within 4" of JOP.
DeleteRAW 7.6 OVER-RUNNING JUMP-OFF POINTS
Troops moving to within 4” of an enemy Jump–Off Point will deny its use to the enemy while they are in such close proximity.
Troops who move onto an enemy Jump-Off Point are considered to have captured that position, stopping it from being used for the remainder of the current Turn.
If the original owner of the Jump-Off Point is unable to move troops onto the Jump-Off Point before the end of the current Turn, thereby recapturing it, it will be removed from play at the end of the Turn.
So hence my observation that JOP could not be captured thus closed down as troops in the house were within 4" of said captured JOP.
Not quite. The first paragraph of that section describes what happens when troops move to within 4" of the JOP but don't actually make contact. In that circumstance, the JOP cannot be used while they remain within 4".
DeleteThe second and third paragraphs then describes what happens if troops actually make contact with the JOP. Then it is captured and will either be removed at the end of the turn or can be recaptured if friendly troops move into contact with it before then.
Oh ok! so then being 4" is denying its use and is closing it down but no BTH at turns end and being on it, in contact that is, is capturing it and at turns end BTH. Got it thanks for the clarification Morgan.
DeleteYup Tamsin and Morgan have it spot on. The question came up on the forum recently does the unit have to remain actually on the JOP when the turn ends to capture it. Consensus was no - I still play it that way though as it is more challenging
DeleteAnother enjoyable report from this campaign :)
ReplyDeleteThanks Tamsin and thanks for jumping in there and answering the question about JoPs, you beat me to it.
DeleteNice report and the good news is that the camapign carries on.
ReplyDeleteAt least I'm saved the shame of not getting any further than the first scenario, good to be making some progress at last!
DeleteAnother great report that reads like a novel - you may have missed your calling! I just don't know how you manage such a clean table and the ability to stop action to take the great photos!. Do you secretly just takes notes and then re-stage the game scenes for photos? Come on fess up.
ReplyDeleteI wonder the same thing! Great AAR, looking forward to the next one... :)
DeleteI could tell you.....but then I'd have to kill you. No secret ingredient I'm afraid. The clean table is just the way Dave and I like to play our miniatures, any clutter on the table that isn't part of the terrain distracts from the immersive nature of the experience. We use a small side table for all that stuff and keep the table clear. Other than that I just make notes on my iPhone as we go and do the same with the camera. Soon after the game I drop the notes into a draft of the blog and then add the pictures. The pictures provide a useful chronology if I have trouble interpreting my notes and it helps to have the game fresh in my mind. From time to time in the excitement of the game I do miss the odd thing. As for the writing I was a journalist and writer for many years and then I have worked in the film industry for over 20 years. I guess I have storytelling and visual storytelling in my system.
DeleteExcellent AAR. Looks like COC is a good rules set.
ReplyDeleteThanks. CoC provides playable rules that always seem to give a plausible historical narrative, which is very important for me. I'm happy to play an abstract themed game if I just want a game, but if I want a historical wargame then it has to feel right for the period I'm playing. I think CoC certainly manages that and the campaigns just add another whole layer to it all.
DeleteThanks again for the report. I can't recall, but do you have the option of 'Blitzkrieg' to push on in the same game turn and give yourself some time back?
ReplyDeleteI thought I may have missed something when you mentioned that but I've just gone back through the campaign pdf and there is no provision for a Blitzkrieg move of that type for this particular campaign. Shame, that would be very handy right now.
DeleteWow what a turn around from previous games, nice victory for the Germans, love your Stuka, wonderfully built and painted model and the pictures of the plane are amazing , you really capture the feel of the air attack , the pilot must have known that a camera man was going to be present and pulled up his socks to perform well, thanks Mark a great read , feel sorry for the French, all that Shock from the Air attack really slows down what the French can do.
ReplyDeletecheers John