
If you've been following this campaign then you no doubt enjoyed watching Groundhog Day, because there's something ominously familiar about the look of this table. Like I said prior to the previous game ....deja vu. So here we are, back again peering across the fields at Perbais and wondering if this is the attack that will finally push the French out of the village.
My Germans have to face the brutal truth that if this attempt fails then the campaign is lost, we have simply run out of time. So, what to do differently this time around?
Unfortunately the French platoon opposing me is still in good shape, having lost only three men permanently across the previous four games. By holding the battlefield and keeping their own force morale high they have been able to recover most of their casualties and return them to action.

The same cannot be said for the Germans. They have seen the backs of two platoons broken in the attempts to push the French aside. As a result I see no option but to call on the last available fresh reinforcement platoon, because if I can't win this scenario the campaign is lost for the Germans. In addition the fresh platoon will be able to draw from a very generous pool of 17 support points, surely this will be enough to tip the balance?
Unfortunately the French platoon opposing me is still in good shape, having lost only three men permanently across the previous four games. By holding the battlefield and keeping their own force morale high they have been able to recover most of their casualties and return them to action.


With the German CO and Men's opinions so low the negative modifiers for force morale mean it is no surprise to see the Germans start at eight and the French at ten. Not an encouraging start.
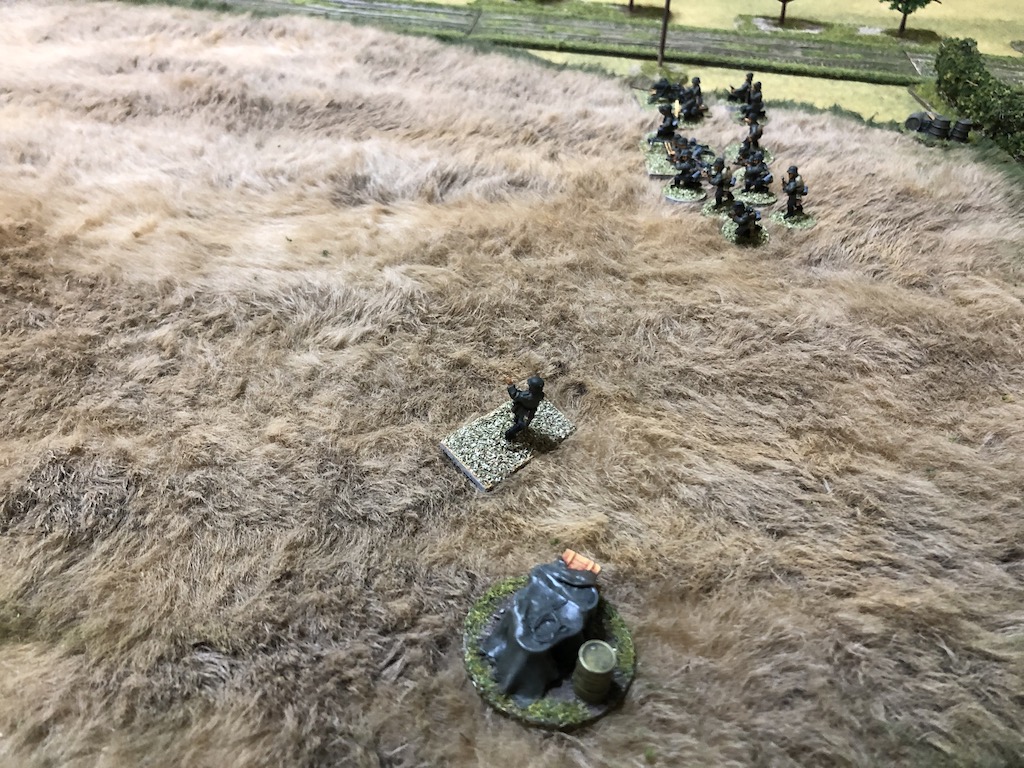
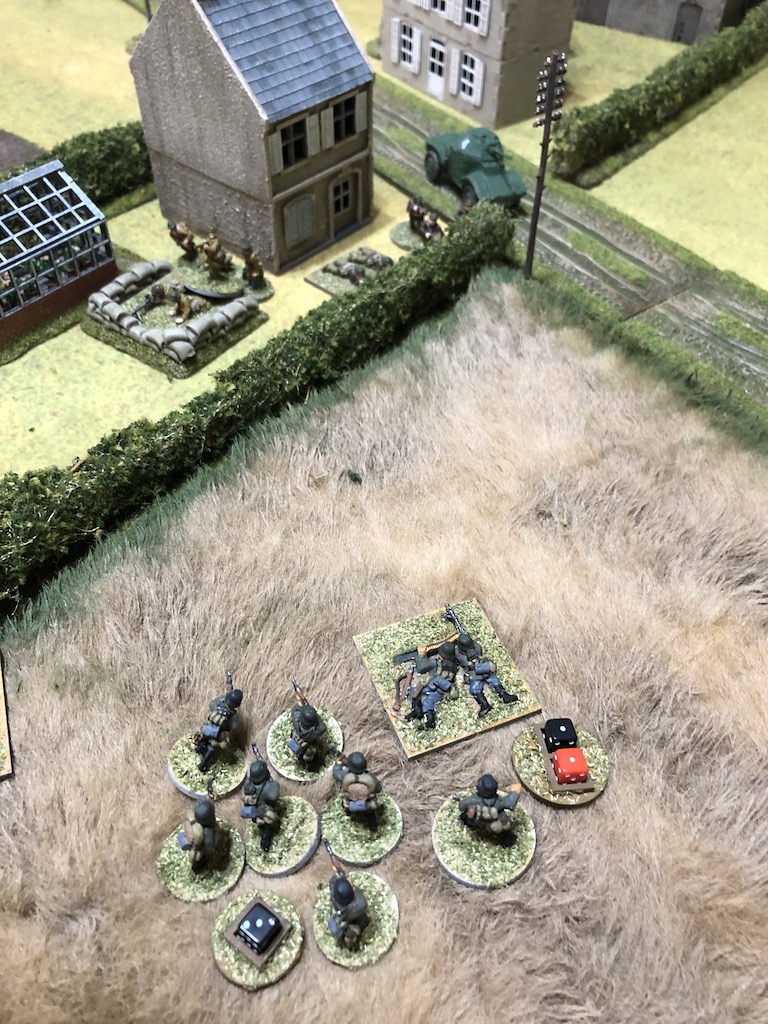
During the patrol phase my emphasis on the left flank results in two jump off points in the wheat field, with one much further forward than I've managed previously. The only risk with focussing on a single flank is that it does allow the defender to concentrate against it.

The French have the initiative and therefore the first phase. Despite rolling 54411 Dave elects to stay concealed and no French units deploy. This he quickly regrets when the first German command roll is 66543(6) (note: when I show the German command rolls the red die number will be in parentheses). I plan to take full advantage of this opportunity and deploy the support squad and the Feldwebel (SL) into the wheat field.


This encouraging start continues with a subsequent command roll of 66111(2) which allows me to push forward aggressively and the support squad leads the way through the wheat field towards the hedge row.

Meanwhile a second squad and one of the MMG teams deploy on the right of the wheat field ready to cover the movement of the support squad.


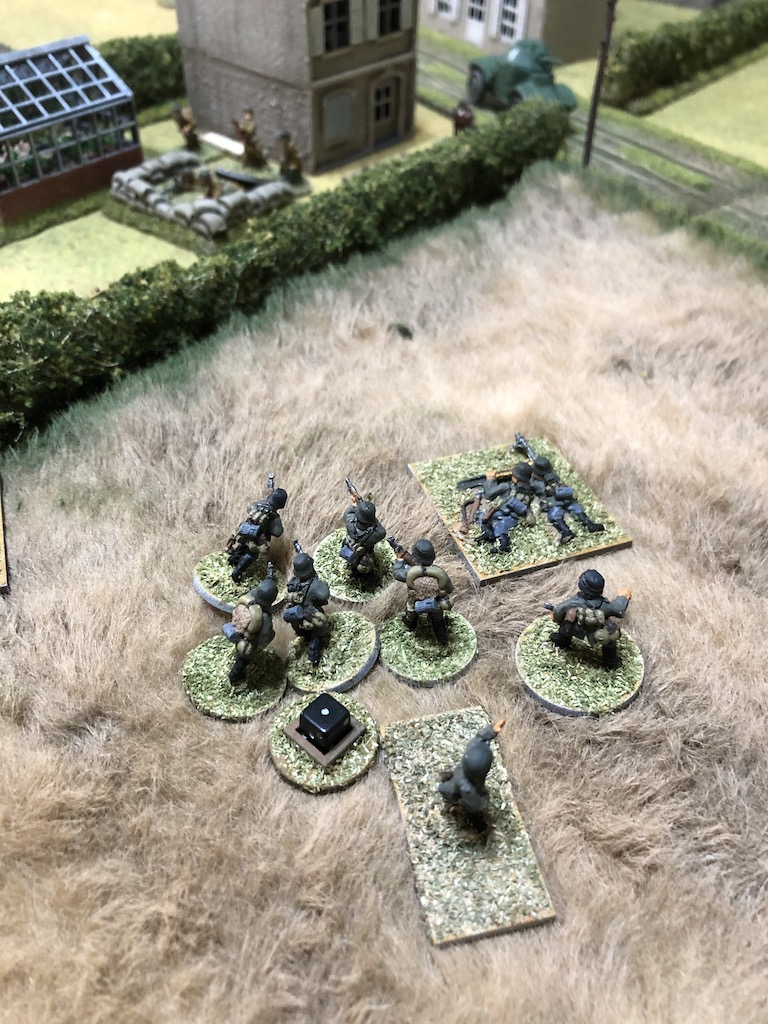
There are no more double phases but the final German phase sees the support squad reach the hedge row.


The Feldwebel makes his way over to the other squad and puts the LMG team and the MMG team onto overwatch, ready for the inevitable French response.


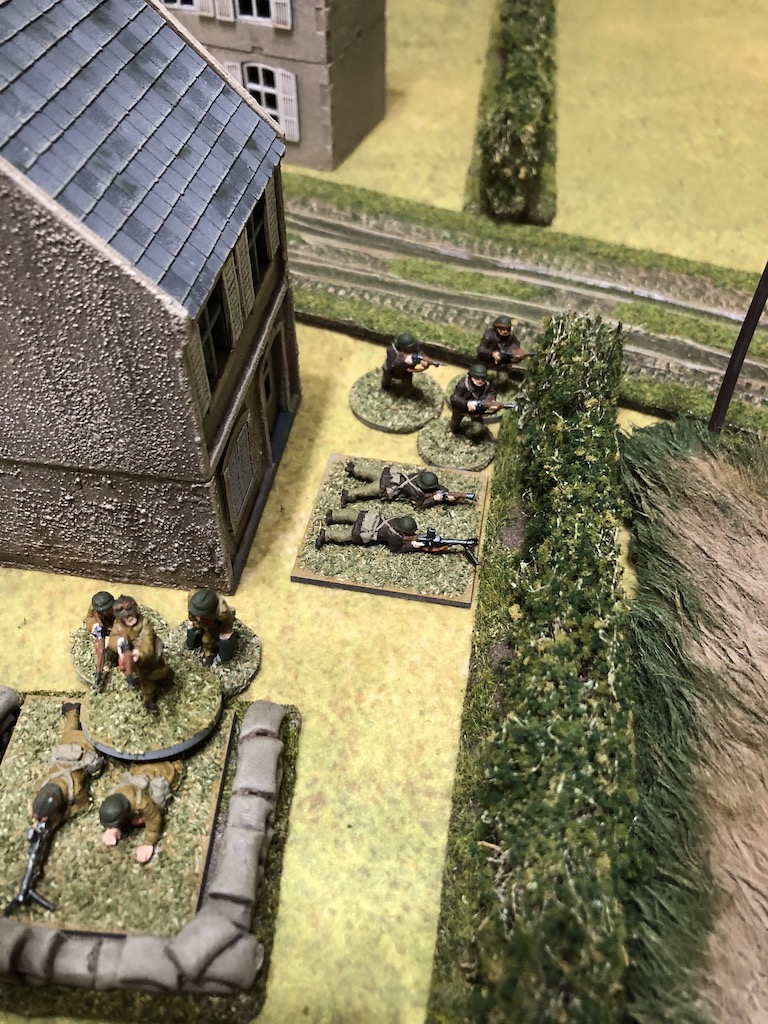
The French command roll of 55442 limits Dave's options. He attempts to deploy a Groupe through the barrage and they come through successfully. The Groupe LMG team are dug in around one of the houses, but back from the hedge line, while the rifle team occupy the house itself. The platoon sergeant tries to join them, but is unable to make his way through the barrage.


The German phase see the Feldwebel order the squad and MMG team forward and he follows them through the wheat field.


The support squad edges its way cautiously along the hedge row using tactical movement.

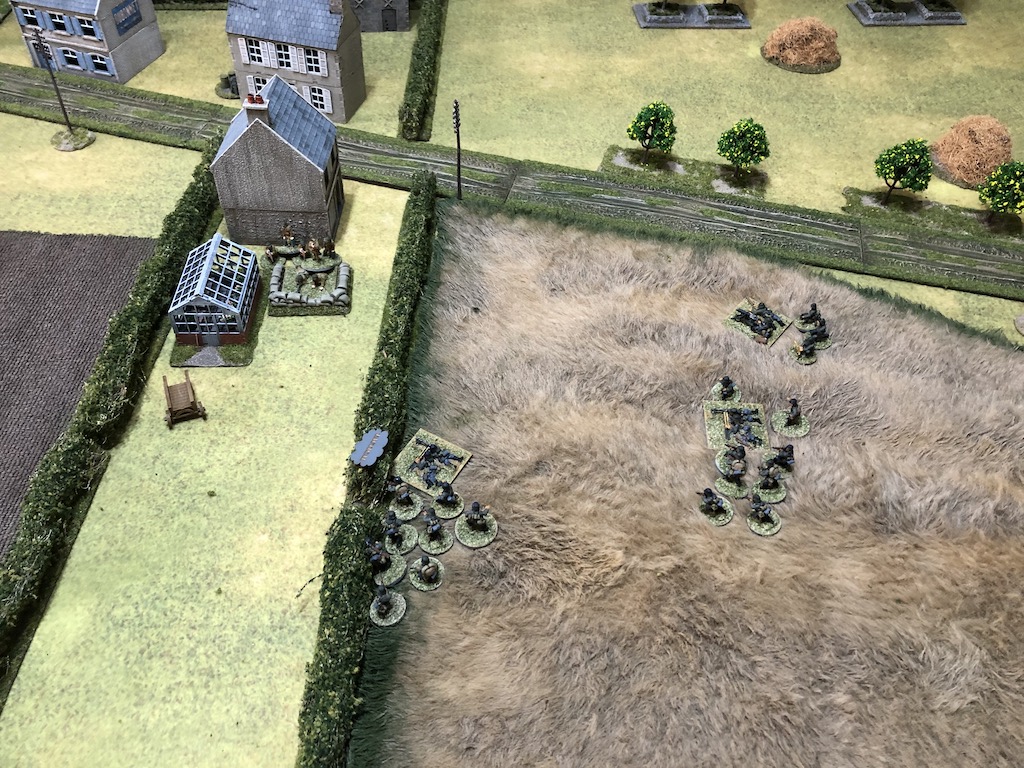
The French try to deploy another Groupe through the barrage but this time the unit fails and the platoon sergeant continues to have the same problem. Once again a pre-game barrage is proving useful to the Germans. All that remains in the French phase is for the entrenched LMG team to target the squad at the hedge.


The hail of German bullets causes two French casualties. The Obergefrieter then orders one of the men to lob a grenade into the entrenchment, but it falls short.

I need to bring as much fire to bear as I can and so the Feldwebel orders the other squad forward to support the squad at the hedge row. He then moves to join the MMG team and places them on overwatch.

Just when I feel the Germans are making some decent progress the French command roll is 66631. Not only a double phase it heralds the end of the turn and the lifting of the pre-game barrage. The first French action is to have the entrenched LMG team continue to target the men at the hedge and the Germans lose one of the men from the rifle team.

With the pre-game barrage still in effect an attempt to deploy by a team of Escouade de Fusiliers Motocycliste fails. With that the phase ends as does the turn and so the pre-game barrage is no longer active. It's disappointing to see it go so soon but at least it has managed to hamper some of the French deployment in these initial phases.
The subsequent French command roll is 66553 and so now it's their turn to enjoy a run of phases. However, as is so often the case, the options for activation are limited. The activation that does occur takes me quite by surprise - the appearance of a Panhard armoured car.

It can move fast on the road and comes racing through the village. I'm not sure how I'm going to deal with that.


I announce the presence of a 5th columnist at which point we discuss whether this is a legal use of this support given the French unit is ambushing rather than conducting a regular deployment. We decide it is a legal use given the ambush must originate from a specific jump off point, however we make a compromise and decide that should the Escouade de Fusiliers Motocycliste fail to deploy into ambush because of the 5th columnist no ambush actually takes place and so the CoC die is not used. All of this becomes academic when Dave rolls a 6 and the Escouade de Fusiliers Motocycliste see the 5th columnist for who he is and despatch him.
The ambushing men open fire at the German squad in the wheat field and hit one of the LMG team.

In the following French phase the Panhard drives slowly up the road. The moment it has a line of sight to the MMG team in the wheat field it opens fire with its co-axial machine gun.


The first volley of grenades is not particularly effective, only inflicting a point of shock, but now the VB team has them in their sights the MMG team could find itself under a hail of rifle grenades in the near future. The French have responded quickly and violently with that run of phases and are in danger of seizing the initiative.


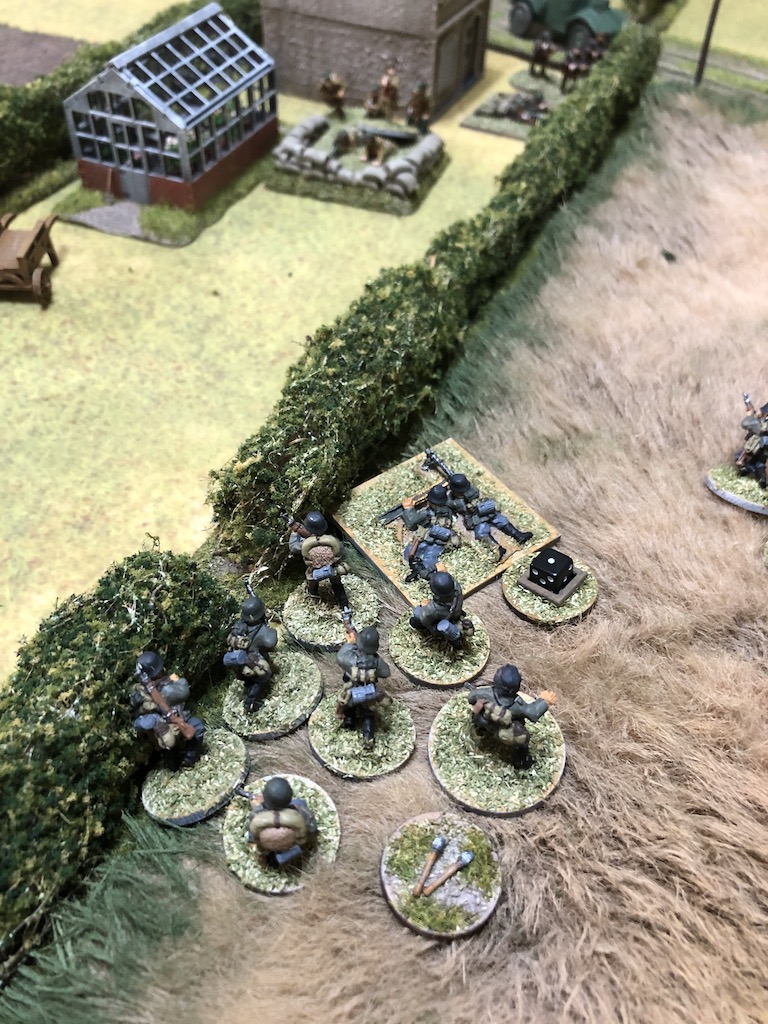
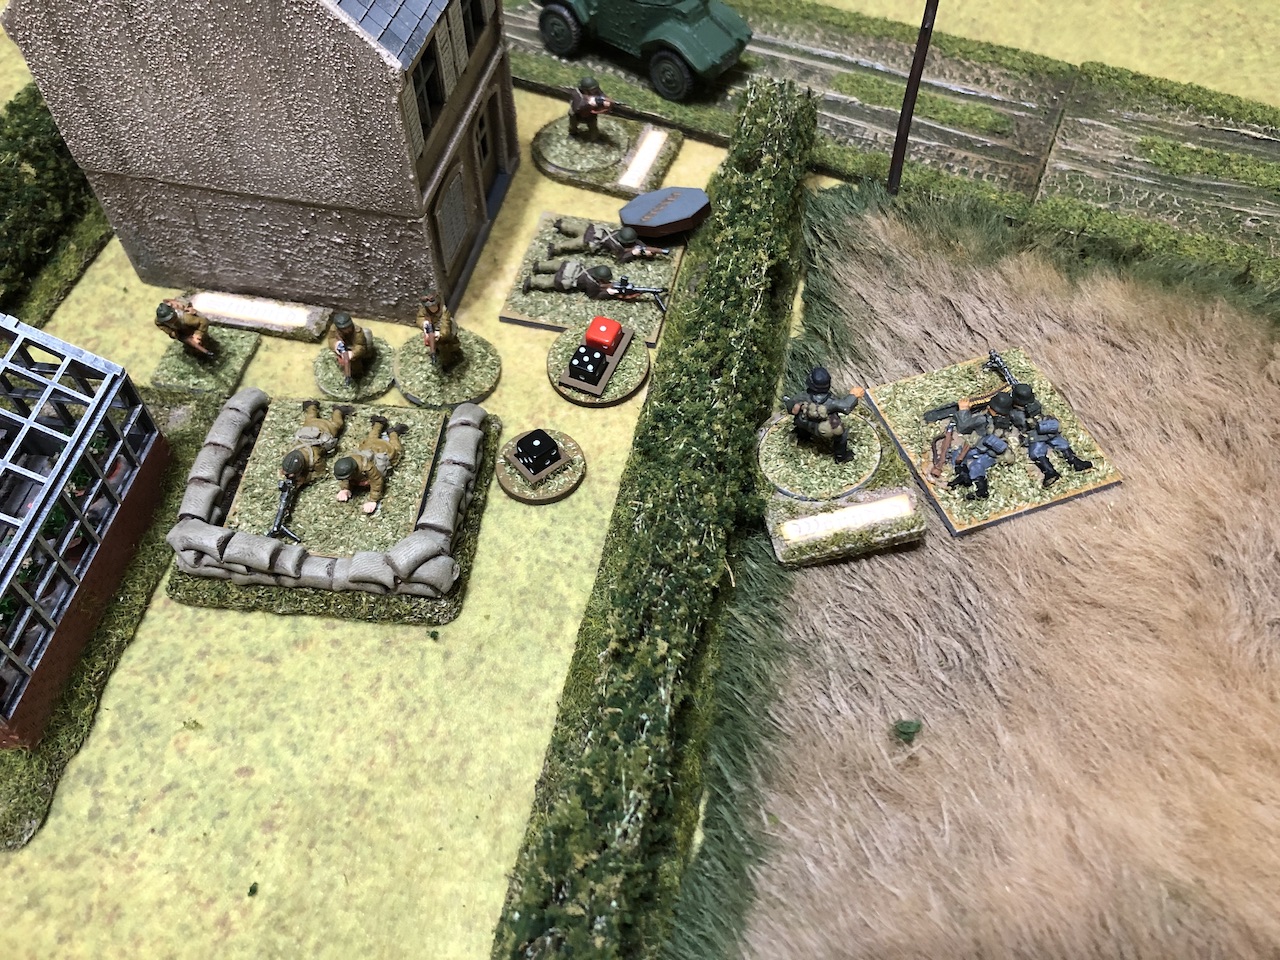
The Obergefreiter rallies shock off the squad at the hedge and then directs their fire back at the French LMG team.


The only remnants of the German assault are the casualties left behind. Somehow I have the feeling I'm never meant to capture Perbais.


The rifle grenades come crashing down and kill one of the crew and add to the team's shock.

Just when it looks as though the pendulum might be swinging against me the German command roll delivers another double phase. Hopefully this gives me time to galvanise my units and maintain pressure on the French. The Obergefreiter at the hedge spends the phase rallying shock off his men.


The fire inflicts two points of shock and that's enough to break the French team.


Fortune continues to favour the Germans when the next command roll is 66653(4). This looks promising, as the turn end will see the Escouade de Fusiliers Motocycliste rout off the table taking their leader with them and that will hurt French morale further. Can I break the entrenched team and force them from the table too? They are very close.
The squad at the hedge opens fire. They inflict another point of shock and in an attempt to break the French team the Obergefreiter orders one of the men to throw a grenade, but it falls short.

I cannot ignore the Panhard completely and so the Leutnant takes shock off the MMG before ordering the team to fire at the armoured car, but it has no effect.

The Leutnant then orders the LMG team to follow him and make their way toward the hedgerow.

With that the phase ends, as does the turn. The Escouade de Fusiliers Motocycliste rout off table taking their leader with them which drags French morale down to two. For the first time in the campaign I really feel I'm close to victory. With their morale at two the French are required to move a unit back to a jump off point and so the VB team moves to the nearest JoP which is in one of the barns.

The run of phases ends for the Germans, but they are still able to maintain pressure on the French for one more phase. The Leutnant orders the squad at the hedge to continue firing.

Once again their fire is very effective, causing another casualty and a further two points of shock.
The squad at the hedge opens fire. They inflict another point of shock and in an attempt to break the French team the Obergefreiter orders one of the men to throw a grenade, but it falls short.

The Leutnant then orders the LMG team to follow him and make their way toward the hedgerow.


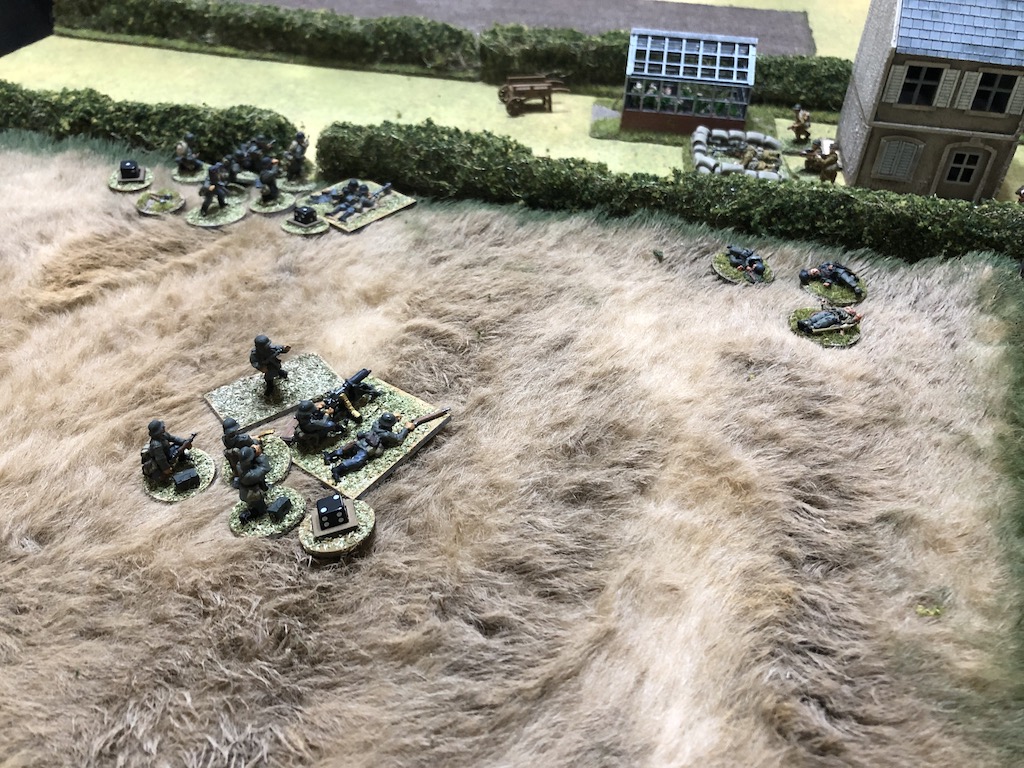
That's enough to see the French team break and retreat, bringing their force morale down to one. I think we have them!

With that the Germans have managed to throw back the French front line while driving down their force morale in the process.

The Leutnant orders the LMG team to follow him over the hedge.

The Panhard still represents a threat that could snatch a French victory from the jaws of defeat and so the Leutnant orders the MMG to continue firing. The machine gun fire rattles the crew of the armoured car who are forced to halt and engage the MMG in the next phase.

With that I have no more activations in the phase, however I do have a full CoC die and so use it to deliver the coup de grace and end the turn. This will force the broken LMG team to rout from the table, taking both the platoon sergeant and the squad sergeant with them. That shocking sight is enough for French force morale to crash to zero (if not well below), finally giving the Germans their long desired scenario victory.

The difference in force morale was six in my favour, which sees all of the casualties from the core platoon returned. This is very welcome as I can ill afford to lose too many men now that I have called on all my reinforcements. The opinion of my men takes a modest turn for the better and is now at -8. Similarly the CO's opinion has gone up to -5. Unfortunately the platoon leader's outlook remains 'In Shame'.
The reverse applies for the French who see the men's opinion drop to +7 and the CO's opinion drop to +5. The platoon leader's outlook drops from Affable to Happy. Having said that, the French platoon put up a very gallant and determined fight, causing considerable delay. The French can only be pleased with what was achieved and so Dave insists we salute those brave defenders by knocking back some Eau-de-Vie in their honour!


The reverse applies for the French who see the men's opinion drop to +7 and the CO's opinion drop to +5. The platoon leader's outlook drops from Affable to Happy. Having said that, the French platoon put up a very gallant and determined fight, causing considerable delay. The French can only be pleased with what was achieved and so Dave insists we salute those brave defenders by knocking back some Eau-de-Vie in their honour!

I started this game prepared to face the prospect of failing yet again and with the knowledge that defeat would see any chance of a campaign victory slip away. Yet while the win has been a boost to my personal morale, my prospects for a victory in the campaign as a whole remain very slim - I must win all of the next five games at the first attempt and do all that with a single platoon. While that will be tough it does remain possible and so we move on to scenario two where I trust you, like me, will be relieved to see a change of terrain in the next AAR.
You can find out what happens next in the report on Scenario 2 The Culverts at Noirmont.
A salute indeed to the brave defenders of Perbais. But also to the Germans for not giving up, but coming back to try again and again. /Mattias
ReplyDeleteThanks. Always worth continuing while a chance remains, no matter how slim the chance, if it's a possibility then who knows what might happen?
DeleteAnother great game and read, I really believed that it was going to take all your force to break the french after previous games. Looking forward to the next installment I'm glad it was the end.
ReplyDeleteYes, it ended up being fairly painless, certainly not what I was expecting, but I'll happily take it.
DeleteBad spelling , 'wasnt the end'
ReplyDeleteSuperb account, thanks for doing all te work that went into that.
ReplyDeleteThanks. While it is a bit of work I really enjoy putting these together, it's a bit like refighting the battle all over again.
DeleteA great report and proof that persistence can pay off :)
ReplyDelete"With their morale at two the French are required to move a unit back to a jump off point" is that a rule specific to the PSC? I thought that a drop to FM=2 results in the loss of a JOP.
Thank you. The rule appears in the Blitzkrieg 1940 handbook and gives certain units additional fine tuning on the FM chart. For example the Germans lose their red dice if FM drops to four, similarly certain units have to retreat a unit to a JoP on a two. No major changes, just a few extra nuances for more flavour.
DeleteCheers - thought it must be something like that.
DeletePhew! This continues to be riveting reading. Well done for keeping your personal morale up. I think I’d have given up by now.
ReplyDeleteAh well, never say die and all that. It ain't over until it's over, although I have to admit I was close to throwing in the towel with this one!
DeleteHooray! Really enjoyed this AAR, I was almost holding my breath as I read it :o)
ReplyDeleteLook forward to the next installment.
Cheers
Matt
Yes, I shouldn't get too elated, the odds are still heavily stacked against me but at least we are heading in the right direction now.
DeleteA gripping read and a well earned success. Await the next instalment with baited breath.
ReplyDeleteHopefully my Germans can get a bit more blitz into their blitzkrieg now that we've pushed the French aside (he says wistfully....).
DeleteGreat report, I infrequently read them from the beginning to the end but this one kept me going through every line, bit unlucky with the assault but all things ended well, now we will see a different table!
ReplyDeleteThanks. Yes when the assault went badly wrong I thought the luck was just going to go against me, but I also felt I had the French under pressure - which is why I assaulted in the first place. All good in the end, as you say.
DeleteHa! At last. Still, it was another damn close run thing until the French morale started plummeting. I'm looking forward to the next scenario.
ReplyDeleteAt last indeed! A bit of luck always helps and I feel as though I was due a bit after some of the earlier games. No margin for error now though I'm going to have plan each of the next few games very carefully.
DeleteWell done on finally breaking through the french lines! As always an engaging read and I‘m pleased there‘s still some fighting ahead for your Germans in this campaign.
ReplyDeleteThanks. I have to say the thought of having this campaign end without ever leaving the first table was a depressing, especially as my shame is recorded for posterity in the AARs. I'm only hanging on by the thinnest margin but at least I'm still in the fight.
DeleteSome brilliant play on your side. I can't think of anything I would have done different, except maybe worse. Sometimes it's better to just attack with limited forces and keep them moving.
ReplyDeleteI think most scenarios are decided by a few critical decisions during the course of the game. While luck can help, it's how well you use those opportunities (or manage the misfortune) that can be critical. Prior to the game I really thought I would need maximum force but as things turned out pushing hard with a smaller force got me there in the end.
DeleteThese AARs are as good as any YouTube play through, if not better. Congrats on your well earned victory. I was rooting for you the whole time. Never a doubt. 😀
ReplyDeleteThanks Stew. I find it hard to watch the YouTube play throughs as I like to follow a game at my own pace. And after 20 years in the film industry the quality of production (bad camera angles, too much camera movement, poor editing etc) often drives me to distraction. Then again, maybe I'm just getting old. Anyhow onwards and upwards with this campaign, if nothing else it will be refreshing to have a different table to play on.
DeleteFinally a new map coming up! Well done Mark. Now if only your lads could practice their grenade throwing and bayonet skills it will be easier next time :)
ReplyDeleteI do seem to recall it was your earlier advice that I should call in a mortar barrage and then send the men in with a Handranaten command. I didn't bother with the mortars in this one but I did have your advice ringing in my ears as that sad group of survivors fell back in defeat. All good in the end though and yes, a new map will be most welcome.
DeleteAhh yes I forgot to add in my tactical advice you are supposed to win the combat.😀
ReplyDeleteBut to be fair you did get caught out by the sneaky French trick of having another team within 4" of the target!
Well done Mark, a very tough nut to crack and I think we were all willing you on. Looking forward to the next instalment.
ReplyDeleteCheers,
Pat.