
My intention is to keep it very simple and rely on a weapon with range to inflict casualties before withdrawing. I will have a minimum three support points to use, which means I can call on a Maxim MMG for support. Ideally, if I have four or more support points, I would take the DSHK 12.7mm HMG because of its longer range and ability to reduce cover by one level. With my surviving men I plan to form two squads, one with two LMGs and one with a single LMG. My thinking is to use the LMGs to put covering fire on German units and thereby protect the machine gun, hopefully while it is inflicting casualties at long range.

The most obvious place to put a machine gun is in the upper level of the railway signal box, the only building with an upper level and with excellent lines of sight. There are two good reasons why this is a great location - it provides hard cover and allows the MG to make full use of its long range. Unfortunately it is so good that it must be blindingly obvious to Dave. I'm certain he will plan on trying to find a way to neutralise it. With a possible eleven support points (ten for the scenario plus one extra because of his CO's opinion) he will most likely be able to call on some armour or the leIG18 75mm infantry gun. I will wait to see what the support levels are and then make a final decision.

The Germans start the patrol phase with two free moves but the Russians move swiftly up the centre. The phase is quite brief and the Germans find they have been pressed back to jump-off points further back than they would have wished.

On the other hand they have a much more pleasing outcome when it comes to force morale. The Germans start at eleven while the Russians are only at eight. Next comes the critical support roll. It's six, which means the Germans have seven support points and the Russians have five.
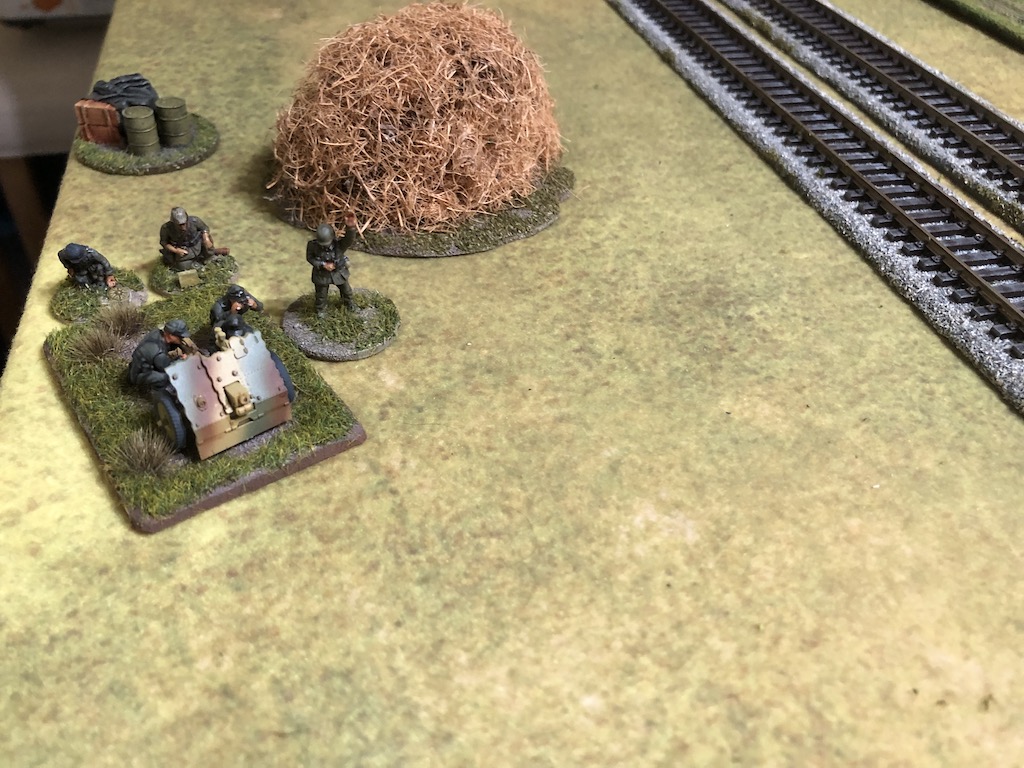
This gives me a few options but I decide I will take the DHSK HMG. The one remaining support point could be used for a panzerfaust, after all Dave may well consider using a tank to deal with any Russians in the signal box. On the other hand if that position is so obvious I consider whether it would not be better to entrench the HMG, that way I am not restricted to the one very obvious location? It does mean I have no anti-tank defence, but I don't intend to try to hold this table, so if things become too deadly I can always withdraw. I decide I will take the risk and so the HMG with an entrenchment are selected as the Russian support.
The Germans get the game started and waste no time demonstrating how obvious they think the signal box is as a defensive location. An leIG18 deploys almost directly opposite the building.

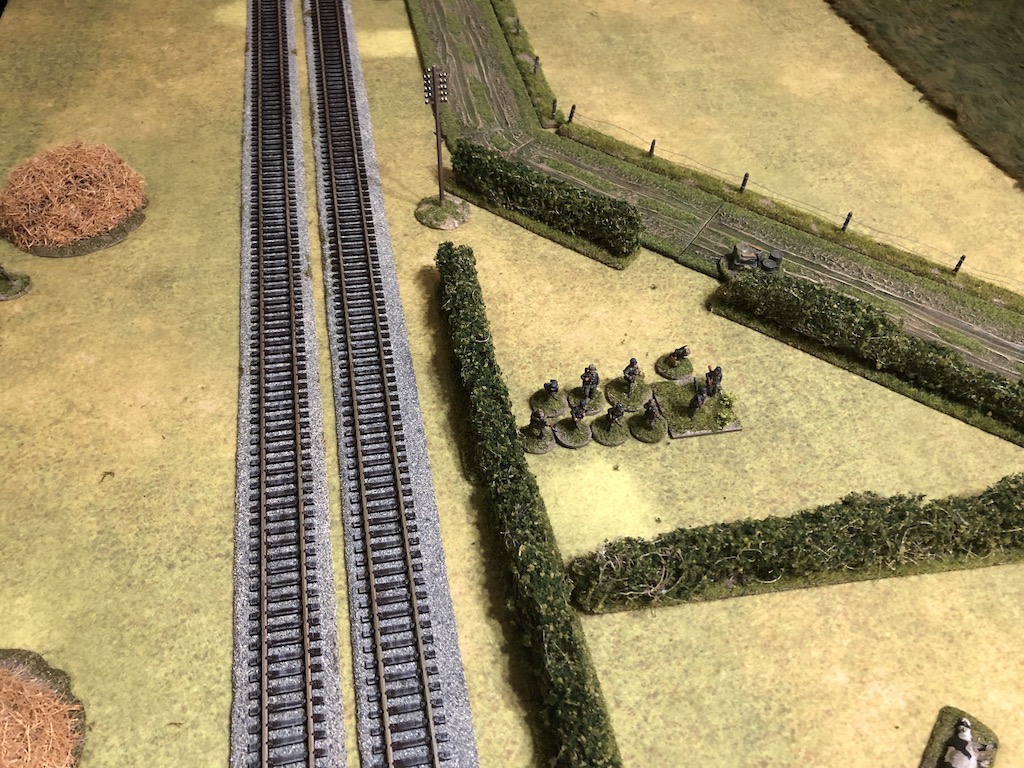
In the centre of the table a full squad, called in as support, also deploys.

The squad and the infantry gun both have the signal box covered. Clearly Dave is expecting something nasty to appear and wisely he's using support units to try to deal with it. Both of us are needing to protect our core platoon from any heavy losses.

Lastly on the German left a squad deploys in the water meadow and is placed on overwatch.

That deployment sees German units covering both flanks and the centre.

In the Russian phase I contemplate my options. The HMG could deploy into the signal box and duel it out with the IG. With more firepower and reducing the level of cover, the odds are in its favour, but is that what I really want to do? My aim here is to inflict casualties on the German platoon and I don't want to risk the HMG just yet. I decide to bide my time and let the phase pass back to the Germans.
The Germans are feeling under pressure and the Unterfeldwebel orders the two squads to put covering fire on the HMG and the Russian LMG.

He then has the squad in the road throw a smoke grenade for additional cover.


The HMG has proven a real threat and the Germans are doing what they can to mitigate the damage.

They aim to bring as much fire to bear as they can and the squad in the centre tries to quickly move over the hedge, but they struggle to find a way through only managing a 1" move. Not the speedy response Dave was hoping for.

On the other hand the IG crew prove very adept at manhandling their gun and move 9" across the railway lines.

There is some way for the gun to go before it can engage the Russians but the Germans are doing what they can to concentrate over on this flank.


A final German squad attempts to deploy in the centre. This requires a die roll given the Unterfeldwebel has already deployed but in the end it's not a problem. That is all the German force on the table.


The German LMG team behind the hedgerow decide to target the lone Russian Leytenant.

He is hit, but only lightly wounded. Russian force morale drops a point to seven. I'm beginning to think my work here is done and it might be time to withdraw soon.

The German rifle team target the HMG and the squad, but the fire has no effect.

The Unterfeldwebel orders the squad in the road to move between the gap in the hedgerows towards the centre of the table.

He then orders the rear most German squad to move forward and over the other hedgerow.


Lastly he order the infantry gun forward and moves up with them.


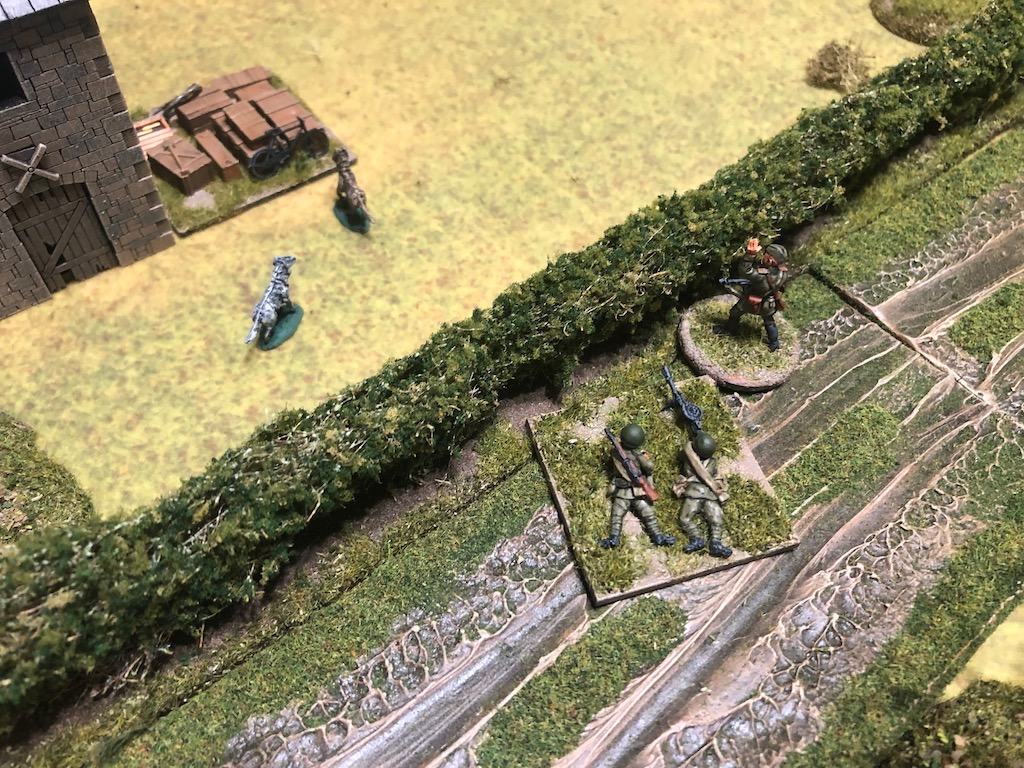
Dave uses the opportunity to make a grab for the Russian jump-off point in the centre buildings. One of his squads moves at the double through the gap in the hedgerow.


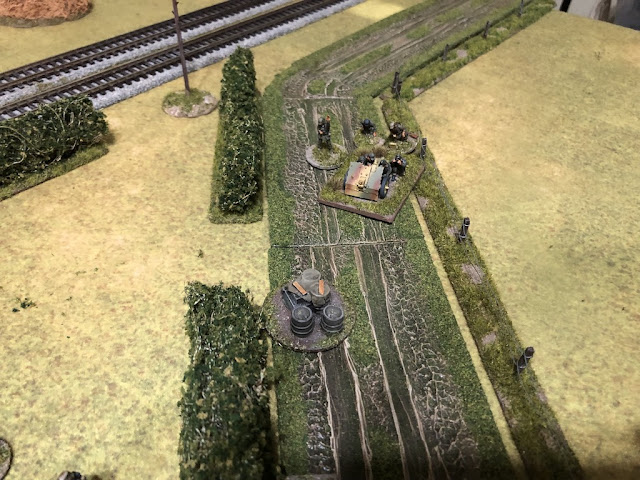
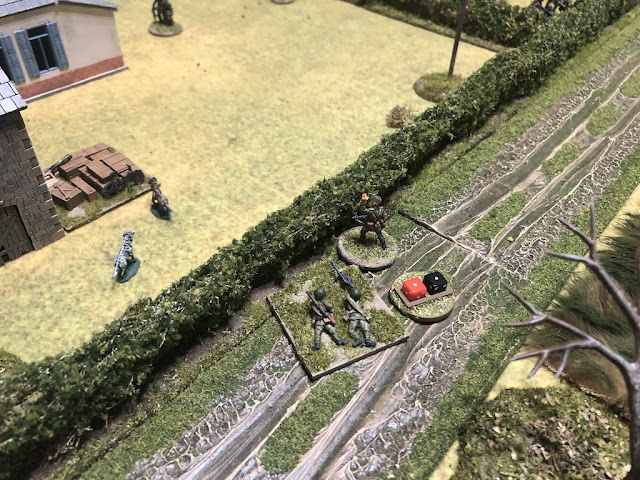
More infuriatingly the Infantry Gun manages to make yet another 9" move and emerges from out of the smoke ready to take on the HMG.


This time their fire is even more devastating. The Germans take three casualties and two points of shock. This sees the LMG team wiped out and the Obergefreiter wounded and stunned for the rest of the turn. German morale fall two points down to eight.

The Leytenant then orders the HMG to continue firing into the meadow.

It results in a casualty and a point of shock on each team which is enough to break the squad and send them reeling back. German force morale takes another two point tumble down to six.


The last act of the phase is for the pinned Russian squad to fire into the hedgerow.

Three hits results in two points of shock.

Well, that was a very effective double phase, but with my squads still exposed I think it is now time to consider withdrawal. I've achieved exactly what I set out to do, which is inflict as many casualties as I could on the German core platoon. I decide I'll withdraw at the start of my next phase.
Well, that was my plan, but that was before fate decided otherwise. The next German command roll is 66322 and it looks like I'll be facing much more German fire than I was bargaining on.
Dave wastes no time jumping into action. The Obergefreiter with the squad at the hedgerow rallies a point of shock and they open fire at the HMG and pinned squad. The Russians take their first casualty from the core platoon.

The Unterfeldwebel orders the infantry gun to target the Russian squad with the two LMGs directly down the road.


The losses from this scenario will see the German platoon lose five men permanently and three wounded men will miss the next game. They will be down a total of fifteen men for the next scenario.
This gives me a few options but I decide I will take the DHSK HMG. The one remaining support point could be used for a panzerfaust, after all Dave may well consider using a tank to deal with any Russians in the signal box. On the other hand if that position is so obvious I consider whether it would not be better to entrench the HMG, that way I am not restricted to the one very obvious location? It does mean I have no anti-tank defence, but I don't intend to try to hold this table, so if things become too deadly I can always withdraw. I decide I will take the risk and so the HMG with an entrenchment are selected as the Russian support.
The Germans get the game started and waste no time demonstrating how obvious they think the signal box is as a defensive location. An leIG18 deploys almost directly opposite the building.
In the centre of the table a full squad, called in as support, also deploys.
The squad and the infantry gun both have the signal box covered. Clearly Dave is expecting something nasty to appear and wisely he's using support units to try to deal with it. Both of us are needing to protect our core platoon from any heavy losses.

Lastly on the German left a squad deploys in the water meadow and is placed on overwatch.


In the Russian phase I contemplate my options. The HMG could deploy into the signal box and duel it out with the IG. With more firepower and reducing the level of cover, the odds are in its favour, but is that what I really want to do? My aim here is to inflict casualties on the German platoon and I don't want to risk the HMG just yet. I decide to bide my time and let the phase pass back to the Germans.
A roll of 65443 leaves the Germans with few options and so the commander of the IG puts the crew on overwatch.


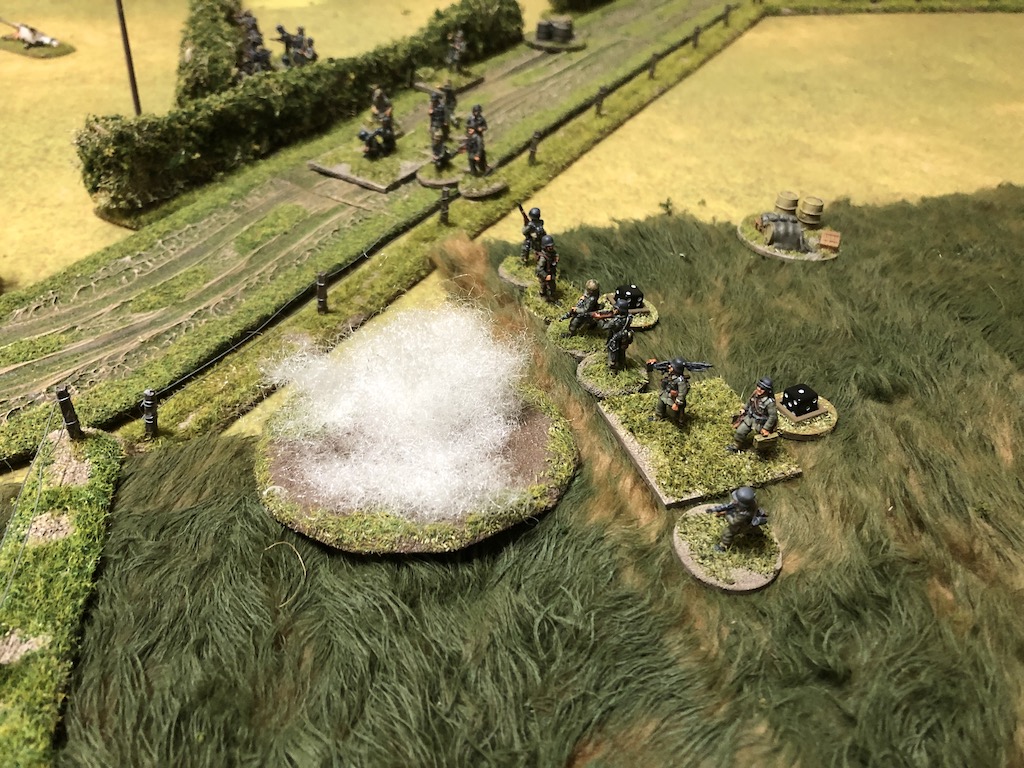
Knowing the Germans have used all their support points on the IG and a regular squad I now know what the Russians are up against. I had chosen an entrenchment so that I wasn't restricted to the signal box and now is the time to make use of it. With a German squad exposed in the water meadow the HMG deploys on the Russian right and fires.


The fire is effective causing a casualty in the LMG team and inflicting shock on both the squad's teams.

The Germans were on overwatch and return fire, but the hard cover of the entrenchment provides excellent protection and the fire has no effect. As planned I now deploy one of the Russian squads alongside the HMG and the squad LMG lays down covering fire on the Germans.

Should the Germans choose to return fire it will be at effective range and the covering fire will mean they hit only with a 6. Where as the HMG is firing at close range and will hit on a 4,5 or 6. I like those odds.


Another command roll of 65443 leaves the Germans with limited options, but it's enough for another squad to deploy. They make good use of the cover of the hedges to stay out of sight of the Russian squad and so concentrate their attention on the HMG.


The LMG team opens fire, but once again the hard cover of the entrenchment protects the crew. The German rifle team then put covering fire on the HMG and play the Russians at their own game.


Dave decides that he needs the Unterfeldwebel on hand to try to rescue the situation on this flank. He deploys and orders the squad in the water meadow to return fire.


With the covering fire and the shock they only manage one hit and it has no effect.

The Unterfeldwebel decides more firepower is needed and he orders the support squad in the centre to move forward to the hedgerow.

With his last CI he has the squad out in the water meadow throw a smoke grenade and that provides them with more cover.

With the smoke helping to conceal the Germans in the meadow the Russian HMG turns its attention to the squad in the road.

The German covering fire fails to deter the determined machine gunners and the squad takes six hits which result in a shock and a casualty on each team. One of those casualties is the Obergefreiter who is wounded and stunned for the remainder of the turn. German FM drops one point down to ten.

Meanwhile the Russian LMG continues to put down covering fire on the squad in the water meadow.

The Germans are feeling under pressure and the Unterfeldwebel orders the two squads to put covering fire on the HMG and the Russian LMG.

He then has the squad in the road throw a smoke grenade for additional cover.


The HMG has proven a real threat and the Germans are doing what they can to mitigate the damage.

They aim to bring as much fire to bear as they can and the squad in the centre tries to quickly move over the hedge, but they struggle to find a way through only managing a 1" move. Not the speedy response Dave was hoping for.

On the other hand the IG crew prove very adept at manhandling their gun and move 9" across the railway lines.

There is some way for the gun to go before it can engage the Russians but the Germans are doing what they can to concentrate over on this flank.


A final German squad attempts to deploy in the centre. This requires a die roll given the Unterfeldwebel has already deployed but in the end it's not a problem. That is all the German force on the table.


The Russian command roll of 43322 means the HMG cannot be activated and so I decide to deploy the Leytenant to the rear of the HMG but within command range (no picture I'm afraid) and he orders the HMG to fire at the squad in the road.


With the covering fire and the smoke there is not much chance of hitting, but the one hit they do get is enough to cause a casualty in the German rifle team. So far the HMG has caused three casualties and wounded an Oberfrieter and the Russians are yet to lose any men or take any shock. I know it won't last but it's the sort of result I was hoping for.

Meanwhile the Russian LMG sticks to its task and continues to lay down covering fire.

The Russians are dealing out some punishment but German pressure is beginning to build. I need to take what opportunities I have left to inflict as many casualties as I can before pulling out.

Just as I think things are going well the German command roll is 66541. A double phase and an opportunity to activate the Unterfeldwebel. Dave uses the 1 to activate the gun crew and once again they demonstrate their manhandling skills and move the gun another 9". It's starting to get a little too close for comfort.

The Unterfeldwebel orders the squad who had trouble getting over the hedge to move at the double towards the other hedge and this they manage to do easily.

This adds a new and additional threat to the Russian units.

He then orders the squad in the road to move forward tactically but even their low level of shock is enough to keep them rooted to the spot.


With the arrival of the squad at the hedge the Germans in the meadow move out from behind their smoke screen and up to the wire fence. I sense Dave is attempting to capitalise on the double phase and overwhelm me with fire.


The subsequent German command roll is 55332, which means the Unterfeldwebel won't be activated this phase. Nonetheless there are plenty of options. The Infantry Gun continues to move at a good pace, coming 6" up the road.

The Germans can now exert some firepower and both the squad behind the hedge and the one in the meadow open fire. The Russian squad is only in light cover and so they can ignore the HMG and focus all their fire on the easier target.


The Germans roll twenty fire dice and score twelve hits. The Russians are very, very fortunate and although they suffer seven points of shock and are pinned, they don't lose any casualties.

Things are really beginning to heat up and I need to consider deploying my other squad or perhaps withdrawing. The Russian Leytenant orders the HMG to fire into the meadow but before they can do that the Germans interrupt and open fire from behind the hedgerow.

Despite six hits the entrenchment provides ample protection to the HMG crew and they come away unscathed.

When they open fire on the Germans they cause another casualty in the rifle team and add shock to the LMG team. The casualties are steadily mounting but I'm going to have to consider my own predicament with German pressure building.


The Russian squad turns the attention of the LMG to the squad behind the hedgerow and lays down covering fire.

In the following German phase the squad in the meadow returns fire and with the Russian squad now pinned any hits must be shared across both the squad and the HMG. This results in the first Russian casualty, as a member of the HMG crew is hit.

The German LMG team behind the hedgerow decide to target the lone Russian Leytenant.

He is hit, but only lightly wounded. Russian force morale drops a point to seven. I'm beginning to think my work here is done and it might be time to withdraw soon.

The German rifle team target the HMG and the squad, but the fire has no effect.

The Unterfeldwebel orders the squad in the road to move between the gap in the hedgerows towards the centre of the table.

He then orders the rear most German squad to move forward and over the other hedgerow.

There is movement in the German centre and I sense some sort of outflanking move is about to take place. I'm not sure how much longer my small force can hold these Germans at bay.


Lastly he order the infantry gun forward and moves up with them.


I decide to see if I can just inflict a few more casualties before the Germans make a flanking move. I feel justified when the command roll is 66532, even if it limits how much I can actually do.
The pinned Serzhant rallies shock off the squad and with their SMGs now in range they all fire at the hedgerow. It's not a lot of fire given the shock and the fact they are pinned but they manage one hit and it's enough to cause a casualty.

I try to bring on the final Russian squad to add to the available firepower for this double phase but with the Leytenant already deployed onto the table the squad fails to arrive.
I'm still not willing to withdraw, I sense I have too many good targets and so roll command dice for the subsequent phase. The wounded Leytenant uses one CI to put himself tactical and the other to order the HMG to continue firing.

The fire has barely any effect and inflicts a single point of shock.

The squad Serzhant rallies off more shock and has the squad put covering fire on the hedgerow. It seems more likely to have a result than the pitifully small amount of fire the pinned squad can generate.

Another attempt to deploy the second squad also ends in failure. Just when I think withdrawing may have been a wiser option I look in horror as the Germans roll 66532 and a double phase of their own.

The fire has barely any effect and inflicts a single point of shock.

The squad Serzhant rallies off more shock and has the squad put covering fire on the hedgerow. It seems more likely to have a result than the pitifully small amount of fire the pinned squad can generate.


Another attempt to deploy the second squad also ends in failure. Just when I think withdrawing may have been a wiser option I look in horror as the Germans roll 66532 and a double phase of their own.
Dave uses the opportunity to make a grab for the Russian jump-off point in the centre buildings. One of his squads moves at the double through the gap in the hedgerow.


More infuriatingly the Infantry Gun manages to make yet another 9" move and emerges from out of the smoke ready to take on the HMG.


The next German command roll of 65221 allows the Unterfeldwebel to activate, but firstly Dave uses the 1 to have the LMG team in the centre move at the double again and close down the Russian jump-off point.


The Unterfeldwebel then barks an order to the infantry gun and it opens fire.


The HE round hits both the squad and the HMG team but only results in two points of shock on the HMG.

Lastly the Unterfeldwebel orders the squad in the meadow to lay covering fire on the Russians.


The Germans now have two squads and the infantry gun engaging the Russians while in the centre they are pushing towards the other Russian jump-off points. I feel in a dangerous position but I need to remind myself I have lost only one casualty. Not only that, but the HMG has several attractive targets. If my aim is to inflict casualties on the German platoon perhaps it's premature to consider withdrawing just yet?


The Unterfeldwebel then barks an order to the infantry gun and it opens fire.


Lastly the Unterfeldwebel orders the squad in the meadow to lay covering fire on the Russians.


The Germans now have two squads and the infantry gun engaging the Russians while in the centre they are pushing towards the other Russian jump-off points. I feel in a dangerous position but I need to remind myself I have lost only one casualty. Not only that, but the HMG has several attractive targets. If my aim is to inflict casualties on the German platoon perhaps it's premature to consider withdrawing just yet?

I decide to see if I can keep the HMG in action a little longer and this seems to be rewarded with the Russian command roll of 66621. Now that could be very useful indeed. Not only will I decide to stay, I see an opportunity to really inflict more damage. I use the 2 to try to deploy my remaining squad and this time I'm successful. They deploy in the road behind the hedgerow where they can target the Germans in the centre, who are caught in the open.


They open fire and the German LMG team loses two casualties and suffers a point of shock. That was a good result and hopefully I have another phase of fire.

With the remaining command dice the HMG team activates and fires into the meadow.

One of the German rifle team is hit and with more shock the squad is pinned. This is the sort of result I was after, that's three more men from the German platoon who are casualties.

With that the turn ends. It means the Germans in the meadow remain pinned, but unfortunately so does my squad next to the HMG. The smoke is removed and the Obergefrieter who was stunned gets to his feet.


The next Russians phase sees the Leytenant order the squad at the hedgerow to continue firing.

This time their fire is even more devastating. The Germans take three casualties and two points of shock. This sees the LMG team wiped out and the Obergefreiter wounded and stunned for the rest of the turn. German morale fall two points down to eight.

The Leytenant then orders the HMG to continue firing into the meadow.

It results in a casualty and a point of shock on each team which is enough to break the squad and send them reeling back. German force morale takes another two point tumble down to six.


The last act of the phase is for the pinned Russian squad to fire into the hedgerow.

Three hits results in two points of shock.

Well, that was a very effective double phase, but with my squads still exposed I think it is now time to consider withdrawal. I've achieved exactly what I set out to do, which is inflict as many casualties as I could on the German core platoon. I decide I'll withdraw at the start of my next phase.
Well, that was my plan, but that was before fate decided otherwise. The next German command roll is 66322 and it looks like I'll be facing much more German fire than I was bargaining on.
Dave wastes no time jumping into action. The Obergefreiter with the squad at the hedgerow rallies a point of shock and they open fire at the HMG and pinned squad. The Russians take their first casualty from the core platoon.


That squad takes one casualty. After suffering no casualties so far I've just lost two men in short succession.


That done the Unterfeldwebel moves towards the centre with the intention of ordering the rifle team in the centre to advance, but he has trouble finding his way and moves only 2".

It's not far enough and he can't issue commands to that team.

With one CI left he orders the squad at the hedgerow to throw a grenade at the pinned squad by the HMG, but the grenade misses.
Just when I think I'll have to suffer another German phase Dave rolls 66444 - this is going to turn into a triple phase. The Unterfeldwebel orders the infantry gun to fire at the same target.

It's another clear, simple shot straight down the road and my squad looks horribly exposed.

The HE round does its work and the Russians lose another two casualties.

The Unterfeldwebel continues to coordinate the firing and has the squad behind the hedgerow fire at the HMG team and the squad. The pinned Russian squad takes another two casualties.

Their squad leader is not hit, but the shock that would have been enough to break the squad had it survived causes him to fall back.

With the section wiped out it brings Russian morale down to six.

The Unterfeldwebel then moves forward and directs the nearest squad to join him.


It's another clear, simple shot straight down the road and my squad looks horribly exposed.

The HE round does its work and the Russians lose another two casualties.
The Unterfeldwebel continues to coordinate the firing and has the squad behind the hedgerow fire at the HMG team and the squad. The pinned Russian squad takes another two casualties.

Their squad leader is not hit, but the shock that would have been enough to break the squad had it survived causes him to fall back.

With the section wiped out it brings Russian morale down to six.

The Unterfeldwebel then moves forward and directs the nearest squad to join him.


This has suddenly gone horribly wrong just at the moment it was all going so well. The only consolation is the next German command roll does not herald another double phase. At 65521 it is enough to activate the infantry gun which fires down the road once again.


It results in yet another Russian casualty from the LMG crew and the Serzhant is lucky to escape being hit.

With the final 2 in the command roll the squad behind the hedge fires at the HMG and a crew member is hit and they lose another man.
When it finally comes to the Russian phase I announce the belated Russian withdrawal.
Well, that was a dramatic finale to a game that was going so well for the Russians. I set out to use the HMG to inflict as much damage as possible on the German platoon and that's exactly what it started doing. For several phases the Russians had the upper hand, inflicting casualties on German squads and remaining unscathed themselves. Then in a dramatic run of phases the Germans managed to do a significant amount of damage to the Russian platoon and I was incapable of reacting fast enough to escape.
The Germans suffered eleven casualties from the core platoon and one from a support unit. The Russians, no thanks to those final German phases ended up with seven casualties from the core platoon and two from the support. That triple phase was a killer - literally.
The Russian platoon will see three permanent losses and two wounded for the next scenario. They now have eleven men killed. Two wounded men and a Serzhant who was dispersed after the previous scenario will return for the next game, but all up they will be down thirteen men for the next scenario. It might be time to call for replacements.


It results in yet another Russian casualty from the LMG crew and the Serzhant is lucky to escape being hit.


With the final 2 in the command roll the squad behind the hedge fires at the HMG and a crew member is hit and they lose another man.
When it finally comes to the Russian phase I announce the belated Russian withdrawal.
Well, that was a dramatic finale to a game that was going so well for the Russians. I set out to use the HMG to inflict as much damage as possible on the German platoon and that's exactly what it started doing. For several phases the Russians had the upper hand, inflicting casualties on German squads and remaining unscathed themselves. Then in a dramatic run of phases the Germans managed to do a significant amount of damage to the Russian platoon and I was incapable of reacting fast enough to escape.
The Germans suffered eleven casualties from the core platoon and one from a support unit. The Russians, no thanks to those final German phases ended up with seven casualties from the core platoon and two from the support. That triple phase was a killer - literally.
The Russian platoon will see three permanent losses and two wounded for the next scenario. They now have eleven men killed. Two wounded men and a Serzhant who was dispersed after the previous scenario will return for the next game, but all up they will be down thirteen men for the next scenario. It might be time to call for replacements.
The losses from this scenario will see the German platoon lose five men permanently and three wounded men will miss the next game. They will be down a total of fifteen men for the next scenario.
The Russian CO is not impressed and his opinion drops to -3. The Men's Opinion also falls, this time to -1. The platoon commander's outlook is now Content. The victory sees the German CO's opinion increase to +5, but the high casualties see the Men's Opinion drops to -3. The platoon commander's outlook becomes Gregarious.
So we now move to map 5 and time is running out for the Russians to stall the German advance. There are two more maps left in the campaign and the Germans have three turns left to take them to achieve campaign victory. You can follow what happens next in Scenario 5 Outposts at Linderau.
The Westwind Königsberg Campaign appears in the Too Fat Lardies Summer Special 2014. You can purchase this as a downloadable pdf from TFL Summer Special 2014.
You can find AAR game reports for this and all the other Chain of Command campaigns on the CoC campaigns AAR page.
In the CoC errata, pinned units cannot do covering fire. Knowing that might in this case might have saved the Soviets from that deadly triple phase.
ReplyDeleteThanks for pointing it out. We did think that might be the case but when we couldn’t find it quickly in the rules or FAQ we just allowed it. Given we were both guilty of doing it things probably balanced out. Noted for the future though!
DeleteAnother great report! You seem to know which units are from the 'core' platoon as opposed to the support platoon. Do you differentiate the troops on the table, somehow or is just word of mouth from your opponent? While I have you - I posted a question on your article about building the Sarissa row houses, which You have probably not seen. Could you check it out? Thanks
ReplyDeleteI guessed it was a support squad because it was full strength, most of his core platoon squads are under strength. Sometimes we announce that they are, but we don’t have any particular protocol. That said we are careful to separate core platoon casualties from support so it’s just something you notice while playing.
DeleteThanks for sharing. I can't help but feel that the early commitment of a core squad so far from support, and in only light cover, was a huge mistake. The German platoon is being bled dry and will soon lack the necessary strength to continue offensive operations.
ReplyDeleteGood point. I think Dave was expecting me to defend the signal box and that squad on the flank was not intended to take the brunt of the Russian defense.
DeleteAnother cracking write up and pictorial narrative combination. The game certainly highlighted how fickle are the fortunes of war.
ReplyDeleteYes indeed. I definitely rode my luck for too long!
DeleteGreat AAR and well played by both you and Dave. Quite interesting with the use of the big guns. I enjoyed reading this. Thanks for posting. 😀
ReplyDeleteGreat write up, and helps to explain a bit of the mysteries of CoC to an outsider.
ReplyDeleteSeems as if you are lucky that Dave did not get a tank for support instead of the support gun.
I took a gamble with the tank but as I said, I was prepared to withdraw if things got difficult. The main aim was to try and inflict some casualties while I could. I was doing okay for a while, and then.....
DeleteMan this was a great but frustrating read! I was internally shouting at the computer for you to withdraw while reading the last few Russian phases before that inevitable run of good luck for Dave.
ReplyDeleteGreed is the true killer! haha, great read none the less!
Yes, knowing when to go and when to stay requires a delicate balance of the risks. Sometimes you get it right and sometimes you don’t!
Delete