
The Germans continue Operation Westwind, their attempt to break out from the encirclement of Konigsberg. They were held up longer than expected on the outskirts of the East Prussian town of Metgethen where the Russians had made a determined stand in the local girls' school.
Having cleared the school they now enter the town of Metgethen itself where they have caught the defenders unprepared. With no time to construct defensive positions my Russian platoon must try to conduct a delaying action to slow the German advance.


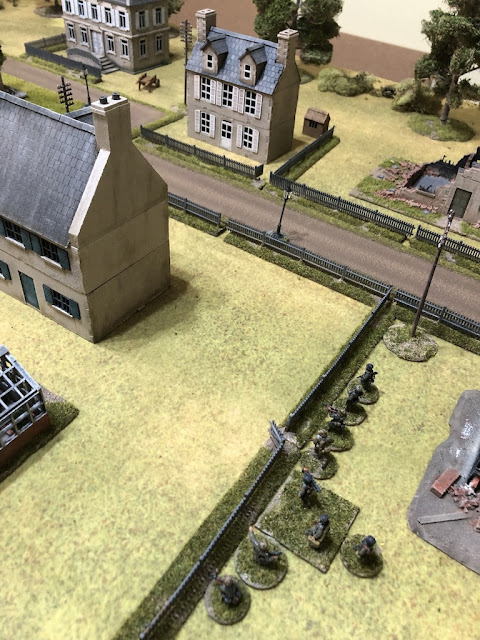
The well laid out town features a war memorial at its centre and any apparent calm is about to be shattered by the arrival of German units approaching from the eastern edge of the table. This is Scenario 4 from the main rule book and is a delaying action.


The patrol phase sees both sides move on the flanks and centre and so the jump-off points are spread across the table. The scenario objective will be the Russian jump-off point in the long row of houses at the rear of the table.

Force morale starts with the Germans at nine and the Russians at ten. The Germans will have six support points and the Russians will have five. This is a tough call for the Russians as the relatively small SMG platoon is already feeling the loss of five men and so it's important I try to minimise casualties. That said, this is ideal close terrain for the SMG platoon who should be able to take full advantage of their firepower if they can bring the fight to close quarters. I know I need more men and so four points for a regular infantry squad is one obvious support choice, but that will only leave a single point for another support. On the other hand a powerful support weapon like an HMG is very appealing as it will provide me with a weapon that has a good range with the added advantage of reducing cover by one level. However if I make that choice then I must leave any other fighting to the remaining men of the core platoon and risk further casualties. It's a tough choice and in the end I settle on a regular infantry squad and a panzerfaust for support.
As for the Germans, I'm not sure what they will bring. While I will have to rely on the single panzerfaust if they have armour support, my gut instinct tells me Dave will conduct an infantry assault. We will soon find out.
The first Germans to appear are a squad of Volkssturm on the German left flank and they take up overwatch positions.


The Russian command roll brings a CoC point and I do consider whether to deploy a squad into the house on my left to engage the Germans behind the fence.


Looking at the German squad in the centre I begin to regret not selecting the HMG as a support. There is a clear line of sight from the buildings on the opposite side of the war memorial and I could catch the full squad in open ground. A glorious target and a real opportunity to do some damage. Oh well, it's not to be.


He then orders the pioneers to follow, but their equipment must be cumbersome and they only move a short distance.


The Russian fire is not that effective and inflicts one point of shock on each team.


His first action is to order one of the squads to continue firing at the Volkssturm and this second round of SMG fire adds enough shock to pin them.


That was a very good result for the Russians who are now poised to attack the German squad in the garden from the rear.


Despite being pinned the German LMG team in the garden fires at the Russians in the woods.

The Germans take a little revenge when the single hit is enough to kill one of the SMG men.


The last action of the phase sees the Serzhant in the rear house rally the shock off the LMG team and direct them to return fire at the Germans in the woods. The fire has no effect. With German FM so low I try to think of a way to drive it down and achieve a scenario victory, but the options are not great. In order to inflict enough damage to cause a leader casualty or enough shock for a team to break I'm going to have to engage in a firefight with the Germans. The problem is they outnumber me and they out-range me, so I stand to lose more than I could gain. I don't want to consider withdrawing just yet but I need to find a cost effective way to win this.
The Germans are down to four command dice, however the roll allows the Unterfeldwebel to activate. He orders the rearmost squad into a ruined house.


He then orders the squad in the woods to continue firing at the Russian LMG in the houses at the rear.


The three hits result in one casualty and a point of shock, which brings this squad down to a single man with the LMG and the Serzhant. They won't be able to stand much more of this and I'm losing men that will be hard to replace.

Lastly the German pioneers make their way around the back of one of the houses towards the centre of the table.

The Russian CO's Opinion remains unchanged at 0, partly helped by the fact this was considered a 'losing draw' due to the disparity in casualties. The men are clearly feeling better about things and their Opinion rises to +2. The platoon commander's outlook remains unchanged at Cheerful.
With the loss of Metgethen the Russians have the option to play a Wild Card and so take the initiative by mounting a counter attack on any ground held by the Germans. This is an option to consider for our next game, do I try to retake Metgethen? Or do I save the Wild Card counter attack for a different map?
You can find out what happens next in this game report.
The Westwind Königsberg Campaign appears in the Too Fat Lardies Summer Special 2014. You can purchase this as a downloadable pdf from TFL Summer Special 2014.
You can find all the AAR game reports for this campaign and other Chain of Command campaigns on the Campaign AARs page here.
As for the Germans, I'm not sure what they will bring. While I will have to rely on the single panzerfaust if they have armour support, my gut instinct tells me Dave will conduct an infantry assault. We will soon find out.
The first Germans to appear are a squad of Volkssturm on the German left flank and they take up overwatch positions.


The Russians choose to stay concealed and so the Germans deploy a squad from the core platoon on their right in the wooded area.


The Volkssturm rifle team probe forward, while the LMG team remains on overwatch.

The Russians acquire a couple of CoC points in their phase, but once again choose to stay concealed. I have a brief moment of panic about that decision when I see the Germans roll a double phase. Fortunately the roll of 66511 limits their options for this phase, but it highlights the risk a defender takes by remaining concealed.
The Germans deploy a third squad in the centre of the table and it looks like they plan to probe the defences on a broad front. All the more reason to delay Russian deployment until I can be sure of where their main effort will lay.


In their subsequent phase the Germans continue their advance. The recently deployed squad moves out of the rubbled building and up to the picket fence surrounding one of the houses.


Meanwhile to their left the Volkssturm Obergefreiter puts the rifle team on overwatch and then calls the LMG team forward to join them.


The Germans are advancing cautiously, but remain out of range of my SMGs. I see no reason to deploy just yet and opt to wait to see what unfolds. Having said that, with the enemy closing in on some of my jump-off points I need to be wary of the threat another German double phase could pose.
The Russian command roll brings a CoC point and I do consider whether to deploy a squad into the house on my left to engage the Germans behind the fence.

It's a very tempting target, but with the range greater than 12" that would make the squad LMG the only effective weapon. I decide to wait, in anticipation the Germans will choose to advance and close the range.
The Volkssturm continue to move through the woods bringing them closer to the Russian jump-off point on that flank. I will not be able to stay concealed for much longer.
The Volkssturm continue to move through the woods bringing them closer to the Russian jump-off point on that flank. I will not be able to stay concealed for much longer.
On the opposite flank a squad advances through the woods, but they have trouble finding their way and barely cover any distance. Nonetheless the Germans are now pressing forward on a broad front however it's not clear where their main effort intends to be.

Despite the fact there has been no action the game has a definite air of tension and there is an impending sense that at any moment that could be broken by an eruption of violence. I want to time my deployment to be as effective as possible, however it's quite a gamble given how close the Germans are encroaching. On the other hand the Germans don't want to take any unnecessary risks and so, wary of what may come in the next Russian phase, the German squad in the centre is placed on overwatch.

It really is very tempting to deploy some Russian units, but I want to resist the temptation to do so prematurely as I still don't know what other support Dave has selected and I don't want to gift him any targets. The Russian command roll delivers another CoC point which brings up their first full CoC die. That could come in very useful. Other than that another Russian phase passes without any deployment.
The Germans have a frustrating command roll of 55441. They have only one senior leader and he is best left off table directing troops to their deployment points, so the 4s are not of much use. All they can do is to push forward in the centre, sending the rifle team over the fence and into the garden of one of the houses.

I decide to let yet another Russian phase pass without any deployment. However when the Germans roll another double phase I'm gripped by a second moment of panic and wonder whether that was the best decision! The command roll of 66541 limits their options, but I will still have to face the prospect of another German phase with no Russian units deployed to oppose them. The Germans use the command roll of 1 to move the LMG team in the centre to join the rifle team.

Despite the double phase there are no rapid advances by the Germans, who continue to move steadily forward on a broad front.


Conscious of their proximity to a Russian jump-off point the Volkssturm squad exercise some caution and advance tactically through the woods.

Looking at the German squad in the centre I begin to regret not selecting the HMG as a support. There is a clear line of sight from the buildings on the opposite side of the war memorial and I could catch the full squad in open ground. A glorious target and a real opportunity to do some damage. Oh well, it's not to be.

Much more ominously the Germans now deploy a Pioneer squad with two flamethrower teams on their right. I had a sneaking suspicion this might be Dave's other support choice. I think if I was about to face SMG armed Russians in hard cover that's exactly the sort of support I would consider bringing.

If nothing else I now have a much better idea of how the German assault is unfolding. Though quite how I delay it or stop it is another matter altogether. I sense my best option will be to focus on the weaker flank by targeting the Volkssturm and regular squad. For now though I still can't see any advantage to deploying and so the Russians continue to remain hidden from sight.
The Germans now deploy their third squad on the right flank to join the pioneers.

Aside from the Unterfeldwebel (SL) that's the full German platoon and supports all deployed, so I now have a clear picture of what I am up against. On my left I face two regular infantry squads and the flamethrower equipped pioneers. On my right I have the Volkssturm squad and a single regular infantry squad. I can't see how I can deal with the left flank, but if I can find a way to hit the weaker German force on my right there might be an opportunity to knock the Germans off balance. A double phase would be nice.
The double phase doesn't come and a roll of 65541 leaves me little option but to continue to stay out of sight. We are several phases into the scenario, with the full German contingent deployed and still not a Russian in sight. It's turned into a rather tense game of cat and mouse.
The double phase doesn't come and a roll of 65541 leaves me little option but to continue to stay out of sight. We are several phases into the scenario, with the full German contingent deployed and still not a Russian in sight. It's turned into a rather tense game of cat and mouse.
With all units deployed the German Unterfeldwebel now arrives and joins the two squads and the pioneers, making it clear this is the flank with the greatest threat.

His first order is to send the nearest squad forward through the woods and they move off quickly.

He then orders the pioneers to follow, but their equipment must be cumbersome and they only move a short distance.

Finally he orders the remaining squad to advance tactically towards the nearest house in anticipation of a Russian reaction.

The Volkssturm feel a bit isolated out on the flank and so move towards the squad in the centre for additional support.


Lastly the rifle team from the centre squad edges forward tactically. The time is fast approaching for a Russian response.

When the Russian command roll delivers a double phase with good activation dice (66332) this is the spark that sees them burst into action. It is exactly the sort of roll I was hoping for so finally the Russians will make an appearance. This is the moment to deploy on my right and take on the Volkssturm squad. However, before I do that I'm conscious the Germans have a CoC die and could perform an interrupt so I hope I can tempt Dave to use it somewhere else rather than with the Volkssturm.
I have one weakened squad that is made up of a two man LMG team and a Serzhant and so I deploy those into the houses at the rear of the table where they can target the German squad in the garden.
I have one weakened squad that is made up of a two man LMG team and a Serzhant and so I deploy those into the houses at the rear of the table where they can target the German squad in the garden.


With the rifle team in tactical positions it means I can make the German LMG team my sole target, as they have less cover. That's a threat the Germans cannot ignore and so Dave uses his CoC die to interrupt and move the whole German squad forward tactically. That makes both teams tactical and unites them as a single target.

The Russian fire is not particularly effective, inflicting a single point of shock on the German LMG team, but it does mean there is now no chance the Volkssturm can interrupt.

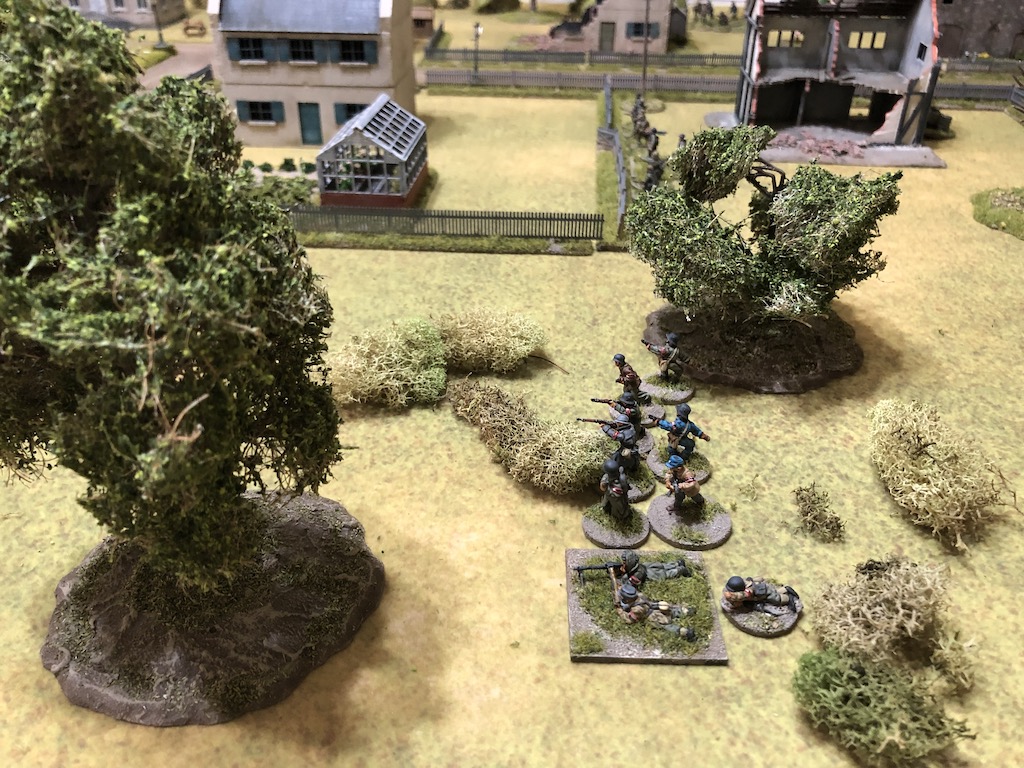
With that a Russian squad deploys into the woods putting them within line of sight and SMG range of the Volkssturm.


The Russian fire is not that effective and inflicts one point of shock on each team.

No matter, I intend to make the most of the double phase to exploit the German weakness on this flank. A second Russian squad deploys from the same point and likewise they target the hapless Volkssturm.


This time the SMG fire is much more effective and the Volkssturm take four points of shock and lose two casualties, one of which is the Obergefreiter who is killed. The loss of a Volkssturm leader adds a +1 modifier to the roll on the force morale table and sees German morale drop to eight. That's a better result and the Russians still have another phase.

Well the command dice are very kind, delivering another double phase, however the roll of 66554 is not the best for activation. Nonetheless this is too good an opportunity to lose and even though there is still a support squad to deploy the Russian Leytenant (SL) has a critical role to play here and he joins the two SMG squads.

His first action is to order one of the squads to continue firing at the Volkssturm and this second round of SMG fire adds enough shock to pin them.


Suffering nine points of shock, with no leader and pinned down the Volkssturm are ripe for close assault and so the Leytenant orders the second SMG squad to advance the short distance to contact.


The best the Germans can hope for in this situation are odds of more than 4:1 and a rout, but it ends up 20 Russian dice to 6 German. The Russians inflict nine kills, enough to wipe out the entire Volkssturm squad, who are unable to inflict a single casualty in return. The loss of an entire squad sees German morale drop two points down to six. Not only that, the loss of the entire Volkssturm squad will deeply impact the Men's Opinion and now means it cannot increase as a result of this scenario, regardless of the actual outcome.

That was a very good result for the Russians who are now poised to attack the German squad in the garden from the rear.

Much to Dave's relief the next Russian command roll is not another double phase, but it is enough to activate the Leytenant who orders the squad to advance into contact with the Germans in the garden.

Under assault from the rear the Germans cannot make use of their LMG and the Russians will attack with eighteen dice to the German eight. The Germans take four points of shock and four casualties, one of which is the Obergefreiter who is lightly wounded. German morale holds steady. In return they inflict two casualties on the Russians, but the Close Combat net loss of two sees the Germans fall back 9".

There is no point the Russian squad occupying the garden where they will only expose themselves to German fire, so they remain in the woods to benefit from the better cover.

That was a rapid and violent attack that has really battered the German left flank and achieved far more than I could have hoped. With the Germans driven back the Leytenant orders the other squad to take up overwatch position covering the road.


An opportunity exists to inflict more losses on the German squad that was defeated in close combat, however it would require deploying the support squad into the house on my left flank, dangerously close to the German pioneers and accompanying squads. Despite this it seems too good an opportunity to let pass and of all the squads under my command this is the one I can most afford to lose (cynical, I know!). Without a senior leader to direct them onto the table I need to roll to see if they are successful, but my luck is running hot and they have no problem. They deploy with the LMG facing out at the squad and the SMG men facing towards the rear of the house.


They all fire. The LMG inflicts another casualty on the Germans in the garden and with a further two points of shock that squad is now pinned.

The SMG men fire at the squad behind the house and that results in a point of shock and two casualties from the LMG team.


The next German roll delivers several CoC points, but not much in the way of activations. Nonetheless the Unterfeldwebel is able to order the pioneers forward. I knew it wouldn't be long before they were brought close to the action.


The Unterfeldwebel then moves up himself and orders the squad to lay covering fire onto the windows of the house.

Despite being pinned the German LMG team in the garden fires at the Russians in the woods.

The Germans take a little revenge when the single hit is enough to kill one of the SMG men.

The Russians now take a turn to roll a lot of fives in their command roll but it does give them another CoC die. The Leytenant orders the squad in the woods to return fire on the pinned Germans in the garden.

They inflict a further two points of shock bringing the total to nine and the squad very close to breaking point.

He then orders the other SMG squad off overwatch and advances with them towards the fence where they can join the firefight and hopefully finish off the German squad.

In an attempt to take out the German squad in the garden the Russian support squad prepares to fire once again, but before they can do this the Germans interrupt with the pioneer squad. Something tells me this is not going to end well.....

The flamethrowers do their nasty work and the Russians take four casualties and six points of shock. The Serzhant is fortunate to survive but with only three men remaining in the squad that's enough for them to break. They beat a hasty retreat from the house and Russian morale drops one point down to nine. Oh well, better that happens to the support squad than one from the core platoon.


In the following German phase the pinned squad in the garden returns fires at the Russians in the woods, however it's now my turn to interrupt.

There are only three hits, but that's enough to cause a casualty and the resulting shock is enough to break the squad. They fall back and German morale drops a further point down to five.


There are only three hits, but that's enough to cause a casualty and the resulting shock is enough to break the squad. They fall back and German morale drops a further point down to five.


With the Russian support squad driven from the house the German squad leader assigns a rifleman to the LMG team and orders them to fire at the Russian squad in the house behind the war memorial.


The hard cover of the house provides good protection and they suffer a single point of shock.

The Unterfeldwebel orders the pioneers to close up to the cover of the house. He then orders the squad at the rear to fire across the table at the Russians in the woods. The line of sight crosses several pieces of light cover which puts the Russians in hard cover and they only suffer one point of shock.


I think the key for me now is to minimise the opportunity for the remaining Germans to inflict casualties on my platoon. While I may have the Germans on the back foot my force is very brittle and as much as I would like to win this scenario it cannot be at too high a cost. The Russian platoon is currently composed of the Leytenant, a three man squad, a six man squad and a four man squad - fourteen men in total.
If I choose to make a stand around the objective jump-off point I would face the prospect of two German squads exerting suppressive fire from well beyond my SMG range while the pioneer squad worked its way into flamethrower range. I don't know about you, but I can only envisage that ending badly.
The Russians roll a double phase and I take the opportunity to have the squads in the woods pull back and out of sight of the Germans.


I intend to use a CoC die to end the turn at the end of this phase. It will mean the broken German squad will rout off the table taking the Obergefreiter with them. So to avoid the same thing happening to me I activate the Serzhant from the support squad and he detaches himself from the broken squad.

I then use the CoC die to end the turn. As a result the broken German squad routs off the table taking the Obergefreiter with them bringing their force morale down to four. In the subsequent Russian phase the Leytenant continues to direct the squads towards the rear.


The last action of the phase sees the Serzhant in the rear house rally the shock off the LMG team and direct them to return fire at the Germans in the woods. The fire has no effect. With German FM so low I try to think of a way to drive it down and achieve a scenario victory, but the options are not great. In order to inflict enough damage to cause a leader casualty or enough shock for a team to break I'm going to have to engage in a firefight with the Germans. The problem is they outnumber me and they out-range me, so I stand to lose more than I could gain. I don't want to consider withdrawing just yet but I need to find a cost effective way to win this.
The Germans are down to four command dice, however the roll allows the Unterfeldwebel to activate. He orders the rearmost squad into a ruined house.


He then orders the squad in the woods to continue firing at the Russian LMG in the houses at the rear.


The three hits result in one casualty and a point of shock, which brings this squad down to a single man with the LMG and the Serzhant. They won't be able to stand much more of this and I'm losing men that will be hard to replace.

Lastly the German pioneers make their way around the back of one of the houses towards the centre of the table.

The loss of the man in the LMG team was the sign that the Russians have probably done enough here and it would be better to fall back without further loss. In the Russian phase I announce a voluntary withdrawal. This may result in a German scenario victory but the difference in force morale from Russian 9 to German 4 means they won't be able to collect any of their casualties and patch them up.
That was an interesting game where I had to think very carefully about when and how to deploy. The fact the Germans were fully deployed before I had a single unit in play helped me understand where the main threat lay, but more importantly where there was a possible weakness. Once I had decided that my best bet was to hit the Volkssturm fate then played a very kind hand. Three phases in a row made the job a lot easier than it might otherwise have been and enabled a quick and devastating strike that broke the Germans on that flank. It brought me very close to a possible scenario victory but with so few available men I think it was better to give the Germans a bloody nose and fall back to fight another day.
German casualties were high with a total of seventeen men hit, seven from the core platoon and all ten from the Volkssturm squad. This will result in the platoon taking a further three permanent losses in addition to two wounded men who will be absent for the next game. In effect the platoon will be short nine men for the next scenario.
The victory means the German CO's Opinion rises to +3. However the same cannot be said for the Men's Opinion which drops to -3 as a result of the heavy casualties (also worth noting a campaign specific rule whereby the Men's Opinion cannot rise, regardless of the outcome of the scenario, if the entire Volkssturm squad is wiped out. As the notes say 'Your troops don't like seeing their grandfathers killed!'). The platoon commander's outlook is also impacted by the loss of the Volkssturm. It cannot rise vertically and if it does it goes to the right instead. His outlook was Secure and would normally have risen to Sociable but as a result of the loss it moves to Assured (and sees him tempted to hit the bottle to relieve his anguish!).
On a more sombre note the discovery in Metgethen of the bodies of brutally treated German women and children reinforces the platoon's determination to fight through to the coast and from now on German troops will be considered Aggressive for the rest of the campaign.
The Russians suffered eight casualties, four from the core platoon and four from the support squad. This results in two permanent losses and one man wounded and so they will be down a total of seven men for the next scenario.
The Russian CO's Opinion remains unchanged at 0, partly helped by the fact this was considered a 'losing draw' due to the disparity in casualties. The men are clearly feeling better about things and their Opinion rises to +2. The platoon commander's outlook remains unchanged at Cheerful.
With the loss of Metgethen the Russians have the option to play a Wild Card and so take the initiative by mounting a counter attack on any ground held by the Germans. This is an option to consider for our next game, do I try to retake Metgethen? Or do I save the Wild Card counter attack for a different map?
You can find out what happens next in this game report.
The Westwind Königsberg Campaign appears in the Too Fat Lardies Summer Special 2014. You can purchase this as a downloadable pdf from TFL Summer Special 2014.
You can find all the AAR game reports for this campaign and other Chain of Command campaigns on the Campaign AARs page here.
Fantastic AAR!
ReplyDeleteI really enjoy your write ups as you include your reasonings and options through out. Also, you include just the right amount of detail for the reader to be involved and follow the action.
Textbook defense by the Russians in this one. An really interesting to see the SMG platoon in use, they really have a certain set of strength and weaknesses. The game also helps highlight the brilliance of Chain of Command as a game. It can be so tense! Even with only miniatures from one player yet on the table. :-)
Also, beautiful terrain and set up!
Look forward to more of this campaign.
/Mattias
Thanks. I'm glad I managed to convey the feel of the game. It's great how the way units can deploy creates such a powerful fog of war, I think that really adds to the tension.
DeleteWonderful stuff, the build up of tension in the opening phases was so absorbing my coffee nearly went cold. Then like an uncoiled spring the Russians unleashed hell, CoC coupled with your splendid narrative and photos equalled bloody brilliant.
ReplyDeleteThanks Phil, those early phase were very tense so I'm glad I managed to get that across. Sorry about your coffee though!
DeleteGreat AAR. I was rooting for you the whole time. 😀. Sounds like a game that really tested the nerves.
ReplyDeleteWell played by both sides, though I tend to feel that attacking in CoC is a little harder to do successfully than defense.
I love these campaign series. 😀
It really was a waiting game. I had some luck with the phases when I needed it, but I also ran the risk of that working against me by holding off deployment so long. It was what made it so tense.
DeleteWhat a debacle. The Germans over-deployed and were too timid in their approach. They should have capitalized on the Russians waiting and used the double-phase to shut down your JoPs.
ReplyDeleteAlso, maybe I misunderstood, but did you detach a JL from his squad?
Yes, I was surprised they didn't try to race forward and close down a JoP (or two).
DeleteYes I also detached the JL from the broken squad, this per 14.2 on pg 62 in the rule book - 'if a Leader is with a Team which breaks he may detach himself from that Team on subsequent activations'. I detached him as I intended to end the turn and didn't want the morale consequences of him routing off the table. Otherwise you are free to detach a JL from a squad at any other time should you wish. I'm not sure why you might do it but there is nothing stopping you. The JL cannot command any other teams, so other than a roving individual with an SMG he's not likely to do much. As per the FAQ a JL whose squad is wiped out is free to join another squad where he serves as another member of the squad but not as a JL.
Thanks for the info. Definitely an edge-case thing where you spend a JL's activation to detach rather than rally
ReplyDelete