

In the post Getting ready for the Westwind Königsberg campaign I describe how I've prepared for the campaign and put together some of the units and terrain.
This, our first engagement, is a Probe Scenario on the outskirts of the hamlet of Moditten. It's a fairly open table dominated by a cluster of farmhouses and agricultural buildings. This is not ideal terrain for my SMG platoon given the short range of many of their weapons, but the Germans must come to me and there are several sturdy buildings at the Russian end of the table from where I plan to mount my defence. I don't intend to stand and fight for long, just long enough to inflict some casualties on the advancing Germans who, like the Russians, must rely on the same platoon for the entire campaign.


The roll for force morale sees the Germans start at nine and the Russians at eight. The Germans then get off to a brisk start with four free moves in the patrol phase and they make good progress. They are able to place a jump off point behind a sturdy farmhouse on their right flank which, given the cover it provides, is the most obvious avenue of approach for an attacker. To keep all options open they place one jump off point at the back of the table on their left flank. I'm content to have jump off points covering both flanks and a third where I plan to anchor my defence on the cluster of buildings in my centre.


The support roll is three. The German infantry platoon has a force rating of zero. The Russian SMG platoon has a rating of -2 (note that the most recent Chain of Command FAQ revised this down from -3 in the core rule book). As a result we have three support points each. This little bit of intelligence lets me know that the Germans will not have any armour, which means I won't need to call on any anti-tank support. Aside from the Degtyaryov LMG in each squad the Russian SMGs suffer from short range and so for support I decide to use all three support points to call on a Maxim MMG team to help me extend my reach. With that done we start the game.
The Germans begin by deploying a le.IG18 infantry gun from the rearward jump off point on their left flank and this is placed on overwatch. From here it can cover most of table and will negate some of the benefits I hoped to derive from the hard cover of the buildings. With that deployment Dave has shown his hand, as this will have used up all three of his support points. Nonetheless it's a good choice given the terrain.

On the right flank a squad deploys tactically alongside the farmhouse.


For now I decide to sit tight and let the phase pass back to the Germans, who move the squad on their right from the farmhouse up to the hedge.

While this allows them to establish a good base of fire at some stage the Germans will need to cross the open ground in front of them. If they do, I intend to be ready to deploy from either building and make that as hazardous an undertaking as possible.

Meanwhile a second German squad deploys behind the farmhouse with their LMG team placed on overwatch to cover the central cluster of buildings.


The Russian command roll then delivers a double phase. Far be it for me to complain at the good fortune, but I hate rolling these so early in a scenario where I am the defender and there is no benefit in deploying just yet. However, there is an opportunity to hit the squad behind the hedge and so I deploy the MMG team into one of the houses in the centre and open fire. They inflict a point of shock and a single casualty, but it is the squad Obergefreiter (JL) who is hit and he is lightly wounded. German morale takes a blow at the sight of this and drops two points to seven. That's a good start for the Russians, hopefully another phase of fire can inflict more damage.

Alas this is not to be, as the Russians are unable to activate the MMG in the subsequent phase and with that the phase passes back to the Germans. They promptly decide the duel with the MMG is not an attractive proposition and fall back from the hedge to the cover of the farmhouse.


The next command roll is 66543. While that heralds a double phase there is little I can do given the MMG team require a 1 to activate. The alternative is to bring on the platoon leytenant to command them, but that may not be wise given there are three SMG squads yet to deploy. I let the phase pass and unfortunately the same happens with the following command roll. Clearly, for whatever reason, the MMG team do not share my sense of urgency.
The next German command roll sees them accrue enough points for a full CoC dice. They also take advantage of the mobility of the infantry gun and move it forward 9".

Once again the Russians roll a double phase but at least this time the MMG can be activated, just a pity it has no targets. With that it moves to the upper level of the building, which means it can see over the hedge into the farm and make movement hazardous for the German squad there.

There is nothing further I can or want to do in the subsequent phase and so things pass back to the Germans who use the phase to continue to move the infantry gun forward to gain a better line of sight.

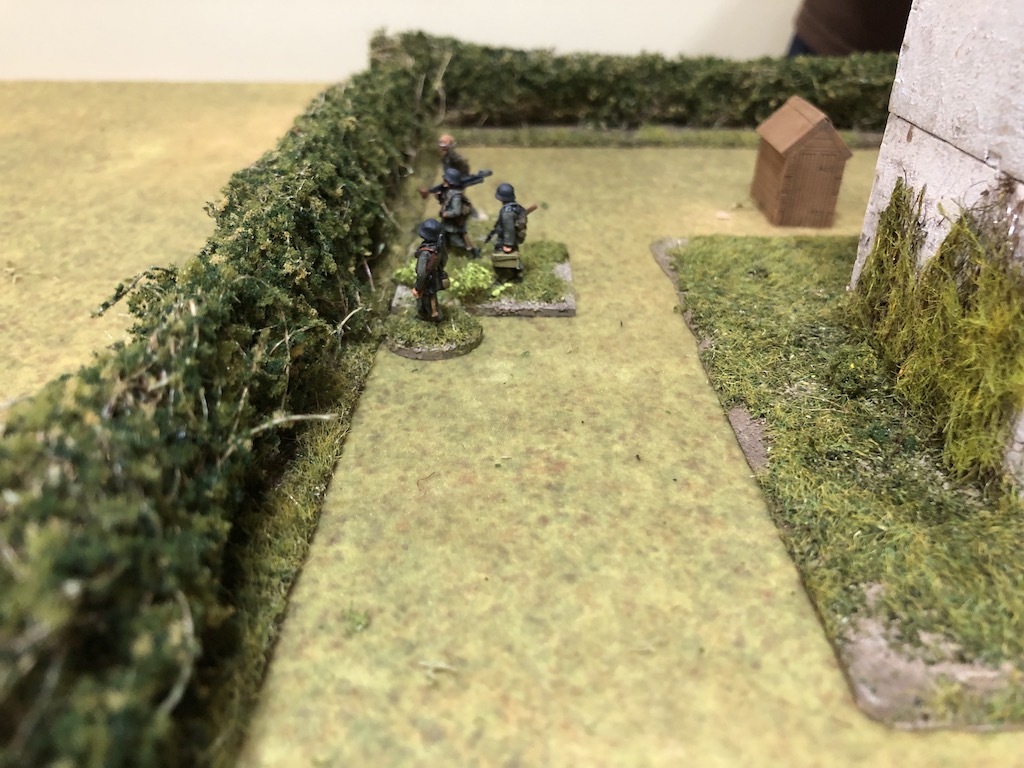
With the Russian MMG covering his right flank Dave decides there is little to be gained by pushing down this flank. We have both observed that all the buildings face across the table and the central cluster of buildings have a blind side facing the German table edge - well illustrated by the picture above. With that the Germans deploy a third squad tactically into the road. Normally this would be something of a risk, but the combination of approaching the buildings from their blind side and the fact he can bring significantly more fire to bear if I attempt to engage him beyond 12" make this much less of a risk than it might otherwise be.

With the full German platoon now deployed the Unterfeldwebel (SL) joins them behind the farmhouse and orders the squad there to move at the double to the left and into the centre of the table. They are quick to obey and move 12”.

This has resulted in a sharp shift of emphasis by the Germans towards the centre.

The Unterfeldwebel spends the rest of his activation rallying shock off the squad that was hit by the MMG and ordering their LMG team onto overwatch.

With the German shift to the centre there no longer seems a good reason to keep the Maxim in the upper level of the house and so in the Russian phase it moves down to the lower level ready to relocate to cover the centre if necessary. This turns out to be a wise decision as the German infantry gun is now able to fire on the building. This it does in the following phase, but it has no effect.


The German squads continue to move, but instead of advancing forwards in the centre they move at the double to hook around to their left.


The Unterfeldwebel orders the other squad to follow, also at the double, but they are unable to maintain the pace of the first squad. Nonetheless it's clear the weight of the German attack has now shifted over to this flank. While they have to cross more open ground, there are far less advantageous positions for Russian deployment to cover that flank.


However not all the German pressure is coming from one side. In order to keep the Russian defence stretched the Unterfeldwebel orders the rifle team from the squad on the right flank to climb over the hedge in what looks like the first steps of a flanking move over on this side.


With the farmhouse targeted by the infantry gun the Maxim team exit the building and move in the direction of the hedge behind the house. From there they should be able to cover that flank without the threat of being hit by the infantry gun.


With the German squads now quite exposed it is very tempting as the Russian to deploy some squads, even if they can only hit the Germans with their LMGs. However I would be faced with two German squads and the infantry gun. Not only that, they hold a CoC dice which means a chance to interrupt. While I may inflict some casualties I fear the end result will be a lopsided fight that is not in my favour. I decide to bide my time and let the Germans come a little closer.
On the German right the Unterfeldwebel orders the LMG team to return to the hedge line. There is now a well worn path between that hedge and the jump off point!

After issuing that command the Unterfeldwebel then moves towards the centre and once in command range he orders the nearest squad to continue moving to the left to join the other squad.


On the opposite flank the rifle team moves cautiously along the hedge and in so doing pose a threat to the Russian left flank.
In response the Russian Maxim MMG moves tactically up to the hedge behind the farmhouse from where it can cover any move on the German right. So far I am playing a cautious game with only the MMG deployed, but given the open table and German firepower I see no reason to deploy when it really only gives my enemy an advantage.

The Germans now roll a double phase that will also end the turn. The Unterfeldwebel moves to join the two squads on the German left and once in command range he orders both squads to keep moving in that direction.


The turn ends, but this has little impact on the game. The next German command roll is 55552. Not what Dave was hoping for, even if it does mean he now has two CoC dice available. Using the command roll of 2 the squad on his extreme left continues the move around to the left.

It's now the Russians turn to roll a double phase (again!). The Maxim is able to target the German LMG team behind the hedge, but before it can fire the Germans use one of their CoC die to interrupt and the LMG team follow their well worn path back to the farmhouse.


In the subsequent Russian phase the MMG team, with no targets in sight, makes a slight adjustment to their position to give them as wide a field of fire as possible.

Once I again I weigh up the decision as to whether I should deploy squads and engage the Germans who are advancing on my right. They are exposed in open ground, a very tempting target, but I would be deploying in light cover against two German squads, one of which could interrupt with a CoC dice. I don't like those odds, so I decide to let him get a little closer first.
In the German phase the Unterfeldwebel rallies shock off the squad in the centre and orders them to join the other squad on the left flank.
In the German phase the Unterfeldwebel rallies shock off the squad in the centre and orders them to join the other squad on the left flank.

The squad on the left has accumulated some shock from moving at the double and so the Obergerfreiter spends the phase rallying some of this off. In the centre the infantry gun is wheeled forward by its crew who have obviously been training hard because at their hands the gun is proving very mobile indeed.

The Germans are now well placed to close in on the central buildings from their left, all under the watchful eye of the infantry gun.

Tempting as it is to deploy I think it best to play to my advantages. Firing at this range is not one of them, so with that the Russians let the phase pass with no activity.
The Unterfeldwebel orders the infantry gun onto overwatch and then heads off to join the two squads on the left flank.

Once within command range he uses his final CI to put the nearest LMG team on overwatch.

Given the likelihood that they are closing in on Russian occupied positions and the risk of coming under SMG fire the German squad on the left now uses tactical movement to edge forward cautiously.

With the growing threat on the Russian right flank the Maxim MMG team climb over the hedge and head towards the advancing Germans. Should the Germans try a move on the other flank I have a jump off point in the building on my left and so can deploy a squad to tackle them. For now the longer range of the Maxim might be of more use on the right flank where there is a clear threat from those two squads.


In the German phase the Unterfeldwebel moves at the double to join the squads. He rallies shock off the rifle team and orders the LMG team to put covering fire down on the hedge opposite.

The Obergefreiter of the left hand squad throws a smoke grenade and the squad moves tactically behind it.


On the other flank the LMG team tred their well worn path between the house and the hedge. With the knowledge that the Maxim team is relocating to the other flank Dave sees a chance to revive the advance from this other flank.

I decide now is the time to try to deal with the German threat to my right. I deploy a squad behind the hedge but away from the covering fire and have them fire at the nearest German squad. Despite rolling 16 fire dice and scoring several hits the fire has no effect. Not a great start.


The Maxim team use tactical movement to edge forward, careful not to expose themselves to fire from the German squads.


In the central buildings another SMG squad deploys. Only a single window faces the Germans but from here the Russian LMG has a clear line of sight to units in the open.


However, before the LMG can fire the Germans interrupt, but they don't choose to return fire, instead the second squad moves forward to join the squad under fire. This means that in the next German phase both squads will be able to return fire as they will both have line of sight into the building.
When the Russians do fire the Germans take a casualty and a point of shock.

The infantry gun is on overwatch but despite being unable to see into the window they can still target the building, which they now do, but fortunately for the Russians it only inflicts a point of shock.


When it comes to the German phase the infantry gun prepares to fire into the building once again. Now it is my turn for an interrupt and with the prospect of fire from the gun and two squads I decide it's time to vacate the premises.

Undeterred the Germans turn their attention to the Russians behind the hedge. The Unterfeldwebel uses Maschinenengewehr for one of the LMG teams while the Obergefreiters command their squads to join the fire. This is what I feared, the concentrated fire of two squads - all up it will be 28 fire dice. The only saving grace is that some of this fire will be through the hindrance of the smoke grenade. The end results is eleven hits and I'm lucky to get away with six points of shock but no casualties. While my fire was fairly ineffective against targets in the open, Dave has had a far more satisfying round of fire despite the fact I am in better cover.

Meanwhile on the opposite flank the Obergefreiter places the LMG team behind the hedge on overwatch.

In the Russian phase I take advantage of the fact the interrupt movement by the German squad has now put them in line of sight of the Maxim, who have a clear shot at the squad in the open. Unfortunately it is just out of close range, nonetheless it results in one casualty and a point of shock.


In order to try to bring more fire to bear my third SMG squad deploys opposite the Germans and fires through the smoke at the nearest squad. Despite 16 fire dice and many hits the end result is only a single point of shock. Unlike the Germans, the Russian fire is not proving very effective today.

With all the platoon deployed the Russian Leytenant (SL) can now join his men. His first action is to rally off three points of shock from the nearest squad. That squad's Serzhant then rallies off another point and orders the squad to retreat back over the hedge. Most of them make it and the remainder who don't can no longer be targeted by the German squads.


In the German phase the infantry gun can't be activated, leaving one less threat to the Russians. However the Unterfeldwebel rallies off three points of shock before both squads are activated to fire. With the leaders' machine pistols this amounts to 31 fire dice. My only consolation is that half of this must come through the smoke. From eleven hits the Russians suffer two casualties and two points of shock, the only saving grace is that the Serzhant is not one of those hit.

I am now at the point where I need to weigh up the value of continuing the fight or deciding to withdraw. I have the Germans in the open, which should be an opportunity to inflict more casualties, if I can do this before withdrawing and without taking too many further losses then it will be worth staying, but it could easily swing against me. I decide to stay for the next Russian phase.
The Maxim still has a good line of sight to the Germans in the open and it fires again. Despite six hits it only manages to inflict two points of shock, that's disappointing. Sensing things are just not going my way the Leytenant rallies off more shock and brings the remainder of the squad back over the hedge.
The Maxim still has a good line of sight to the Germans in the open and it fires again. Despite six hits it only manages to inflict two points of shock, that's disappointing. Sensing things are just not going my way the Leytenant rallies off more shock and brings the remainder of the squad back over the hedge.


I also pull back the more forward squad which has already lost two men. They move tactically away from the firing line.


Aware that there still exists a threat on my left flank the squad in the central farm buildings moves around to my left to try to cover any German advance.


The Germans sense they have an opportunity here and the rifle team break cover from the hedge and make their way across the open ground. They have the LMG team on overwatch and from that distance the only Russian weapon they need to fear is the Degtyaryov LMG.

In the centre I discover that the infantry gun actually has a line of sight to my two squads on the right flank. It promptly fires and I take another two casualties. This is not going well.

The Maxim receives some return fire from the squad it has been targeting but it has no effect on the crew. With that the Unterfeldwebel rallies off some shock and has a man in the squad throw a smoke grenade to hinder the line of sight of the Maxim, which it does successfully.


In the Russian phase the Leytenant continues to rally off shock. The most forward squad makes a rapid move for cover and they move at the double to their left and into the cover of the farmyard.

To escape the attentions of the infantry gun the squad at the hedge and the Leytenant move back tactically across the road.


The Maxim continues to fire and despite the hindrance of the smoke grenade the fire is effective enough to cause another German casualty which brings one of the LMG teams down to a single man. It also inflicts a point of shock.
The Germans now roll a very timely double phase, which could prove disastrous for the Russians except for the fact the roll is 66555. This is a relief. However the next German command roll is 66541, yet another double phase this time with some options for activation. With that the rifle team on the German right flank sets off at the double across the open ground.
The Germans now roll a very timely double phase, which could prove disastrous for the Russians except for the fact the roll is 66555. This is a relief. However the next German command roll is 66541, yet another double phase this time with some options for activation. With that the rifle team on the German right flank sets off at the double across the open ground.


On the opposite flank the Unterfeldwebel rallies off some shock and orders the leading squad to advance.


The subsequent German phase sees the Obergerfreiter of the leading squad use Maschinenegewehr with the LMG team to target the Russians over the road who they can now see. The Russians take another casualty and a point of shock.

The Obergefreiter in the other squad transfers a man to the LMG team and then orders a man to throw another smoke grenade to provide cover as they move across the open ground.

Lastly the infantry gun moves towards the road with the aim of providing some fire support for the move on the German right.

As it looks very likely the Germans can achieve scenario victory with the move down their right flank in a phase or two I see no benefit in remaining and taking further losses. With that the Russians withdraw in their next phase.
That was an interesting encounter and a lesson for command of the SMG platoon. While my casualties are not too high, they are more than the Germans and also a greater percentage of my force. I had hoped for at least parity, but I was punished for my ineffective fire with quite the opposite from the Germans. The Maxim proved a useful support and under different circumstances (and some better luck) it might have been more effective. It did enable me to lay down fire at longer ranges and in this sort of terrain the SMG platoon need a support that can do this.
The Russians took five casualties, one of which will return immediately, two are lost permanently and two will miss the next game to recover from their wounds. The Germans suffered only three casualties which sees them loses one permanently and two wounded for the next game.
Hearing of the success the German CO's Opinion rises two points to +2, while the Men's Opinion rises to +1. The platoon commander's outlook is Cheerful. On the other hand the Russian COs Opinion drops to -1 but the Men's Opinion remains unchanged at 0. The platoon commander's outlook is Relaxed.
We move now to Map 2 The Flank Attack at the Girls School and let's see if I can become a little more tactically adept with my SMG platoon. You can follow all the action here for that scenario here Flank Attack at the Girls School.
The Westwind Königsberg Campaign appears in the Too Fat Lardies Summer Special 2014. You can purchase this as a downloadable pdf from TFL Summer Special 2014.
You can find all of the campaign AARs and individual game and battle reports at this page.
The Westwind Königsberg Campaign appears in the Too Fat Lardies Summer Special 2014. You can purchase this as a downloadable pdf from TFL Summer Special 2014.
You can find all of the campaign AARs and individual game and battle reports at this page.
Superb read, which also highlights the brilliance of CoC in both game and narrative terms.
ReplyDeleteThanks Phil, it always feels like I'm writing a story rather than a straight AAR when I'm putting one of these together. I'm constantly aware of the background narrative that is the campaign itself and that helps keep all the action in the scenario in context.
DeleteVery nice! Looking forward to seeing how this one develops
ReplyDeleteYes, not sure if the SMG will prove a sensible decision, but what the heck, the figures do look so nice.
DeleteOh good. Have been looking forward to this. Will be following avidly. I'm really not sure about the choice of an SMG platoon, but we shall see.
ReplyDeleteYes, all well and good to paint up some SMG figures, but that shouldn't form the tactical basis for their selection for this campaign. As you say, we shall see.
DeleteAgreed excellent report as always and a enjoyable read. One can see that SMG are lacking the range and this results in the enemy getting into your face. Maybe some long range support options for the next game??
ReplyDeleteIndeed, which was one reason for choosing the Maxim for this game, something to really consider carefully for each future game.
DeleteLovely report, different to a lot of Probe scenario reports I've read where one side buys a car and zooms down the road hoping for a quick tri.
ReplyDeleteAlso, I notice that your smoke grenades don't seem to be blocking line of sight like smoke from mortars. Is this a house rule or has there been an erratum?
LLT yes you are correct in the Early war handbook Rich brought this new ruling in concerning smoke from grenades.
DeleteIt is mentioned in the most recent FAQ (which you can download from the TFL website) Essentially smoke grenades do not block line of sight but exert a -1 modifier to the hit die rolls.
DeleteVery nicely done, I find it a lot of work to remember to take photos throughout the game. You have done a nice job and an interesting game.
ReplyDeleteI've got in the habit of taking pictures now and we have a routine. Dave is good at reminding me, but he normally takes advantage of the pause while I photograph to think how to use his command dice, so we find it doesn't interrupt the flow of the game too much.
DeleteIt's always a pleasure to read your action reports. Looking forward to more.
ReplyDeleteThanks AJ, we should be able to play these regularly (as in one every one to two weeks) so I hope there will be a regular flow of AARs.
DeleteExcellent AAR and some good small unit tactics by Dave. Just shows you can attack successfully without a mortar barrage.
ReplyDeleteAs I predicted in defence the SMG squads are at a disadvantage vs the Germans even with the LMG.
Might be OK in a BUA tho.
Cheers
TT
PS The errata on smoke grenades is in last years FAQ and Errata.
The Blitzkreig book limits the smoke grenades to 1 per squad IIRC.
Yes, I can't say I wasn't warned about those SMGs. To be honest I'm less worried about the range than I am about the small size of the squads.
DeleteWhat a great looking game and excellent read! May I ask what make the roads are?
ReplyDeleteThanks, see below from Dave, they belong to him and he got them from Take Cover Scenics.
DeleteThank you for great stories and CoC solutions. Your effort encourages me to try this superb (as I see from your blog) rules.
ReplyDeleteThe roads are from Take Cover Scenics - my one terrain indulgence. They do look nice though.
ReplyDelete