Sunday, 27 September 2020

Second World War Japanese in 20mm

I have long had in interest in the Second World War in the Far East, whether it be the campaign in Burma, or the long protracted Sino-Japanese conflict. The Japanese approach to war and the nature of the terrain meant the war in the Far East was very different from that in Europe or the Mediterranean, presenting unique challenges for all armies. 

Discovering the Chain of Command Malaya 1942 campaign (which was published in the Christmas Special 2015) was my original inspiration to put together a Japanese force for this theatre.


A great starting point and a rich source of information on the structure of Japanese ground forces can be found in the two 'Rikugun' books by Leland Ness. I was lucky enough to get them when first published. I say lucky, because unfortunately, at the time of writing, these are out of print and now fetch quite high prices.


Since the publication of the Malaya 1942 campaign, Too Fat Lardies have published the very comprehensive Far East Handbook for Chain of Command. This contains lists for eleven different Japanese platoons, covering the period from 1941 to 1945, that would have seen service in Far East campaigns in places such as Burma, Malaya, Hong Kong and Java (a handbook covering the Pacific campaigns and including the Americans will follow at a later date).


My platoons are based on those listed in the Far East Handbook. For the initial part of the war I have figures for the campaigns in 1942 based on this list:

Copyright TooFatLardies

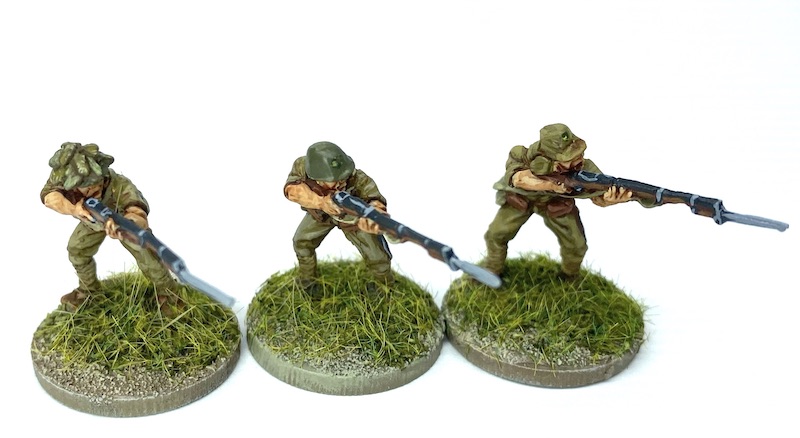
The 1941-42 infantry platoon has three rifle squads. For these I have used mostly figures from the Eureka Miniatures 20mm range sculpted by Mike Broadbent, who also created the Australian figures in their range, so they are a good match. 


The Eureka Japanese range is not extensive and is essentially made up of three rifle squads including an NCO and one Type 11 light machine gunner. All three squads come in the same set of poses, with the only difference being the head wear - the options being helmet with camouflage, plain helmet, or forage cap. 


I have based the figures individually except for two of the LMG crew which are based as a pair simply to make them easier to distinguish from the riflemen. Below is the set with the camouflage helmets.


Below is the plain helmet set:


The Gurkha Museum has a Japanese helmet on display, but one can't help think that things did not end well for its previous owner.


Finally, the forage caps:


As you can see below, these are the same poses, just with different heads.


The Imperial War Museum has a full Japanese uniform, where you can see a few distinctive features, including the forage cap and the leather ammunition pouches worn on the belt.


Also worth noting the split toe shoes. These are rarely seen in miniature sculpts, but were common footwear.


The Japanese had two versions of their light machine gun. The Type 11 was the most commonly used by the infantry, as it was lighter than the Type 97, which was more often found mounted in AFVs and vehicles. It looks like most of the Eureka sculpts are the Type 11, like this one in the Palm Springs Air Museum:


The museum also has a Type 97 and this is the infantry version, as it's equipped with a bipod.


The Australian War Memorial Museum also has a Type 97 on display:


As does the Army Museum in Hawaii.


The Palm Springs Air Museum has a good selection of Second World War small arms (especially considering it is primarily an air museum). That includes a good range of Japanese rifle types:


Eureka also include standard bearers in each squad. I know Japanese made much use of flags, but I don't believe they carried them right down to squad level. However, as the army list for Japanese platoons in the Malaya 1942 campaign included fourteen man squads it was soon apparent that I would need every figure I could get my hands on. I found some nice images of suitably worn looking IJA flags by surfing the net. Once resized down to this scale, I simply printed them out and used diluted PVA glue to attach and shape them.


Perhaps a touch ahistorical, but they do add flavour to the table.


Once I realised that large Japanese squads were not at all uncommon, I knew that I needed to find a source for a few more figures. Rather than repeat the poses in the Eureka range, I have found the figures from Simon's Soldiers (formerly Wartime Miniatures) a great addition and they helped to add the variety I needed.

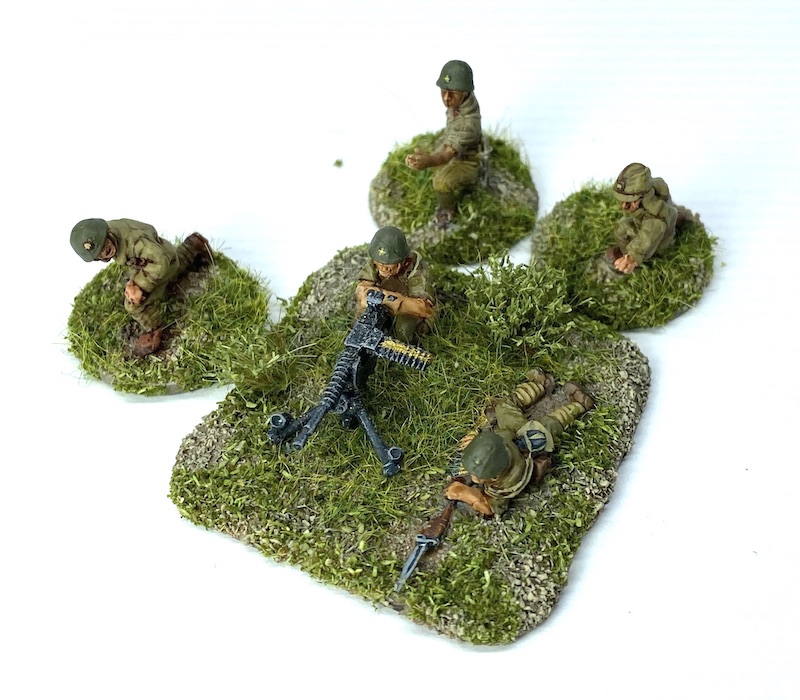
With all the Eureka LMG gunners standing, I also like the fact that the LMG team from Simon's Soldiers gave me a prone team, who appear to be firing a Type 97 LMG.


As you can see below, the figures from the two different ranges match well together.


I also have some figures from the Early War Miniatures range, but I have mixed feelings about these. They seem to have come from different sculptors and so the quality can vary.


The two EWM figures pictured below match well with the other ranges. They are also nice sculpts, but sadly that doesn't apply to all the figures from EWM.


Originally, I had looked at the EWM range because they had figures with submachine guns. I wanted a few of these to use when taking those weapons as support upgrades for the squad leaders. However, I wasn't impressed with the sculpts at all, they were rather crude and as you can see from the picture below, even a decent paint job won't redeem the SMG gunner.


Their LMG team were similar and I wasn't overly impressed that the loader for the LMG team is the exact same sculpt as the loader for the grenade discharger teams. In their case, this looks like they are equipped with a Type 11 LMG. I painted them up and will use them as a spare team if I ever need one, but they won't be first choice.


Talking of grenade dischargers, a squad equipped with these makes up the fourth squad of the standard Japanese platoon with three grenade discharger teams. Eureka do a nice set of the gunner and loader, but they do it in only the one pose. It's a good, dynamic pose, but given the teams all act together in the one unit, that means during a game they will be close to one another and it looks a bit repetitive.


Simon's Soldiers make a grenade discharger team and that's allowed me to introduce some variety into the squad.


This gives me a total of five grenade discharger teams, probably more than I will ever need. That said I do know that the SNLF Marine platoon had four grenade dischargers in their squad. I suspect this was to make up for the lack of other support firepower. Their amphibious landings meant they travelled light and with little additional artillery support.


I've used spare figures from various weapons crews to make up the four man teams for each grenade discharger and one of the prone figures with binoculars from the Waterloo set makes for a good commander for the squad.


The grenade discharger is a fairly large weapon and I think the Eureka version is a better size than the one from Simon's Soldiers, which seems a little on the small size. Here are two that I found on display in the Army Museum in Honolulu.


The Australian War Memorial Museum also has a few on display, including this one with a mannequin which gives a good idea of its size relative to the man firing it.


On display is the canvas bag used to carry the weapon which is something that I've never seen before and can't ever recall seeing modelled on a miniature.


The basic Japanese infantry platoon has two senior leaders, a Chui (second lieutenant) and a Gunso (sergeant). The Gunso operates as an inferior senior leader (having only two command initiatives rather than the usual three). Then there are four corporals, one to command each of the rifle squads and one to command the grenade discharger squad.

The Eureka range only include a NCO/Officer figure with a drawn sword, all in similar poses. I have three based as squad corporals and one as the platoon senior leader.


The officers carried finely crafted and expensive swords, often family heirlooms, like the one below on display at the Australian Army Infantry Museum.


The corporals were equipped with far more basic and utilitarian swords and, as the war progressed, these became more and more basic in construction. The Frank Patridge VC Military Museum in the small rural town of Bowraville in New South Wales has several where it is easy to see the lack of refinement in their construction.


Similarly, the Gurkha Museum has two that show the same difference. The one on the top is that of a NCO while the far more intricately decorated one below is that of an officer (both were captured by the Gurkhas in Burma).


So, while the squad corporals did indeed carry a sword, they were also armed with a rifle. I have these three NCOs with rifles which come from SHQ. Some people find the SHQ figures rather slim when compared with other ranges, but I find these don't look out of place with the others I have.


To add variety to the senior leaders, I have two from the Early War Miniatures range, one with a pistol and one with a sword.


While it's difficult to distinguish exactly what pistol the officer is carrying, it is most likely to represent the Taishu Nambu 14 automatic pistol, like the one below at the Australian Army Infantry Museum.


To differentiate the Gunso (the inferior senior leader) from the platoon leader I have used a kneeling NCO figure from Simon's Soldiers who is holding a rifle and has his other hand on the hilt of his sword 


The full platoon leadership is made up of the Chui, the Gunso, the corporals of the rifle squads and the corporal in command of the grenade discharger squad.


The Green Jackets Museum has a number of Japanese rank badges on display. I've vaguely attempted to reproduce these in miniature on the various officers and NCOs.


Simons Soldiers have a command group that provides a FOO operating a field telephone with an assistant as a wire layer. It’s a great touch and helps illustrate the point that Japanese FOOs are restricted to much less mobile means of communication.


The set also includes a couple of additional figures suitable for senior leaders.


That covers the core basic platoon, which as you can see, is a large four squad platoon. Support weapons and teams come from a number of manufacturers.

Eureka have a Type 92 medium machine gun team. 


There are only two crew figures supplied with this gun and so additional crew members are made up using figures from various manufacturers.


Here's a Type 92 MMG in the Army Museum in Honolulu.


I managed to find an excellent set of plastic figures and weapons to fill a number of gaps in the support lists. This set was originally produced by Waterloo 1815, but is now more widely available under licence from Italeri.


This set contains two sprues with enough to build two Type 92 70mm guns (called M92 Light Howitzer by Italeri) with their crews. In addition there are two rifle grenadiers, two tank hunters with pole charge, two Type 92 20mm anti-tank rifle teams and four figures with binoculars. All in all, a very useful set of figures and weapons. 


The crew figures are very versatile and they have been put to use manning a number of different guns.


Here I've used the crew for a Type 41 75mm Mountain Gun, like this one in the military museum in Beijing.


The tank hunter, anti-tank rifle and rifle grenadiers are all very common support elements.


Simons Soldiers sells a good set of Japanese tank killer teams and they have a number of figures in dynamic poses that work very well. It’s probably given me more than I need but there’s nothing wrong with that.


A flamethrower was one outstanding addition to the support lists and this one came from Simon's Soldiers.


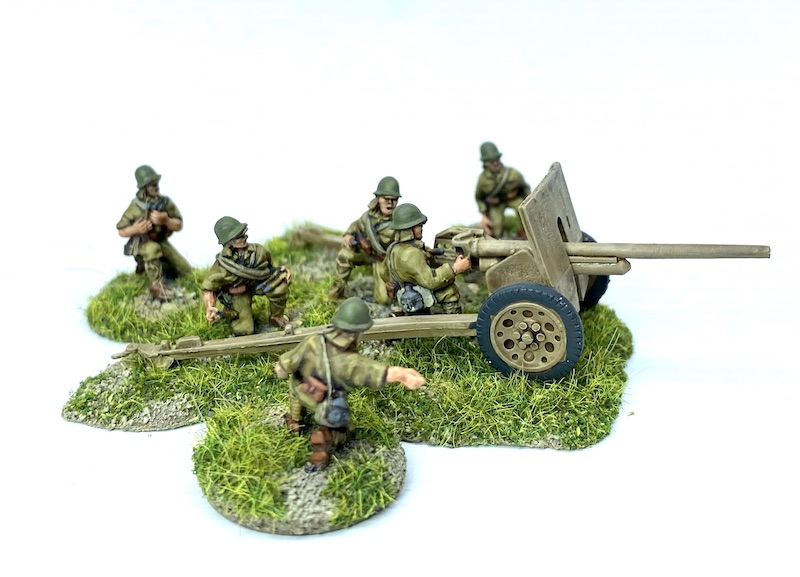
Ironically, I have found a crew from Simon's Soldiers my preference to crew the Type 92 70mm gun that comes with the set.


Having said that, one of the prone figures with binoculars from that Italeri set makes for the perfect gun commander.


I've seen a few of these guns. This one below is in the Army Museum in Honolulu and has the metal wheels, which match the Italeri model.


The one below is in the military museum in Beijing and has spoked wheels, which marks it out as an earlier model. They were replaced with steel wheels after troops complained the noise from the squeaky wooden wheels was a threat.


The Australian Armour and Artillery Museum also has an earlier model with the spoked wheels.


Early War Miniatures make a Type 94 37mm anti tank gun with three crew and I use the additional crew figures from Simon's Soldiers to make up the remaining members of the crew.


Here is a Type 94 that I found in the collection of the museum in Beijing.


Also one in the Australian Armour and Artillery Museum which, unlike the one above, has wooden spoked wheels. 


The more powerful 47mm AT gun first appeared in 1942 and proved much more effective against allied armour. This gun and all the crew are from SHQ. As I've mentioned, I find the SHQ figures slimmer than those in other ranges, but when grouped together on their own in a setting like this, I think they don't stand out as that different. Regardless, they always paint up well and look the part.


I've seen a couple of these gun. One in the Military museum in Beijing.


And this one at the Army Museum in Hawaii.


Bunkers play a key role in any Japanese defensive position and the Far East Handbook includes a number of specific rules covering their use. I scratch built several to cover those and there is a more detailed post on how I made them here. The first two are small LMG bunkers that will be used for squad sized defensive positions.

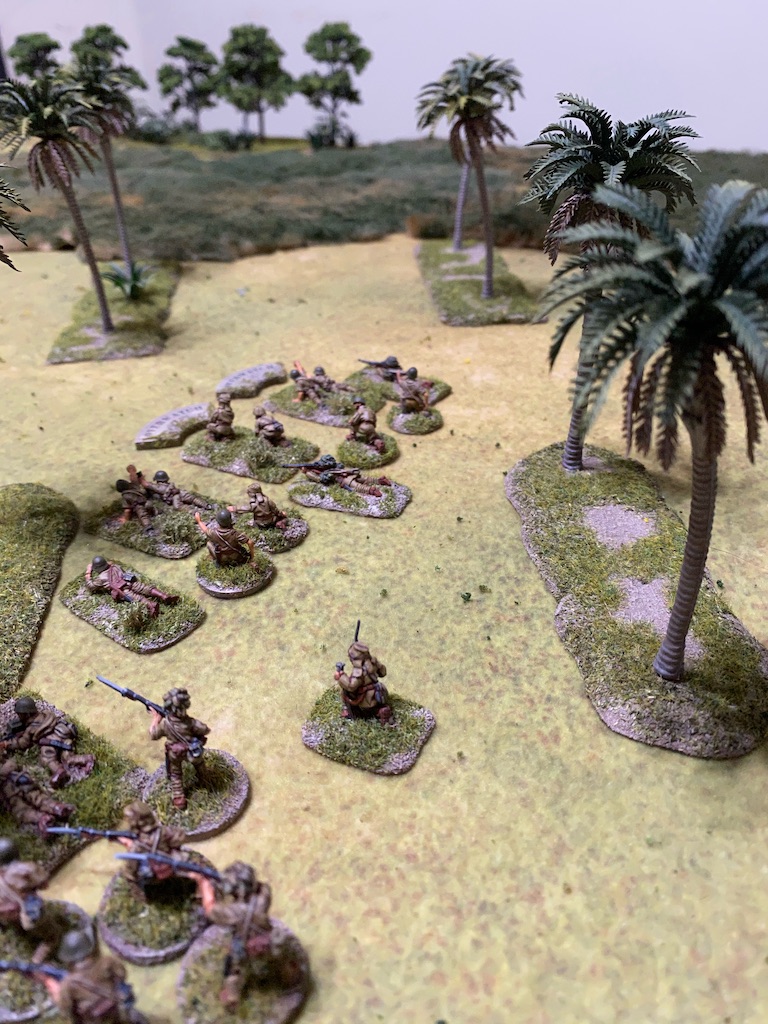
These were supported by individual weapon pits for the riflemen of the squad, sometimes referred to as spider holes. These would be positioned in mutually supporting positions close to the LMG bunker. 172 Scale Miniatures make a set of these and all I've done is put them on slightly larger bases so that I could texture the terrain to match the bunkers. 


To have enough to make up positions for two squads I also scratch built a few extras, making use of left over figures from the spares box. Some of the figures are from the Waterloo plastic Japanese infantry set, while those with the camouflage helmets are from 172 Scale Miniatures.


The second bunker type is slightly larger than that for the LMG and houses an MMG team. The MMG barrel is another spare from one of the plastic figure sets.

Of a similar size is a bunker to accomodate a small anti-tank gun. Once again I've raided the spares box for a suitable barrel.

Last, but not least there is a double bunker that can house two teams.


You'll notice that the bunkers are set very low in the ground, as they would have been historically, which means there is no room inside for figures. So I've created a holding box for the occupants so we can track casualties and shock in the course of a game. 


We used several of those bunkers in a short campaign set around Nunshigum Ridge, during the battle for Imphal in 1944.


You can follow that campaign starting with this game report.


The Italeri figures with binoculars have come in useful not only to fill the role of commanders of gun crews but also for a Japanese themed jump-off-point.


The Japanese were also equipped with SMGs. These are available in the support lists as an upgrade for a junior leader. I have also discovered that the platoon HQ in a SNLF unit included three men with SMG who accompanied the platoon leader. I wanted to add these to the collection but I had trouble finding suitable figures. As mentioned earlier, at first I settled for the SMG armed figure from Early War Miniatures, as that was the only one I could find in 20mm. The sculpt didn't look great on their website and my suspicion was confirmed once they arrived. Nonetheless they seemed to be the only figures available and so I painted them up. I based some as junior leaders and others as regular infantry. Fortunately, someone directed me to 172 Scale Miniatures, a manufacturer I was unaware of, and they have a lovely set of eight figures armed with SMGs. These were not only better looking sculpts, they would also give me a greater variety of poses.


These all carry the Type 100 submachine gun, one of which I found on display in the Australian War Memorial Museum (you can see in the picture below above the light machine gun).


I think the marked superiority of the 172 Scale Miniatures figures can be seen in the picture below.


The figures with rocks on the base are to mark them as junior leaders, those without rocks are other ranks. Those can fill a number of roles including the three man team that accompanies the senior leader of the SNLF platoon.


These are a great improvement and now give me a number of different figures from various suppliers to use as junior leaders. 

The 172 Scale Miniatures range also included sets of two prone snipers. My understanding is that what the Allies often considered 'snipers' were simply normal riflemen firing from concealed positions. These men were not necessarily even marksmen and yet the perception remains that the Japanese made a greater use of trained snipers than was actually the case. 


Despite this I always find a few prone figures useful, even if only for additional crew members for the grenade discharger teams.
 

I find casualties figures particularly useful for the pictures for the AARs of our Chain of Command games that you can find on the AAR Pages. These are a set that come from SHQ.


The most common Japanese tanks for most of the campaigns I want to cover are the Type 97 Chi Ha and the Type 95 Ha Go. Not many Japanese tanks survived the war but I've come across a few in various museums.

The Tank Museum at Bovington has a Ha Go in good condition.


I also found one outside the Army Museum in Honolulu.


The Australian War Memorial has one with an interesting history. It was one of two Ha Go to land at Milne Bay in New Guinea and fight the Australians there. Both were eventually bogged down in the mud and abandoned. They were well documented at the time and the picture below (from the AWM collection) is one that often appears in reference to the fighting in Milne Bay.


I'm not sure which of the two tanks was sent to Australia but the museum has restored one of them. The lighting for the display is very atmospheric, but not the best for photography.


I bought a set of Japanese model tanks on eBay several years ago. These were already painted and required very simple assembly. While not the most detailed kits I picked up three Ha Go for a very reasonable price and with a bit of detailing and a new paint job they were fine for gaming.


A variant of the Ha Go was the amphibious Type 2 Ka-Mi which added flotation devices among other features to the HaGo to create a vehicle for the naval landing forces. I picked this up the model below at a Bring and Buy so not sure who the manufacturer is but it makes for a very distinctive looking AFV.


The Type 97 Chi Ha is harder to find but there is one in the museum at the Yasukuni Shrine museum in Tokyo.


There is also one in the military museum in Beijing.


The model I've been using for my Japanese force is the venerable old Airfix kit from the 1970s, which I think has held up very well considering its age.


More recently I added a further three, all cast resin from 172 Scale Miniatures. 


The Type 97 Chi Ha was upgunned later in the war and given a larger turret to house the more effective 47mm gun. This was known as the Shinhoto Chi Ha, where shinhoto translates as 'new turret'. These are also from 172 Scale Miniatures. The distinctive yellow lines over the Japanese camouflage was a feature of the early war and was no longer in use after 1942, so the Shinhoto versions I have painted in a late war three colour scheme. 

For earlier in the war and mainly for China I have a Type 89, this is a more modern and detailed plastic kit from IBG.


The Tank Museum in Bovington has a complete Japanese tankers uniform on display.


I also have three Type 94 tankettes. Also known as the Te-Ke these were the most numerous of the Japanese light tankettes, with many more built than the Ha Go. Most were used in China in a reconnaissance and infantry support role. While not well armoured the Chinese infantry had little that could penetrate them. They also saw action in the conquest of Java and Timor as well as Burma and the Philippines. These are resin models from Milicast.


To get some idea of quite how small these tankettes can be, here are they are alongside a 20mm figure.


A very similar looking vehicle is the Type 97 Te-Ke, the final version of the Japanese tankette concept. However this was larger and heavier than the early version, mainly to be able to accommodate a turret with a 37mm gun. These two below are plastic kits from s-models with options to mount either a machine gun or 37mm as the main armament.


Late in the war the Japanese also developed a self-propelled gun that could serve as both artillery and a tank destroyer. The Type 1 Ho Ni used the Chi Ha chassis and mounted the 75mm Type 90 gun. As far as I'm aware these were only encountered in the Philippines. I bought this very cheaply on eBay as a pre-painted model that needed simple assembly. It lacks the detail of plastic or resin kits but works fine for gaming.


The Japanese made a lot of use of armoured cars, particularly in China, but I've had trouble finding models of these. They did acquire a Austin armoured cars although I'm uncertain if they saw much use after 1940. This is an Austin MkIV model from Master Box.


There is an excellent example of one of these in the Tank Museum at Bovington.


While there is not much need for soft skin models for skirmish level games trucks can be useful as either scatter terrain or for scenarios that involves escorting convoys etc. I acquired a few Lledo die cast trucks and have mostly converted those into commercial vehicles for the Far East. I had one left over and decided to paint it up as a Japanese captured/requisitioned vehicle that could be used for Chindit games set in Burma.


Hasegawa do a very nice Isuzu fuel truck that includes a trolley and petrol barrels.


IBG also do an Isuzu truck. The kit includes a full engine and so it seemed a shame not to have it visible.  In this instance I've made it up as one that has broken down.


The diminutive Kurogane car is an unusual looking vehicle, almost toy like, although it was the very first four wheel drive car to be in service in any army. This one is from 172 Scale Miniatures.


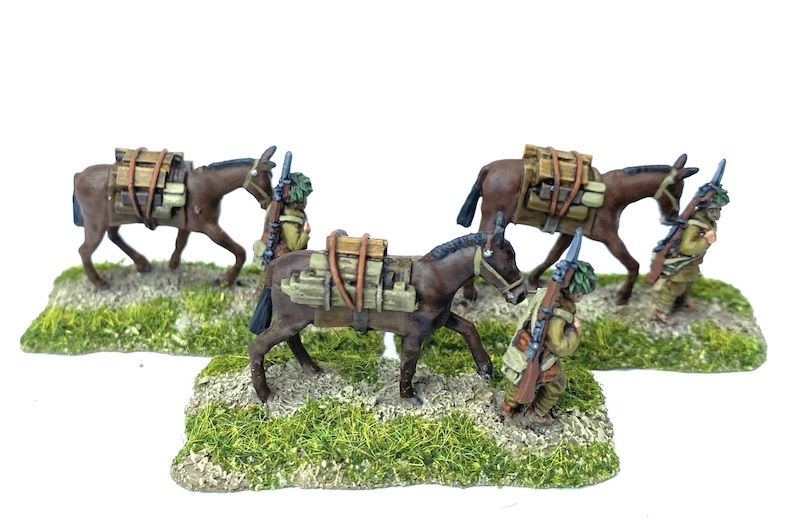
For non-mechanised transport I have this team of three mules and their handlers from the 172 Miniatures range. I have in mind these might work well as one of the targets of a raid behind the lines by Chindits in Burma or by Chinese Communists in China.


Generally, the Line of Communications markers used for the Far East in Chain of Command are more a feature of the early part of the war to reflect the way the heavily mechanised allied forces were so dependent on the roads. However, that changes as the war progresses and the allies shift to the offensive. That’s when the need for Japanese LoC markers can arise. For those I’ve decided to create two options, mainly because I had enough in the spares box to indulge myself.

The first are a team of pack horses. These are a blast from the past for me, as they are figures from the old Airfix Jungle Outpost set. I picked up two of those on eBay a few years ago and the huts were the first of my Far East buildings. I wasn’t sure what to do with the figures, so they languished in the spares box. It wasn’t until publication of the Far East Handbook and the concept of Line of Communication markers came about that I could see a use for them. I thought they might also come in handy as an objective, or as a target for Chindit raids on Japanese communications. While the poses of both horses and soldiers is repetitive, I think they make for quite an atmospheric group.

I built a Hasegawa model of an Isuzu TX40 fuel truck for use as scatter terrain or another objective for Chindit raids, but it will also work well as a LoC marker. As I’ve done for the British the addition of a figure adds more to the narrative and brings the setting to life. This figure comes from the Orion Japanese tank crew set.

It’s a very useful set of figures.


It includes four identical sprues each with twelve different poses. They’re all well sculpted and offer a good variety of poses.


It includes a couple of figures that could be used to represent crew members bailing out. I’ve found similar sculpts of German and British crew figures from AB very useful for the game reports here on the blog and so it was an easy decision to paint up these two to serve the same role.


The Far East Handbook introduces a Zero Attack as a Japanese support option. Like the pre-game barrage it is an abstracted portrayal of disruption to deployment caused by an air attack. There is no need to represent it on the table but if you read my AARs for our Early War campaigns in Europe you'll see I like to represent the Stuka Bombardment in the photographs and so I intend being able to the do the same for the Japanese. For that I have one of the very nice new tool Airfix 1/72 kits.


There is a Zero on display at the entrance to the museum at the Yasukini Shrine in Tokyo.


Last, but not least, I like to have patrol markers themed for all my nationalities and the Japanese are no exception. These were designed by John Bond. I print them out and attach to 40mm MDF round bases.


Many of these figures and models can be seen in action in the game reports for the Chain of Command campaigns that can be found on this page. 

They were used to play the Malaya 1942 campaign against the Australians. This was a tough campaign for the Aussies who had to try to hold back the Japanese with only limited resources. 


It proved very enjoyable and tactically challenging for both sides. You can find the report for the first game here (and then follow the links at the end of each game report for the rest of the campaign).

They were also used to play a Chain of Command campaign that was published in an issue of Wargames, Soldiers and Strategy magazine entitled Last Stand on Opium Hill and set just before the fall Singapore. This time a unit from the Malaya Regiment was trying to hold back the Japanese tide on the outskirts of the city. You can find the first game report here.


You can see several of my other 20mm collections for the Second World War by clicking on this link 20mm Miniatures.

Wednesday, 23 September 2020

Ultracombat Normandy review

Ultracombat Normandy is a set of Second World War wargame rules from Dishdash games, the creators of Skirmish Sangin. The rules describe themselves as 'an easy, fast-paced set of squad-level skirmish wargames rules for depicting the frenetic close-ranged combat that occurred during the Normandy Campaign'.


The creators of Ultracombat Normandy were at Cancon in January this year and my regular opponent Dave joined in a small demonstration game to get a feel for the rules. His initial impression was a good one, so much so that he bought the rule book. We recently finished the Chain of Command campaign 29, Let's Go! and before we embarked on another campaign we thought we'd play a few other rules and periods.

Ultracombat Normandy is pitched at a similar skirmish level to Chain of Command, however where it seems to differ most from those rules is that players don't just operate the various teams that make up a squad, they also handle the actions of the individual men within those teams. 

Each squad is broken down into what the rules refer to as 'elements'. These elements can be made up of a single character in the case of NCO's and officers, or a number of soldiers in the case of fire teams. For example, an American squad is made up of five elements - NCO, Junior NCO, Rifle team, BAR team and Scout team. Each element has a card that includes its various characteristics such as morale, spotting ability and firepower. However these are not simply quick reference cards, they are also the mechanism for how the sequence of play in each turn unfolds.

Every turn each player selects one element to activate by taking their card and placing it face down on the table. When both players have done this the cards are revealed and these two elements will be the ones that will activate first during the turn. The element with the higher experience rating will go first, in the case of the experience being the same the players dice off. Once those two elements have carried out their activations the players repeat the process by selecting the card for the next element they wish to activate.

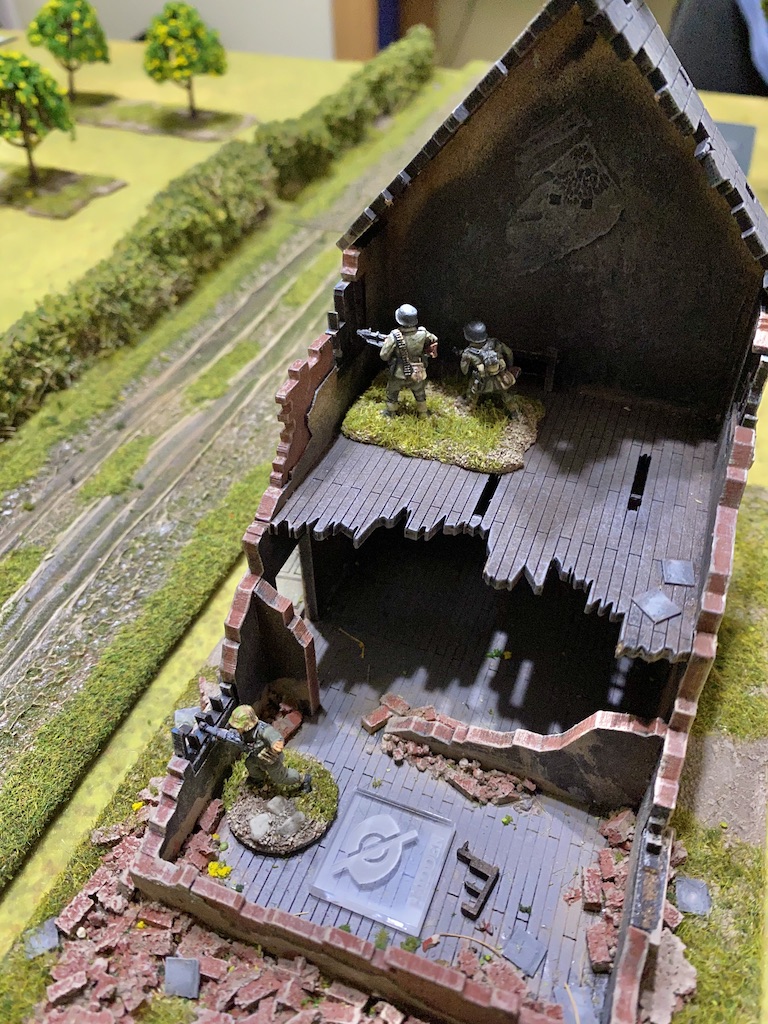
We set up a small 4x4 table and ran a simple scenario where two American squads were trying to take some damaged houses from a solitary German squad backed up by an additional MG42 team. So, what were our impressions?

The mechanic of using the cards to determine the sequence of play sounded as though it offered another variation on breaking up the predictability of IGO-UGO play sequence. It also added an element of tension and decision making as to which element you should activate first. However in practice I found it unsatisfactory. There were a couple of reasons why. 

Elements can be rated Novice, Average or Veteran and we found that as most of the elements on both sides were Average virtually every card play was resolved with a dice roll. It was, we were to find, the first of a lot of dice rolling that was to come. 

Secondly, I found the activation of one element at a time tended to detract from thinking tactically about using the coordinated action of several different elements. The tendency was to focus on the single element that activates. This is not dissimilar to the way play can unfold in Bolt Action. However, unlike the random sequence that occurs in BA, in these rules the player can control the sequence of their activations by selecting which cards to use. Nonetheless it creates a certain stop-start nature to the way those activations take place and I think that detracts from the flow of the game. 

I recently reviewed the board game Undaunted Normandy (similar title, I know) which also uses unit cards to drive activations, however it does it in a way that means in each player turn it's possible, under certain circumstances, to activate up to three units. This makes a difference because it allows the player to create a tactical sequence to propel the game. For example, a player could play the MG team card to suppress an enemy unit before playing a scout team card to explore more terrain and have a rifle team advance in their wake. 

Undaunted Normandy also uses cards to propel the sequence of play

It's not that you can't create that sequence in Ultracombat Normandy it's just that I felt it unfolds in a more disjointed manner. As a result I found I wasn't always thinking in broader tactical terms. Having chosen the element you wish to activate the player then carries out actions with the men in that element. Each man has three action points and spending those action points is how the characters that make up each element carry out activities like spotting, moving and firing. We played the game using 20mm miniatures and used the suggestion in the rules that we convert measurements from inches to centimetres. I'm not sure that's a great idea. 

With each action point (AP) a character can move 6" (or in our case centimetres), which means a character or element using all three APs to move would cover only 18cm, where as in 28mm a character would cover 18" in the same time frame. I suspect with the latter the game moves at a much greater pace. While that's a lot of ground to cover in a single phase the opposing player can interrupt by playing the card from an element that has not yet activated and fire (essentially bringing that element's action forward in the turn). It works in effect as an overwatch ability.

As appropriate for a game at this scale the junior leaders play an important role. This they do primarily by enhancing the actions available to an element by increasing the Action Points available to them in a given turn, thus enabling them to move faster or fire more often.

One major difference to Chain of Command is the emphasis put on spotting. Every time a unit tries to fire it must first spot the target. While I understand why a set of rules set at this scale might want to factor in the importance of spotting targets before firing we found these particular mechanics laborious and convoluted. If an element of riflemen (five characters) wishes to fire at a target players must roll for each individual character to see if they spot the target (spotting costs 1AP). A character that successfully spots a target may spend an additional AP to assist another character with their spotting by adding a positive modifier to the spotting roll. Characters can spend multiple APs trying to spot. This can involve a lot of dice rolling. Far too much in my opinion and not in any way that adds to the game experience. 
I'm just not sure it's worth all the effort, especially as the player knows where the enemy unit is located. If I know a field is covered by an enemy LMG team I'm not going to move into that field regardless of the success of my spotting roll. I may not be able to have my miniatures spot it and suppress it, but as the player I won't pretend it's not there. In a worse case scenario a player could make two spotting rolls for each character and if none are successful then their third and last AP might be used for something else (no point making that third spotting roll as by then you've run out of AP to fire). So it's quite possible to make ten separate spotting rolls for a five man rifle team, all unsuccessful, to then discover you can't do what you wanted in the turn. If you consider that all this is for one rifle team of five men, then imagine how many spotting rolls you might make in a turn for a major firefight between several squads?

I have no issue with the concept of a target being difficult to locate, but as the player/commander where should my focus of attention be? If my element/unit is unlikely to cause damage or suppress a target then I need to react tactically to resolve it. If I'm trying to think like a platoon leader then a simple and speedy resolution of this spotting/targeting issue would keep my attention focussed on the tactical issue rather than engaging in multiple spotting rolls.

Once a target is spotted a character may fire at it. All actions are resolved using a D20 and require the player to roll less than a specified number to be successful. As you might expect, various positive and negative modifiers apply depending on cover and types of weapon. 

This then brought us to another issue which we found unnecessarily complex and that was the number of possible outcomes from firing. There seemed a slightly bewildering number of these. At best an opponent's character will become combat ineffective (removed from the game). A weapon capable of suppressive fire (like an MG42 or semi automatic rifle) will make the unit suppressed (for which a morale check is required to remove). Some fire results will add Morale chits to the target (again requiring a morale check to remove, but not having the same effect as being suppressed). Units can also become Hesitant or Pinned. Often they can have a combination of some or all of these.
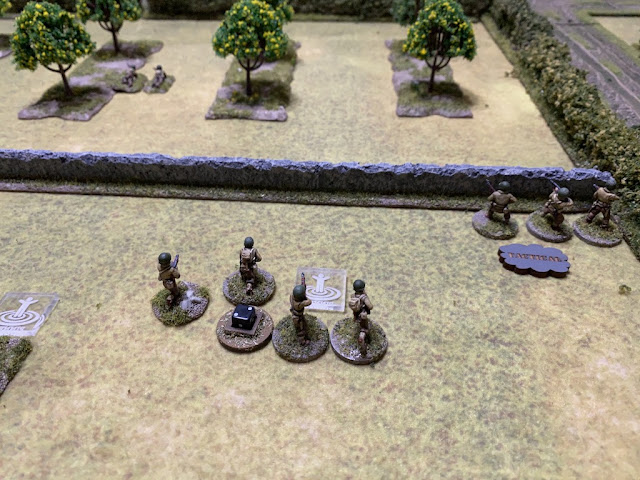
When taken individually each of these results make perfect sense and represent various degrees of discomfit a unit may suffer from incoming fire. However it makes for a lot of game mechanics and it's hard not to think that the rules writers could have found a way to abstract these to some degree and stream line them to achieve the outcome they want. 'Design for effect' to use a well worn gaming term. 

How did this impact our game? Well the simple scenario unfolded as one might expect. The Americans approached the objective using a combination of fire and movement while the Germans tried to use their LMGs to hold up their advance. Despite taking casualties and losing two NCOs the Americans successfully cleared the buildings and won the day. That said, for a game that represented a relatively simple action it took several hours to play and it never felt like it depicted the 'frenetic close-ranged combat' that it claims to do.

I understand what the rules writers are trying to simulate here but it can make for a dull experience. Admittedly this was our first game, nonetheless I think it was the flattest atmosphere I've experienced when playing Dave. It wasn't so much that we were bogged down in trying to understand the rules, it was more that we were mired in the myriad mechanics. Playability suffered and the added detail didn't make for a more enjoyable game. I can only imagine playing the same scenario using a set of rules like Chain of Command would deliver a shorter, more intense experience and result in an equally plausible historical outcome.

While it seems harsh to judge a set of rules on a single playing the experience was so underwhelming both Dave and I concluded that these were not a set of rules we would be in any hurry to return to in the near future.