As the year draws to an end and I look back at what I have managed to achieve in the hobby during 2019 I've realised quickly it is far more than I thought.
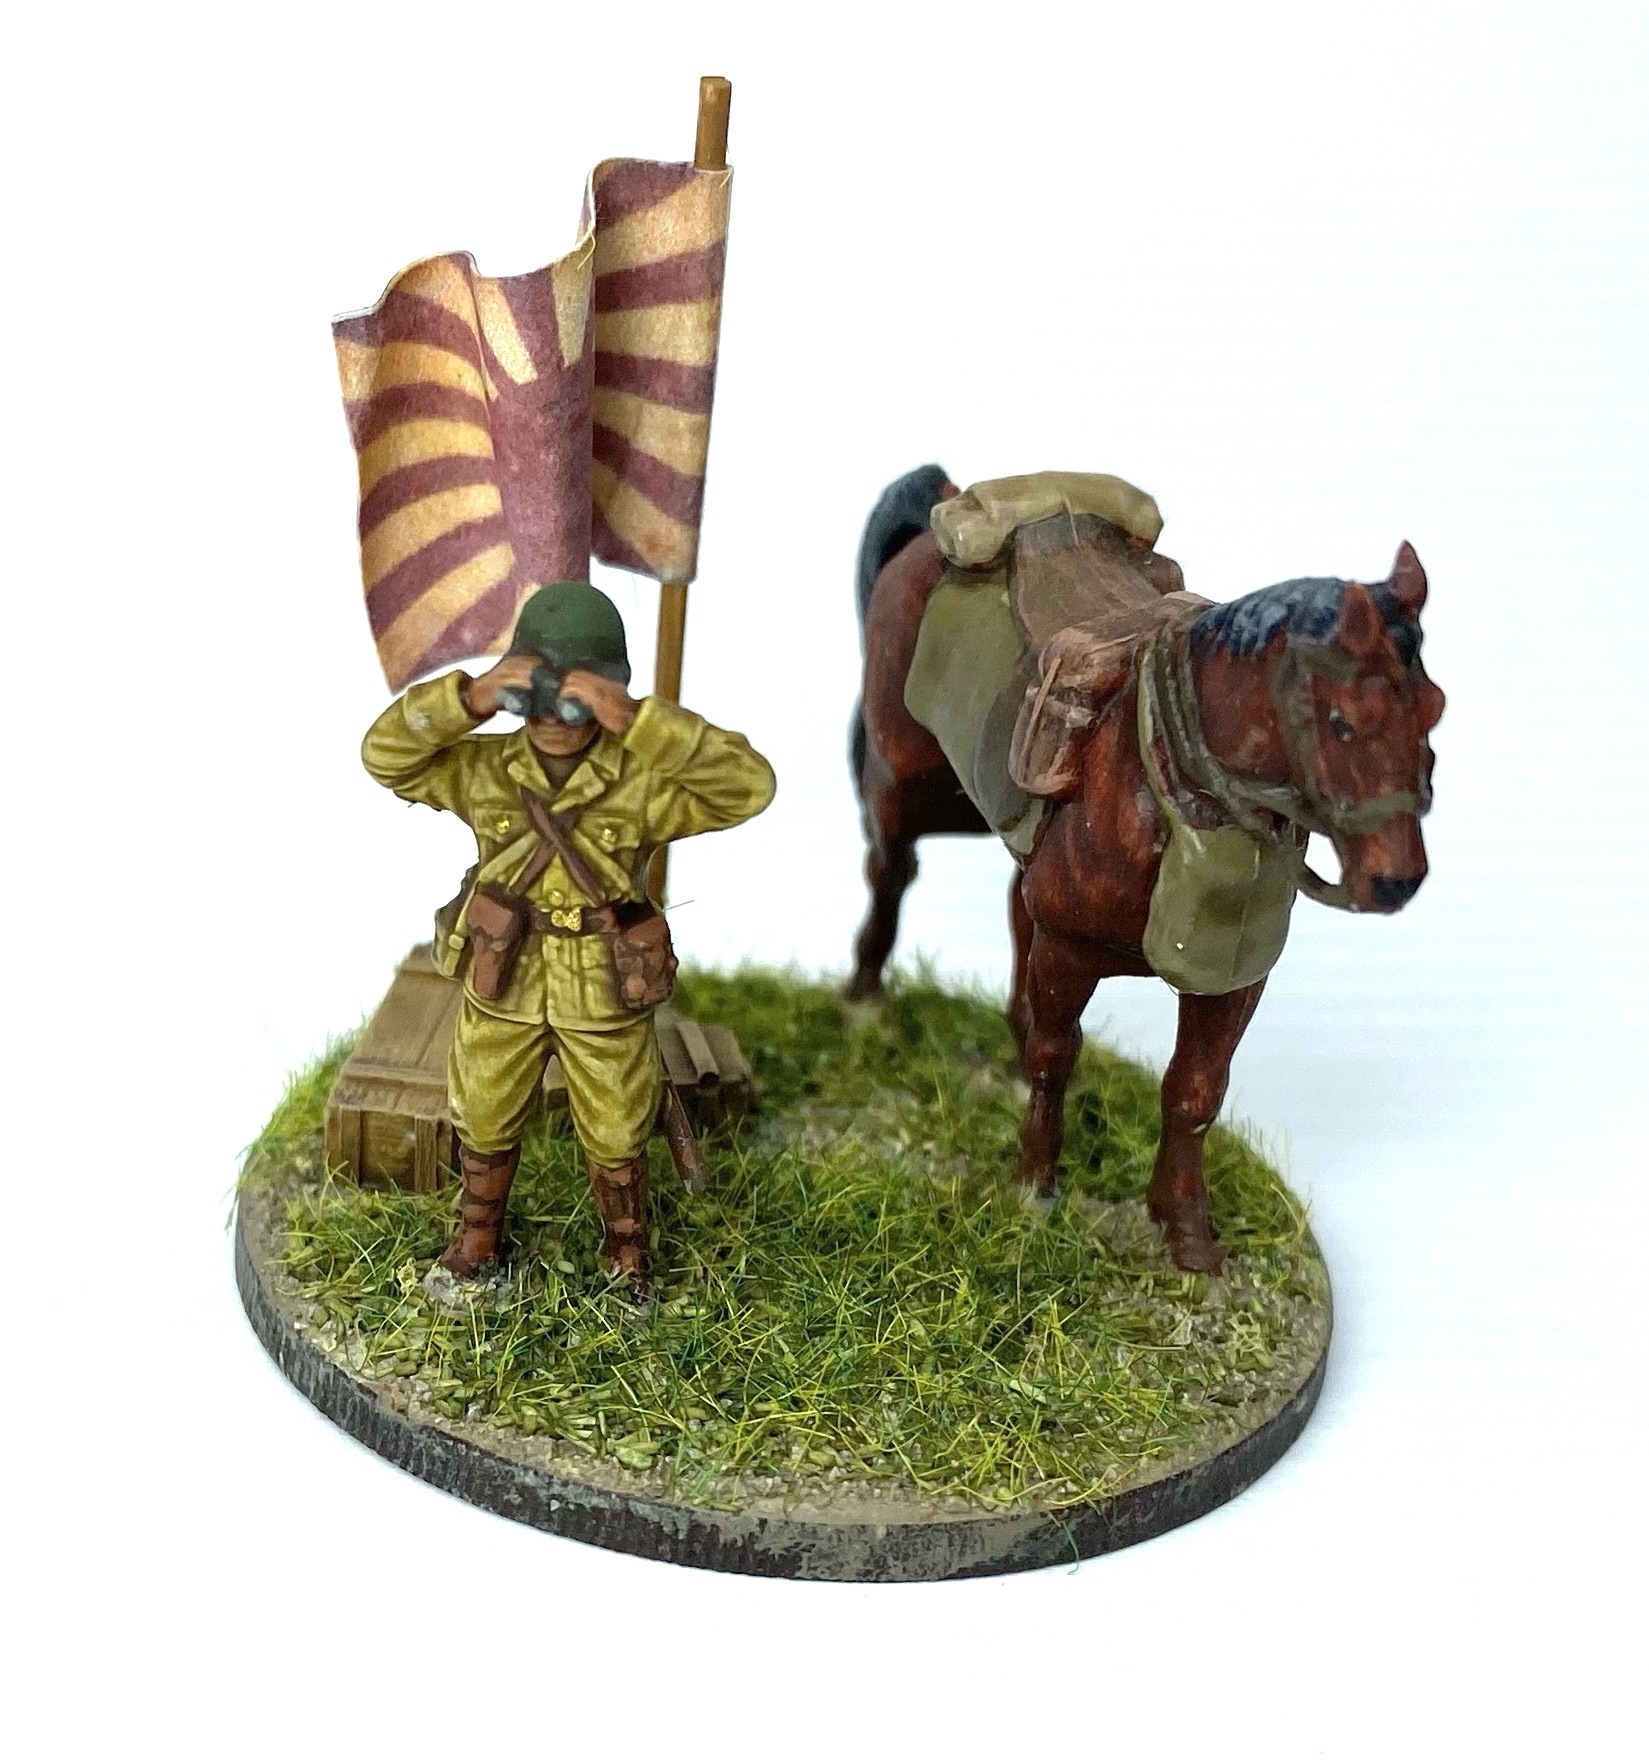
In terms of games played the year has been dominated once again by games of Chain of Command against my regular opponent Dave. In January we completed the final scenario of the Malaya 1942 campaign. My Japanese won that scenario but it wasn't enough to win the campaign, which ended with a minor Australian victory.


We then moved from the jungles of Malaya to the villages and farms of East Prussia for the Westwind Konigsberg campaign. You can follow the full campaign starting with Probe at Moditten, the first scenario. My flawed decision to take a Russian SMG platoon instead of a rifle platoon led to my downfall but did not detract from an otherwise very enjoyable campaign that ran across eight games.


The latter half of the year saw us start the Taking the Gembloux Gap campaign set in Belgium during 1940. My Germans struggled to take the first map, succeeding only on the fifth attempt and leaving no margin for error for the remainder of the campaign. You can follow that campaign starting with the first scenario Palm-off at Perbais. We managed six games before Dave's workload meant a longer than planned for break. We hope to recommence early in the new year.


I introduced a new player in our game club to CoC and we played a one-off eastern front scenario. The game went well and we even had enough time at the end to squeeze in a quick game of What a Tanker!
This year Dave and I decided that in between CoC campaigns we should spend some time trying out different rule sets and periods as we'd both been busy painting miniatures for periods other than WWII.
We had both bought the SAGA rules but were yet to actually play a game. Dave has painted up units for games set during the Crusades and so we played several scenarios to get a feel for the rules. While they provide for a good game and plenty of decision points it just didn't feel like historical gaming to me. There were two things about the battle boards that bothered me. The first was I felt the decision making that revolves around the allocation of the SAGA dice interfere with the flow of the game to the point it left me feeling disengaged from the action on the table. The same happens to some degree with the decisions over the command dice in Chain of Command yet somehow I don't feel the same disconnect. That may relate to my second issue and that was the rationale behind the use of dice to give extra abilities to units. The decision seemed arbitrary with no justification on the table for this sudden increase in a unit's fighting or movement strength. While Dave was more enthusiastic I think we both agreed that SAGA was more game than wargame.


We also tried Lion Rampant, the popular medieval skirmish rules from prolific rules writer Dan Mersey. I have to say I enjoyed these much more than SAGA, perhaps because there was no interruption to the flow of play from the dice and battle board decision making process. We played the rules as written and had no problem with the activation of units. I think we are both players that like some friction in our games and I felt it added a dynamic element to the flow of the game. A little light on the historical side but nonetheless to me it felt much more like a wargame than SAGA. We played one game set in the Crusades using Dave's figures and a couple of games set during the Hundreds Year War using the Perry figures that I've been slowly painting.


Returning to WWII I wanted to introduce Dave to Crossfire, the rules that got me back into playing miniatures. The rules have some innovative concepts which I thought Dave would appreciate. There is a simplicity and an elegance that makes the system easy to learn but challenging to play. We only managed one game but I think there was enough there to see us try it again.


Dave and I played a game of Sharp Practice set during the American War of Independence and I then organised two games where I introduced two players from our game club to the rules. The more I play Sharp Practice the more I discover in the game and I find I'm still some way from really playing optimally and making the most of what the rules allow. I'm also discovering what makes for a good scenario. I'm hoping to play more SP in 2020.


I haven't bought a board wargame for some time but this year I picked up Undaunted Normandy from Osprey Games, an intriguing mix of deck building and board game set at platoon level during WWII. It certainly makes for an enjoyable and quick game. I'm not convinced deck building is the right mechanic but as a big fan of Avalon Hill's Up Front it had a similar feel but added an extra twist with the board and counter element.
I seemed to have done a lot more painting than I realised. I started the year with two main aims in this regard. One was to complete my 20mm WWII US army force for Chain of Command and the other was to complete painting two opposing retinues in 28mm for Lion Rampant. I'm pleased to say I managed to achieve both of these.
The bulk of the US platoon was completed last year and this year my aim was to finish off the support units like AT guns and armour. The end result was a mix of Sherman models from early M4s through to M4A3(76), an M5A1 and an M10 tank destroyer (a mix of models from Plastic Soldier Company, Italeri and Armourfast). All with crews from the AB Figures range. Guns included one 57mm AT gun and two 3" AT guns.


I also added two armoured cars to the force.

Some spare figures from Wartime Miniatures came in handy to make a couple of themed US jump-off-points.

One thing that I've noticed when putting together the AARs for our games is that when a team is wiped out or a leader is killed I have no way to illustrate the fact other than photographing a blank space on the table where the figures were previously. While I've always been a bit wary of using casualty figures I've decided these will help illustrate the narrative so much better. The first of these figures are for my Americans and these come from Wartime Miniatures.

As these were limited just to two poses I decided to add more variety with some of the casualties from the AB Figures US range.

An extra bazooka team made sure I would have enough to cater for most scenarios.

While I was painting the US figures I also found time to finish off batches of unpainted 20mm figures for other nationalities. I've slowly converted my German and British platoons from plastic Plastic Soldier Company figures to metals from the AB range. So this year I painted three LMG teams and an additional rifle team to fill the ranks of the German platoon.


The Germans also joined the Americans in having some dedicated casualty figures.

These soon made an appearance in some the AARs for the Gembloux Gap games (although the observant of you will be quick to point out that these Germans are incorrectly uniformed for 1940).

A lovely crew from AB helped add the finishing touches to this Marder III from Plastic Soldier Company.

Something completely different was the addition of the lovely new 1/72 Stuka from Airfix. Again, much like the casualty figures, this was intended to help illustrate the blog AARs for the new Stuka Bombardment rule introduced for Chain of Command in the Blitzkrieg 1940 Handbook.


That led in turn to the creation of markers to represent the unexploded bombs that can result from a Stuka attack. Well, why do things by half measures? If I was going to do the Stuka I might as well do the UXBs.


Similarly the Russians saw new additions to the core platoon to replace the PSC plastic figures.


Some gun crews were also upgraded including a 45mm AT gun and a Zis-3. The guns remain the original PSC pieces but the crews and commanders were replaced with AB. I also took the opportunity to modify the basing to make it easier for them to fit into terrain.

When AB released a maxim and crew with the gunner lying prone I knew that was the obvious upgrade for my Russian supports.

Nothing like a crew figure to bring an AFV to life and so I also added AB crew figures to some of my Russian armour.


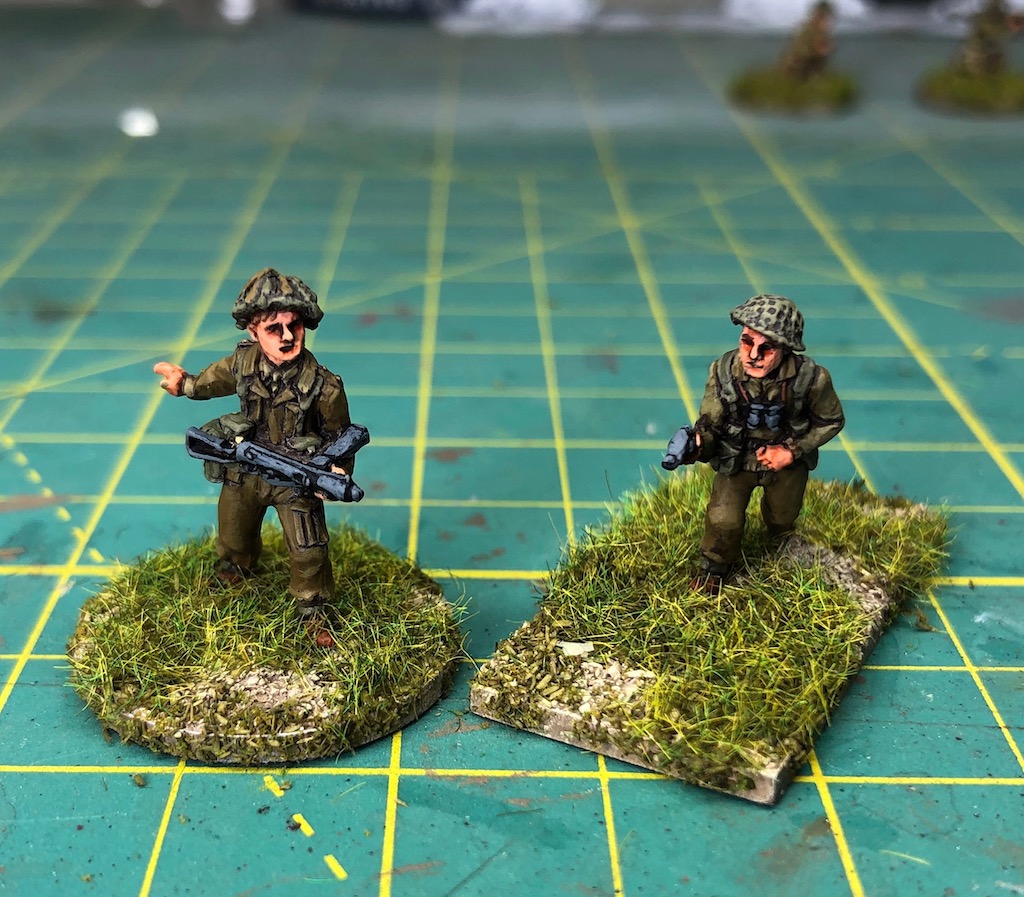
The British platoon received similar upgrades in the form of new junior and senior leaders; 16 riflemen; a flamethrower team, and a sniper team.


The British 6 pounder, again from Plastic Soldier Company, received an upgraded crew from AB.

A successful experiment creating camouflage netting for an Armourfast Cromwell led to a more ambitious attempt at hessian camouflage on a Firefly from the Plastic Soldier Company. They were finished off with crews from AB. I was really pleased with these and they've added lots more character to my British armour.


What's a good miniatures game without terrain? And this year saw several new elements added to my terrain collection. You can see much more about all of these on the Terrain Page of this blog. Buildings included this German railway signal box.


I revisited my markers for wounded leaders in Chain of Command, drawing inspiration from the single sabot bases I had used to mark my various leaders in Sharp Practice.


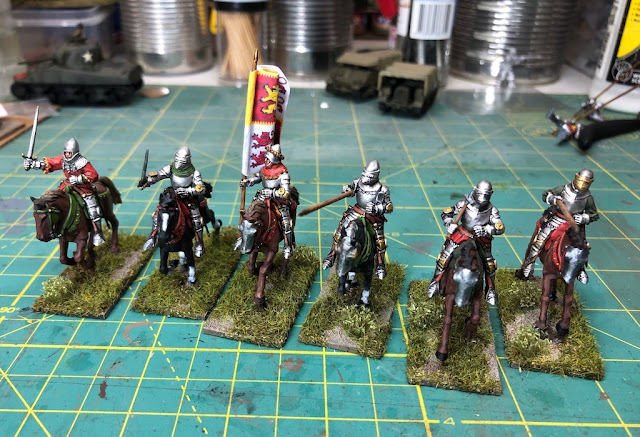
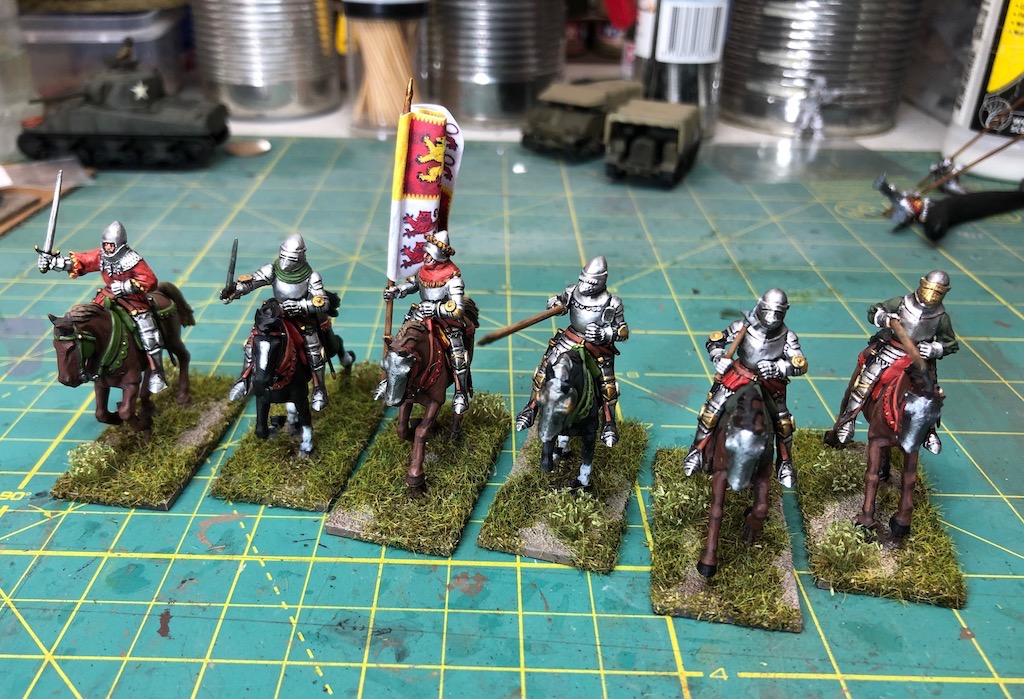
Moving up a scale to 28mm my main focus was on creating the retinues for Lion Rampant for the Hundred Years War era. I managed to complete most of what was planned for 2019 including: 6 Bidowers; 24 mounted men-at-arms; 6 mounted serjeants; 8 foot serjeants; 2 foot men at arms; 12 English archers and 12 French crossbow men.


The American War of Independence wasn't entirely forgotten with twelve Perry British regulars in roundabouts finished off to add to the British force for Sharp Practice.

Not as much terrain was created in 28mm (although the trees and hedgerows for 20mm work just as well in 28mm), however I did need to create some bases with suitable bounty for foraging or raiding scenarios for both Sharp Practice and Lion Rampant. This led to several bases featuring various farm animals and a vegetable garden.


I also added two armoured cars to the force.

Some spare figures from Wartime Miniatures came in handy to make a couple of themed US jump-off-points.

One thing that I've noticed when putting together the AARs for our games is that when a team is wiped out or a leader is killed I have no way to illustrate the fact other than photographing a blank space on the table where the figures were previously. While I've always been a bit wary of using casualty figures I've decided these will help illustrate the narrative so much better. The first of these figures are for my Americans and these come from Wartime Miniatures.

As these were limited just to two poses I decided to add more variety with some of the casualties from the AB Figures US range.

An extra bazooka team made sure I would have enough to cater for most scenarios.

While I was painting the US figures I also found time to finish off batches of unpainted 20mm figures for other nationalities. I've slowly converted my German and British platoons from plastic Plastic Soldier Company figures to metals from the AB range. So this year I painted three LMG teams and an additional rifle team to fill the ranks of the German platoon.


The Germans also joined the Americans in having some dedicated casualty figures.

These soon made an appearance in some the AARs for the Gembloux Gap games (although the observant of you will be quick to point out that these Germans are incorrectly uniformed for 1940).

A lovely crew from AB helped add the finishing touches to this Marder III from Plastic Soldier Company.

Something completely different was the addition of the lovely new 1/72 Stuka from Airfix. Again, much like the casualty figures, this was intended to help illustrate the blog AARs for the new Stuka Bombardment rule introduced for Chain of Command in the Blitzkrieg 1940 Handbook.

A model is not necessary as the Stuka bombardment effect is abstracted, but as you can see it does a fine job illustrating the story.
That led in turn to the creation of markers to represent the unexploded bombs that can result from a Stuka attack. Well, why do things by half measures? If I was going to do the Stuka I might as well do the UXBs.


Similarly the Russians saw new additions to the core platoon to replace the PSC plastic figures.


Some gun crews were also upgraded including a 45mm AT gun and a Zis-3. The guns remain the original PSC pieces but the crews and commanders were replaced with AB. I also took the opportunity to modify the basing to make it easier for them to fit into terrain.

When AB released a maxim and crew with the gunner lying prone I knew that was the obvious upgrade for my Russian supports.

Nothing like a crew figure to bring an AFV to life and so I also added AB crew figures to some of my Russian armour.


The British platoon received similar upgrades in the form of new junior and senior leaders; 16 riflemen; a flamethrower team, and a sniper team.


A successful experiment creating camouflage netting for an Armourfast Cromwell led to a more ambitious attempt at hessian camouflage on a Firefly from the Plastic Soldier Company. They were finished off with crews from AB. I was really pleased with these and they've added lots more character to my British armour.


What's a good miniatures game without terrain? And this year saw several new elements added to my terrain collection. You can see much more about all of these on the Terrain Page of this blog. Buildings included this German railway signal box.

An upgrade to an industrial building from Charlie Foxtrot Models to create a French garage.

Terraces house for France and north west Europe in MDF from Sarissa Precision.


Few French towns are without a war memorial and so this was scatchbuilt using a statue figure from Sgts Mess.

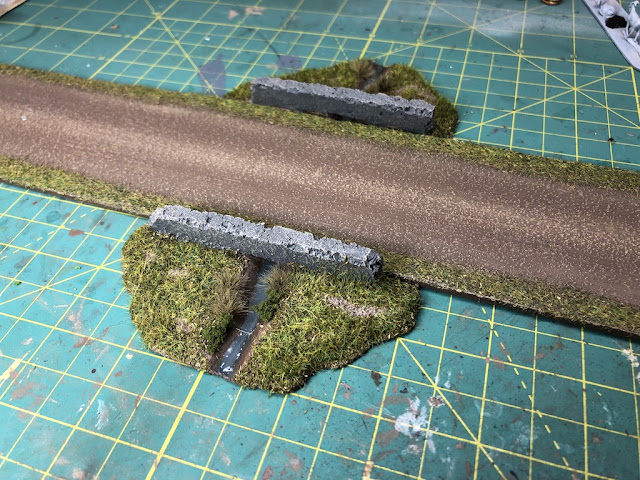
A simple idea I had for making versatile culverts was well received and I'm very pleased to see it has already inspired others to use the idea.

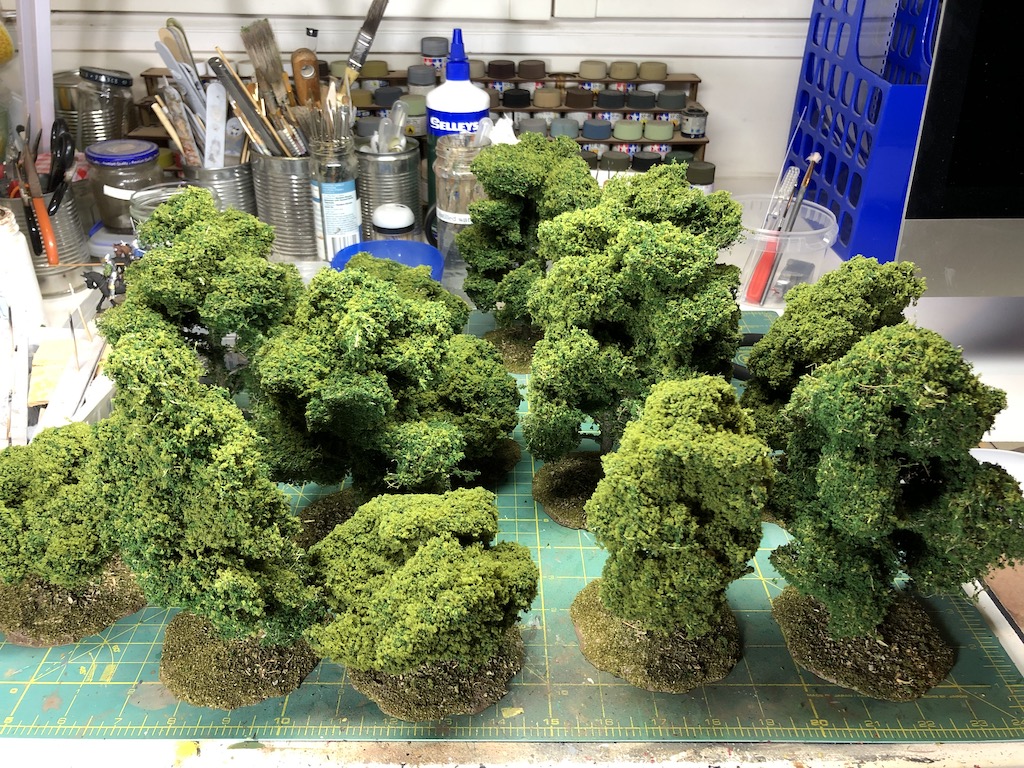
I undertook a big refresh of my trees after several had begun to show signs of serious wear and tear. I used a different method to create the foliage and gave all the bases a lot more attention.

That in turn led me to consider what to do with the large number of smaller trees I had bought when I first returned to miniature gaming but now considered a bit too small to use as 'standard' trees. The results were rows of trees to line roads and something of a makeover on my hedgerows.


Scatter terrain was high on the terrain agenda and lots of small pieces were added to try to give more character to my tables.
That in turn led me to consider what to do with the large number of smaller trees I had bought when I first returned to miniature gaming but now considered a bit too small to use as 'standard' trees. The results were rows of trees to line roads and something of a makeover on my hedgerows.


As well as working on scatter terrain I also had a project to minimise the amount of clutter on the table by creating markers that would blend in more with the terrain. This started off with making ammunition markers to record mortar HE rounds, hand grenades and flamethrower fuel for Chain of Command.


I revisited my markers for wounded leaders in Chain of Command, drawing inspiration from the single sabot bases I had used to mark my various leaders in Sharp Practice.


As campaigns form a large part of my Chain of Command gaming I also wanted to create something to mark those junior leaders who had been promoted from the ranks to replace leaders who had been killed in previous scenarios.

This gave me inspiration to make all my markers blend in more with the terrain and match the basing style for my figures.

Moving up a scale to 28mm my main focus was on creating the retinues for Lion Rampant for the Hundred Years War era. I managed to complete most of what was planned for 2019 including: 6 Bidowers; 24 mounted men-at-arms; 6 mounted serjeants; 8 foot serjeants; 2 foot men at arms; 12 English archers and 12 French crossbow men.


The American War of Independence wasn't entirely forgotten with twelve Perry British regulars in roundabouts finished off to add to the British force for Sharp Practice.

Not as much terrain was created in 28mm (although the trees and hedgerows for 20mm work just as well in 28mm), however I did need to create some bases with suitable bounty for foraging or raiding scenarios for both Sharp Practice and Lion Rampant. This led to several bases featuring various farm animals and a vegetable garden.


I also made progress on the Renedra American Church which only needs a suitable base and picket fence to be completed.


All up then, a very productive 2019 and far more productive than I had initially thought. Happy new year and wishing you all a great 2020.