Sunday, 7 October 2018

Sarissa 20mm Far East huts

I have quite a few buildings from the Sarissa Precision 20mm range and I really like them, but up until now they have only covered Western and Eastern Europe. There seems to be a real shortage of 20mm buildings for the Far East and Pacific, where as other scales like 15mm and 28mm seem well served, so I was pleased when Sarissa announced they would be producing some of their 28mm Far East buildings in 20mm. Timing could not have been better as I was just starting a Chain of Command campaign set in Malaya 1942 and I would need more than the two huts I already owned - the very venerable Airfix Jungle Outpost buildings which have been long out of production.

The Airfix Jungle Outpost

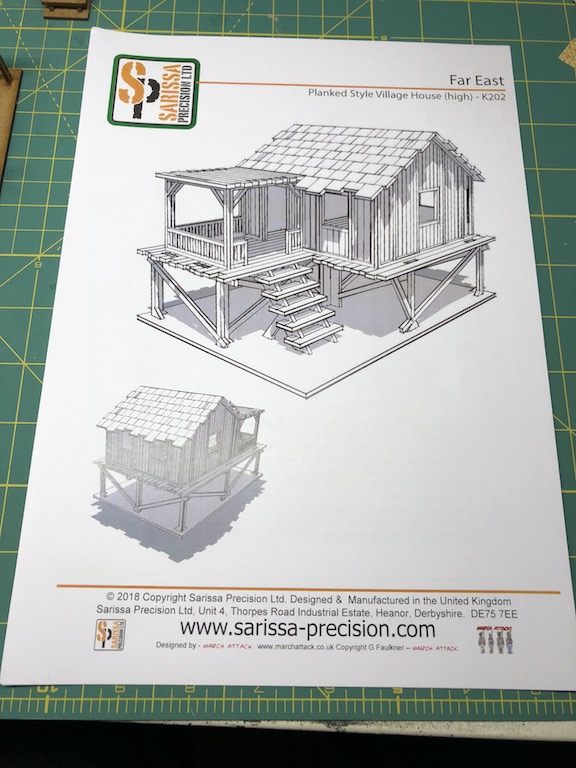
I purchased a couple of the Sarissa buildings and chose two that were on stilts, to try to match the look and feel of the Airfix huts.


They both went together very easily, but did look particularly chunky and very much like MDF laser cut buildings. In this state they weren't going to fit in with the Airfix huts.


I wanted to find a way to give them a similar thatched look to the Airfix buildings. A few years ago I had considered scratch building some tropical buildings and bought several textured A4 sheets of decorative paper that I had seen in an art supplies store. I had tucked these away and almost forgotten about them, but it has turned out they may be perfect for this job, particularly the roof.


I selected the one that most closely resembled the Airfix buildings. Once cut to shape I scored it down the middle with a sharp knife and then bent it. I used interior PVA wood glue to stick it down onto the MDF and cut out a smaller piece for the balcony roof.


I thought that worked well, but felt it could do with some more embellishment and character. Firstly I wanted to line the main ridge so I cut out a section, scored it lightly and folded it before sticking it down.
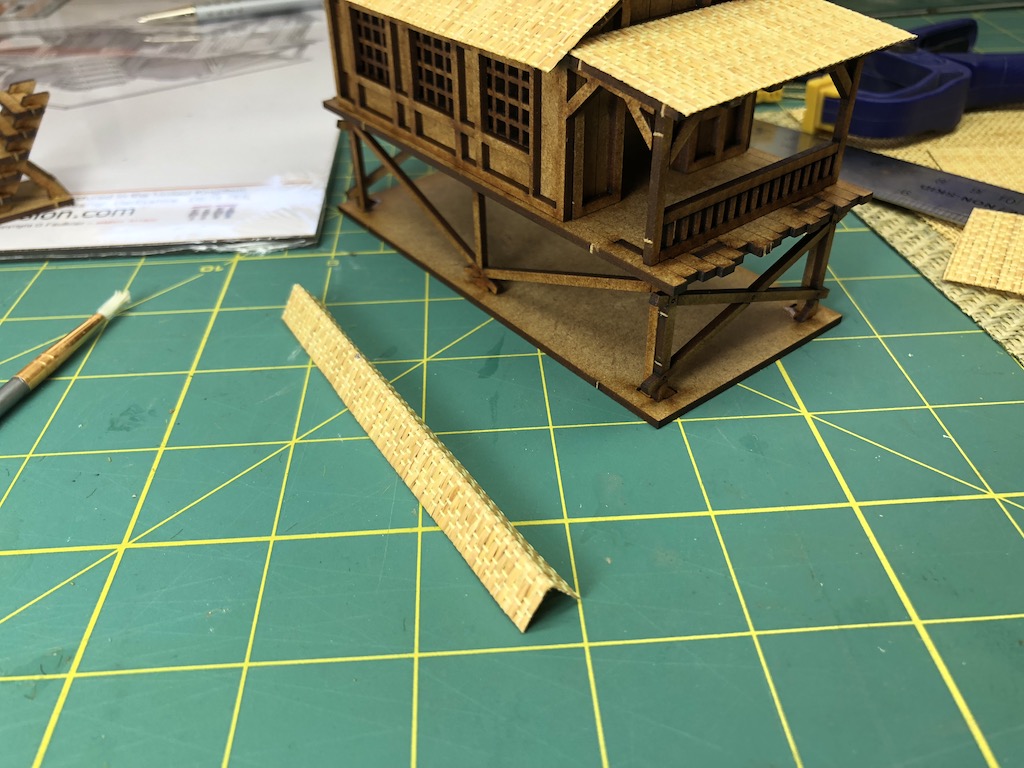

I also cut some thinner strips for the edges of the balcony roof.


One of the ugliest parts of any MDF model is the plugs that are visible from any of the joins. Nothing screams out 'MDF building' louder than the appearance of a few of these. I didn't bother with these with my first MDF buildings and I regret that. One day I will go back and rectify those, like this Normandy barn.


The huts have the same issues. So far that was solved for the roof, but I wanted to do something about the side walls.


The MDF joins aside, the wall lacked any character and so I decided I would try to use the same roof material for the side walls.


That worked well. I did the other side, but left the end walls, as these are engraved with wooden planks. Something still seemed to be missing from the roof so I added a strip of wood from a wooden skewer to run along the top of the ridge.


This was all coming to life nicely and that inspired me to replicate the window shutters that feature in the Airfix huts. I cut squares to size from the same material as the walls and roof. I mounted these on some card to give them more rigidity and glued them into place.


Finally I add some texture to the hut floor using one of the other sheets of textured paper.


This was a relatively quick and easy job for a very pleasing result. It almost seems a shame that I plan to paint it, but I will need to if they are to blend in with the existing huts. The scale works well, as you can see here with a Eureka 20mm Australian bren gunner.


And here was how it looked before the textured paper was added:


The difference between this hut and the other hut before it got a makeover shows what a difference the extra material makes.


I followed the same process for the second hut.


As this one already had the texture of wooden planks on the exterior walls I've decided to leave them as they are, that way each building can have a slightly different character. Here they are together.


I think they bear a reasonable similarity to the Airfix buildings, particularly when they are both seen in their unpainted states.


I wanted to have them on bases to match their Airfix counterparts, so I cut out a similar sized piece of MDF and then took the Dremel sanding tool and smoothed off the edges of both the MDF and the bases that come with the huts before gluing the hut bases to the MDF.


Both bases were then given some texture with sand, sprinkled over a layer of PVA glue.


Once that was dry the entire base and hut was covered with a grey primer from a rattle can.


They were then given a base coat using Dulux emulsion household acrylic paints, in this case I used Log Cabin as the dark brown base colour. I buy these in sample pots from one of the major hardware stores. It's an inexpensive way to cover a large area.


Next I dry bushed the thatch on the roof, window shutters and the walls in a mix of Deep Bamboo and Arava.


I then dry brushed all the wood in a dark grey (Western Myall) and then a light grey (Timeless Grey) and applied some of this to the thatch work to tie all the colours together.


I was trying to match the faded wood effect I had on the Airfix huts.


I gave the ground work a dry brush and applied my first layer of flock, some Noch scatter. I like to put this down as a base on to which I will apply some static grass.


I added static grass and a few shrubs, before the final touch of a couple of palm trees that I had left over from my Pacific Palm Trees project. With that I'm calling them done.


While the Airfix buildings don't look as chunky as these from Sarissa I think I've done enough to make them look reasonably compatible together. This should give me enough huts for the scenarios in the Malaya 1942 campaign, not to mention other Pacific settings.


Here they are with my new paddy fields and some additional jungle terrain.


Sunday, 30 September 2018

Loving the Lard at MOAB 2018

Spent a few hours on Saturday at the MOAB gaming event in Sydney's south. MOAB (Mother of all Battles) is an annual gaming event organised by Sutherland Shire Gamers and has established itself as Sydney's major show, growing from strength to strength each year.  It's a mix of tournament, demonstration and participation games plus the usual opportunity for traders and other suppliers to sell their wares.


Last year's Chain of Command tournament garnered a lot of praise, no doubt helped by the splendid terrain created by John Bond. With John focussing on the terrain for the Pacific themed tournament at CanCon in January there was no Chain of Command at MOAB this year, however the Lardies were represented by What a Tanker and Sharp Practice. That said, John was one of many familiar faces I bumped into on the day, but this time he was there as spectator and shopper, much as I was.


The main hall was busy with traders and games from a very popular participation game of Gaslands through to a busy Bolt Action tournament. Adjoining rooms featured everything from Bloodbowl and Warhammer, through to DBA and Flames of War. A big attraction for many, as it was again this year, was the very popular Bring and Buy.


What a Tanker was organised by Richard Naco (better know as oozeboss in some of the forums) and if the number of blazing tanks on the tables was any measure of the entertainment, all seemed to be having a great time. A Hetzer was proving to be the tank killer of the tournament.


Ben Fiene was running a Sharp Practice American War of Independence participation game set during the Saratoga campaign.  I found him at a pause in the game while the participants had headed down to the Bring and Buy which had just opened, but that gave us some time to talk and admire the beautifully painted miniatures on the table.


Ben was wondering if the players commanding the Rebels were being a bit too bold with their militia in trying to hold a river ford, considering they were trying to oppose a few groups of British regulars.


I didn't fancy their chances, but when I returned to the table a little bit later it seems that while the militia had fallen back taking several casualties American riflemen in good cover and firing at long range had managed to kill the British Level III leader and wound his second in command, so things were not going quite so well for the regulars.


So aside from catching up with friends and watching games I dutifully made my way around the trade stands. I picked up some foam trays and a cardboard carry case from Knight of Dice as I desperately needed to find some secure storage for my growing American War of Independence collection. The trays and case will hold up to two hundred 28mm figures, which should adequately meet my needs (well, for now anyway).


On the subject of Sharp Practice I needed a dice bag for my chips, so picked up something simple from Olympian Games.


War and Peace Games had a clearance on Gamers Grass with everything at $5, which allowed me to replenish my stocks.


Finally, I wasn't prepared to deal with the initial crowds at the Bring and Buy, but there was still a fair selection when I got down there. Not much that took my fancy though and all I ended up walking away with was some Woodland Scenics scenic cement for $5. Sutherland Shire Gamers now have this extremely well organised, with sellers able to download a bar code to place on their item.


An excellent show, just a pity I didn't have time to squeeze in a game.

Thursday, 27 September 2018

Perry Miniatures Continentals ready for Sharp Practice

Now that I've finished painting a small group of Continental Light Infantry I have enough Rebels to make up a core Sharp Practice skirmish force for the Continental Army 1778, or for a Southern Militia force made up of state line (well that's assuming I pass off my Continental regulars as State Line, but I think I can fudge that one).


I painted the Continental Light Infantry in hunting shirts, which is not entirely correct for the time period, but I wanted to make use of the plastic Perry figures in the boxed sets and their different poses would help me differentiate the Lights from the Line infantry. Although as you can see, their leader is not in a hunting shirt and wears a regulation jacket and rank sash.

As the Lights will act in a skirmishing role in groups of six I've made use of smaller sabot bases that take three figures each. These sabot bases are also from the Warbases range and as I did with the square bases I rounded off the square edges with my Dremel before painting and flocking.


These sabot bases will work well given one group of light infantry skirmishers can screen two groups of units in line and as you can see they manage this perfectly.


So here is the Continental force made up of one group of light infantry, two groups of state line and three groups of Continental regulars, with their respective leaders. In this instance all the figures are from the Perry plastic Continental infantry box set.


For the Southern Militias I will replace the Light infantry with the lovely Perry metal Frontiersmen Skirmishers.


Thursday, 13 September 2018

More for Chain of Command in Malaya

With our Chain of Command Malaya 1942 campaign now in full swing, I've been inspired to work on a few more terrain pieces so that we have all that we need for the coming scenarios.

When I first started playing Chain of Command I made only six Jump off Points and had failed to notice that some scenarios like The Flank Attack and Attack on an Objective will require a fourth. With two Flank scenarios coming up in the Malaya campaign I thought it was time I redressed this and created enough JoPs.


This then led me to think about how I might do this more imaginatively. Lately, in some of the forums, I've seen some very creative JoPs often featuring a few miniatures. These look great, but I often worry that they will be confusing during play. I think the solution is simply to make them look different enough from any other based miniatures and as close as possible to the style of your other JoPs that there's little chance of that happening.

So while I made up two more JoPs in exactly the same style as my others I also had some inspiration to create one that was specifically Japanese. I had created a company commander base for my Crossfire Japanese platoon and realised I could adapt this to suit Chain of Command (while it could still serve its purpose for Crossfire).

Some additional JoPs in my traditional style

The new JoP sits comfortably with the other ones
I'm very happy with this and have similar sorts of figures that I could use for a British and American version, so these will no doubt end up being little side projects I'll develop to help break the monotony when I have a load of miniatures to paint.

While I was at it, I realised I didn't have a Japanese Forward Observer team and so sifted through some plastic 1/72 Japanese from the Waterloo and Italeri sets that would just about do the job. They are not the finest sculpts I've ever seen, but they are functional.


Having successfully made a dry paddy field I've also wanted to try my hand making some in-season wet ones.

A dry out-of-season paddy field

The basic shape followed that of the dry one - a MDF base with the paddy banks made out of insulating foam and shaped with filler.  This time I painted the interior in a dark green/blue colour.


I then made it look wet by covering it with several coats of Modge Podge varnish. This is water based and a lot less smellier than an enamel based varnish.


Next up I tried to see how best to show the rice plants growing. For this I planned to use static grass and find a way to lay it down in a pattern that would be consistent with a planted rice paddy. I tried two different methods, one using a line of glue on the left hand side and the other with spots of glue on the right.  Rather rashly I made the decision to change method half way through making the first paddy field.  In hindsight a rather silly idea.


I think the spots worked much better, the only problem now is how do I make it all looks the same? Well, that's my punishment for being impatient.


The paddy banks themselves will also need flocking, but I think I can work this to come up with a reasonable impression of an in-season paddy.


Finally, in the mail today were some of Sarissa's new 20mm Far East huts and these I will make up and add to my Airfix Jungle Outpost huts. That should give me sufficient buildings for the village fight which is the final map of the Malaya 1942 campaign.