
This is our eleventh game in The Scottish Corridor campaign for Chain of Command. If you haven't been following along, you can find all the previous game reports on the Campaign AAR page.
Now we reach the final map of the campaign, with two turns remaining. If the Germans can capture this map at the first attempt they will win the campaign. Failure will allow the British to counterattack and possibly recapture one of the lost maps, which would in turn earn them a campaign victory. So we both have everything to play for and hopefully this sets up an exciting finale.

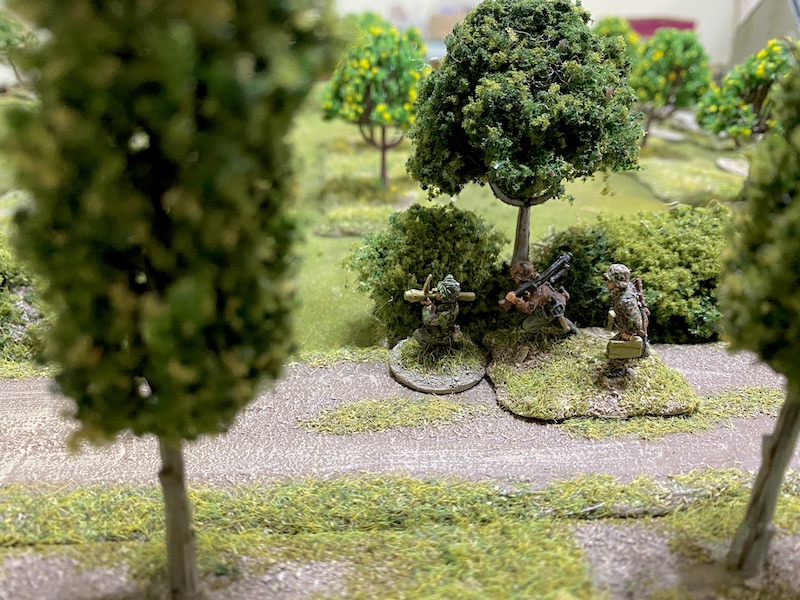
This table is quite open, the only key feature is a large orchard. While that gives the Germans few options for how they can attack, it also presents problems for the defenders.

As always, standing up to the firepower of the panzer grenadiers is fraught with danger and the lack of suitable cover around which to anchor a defence is my main concern. The British will have thirteen support points and I give some thought to entrenchments. While that solves the issue of cover, it doesn't help address the main problem, which is how to apply enough firepower to drive back the assault before the panzer grenadiers bring the full weight of their fire to bear.
I think the answer lies with armour. In several earlier games the British Churchill has proven a very useful support. Unfortunately, thirteen support points is insufficient for two of those. At the same time I need to factor in the presence of German armour. In the end, I settle on an M4 Sherman, backed up by a Sherman Firefly. They may lack the combined HE firepower of two Churchills, but it does mean I have a powerful anti-tank weapon. Regrettably, there are not enough support points left to add an AFV senior leader.

In the patrol phase, I place one jump-off-point in the flank of the orchard, the other two are towards the back of the table. Depending on how things unfold, I'm hoping a combination of infantry deploying into the orchard, supported by the armour, will make it difficult for the panzer grenadiers to make progress in that direction. It also means that any German armour will have to drive into the orchard to offer support, or come around the flank. In either case, if the British armour can deploy first (and on overwatch) it will give them a good chance of landing the first shot. As always, there are a lot of 'ifs' in those plans, especially given the Germans have also secured jump-off-points in the orchard.

The Germans start with two CoC points and given it's quite obvious which way they intend to come, there seems little reason for them to hold off their deployment. As he has done in every game, Dave has taken a Red Dice as a support option. In the opening phase two sections deploy into the orchard near the road.


The first British command roll is 66621. That's a promising start but, as is so often the case, the roll lacks sufficient activation dice to deploy much to the table. A British rifle section could deploy into the orchard and engage the panzer grenadiers, but as they are on overwatch there seems little advantage to that. Instead the M4 Sherman deploys.


The following command roll is 55214. I decide to use the 1 to activate the Sherman driver and have him move ahead flat out. The tank makes it to the edge of the fruit trees.

However, I'm still reluctant to commit a section into the orchard. There are simply too many panzer grenadiers hanging around. Instead, a section deploys at the hedge to the rear of the Sherman.


The Germans then roll a double phase. To some degree I'm relieved. I'm glad I didn't deploy a section into the orchard. With insufficient CoC points to hit the dirt, they would have faced a couple of phases of fire which, by my calculation, would be very close to one hundred fire dice. Not good odds for ten men in light cover.
However, with no opposition in the orchard the oberscharführer sends all the units in the direction of the British jump-off-point.


A third German section then deploys into the orchard. With another phase coming, Dave wants to make as much progress as he can.

As it turns out, he doesn't just have one more phase coming - the next command roll includes another double six. This doesn't bode well. One panzer grenadier section heads toward the Sherman. It's not difficult to see what Dave has in mind. The section carries a single panzerfaust and should be able to fire it in the following phase if it approaches close enough.


Another German section moves toward the British jump-off-point in the orchard. They don't make contact, but are near enough to close it down.

The Germans are making the most of the run of phases and are being very aggressive. Fortune is certainly smiling - the subsequent command roll includes another double six. Well, well, what can you do?


The Germans in the orchard make for a bunched up target.


While British fire is inflicting a few casualties, it doesn't seem anywhere near enough given the number of panzer grenadiers. It's galling to think what additional casualties the Sherman could have inflicted.


Judging by that move, whatever the Germans have left to deploy is unlikely to include armour. So I imagine we will see another section with a panzerfaust in the not too distant future.


The following British command roll is 44442. I don't know whether to laugh or cry. The universe is clearly trying to tell me something. The section by the railway needs to find better cover and so they advance forward tactically.


In the German phase, Dave rubs salt in the wound. As he contemplates how he can use five very useful command dice, he confesses to having more command dice than he can use. At which point it's obvious that my meagre force is about to receive the full attention of an awful lot of panzer grenadiers.

There are no casualties this time, but the shock that the sergeant recently removed is soon replaced.

The oberscharführer rallies a point of shock. Then he assign a man to the LMG team, before ordering the whole section to also target the men behind the hedge.

The shock builds up. There are six men suffering six points of shock, they won't be able to take too much more fire.

Then a surprise appears from the moved jump-off-point - a flamethrower team emerges.

Dave intends to take on the Sherman, however he has failed to take into consideration the close proximity of friendly units. For now the team cannot fire and so take up tactical positions.

Finally, the platoon's oberscharführer deploys. With four command initiatives and a range of 12", he can almost single handedly control the German attack.

His first order is to send the MMG team to the hedge alongside the road.

He them instructs the section at the rear of the orchard to move up.

With that done, he uses his remaining two orders to work with the scharfuhrer from the other squad to have both of the section's MG42 teams use maschinengewehr to blast away at the British behind the hedge. They lose two more men and with more shock they are soon pinned down.


The oberscharführer orders the section nearest the Sherman to fire its panzerfaust.

From that close, it's a relatively easy shot, even for a weapon with limited range.

The hollow charge round hits the Sherman and inflicts three AP strikes. To my relief the tank's armour proves resilient and the crew suffer only a single point of shock.

The oberscharführer then orders the section to his right to split up. He sends one team to try to contact the British jump-off-point, while he leads the other team forward through the orchard. That has seen the Germans make speedy progress and in the process capture the only British jump-off-point that could threaten them.

The section nearest the Sherman then fires at the British infantry behind the hedge.

They hit the dirt.

Despite the better cover, they still suffer shock and lose a man in the Bren team.

The following German command roll will see the run of phases come to an end, but not before they have one more phase. The oberscharführer orders the team that captured the jump-off-point to join the rest of the section.

The section's other team repositions in the orchard.

The oberscharführer orders the team to use its panzerfaust to target the Sherman.

The reposition has allowed for a potentially lethal flank shot. However, to do any damage it must hit the target and, much to my relief, it misses!

Meanwhile, the other section in the orchard continues targeting the British behind the hedgerow.

They may be at effective range and in hard cover, but they still manage to lose one of the rifle team and suffer shock.

Finally, the British have a phase and I hope to take full advantage of the Sherman's close proximity to so many Germans, especially as they have almost exhausted their supply of anti-tank weapons. However, the dice have other plans and a command roll of 64422 is not what I'm looking for. It looks like this could be a bad day at the office for the British.
The platoon sergeant rallies shock and orders the nearby section to fire.


The British fire proves effective. One of the MG42 crew is killed and the scharführer is stunned. German morale drops to ten.

That's all I'm going to be able to do in this phase, unless I'm willing to commit more men. However, deploying at the hedgerow would be to gift the panzer grenadiers a bunched target myself. Doing nothing hardly seems like a viable option, so in a rather desperate and feeble attempt to tie down the Germans, a section deploys on the British right flank near the railway line.

They too fire into the orchard and the Germans lose another man and suffer more shock.


The German command roll doesn't include any multiple sixes, but with a red dice as part of the mix they are able to make much happen in each phase. Before anything activates, Dave uses a full CoC die to move one of the jump-off-points forward.


The oberscharführer orders the team that recently captured the jump-off-point to move up to join the men who recently repositioned. He then directs the section's other team to join the section to their left in targeting the hedgerow once again.

Three MG42 teams pour fire into the British.

It proves deadly. Two men are killed, which brings the Bren team down to a single man. On top of that, the section corporal is stunned, but British morale holds steady.

As I expected, a fourth panzer grenadier section deploys from the recently moved jump-off-point

They can't gain a line of sight to the Sherman, but they can see across the railway tracks to the British section there.

They are in the open and I don't have enough CoC points to hit the dirt, so they are fortunate to escape with only three points of shock.


At the hedge, the platoon sergeant rallies shock, then assigns a man to the Bren team before ordering the section to fire.

The panzer grenadiers in the orchard remain a bunched up target and they pay the price. Three men are casualties and that reduces one of the LMG teams to a single man. Meanwhile, I can only gnash my teeth wondering how much more damage that Sherman could do....

The scharführer of the section on the German right rallies a point of shock and has the section target the hedgerow.


British fortunes barely improve with the next command roll of 65441. It leaves few options, but at least I can try to pull the Sherman back out of panzerfaust and flamethrower range. Alas, the shock means the driver is stunned and the Sherman remains immobile. It's fast turning into one of those games.

The platoon sergeant desperately tries to steady the men at the hedge and spends his entire activation rallying off shock.

The next German command roll includes, yep, you guessed it, another double six. Dave looks at me sheepishly and apologises. We are both fairly competitive and I fully expect him to exploit his advantages. Nonetheless, I sense his run of good luck, matched by my equally bad luck, has reached the point where it might actually be spoiling his enjoyment.
That said, it hasn't spoiled it enough to prevent him unleashing the full fury of his panzer grenadiers. And why shouldn't he? He knows I'd do the same to him. The platoon's oberscharführer sets about issuing orders.


It doesn't need a blow by blow account to understand the outcome. Before long before the shock takes the section to breaking point and they rout off the table, taking the platoon sergeant with them. Little surprise British force morale slumps to five.

The stunned corporal is left behind, although quite what he will do if he evers gets back on his feet remains a mystery.

Having swatted that section aside, the Germans then turn their attention to the section by the railway line. The MMG team are first to fire.

Fortunately, the section is tactical and the initial burst of fire has no effect.

The panzer grenadier section at the rear of the orchard moves up to join the others.

With the phase completed, the turn ends. The section by the railway loses its tactical status. Both the German and British stunned leaders are back on their feet.


The captured jump-off-point is removed. That's another blow to British morale which drops to four. I begin to wonder, if I had trouble activating the tanks with five dice, what hope do I have with four?
In the following German phase, the section on their right moves around the flank. I assume they are heading for the other British jump-off-point. They seem oblivious to danger, which says something about how this game has unfolded!

The oberscharführer rallies shock and orders the nearest section to move away from the Sherman.


On the other side of the orchard, the section opens fire at the British by the railway line.

They hit the dirt, nonetheless they suffer one casualty and more shock.

The MMG team targets the same men. Two of them are killed and the section suffers more shock.


One panzer grenadier section targets the lone corporal at the hedge, as Dave hunts down easy ways to drive down British morale. The corporal survives and will use his next activation to leave the table to join his section.

Finally, the flamethrower team have their moment. They send a blast of burning fuel at the Sherman. The hapless tank might have done little more than provide the Germans with target practice this entire game, yet it has proven remarkably resilient to whatever has been thrown at it. So it proves again.

Well, dear reader, if you've managed to stick with the narrative this far, I commend you. I suspect you, like me, could see the outcome of this game long before it reached this point. I think it's time for the British to accept defeat.
With the lone British corporal about to rout off the table to join his section, British morale is already heading for another drop. Even a series of consecutive phases where the Sherman can activate (and there's an awful lot of wishful thinking in that thought) would unlikely be enough to drive German morale down sufficiently to save the day before British morale collapsed.
They have two panzerfausts still available and the flamethrower may yet prove lethal. With six command dice (including the Red Dice) and the oberscharführer's added command ability, there's every chance they can make short work of this.
Regrettably, the campaign fizzles out with a rather comprehensive German victory and not the tense finale I was hoping for. Sure, luck played a big part in this game, but Dave ruthlessly exploited his opportunities and it would be churlish to take anything away from a well conducted campaign.
In hindsight, we had a few thoughts about the campaign itself. We used the v2 rules and they worked very well. That said, the campaign also gives the Germans the benefit of turning every single six in the command roll into a CoC point. Given the much wider uses for CoC points in v2, we found they were able to amass those points at a much greater rate than the British. That alone wouldn't be such an issue if they weren't also able to take advantage of supports options like a Red Dice and an extra senior leader.
If we were to make any changes they would be to the support lists. Our general view is that if taking a support choice is a no-brainer, then it is probably costed too cheaply. In the case of the Germans, this would most likely be the additional senior leader and the Red Dice. Dave never failed to select these and they always paid off handsomely. The converse to this thought is, if you never select a support option, chances are it is costed too high (we would cite the sniper as a case in point).
From a British perspective the choice of supports were always torn between entrenchments or armour. It wasn't normally possible for a mix of both. When faced with the superior firepower of the panzer grenadiers there are times you need to be able to find a balance of each. That also meant, if more than one tank was chosen, it wasn't always possible to upgrade one of the AFV leaders to a senior leader. Overall, the British struggle with command and control in a way the Germans don't and that may tip the balance slightly in their favour.
However, I wouldn't want to lose sight of the overall balance of the campaign, after all, it was only decided in this, the eleventh game, out of a possible twelve. When preceded by playing the Operation Martlet campaign, it's provided a rewarding, deep dive into the Normandy experience at platoon level for both players.
You can find all the game reports for this campaign and for many others on the Chain of Command AAR page.
Well that was a bit of a let down, I was hoping for a stalwart Brit defence. There’s much to learn from the game though. Firstly, like the conclusion from my recent game, I have realised that using v1 campaign rules with v2 rules can tip the balance. In this case I see the Germans already benefitting from ‘6’s as CoC points (v1) also started with 3 CoC points (v2) which together with their red die (v2) gives them IMO too much command flexibility - what they can’t do with command points they can often do with CoC points. I don’t use the commander’s and troops’ opinions in campaigns, and seeing the impact of the uber-commander reinforces that preference.
ReplyDeleteThe increased use of CoC points in v2, is potentially a problem, it’s hard enough getting the command dice to do stuff, but then having it all wiped out by CoC points can seem harsh. On that topic it seems hard that non-infantry units can’t react fire - the Sherman surely would not have sat there ignoring all that was happening in front of, and to it.
Seeing all that firepower appear in phase one, reminded me of a mooted house-rule to limit how much can deploy from a JOP per phase. It wouldn’t have helped much in this case as the Germans had two JOPs next to each other, but even just stopping the MMG deploying at the same time is something.
The Brits were also hampered from the beginning by having all their JOPs on the table edge, although how that happened wasn’t explained. In the scenario their patrols start 12-20” in depending on whether you put dashed start-line where shown on the map (c. 20”) or as specified in the rules (12”). Either way the rules say that defender JOPs are never placed behind the dashed line, being placed on it if they can’t be placed in front. There was always going to be trouble if anything broke.
The jump-off-points could have been further forward but that would have meant having them all in the orchard. Had that happened and the Germans had the same run of phases then I might have lost them all. The reason I moved them to the back was to make the Germans come to me, where hopefully I'd be ready with two tanks and infantry in place. One issue is how few places there are for jump-off-points if not in the orchard.
DeleteMy mistake I thought the third scenario in the rulebook was the Probe scenario, in that you can't put JOPs behind the dashed line.
DeleteThe oberscharführer deserves a promotion to a ranking senior leader!
ReplyDeleteWell, that wasn't quite the thought I had in mind as he was driving me off the table!
DeleteThis battle looks like one of those where it was lost in the patrol phase. Once the Germans were in the orchard the British are really in trouble. I certainly wouldn't have called it there and then though - at least roll the dice to see what you got. It could have been 2 sixes and 2 threes!
ReplyDeleteThanks for publishing the campaign. Was fun to read along.
Thanks for following along. The problem with this game is how few locations there are for jump-off-points if not the orchard. As much as I tried to keep the Germans out I couldn't quite move patrol markers fast enough to prevent them gaining a spot. Dave realised the issue so put all his eggs in one basket and went all out to try to get a toehold. End of the day the luck swung to two extremes. I could have lived with a bit of German luck if my dice had been even average. A few phases with the tanks in action on the table could have made a big difference (or at least made a game out of it), unfortunately the levels of luck were at polar extremes.
DeleteThank you for sharing your adventures in this campaign. This final game was brutal, I could feel your pain from half way around the globe.
ReplyDeleteThanks Dennis, it was just one of those games, what can you do? At least the overall campaign ran much closer and had this game swung my way the whole campaign outcome would have been different.
DeleteAnother lovely looking game, terrain and miniatures are stunning, very enjoyable read and the whole campaign has been an interesting follow.
ReplyDeleteThanks for following along and commenting, glad you've enjoyed it.
DeleteYou were certainly steamrolled there old chap the dice gods were not at all kind to you. Still it has been a great campaign to follow, Dave is a most worthy opponent.
ReplyDeleteYep, the dice were very cruel, but take nothing away from Dave, he made the most of those opportunities, which is what makes him such a good opponent.
DeleteJings! That was nasty. I feel the balance of the rules is tipped slightly too far in favour of the Germans. Having said that, there's nothing that can be done about the appalling dice rolls.
ReplyDeleteYep, the dice were very cruel (or kind, if you were Dave). That said the campaign felt balanced overall, after all if I'd won this one we would have had a different outcome to the whole campaign.
DeleteAn interesting AAR to follow on from your post about how to deal with an opponent who keeps getting multiple phases...not much you can do though if the dice will not let you activate your intended counter! Overall it has been great to follow along this campaign even if the final game wasn't the tense cinematic showdown we all hoped for! Well done.
ReplyDeleteYes indeed. I wrote a post on dealing with panzer grenadiers and the next game Dave hosed me off the table, same now with the post on dealing with double phases. Seems I shouldn't tempt fate by writing posts like that!
Deletehaha! Indeed!
DeleteAwwh man, what a shame the campaign has already ended. Since this one already had me checking this blog daily, i'll be looking forward to the next campaign AAR. Thanks for the wonderful read!
ReplyDeleteThanks for following, glad you enjoyed it!
DeleteA hard fought, sprawling campaign. Save one game, the Brits definitely didn’t get the rub of the luck. Even with all that seemingly unstoppable momentum, it still came down to the wire, so perhaps the campaign still worked as intended.
ReplyDeleteWould love to see you guys play Bazooka Town at some point.
Thanks, shame the campaign fizzled out at the end, I would have loved a more dramatic ending, but overall it was a close run thing and I thoroughly enjoyed it. Not sure what we will play next, but I'll certainly have a look at Bazooka Town.
DeleteHonestly Mark, you're the only vloke I know of that has as consistently shitty luck rolling as I do. It's always disappointing to be rolled off the table. I may be about to replay the Martlet/SC campaign ising V2 myself, so am very interested in your comments on intergrating the new rukes with the campaign. I'm thinking that introducing the V2 rules, while sticking to the V1 scenario and support list will be the way to go, but the V2 scenario changes do and urgency, so I'm not sure 🤔
ReplyDeleteAnyway, thanks, as always, for the compelling write ups.
Thanks. We certainly enjoyed using the new v2 rules. The mission/scenarios need a bit of thought and I suspect sticking with the v1 interpretation and what the PSC itself dictates is probably the way to go for most scenarios but not necessarily all as I think a bit of personal discretion helps as long as you stick with the spirit and intention of the PSC scenario.
DeleteI guess that I take a slightly different view to most commentators here. For me the luck is inherent in the game with CofC, and so is imbalance, and terrible terrain to defend, or attack over. For me it’s trying to solve those problems that makes the game what it is, and that’s exactly what you tried to do in this game, you tried to make the best of what you had, Dave did the same. Win, lose, get completely handed your ass, I still love playing this game, because it doesn’t try to be ‘fair and balanced’. I would also like to say that your reports are not only beautifully presented, but also give deep insight in to the thinking of two highly skilled players, and there is a great joy in that.
ReplyDeleteI'm with you 100% on liking the challenge of imbalance, poor terrain or a dire situation. This particular game was a rarity, where one side gets a lot of good luck and the other a lot of bad luck. Normally the differences are less extreme. I was only saying to Dave yesterday, I had no real issue with his four phases in a row, they didn't lose me the game, they just altered the tactical situation. Had I been able to activate the Sherman and bring on the Firefly, who's to say things couldn't have changed dramatically (after all, he had only panzerfausts for AT weapons and he'd fired off two of those to little effect)? I think my only regret was that I was hoping if this was to be the last scenario of the campaign it would end with more of a bang than a whimper!
DeleteWell there is a phrase "Blood for the blood gods", I think you need "Dice for the dice gods" sacrifice or something. I think you had a solid plan but the fickle finger of Fate decided otherwise...
ReplyDelete