

Not that this has deterred Eahlbeard, the Saxon lord. He's intent on making the most of what remains of the fighting weather. He receives word that Cadwallon, the British lord, is escorting a wagon train of valuable supplies to one of his fortifications.

Eahlbeard is quick to act. He gathers a warband and heads into the neighbouring British province in search of plunder. Cadwallon, accompanied by part of his warband, must escort the wagons across the table and into the safety of the fortification.

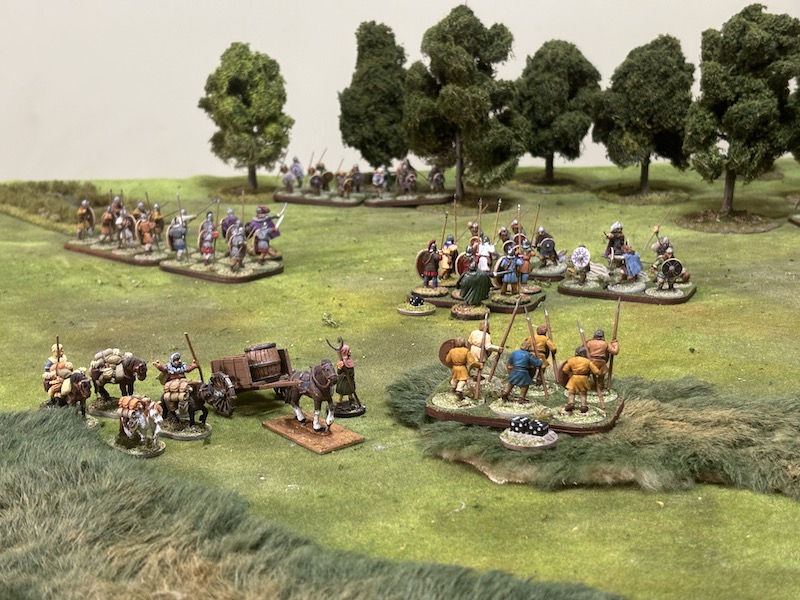
There, the remainder of his warband are waiting - a group of slingers and two groups of British levy, under the command of the noble Malvin.

Should the Saxons suddenly make an appearance, Cadwallon, with his force divided, could find himself in a difficult position.

The Britons' force morale starts at eight, which puts them in much better spirits than the Saxons, who start with only five. That said, the Britons may face the more difficult task.
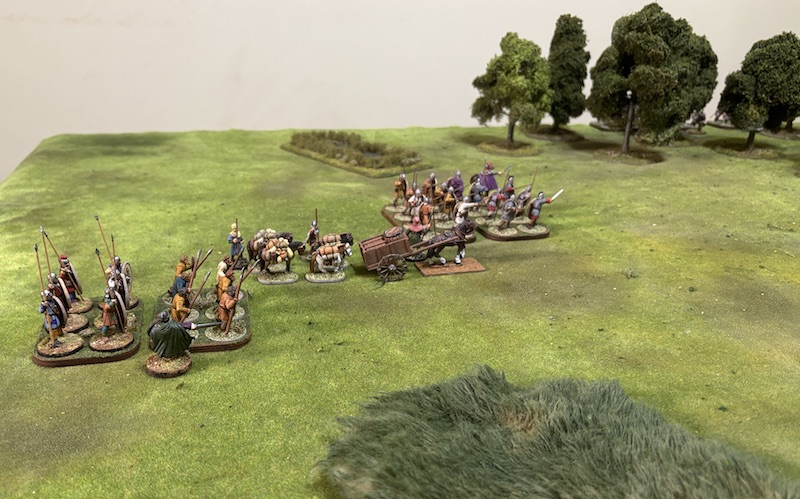
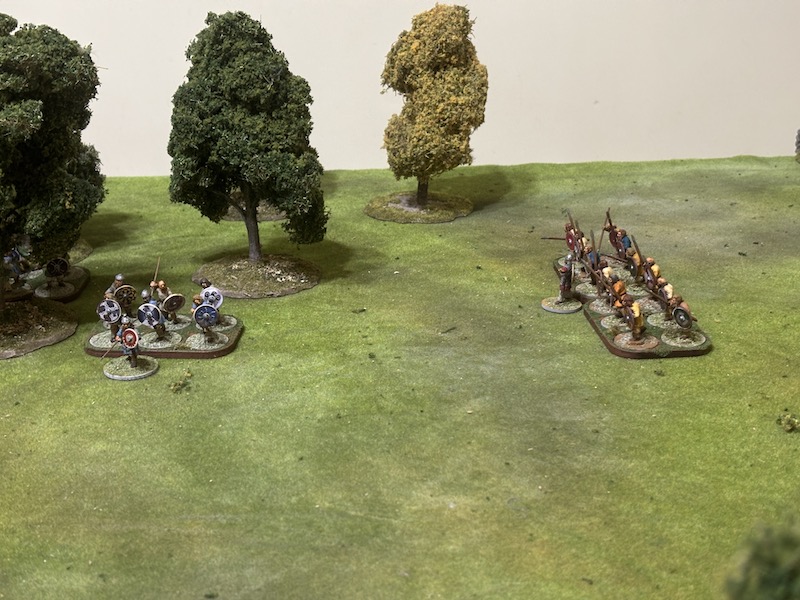
The wagon train and escort begin to make their way up the table, before discovering there are Saxons lurking in the woods to their left.

Eahlbeard, with his companions and a group of warriors, lead the way. They are followed closely by Hrothgar, a Saxon noble, leading more warriors.

Cadwallon, at the head of his companions and a group of warriors, moves on ahead of the wagons.
Meanwhile, Hrothgar's Saxon warriors move slowly in the woods.

The British slingers sally forth from the fortification to seek out and harass the Saxons.
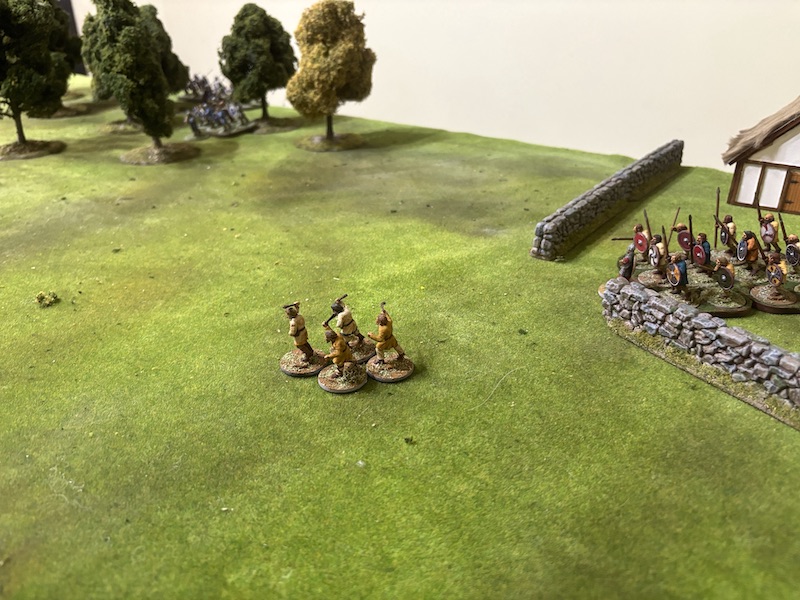
They are followed by Malvin, who leads the levy out to join them.


Eahlbeard is eager to get to grips with the Britons and leads his men forward through the woods.

That brings him quickly into a position from where he can try to intercept the wagon train.

Broethr, a noble accompanying Cadwallon's force, moves ahead quickly with a group of levy and warriors.


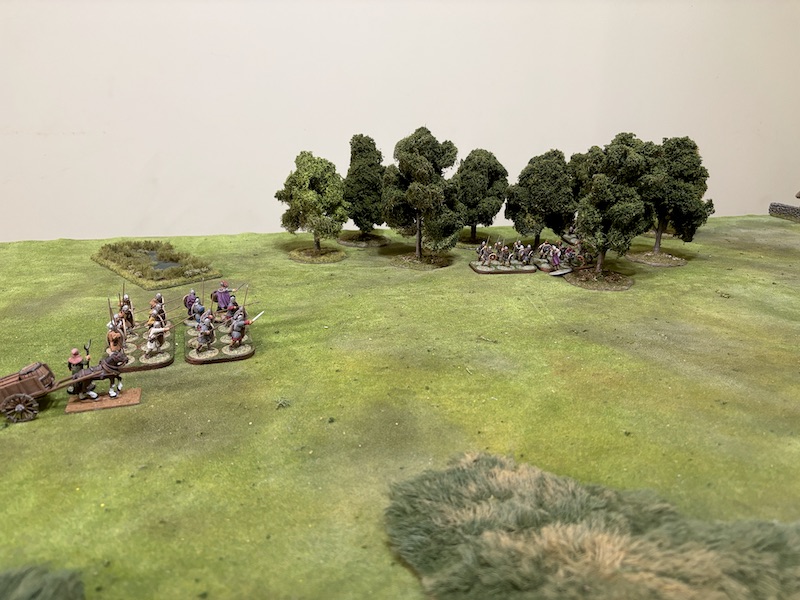
In the next turn, the remaining Saxons - a group of archers and two groups of warriors under the command of the noble Maethelweald - follow in the footsteps of Eahlbeard and arrive in the woods.

Broethr moves his levy and warriors forward to face Eahlbeard.


Maethelweald moves his newly arrived band to the edge of the woods.


Hrothgar moves his warriors out of the woods.


However, for now at least, their main interest seems to be the escort party for the wagon train.

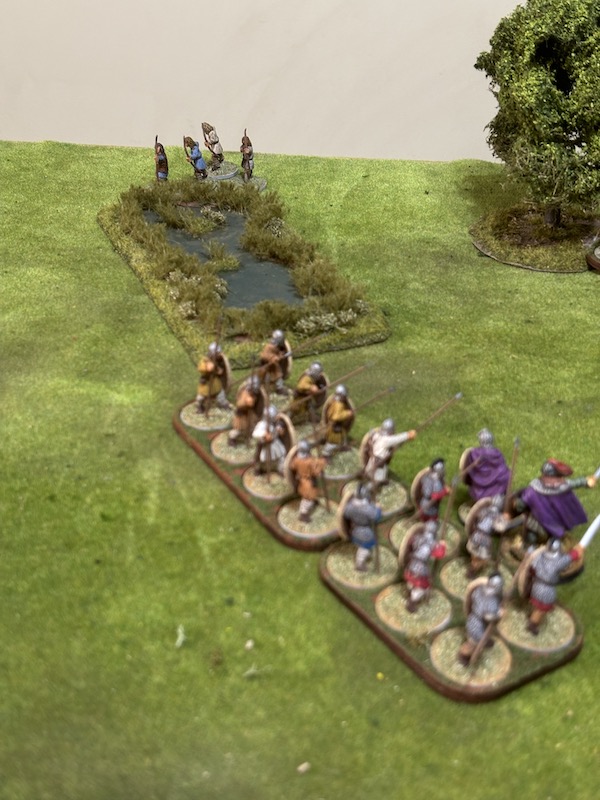
Cadwallon moves his men forward and anchors their flank on the marsh.


The slingers move close to Hrothgar and his warriors and unleash a volley of missiles.


Meanwhile, the Saxon archers seek out similar targets and move around the marsh.

Malvin moves the levy shieldwall forward slowly. He is not seeking confrontation, but wants to give the Saxons reason to keep one eye over their shoulder
Eahlbeard decides to move out of the forest toward the British.
His men move further and faster than he expects and that brings them directly into contact with Broethr's command.

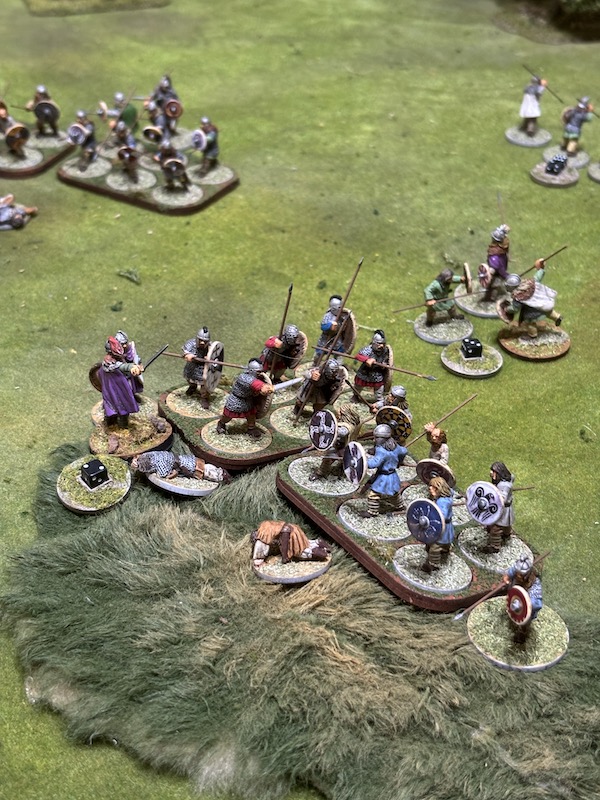
The first clash between Saxon and Britons takes place.


The shieldwall proves resilient and the Britons suffer shock, but no casualties. The Saxons, on the other hand, suffer greviously. Two of the companions and two of the warriors are killed. Eahlbeard himself is hit and only play of the Armour Bright card saves him from taking a wound.


Those losses see the initial Saxon charge thrown back and their formation falls apart.


The Saxon archers then make a threatening move around the marsh, to place themselves in position behind the shieldwall. Now, they have gone from being annoying, to being dangerous.

Eahlbeard is determined to press home his attack and directs his men back towards the Britons. He decides to focus on their weak point and attack the levy. He uses the Goad card to have his companions stand off from the British warriors, while he leads the warriors against the levy.

The British, quite literally, have another card up their sleeve. To the Saxon's surprise, they play a second Shieldwall Braced card. It reduces the number of hits, but while they don't suffer any casualties, they cannot escape taking a lot of shock. The Saxons, don't suffer any shock, but they do lose another man.

The shock means the levy are unable to hold their ground. They break off from the shieldwall and fall back.

Maethelweald attempts to lead his men out of the woods, but they find the going extremely difficult and barely move. On the contrary, the wagon drivers have no problem picking up speed. They move around behind the levy, trying to put as much distance between themselves and the Saxons.
Hrothgar, ignores the levy shieldwall behind him and brings his men up to join Eahlbeard. Broethr and his warriors are in danger of being overwhelmed.

While killing Saxons may help his cause, his principle task today is to protect the wagon train. He rallies shock and falls back to join the levy.


Cadwallon debates whether to attack the nearby Saxons, but, like Broethr, he remembers the key aim of their mission is to protect the wagons. He also moves back.


The slingers continue advancing on the Saxons and pelting them with missiles, but it fails to have any impact.


That threatens the Saxons with an attack from the rear and may draw their attention away from the wagon train.

The Saxon archers have lost their opportunity to shoot on Cadwallon's shieldwall from the rear. Nonetheless, they target the nearest group of British warriors, but their arrows fail to find their mark.

Eahlbeard considers his options. The levy behind him are no longer in formation and make for a very tempting target. However, before he can order his warriors to strike, the British play the Step Forth card, which allows Malvin to activate and interrupt.

He forms a shieldwall with his men and presents the Saxons with a more formidable target.

When Eahlbeard acts, he has a change of heart. Sensing the levy shieldwall may be a distraction, he sends the warriors and his companions to attack Broethr near the wagon train.

He directs Hrothgar and his warriors to deal with the levy.

This may prove a tougher fight than tackling Malvin's levy, but it puts the Saxons much closer to their key objective - the wagon train.


The Saxons emerge virtually unscathed. A small price to pay for driving two groups of Britons from the field.

Now that leaves the wagon train horribly exposed. Do they try to fall back behind Cadwallon's men, or should they attempt to make a run for the fortification?


Finally, Maethelweald is able to lead his warriors out of the woods and towards Cadwallon. The situation is looking grim and the Britons are in real danger of being overwhelmed by the Saxons.

Broethr leaves his broken warriors and heads off to join Cadwallon.

Cadwallon decides the best form of defence is attack. Making use of the cards Carpe Diem, Audacia and Hero of the Age he leads his companions and warriors to attack Eahlbeard's command.


Cadwallon stays in contact, but that was a disappointing outcome. This was an opportunity for the Britons to inflict enough casualties to see Eahlbeard's companions driven from the field, with the consequent blow to their force morale. Alas, it was not to be.


Cadwallon is next to activate. The Saxon's interrupt with play of the Step Forth card and Eahlbeard activates instead.

He rallies shock from his warriors.

The Saxons then play the Carpe Diem card for a flank attack. Eahlbeard directs Maethelweald's warriors to charge the group of British warriors that failed to make contact with the Saxons in the last combat.

They slam into the flank of Cadwallon's warriors. This could end very badly.

The Saxons then play the Audacia card for Eahlbeard. He leads the group of warriors to join the fight against Cadwallon.

This is where the losses suffered by the Saxons earlier begins to tell. Cadwallon's men stand up heroically to the attack and suffer only a single point of shock, but, in return, they kill another of Eahlbeard's companions and inflict more shock.


They lose their amphora and break. The sight of which drops Saxon force morale to three.

A second round of combat ensues.


And so it transpires. The Saxon onslaught is deadly, killing five of the Britons.


That was a considerable degree of carnage. While there is no doubt the Britons are weakened, the Saxons have also suffered losses. More significantly, now their force morale is very low. Can Cadwallon finally act and turn the tables? Hrothgar's group of warriors are still at full strength and suffering no shock. However the withdrawal of Eahlbeard and his force has left their flank exposed.
The British have a Carpe Diem card and now is the perfect time to play it. Cadwallon will launch a flank attack of his own. He turns his companions to their right and they plough into the flank of the nearby Saxon warriors.
Unable to respond in this round, the Saxons suffer three points of shock and lose one man. Were it not for play of the Armour Bright card they would have seen Hrothgar wounded.

The Saxons turn to face the Britons for the next round. There are no more casualties, but both sides see their shock mount.


They rout away from the Britons. The combined sight of a wounded noble and yet another group of broken warriors leaving the field is enough to bring Saxon force morale crashing down to zero.


Casualties for both sides ended up very similar, but the Britons have a pursuit card and so eke out a modest +2 victory. It's sufficient to add a Beggar's Bowl to Cadwallon's wealth. Perhaps more importantly, it will be some time before the Saxons are in any shape to raid again, which means they won't return before winter sets in.
A close-run thing indeed! Hurrah for the Home Team!
ReplyDeleteIt was indeed, it definitely didn’t look like it was going that way at one stage, but Hurrah! indeed, but then, I’m biased.
DeleteI've been following your campaign since the beginning, as usual, I do enjoy your excellent story telling and pictures. This set of rules look great as well, this might be time to start a new project ;)
ReplyDeleteThanks, great to hear you've been following along and enjoying them. We are finding these provide a very good game with plenty of narrative. The rules mechanics themselves are very straightforward and we've picked them up very quickly. I'd definitely recommend them.
DeleteThis is a great game. I have all the figures so will try it. Thanks for the inspiration. I do not have those excellent trees, who makes them?
ReplyDeleteThanks. As for the trees....I make them. They are based on Woodlands Scenics armatures. I have a post here on the blog on how I make them - you'll find it in the terrain section or by clicking here http://thetacticalpainter.blogspot.com/2019/11/making-trees.html
DeleteI read the tree article, excellent stuff! I think I can do that. By the way, I re-read the raid article on my iPad so I could expand the pictures as I read, even more exciting than just the text alone, with full screen pictures.
DeleteAnother splendid AAR…
ReplyDeleteA damn near run thing indeed… Well played the Britons.
All the best. Aly
Thanks Aly, the Britons seem to be on a roll, let's hope it continues!
DeleteYet another gripping battle report - fine job! I hope the Saxon player is not getting disheartened. He's had a tough row to hoe...!!
ReplyDeleteThanks Mike, fortunately Dave is not easily disheartened, although I think he found this one hard to swallow, given how close he came to victory. On the other hand, I'm feeling pretty good about the way my Britons are fighting off the invaders!
DeleteI have been reading the whole series of these games; very exciting stuff. I think the use of casualty figures adds quite a bit to the overall visual of what’s happening. The particular casualties that you were using are quite good, where did you get these? Thanks much, Bob.
ReplyDelete