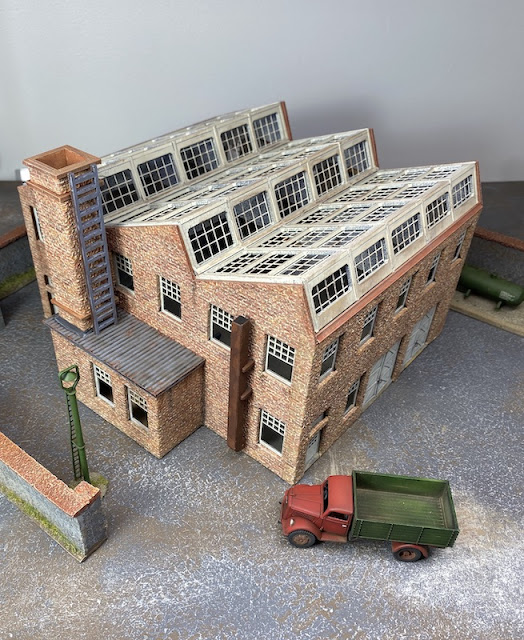
A couple of years ago I bought the Sarissa Precision large factory with the intention of adding it to my existing industrial buildings so that I could create a large factory complex or dockside area.

The industrial buildings I currently own, like the factory below, had all been scratch built using foam core. The intention I had for the Sarissa factory was to add something a little different to the mix.
I've really liked the idea of making a factory built of exposed brick ever since I followed the build of the magnificent Stalingrad table that Al Sheward posted in the Lead Adventure Forum. It was that project that inspired me to invest in about twenty A4 sheets of embossed brick wallpaper scaled for 20mm from a seller on eBay.

Up until now I've used it to embellish parts of a building rather than cover the entire structure. I've found it does a particularly good job of things like chimney breasts and while the house below is 28mm the brick sheets seem to work just as well in either 20mm or 28mm.

The Sarissa factory seemed perfect as the base for trying to use the paper on an entire building.
The first stage was to assemble most of the building. It was all fairly straightforward, although the roof needed a few dry runs before I was confident enough that I had it right and could apply glue.
The first thing I noticed was how much detail was lacking from the roof. My original thought was to use sheets of clear styrene sheet to add glass but I wasn't sure if that would work and so I decided to wait and see how the rest of the construction looked before settling on the solution.
As the entire roof can be removed as a single piece I envisage using it complete with roof for games in areas where there has not been prolonged fighting. Alternatively I think by removing the roof altogether and making up a number of bases with rubble to place within the roofless building it would work quite well as the shell of a bombed out factory.
The plan for the exterior factory walls was to have them entirely in a bare brick finish using the embossed printed wallpaper. This can be applied with a number of glues but I've found diluted PVA glue works well. The paper is fairly thick but it becomes softer and more flexible once the glue has been allowed to soak in for a minute or two.
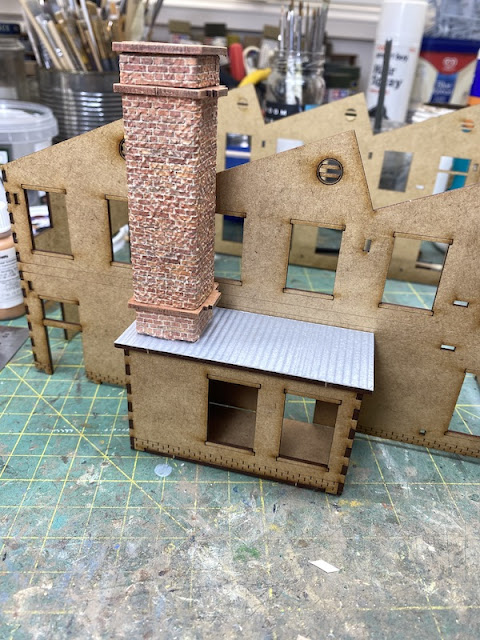
To make sure this was all going to work as planned I decided to do a trial run on a small piece and chose the factory chimney.
I find that allowing the diluted glue to soak into the paper makes it much more pliable and easier to wrap around corners.
The roof for the chimney area was plain MDF and so I embellished it by adding corrugated cardboard.
That gave me the courage to embark on the much bigger job of the entire factory exterior. The first thing was to paste an entire A4 sheet over the whole exterior of one side including the window and door openings.
Once the glue was dry I used a sharp scalpel blade to score diagonally across the window openings and wrap the paper around the window sills and edges and glue it on the internal wall.
It's a lengthy process and quite laborious (not to mention repetitive), but the results speak for themselves and I think this worked very well.
The factory chimney had a very visible join where it met the roof and a bit of Milliput worked well for flashing.
The window frames and doors come on separate panels of grey board which cover each of the entire internal walls. It was much easier to paint those panels with the window frames before installing them.
The corrugated iron roof needed painting and weathering to give it a more natural look.
Once I reached this stage it was easier to visualise how the whole thing was coming together.
The ladder on the chimney was painted and weathered before being attached.
The factory floor was just a sheet of plain MDF so to give it some character and show signs of use I engraved the surface to give the appearance of slabs of concrete and then added cracks in the same way.
I spray painted the floor with grey primer and then dry brushed it with household emulsion.
While I have no immediate plans for a very detailed interior I felt that at least the floor now gave the interior more detail.
The external stairs and gantry come as two separate parts which I assembled and glued together. There was a fairly obvious join and so to hide that I used coffee stirrers to give the appearance it was a single piece.
The internal panels with the doors were very two dimensional and so I added more features to give them more depth.
For this I used the offcuts and edges from sheets of Charlie Foxtrot roof tiles.
Small lengths of fuse wire were cut and bent to make door handles. It's funny how sometimes it's the smallest details that make all the difference.
These internal panels were glued into place after painting the doors and window frames, that way I avoided any accidental paint spills on the brick wallpaper.
The interior detail for the factory is limited to a gantry along one wall. Similarly the interior sides of the window and door panels have few features. I considered adding more detail but the amount of effort that required led me to decide to try a more impressionistic approach and just use paint (there are more than thirty windows after all!). It's not ideal but I do intend making machine tools and/or generators that can be placed inside on the factory floor and I'm certain they will draw the eye away from those rather simple interior features.
While I considered brickwork for the interior I realised that the roof would either not be able to fit if that was the case, or the constant removal of the roof would scratch away and damage the wallpaper.
The easiest solution was to paint the walls in a similar colour combination to the bricks. It's not ideal and the factory interior will certainly look a lot more basic than the exterior.
This brought me back to considering what to do with the roof.
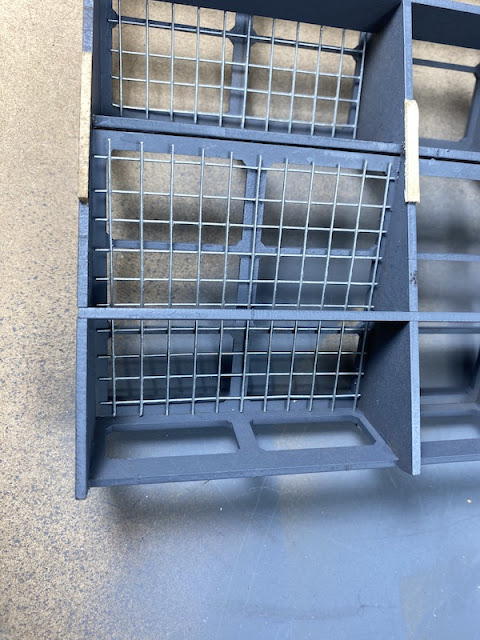
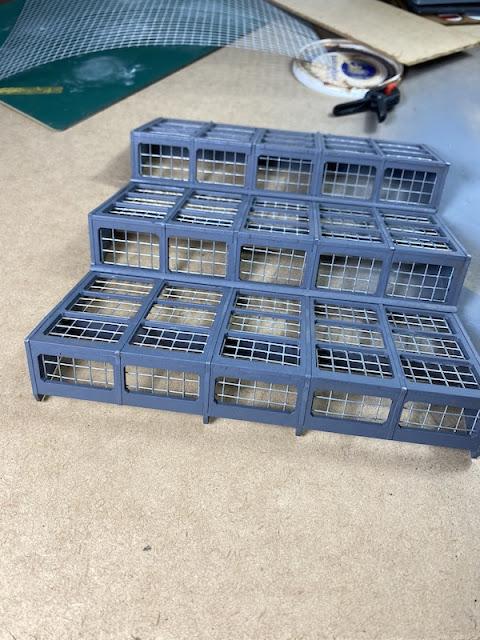
In the end I decided to add smaller window frames within the larger ones and for that I would use gutter wire from a local hardware store.
It was easy enough to cut to size and glue in place with super glue.
It was primed before painting and I've found this Rust-oleum primer very good for priming a broad range of materials including plastic and wood.
Once primed it was painted in the same colours as the doors and windows and then weathered.
I was really pleased with the way the wire added so much more detail to those windows for relatively little effort. I still have the clear styrene sheets to use for glass but I'm not sure I really need to use them.
I want to add a few signs to the building exterior but these will be temporary fixtures because I envisage using the factory in a number of locations, be it the docks of Singapore or Hong Kong; any number of countries in north west Europe - France, Belgium, Holland or Germany, and, also on the eastern front in Russia. So for now I'm calling it finished.
While it's a very different style building to my scratch built factory I don't see any reason why the two can't work together on the same table.
It's good to know that the old factory still has some life in it yet.
You can find a number of my other terrain builds and projects on the
20mm Terrain page here on the blog.
If you've found this post useful and would like to
Buy Me a Coffee to help cover some of the costs of running the blog you can click through at the link or on the tab in the right hand column of this page.


Superb - a most enjoyable post, thanks.
ReplyDeleteThanks Norm, glad you enjoyed it.
DeleteAnother brilliant "how I did it" there Mark. Class!
ReplyDeleteCheers Phil, appreciate that, nice to share a project with others.
DeleteGreat stuff, thanks for making the effort to document the build. Very helpful.
ReplyDeleteThanks Doug, it was one of those projects that as I documented it I did have in the back of my mind the thought that if this turns into a disaster it won't be something I'll be wanting to trumpet on the blog. Things turned out okay fortunately.
DeleteVery nice work and well worth the effort - for what it is worth, I think your home-made factory is every bit as good!
ReplyDeleteThanks, I have to admit I do have a soft spot for the scratch built factory and it has stood the test of time (although I must do something about the chimney, it still looks too much like the cardboard insert to a roll of kitchen towel that it once was!).
DeleteMark, that looks absolutely magnificent. It shows exactly what can be done to basic MDF kits with some thought, imagination and talent. It is really impressive.
ReplyDeleteThanks Carole, glad you liked it. I think that's the knack with MDF kits, the more you can do to break away from the obvious signs - features like the joins and the razor sharp laser cut edges - the less it looks like an MDF kit.
DeleteYour builds are very helpful in explaining how it's all been done but nonetheless the quality of the finished piece is soooo daunting.
ReplyDeleteThanks Rob, you're very kind, although to be honest this was less about skill and more about patience and perseverance. The embossed paper is the hero of the piece.
DeleteWonderful narrative and explanation of techniques used. Your approach allows you to change the building's location through signage, equipment and debris on site. Thanks for sharing your work.
ReplyDeleteThanks, I'll post an update once I've produced a few signs. I have a few ideas for those and will probably use the home printed decals similar to the way I put the decals on the Chinese commercial trucks that I made last year.
DeleteOooooohh, THAT's how you cut out the windows. I'll have to remember that.
ReplyDeleteGreat job on really dolling up the simple MDF shell. 😀
Thanks Stew. One reason I was slow to start this project was working out exactly how I'd solve the windows, but it was one of those things that came to me in a light bulb moment and finally I could get started. The paper really is the hero of the piece, once I'd worked out how it was going on everything else fell into place.
DeleteExcellent job- such a huge improvement on the kit.
ReplyDeleteThank you. It's not a bad basic kit but the embossed paper really takes it to another level.
DeleteVery effective!
ReplyDeleteThanks, I agree, well worth the effort to transform the basic MDF shell.
DeleteAwesome.
ReplyDeleteUniversal: Suitable from New York to Silesia and from Milano to Port Arthur.
Have You considered gluing magnets so change metal signs?
This is amazing and very inspirational. Thanks for sharing it in such detail!
ReplyDeleteGreat stuff - these changes really elevate the basic kit, and most of them seem achievable by someone of ordinary skill--especially if they have your excellent article to follow along!
ReplyDelete