
The first scenario of our Ruckzug campaign for Chain of Command is a delaying action at a small village in Northern France in late summer 1944. Can the ad hoc German kampfgruppe hold back the British advance and buy time for an orderly withdrawal, or will they be forced into a hasty and more chaotic retreat?
My under strength German platoon has managed to muster a few additional units for this first action (you can find an overview of the campaign and how support is determined in this earlier post). They've been joined by a sniper, a panzerschreck team and perhaps most significantly, a battle-hardened infantry squad who are classed as elite. I was hoping for armour, but under the circumstance I must make do with what is at hand.
The British have 6+2D6 support and that could well include tanks. In that context the panzerschreck team is a welcome addition given the only other German anti-tank weapons are short range panzerfausts. Exactly what support either side has is unknown to their opponent and won't be revealed until it appears in the game.
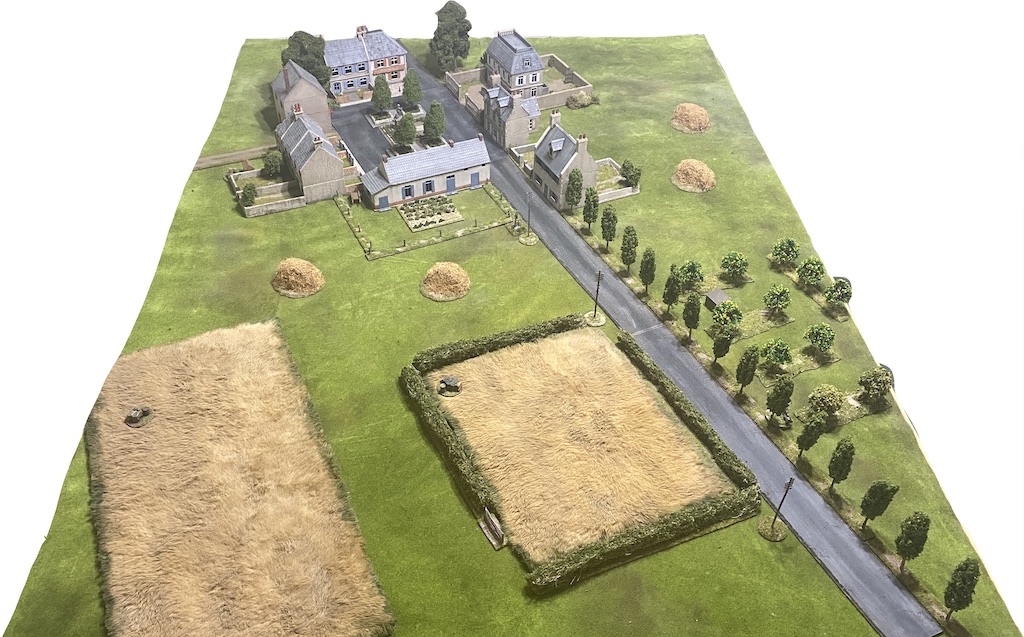
Both German and British start with their force morale at nine. The patrol phase plays out fairly predictably and jump-off-points are placed as in the picture below. As the Germans I opt for a cautious defence, my aim is to make a stand and then be in a good position to conduct an orderly withdrawal. For that I need to have all my units within 12" of a friendly jump-off-point.

As a reminder of the importance of achieving that orderly withdrawal the German trucks and cars have been placed at the rear of the table. In the event of a hasty retreat the number of vehicles available will play a key role in determining how successfully the troops and equipment withdraw. Technically these are further back in the rear and don’t need to be represented on the table, but as their existence plays an important role in the overall narrative of the campaign I like the idea of having them here.


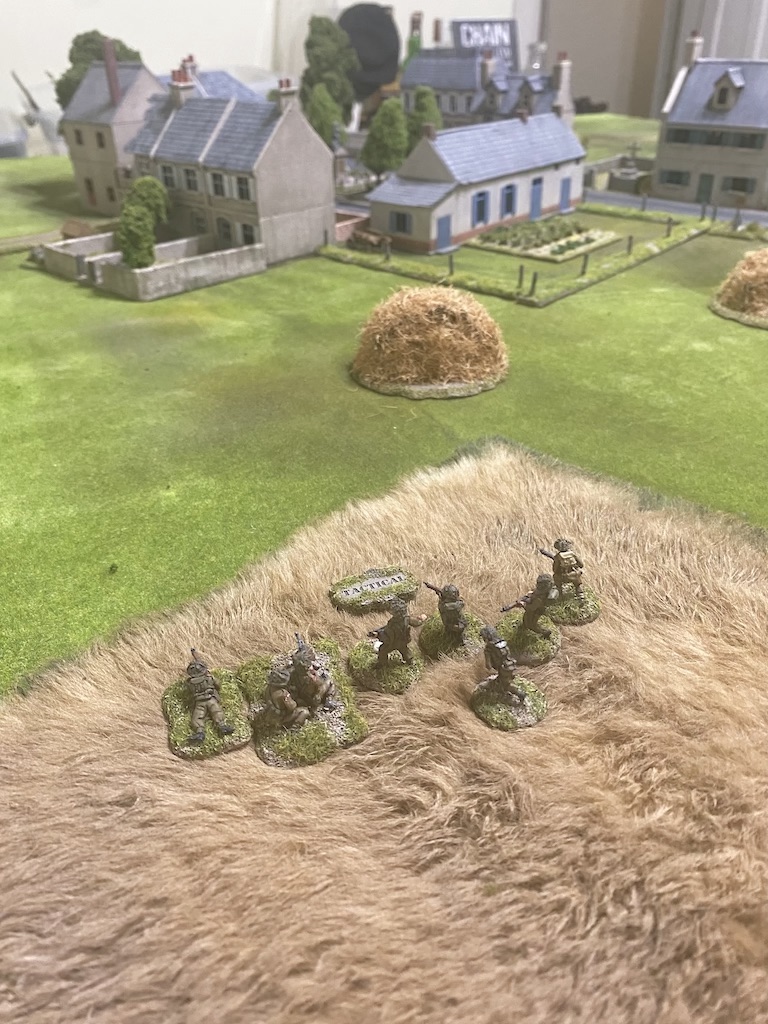
Before we start the British announce a pregame barrage. That's going to make German deployment a little less predictable. The British have the opening phase and waste no time deploying. An infantry section appears in the crop field on their left flank and takes up tactical positions.

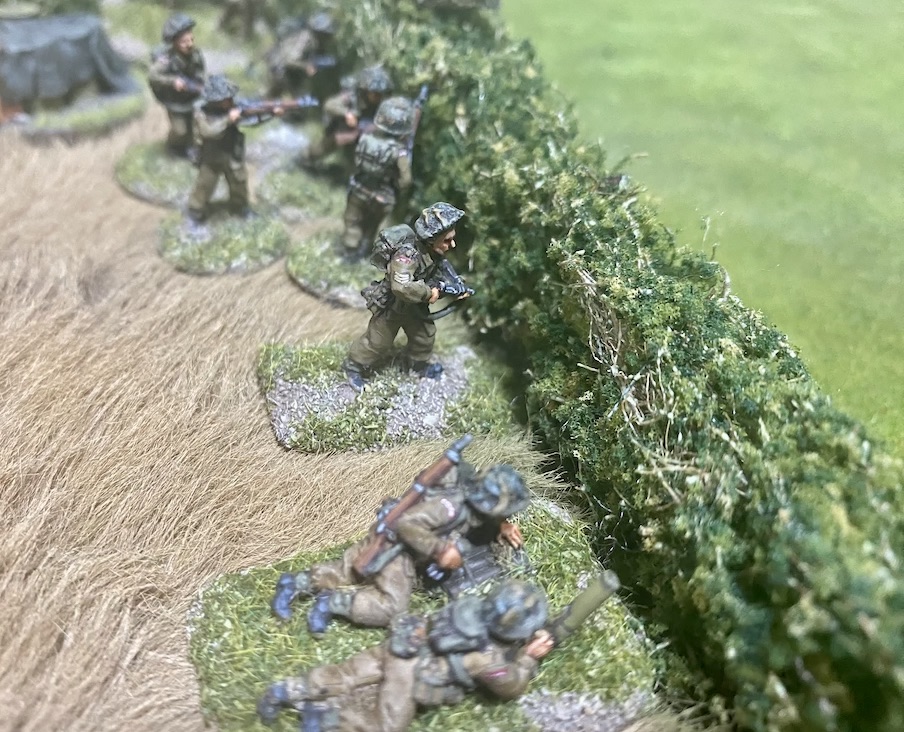
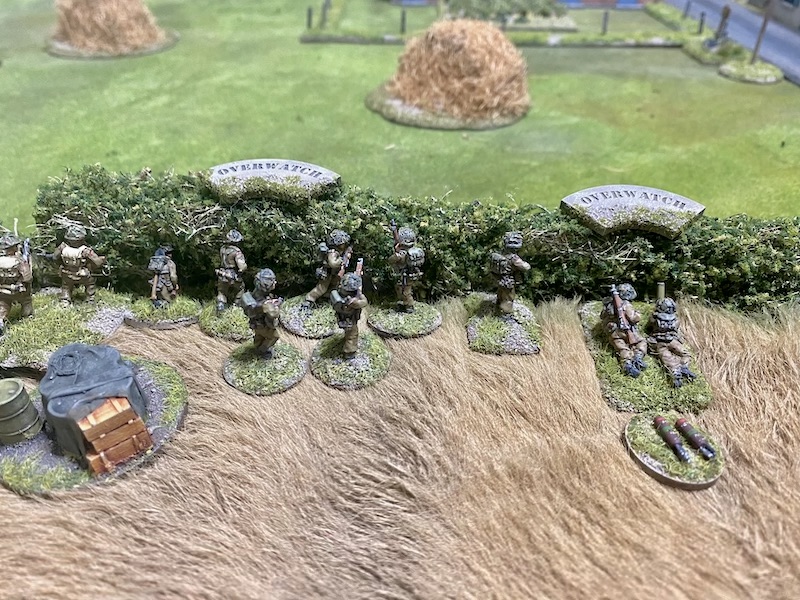
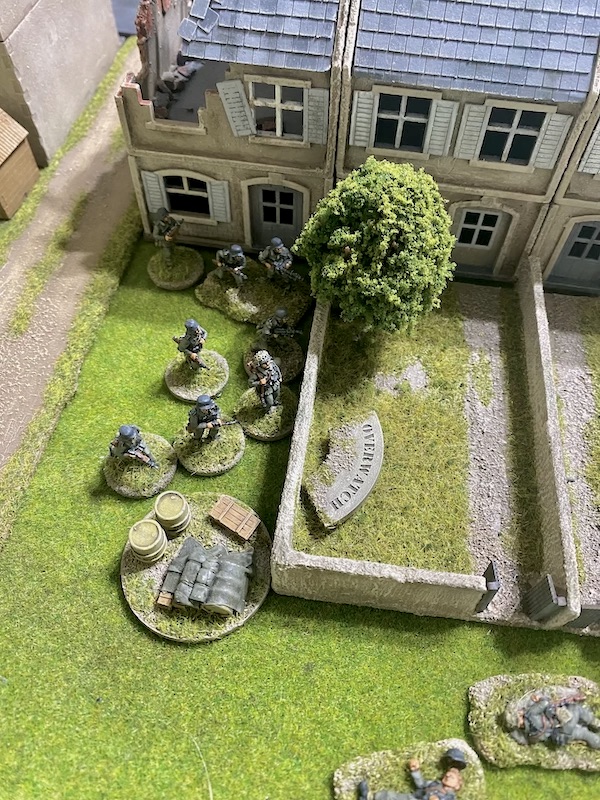
A second section deploys from the central jump-off-point and takes up overwatch positions behind the hedgerow.


It looks like the British intend to make an initial approach on their left flank.

A lone Universal carrier arrives on the other side of the road indicating a possible British move on both flanks.

The German command roll is 44211 but other than trying to deploy the sniper I see little advantage to revealing my presence and so let the phase pass.
The British platoon sergeant and the 2” mortar team join the section in the centre.
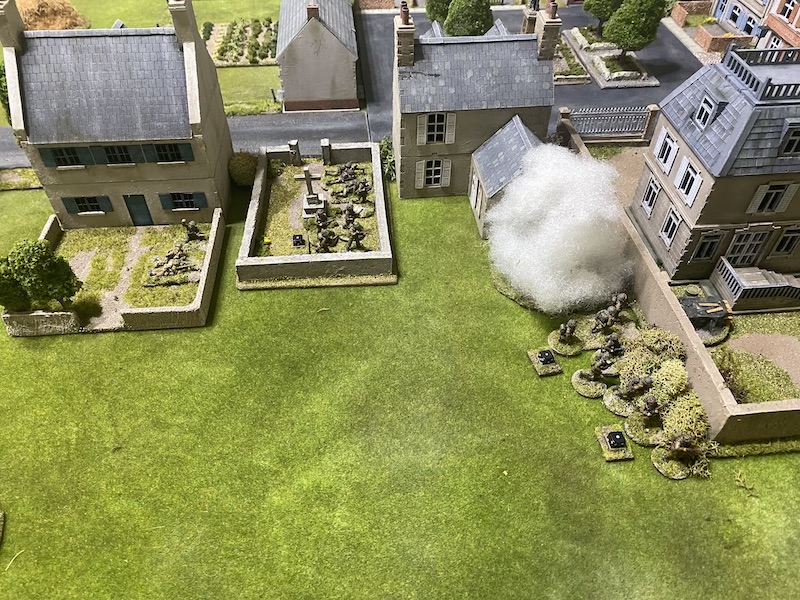
The mortar fires a round of smoke to the left of the village and it lands on target.

Confirmation, if it's needed, that the British have plans to make a move on this flank.

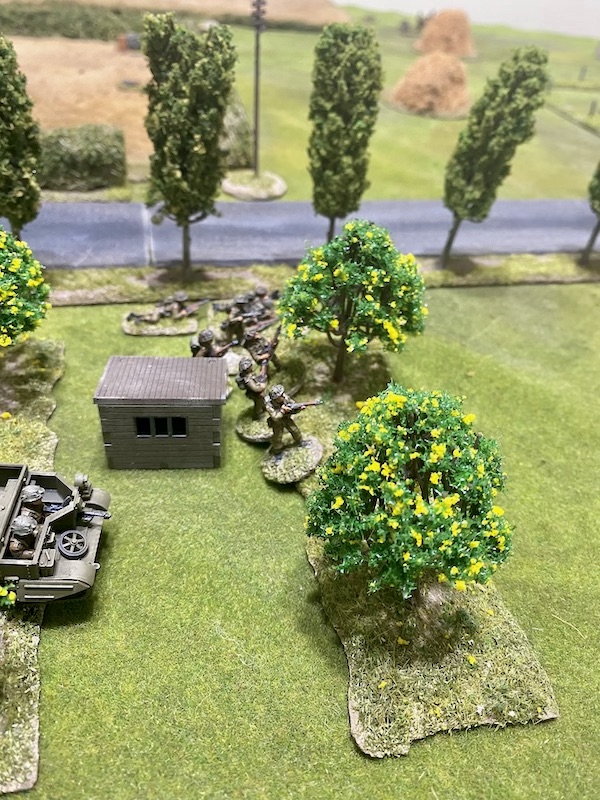
Meanwhile, across the road the carrier moves forward cautiously into the orchard.

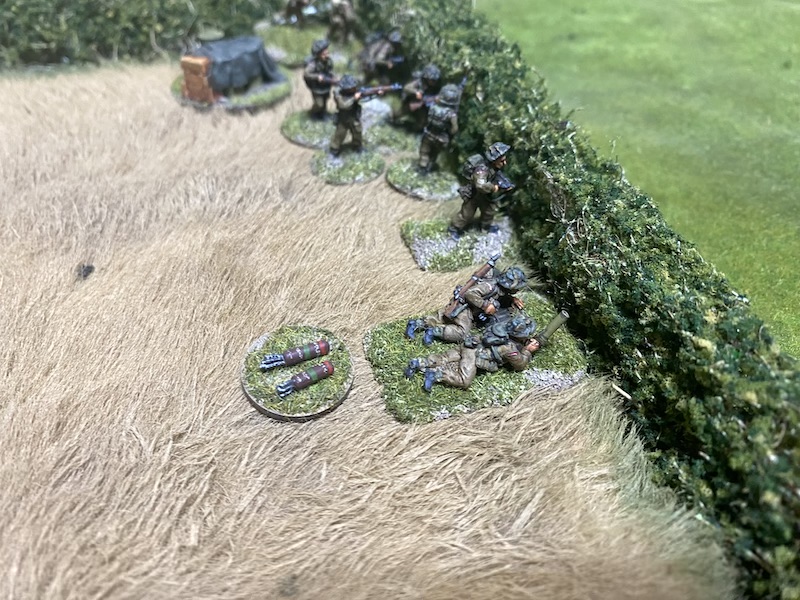
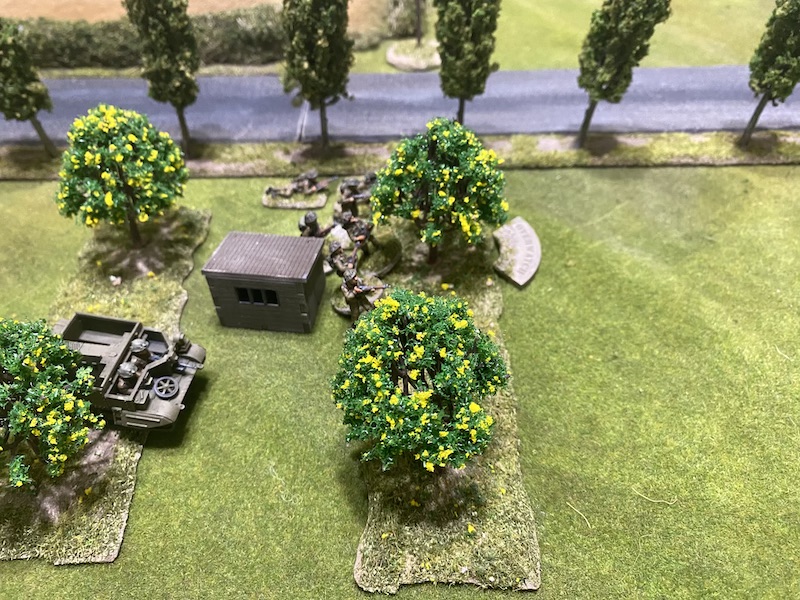
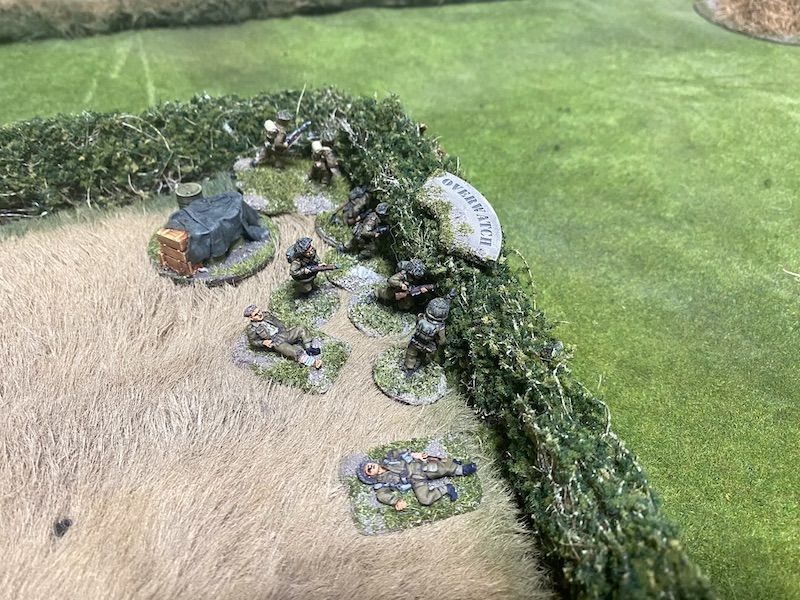
Until I can determine the main direction of the British attack I'm reluctant to deploy in any strength. However the sniper has a high nuisance factor and a reasonable chance of taking out a British NCO. So in the next German phase the team deploy successfully into the small graveyard at the edge of the village.

They target the rifle section behind the hedge.

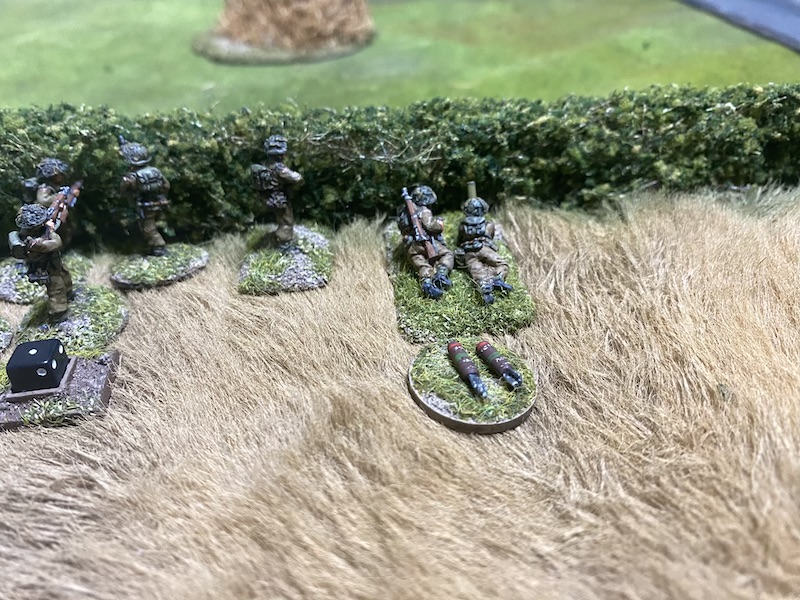
Their first shot misses and the British section, which is on overwatch, immediately tries to locate the sniper but has no success.

In the British phase the platoon sergeant orders the 2” mortar team to fire more smoke.

It adds to their previous round, putting up a screen that effectively blocks the line of sight from any of the buildings or garden walls on that side of the village.


The lone carrier continues making its way through the orchard. I wonder if the British are planning to advance down both flanks, or if the carrier is hoping to flush out German armour or anti-tank weapons? (If only they knew how little the Germans have of either!).

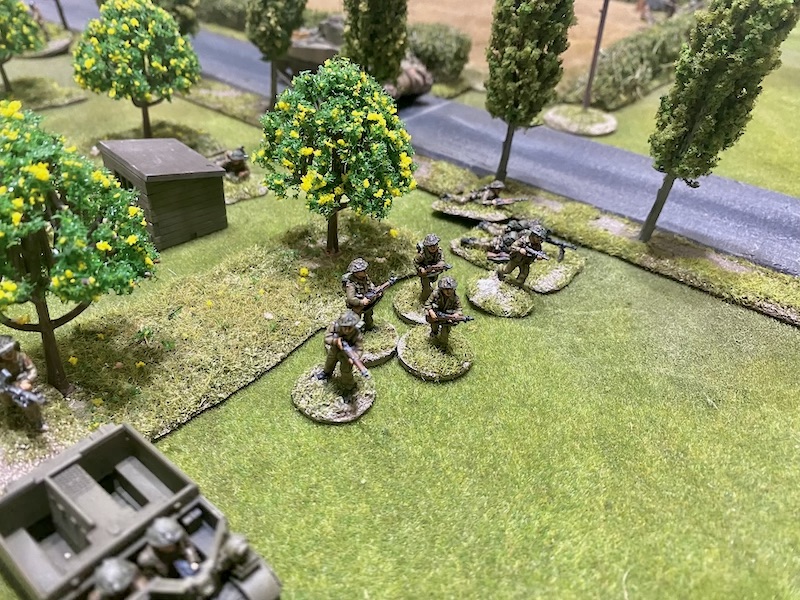
Taking advantage of the cover offered by the mortar smoke the section emerges from the crop field on the left flank.


The next German command roll is 66511, heralding a double phase. There are not many command options but the sniper continues to target the rifle section at the hedge.

Despite a hit, it results in no effect. Once again the rifle section search in vain for the sniper's location.

I sense the double phase could be a good opportunity to deal with the section advancing out of the crop field. If the Germans can deploy the MG42 MMG team into the open, beyond the walls of the back gardens, they will have a clear shot.
There is a risk involved, but for now the smoke screen would block the line of sight from the other British units behind the hedgerow. Any return fire would come only from the section in the open who would first have to endure two consecutive phases of machine gun fire. Unfortunately the pre-game barrage puts an immediate stop to that idea. The MMG team fail to deploy.
The following German command roll is 66432. As welcome as it is to have another double phase it feels too early in the game to take maximum advantage of the opportunities it might offer. That said, I still want to try to drive off that British section. I can't activate the MMG team but I can try to deploy one or more squads. However both attempts fail. The pre-game barrage is proving a fruitful investment for the British.
The Germans may be struggling to deploy but they continue to enjoy a run of luck on the command dice. The following command roll is 66431 and so I'm determined to stick with my plan. This time my perseverance pays off and the MG42 MMG team deploys successfully through the barrage.


Their opening burst of fire inflicts one casualty and a point of shock.

It’s a start, but just as I think things are going to plan they start to unravel horribly. The next German command roll is 66663 and it sets in train a series of events that dramatically change the situation.
The first is a random event that comes in the form of a stray mortar barrage. It couldn't fall in a worse place - it hits the British section in the open; the German MG42 MMG team and the nearest German jump-off-point.


I could attempt to deploy a squad but with the jump-off-point on this flank out of action I see little advantage deploying anywhere else, so with that the phase ends and perhaps more significantly the turn.
The smoke is removed and that leaves the MMG team out in the open. To make matters worse the mortar barrage prevents them from moving to cover in the next phase. How quickly the tables have turned.

On a slightly brighter note the turn end also signals the lifting of the pre-game barrage and frees up German deployment. It also sees the British section at the hedgerow come off overwatch.
The subsequent command roll is 63331 and the run of German phases will come to an end. Given all that's occurred I can't really see that I have benefited that much from the outcome.
The machine gun team can’t move but at least they can fire, which they do. This time it’s much more effective. Both British teams lose a man, which reduces the bren team to a single crew member, and each suffers a further point of shock.

In the British phase the platoon sergeant takes full advantage of the unexpected lifting of the smoke.


Their fire proves deadly and the crew suffer three casualties and a point of shock.

The sergeant is not finished with them yet. He orders the 2” mortar team to fire one of its few HE rounds.

It falls right on target and the Germans suffer yet another casualty. All that remains is a solitary crew member.

To make matters worse a Sherman rumbles into sight.

With a clear view over the hedgerows it too targets the MG42 team and hurls a round of 75mm HE in their direction.

The Germans are fortunate not to suffer any more casualties but the additional shock is enough to break what remains of the crew.


The following German command roll is 64111. That doesn't open up many options. For now the British section approaching the village is considerably less effective and with the Sherman and other British section able to cover that side with fire I decide to bide my time before deploying again.
The only German action is a shot from the sniper but so far he has yet to find his aim and he misses.

In the British phase the platoon sergeant organises the units at the hedgerow.
He puts the bren and rifle teams from the section and the 2” mortar team on overwatch.
Over on the flank the corporal reorganises his battered section. He transfers one man from the rifle team to the bren team to enable it to operate at full effect.

He then has the section seek better cover and they edge forward slowly taking up tactical positions.

Over on the British right flank the section moves forward cautiously to the edge of the orchard.
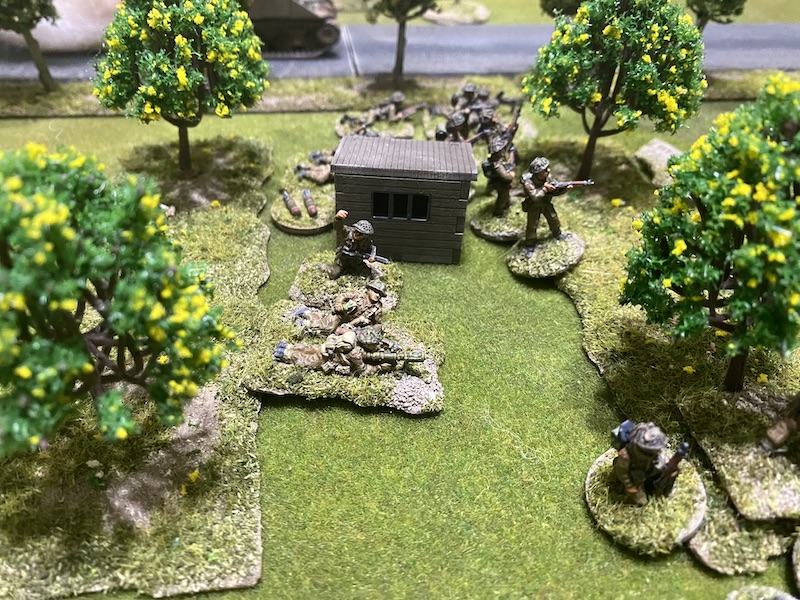
The following German command roll is 66542 and another double phase. Despite the fact the advancing British section is much weaker it cannot be ignored. I see the double phase as a second opportunity to drive it off. Given the possible return fire this is a job to be tasked to the hardened veterans of the squad who recently joined the kampfgruppe. They deploy behind the hard cover of the garden walls and open fire.

The British are fortunate not to suffer any more casualties but they now have enough shock to see them pinned down.

The section behind the hedge are on overwatch and return fire immediately, but they are engaging an elite squad in hard cover at effective range and it has no effect.

The 2” mortar team is also on overwatch and they fire a smoke round.


In the second German phase the squad redirects its fire at the rifle section behind the hedge.

The British suffer two shock on the rifle team and one on the bren team.

The British command roll is 65544 which brings them very close to their first full CoC die. The platoon sergeant rallies a point of shock from the nearby rifle team.


Their fire manages to inflict only a single point of shock.

They maintain their high level of accuracy and once again a smoke round lands on target.

The Germans now find they have lost all sight of the enemy.

The arrival of the British platoon lieutenant in the orchard sees a shift of emphasis to their right flank.

He puts both teams from the rifle section on overwatch.

In the German phase the squad's obergefreiter rallies off the point of shock.


In the British phase the corporal at the hedge rallies the remaining shock off the bren and rifle teams.

The sergeant then has the 2” mortar team fire smoke once again.

As has happened consistently, the mortar's smoke round falls with unnerving accuracy to complete a wide screen of smoke to cover the approaches to the village.

The sergeant then puts the nearby section on overwatch.

The platoon's PIAT team deploys into the orchard alongside the lieutenant. My initial reaction is to wonder why Dave has done this, but then I remember he has no inkling that I am without armour and he's just taking sensible precautions.

The Sherman starts up and moves slowly toward the road.


This time he finds his mark with a hit that results in a kill.

The platoon sergeant is the one who is hit and the wound is fatal. The sniper may have taken his time but finally he has struck an important target. The loss of the senior NCO brings British morale down two points to seven. That's a blow to the British in many ways and will complicate command and control for the platoon now that it is spread across the table. The nearby rifle team are on overwatch but once again they are unable to locate the sniper.

The next British command roll is 65544 and besides adding to the CoC die tally the inability to deploy more units gives Dave pause for thought. He decides to let the phase pass. The Germans find themselves in a similar situation when they roll 65554. It also increases their CoC die tally but leaves them with little else to do.
The following British command roll of 55541 brings them to two full CoC dice, but with the death of the sergeant they now have less options open to them when it comes to the command dice. As a fairly clear indication that the British are shifting the emphasis to the right flank the 2” mortar team moves along the hedge towards the road.


In the German phase the squad obergefreiter puts both teams on overwatch.
With every shot in front of the section on overwatch the sniper increases the chance of being spotted, yet the chance to damage British force morale by inflicting the loss of another NCO is just too tempting. The sniper directs his attention to the rifle team behind the hedge.

His aim has certainly improved and a rifleman is hit and killed. The rifle team search the village fruitlessly for the sniper who is now living dangerously and increasing the chance of being spotted with every shot.

In the following phase the British use their adjutant to ensure a successful deployment of another section into the orchard.


The platoon lieutenant then orders the 2” mortar team to move across road and join them.

The following German command roll is 65441. The only option is to activate the sniper but if he fires again the section at the hedge have an extremely good chance of spotting him and I don't think I can chance his luck any further. I could use one of my two CoC die to move him but I think I have better uses for those - like an ambush by the panzerschreck team or the tank hunter team. I decide to let the phase pass without doing anything.
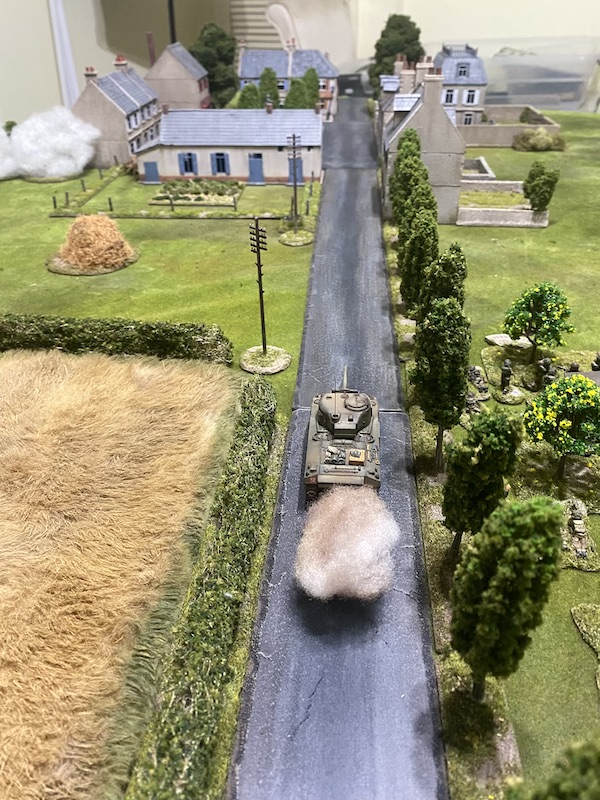
In the British phase the Sherman makes a bold move and drives flat out up the road at great speed.

The 2” mortar team continues to pump out rounds of smoke and fires from the orchard.


The British then begin their first tentative move forward out of the orchard with the carrier leading the way.

The lieutenant orders one of the sections to move behind it to the edge of the orchard.

He then moves forward with the PIAT team.

With British pressure building I decide to throw caution to the wind and in the German phase the sniper fires again.


The Sherman then moves slowly into the orchard to add the weight of its support to the move on this flank.

The commander places the gunner on overwatch.

A command roll of 66633 will see the British run of phases continue but like the German run of phases the turn end will prove a mixed blessing. First the corporal on the left rallies two points of shock to ensure that when that turn end comes the section will no longer be pinned.

Over on the other flank the section at the orchard seizes the moment to move at the double towards the nearest garden wall. With another phase to come it looks like the British are going to have more luck breaking into this side of the village.

With that the turn ends. The mortar smoke is removed and the MG42 MMG team rout off the table. That puts an end to a rather sorry episode and the only consolation for the Germans is that the machine gun itself has not been lost.


The platoon lieutenant orders the 2” mortar team to fire smoke across the table and provide cover for the section on the left flank.


The lieutenant sends the second section towards the chateau and he follows them with the PIAT team.


The subsequent command roll sees the run of phases come to an end but it still allows the British to maintain their tempo. First the 2” mortar team drops a round of smoke in front of the chateau.


The lieutenant then begins barking out orders.


Lastly, the lieutenant moves with the PIAT team up to one of the garden walls. In no time at all it seems the British have broken into the outskirts of the village.

In the German phase the sniper directs his aim towards the PIAT team and the lieutenant. While the British seem to be in the ascendancy the loss of their lieutenant could change that dramatically. Unfortunately the sniper misses.

Over on the other side of the village the squad targets the British section in the open.


Before they can fire Dave uses a CoC die to interrupt and the section slips behind the smoke leaving the Germans without a target.

In the following British phase their aggressive push into the village continues unabated. One section moves into the graveyard and makes contact with the sniper who makes a hasty exit off the table.

The lieutenant and PIAT team follow close behind.

The other section moves at the double towards the tall wall surrounding the chateau. They move quickly and go far enough to close down the German jump-off-point.

The section in the centre moves along the hedgerow and towards the road. It's obvious where the weight of the British attack is now falling. The problem for the Germans is how best to respond, especially given the jump-off-point on that flank is currently out of action.

By now the section on the left must be feeling abandoned! As a precaution they take up tactical positions behind the smoke.

The next German command roll is 66663 and I think that must be the first time I've seen quadruple six occur twice in the same game. Once again the random event is a mortar barrage but this time it falls harmlessly on an empty sector of the battlefield.

Before the German jump-off-point can be captured I decide to use one of my two CoC dice to move it back to a safer location.

It's placed on the other side of the chateau but in a position where the Germans can still deploy into the chateau should I choose. Given the British threat on that flank I'll need to find a way to hold them up and defending that building seems the best way to do it.

The impending turn end will see the smoke clear and I'm determined to deal with that section on the flank once and for all. The obergefreiter leads his squad back over the wall.

While that puts me in a position to drive off that British section, there is a far more important matter that needs attention. I have a CoC die and have been keeping it aside for a possible ambush by the panzerschreck team. Now I seize my opportunity.

The ambush allows the team to deploy 12" from the jump-off-point.

That puts it close to the Sherman and perhaps more importantly with a chance to place a shot in its side armour.


That's exactly what I roll. The panzerschreck rocket slices through the side armour with an AP strike of nine. There is no question of the outcome and with three net hits the Sherman is knocked out. Despite the increased likelihood of it burning it doesn't explode which allows the crew to bail out.


Nonetheless that's enough to bring British force morale down to six. With its work done the panzerschreck team disappear as quickly as they came.
That has put a completely different complexion on the game. Once British force morale drops to five the Germans will be in a position to make a voluntary withdrawal (assuming all units are within 12" of a jump-off-point, which they currently are). More significantly, the loss of the Sherman deprives the British of a very powerful piece of support for their attack and probably puts the odds back in favour of the defenders.
With that the phase ends, as does the turn. The mortar smoke is removed as is the tactical marker, which leaves the British section very exposed to German fire once again.


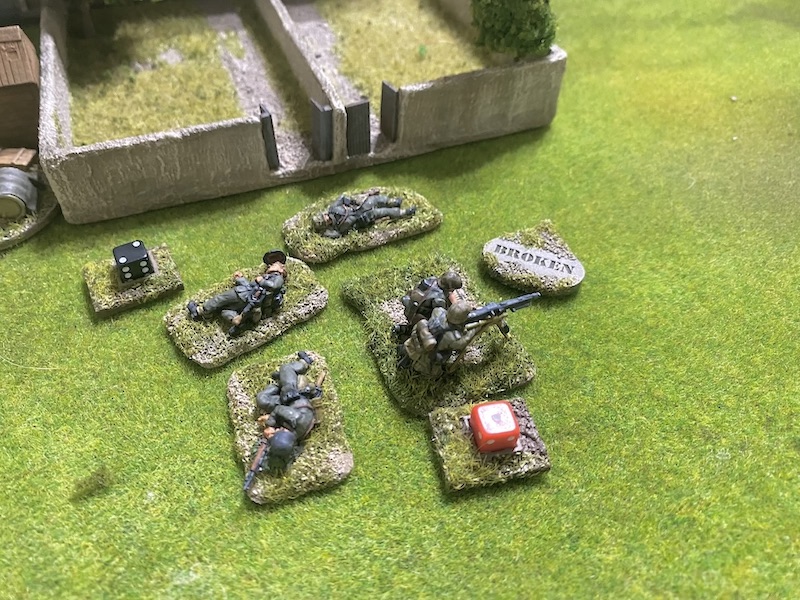
Caught in the open with no cover the British suffer two casualties. That reduces the section to the corporal accompanied by a single man in each team. An additional three points of shock is enough to see those surviving remnants of the section break.


That was a sudden end to an intriguing game, one that was decided in a few critical moments. Prior to the game I was a little disappointed with the German support rolls. Had I rolled higher they could have been equipped with armour or heavy anti-tank weapons and so the arrival of a sniper and panzerschreck team felt underwhelming. In the end they were the two units that most contributed to the scenario victory, with the sniper killing the platoon sergeant and the panzerschreck team knocking out the Sherman. Both those events prevented the British from concentrating their force to maximum effect.
In hindsight Dave regretted moving the Sherman. He felt it should have remained at the back of the table dealing with the German squad on the flank and clearing a way for the section to advance into that side of the village. I suspect he was right. Moving it forward to support the right flank exposed it to the successful ambush by the panzerschreck team. Once the Sherman was knocked out it was hard to see how British infantry alone could clear the village without further losses.
Force morale ended with the Germans on eight and the British on six which means the Germans are able to recover two of the casualties in the MG42 MMG team, patch them up and return them to duty. Of the remaining two casualties, one is lost permanently and the other is wounded and will miss the next game. British casualties were mainly from a support section (the one that attacked from the crop field on their left flank), which lost five men. The only losses from the core platoon were the platoon sergeant and one rifleman.
That scenario victory gives the Germans their best opportunity to withdraw in relatively good order. It will be a retreat rather than a rout! All troops escape in a timely manner to fight another day but I roll to see if the two trucks and cars also get away. Unfortunately one of the cars suffers a breakdown and is abandoned, but the remaining vehicles make good their escape.
The campaign is won by the side with the most victory points and for this scenario victory the Germans will receive D3 points. Unfortunately I roll a 1 which gives me only the minimum number of possible points, but I can't complain a victory is still a victory.
All things considered from the German perspective that's a good opening to the campaign. They now fall back to the next map which is rural farmland. Without time to prepare a defensive position this may prove a more difficult proposition. Having lost the scenario the British will have access to 6+3D6 support for the next game and they could pack a powerful punch. The Germans have bought themselves some time with this victory and that might allow the kampfgruppe to gather a few more support units as they retreat, but exactly what that might be remains to be seen.
You can follow what happens in the next game in this post.
If you've enjoyed following along and would like to Buy Me a Coffee to help cover some of the costs of running the blog you can click through at the link or on the tab in the right hand column of this page.
You can find links to all the games in this campaign and several others on the Chain of Command Campaign AAR Page (link from here or at the top of this page).
Highly enjoyable. Just where do you purchase dice with that number of sixes? As always a thoroughly entertaining report which always makes me think what I might have done differently. Use a CiC dice to move the sniper? Perhaps. Looking forward to the next one.
ReplyDeleteThanks Doug. Yes a crazy number of sixes, especially two command rolls with four of them. Hardly your run of the mill CoC game. As for the sniper I wasn't overly concerned as he doesn't die when contacted he's driven off, so not lost. I was sorely tempted but decided he'd done enough for the day and I'd use the dice for something else.
DeleteI do enjoy these, nice to see you back in action! The terrain, the minis, the action, it all comes together for an enjoyable read. Thank you for taking the time to put this together!
ReplyDeleteThank you, that's great to hear. I do enjoy writing them, it's a bit like playing the game over again.
DeleteThis report was well worth the wait. Another game which could have gone either way until the very end. Thanks for sharing.
ReplyDeleteThanks Dennis, it's great to be back playing a campaign and writing up the reports.
DeleteA grand return to the campaign season and a fine comeback for the Germans after the initial phases things did look bleak. Your support units certainly turned it around, plaudits must also go to the chappie firing the 2" mortar too.
ReplyDeleteThanks Phil, I didn't realise how much I've missed doing these until we started this campaign, I think it's one of the longest gaps between campaigns for us (I think we managed more during Covid!).
DeleteWonder if you'd have let him use the PIAT to breach the high wall?
ReplyDeleteNot sure the exact provision in the rules for that, although firing a PIAT (or any other infantry AT weapon) at a non vehicular target does require an activation by a senior leader. Is there much evidence PIATs were used in this way? Of course, had the Sherman survived it could have done that job just by driving through.
DeleteMy old work colleague was a paratrooper they used one in Greece to silence a sniper.
DeleteFrom the wiki on mouseholing so usual caveats
Delete"During the Battle of Ortona in 1943,[4] the Canadian Army, which gave the tactic its name,[5][6] used it to great effect, breaching the walls of buildings (houses in Ortona shared adjoining walls) with weapons such as the PIAT or Teller anti-tank mines"
A PIAT has HE and can be used to target infantry (as long as it’s ordered by a senior leader), but damage to a building by HE is only likely to occur if the hit roll contains 3 sixes or more. PIAT HE is only 2 dice, so not enough to cause a structure to become unstable or collapse. Breaching a wall is a slightly different thing, I know. The British could climb over the wall but it takes all their move actions, so they’d want to do that somewhere the Germans on Overwatch wouldn’t see them.
DeleteYeah, it's a "play the period" thing. Come to some sort of gentlemens agreement, I suppose
DeleteThanks. Another great report. And nice to see the Brits on the table.
DeleteWRT the PIAT being used as a fire support weapon, I would refer people to Mathew Moss’ excellent book The PIAT. Here he refers to troops from 78th Division in Italy firing some 600 rounds from a single PIAT. Indeed he says the Ordnance Board were concerned that such heavy use would wear out the spring. Later, Mathew also mentions a PIAT failing to knock out a Tiger II near Caen in early August 44 despite hitting it 3 times. Let’s hope the Brits don’t come up against one of those beasts in a later game.
BTW, Mathew produces the excellent uTube channel Armorers Bench.
A very enjoyable report on an interesting game. Look forward to the next instalment.
ReplyDeleteThanks
Matt
Thanks Matt, glad you enjoyed it.
DeleteFantastic looking game and very entertaining report!
ReplyDeleteTerrific stuff, a really enjoyable read and, as usual, a lovely-looking table.
ReplyDeleteThanks Carole, first use of a new game mat (well new to me), it's an old GW mat that I bought off someone at the club. Works well with my flocking I think and ties all the terrain together nicely. I'm very happy with it.
DeleteA great game, providing a fascinating narrative, which is one of the reasons I think CoC is a brilliant rule-set and one I've not tampered with or tweaked which is saying something.
ReplyDeleteThe outrageous turns of fortune add a real chance element which beautifully replicates the limited (non-existent?) control over circumstance that any platoon commander would face. I particularly liked the way that rash moves were punished e.g., the MMG moving out into the open and the Sherman rushing in where armour should fear to tread.
This made my morning, can't wait for the next instalment.
Thanks Rob, I don’t think I’ve seen this many sixes in command rolls in a game before, but the fortune swung both ways and as a result the game swung back and forth with both sides having the upper hand at various moments. I often think this makes you think about managing the uncertainty as much as trying to execute a plan.
DeleteAs AAR'S go, this one somehow works for me better than any I had read using these rules. I think the limits for both sides made for a more thoughtful game; except for the Sherman which did drive up too fast.
ReplyDeleteThanks, glad you liked it.
DeleteWelcome back! What a great AAR to start off with! I am looking forward to the next one. I plan to modify this campaign to use my American Kit (I only have US and German) later in the in the year.
ReplyDeleteThanks Dick, it’s good to be back playing a campaign and writing up the games. The campaign should be perfectly adaptable for other forces. It’s an interesting challenge for both sides.
DeleteBrilliant as always. The account makes the use of the rules clear, and I like how you explain your options. It brings home the struggle both sides had in making best use of what they had.
ReplyDeleteThanks, that’s great to hear, I try to explain not just the actions but why I’m taking them so I’m pleased to hear that comes across when reading them.
DeleteGripping report and quite a surprise ending. I've never read or played the rules, but this report really drives home why people are so into it!
ReplyDeleteTruly excellent report, and thank you for putting it together for us.
ReplyDeleteThe concept of this campaign seems like it would have a lot of places that it could be used... Germans trying to prevent fleeing from the Soviet Union, in Sicily, or up Italy? Americans in the Philippines? You would just need to adjust the platoons and charts to suit (which of course may be difficult)
Beautiful table as always and another great AAR, with signs of a very exciting campaign shaping up. Looking forward to seeing some of the twists and turns of the German supports, as well as some of what Dave might have to throw at them with a fairly open shop and lots to spend!!
ReplyDeleteGreat AAR as usual. Always a favourite read and an example for others to follow if honest (and not too gushing). You manage to balance describing the game mechanics and the story on the tabletop. Thanks for taking the time!
ReplyDeleteFantastic AAR, absolutely loving the blow by blow account. A quick question, when the 4 6's happened and the random mortar attack happened did you end the turn and then apply the random mortar attack or did the mortar only fire for one round and then the turn ended?
ReplyDeleteThanks. From our reading of the rules we worked backwards from the four 4s. According to the rules the mortar barrage affects the current phase that’s about to be played, so that happens immediately. Three 6s then means the turn ends at the end of this the current phase (as it usually does when rolling three 6s), in other words you play out the current phase and at the end the turn ends and all the turn end effects come into play. Last, two 6s means the current player has the next phase. Hope that makes sense.
Delete