
The previous game took place during Campaign Turn 3 and the Germans have made good progress in the campaign so far. So much so that they have advanced far ahead of the division's armour, which has been waiting for engineers to complete a bridge so they can cross the river. That success has given them a bit of breathing room and so I've decided to pause for Campaign Turn 4 and resume the offensive on the following campaign turn which will allow the armour to catch up with the infantry.

The pause takes some of the pressure off the Dutch and leaves the Germans less time to reach the bridge at Map 6 before Dutch engineers can arrive and attempt to demolish it. However I think once the armour catches up with the infantry the Germans can make up for lost time, so I'm prepared to run the risk.
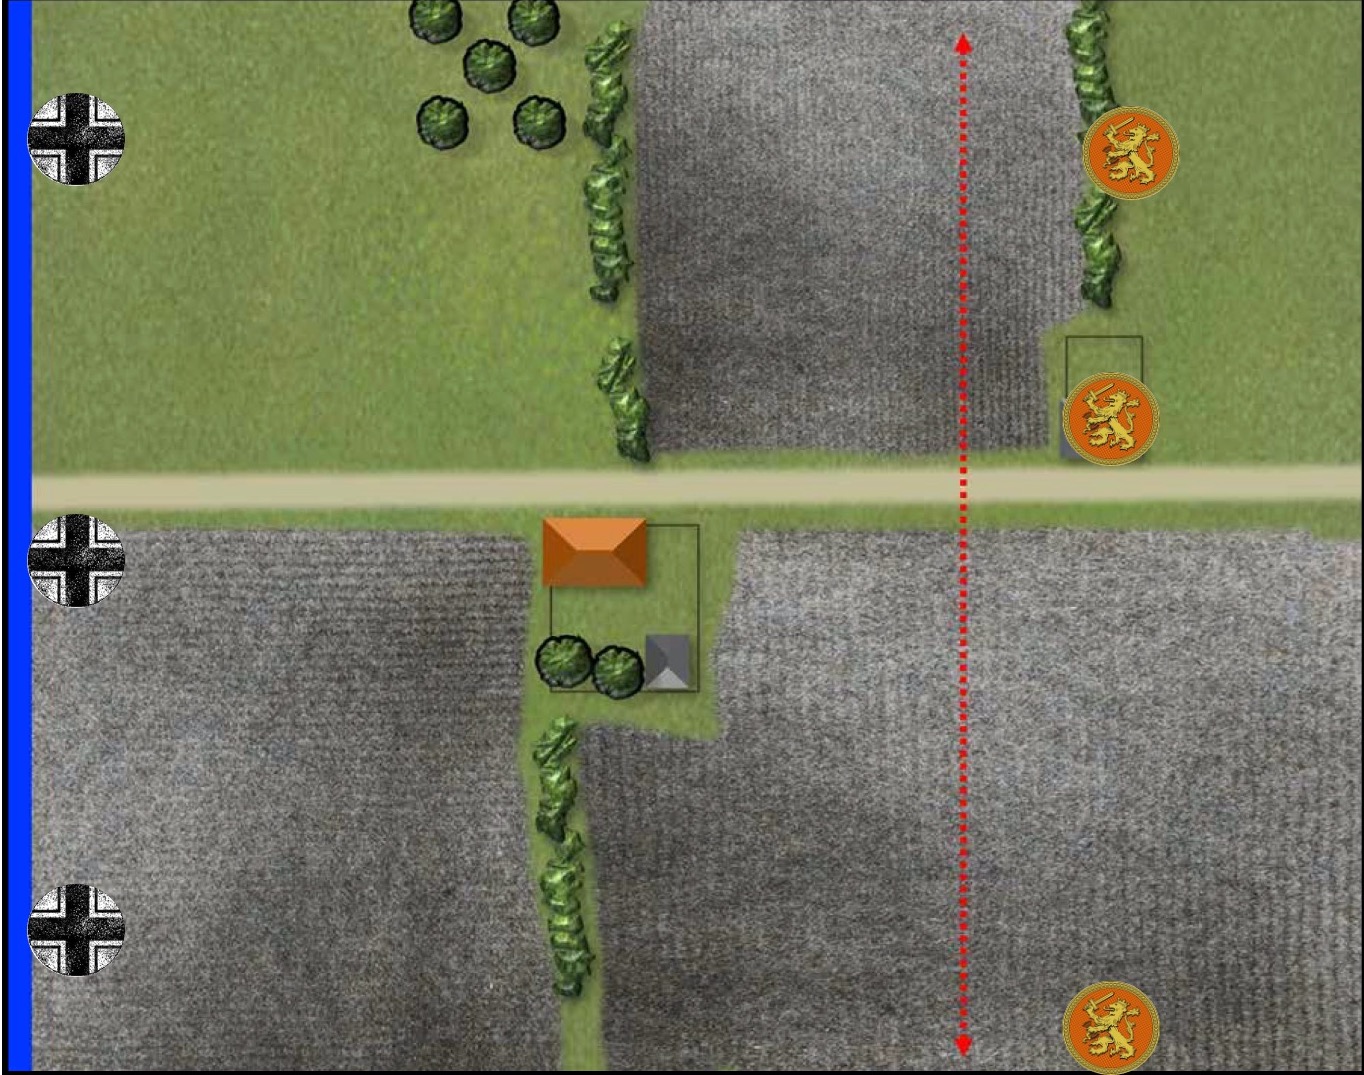
This now brings us to Campaign Turn 5 and Map 5, the last map before the Germans reach the important river bridge. This is a Blitzkrieg scenario from the 1940 Handbook. To win the Germans must exit two units off the Dutch table edge, however if the Dutch can play two full command dice before that happens they are assumed to have called up significant support and prevented a German breakthrough.
Time is of the essence and while the Germans can use one full CoC dice to reduce the defender's CoC point total by three they will need to keep up their momentum if they want to make a successful breakthrough.

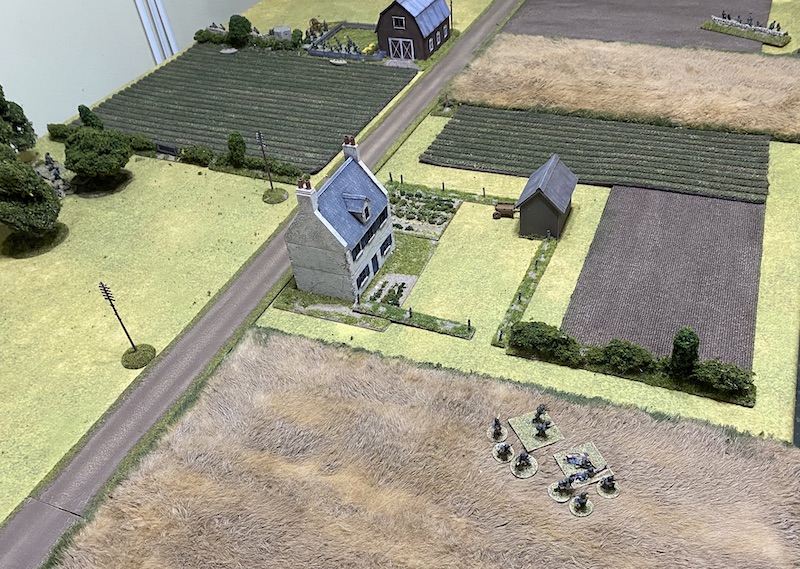
The Germans will be coming from the blue area at the left of the map above. They must cross fairly open terrain and this is a good place to exploit the faster movement of the division's armour. My plan is straightforward - my infantry will probe the defences and be ready to deal with any anti-tank weapons while the armour will look to penetrate the Dutch line and make a breakthrough.
To support the armour the Germans will call on their 3rd platoon which has yet to see action in the campaign and is at full strength. The Dutch have no fresh platoons to call on and will use their 1st platoon which has taken a number of casualties and lost eight men.

Despite their success to date the Germans will start with their Force Morale at eight while the Dutch will be at nine. In the patrol phase the Germans focus their effort on keeping the defenders from holding a forward line and although they have only one free move they manage to do that successfully. Given the terrain it's no surprise the German jump-off-points are at their table edge.
We make our support rolls and selection secretly. The Germans receive 3D6+2 and for the first time in the campaign will have access to the full range of support options. The dice roll is ten and so they have a total of twelve. I've decided to make this a very aggressive attack with armour, hoping I can achieve a quick breakthrough by exiting two tanks off the table. For this I will call on a platoon of three PzI. A pre-game barrage will aim to disrupt or slow Dutch deployment and lastly a pioneer mine clearance team will be on hand in case of any obstacles.
The Dutch receive 2D6+1 support and Dave rolls an eight. This gives them nine, plus another seven for the difference in force ratings, for a total of sixteen. As the Germans could call on Stukas he selects AA machine guns, little does he know they won't be needed, on the other hand he calls on a 47mm Bohler AT gun as he rightly predicts he will face German armour. The Dutch will also have an Adjutant, a support mitrailleursgroepen, an entrenchment and a Kazemat.
Before we begin the Kazemat is placed behind the hedge on the Dutch right flank.


The Dutch start with the initiative and their first command roll is 65554 immediately giving them three points toward their first CoC die. If they continue accumulating CoC points at this rate the game could be over before it's started.
In the German phase I decide to begin a cautious probe forward with the infantry before the tanks appear. One squad deploys tactically on the left.


The Dutch gain another CoC point in their phase and a mitrailleursgroepen successfully makes its way through the barrage and deploys in the Kazemat and entrenchment. Dave doesn't want to risk any possible delays caused by the pre-game barrage and is prepared to show his hand early.


The Germans press ahead and the squad on the left moves at the double towards the woods.

The ploughed field prevents the other squad from advancing as quickly but they too move forward.


The following Dutch command roll is 55422, which means they have already acquired their first CoC die. That's a worry. I feel as though the game has barely started and yet the Dutch are halfway to winning the scenario. Content with how things are going Dave decides to hold off on any further deployment.
The German command roll is 66543 and the double phase could prove very handy given the time pressures. The first PzI arrives on the road.

The schützen platoon's second in command, the Feldwebel, deploys on the left. With no enemy in line of sight he is able to rally the shock off the squad.


The subsequent command roll is 65311. Ideally I'd like to bring on another tank but I don't like seeing my Feldwebel so exposed in that open field, he makes a very inviting target. I decide to play safe and have him make his way quickly to the woods.


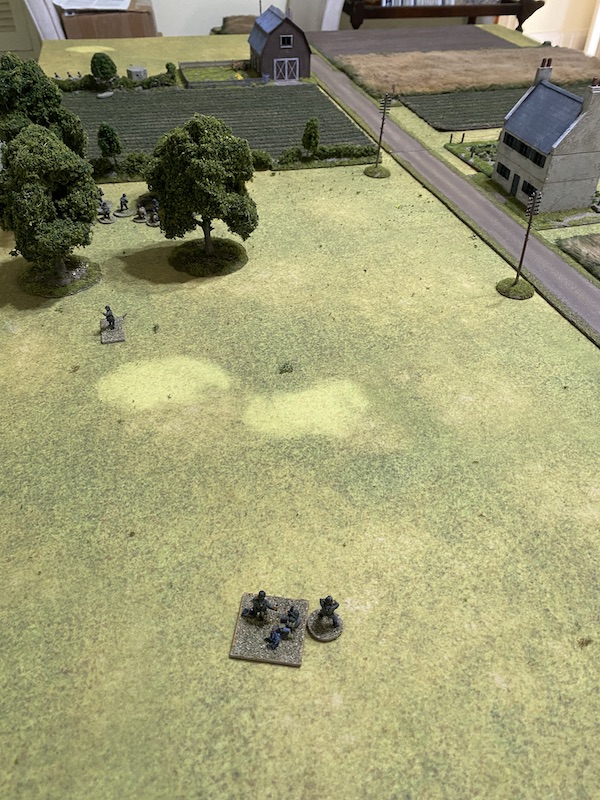
The platoon's 50mm mortar team deploy on the left. It is hardly the most potent of weapons, but the mortar's long range might come in useful suppressing an anti-tank gun should one appear.

The next Dutch command roll is 66651, which will see the the German pregame barrage lift when the turn ends at the completion of this phase. As if that isn't bad enough, their tally of CoC points also continues its remorseless rise.
An equally ominous development is the appearance of a 47mm Bohler anti-tank gun which deploys alongside the Kazemat.


Not a great deal happens at the turn end other than to remove overwatch markers from the Dutch and note that the effects of the pregame barrage are no longer in effect. In the second Dutch phase they acquire yet another CoC point and now have two points towards their second CoC die. I'm some way from acquiring my first so at this stage there is little I can do to decrease that total.
The platoon Luitenant joins the mitrailleursgroepen's Lewis gun in the Kazemat and puts the whole squad back on to overwatch.

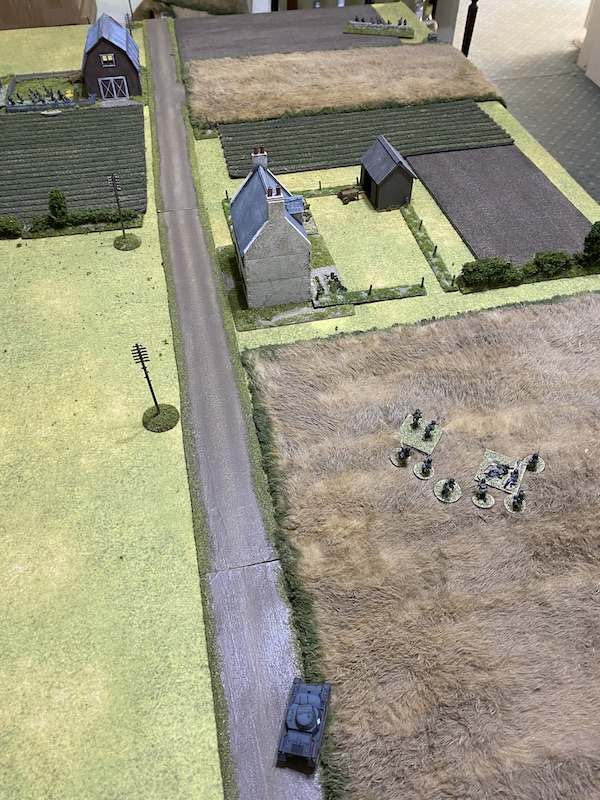
A support mitrailleursgroepen deploys into the back yard of the barn.


A third mitrailleursgroepen deploys entrenched in an open field on the Dutch left.


The German command roll is 55542 and those CoC points are very welcome, but it does limit my overall command options.
The squad on the German right moves towards the hedge. I want to bring on the tank platoon commander and need the schützen to clear the line of sight so the tanks can engage the entrenched infantry.

The tank platoon commander arrives in his PzI.


In the Dutch phase the mitrailleursgroepen target the mortar team once again. The sergeant uses the mitrailleursgroepen characteristic to extract maximum fire from the Lewis gun.
The mortar team are lucky to escape with a single point of shock but I need to find a way to move them out of danger or suppress those entrenched Dutch.

The German command roll is 65552. That's a double edged sword because it does give me the full CoC die that I need, but it severely limits command options. First things first. I use the CoC die to reduce the Dutch CoC points by three, leaving them with a total of five CoC points and buying the Germans some additional time.
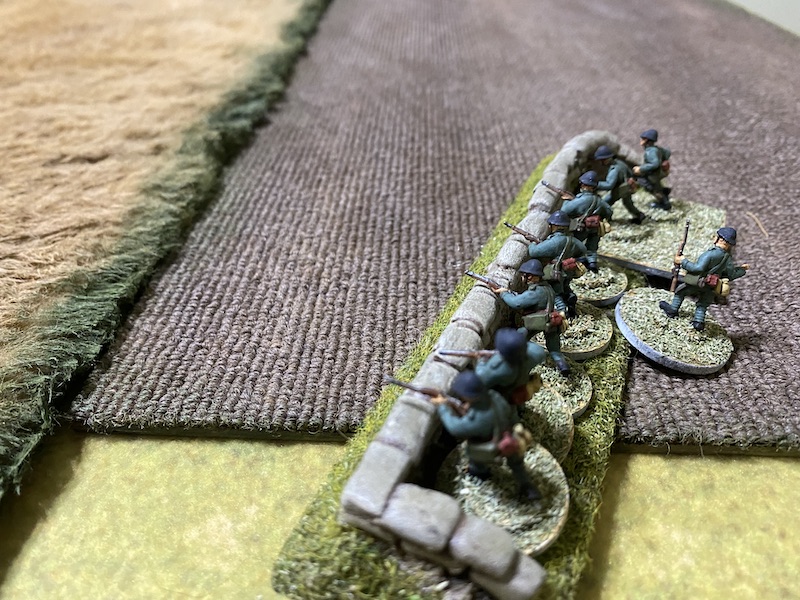
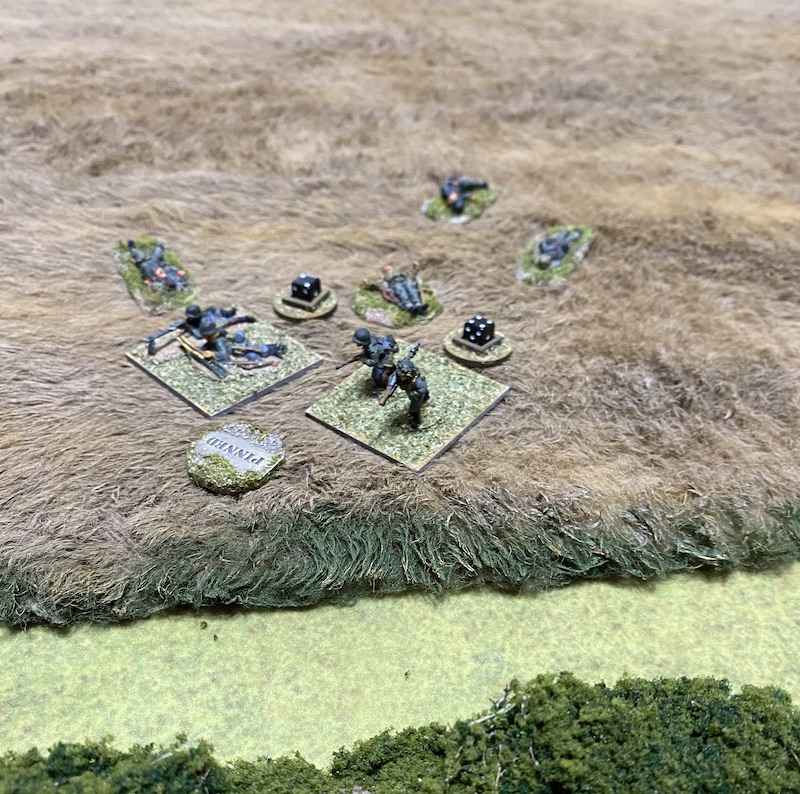
Aware that the clock is always going to be working against me I use this temporary reprieve to push ahead on the right and the schützen squad moves a good 10” towards the hedge row.


The schützen squad is caught moving in the open and each team suffers a casualty and a point of shock. The Obergefreiter is also hit and lightly wounded. That was a costly move that sees German force morale drop to seven.

The Luitenant is well situated in the Kazemat and in the Dutch phase he orders all the nearby units with a line of sight to the field to open fire. Between the Lewis gun in the Kazemat, the mitrailleursgroepen at the barn and an HE round from the anti-tank gun a hail of fire strikes the unfortunate schützen.

The result is deadly. The squad loses another three men and to make matters worse their Obergefreiter suffers a second light wound which is enough to kill him. That comes as a big blow to German morale which drops to six. The surviving men suffer further shock which is enough to see the squad pinned. Well, that was very nasty.
Unfortunately the horror doesn't end there. Once again the mitrailleursgroepen in the field target the mortar team.

This time the surviving members of the crew are both killed. That sees the team wiped out, which knocks German morale down to five. This is fast turning into a debacle.

Just when things are looking bleak there's a small glimmer of hope with a German command roll of 66421. Can I use the double phase to turn things around? The third PzI arrives to join the rest of the platoon.

The commander has his driver advance flat out and issue orders across the radio network for the other tank to follow his lead.


The following command roll is 66652 but other than add a useful CoC point the tanks are unable to move. The next roll is 65211 and the tank platoon commander uses the radio network to have the recently arrived tank advance flat out to join the rest of the platoon, both of whom have turned to focus their attention on the entrenched Dutch in the field.

The next Dutch command roll is 55211 and yet again they accumulate vital CoC points. The pinned schützen squad in the field still present an excellent target and the Luitenant orders the mitrailleursgroepen at the barn and the anti-tank gun to continue firing on them.


That's enough to break the squad and see it fall back.


With the Germans driven off the Luitenant puts the second mitrailleursgroepen on overwatch.

Is there much point continuing the attack? It will be tough with only three command dice and yet there is a remote chance the tank platoon can try to force a way down the road and off the table. It may require a bit of luck but I'm not ready to accept defeat just yet.
A command roll of 653 is not the most encouraging, but at least one of the PzIs can fire at the entrenched mitrailleursgroepen in the field.


This presents a dilemma for Dave. If he's not careful the German tank platoon can simply sit back and pour fire at those men for phase after phase with the potential to wipe out the mitrailleursgroepen. The Dutch command roll is 54321 and the additional CoC point is a reminder that the Germans don't have the luxury of too much time. The Dutch decide to give themselves as much cover as they can and the mitrailleursgroepen sergeant has one of the men throw a smoke grenade in front of the trench.


The Luitenant puts the mitrailleursgroepen near the Kazemat and the anti-tank gun on overwatch.

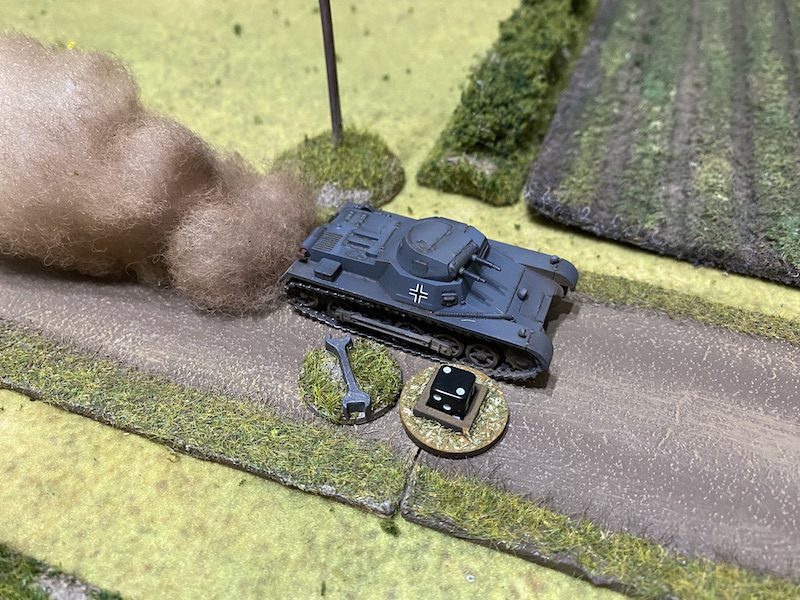
Unfortunately, I don't think the Germans can afford to bide their time and so when the command roll is 411 I decide it's time to push forward. The tank platoon commander orders the tank on the road to move flat out.


The 47mm AT gun is on overwatch and fires once the first PzI comes into sight. However it's a small, low profile AFV moving flat out, so is not the easiest target and the gunners miss.

The platoon commander sends the second tank forward, also going flat out.

Finally the commander joins them.


The Dutch command roll of 65522 contributes more CoC points to their total, which really does add to the sense of urgency. The Luitenant orders the 47mm AT gun to fire at the lead tank. I have a CoC die that I intended to use to reduce the Dutch total but this a chance to use it for an interrupt and grab an additional phase of movement while getting at least one tank out of harm's way. At this stage I decide speed and movement are paramount. It remains a gamble, but that's what I decide to do. So I use the CoC die to interrupt and the lead PzI continues driving flat.


The AT gun has other targets and so fires at the second tank.


This time the AP round is on target. It slams into the PzI, killing the driver and inflicting two points of shock. At this stage of the proceedings that's probably as good as knocking it out.


In the German phase the command roll is enough to activate a single tank and so the lead tank continues to race flat out for the table edge.

In the end it won't matter. The following Dutch command roll is 55411 which delivers the CoC points required to make up their second CoC die. Enough to see the timely arrival of more Dutch support to stymie the German blitzkrieg and earn them a scenario victory.

It was always going to be something of a lottery trying to drive the tank platoon through the Dutch lines and ultimately I'm not surprised at the outcome. Would things have ended any differently had I used the German CoC die to reduce the Dutch CoC points instead of interrupt the AT gun? It's possible, but probably unlikely. With only three command dice it was always going to be difficult to be certain the entire platoon could move every phase and then that's to assume at least two of the tanks could survive the attentions of the Bohler AT gun or the Lewis guns. No blitzkrieg today I'm afraid.
With the arrival of additional Dutch support the German commander orders a withdrawal. The schützen squad in the woods must roll to see how successfully they retire from the table. While all the men of the squad are successful, things don't go so well for the NCOs - the Feldwebel is dispersed and the squad's Obergefreiter is captured. Overall the platoon has suffered badly, with ten casualties including the permanent loss of two Obergefreiters. The Feldwebel will eventually find his way back but will miss the next campaign turn. This was the first time the 3rd platoon has seen action in the campaign and given the losses it could well be the last.
With Dutch force morale still at nine the one casualty they suffered will be patched up and returned to duty immediately. A welcome victory for the Dutch at a crucial stage of the campaign and time for the Germans to go back a rethink how to break through to the bridge. You can find out what happens when the Germans make a second attempt to capture this map in this post.
If you've enjoyed following along and would like to Buy Me a Coffee to help cover some of the costs of running the blog you can click through at the link or on the tab in the right hand column of this page.
You can find links to all the games in this campaign and several others on the Chain of Command Campaign AAR Page (link from here or at the top of this page).
Great AAR, on paper it looks simple, but in practice that seems to be a tough nut for the Germans to crack.
ReplyDeleteYes, not as simple as I thought, although the battering my force morale took when that squad was shot up in the open was probably my undoing.
DeleteA tough one, just two CoC dice for a win. Still it looked close for a bit. Not sure what else you could've done, if you'd been more cautious with your infantry the time would run out but going with the armour alone, before any AT units are located, is pretty risky. Do you have to refight and win this one to win the campaign? If so, you'll need either more support or more time.
ReplyDeleteI think what really hurt was the blow to my force morale when the squad and its Obergefreiter were shot up. If I had avoided that and used my CoC dice to dial back his CoC points then I think I may have been in with a better chance. Yes, I'll need to refight this one and then move on to the final map where the bridge is located. Timing is key there, if the Dutch engineers have time to set the charges before I arrive then they have a much better chance of blowing the bridge. If they have to set the charges when I'm attacking the table it becomes a lot harder for them.
DeleteThat was a thrilling report! A tough one for the Germans.
ReplyDeleteThanks. Yes, a bad day at the office for the Wehrmacht.
DeleteCouldn't see what else the Germans could do there, they just didn't get the tub of the green in this one. Great entertaining read as usual.
ReplyDeleteRub, FGS🙄
DeleteI think you're right. Having the squad shot up and losing their leader with two hits on their force morale for the wounds really made things very difficult. Some bad luck perhaps, but I should have noticed how exposed they would be before they moved - no one to blame there but myself.
DeleteAlways a treat to see a new AAR here. That's a tough scenario for the Germans.
ReplyDeleteThank you, glad you enjoyed it.
DeleteVery difficult scenario for Germans. Frankly I also would risk and push the tanks. No fault on You.
ReplyDeleteMay I ask: why You have pause for one game waiting for tanks? What was the bonus for You?
Of course it would be less possible to breakthrough without tanks, but maybe You could use this paused scenario to reduce number and morale of Dutch with infantry guns, mortars and HGMs?
The main benefit of the pause was the armour. I could have tried an assault instead, just to inflict casualties but it would count as a defeat which would impact the COs opinion negatively (which could mean less support points). It would be an option to consider.
DeleteA tough task for the Germans under any circumstances. Along with their good deployment, the Dutch had luck on their side with the rapid accumulation of CoC points.
ReplyDeleteOnce again, your narrative skill brings the game to life.
Thanks Dennis, I think you're right, it was a combination of different factors, not just luck that swung the game in favour of the Dutch.
DeleteTough scenario. Using the CoC dice like this is interesting and I see what the designer was going for -- especially giving the German player the chance to remove 3 pips on the die. That could have cut both ways and in this case it went against the attacker, but it could have just as easily gone against the Dutch. And it seems to make the game pretty dependent on those rolls of the dice. My game designer brain is whirling with options on how to change this a bit to make it a bit more fair, but I'd have to think it through a bit more. Anyway, great AAR as always!
ReplyDeleteThat was a tough scenario for the Germans. Better luck next time!
ReplyDelete