
The Japanese suffered the first set back of their campaign when the Malay Regiment repulsed their initial attack on the previous map. While that opening assault was unsuccessful, their second was swift and aggressive, clearing the way for an advance to the fourth scenario.
That now brings us to the final map, the site of the opium factory from which the hill derives its name.
 |
| Map © Rosio Espin and Karwansaray BV Originally published in Wargames, Soldiers and Strategy #101. |
This could prove a tough assignment for the Japanese. The British can be expected to take full advantage of the hard cover offered by several sturdy buildings while the attack will have to be conducted across an expanse of open ground.
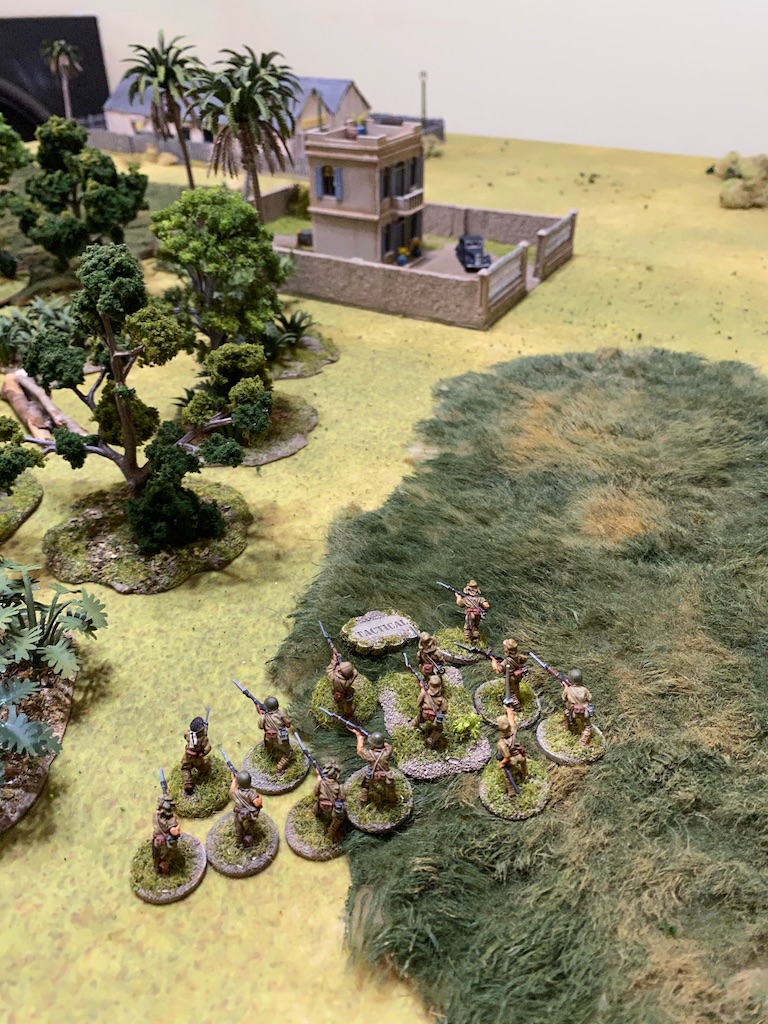
The accumulated losses from the previous games will see the British replace their platoon with a fresh one at full strength. This is their sole reinforcement for the campaign and the new platoon is led by Lieutenant Adnan Saidi, whose historic defence of this area has made him one of Singapore's national heroes. His presence allows the British to re-roll any force morale roll of six (although they must abide by the second roll, regardless of the outcome). For two support points there is the option to have him armed with a Lewis gun.

As the Japanese I intend to continue attacking with my second platoon. While they have taken losses they are still in reasonably good shape and this scenario may require more than one attempt to drive off the defenders. If this initial attack proves unsuccessful I'm hoping this current platoon will have at least been able to inflict casualties on the British, whittling down their strength before I commit the third Japanese platoon to the battle.
As in the previous game I will re-assign men from the grenade discharger squad to bring the rifle squads closer to full strength.

This is an 'Attack on an Objective' scenario and the Opium Factory will be the objective building.


 |
| Photograph by Harrison Forman circa 1950 |

Aside from the cover provided by the lone hut the Japanese must approach their objective across open ground and this limits possible locations for jump-off-points. The aim is to place one at the hut and accept that the other two will be at a table edge. During the patrol phase I use only three of the four available patrol markers to ensure I can move fast enough to secure the hut. With two free moves at the start of the phase I'm able to make good progress and even manage to work around on my left flank close to the jungle. Japanese jump-off-points end up placed pretty much as expected.
 |
| Map © Rosio Espin and Karwansaray BV Originally published in Wargames, Soldiers and Strategy #101. |
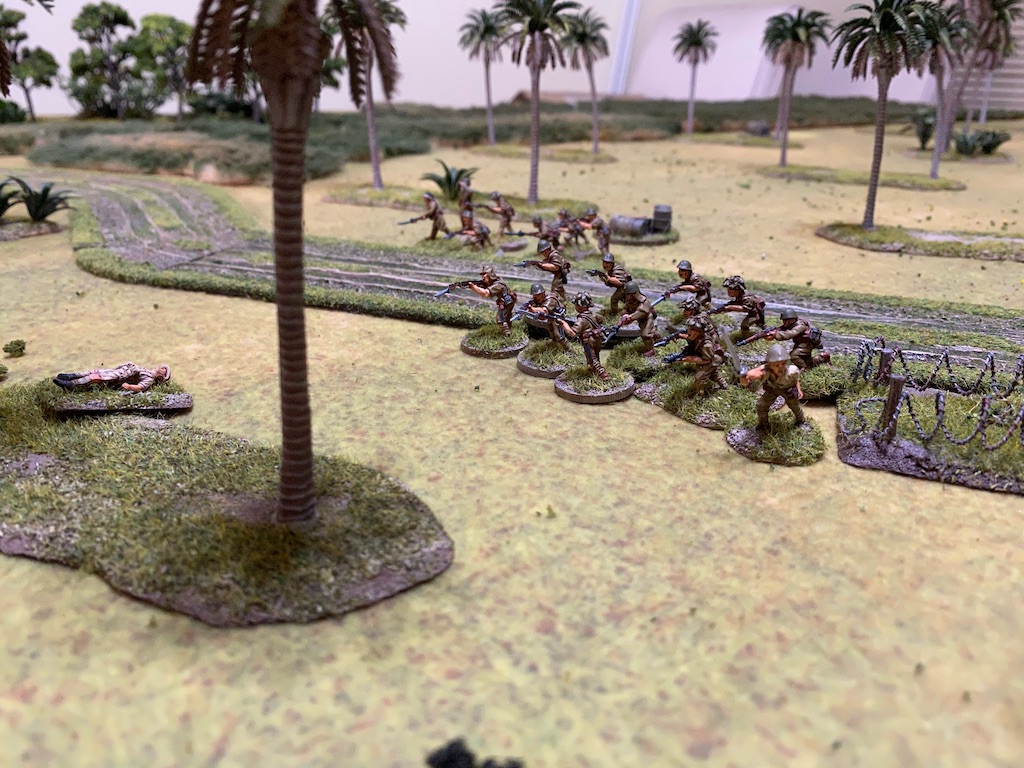
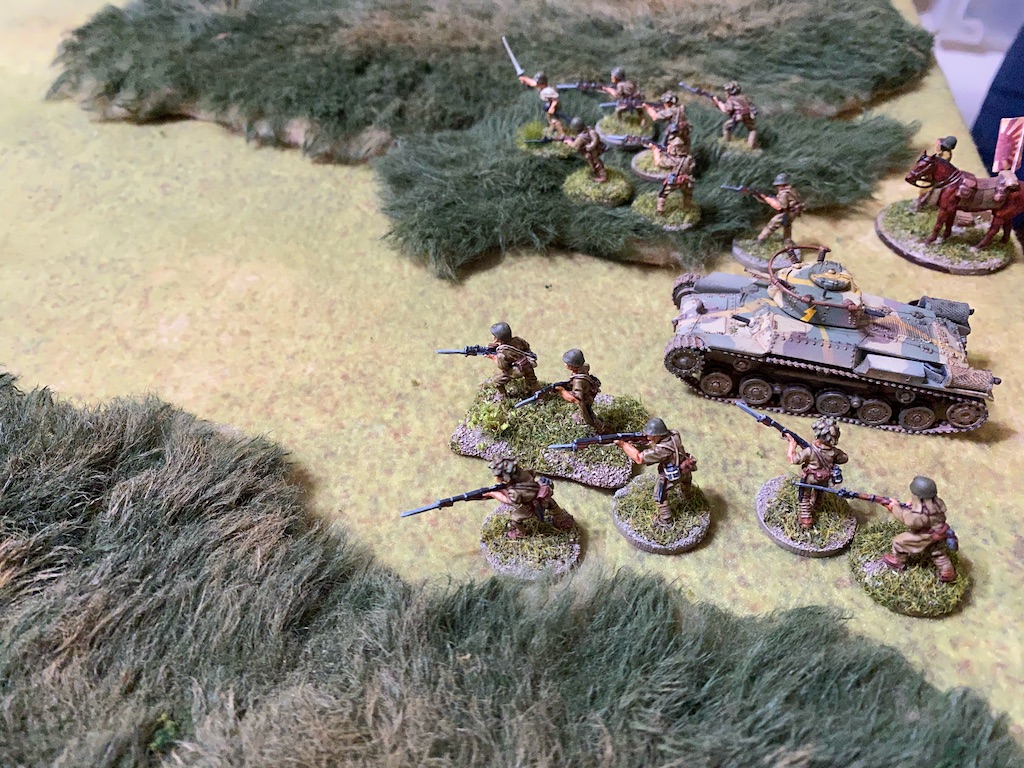
The Japanese begin by deploying a squad on their left flank. The jump-off-point is not close enough to allow deployment into the jungle and so they take up tactical positions in the open ground.

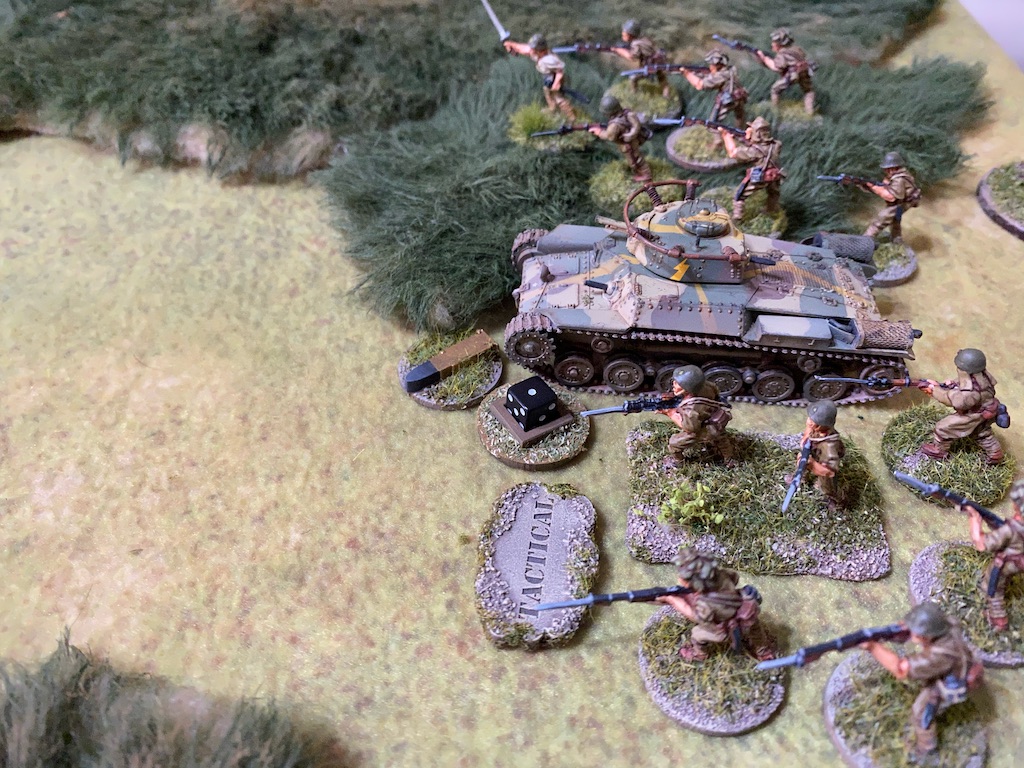
In the centre the Type 97 Chi Ha arrives and is placed on overwatch to cover the advance.


The tank is joined by a second rifle squad that takes up tactical positions.


The Japanese units are all exposed and I'm hoping the pre-game barrage can succeed in making it difficult for the British to respond. However that is not to be. Their first attempt at deployment is successful and to my horror a 2 pounder anti-tank gun appears in the factory. Dave took quite a gamble, using up four of his available eight support points, but he felt fairly confident the Japanese would call on armour and took a calculated risk. It may pay off.


The first round hits the target, managing three AP strikes. Despite the relatively weak armour the tank suffers only one net hit, but it's enough to inflict a point of shock and prevent the gunner activating in the next phase.

The tank is on overwatch and this raises an interesting rules question. Do we take the rule literally and allow the gunner to fire in this phase but not in the next? Or do we prevent the gunner from firing in this current phase but permit it in the following phase instead? In the end we decide to keep things simple (if counter intuitive) and apply the rule as written, allowing the gun to use its overwatch in this phase.
The Chi Ha lobs a round of HE back at the 2 pounder, but the single hit has no effect on the gun crew.

The Malays are eager to deal with the tank, but when the platoon's AT rifle team tries to deploy they are delayed by the barrage. The same cannot be said for one of the rifle sections which deploys successfully into the grounds of the plantation house.

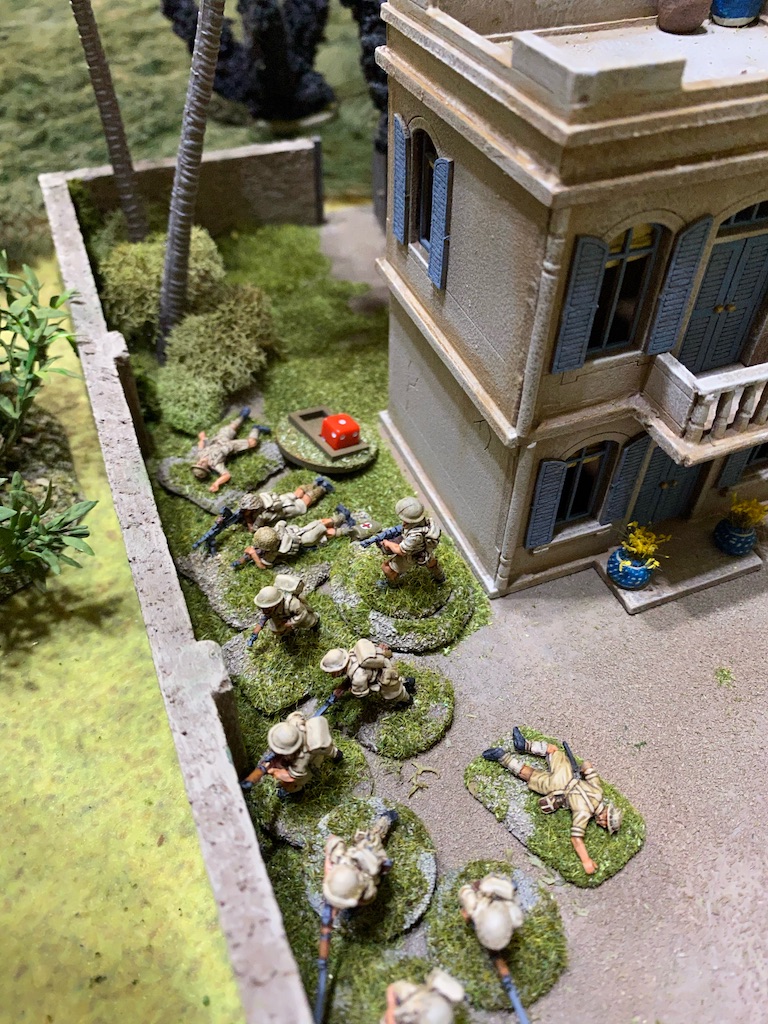
They take advantage of the Japanese squad in the open and fire on them.

The squad takes a casualty and suffers four points of shock.

The platoon sergeant also manages to deploy and joins the rifle section. He is armed with a rifle and takes a shot at the Japanese.

It looks like the sergeant is something of a marksman because his single shot rings out and another Japanese soldier falls.

The Japanese have found themselves in a tight spot so the next command roll of 42211 is very useful. First, the grenade discharger squad deploys to the right of the hut and they all fire their single round of smoke at the factory.


Two of the rounds land directly on target while the third drifts and lands directly on top of another. Nonetheless the smoke has done a good job of blinding the 2 pounder.

However this is no time for complacency and the Chi Ha commander rallies his crew and orders the driver to move ahead flat out. Unfortunately the tank doesn't make as much progress as hoped for and only moves ahead 10”.

The Japanese squad on the left is in danger and the Gunso, the platoon's second in command, comes to their assistance. Unfortunately if he orders them to move into the jungle he will be left alone in open ground, making him an inviting target. Instead he rallies a point of shock and orders the squad to return fire.


The Malay's section corporal is the only man hit and he is lightly wounded.


The Japanese forward observer then deploys into the hut and makes contact with the gun battery.

The British command roll of 65543 means they will find it difficult to coordinate a response. Nonetheless, the platoon sergeant in the grounds of the plantation house uses two of his command initiatives to direct the rifle team to fire 5 rounds rapid and his third CI to direct the Bren team. They all target the Japanese in the open.


Another two men are hit but fortunately neither of these are the squad leader or the Gunso. Despite that they have now lost four men and are suffering six points of shock. They need to move to better cover and quickly.


The pre-game barrage begins to create problems and an attempt by a second British section to deploy ends in failure.
From a Japanese perspective events take a turn for the better with a command roll of 66541 and the prospect of a double phase. This should give them the opportunity to bring down the barrage before the Malays can respond. The forward observer calls in an aiming round on the plantation house.

The Gunso spends the phase rallying shock from the squad.


The subsequent command roll is 55411 which limits options and has meant the Chi Ha has made little progress across both phases. The time has come for the Gunso to direct the squad to find better cover and he rallies off a point of shock and tells them to move into the jungle. The jungle is dense and the use of two dice to move will mean the squad picks up an extra point of shock, but I think this is worth it to ensure the squad reaches safety.


The forward observer calls for another aiming round and this time it lands on target.

The Malays continue to find coordination difficult and a command roll of 55211 presents limited opportunities. The rifle team in the grounds of the plantation house can just see the lone Japanese straggler near the jungle.


Once again another section from the Malay platoon fails to make its way through the barrage and join the fighting. The pre-game barrage is starting to prove its worth but it will only be of value if the Japanese can cross the open ground quickly.
In the Japanese phase the command roll of 65443 means the forward observer won't be able to activate without the direction of a senior leader. As a result I will need to bring on the Rikugun, the platoon second lieutenant. I think it's critical I bring down the barrage and keep up the momentum of the attack and so while this is not the ideal deployment for the platoon commander it is a critical time for him to exert his influence.
First though, the Gunso rallies the squad in the jungle.

With the Rikugun to deploy on the right I decide to deploy the third rifle squad on this flank. This puts them in an exposed position but with the factory masked off with smoke and the barrage about to neutralise the plantation house I hope to have this squad move quickly and out of danger. The squad are placed on overwatch.


The Rikugun then deploys behind the hut, from there he is able to command the squad, the forward observer and the grenade discharger squad.

Before he calls on the forward observer to bring down the barrage he orders the grenade discharger squad to fire into the grounds of the plantation house.


Despite the fact they lack a direct line of sight their grenades land on target inflicting two casualties on the Malay section, who lose a man from each team.

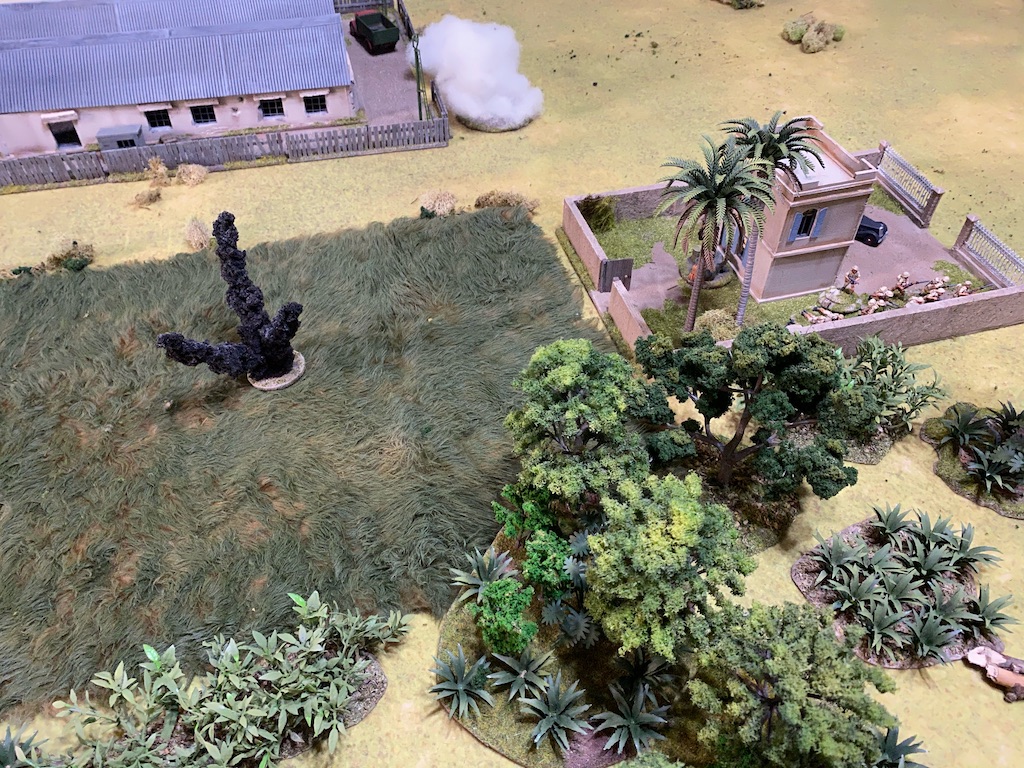
With that done the forward observer calls down the barrage which crashes around the plantation house.


The barrage itself is not particularly effective, nonetheless the Malay section lose another man from the Bren team, reducing that team to a single man.
I begin to have a good sense that things might be starting to go to plan. The main threats are neutralised for now and I hope in the coming phases to press forward and cover the open ground before the British can respond.
That plan begins to unravel when the next British command roll is 66631 - not only a double phase but the end of the turn. It could not come at a more opportune moment for the British and it does not bode well for my attack. All the effort putting down smoke and bringing down the barrage may come to nothing.
The turn will not end until the phase is completed and so the British must still try and negotiate the pre-game barrage. Once again a rifle section attempts to deploy and once again it fails. However a forward observer is not held up and he makes his appearance in the factory.

With that the turn ends bringing a disheartening end to the Japanese smoke screen from the grenade discharger squad and the 75mm barrage and the pre-game barrage. The loss of these three key elements so essential in helping the platoon cross the open ground is nothing short of a disaster.


The following British command roll of 66655 is almost a repeat of the first. As there are no activations we remove the smoke and explosions ready for the next British phase.

The run of phases comes to an end but a command roll of 43221 leaves the phase open for a lot of action from the British. At the plantation house the wounded corporal uses his single command initiative to assign a man from the rifle team to join the Bren team so the gun can fire at full effect. That now leaves the section with two men in the bren team and four in the rifle team.

With no hindrance to deployment from a pre-game barrage the platoon's Boys anti-tank rifle team appear on the roof of the plantation house.


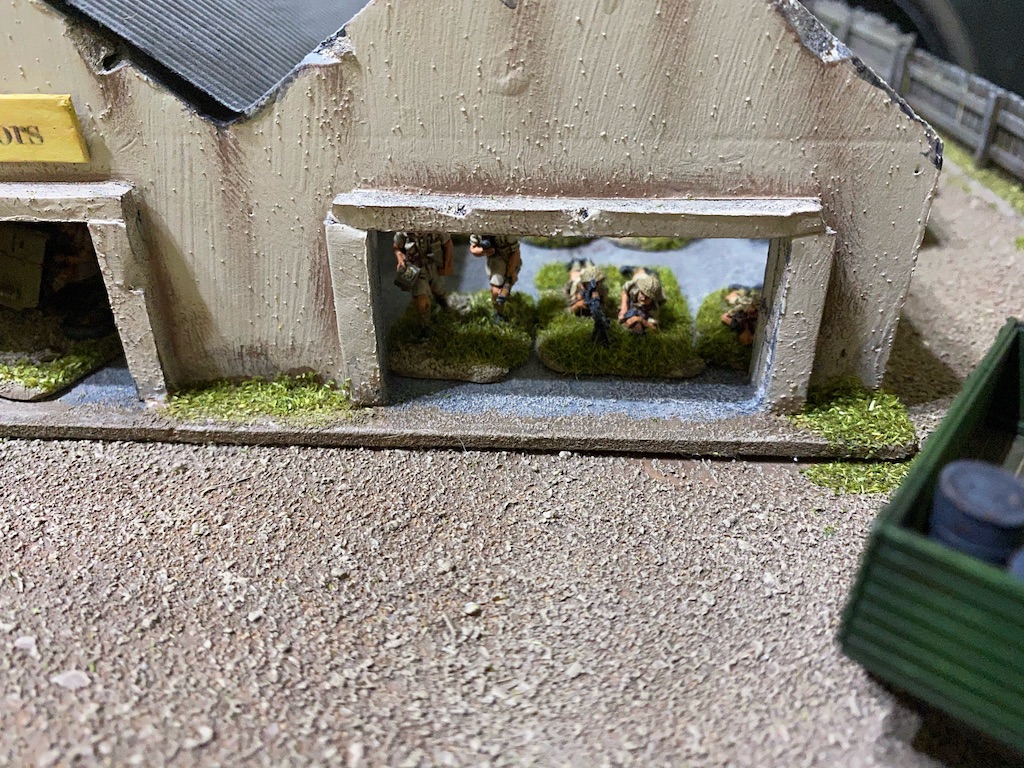
A rifle section deploys into the factory and their Bren team takes up position alongside the forward observer.


That squad now finds itself in an extremely vulnerable position - exposed in open ground and with under strength crews in each team. They lose two men, one from each of two teams reducing each to a single crew member.

Finally the platoon lieutenant, the heroic Adnan Saidi, joins his men in the factory where he orders the 2 pounder crew to engage the Chi Ha.


The 2 pounder AP round is on target. There is only a single AP strike but it's enough to inflict one net hit. Nonetheless that rattles the crew who suffer two points of shock and reverse back 10", almost crushing the nearest squad as it does so.

The Lieutenant then calls on the forward observer to waste no time and bring the barrage down immediately without waiting for an aiming round. The barrage is not too far off target and crashes around the hut. With only two 3" mortars in the battery the barrage blankets a relatively small 10"x10" area but that is enough to hit several Japanese units.


The rifle squad lose one man and suffer a point of shock.


The grenade discharger squad see their third team reduced to a single man, making that squad extremely fragile.


The squad on the other side of the hut loses another three men as casualties. They are caught in the open and are taking a beating.


The command roll of 32222 means I can expect a lot of trouble to come my way and I very much doubt I can recover from this. Dave rubs salt in the wound by firing HE from the 2 pounder. It has no effect other than to demonstrate the British have mastery of this encounter.
They do suffer a minor setback when, with both senior leaders on the table, the third rifle section fails to deploy. Nonetheless the lieutenant has the forward observer move the barrage to the right.


The rifle squad suffers a further two casualties and one of those hit is the forward observer, who is killed. Japanese morale drops another point down to two.


The fire results in a single hit but it's enough to wound the squad corporal. Japanese morale falls once more and is now down to one.


The Japanese force morale is close to hitting zero, which would have dire consequences as we are using the special rules from the Malaya 1942 campaign which specify:
- Table 17 – Force Morale Effects, is applied as normal except when the level reaches zero. When this occurs the Japanese force routs and each team and leader must roll a D6, with a roll of 4, 5 or 6 resulting in the team or leader committing suicide. Any team that cannot rout must commit suicide (never surrenders).
The Japanese suffered nineteen casualties including the forward observer. Even with the return of some wounded men that sees the second platoon written down and out of the campaign. Nothing the Japanese sought to achieve in this game transpired, the only positive (if you can call it that) was that I did not commit the third and final platoon to this encounter. That gives me the opportunity to make another attempt at clearing the Malays from the opium factory with a full strength, fresh platoon.
The Japanese CO's opinion drops two points taking it down to -1. That is nothing compared to the men, who are horrified at the butcher's bill for this campaign and their opinion drops to -7.
It's no surprise to learn that this victory has done wonders in the British camp. The CO's opinion rises to +2 and the men's opinion rises to +3.
Now all that remains is for the Japanese to go away, digest today's lessons and come back with a fresh plan of attack for the next game. You can find out what happens next here.
You find reports for all the games in this campaign and many other campaigns on the Chain of Command Campaign AAR page here.
Last Stand on Opium Hill, a campaign for Chain of Command, appears in Issue 101 of Wargames, Soldiers and Strategy Magazine. My thanks to the magazine and publisher for permission to reproduce the maps.

Thrilling AAR, love to hate those mortars.
ReplyDeletecheers John
Thanks John, it was all going so well, until....it wasn't. A bad day at the office!
DeleteAmazing how a situation can go from all OK and according to plan to a pile of steaming elephant dung in a couple of phases....mainly due to a few handfuls of 6's admittedly.
ReplyDeleteBest to draw a kimono over this one and start again next game.
Perhaps a direct fire support HE and MMG would be better than a paper thin tank?
I had a bit of luck that helped me get going, then Dave had a bit of luck but the timing couldn't have been better. Just one of those things. There is no direct HE support in this campaign, the nearest thing to something on table is the Chi Ha and its 57mm gun. The other problem with this game in particular is that there is no decent cover from which to fire other than the hut. I'm going to have to scratch my head about how to tackle this one. Thank goodness I have a fresh platoon available.
DeleteAhh OK fair enough - in that case on this scenario would be reluctant to take the tank if there were any other options - don't have the campaign. But , I do note Munin's comments on the forum regarding the elevations. It looks like there is a hill in the middle of the table?
DeleteI've been in touch with Mark Backhouse who designed the campaign and he's been following the AARs. No mention about the hill being significant. In fact the maps shouldn't be taken too literally, there's a fair bit of artistic licence in there from what I can gather. As far as I'm aware the ridge is not particularly steep so in CoC terms any slope is not going to be significant.
DeleteA great AAR and a lovely looking game.
ReplyDeleteThanks Steve, glad you like it.
DeleteWhat a splendid and gripping narrative, a nice steady advance by the Japanese, then bam! bam! bam! I didn't see that coming. The beauty of CoC but not if you were the Japanese this time, very tough luck there Mark.
ReplyDeleteThanks Phil. I had my share of luck but Dave's came at exactly the right time and he made the very most of it. Just one of those things that can happen but it was surprising how quickly the game turned around, that I didn't see coming.
DeleteI was just waiting for that turn end, and wow it did not disappoint. Great AAR as usual.
ReplyDeleteYep, it couldn't have come with better timing from Dave's perspective and he seized the moment and made the most of it.
DeleteA dramatic turn of events! That 2pdr earned its keep.
ReplyDeleteFor sure. A good call by Dave. I knew I was going to be in trouble the moment the smoke lifted and the AT gun started shooting.
DeleteGreat AAR. One of the things I love about CofC is how things can change from one phase to the other. And that was exemplified perfectly here. Looks like the Japanese have a very hard task ahead, good luck for the next attempt! How many battles till the campaign ends?
ReplyDeleteThanks Matias. Yes it's going to be tough, I'm glad I still have a fresh platoon but it will still be difficult. There is no specific time frame for the campaign, I think the casualties will decide how long things last. There will come a point where the Japanese just don't have the numbers and run out of steam. If I can't win it in the next game that might be the end if I lose too many men.
DeleteAnother cracking report. Superb stuff, and well done to the Malay Regiment.
ReplyDeleteThanks Doug, it certainly looks like the Malays are going to make this a tough fight as we come to the finale.
DeleteFantastic to look at and read- very well done.
ReplyDeleteThanks, glad you enjoyed it. Let's hope my Japanese can do a little bit better at the second attempt.
DeleteOutstanding AAR’s, you really put your reader / gamer right there in the game, well done sir!
ReplyDeleteI’ve just started to pursue your blog. Have you posted WIP about your figs and terrain, or noted scale, mfgr, etc?
Thank you. Yes lots of stuff on figs and terrain. Check out the page links at the top of the page 'Second World War in 20mm' covers figures and vehicles and naturally 'Terrain' covers, well terrain :-) Enjoy.
Delete