
The campaign has progressed well for the US 175th Infantry Regiment. We now reach scenario 4 without the Germans succeeding in delaying their advance. While casualties have been heavy at times it has never been enough to throw their push toward Utah off schedule.

Before they can advance any further the 175th need to clear a German position on their right flank near the radar station at Cardonville. Here they will confront a fresh German platoon. As in the previous scenario "Flanking St Germain du Pert" the platoon has only one mission and that is to hold this table. Given American progress so far, it would be ideal to delay them for two or more games. However that will be easier said than done. The Americans can call in fresh platoons for every assault and they are well supported with armour. Nonetheless this is good defensive terrain with a network of hedgerows and orchards and so I hope my Germans can make a determined stand.

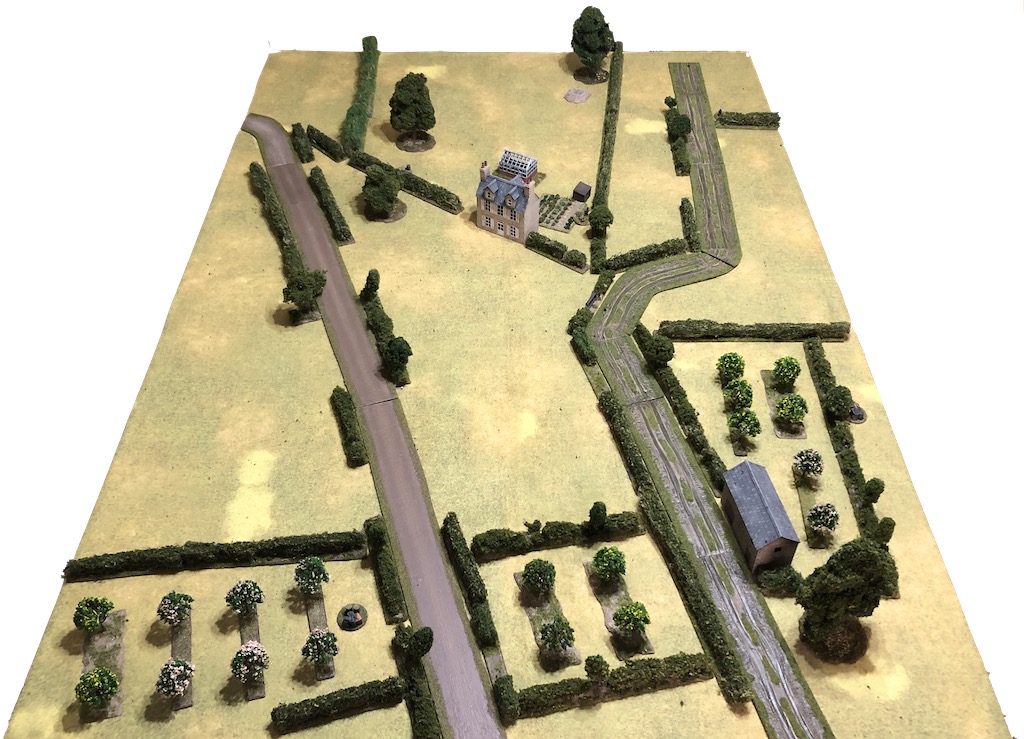
Despite the fact they must cross a fair amount of open ground the Americans can support any advance with significant firepower. That means my defenders must make the most of concealment. Ideally I draw the enemy into the close terrain of the orchards and hedgerows where it will be more difficult for them to concentrate their firepower.
A defence like this calls for patience and carries an element of risk. I must resist the temptation to deploy too early, even if I'm presented with inviting targets. It's important I don't allow the Americans to deploy in response to my defence, that's how they will be able to concentrate their firepower. Better I let them commit themselves and then I respond.
The risk lies in two factors. Firstly, there is the unpredictability of the sequence of phases. This was amply illustrated in "Delaying Action at Arthenay", the second game of the campaign, when a timely American double phase and a series of rapid movements caught me completely off guard and compromised the defence before I had deployed. Secondly, for the first turn of this scenario a naval bombardment by HMS Glasgow will disrupt German deployment, which will only succeed on a roll of 5 or 6. That makes any delay a risky proposition.
Looking at those two factors I want to ensure my jump-off-points are placed reasonably far back. This is the area of orchards around which I hope to base my defence but just as importantly, it will also allow a buffer of time to attempt deployment before the arrival of enemy units.
The Americans get off to a good start with six free moves at the beginning of the patrol phase. I was hoping to prevent them placing their jump-off-points too far forward but this proves difficult. Not only that, I'm unable to place a jump-off-point in the central orchard and so decide to concentrate around the orchard on my right flank.
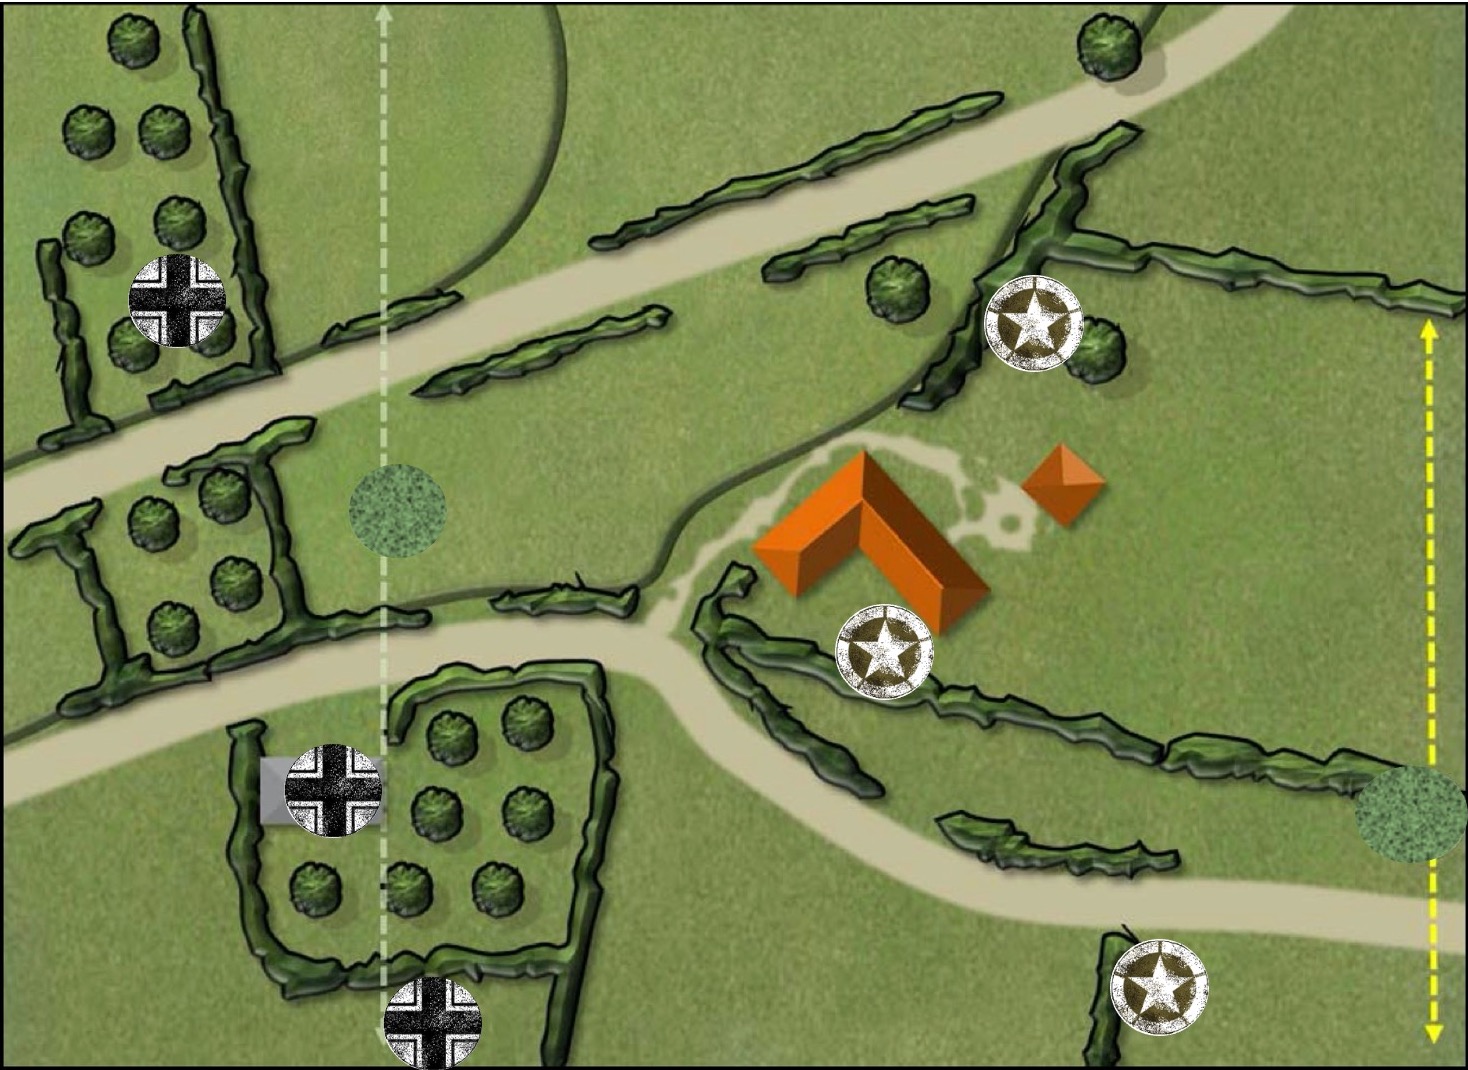
Force morale starts with the US at nine and the Germans at eight. The Americans have fourteen support points but six must be used for one Sherman, which leaves eight free for other choices. They also benefit from a naval bombardment by HMS Glasgow, the equivalent of a powerful pre-game barrage.
The Germans have eight support points. I've decided that fixed defences might work best in this situation. I will place two minefields to block off the approach that offers the Americans the most cover.

I also plan to have two of my squads dug in. That will provide me with hard cover in the orchards and may give me an advantage in any firefights. It will also provide added protection should the Americans call on a mortar barrage, which I suspect they might.
Lastly, with only one senior leader I will call on an adjutant, which will allow me to try to deploy the Feldwebel early if the naval bombardment is playing havoc with my other deployment.
Lastly, with only one senior leader I will call on an adjutant, which will allow me to try to deploy the Feldwebel early if the naval bombardment is playing havoc with my other deployment.
The minefields are placed and then we are ready to start.


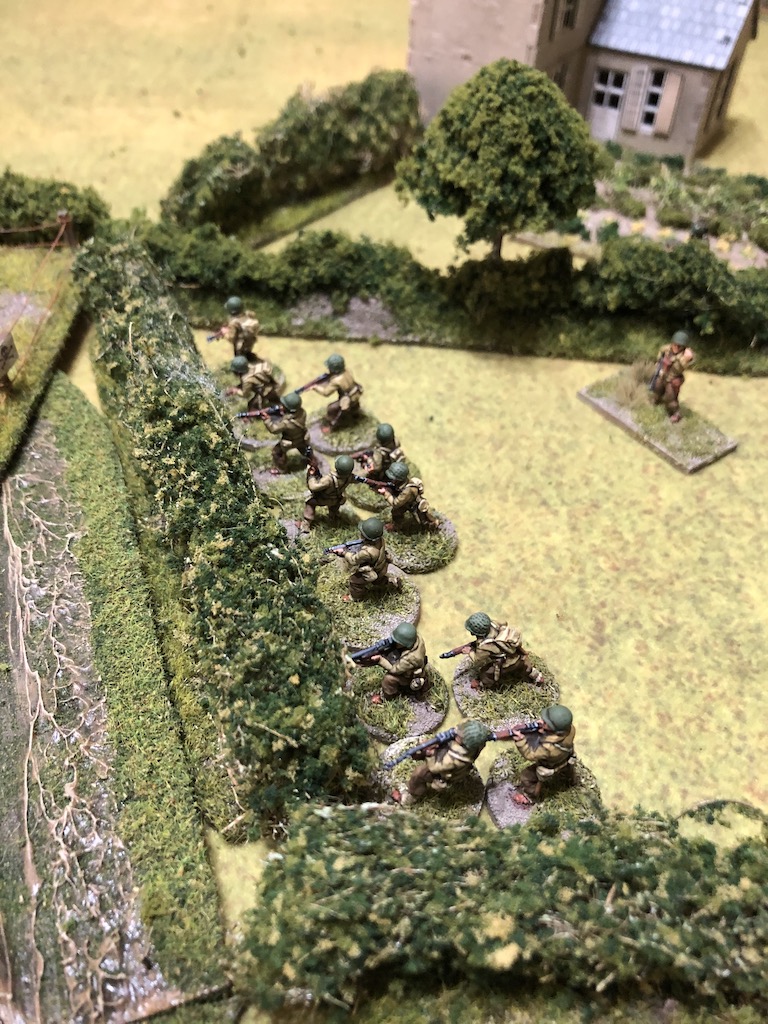
The Americans waste no time and deploy a squad into the field close to the minefield. They keep back from the hedgerow, possibly in anticipation of an aggressive German defence. An observant German notices that the squad is well armed, they have two BAR gunners.

The platoon sergeant joins them.

While they may be keeping back from the hedgerow for now, I suspect this squad is just the start of what will develop into a powerful base of fire to support the attack.

The German command roll is 66221. Nothing worse than a double phase when you have no targets and don't want to give away your position, so I do nothing. I then roll 66533. It is galling to see such useful dice go to waste, but once again I let the opportunity pass. The succession of consecutive phases ends but once again the Germans do nothing. How frustrating. My defence relies on patience and only risking deployment once the Americans are committed, so until then I must bide my time. I can only hope I have a repeat of those dice a little later in the game.
In the US phase the squad moves up to the hedge. No doubt getting ready to provide covering fire for engineers who will be tasked with clearing a path through the mines.

A lone Sherman deploys at the back of the table, wary of Germans armed with panzerschrecks. The commander puts the gunner on overwatch.


American firepower begins to build with the arrival of a 50 cal HMG team next to the squad near the minefield.


There is no reason to commit any German units just yet and so I let the next phase pass without taking any action.
The next American command roll is 66652. This is a mixed blessing, but a relief that the turn will end and with it the effect of the naval bombardment. Nonetheless with no Germans yet deployed the double phase could be an opportunity for the Americans to move forward in strength. A squad deploys on their left in the open.


There's little doubt in my mind that they are preparing to make a dash towards the orchard.

With that done the phase ends, as does the turn. I'm relieved to see the end of the naval bombardment. That takes considerable pressure off my deployment decisions and should allow me to deploy in a more coordinated and timely manner. The Sherman and 50 cal team are no longer on overwatch and so the Americans may have to spend the next phase re-organising themselves to continue the assault.
The following phase sees the squad behind the hedge placed on overwatch.


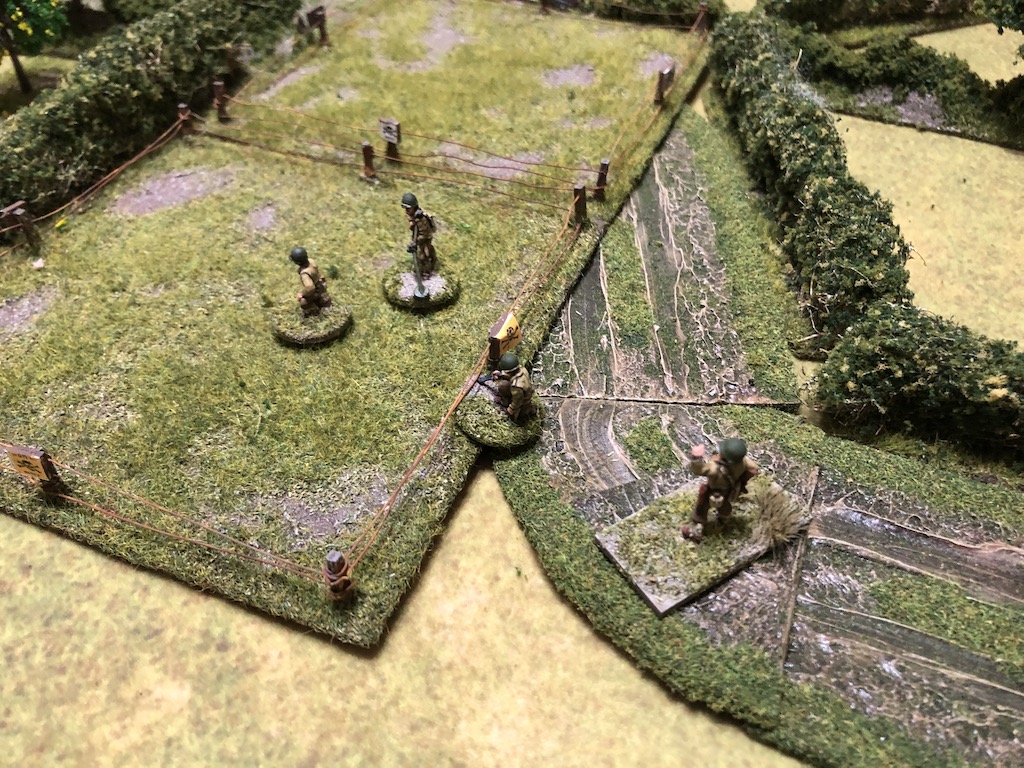
With the lifting of the naval bombardment the squad on the left doesn't risk moving at the double and makes a normal move across the field. Now that German deployment is less unpredictable I sense an element of caution has crept in.


As I expected an engineer mine clearing team deploys close to the minefield. They will have to venture into the open to clear the mines but between the squad, the Sherman and the 50 cal HMG they will have ample firepower to cover them as they work.


The next German command roll is 66554. In one sense I can't complain about my luck, although I could about the timing. I can see no advantage to deploying into the face of so much firepower and so I let the phase pass. The next roll is 65521. I choose to do nothing but it does give me enough CoC points for a full CoC dice. That could come in very useful.
The US continue their build up. The platoon sergeant puts the 50 cal team on overwatch.


The platoon sergeant orders the engineers to make their away around the hedge and towards the minefield.


The Sherman gunner is put back onto overwatch.

Meanwhile the squad on the left continues to move towards the orchard.

Any German response at the hedgerow is going to face a forbidding amount of return fire from the Americans, who have built up in force along this flank.

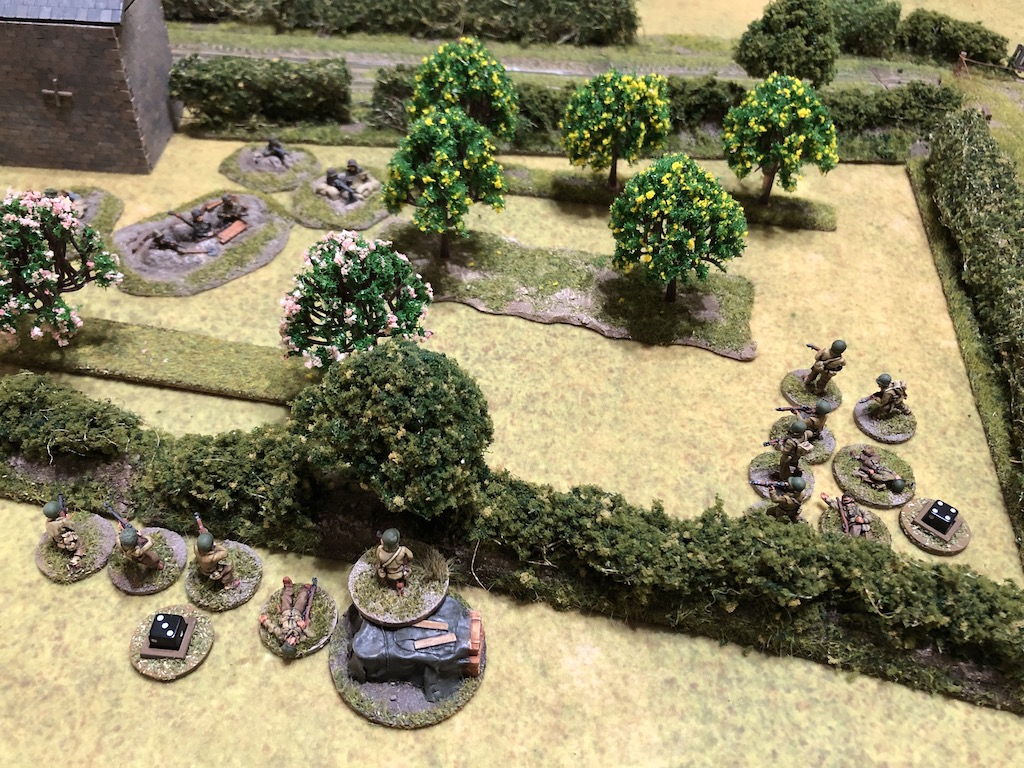
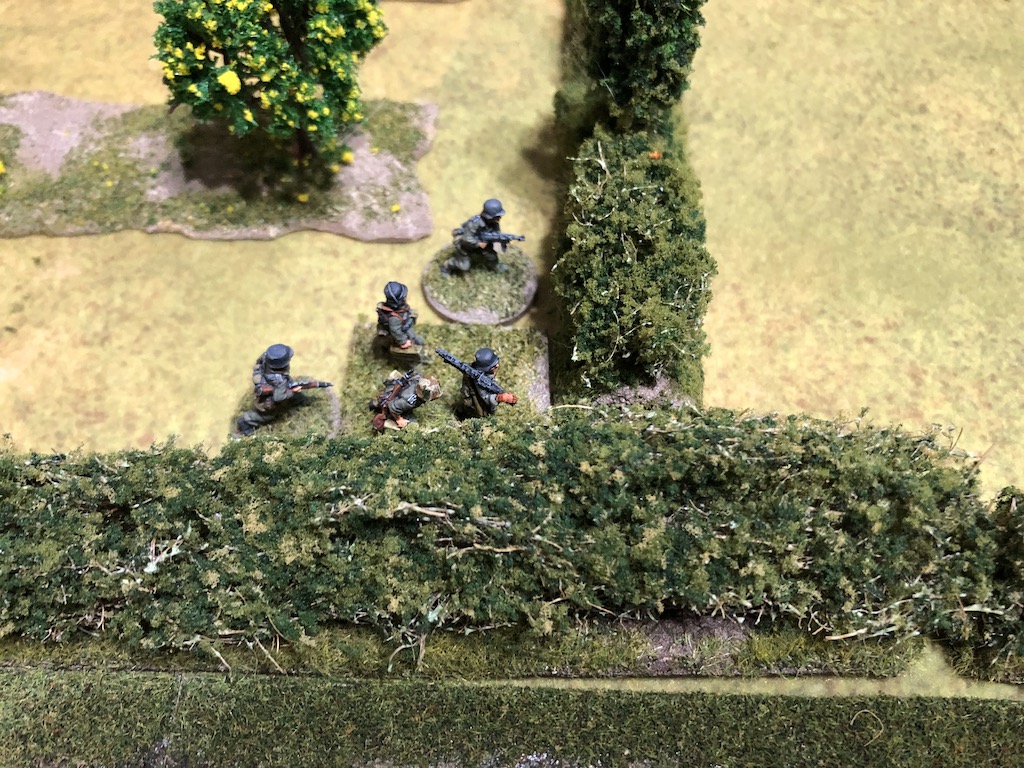
The third US squad deploys on their right flank and take up tactical positions.


While the main threat is to my right flank the arrival of this squad on my left means I need to be wary about an outflanking move in this area. There are Americans coming from all directions.

At this stage things are delicately poised. I can see no point deploying to any of the hedgerows, there is just too much firepower lined up to hit a defender. Ideally I allow the advancing American squad to reach the hedgerow and then at that point the Germans start to deploy in the cover of the orchard, back from the hedge line, where the units on overwatch cannot target them. This is always a risk and calls for nerve wracking decisions about timing of deployment.
In an earlier game Dave had the good fortune to roll a double phase at a moment just like this and move units rapidly to close down jump-off-points. However I estimate I can wait. The US squad approaching the orchard will most likely only make it to the hedgerow in the next phase. If I deploy in this phase I give away my position and would expect to see the Americans adjust their plans. I decide to hold off deployment for this phase and wait until they reach the hedge line.
In an earlier game Dave had the good fortune to roll a double phase at a moment just like this and move units rapidly to close down jump-off-points. However I estimate I can wait. The US squad approaching the orchard will most likely only make it to the hedgerow in the next phase. If I deploy in this phase I give away my position and would expect to see the Americans adjust their plans. I decide to hold off deployment for this phase and wait until they reach the hedge line.
When I look at the next US command roll I can't believe what I'm seeing - 66521. I have an awful sense of deja vu. There was always a chance this might happen, although I can't quite believe that it has.
The engineers move to the minefield and prepare to clear a more direct route into the orchard.

Then my worst fears are realised when the squad on the American left makes a normal move of 11" that takes it right up to the hedgerow in a single bound. This looks like a repeat of scenario 2 with a double phase and extraordinarily rapid movement by the US infantry.


With another phase to come it's hard to imagine they won't move the distance necessary to close down my jump-off-point. I think I need to learn a lesson here.

Could things get worse? Yes. The next American command roll is 66431. I don't know whether to laugh or cry. As predicted the squad moves over the hedge to my jump-off-point and closes it down.

It's a small consolation, but the American engineers are unsuccessful trying to clear a path through the minefield.
The platoon lieutenant deploys on the right flank and sends the squad forward.


The American run of phases will come to an end but their third consecutive phase provides plenty of activation options. On the left the BAR team move to occupy the jump-off-point, meanwhile the rifle team are placed on overwatch to prepare to face any German response.


Once more the engineers set to work at the minefield, but clearing it is taking them much longer than they hoped and they are not successful.

The platoon sergeant moves to join the squad behind the hedge, positioning himself between them and the 50 cal HMG team.


The lieutenant orders the squad forward on the right flank and they present a growing threat as they advance closer to the orchards.


The Germans are now under real pressure and when my phase arrives I decide I have no choice but to respond. While the situation looks bad, it's not quite as bad as it may first appear.


The squad at the jump-off-point is isolated from the other American units and is not supported. If I can hit it hard I may have a chance to drive it off. While I may have lost the jump-off-point on the flank I still have one in the barn.

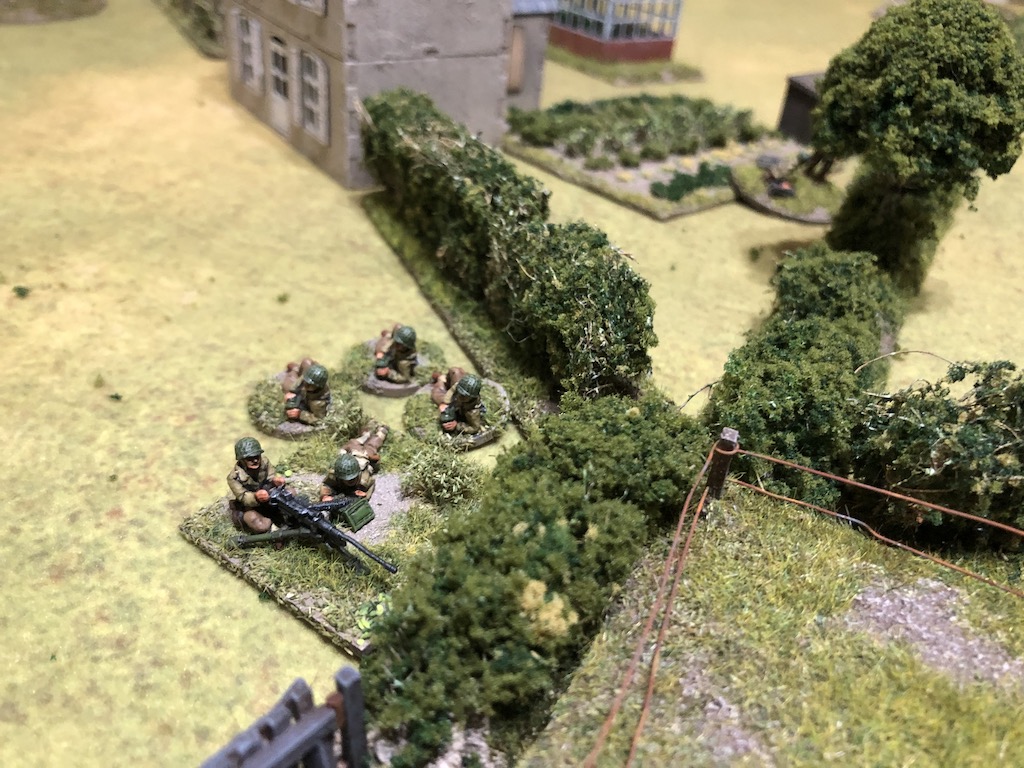
To maximise the available firepower the Feldwebel deploys with one of the squads. They are entrenched in the orchard. It's a strong position from where they can concentrate all their fire on the single American squad without fearing return fire from the other US units.


The range is short enough for the feldwebel and the obergefreiter to contribute their SMG fire and so the Americans will face a torrent of German fire.

One of the BAR team is killed and they suffer a point of shock.

The rifle team lose a man and suffer four points of shock.

However the Germans are not finished yet. The feldwebel is not just there to contribute fire from his machine pistol, he's also brought a handful of grenades.
A stick grenade comes flying out of the orchard but only inflicts a point of shock on the BAR team.

A second stick grenade comes spinning out of the orchard. This time it kills a man from the rifle team and adds another point of shock to the BAR team.

One of the MG42 team is killed and the rifle team suffer a point of shock.


That should stop the Americans in their tracks and give them something to think about. Without any support their squad could find itself out gunned in this firefight.
In the next American phase the platoon sergeant orders the engineers to continue mine clearing but they are having no luck at the moment and cannot clear a path through. This is working to my advantage. The longer it takes those engineers to clear the minefield the longer it remains a hindrance. That will make it more difficult for the Americans to respond quickly to the development in the orchard.

With the minefield blocking the way the platoon sergeant directs the squad next to him to move at the double and make its way around the hedge.


The minefield has forced them to take the long way around and may buy my squad some additional time to deal with the immediate threat.

The platoon sergeant moves to the corner of hedge.

On the other flank the platoon lieutenant runs towards the squad.

When he gets within command range he orders them to move at the double towards their left and towards the Germans in the orchard.

They move fast and find themselves in close proximity to the entrenched Germans.


The Americans in the orchard are about to fire at the German squad, but I use the recently acquired CoC die to interrupt and fire first. This seems as good a time as any to make use of it.


The fire is extremely effective and does a good job of suppressing the Americans. The BAR team suffer a further three points of shock.

The rifle team lose another man killed and suffer a further five points of shock.

The shock has accumulated quickly for that squad and with the losses they have suffered they now find themselves pinned down. That will greatly reduce the amount of fire they can return.


In fact the return fire is so meagre that it has no effect on the entrenched Germans. I'm hoping the forthcoming German phase is an opportunity to break them and drive them from the orchard.
With that in mind the obergefreiter orders the squad to fire again.


What follows is another round of very effective fire. The BAR team suffer a casualty and it's the squad sergeant, who is wounded and stunned. That's a blow to US morale which drops two points to seven.

The rifle team lose a man and are reduced to three men. They also suffer more shock.

With seven remaining men and fifteen points of shock, that's enough to see the squad break and fall back.

The sight of them running out of the orchard towards the rear is enough for US morale to drop another two points down to five.


As one squad advances towards the orchard they have the dispiriting experience of seeing their broken comrades falling back in disarray.

The obergefreiter uses his second command initiative to rally the point of shock off his rifle team and then surveys the carnage in the orchard with a grim sense of satisfaction. The American double phase had made things look very precarious for a moment but a swift and violent riposte from the squad in the orchard has driven the enemy back leaving behind many casualties.


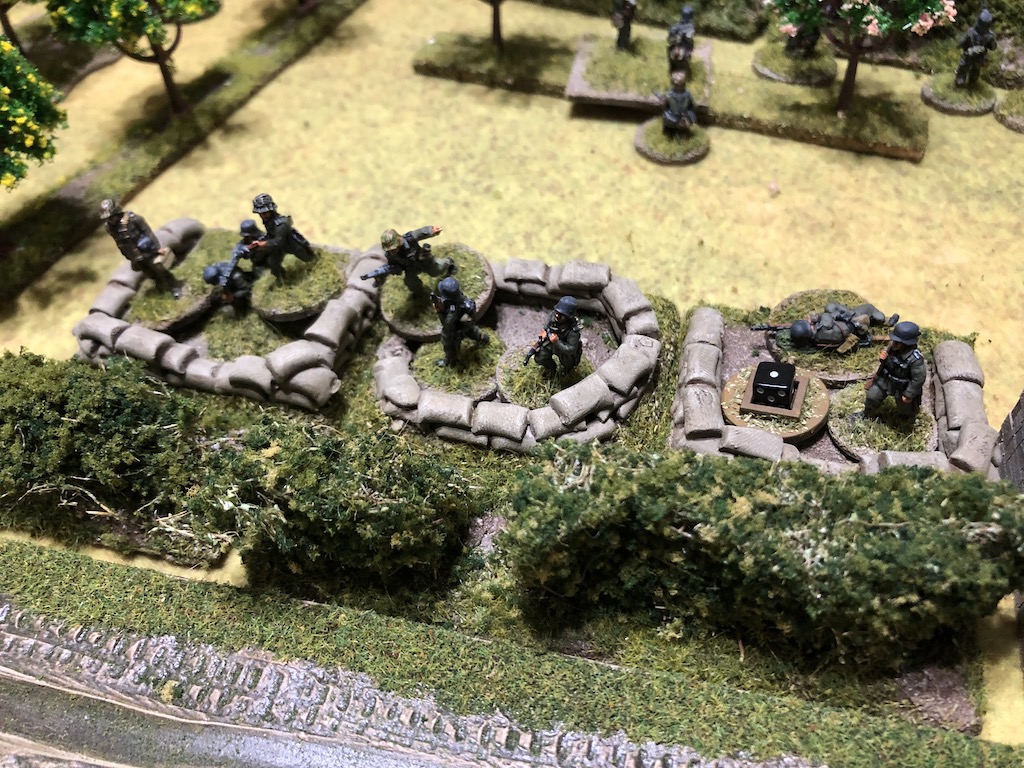
The Germans are not done yet. A second squad deploys in the orchard, facing out towards the road. They are dug in behind the hedgerow and open fire immediately on the Americans in the open.


The exposed Americans are caught in a murderous fire. The rifle team lose two men and suffer three points of shock and the BAR team lose a man and also suffer shock.

The obergefreiter hasn't quite finished and he orders one of the men to hurl a grenade over the hedgerow. Despite the relatively close range the grenade falls short of its target.

Just as I'm beginning to think I might get the upper hand here the Americans roll 66521 for their command roll. Dave seems to have a real knack for doing this at the most crucial moments.
Despite the good fortune with the command dice he's having no luck with the engineers who continue to fail to clear the minefield.
Despite the good fortune with the command dice he's having no luck with the engineers who continue to fail to clear the minefield.

The squad in the road wisely move backwards behind the hedge. The shock slows them down, but they just manage to make it into cover.


In the subsequent American phase the platoon sergeant orders the engineers to continue with their work, but to his frustration they seem to be getting nowhere.

He then orders the 50 cal HMG team to move forward over the hedge, which they do slowly.

The squad on the left move tactically towards the orchard.


The platoon lieutenant runs across the field towards the hedge to see if he can rectify the situation around the road.

He just manages to get within 4" of the squad.

This allows him to rally off two points of shock before ordering the squad to return fire across the road.


The German command roll is 53331 which is excellent and will enable me to maintain a really aggressive response. In anticipation of the arrival of another American squad the feldwebel puts both teams in the orchard on overwatch and rallies shock off one of the LMG teams.


The obergefreiter behind the hedge orders the squad to fire across the road.

The BAR team suffers three points of shock.

He then orders the squad to throw his last grenade, but this has no effect.

The Germans have the chance to catch that squad in a crossfire. The third German squad deploys its MG42 team across the road behind the hedge. From there it can catch the Americans in enfilade in the open. The rifle team deploy into the barn, but the line of sight is limited and only two of the men can target the squad across the road.


The BAR team lose another man and are reduced to a single gunner and the squad accumulates enough shock to pin them down. If I can break this second squad it will make it very difficult for the Americans to persist with the attack.


But things are never as simple as they seem - the next American command roll is 66421. It seems every time I make some progress I'm destined to find an enemy double phase in response. Nonetheless I feel like I have the upper hand now and we are very close to the tipping point in this game.
It comes as little surprise to see the engineers continue to struggle to clear the mines and make no progress.
It comes as little surprise to see the engineers continue to struggle to clear the mines and make no progress.

The lieutenant orders the 50 cal team to advance to join him.

With the squad at the hedge close to breaking he uses his remaining two CI to rally off some of their shock.

On the US left the squad pushes forward and the leading men climb over the hedge.


In the subsequent phase the platoon sergeant continues to urge the engineers at the minefield to clear a way through but they still struggle to locate and lift all the mines.
He then moves over the hedge himself towards the other squad.
Once he is in command range he orders them forward.


Over on the other side of the road the lieutenant rallies shock from the BAR team


He then orders the 50 cal team to open fire.


It's a powerful weapon and the Germans are fortunate that they suffer only a single casualty from the rifle team and one point of shock.

The German defenders are benefiting from the cover provided by the orchard and it has meant the Sherman has been unable to find any targets. The commander needs to find a better location and so orders the driver to go flat out down the road towards the sound of gunfire.


Now the Germans enjoy some good fortune. A command roll of 66532 opens up a few possibilities. It also gives them a total of five CoC points. One more and they can end the turn which could see one of the American squad sergeants rout from the table with his broken squad.
The MG42 behind the hedge continues to enfilade the American squad.
The MG42 behind the hedge continues to enfilade the American squad.

That adds a point of shock to each team and the squad is very close to breaking.

With another American squad approaching the orchard the obergefreiter orders his men to leave their entrenchments and form a firing line along the hedge.

Unfortunately the men are slow to move and the LMG team don't quite make it to the hedge.


The following German command roll is 55432. This gives me a full CoC die, one which I intend to use to end the turn. First though I want to try and break a second squad. The LMG team behind the hedge fire again at the exposed Americans.

A man is killed in the rifle team and with additional shock that is enough to break the squad.

The platoon lieutenant is attached and as the squad breaks he retreats with them. They fall back 15”, running through the 50 cal team as they go. However with seven men and 14 shock there is no excess shock to put onto the 50 cal team. Nonetheless the sight of another squad breaking brings American morale down to four.
UPDATE: we actually played that interpenetration of the 50 cal team by the broken squad incorrectly. We assumed 'excess' shock means more shock than they need to become broken, but the rules actually state: A Section, Squad or Team that is interpenetrated by a Breaking friendly Unit retreating due to excess Shock, will itself suffer the number of excess Shock points that the Broken Unit has. For example, a five man Unit with ten points of Shock will cause five points of Shock on any Section. Squad or Team it interpenetrates. See Section 14, Shock. So what should have happened was the 50 cal team suffer an additional seven points of shock, taking total shock to nine points on the three man team, which would mean they would break too. It had no impact on the outcome of the game but useful to remember for future games.
UPDATE: we actually played that interpenetration of the 50 cal team by the broken squad incorrectly. We assumed 'excess' shock means more shock than they need to become broken, but the rules actually state: A Section, Squad or Team that is interpenetrated by a Breaking friendly Unit retreating due to excess Shock, will itself suffer the number of excess Shock points that the Broken Unit has. For example, a five man Unit with ten points of Shock will cause five points of Shock on any Section. Squad or Team it interpenetrates. See Section 14, Shock. So what should have happened was the 50 cal team suffer an additional seven points of shock, taking total shock to nine points on the three man team, which would mean they would break too. It had no impact on the outcome of the game but useful to remember for future games.

The German squad in the orchard fires across the road at the 50 cal team.
The fire proves deadly, killing two of the crew and inflicting two points of shock.

On the other side of the orchard the rifle team fires and the LMG moves up to the hedge and joins in the fire.


The Americans are caught in the open and lose four men, three from the BAR team and one from the rifle team.

With the phase completed I use my CoC die to end the turn. Two broken American squads rout from the table taking with them the platoon commander and the two squad sergeants.


That's more than enough to bring US force morale crashing down to zero and see the first German victory of the campaign.
Well, that was an extraordinary game. There was a very high number of double phases and while several rolled by the Germans came at the wrong time, the Americans seemed to enjoy their's at some critical moments. The triple phase that allowed them to close down the German jump-off-point looked like it had the making of undoing the entire defence. Yet by moving quickly to take advantage of the sequence of phases the Americans found one of their squads may have pushed forward a little too hastily. Here the minefields played a key role. They blocked the way for other squads to move to their assistance and so found themselves unsupported. The German defenders were able to take full advantage of their isolation. Other American squads were not well positioned to come to their assistance quickly and when they did they too found themselves under fire. In this way the Germans were able to pick off individual units and prevent the Americans from concentrating and exploiting all their available firepower.
With that setback the commander of the 175th Colonel Goode has become 'Troubled'. He's not troubled enough to halt the advance but he's in danger of becoming so.
The Germans are still out of radio contact with their CO and so his opinion remains unchanged at -3. The men however are buoyed by the recent victory. Their opinion rises to +2. The platoon commander's outlook does not improve and goes from Irritable to Prickly.
The difference in force morale at the end of the game means all the German casualties will return to the platoon, putting them at full strength. Which now leaves the Germans with an interesting choice. The campaign allows for a localised counter attack:
At any point in the campaign where they hold the initiative, the Germans may launch a localised counter‐attack. However, they may never attempt to advance any further forward than their positions at La Cambe.
This is an attractive option as it gives the Germans an extra game - the Americans will have to fight off the counterattack in one game before making a second attempt to take the map we've just fought over. Given the Germans have a full strength platoon this could be the right time to consider just an attack. You can find out how that attack progresses in this post.
You find reports for all the games in this campaign and many other campaigns on the Chain of Command Campaign AAR page here.
Brave Americans have not coordinated enough their attack, tempted by good rolls and barrage.
ReplyDeleteLessons learned:
Build base of fire protecting engineers.
Clear minefields.
Be patient, since barrage was over.
Great AAR, as always.
Those miefield really payoff.
ReplyDeleteThanks. Yes, they worked out well in the end.
DeleteGreat report - nice to see your patient defence paid off in this one! As I recall once the Germans win a game they can opt to go for a counter attack. In terms of delaying the Americans this is a "must do" activity, even if done cautiously, as it ticks down one more game turn without letting the Americans advance. Lovely to see your terrain and figures in action again, really enjoying this series (although I have enjoyed all of them).
ReplyDeleteThanks. I'd forgotten about the option for a counter attack until I was re-reading the campaign notes. I agree it's a 'must-do' to gain that extra game (and boy I need all I can get!). Glad you're enjoying it.
DeleteWow that was veryyy tense. Those american double and triple phases at the beginning were scary. I honestly thought you would get overun with the massive base of fire the americans were able to concentrate at the beginning.
ReplyDeleteThe minefields and the trenches were very useful and played out just right!
Curious to see how the next game goes, the Americans learning from their very costly lesson without a doubt
You and me too. I thought it was going to be a repeat of the earlier debacle, fortunately the Americans may have pushed that lone squad a little too far forward and they paid the price.
DeleteOne more thing: obvious plan was to put 3 German JoP in all 3 orchards. You were trying (as I would) to put JoP in central orchard, but was blocked. You (and me, honestly) thought it was really bad. However, we were mistaken.
ReplyDeleteSupporting JoPs won the game: You could use central JoP to save southern JoP. If this central JoP was in central orchard You couldn't deploy to southern orchard, and USArmy would infiltrate to house, encircling central postion.
Lesson learnt: attacking 2 mutually supporting JoP is not a best idea.
You never know what is really good for You.
Yes, that's a really good point.
DeleteThe Germans get the rub of green at last, but only just at times🙂
ReplyDeleteSplendid report as usual.
It couldn't come soon enough, but despite a shakey start everything fell into place okay in the end.
DeleteNice. My regular opponent has been wondering how his GI have been struggling. Now he sees why :)
ReplyDeleteI wish I'd played the first scenario a bit more like this one. No guarantee I'd get a similar result but I rather fancy the Germans will do better if they can hold back and draw the Americans into terrain where they can't bring all their fire to bear. Easier said than done of course, as I ably demonstrated in that first scenario.
DeleteThanks for putting all the effort in with these reports Mark, they have been the highlight of the week for me.
ReplyDeleteLikewise, I know where you are coming from with that Virgo thing.
Cheers,
Pat.
Thanks Pat, nice to hear you've been enjoying these. I think taking lots of photos for a blog as you and I do, allows us to scrutinise our work in more detail than usual. That's when the perfectionist in us is aroused!
DeleteGreat AAR, as always. The minefield certainly proved its worth.
ReplyDeleteThanks. It might have been a different story of those engineers has cleared it quickly but some good fortune meant they remained the obstacles I was always hoping they would be.
DeleteA very enjoyable read as always and well done on your victory Mark.
ReplyDeleteLooking forward to more!
Regards
Gary
Excellent game. It must have given you the jitters waiting and then being stopped by those doube US phases, but it defibitely paid off.
ReplyDeleteGreat stuff. A well-written and tense battle report.
ReplyDeleteAnother splendid battle report!
ReplyDeleteCheers
Matt