

While they certainly do the job, they also take up a bit of storage space. I thought shell holes could be an alternative way of marking out the area of a barrage. They could come in handy for other things and just as scatter terrain with the added bonus that they take up less storage space. This coincided with the start of the 29, Let's Go! campaign for Chain of Command where both the German and Americans have access to a mortar barrage in their support choices, something that made it quite likely we could see two barrages on the table at the same time.
I thought it would be quite effective to mix up the explosion markers and shell holes within the same barrage. So what follows is a simple, step-by-step tutorial showing how these were made.

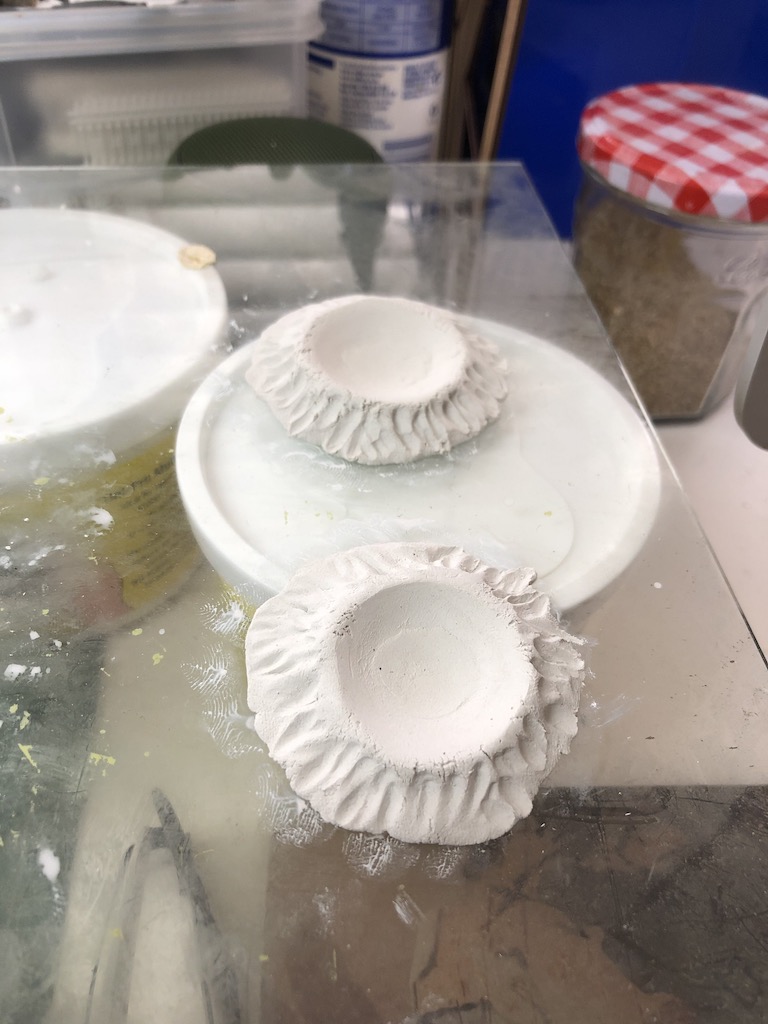
I used air drying clay as the base material, as it's inexpensive and easy to mould into shape.

The shell holes would be based so they matched my existing terrain. To start with I cut the bases from pieces of MDF. As always I chamfered the edges so that there wasn't an obvious step up from the surrounding terrain. I use my Dremel rotary tool for this job and it allows for a more natural edge to the base.

I wanted an even, rounded shape to the blast area, it's the one distinctive feature that defines a shell hole. To achieve that I used a table tennis ball to make an impression in the clay while it was still soft. The outer edges of the 'crater' were then given some shape using a modelling tool.


Once dry the shell holes were glued to the MDF bases and blended into the surface using household filler.


This was then textured by coating with a layer of PVA glue and sprinkling sand.


Once dry they were painted with Dulux household emulsion paint. I buy this in 250ml sample pots from the local hardware store, it's inexpensive and they go a long way. My base earth colour is rather unsurprisingly called 'Brown Land'.


I then give it a dry brush with another Dulux emulsion, this time the more exotically named Arava.


Finally I applied static grass using an applicator and added a few broken twigs to break up the uniformity.

I can see other uses for these beyond marking out the area of a barrage. They could work as jump-off-points or simply scatter terrain.

Splendid craters!
ReplyDeleteCheers
Matt
Excellent idea and execution!
ReplyDeleteThe only drawback for me is that they blend in almost to wel with the rest and as such don't stand out as 'markers' for an effect. but cobined with the explosions it looks really cool!
very nice
ReplyDeleteThey look great.
ReplyDeleteEffective and gorgeous!!
ReplyDeleteVery nice :)
ReplyDeleteThank you, I have some clay so will give this a go. Last time I use air dry clay, I made the feature too big and got warping, so this looks the right size and together with filler blending should work fine.
ReplyDeleteLovely job on those, great idea with the ping pong ball!
ReplyDeleteCheers
Matt
Enjoying these and all your other posts Mark. Your campaign battle reports are very inspirational and I am always eagerly awaiting the next.
ReplyDeleteThey look great! I love the attention to detail.
ReplyDelete