

The first scenario is a probe by the Americans as they seek to push through the first German lines. The platoon is well supported with two Sherman tanks but they must be conscious of an 88mm flak gun that is off the northern edge of the table. It requires a full CoC die to fire and can only cover some areas of the map, but the Germans start the game with two CoC dice so it's a very potent threat.


The Americans have a powerful platoon with the option to add an extra BAR to each squad to improve their firepower. That platoon can be replaced for every single game in the campaign which means they will start each scenario at full strength. When that's added to the support available it makes them very tough opponents.

The Germans are a regular infantry platoon, but unlike the Americans the platoon defending this table will have to do that without reinforcement for three of the maps in the campaign. They can receive some replacement men but these will be Hilfswillinge, recruits from the East, whose quality will impact the force morale of the platoon. It could not contrast more with the Americans.

As a Probe scenario I need to make sure there is no easy way for the Americans to slip one of their units of my table edge for victory. While I have a decent anti-tank capability there is the possibility the Shermans provide the key to a quick breakthrough and so I need to restrict their options. I'm hoping that between the off-table 88mm gun; the platoon's panzerschreck, and, the panzerfausts with each squad, I have enough inherent anti-tank capability that I don't need to draw on anything additional as support. As a result I plan to use static defences to channel the Americans into a killing zone. They must cross open ground regardless of their avenue of approach, however taking the route through the ploughed field on their left flank offers the best cover from the 88. The lack of cover for the Germans defending that flank also makes it an attractive route for the Shermans and so I intend to block that off by laying two minefields. In addition a roadblock will mean the tanks will have to negotiate the hedgerows and the orchard if they intend to lead the breakthrough, increasing their chance of coming to grief from the infantry anti-tank weapons.

I fully expect to see an American mortar barrage. To deal with that I will call on a sniper team to try to take out the forward observer and, in case that's unsuccessful, I will have four of my teams entrenched for better protection. The threat of the barrage means I will try to ensure my jump-off-points are spread out so that a barrage doesn't close down all my deployment options. My thoughts are to try and place one jump-off-point in a forward position and two to the rear, one in the farm buildings and the other in the orchard. I start the game with two CoC dice and while these will be useful for the 88mm gun there is no restriction on how they are used. I like the idea of keeping the option open to use one of those dice to spring an ambush with the panzerschreck team and so a forward jump-off-point might serve that purpose well.
Lastly, with only a single senior leader the platoon's Feldwebel, I will call on an adjutant so that I can deploy the Feldwebel early if needed.
We start with German force morale at ten and the Americans at nine. That's a good start as I suspect I will need all the help I can get. The Americans begin the Patrol phase with three free moves and we both end up placing jump-off-points covering the flanks and centre. I succeed in placing mine as planned, with one forward and two to the rear.

The minefields and the roadblock are then put in place.


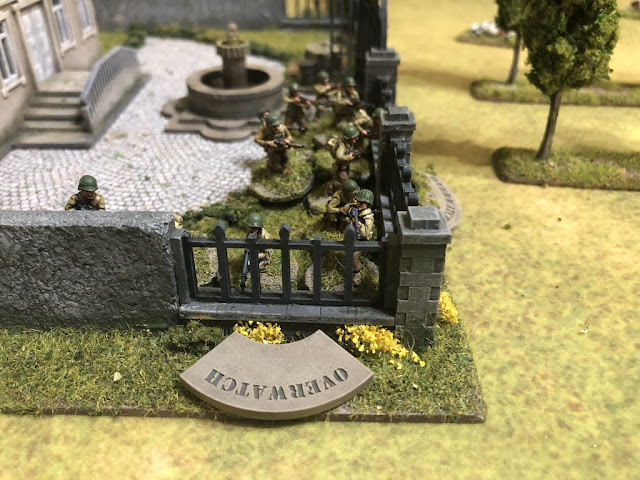
The Germans have the first phase but I choose not to deploy at this early stage until I'm more certain of American intentions. On the other hand they waste no time deploying. The first sight of the enemy is a Sherman that enters on the road. The commander puts the gunner on overwatch.


A squad deploys next to the tank, behind one of the hedgerows and takes up tactical positions.

The German command roll provides some additional CoC points but otherwise there is no activity. Let's wait and see what the Americans have planned. With that a second Sherman emerges behind the recently deployed squad and the tank gunner is placed on overwatch.

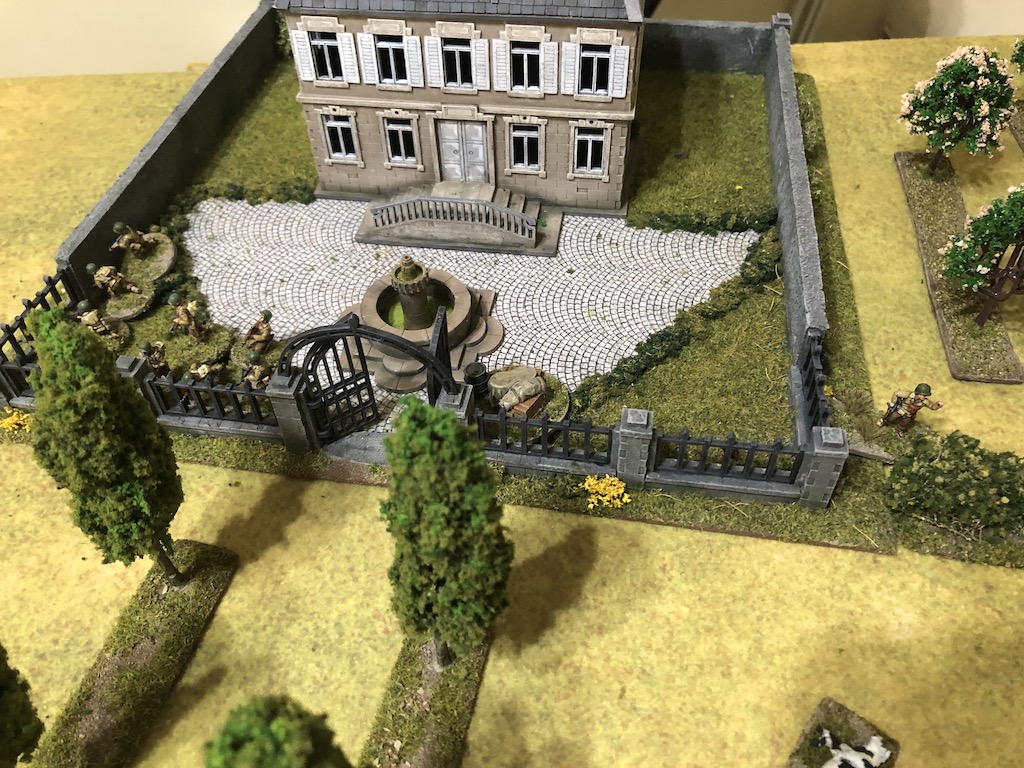
A second squad then deploys into the grounds of the chateau.


The platoon sergeant deploys behind them.


He puts the rifle team and BAR team from the squad in the chateau on overwatch.
He also orders the rifle team behind the hedge onto overwatch.

A second squad then deploys into the grounds of the chateau.


The platoon sergeant deploys behind them.


He puts the rifle team and BAR team from the squad in the chateau on overwatch.

He also orders the rifle team behind the hedge onto overwatch.

Well, this gives me much to think about. The Americans have set up an impressive base of fire to support any forward move and respond to any German activity. I'm going to have be very careful how I time my deployment.
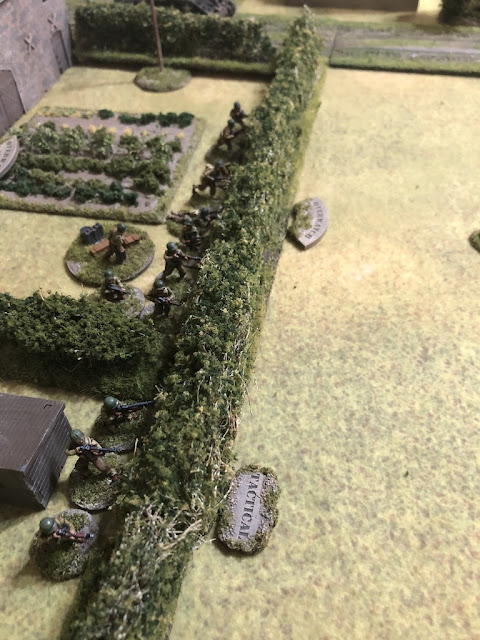
Having established that strong base of fire the corporal with the squad in the chateau detaches a two man scout team. They take advantage of the American scouting characteristic and move normally with two dice but end that move in tactical positions.

I can see exactly what the Americans have planned. The scout team is trying to provoke a German response and whatever that might be will be met with a hail of American fire. I'm in no hurry, so I let my phase pass without any deployment. The American scouts continue to push forward, covering 11” but ending up in tactical positions. They are coming close to threatening my forward jump-off-point. While I don't want to lose that, I really don't want to expose my men to all that American fire. The choice may be down to sacrificing my jump-off-point or my men.

I decide to continue waiting to see how this American move unfolds and remain concealed. The scout team continues forward, but they don't move directly towards my jump-off-point. I realise that's because they could end up obstructing the line of fire from their comrades on overwatch and shield any Germans who deploy in the orchard.

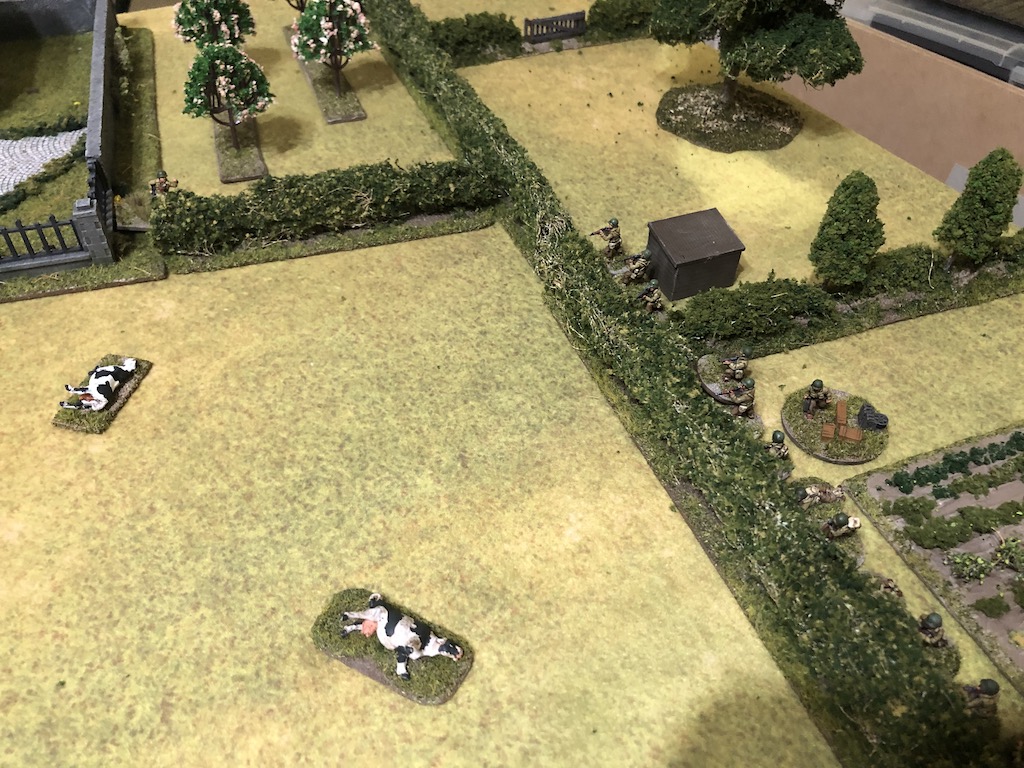
The platoon sergeant orders the squad at the hedgerow to put covering fire on the hedge surrounding the orchard.


The scouts eye the dead cow and ponder whether they are about to face a similar fate.....

The platoon sergeant is alarmed to see the scouts stumble across the field and orders the squad at the hedgerow to take up overwatch positions in expectation of a German response.


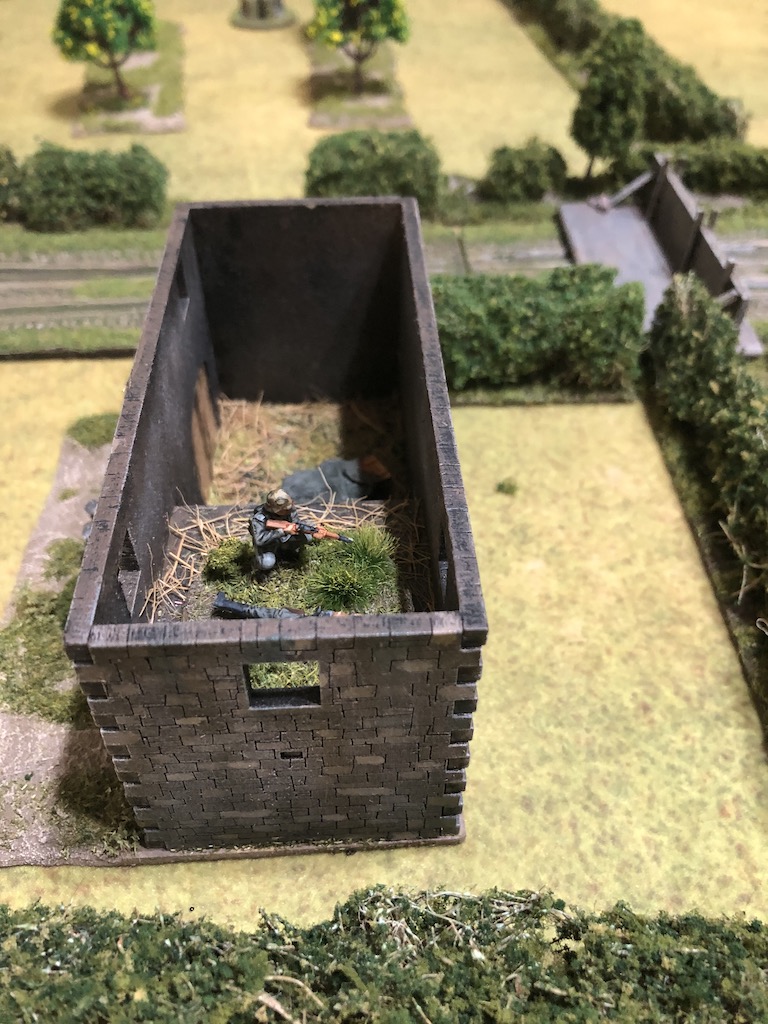
As I suspected the Americans have called on the support of a mortar barrage and a forward observer team deploy into the upper level of one of the buildings.

They waste no time contacting the mortar battery. With a CoC die in hand Dave is now able to counter any attempt by me to terminate the barrage by using one of my dice to end the turn. I may need my sniper team to deal with this threat.

The German command roll includes a 1 and so the sniper team deploys into the upper level of the barn and targets the FO. Unfortunately his aim is off and he misses. The American squads on overwatch hear the shot ring out, but are unable to identify the exact location of the sniper.
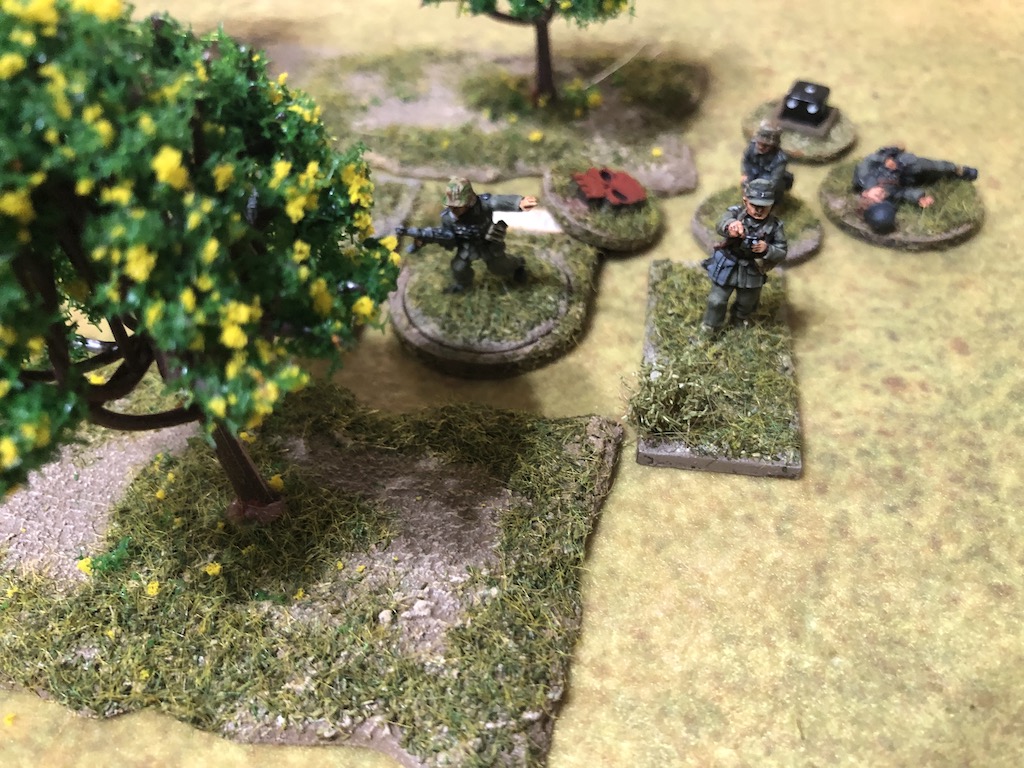
I doubt the American scouts will be as unsuccessful closing down my jump-off-point in their next phase and so I decide to deploy a squad along the hedgerow to deal with them. I know I will face return fire but I'm hoping the hard cover of the entrenchments will give me sufficient protection and I intend to use a CoC die in the next American phase to interrupt and withdraw. Hopefully this can be a hit and run attack, where I eliminate the scouts and slip away before I receive too much attention from the Americans. The Obergefreiter orders the rifle team to open fire.

The hapless scouts are both killed and so the team is wiped out, taking American force morale down to eight. Normandy is not safe for man or beast.


The fire is at long range but the Americans lose one man in the rifle team.

While that is first blood to the Germans, the Americans have several units on overwatch who are about to return fire. Both the squad at the chateau and the one behind the hedgerow open up with all weapons. It turns out to be deadly and despite the hard cover of the entrenchment the Germans lose three men from the rifle team as casualties and see the Obergefreiter wounded. German force morale drops two points down to eight. As if that's not bad enough both the Shermans now open up with their main guns.


The German squad loses another two men and both teams accumulate shock. I thought I'd gain some protection from the entrenchments but that was awful - five men lost as casualties and a wounded squad leader.

In the following American phase the forward observer calls in a ranging shot from the mortar battery, targeting the farm buildings but the shot deviates, drifting to the left.

The platoon sergeant orders both of the American squads to fire at the Germans behind the hedge.

As intended I use a CoC die to interrupt and pull the remnants of the squad back into the orchard.

That's enough to avoid the American small arms fire, but the Shermans can see over the hedgerow into the orchard and they both fire off another round of high explosive.

There are only three hits but this squad seems fated to take casualties from the slightest hint of enemy fire and another two men are hit. The leader is one, but this time his wound only stuns him, however the rifle team is now reduced to a single man. This time German morale holds steady. That squad has taken 60% casualties and I'm not sure how much longer I can subject my platoon to this sort of punishment.

In the German phase the sniper targets the forward observer once again. This time he is more on target but the fire is not accurate enough to cause a casualty. Meanwhile the squad in the orchard pulls back further to hide from the sight of the Shermans.

The Feldwebel deploys nearby and rallies off all three points of shock.

Things take a turn for the worse when the forward observer calls down the mortar barrage. The German sniper is unharmed but effectively out of action now that his line of sight is lost in the barrage.

The platoon sergeant orders the squad at the hedge onto overwatch.


He then orders the squad in the grounds of the chateau to climb the wall and move out.

On the American left a third squad and an engineer team deploy into the ploughed field taking up tactical positions.

The platoon sergeant orders the squad at the hedge onto overwatch.


He then orders the squad in the grounds of the chateau to climb the wall and move out.

On the American left a third squad and an engineer team deploy into the ploughed field taking up tactical positions.


Events are not going well for my Germans. Casualties are high with little to show for them and all my plans have gone awry. The Feldwebel orders the squad in the orchard to move away from the barrage but other than that I only contemplate whether to withdraw in the next phase.


The American platoon Lieutenant deploys on the left.


The lieutenant orders the squad and engineers to move forward normally through the ploughed field.


On other flank the platoon sergeant orders the squad outside the chateau onto overwatch and commands the squad behind the hedge to advance.


One of the Shermans moves forward up to the hedge and the gunner is placed on overwatch.

That sees the Americans advance on both flanks. They are covered by the Shermans and a squad on overwatch while an 81mm mortar barrage looks set to work its way up the German line.


He orders the forward observer to adjust the barrage to the right. Once again the sniper team are unscathed.


On other flank the platoon sergeant orders the squad outside the chateau onto overwatch and commands the squad behind the hedge to advance.


One of the Shermans moves forward up to the hedge and the gunner is placed on overwatch.

That sees the Americans advance on both flanks. They are covered by the Shermans and a squad on overwatch while an 81mm mortar barrage looks set to work its way up the German line.

I think I can see the writing on the wall and this is as good a time as any to withdraw before the Germans sustain casualties they can ill afford. That was very well played by Dave, an almost text book attack with units all supporting each other and covering any movement with ample firepower. I hadn't planned for such a methodical attack and was set up to try to counter a rapid advance.
My selection of supports were not well thought through. While the minefields certainly blocked that flank, were they really necessary? Surely the 88mm gun and my own anti-tank weapons should have been able to deal with any rush from the Shermans? I should have also expected Dave to be wary of the 88 and keep his Shermans back in safer positions. Perhaps an AT gun like the Pak38 or Pak40 may have been more useful, as the short range of the panzerfaust and panzerschreck allowed the Shermans to sit back and fire from longer range. The Pak40 is seven support points, but if it could have dealt with the Shermans it may have been worth the investment.
A sniper at three support points was something of a gamble. It might have been a different story if he had taken out the American FO in those early shots, but it was always going to be something of a lottery. Alternatively a mortar barrage at only four support points could have disrupted the Americans' tactics more effectively. However that's to assume a German forward observer could last long enough to bring the barrage down.
Lots to reflect upon and that's to take nothing away from Dave for executing a patient and tactically proficient attack. Nothing else to do now but dust myself off and go again.
The Germans suffered six casualties and so three men are lost permanently. Two are wounded and will miss the next game and one man returns from the aid station. The CO's opinion drops down to -2 and the Men's opinion to -1.
There is no need to track American casualties for this campaign as they can assign a new platoon to every game. The only opinion that matters is that of Colonel Goode who will become overly cautious if there are too many setbacks. For now he remains concerned and the advance continues.
So we now move to scenario 2 Delaying Action at Arthenay and you can find out what happens next in this game report.
You find reports for all the games in this campaign and many other campaigns on the Chain of Command Campaign AAR page here.
Your battle report made for an excellent read. Riveting every step of the way. Great stuff!
ReplyDeleteGreat report! I actually took the Pak40 as you suggest, and it almost single handedly won the game knocking out both Shermans and causing general havoc with it’s fairly high HE value. Sadly the casualties in the platoon Itself were brutal to the point I didn’t even attempt to defend the table a second time, and voluntarily withdrew.
ReplyDeleteThat’s the issue isn’t it? Somehow the Germans need to find a way to hold the Americans back but not lose too many men. Nice to take out some Shermans though!
DeleteVery interesting reading. Great stuff.
ReplyDeleteExcellent report, nice and concise, great pics and lovely table.
ReplyDelete(I’ve finally sussed out how to stay signed in and post, woohoo!)
With the exception of the cows, I think everyone was able to appreciate this gorgeous report...Inspired, and so well illustrated!
ReplyDeleteReaders should not be distressed, the authors of this blog assure us no animals were harmed in the creation of this AAR.
DeleteGreat stuff! Inspiration for my efforts in 28mm
ReplyDeleteA fine read as always, and has you say Dave played a blinder there. As ever things could have gone differently, better joy in the next perhaps.
ReplyDeleteA nightmare outcome for the Germans. Usually waiting and seeing is a good option for the side defending, but that American aggression really paid off. Mind you, a fresh platoon for each game must help a lot. I'm interested in seeing how this PSC develops.
ReplyDeleteA fresh platoon certainly helps, but as always with CoC the force morale mechanism limits just how aggressive and reckless the American commander can be, but at least he doesn’t have to worry about taking a weakened platoon into future games.
DeleteGreat stuff. I do tend to agree, the US forces played a pretty much perfect game. It might have been different had you got lucky with the sniper, but otherwise, it looked like you had extremely limited options. I would have considered sitting back in positions that weren't visible to the Shermans unless they came forward, and then let the 88mm do it's thing, but the barrage made that a non-starter. PAK 40 in an entrenchment might have been better as you say, but then the barrage could have blinded it. Hard to see what the best option here might be.
ReplyDeleteYeah, I’ve pondered possible alternatives but the best I can think of is a very deep defence at the back of the table with everyone entrenched. That would render the Shermans redundant unless they are brought forward and risk the wrath of the 88. Similarly the mortars are less effective because the Americans can’t exit the table through the barrage, so while it may neutralise part of the table it will do so for both sides. A tough one.
DeleteGreat report as always!
DeleteI think you are right. That forward JOP contributed to the loss for the Germans, as they felt they needed to deploy to defend it. A deep deployment would force any US scouts to come in between the trees and buildings where the Germans could attack them without being exposed to the entire American fire power. JOPs are preferably very deep and able to support eachother without being so close that a single scout team can close more than one down at the same time.
Looking forward to the next game!
/Mattias
Great game report. Well done to the American CO for a textbook attack.
ReplyDeleteWhat a wonderful report and set of photographs. Very entertaining game.
ReplyDeleteFantastic report, very enjoyable.
ReplyDeleteThanks for posting
Cheers
Matt
Great report!
ReplyDeleteNobody is mourning the real heroes; those two stalwart US scouts!
Don't worry, just nicks, flesh-wounds, they would have been patched up and back with their unit within hours, thanks to the Force Morale difference at the end.
DeleteWow, great job by the Americans. I know it’s bad form to praise the opponent of the blog author but in this case, it can’t be helped. Though I was rooting for you The whole time like I always do. 😀
ReplyDeleteAnd of course the game is full of eye candy.
Great report, as always. Quick question on your fences for Storming the citadel. Were they scratch built? Keep well during the enforced isolation and hopefully you'll be back soon. Gerry
ReplyDeleteThanks Gerry. Yes, those fences are scratchbuilt from balsa wood. Not as time consuming as you might think.
DeleteHi,
ReplyDeletethank you for sharing this campaign and all the other 'really useful stuff'.
We played Probe at La Cambe this week in 28mm and it was great fun.
It was on an 8 * 6 foot table so it was far too long for the USA player with little cover for him to use. The Germans sat there like a guy at a fairground shooting stall, but with MG42s and a Pak 40 (subsituted for the 88) rather than a measly air rifle.
Do you play on a 6 * 4 table?
Also do you mind if I post pics of this battle on the Chain of Command Facebook page (where I found out about your blog)?
Thanks. Yes we play in 20mm on a 6x4. I like the sense of space it creates and find 28mm on a 6x4 too crowded for CoC. I don’t mind if you post pictures on FB, but I’m fairly active on that page and post links to the AARs as I write them, but I have no issue if you want to do that.
DeleteHi,
Deletethanks. I have posted some pics of our replay of your game on the Chain of Command Facebook page.
It was great fun. I appreciate your thoroughness in the game prep. Most people would have assumed the use of hard cover in that farm outbuilding, but as you pointed out it had no doors or windows on the side facing the Americans.