

In the previous game the Stuka bombardment had failed to cause the damage and disruption I had hoped for and so this time my intention is to use firepower that my officers and NCOs can control to break into the village. Looking at my support options I have opted to create a powerful base of fire that should make the outskirts of the village untenable for the French defenders and thereby allow my squads to cross the open ground and get in amongst them.
My platoon suffered losses in both dead and wounded in the last game. Those losses included the death of one of the squad Obergefrieters and so I would need to promote a man from the ranks to fill his place. I have assigned the newly promoted man to command a reduced squad of four men that will be in effect a large LMG team. As a result the German platoon currently looks like this - two full squads, a reduced squad (the LMG team) and a 50mm mortar team.

With twelve support points available I have decided to call on two MMG teams, a 75mm infantry gun and a red dice. By deploying these supports beyond the effective range of the French infantry, but within the close range of my weapons, I hope to set up an unequal firefight. My thinking is that between the supports, the LMG team from the platoon and the platoon's 50mm mortar I can create sufficient fire and covering fire to enable my two remaining squads to push into the village. The red dice will allow for additional activation options and I will be looking to my two senior leaders to coordinate this as efficiently as possible. The important thing is to try to dominate any firefight and I plan to concentrate the fire on individual French squads and drive them each back in turn.
As with the previous game I plan to have jump off points on both flanks providing options to push forward from either side depending on how things develop. The Germans start with three free moves in the patrol phase which unfolds much as planned leaving me with jump off points on both flanks.


Both sides start with their force morale at eight and the French hold the initiative. The French have less support points for this game but will benefit from a free entrenchment for holding the table from the last game. Other than that I have no idea what support they may call on. Unlike the German platoon they have suffered fewer casualties and are in better shape.

One thing to keep in mind while following this campaign is that the wheat fields can provide light cover. This is clarified in the campaign notes which state: 'Wheat is around 3’ high at this time. Stationary troops in a wheat field count as being in light cover, due to their location being masked. Moving troops count as being in the open. Where a unit moved in the previous phase they will count as moving when fired at, but in subsequent phases they are assumed to be stationary'. Similarly the railway lines offer some protection: '..troops lining a railway line are presumed to be in light cover from the raised ballast present.'
The French start with a double phase. I find that's usually a frustrating result for a defender who most often would prefer to stay concealed and observe how an attack develops. That's exactly what Dave opts to do and he does nothing in this and the subsequent French phase.
The Germans on the other hand are eager to get to grips with the French, perhaps a touch too eager. The command roll doesn't provide an ideal range of options, so that while the roll of 544112 (including the red dice) has options it is too early to deploy a senior leader which means only the 1,1 and 2 are really useful. As a result the 50mm mortar team deploys on the German right flank and is joined by the LMG team, whose commander, the newly appointed Obergefreiter uses his one command initiative to put the MG34 on overwatch. My hope is the deployment of this small detachment provokes a French response and then I can concentrate my other deployment to suppress it with fire.
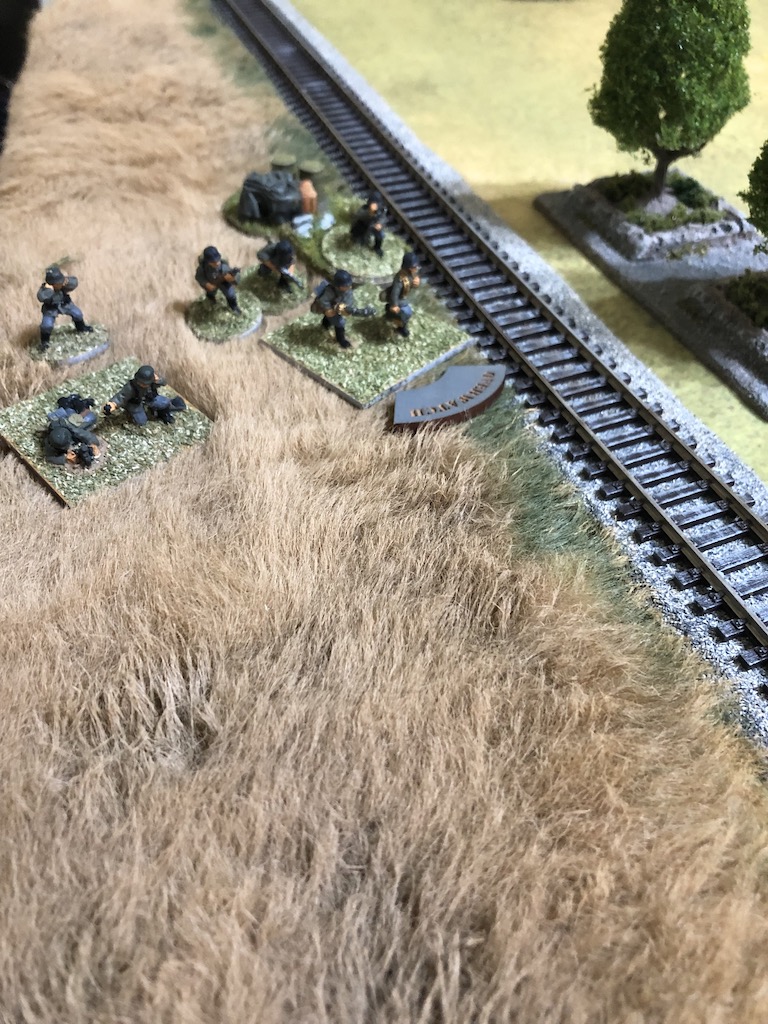

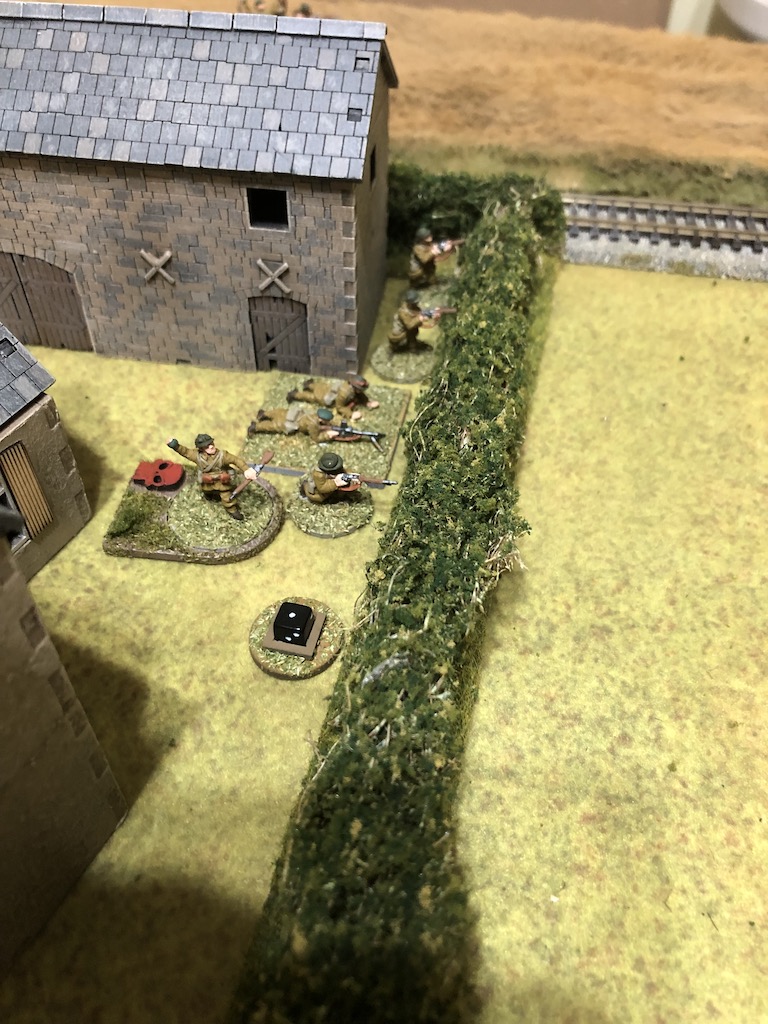
The French command roll of 64322 offers considerably more options and Dave sees this as an opportunity to open a very aggressive defence. The first Groupe appears opposite the Germans in the wheat field while another deploys to their right into the farmyard behind the hedge.


Both open fire on the recently deployed Germans and it proves very effective. Two men in the 50mm mortar team are casualties which means the two points of shock they also suffer is enough to break the team knocking German morale down to seven. To make matters worse the Obergefreiter with the LMG team is also hit and wounded which drags morale down even further to six.


I was hoping to provoke a French response, but I didn't expect to unleash a whirlwind. I have a lot to do today and my force morale is already down to six. This is not a good start.
My Germans are able to extract some revenge when the LMG, which was on overwatch, returns fire at the Groupe in the farm yard and the defenders take two casualties.
My Germans are able to extract some revenge when the LMG, which was on overwatch, returns fire at the Groupe in the farm yard and the defenders take two casualties.

However the French are not done yet and aim to take full advantage of this opportunity to inflict damage to German morale. Another Groupe deploys on their other flank and opens fire.


They are firing at effective range but still inflict shock on the LMG team which is now dangerously close to pinning.

Finally, the French platoon sergeant deploys into the farm. From there he can command both of the Groupes on that flank.


That was a very rapid and violent response from the French but at least I can now see their defensive position. Hopefully I can deploy and bring all my firepower to bear and so dominate the firefight. Unfortunately German coordination is not up to scratch today and the command roll of 554411 really limits what units can deploy. Time is critical here as I need to bring as many units to bear before I am overwhelmed by French fire.
The LMG team in the wheat field opens fire again at the farm.
The LMG team in the wheat field opens fire again at the farm.

The sergeant is hit and wounded and the LMG team suffers shock, however French morale holds steady.

A MMG team deploys alongside the LMG team and it also fires into the farm yard.


The French lose two men and I begin to have a sense I am giving as good as I am getting. I just wish I could deploy more units to really put on the pressure.
The platoon second in command, the Feldwebel joins the two teams to provide some leadership, particularly while the Obergefreiter is stunned.

He uses his command initiatives to rally as much shock as he can from the LMG team in anticipation of receiving more French fire in their coming phase.

Just when I feel I might be in a position to even out the firefight things take an ominous turn with a French command roll of 66421. It looks like my two teams will have to face more than one phase of French fire.
The platoon sergeant orders both Groupes on the French left to fire while the Groupe on the other flank also contributes its fire. The firefight is taking place at effective range for the French but the three Groupes can pour out a lot of fire and the two German teams take twelve hits. Two of the crew of the MMG are killed. The LMG team also loses a crew member, but more devastating the stunned Obergefrieter is hit and killed delivering a big blow to German morale which drops to four.
The platoon sergeant orders both Groupes on the French left to fire while the Groupe on the other flank also contributes its fire. The firefight is taking place at effective range for the French but the three Groupes can pour out a lot of fire and the two German teams take twelve hits. Two of the crew of the MMG are killed. The LMG team also loses a crew member, but more devastating the stunned Obergefrieter is hit and killed delivering a big blow to German morale which drops to four.


This adds only a point of shock to the MMG team but with another French phase to come we can expect a full volley of rifle grenades in the near future. Things are not going well for the Germans.

In the subsequent French phase the storm of fire continues unabated.


The MMG team lose two men killed, reducing the crew to a single man. Once again if not for the presence of the Feldwebel they too would break, instead they are also pinned.


At this stage I'm really wondering whether I should have held off my deployment until I could get more units on the table? Of course, that's with the benefit of hindsight. With German force morale down to four that means the red dice is now lost and the total pool of German command dice is reduced to four. That is hardly going to help and a roll of 6421 really brings home how impactful this will be.
The Germans move to deploy the 75mm infantry gun on their left flank but that is stymied by the presence of Franc Tireur and so some vital command dice go unused this phase.
The Germans move to deploy the 75mm infantry gun on their left flank but that is stymied by the presence of Franc Tireur and so some vital command dice go unused this phase.


With the situation looking desperate on the other flank the Feldwebel spends the phase rallying shock off both teams. The end result has been a frustrating phase with the Germans unable to return any fire and having to face more from the French.

The French are able to activate all their units to fire and once again they pour fire into the wheat field.


Despite the volume of small arms fire coming their way the Germans lose only two men, but they are both from the LMG team which sees that unit wiped out, dragging their force morale down even further to three.


With the prospect of German scenario victory fast receding my only hope is to inflict as many casualties as I possibly can in the hope this will make my task that little bit easier in the next game. Being limited to three command dice doesn't make this straightforward, but a roll of 611 allows some options. Firstly, the 75 infantry gun deploys from the central jump off point near the German table edge. I choose to avoid the Franc Tireurs and rely on the gunshield and long range to deploy into the open ground.

The gun fires into the farm yard and inflicts a casualty and three points of shock.


I use the remaining command dice to deploy the second MMG team alongside the first team. They will also have to handle a lot of return fire from the French but as support units these are losses I am prepared to accept.

The fire kills a man in each of the French teams and the added shock is enough to pin the Groupe. A small success for the Germans, but I suspect it is far too little, far too late.

In the following French phase the platoon sergeant orders both Groupes nearest him to fire on the MMG teams and they are joined by the Groupe on the other flank - in all the two MMG teams are about to face thirty fire dice.
The results are not as bad as they could have been, nonetheless the resulting shock breaks the pinned MMG team and sees them fall back to join the broken 50mm mortar team.


The other MMG team loses a man and suffers a point of shock. Given the amount of fire that just came their way that is a rather fortunate outcome.

The German command roll of 552 in the next phase once again limits options. However I'm determined not to throw in the towel just yet. I have one French Groupe pinned and close to breaking. I still have some firepower to employ and so decide to deploy one of my squads to join the MMG team to keep up the pressure on the French.

With the Groupe in the farm yard pinned and so benefitting from hard cover my squad directs its fire at the Groupe opposite in the wheat field, managing to kill one of the men and inflict some shock.


I can only look on and weep as Dave's command rolls continue to provide a host of useful options for his units. This phase his Groupes are joined by a dismounted Escouade de Fusiliers Motocyliste and they contribute their fire to that directed at my squad and MMG team, but this time they only manage to inflict a small amount of shock.

On the other flank the French Lieutenant deploys and orders the rifle team in the nearest Groupe to put covering fire on the ground occupied by the 75mm infantry gun.


He then orders the LMG team to fire at the two broken German teams in a clear attempt to drive down my morale (figuratively and literally!).

They succeed in routing the mortar team from the table but unlike the MMG team they are not a support unit, so there is no requirement to roll on the force morale table.

I persist with the German attempt to inflict more casualties and the roll of 641 gives me something I can make use of. The 1 activates the infantry gun which fires at the pinned Groupe in the farm yard.

Despite the covering fire the gun manages to inflict another casualty and add enough shock to see the Groupe break and they fall back 15". It's the first blow to French morale which drops to seven.


The Feldwebel rallies off a point of shock and orders the squad and MMG to open fire at the Groupe opposite. There are no French casualties but six points of shock brings that Groupe close to pinning and reduces their firepower.


Despite the low German force morale I feel I'm able to maintain pressure on the French. With the central Groupe now broken and this one in the wheat field close to pinning things don't look quite so grim for the Germans, it's just a shame my force morale has been driven so low.
Then just as I think things might be looking up the French command roll is 66541. That, I could have done without! Fortunately the French are limited in what they can do and the Lieutenant has the Groupe nearest him fire into the wheat field but for once the French fire proves ineffective.
Then just as I think things might be looking up the French command roll is 66541. That, I could have done without! Fortunately the French are limited in what they can do and the Lieutenant has the Groupe nearest him fire into the wheat field but for once the French fire proves ineffective.


The motorcyclists are more successful firing at the broken MMG team which forces them to fall back and in so doing rout off the table. That brings German morale down to two.
Any doubts that today is not my day are confirmed when the next French command roll is 66431. On the French left the platoon sergeant orders the Groupe in the wheat to fire and yet, despite nine hits the Germans opposite only suffer two points of shock.


The sergeant then moves back in the direction of the broken Groupe to attempt to rally them.

In the third French phase the sergeant rallies shock off the broken Groupe.

Meanwhile the other remaining units fire into the wheat field once again. The fire adds more shock and the Germans lose a man from the squad's rifle team.

Considering the Germans faced three consecutive French phases they have come off relatively lightly, although shock has started to accumulate. The German command roll is enough to activate the Feldwebel who rallies shock off the MMG and orders that team and the squad to fire at the Groupe opposite.


Despite the setbacks the Germans continue to inflict losses on the French, but my main concern now is the difference in force morale. If I'm to withdraw and cede the table to the French many of those casualties will be returned. Somehow I need to find a way to drive French morale lower.
Once again the French use their phase to amass their fire and concentrate it on a single target. My inability to have multiple units on the table (and therefore multiple threats) has meant the units that are deployed are receiving a lot of concentrated fire. I'm being punished for my rather sloppy and uncoordinated deployment and in some ways I have no one to blame but myself.
The Groupe sergeant in the wheat field rallies off a point of shock and assigns a man to join the depleted LMG team. That Groupe then joins the Groupe on the other flank and the motorcyclists in firing back at the Germans.
The hail of fire results in fourteen hits and while this mostly results in shock that pins the squad, the Feldwebel is the one man who is hit. He is wounded and stunned for the rest of the turn. A bad turn of events that sees German morale slump to one.


What to do? Time to withdraw? It probably is given I have only two command dice to roll. I contemplate withdrawal but decide I will put the outcome in the hands of fate and see if I can just inflict a few more casualties. Well this time the dice are kind and a roll of 11 means I can activate the MMG and the infantry gun, which will do nicely.
The MMG fires through the wheat and hits two of the French Groupe opposite which is also enough to see them pinned.
The MMG fires through the wheat and hits two of the French Groupe opposite which is also enough to see them pinned.


I suspect the end is nigh. The French put covering fire on the ground occupied by the infantry gun and then concentrate their remaining fire on the squad and MMG team.


It is enough to see the MMG team wiped out. The loss of a support unit drags German morale down to zero and so once again the Germans find themselves driven back from Perbais.
That was a tough game. It would be easy to blame the dice, but I think actually that would be to miss the point. I honestly believe it is not the dice but the way you play them that really matters. They simply define the conditions under which you are operating, it is you who decides how you will operate. I rushed my deployment without placing sufficient force on the table and to Dave's credit when his command roll offered the chance to respond aggressively that is exactly what he did. I used my command dice poorly and Dave did the opposite. There was no hurry for me to deploy and by doing the way I did my weak force was ripe for taking. There was no hurry for Dave to deploy, but when he saw his chance he seized it. Therein lies a real lesson about timing deployment.
Similarly, one could point to the French double phases, but if you actually analyse what happened during those you will see that they were not particularly devastating. We have played games where the scenario can indeed pivot on a double phase that is well executed and at exactly the right moment, but this was not one of those. No, I'm afraid today's game was a story of a sound plan poorly executed. Starting with relatively low morale should have been an indicator I needed to be cautious. Knowing I wanted to build up a strong base of fire should have been a further signal to bide my time until the conditions were right for a good deployment, after all, with 5 dice plus a red dice it wouldn't have been long before the conditions were optimum. And so we live and learn.
As for the butcher's bill, we ended with French morale at seven and the Germans at zero, so of the twelve French casualties seven can be recovered and patched up immediately. Of the resulting five casualties two men are lost permanently, two are wounded and one will return for the next game.
The Germans suffered nine casualties from the core platoon and ten from support units, which will result in the platoon losing four men permanently and three wounded missing the next game.
The German CO has taken a very dim view of the outcome and his opinion has dropped to -3 (resulting in one less support point in the next game). The men are even less impressed given the casualties and their opinion drops to -5 (resulting in a -2 modifier to the next force morale roll). The platoon commander's outlook has gone from Retiring to Confused, adding a further blow to the force morale roll (-1). A very depressing picture.
The French meanwhile have a rosier view of life. The CO is pleased to learn that the Germans have been held off once again and his opinion rises to +3. The men are pleased to see victory attained without large loss of life and their opinion rises to +4. Little surprise the platoon commander's outlook has gone from Content to Happy.
Perbais is proving a tough nut to crack and my platoon will return once again to see if they can finally dislodge those stubborn French defenders. You can find out what happens next in this post.
Thanks for the post, which has clearly involved a ton of work. I enjoyed it very much.
ReplyDeleteThanks Norm, there is a fair bit of effort but it's almost like playing the game again, so it has its own rewards, even more so when I get good feedback that means others are enjoying the read. Nice to know the effort is worthwhile.
DeleteGreat post. Highly informative. You are to blame for me trying to get together enough kit to play this set of rules! Meantime, what is the red die? Is that a new rule?
ReplyDeleteThanks Ellis. The red dice was introduced in the 1940 Handbook and is available to select units, in effect it is an extra command dice but with some limitations. The original incarnation in the rule book gave 'elite' units 6 command dice, but subsequent playing has shown that to be overly powerful. The red dice can be bought by designated units for two support points and unless specified otherwise can only be done when three support units are also selected. This last rule does not apply for the Gembloux campaign, the Germans can use two support points to take a red dice regardless of the number of support points. The reason the dice is a different colour (it doesn't have to be red, just different from the other command dice) is because a roll of 5 or 6 is redundant. The dice can only come into effect on a roll of 1-4, in other words it offers additional activation options but cannot add CoC points or increase the chance of a double phase. Hope that makes sense. It doesn't change anything in the main rule book and only applies for specific campaigns or army lists. That said, it is a good mechanism that addresses the problem of 6 command dice for elite - it provides better command without overly benefiting the platoon in other areas.
DeleteYou're welcome. All praise is well deserved. Thanks for the explanation of the rule. I have the core rules and am going to try and get together enough kit to run at least a handful of scenarios before deciding if I want to do more. At that point, maybe I'll buy some of the supplements. I do, however, want to avoid acquisition creep. Going to try and keep the forces down to a couple of nations, at least at the start...
DeleteGreat report. This is designed to be a hard crust which the Germans are challenged to break through. So don't despair. The key is to break through in the next game and then push on hard and fast.
ReplyDeleteThanks Rich, I knew from comments in forums and your own experience on Lard TV that this might be a tough nut to crack. It'll take more than this to make me despair though, I'll just have to try harder next time!
DeleteGreat report as always! I enjoy the fomat a lot. Frustrating game for the Germans. I believe your plan was a good one. Maybe you are right in that you deployed to little to early, but it was a bit of bad luck too to be punished so hard for that mistake. /Mattias
ReplyDeleteGreat looking terrain and figures. What ‘scale’ 15mm or 20mm ?
ReplyDeleteAh just seen in your primer you use 20mm The red dice rule sounds nice amendment
DeleteI’ve been enjoying these reports. Looks like a good campaign, but a tough job for you!.
ReplyDeleteAnother fantastic report. It certainly seems that this scenario is a testing one for the Germans :)
ReplyDeleteThanks Tamsin, it's tough enough without some hamfisted play by me!
DeleteAnother great AAR. I can barely manage to take piccies let alone write up anything after a game.
ReplyDeleteThanks Mark, but your tables always looks so great I'm always drawn to those pictures. I seem to have found a rhythm for doing this and taking notes that doesn't interfere much with the game. Dave is good at reminding me and often uses the time I'm taking pictures or making notes to decide what to do with his command dice, so we manage a good flow.
DeleteThat first scenario is really tough for the Germans in order to win they can't make any mistakes. I'm kind of confused by this statement "They succeed in routing the mortar team from the table but unlike the MMG team they are not a support unit, so there is no requirement to roll on the force morale table." Both teams have already broken and so should have already rolled on the BTH table so there shouldn't be a need to roll for either one again.
ReplyDeleteNot necessarily so. The mortar team is part of the platoon and therefore rolls for team breaks. The MMG is a support so only rolls for support routs, as there is no roll for support breaks. At least that's our interpretation based on Chpt 15 "The Support Units mentioned on the table are any Units which have been added to your force for the duration of the game.....". The mortar won't roll again if it routs, but the MMG team as a support will roll then as it hasn't rolled for breaking previously.
DeleteThis comment has been removed by the author.
ReplyDeleteWell an edifying if somewhat frustrating read. Only consolation is the rules punish poor tactics (deploying piecemeal) just like in real life! :)
ReplyDeleteYou may find this advice useful by some bloke I dunno "Don't let the dice determine your plan, let your plan determine what you do with the dice." ;)
Perhaps more infantry and some 81mm mortars rather than MMG's and the paperweight that is the iG 18?
Ha ha, well yes, all very well and good dishing out the advice but not much use if I don't take it myself. The mortar barrage costs a hefty six support points so needs a bit of consideration but it might be what's required.
DeleteSorry Mark I couldn't resist 😋
DeleteI still find myself making basic errors in both patrol and deployment phases and against a decent opponent its hard to come back from those initial mistakes.
Your CO is obviously loath to support failure. Bit of a problem when trying to break through!
ReplyDeleteIndeed. Just when I need as much support as I can get he's decided to assign it to another platoon commander......
DeleteGreat aar as usual! One Problem: As I understand the rules the Mortar team is a TEAM there for has to be checked on the Bad Things Happen Chart! A 1 is no effect, 2,3,4,5 is -1pt and a 6 is - 2pts!
ReplyDeleteDick Bryant
HI Dick, the mortar team checked when they broke, but they are not a support, they are part of the core platoon and therefore don't roll if they rout off the table. On the other hand the MMG team was a support and so we didn't roll when they broke but we did roll when they routed off the table. If you read chapter 15 you will see there is a distinction between a team from the core platoon and a team that is a support.
DeleteThanks! I've been playing that wrong. Live and learn.
DeleteLooks like your Germans got a royal pasting! Highly enjoyable AAR and certainly some lessons to be learned from it. Quite looking forward to see if your forces manage to break the deadlock.
ReplyDeleteThanks. There are 6 maps and the Germans have 10 games to capture the last one, so all is not lost just yet.
DeleteI think I want to move this Campaign to the top of my list after this AAR and on Lard TV. Will hope to do as good an AAR as you (good tips on the way to do this) when I finally start.
ReplyDeleteA great AAR, and a lot to ponder for the German player.
ReplyDeleteOuch... Germans' future looks bleak
ReplyDeleteIf I can win the next one then things get a bit easier for the Germans in the following scenarios and there is still the chance for a campaign victory. As Rich Clarke says above it was always intended to be the tough crust that the Germans would have to break through. At the moment I'm finding it a particularly resistant crust!
DeleteThat's one thing I don't understand abut the campaign rules the CO doesn't have confidence in your getting the job done so he reduces your support s that it becomes harder to get it done.
DeleteI understand what you are saying but I find it helps to keep in mind you are playing this from a platoon perspective, you are a small part of a bigger battle. The CO is not prepared to reinforce failure and is allocating the available support to other platoon commanders as he has a higher opinion of their ability to get the job done in their sector of the attack. I also wouldn't take it too literally, I think at its heart it is a simple game mechanic to incentivise you to play aggressively and achieve your objectives. It is the counterbalance to the men's opinion - to keep the CO happy you need to be aggressive, to keep the men happy you need to achieve objectives without excessive losses. It just sets up a nice tension to how you must approach the campaign and each game. Of course in this instance neither the CO or the men are happy.....
DeleteGreat AAR, thanks for taking the time to do these, they are very informative and useful. Better luck next time!
ReplyDeleteFantastic AAR and very instructive too.
ReplyDeleteThanks
Matt