
We reach the second map in our short Chain of Command campaign set near Imphal, Burma in 1944 (there is more background information on the design of the campaign in this post). The British have succeeded in bringing a number of Lee tanks up onto Nunshigum Ridge. This was something the Japanese defenders had not anticipated. In the mistaken belief that tanks could not operate on hills they have neglected to bring anti-tank guns. It's a decision that historically they would come to rue.
In the previous game the tanks from 3rd Carabiniers and infantry from the Dogra Regiment cleared the Japanese from a high point known as The Pyramid.

Now they must move the tanks toward the main position known as the Northern Bump. This is not as easy as it seems. Between the high points of the ridge there is only a narrow spine across which the tanks can traverse. Historically this proved quite a challenge for the armour as the tank commanders had little choice but to expose themselves outside their turrets in order to guide the drivers across the narrow path. Failure to negotiate the spine could see the tanks slip or tumble down either side of the ridge, yet exposure of the commanders made them obvious targets.
The Japanese had not built defensive positions here and once the British artillery bombardment lifted they mounted a series of furious counterattacks that inflicted many casualties. The Dogras lost their company commanders and the Carabiniers lost every tank commander. The attack looked like stalling but the determined leadership of the Carabinier's senior NCOs and the Dogras' VCOs saw the attackers eventually prevail. Once across the spine the tanks were able to work in close support with the infantry to destroy the Japanese bunkers on the Northern Bump.
It is the crossing of the ridge spine which is the action we are trying to represent here. This is an unusual situation and so there are a few special rules we have created specifically for this scenario:
The Lee tanks are restricted to moving along the spine until they reach more level ground in the final 18" of the table. While moving along the spine the commander must be exposed in the hatch of the turret and may use one command initiative to instruct the driver. The tank may only move slow or normal speed, however any roll of double 1 or double 6 will result in the tank slipping and rolling off the spine (this sees the tank lost for the game but will not count as support killed for force morale purposes).

The commander may use his other CI to rally shock or direct the gunner to fire the main gun, he may not fire the 37mm turret gun while he is exposed. The tank can only point forward while on the ridge spine and may not turn. In addition, due to the steepness of the ridge, neither of the tank's guns are able to depress low enough to hit targets below. In other words they can only really shoot directly ahead along the spine until they reach the more level area.
Lastly, the tank commanders will participate in close combat should Japanese infantry get within 4" of a tank or within 4" of any British infantry unit that is within 4" of a tank. In other words should close combat occur in these situations then the tank commander will participate and is liable to become a leader casualty should that eventuate. The tank commander contributes two dice in close combat (this is to reflect that they were armed with grenades, SMG and pistols). A Japanese Tank Killer or Suicide Team will alway ignore the commander for close combat purposes and instead attempt to destroy the tank itself.

In effect this is an infantry game where the British must try to escort the tanks safely across the table guarding them from Japanese tank killer squads and close combat. Alternatively the infantry could create safe passage for the tanks by simply clearing all the Japanese from the table.
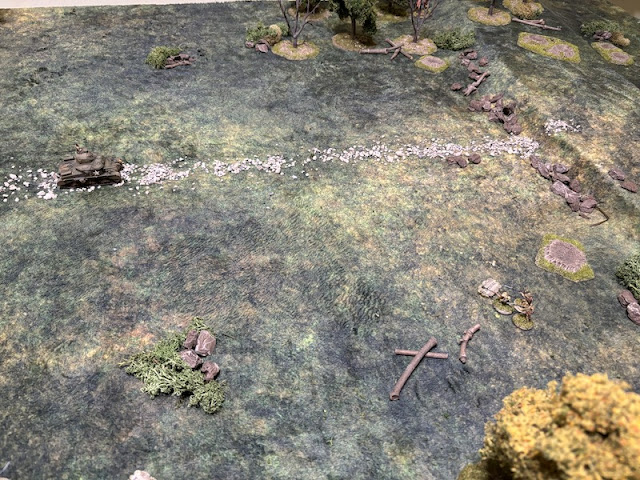
A quick word about the terrain before we begin. We tried to recreate the spine of the ridge but it proved too difficult to do without making it very tricky for the figures to stand up, so for ease of play we have abstracted it.

The stone track will represent the spine and it extends about 3/4 of the way up the table. It acts like a tall wall in terms of line of sight. You cannot see from one side to the other. Units on the spine itself can see and be seen in all directions.


Most of the ground is very open and the wooded areas either side of the ridge spine will count as light orchards for cover and line of sight purposes.

This is a Probe scenario and all rules apply, with one exception - the attacker is permitted to have a pre-game barrage (to reflect what happened historically). For this attack the British will call on a fresh platoon which comes with one Lee tank attached.


The platoon's 2” mortar team joins them.


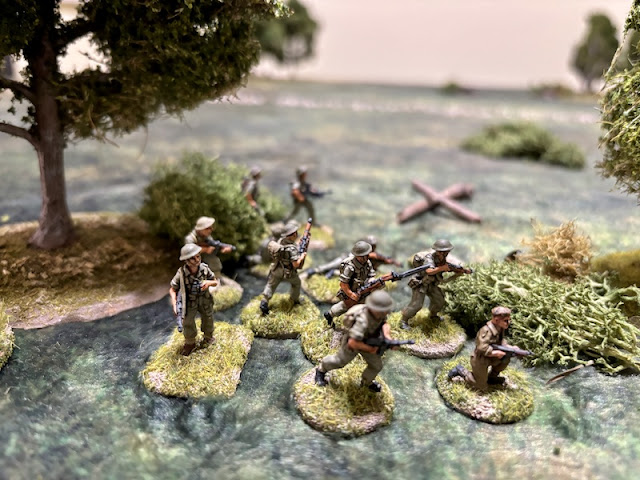
He sends them forward tactically knowing the Japanese could deploy close enough to target them.

The key task for the infantry is to prevent the Japanese attacking the tank once it draws closer to their jump-off-points.


From there they can cover the open ground on this side of the ridge spine.


They have a line of sight through the lightly wooded area and open fire.

Despite having taken up tactical positions the section suffers the first British casualties of the game. The rifle team loses a man and the Bren team suffer two points of shock.


The following British command roll is 66655(2). I welcome a double phase but the turn end is a mixed blessing - on the positive side the wounded Naik will get to to his feet, but on the other hand the pre-game barrage will come to an end.


They have ten support points which gives the option to add a second tank but I think armour can have little impact in this game. The key here is for the infantry to clear the way. With that in mind I have selected a pre-game barrage which I hope will hinder Japanese deployment; two of the section corporals will be armed with a Thompson SMG instead of a rifle, and I will add an additional infantry section. Given the situation I really feel a Red dice would be of benefit. The extra command options could prove very helpful (note that whenever I refer to a command roll that includes the Red dice I will record that number last and place it in brackets).
The Japanese have eight support points, but as this is a Probe scenario they cannot select entrenchments or bunkers. I'm expecting most of this to be used for Tank Killer teams and Suicide teams (available as a Ruse), but let's wait and see what Dave has planned.
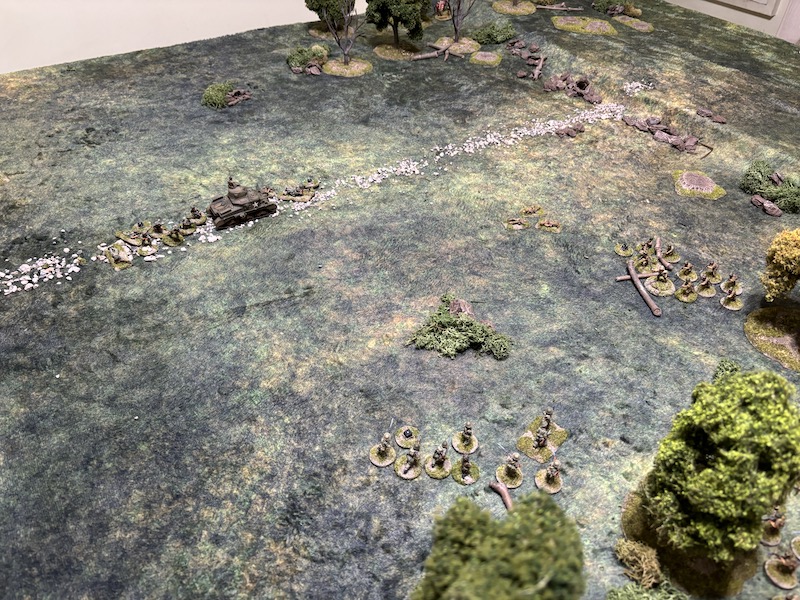
Both sides start with their force morale at nine. The British have jump-off-points in the woods on both sides of the ridge spine with the one on their right flank quite far forward. They have another that will allow deployment on to the ridge spine itself. The Japanese jump-off-points almost mirror those of the British.

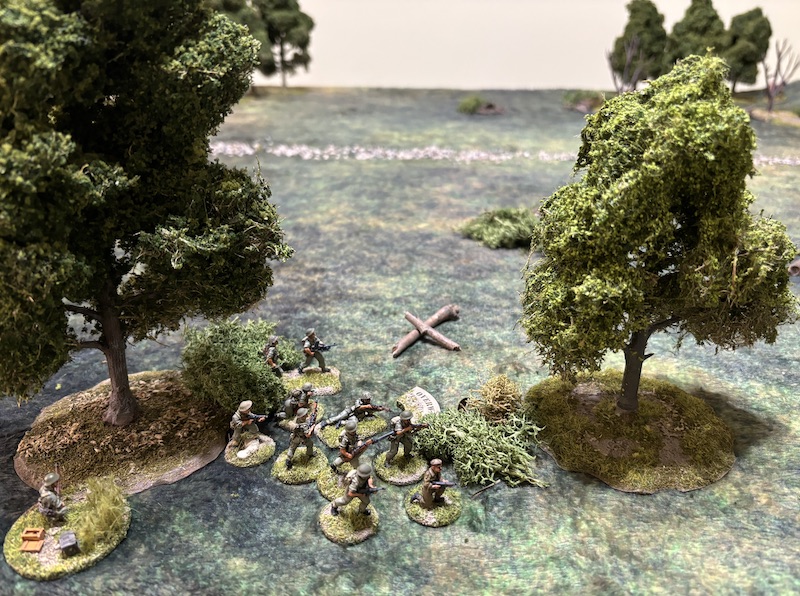
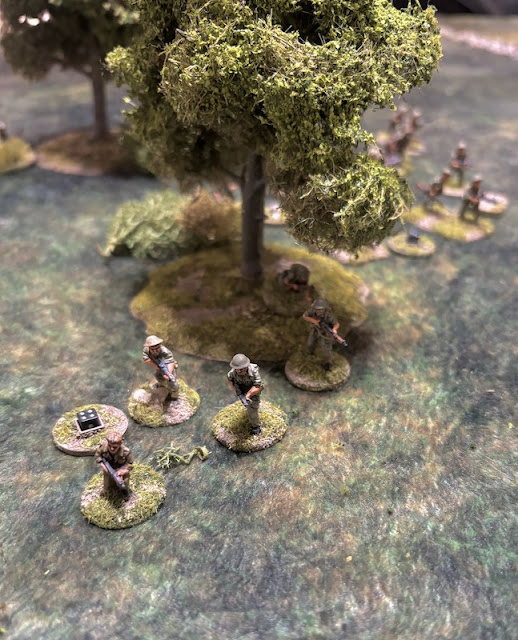
The Japanese win the initiative and have the first phase but choose to hold off any deployment. The British on the other hand have the bonus of the red dice and have many options. They begin deploying immediately. A section takes up overwatch positions on the left side of the spine.


So does the Havildar (a senior leader and the platoon's second-in-command), who puts the mortar team on overwatch.

On the other side of the spine a section takes up overwatch positions at the edge of the woods.

Once again the Japanese choose to remain concealed. In the British phase the Lee makes an appearance on the ridge spine. As the British don't have an option to deploy another section I decide to do no more in this phase. For now this leaves the British poised and waiting to see how the Japanese propose to respond to the arrival of a tank.
The Japanese attempt to respond but the pre-game barrage does its work and prevents any deployment in this phase.
In the British phase the Lee moves forward normally (there's a 5% chance it could slip but I'm prepared to take that risk to keep the tank moving).

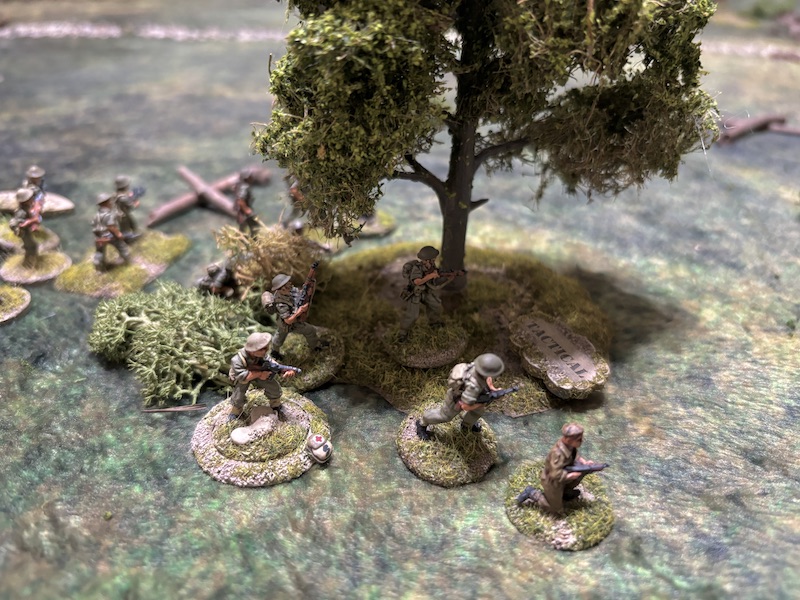
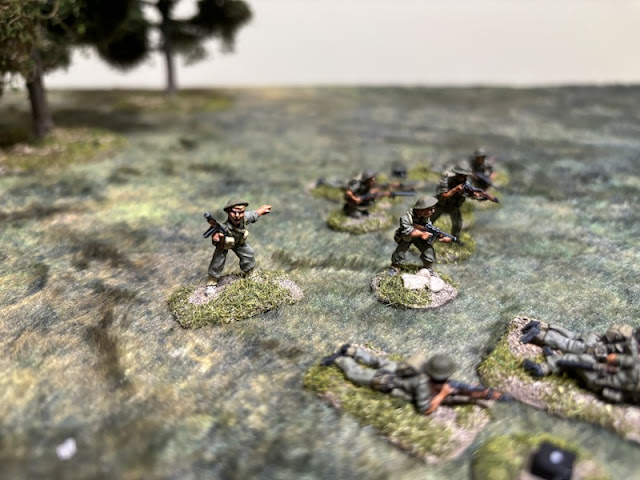
The platoon Jemadar (a senior leader and the commander of the platoon) joins the section on the right of the spine.


A third section deploys near the Jemadar and they take up overwatch positions.


In the following Japanese phase a squad successfully deploys through the barrage and into the woods on the British right.


The section's Naik (junior leader) is also hit and he suffers a light wound that puts him out of action for the remainder of the turn. Fortunately British morale holds steady.
There are not many command options but I decide to move aggressively with the section on the right. I want to close the range so they can bring all three of the section's submachine guns into action.


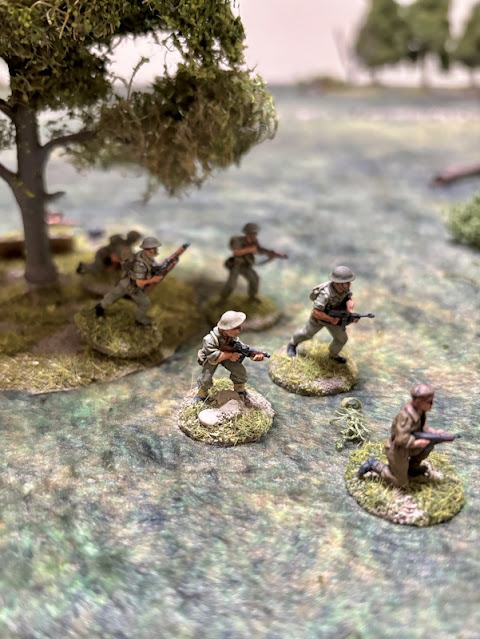


From there they have line of sight to the British section and let loose an initial volley of grenades.


From there they can continue to cover the flank but should also be able to target the Japanese infantry.


It adds a further point of shock to the rifle team.


More significantly, the platoon Jemadar is wounded again. That puts him out of action for the remainder of the turn and takes British force morale down to seven.


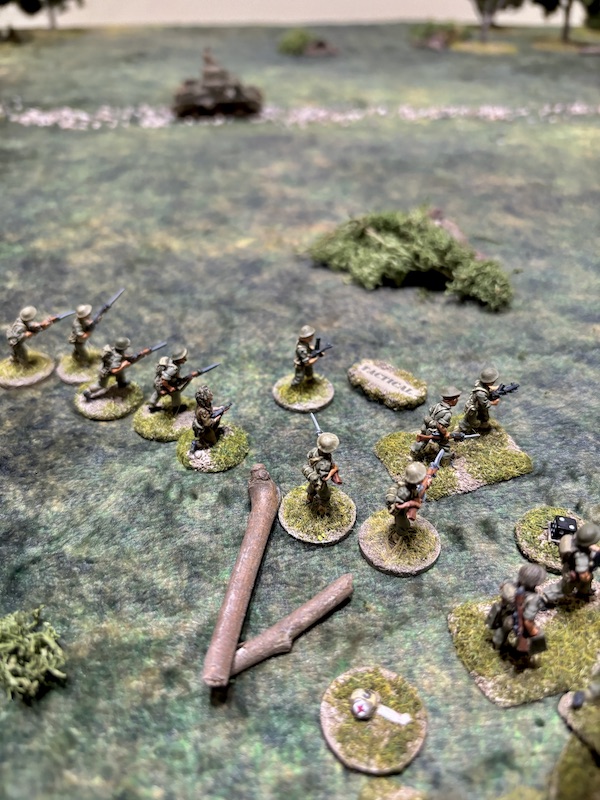
They are out in the open and take up tactical positions ready to seize their opportunity to charge.

They still have some way to go and are probably wise to take what cover they can find.


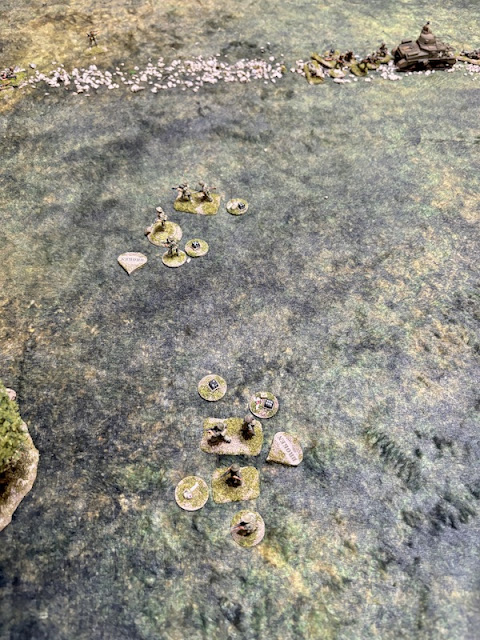
They can't risk accumulating too much shock and so they move normally. While it brings them closer to the tank it still leaves them some way from contact.

I have no intention of letting them come any closer and use a CoC die to interrupt their movement.

The section in the open unleashes a burst of fire.

Despite the lack of cover the small tank hunter team manages to survive. One of them is killed and they suffer two points of shock but that won't be enough to prevent them from moving.

Fortunately the British will have their phase before the tank hunters can move again.


The section opposite suffers more shock and that's enough to see the men pinned down.


They open fire immediately at the section opposite.


From there they can target the tank hunter team.

It may be at effective range but the two remaining men of the team are in open ground and it's little surprise they don't survive the volume of fire that comes their way. They are all killed.

That may see the the first attempt by the Japanese to knock out the Lee beaten off, but I have little doubt there is more to come.


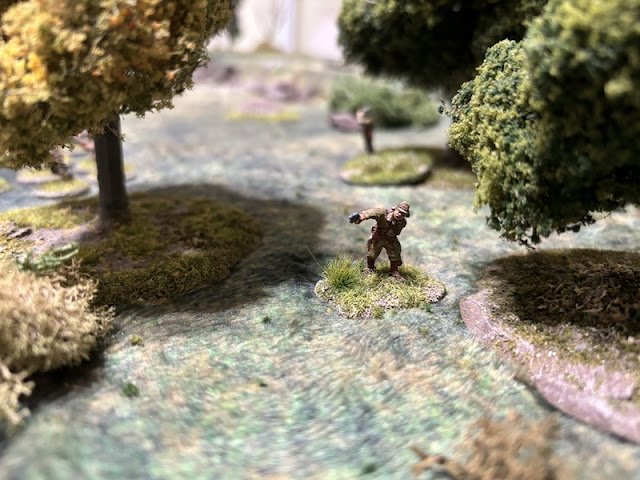
There's always the risk they are caught moving in the open but if they can reach the spine they could make a difference.


Once again the results are disappointing. There is only a single hit and that has no effect.


The first squad has no problem charging in to contact and engages the pinned section. The platoon Jemadar is attached to that section and so despite the fact he is wounded and out of action he finds himself drawn unwittingly into the fight.

The second Japanese squad also joins the charge but obviously they lack the enthusiasm or aggression of their comrades. They barely move forward at all. Clearly they didn't understand the urgency of the command.


That leaves them far behind the other squad and not even close to contact.


The Japanese don’t escape unscathed and suffer a single casualty. Unfortunately it is the platoon’s Gunso, who is cut down in his moment of glory. That sees their morale drop to seven.

The much greater drop in British force morale will see the loss of the red dice and bring their command dice total down to four. As if that isn't bad enough, the prospect of a sudden turn end could see the two leaders with the broken section routing from the table. Currently the Japanese have five CoC points - one more and they can end the turn and probably instigate a total collapse of British force morale. That was a decisive Japanese charge that may have turned the game very much in their favour.
They move quickly and reach the spine of the ridge.

From there they now have a line of sight to the other side and can hopefully bring more fire to bear. Is it going to be a case of too little, too late?


He wants them to target the Japanese squad that failed to make contact in the Banzai charge.


The section opens fire across the ridge and the Japanese lose a rifleman and the LMG team suffers shock.

That's certainly one option. However there is another more aggressive alternative that could still place them in light cover, but one that might also limit how the Japanese can respond. I decide against the more cautious path. The Naik has one of the men throw a grenade into the woods.

It explodes on target and the squad's Gocho is hit and lightly wounded. Japanese morale drops to six. Perhaps this is the moment when the section can turn the tide?

The Naik leads them in a bayonet charge into the woods. The odds are fairly even - the British will roll fourteen dice to the Japanese sixteen. However close combat can be quite a lottery and the outcome almost impossible to determine. The Japanese kill five of the section and wound the Naik inflicting four points of shock as they do. The British manage to kill only three of the Japanese in return.

British force morale remains steady but the close combat is lost and the section falls back 9" and has suffered enough shock to become pinned down.


One of the Bren team is a casualty and that puts the surviving men very close to breaking.

The Chu then orders the squad in the open to target the same section.


They fall back and that drags British morale down to two.


They have some way to go and will have to run past their dead comrades but that is probably of less concern than the full section currently arrayed around the tank.

In the following phase the Japanese command roll is 43322 and so a 5 remains elusive. I suspect it may not matter much. The Cho rallies two points of shock from the squad in the open.


He then orders the grenade discharger squad to target the section on the ridge spine.

Despite being on the receiving end of a full volley of six grenades several miss the target and the section survives unscathed.
In the open the Gocho rallies a further point of shock from his men before ordering the squad to target one of the broken sections.


The British are fortunate not to take any casualties but the Bren team do suffer a further two points of shock. I don't think they'll be taking much more of a role in this game.

The squad in the woods then move up to the British jump-off-point and capture it.

I think it's clear to see which way this game is going.

When it comes to the British phase I decide to withdraw. The Japanese have given my platoon quite a beating and now I must hope the survivors can extract themselves without further loss. With only one remaining jump-off-point this isn't as easy as it appears.

The section on the ridge spine are a little less successful but lose only a single man who is dispersed and will miss the next game.

From the broken sections the platoon's Jemadar makes good his escape. However two men are dispersed and the wounded Naik from one of the sections is captured.


With that the phase and turn come to an end. At least that allows the section's Naik to spring back into action with his SMG.

The following command roll is 65511(2) and demonstrates the advantage of the additional command options that the red dice can provide. The platoon Jemadar (senior leader) moves up to join the section.

He rallies a point of shock off the Bren team.

He then orders the whole section to return fire.

Despite the high volume of automatic fire the Japanese suffer only four points of shock.

In the Japanese phase they then make their own aggressive reply. The platoon's grenade discharger squad deploys into the woods behind the squad.


While it inflicts only a single point of shock on the Bren team the Jemadar is less fortunate.

He suffers a light wound and it's enough to drop British morale to eight.

Next, the squad's Gocho (junior leader) rallies a point of shock before ordering the men to return fire.

This time their fire is less deadly and each of the section's teams suffer a point of shock.


In the British phase the Lee continues moving normally along the spine of the ridge.


To the tank's right the section in the woods continues its firefight with the enemy opposite.

The Japanese suffer more shock on the LMG team and lose a man in the rifle team.

I need to bring more fire to bear and so the section that was in the woods covering this flank of the ridge moves tactically to where it can better engage the Japanese.


Unfortunately for the British the following Japanese command roll is 66221 and heralds a double phase. The Gunso, the platoon's second in command joins the squad. He uses the Japanese characteristic Spirit of Bushido which is specific to the Gunso. This allows him to use corporal punishment to make one free attempt per game to rally 1D6 shock from an accompanying squad (however should he roll a 6 he has taken this too far and the squad lose one man instead and no shock is removed).

In this case his castigation of the squad has the desired effect and he successfully rallies off three points of shock.

He then orders the grenade discharger squad to fire again. Despite the flurry of grenades they manage to add only a single point of shock to the section's rifle team.

He then commands the rifle squad to fire and this proves far more effective.


It kills one of the Bren team.


Taking full advantage of the double phase Dave deploys a Tank Hunter team.


The Japanese have the subsequent phase and the Gunso instructs the grenade discharger squad to continue firing on the same target. The section lose another rifleman and suffer more shock.

The continuous fire from both the rifle and grenade discharger squads is slowly starting to take its toll.

The Gunso then shouts out to the tank hunters to make their move.


In the woods the squad's Gocho rallies a point of shock and orders the men to fire.


The Japanese decide to take advantage of the situation and in a bold move a squad deploys in the open near the edge of the woods. As Dave places the figures he jokingly comments “deploying in the open is only a problem if you’re afraid of dying, so that doesn’t apply to me”. Unfortunately for me he's playing the Japanese in the full spirit of Bushido.


Despite occupying open ground the section suffer only one casualty from the rifle team.

In the following British phase the support section deploys near the spine of the ridge.


The section near the woods returns fire at the Japanese squad opposite.
The LMG team suffers a couple of point of shock and the squad's Gocho is hit and lightly wounded. Japanese morale holds steady.

At this point I decide to take a gamble. I'm hoping there are no more Japanese to deploy and that they are all concentrated on the other side of ridge. Assuming that's the case then the section on the left flank is sitting idle while a key firefight is taking place. I want to bring their fire to bear and so the section and Havildar move at the double out of the woods towards the Lee on the spine.


The following Japanese command roll is 55542. While it may provide valuable CoC points it doesn't give them many command options.
The grenade discharger squad let loose another volley of grenades into the woods.


The Gunso rallies a point of shock from the squad. Then Dave makes use of three CoC points to use a Japanese national characteristics that allows the Gunso to launch a Banzai charge.

Both Japanese squads can participate and they don't have too far to go to make contact. This could prove devastating for the British infantry given one of the sections is already pinned down and carrying a lot of shock.


Nonetheless a vicious close combat ensues. The squad that did make contact finds a British section that are pinned and suffering much shock. They are in no fit state to receive them. In this initial round of close combat the Japanese will be rolling seventeen dice to the British seven. It doesn’t bode well.
Little surprise the British come off worse, suffering six casualties. The rifle team is wiped out and the Bren team are reduced to a single man. The section’s Naik survives but is lightly wounded. What is left of the section fall back 18” taking the platoon's Jemadar with them and suffer double shock. That’s enough to break them. It’s all a severe blow to British morale which drops to four.


In the British phase the Havildar urges the section with him forward.


The Havildar then shouts an order to the support section.


The remaining British section by the woods is now in danger. With the other section driven back following the banzai charge they find themselves isolated and in open ground. They need to find cover and I wonder whether they should move back tactically.


In a rather feeble response the 2” mortar team fire one of their few HE rounds into the woods but it has no effect.

A Japanese command roll of 66221 is an ominous sign. In one sense I'm relieved to see no 5 has been rolled and so Dave won't be able to accumulate his full CoC die just yet. However it may not matter, a double phase could see the British driven from the table without the need to end the turn.
The Chu, the Japanese platoon commander decides its time to make his presence felt. He deploys into the woods within command range of all three squads.

The orders the rifle squad in the woods to fire at the pinned section in the open.


This time a rifleman is killed and with additional shock that is more than enough to break the section.


The sight of shattered sections fleeing the battlefield has knocked my morale so little surprise it has done the same for the platoon!

With morale this low the British also lose a jump-off-point. That's going to make it difficult for units to withdraw safely and unfortunately I will have to wait for the Japanese to carry out a second phase before I can even contemplate doing that.

Finally the Chu orders the grenade discharger squad to target the section on the ridge spine. The initial burst of grenades manages to inflict a single point of shock on the Bren team.

The Japanese remain determined to eliminate the Lee and a second tank hunter team deploys from the woods.


The section near the rear of the table manage to slip away successfully with all their men.


All up the British suffered fifteen casualties which means they lose seven men permanently and four wounded will miss the next game. The captured Naik will need replacing with a man promoted from the ranks.
With Japanese force morale at seven while the British were at two they will recover five of their nine casualties which puts their losses much lower. That was a chastening experience and a demonstration of the rewards for playing an aggressive Japanese defence. So for the next game the British must return to this table and attempt once more to either clear the Japanese or have a unit battle its way to the other end of the table. You can read what happens next in this post.
I'm pleased to say that the campaign is now available in published form as 'On Nunshigum Ridge' in the 2025 Lard Magazine.
You can see all the reports for this campaign and many more on the Chain of Command AARs page.
Great stuff, you are fortunate in having a wily opponent. Thanks for the report. Looking forward to the next instalment.
ReplyDeleteThanks. He is indeed a wily opponent and made very good and aggressive use of his infantry in this one.
DeleteThat was a very enjoyable read. Great game!
ReplyDeleteTough game but certainly an enjoyable one, thanks.
DeleteAnother great report and a real nail biter for the Brits. As a minor point, the M3 has a 3 man turret crew (commander, gunner and loader) so the restriction on the 37mm (and presumably the coax mg) seem overly restrictive. (Also, per the first game, the M3 doesn't hae any bow MGs due to the 75mm gunin the hull. Early models had 2 non traversible MGs controlled by the driver but these were normally removed due to being ineffective.)
ReplyDeleteThanks (and thanks for the earlier reply which I’ve just responded to), what I’ve tried to do is reflect the historical situation as I read it. It seems the tanks were almost exclusively occupied in traversing the spine, with the commander wanting the turret to remain stationary while he observed the terrain ahead and communicated with the driver. To be honest if I really wanted to stay tight to the history the tanks should probably be restricted to moving slow and no faster. Other crew positions had very restricted vision given the situation and as I mentioned the steepness of the ridge sides meant the guns could not depress low enough to hit targets at lower levels. They were relying very much on the infantry to escort them.
DeleteYour restriction on being unable to traverse the turret and the inability of the guns to depress to fire downslope seem reasonable. I was only commenting about the specific restriction on not firing the turret gun and co-ax (assuming it also was). You didn't say whether you are treating the commanders as vulnerable to sniper fire (like one operating an external AA MG in the main rules). I would certainly expect they should be since they most likely would need to be more exposed than just head up to be able to see the ground immediately in front of thevehicle and assuming that the Japanese have snipers as a support option, that this would be more likely to cause commander casualties than the vulnerability to close action. I haven't read any accounts of the original battle so don't know if there was any indication of how the actual commander casualties were caused.
DeleteIn the original battle every single tank commander was either killed or so badly wounded they could take no further part in the action. From what I have read they were all the result of close combat. Reports include commanders using everything from grenades to sub machine guns to defend themselves. The regiment continues to observe Nunshigum day to this day, during which the tanks all parade without officers and commanded by their NCOs.
DeleteThat looked a tall order, seems like some serious anti-personnel firepower was required - how about some mortars or Vickers MMGs? A lot of losses to hinder the campaign going forward, a factor emphasised by the bizarre reincarnation of the 'happy dead' - at least that's what seems to happen with figures springing back to life owing to a higher morale than their opponents. I skip this rule in my campaigns as I can't see a good reason for it - it seemed to be single-handedly responsible for the failure to complete your BoB camapaign in the Ardennes.
ReplyDeleteWhen I was drafting the campaign I was concerned I was making it too tough for the Japanese when it’s now apparent that’s not the case. Historically the British used heavy bombardment and air attacks to soften up the defence, it may be for the first turn any pre-game barrage is even heavier (similar to that in the Martlet campaign). We will certainly go back and review all this once we see how the whole campaign plays out.
DeleteA real nail biter. Well played both.
ReplyDeleteThanks, it was an enjoyable game - despite the outcome!
DeleteVery interesting game TP. You also played very aggressively with your infantry, you did say at the start it would be an infantry fight. I did have a bad feeling when you placed that second Indian section right out of the woods in the open.
ReplyDeleteThe Indian sections have lots of firepower with two SMG (and in my case an extra Thompson for the leader), so I was hoping to bring all that fire to bear. Unfortunately it didn’t really work as planned.
DeleteGreat looking game and report.
ReplyDeleteThank you!
DeleteAnother hotly contested game splendidly narrated and pictorially illustrated. It seemed to have just the right "balance" in game terms.
ReplyDeleteThanks Phil, I suspect you are right, although being on the receiving end of a defeat always makes you question the balance (funny thing that LOL).
DeleteAnother great battle report. What would happen if the Japanese knocked out the tank on the ridgeway? Does this block it and end the campaign? Simon
ReplyDelete